Description
About This Video
Transcript
Read Full Transcript
Hi, I'm Sarah Berta Chellie and I'm back to teach another reformer class. Um, this is my lovely friend Qaeda, who's going to be my student. And last time we taught here, we did a really wonderful, uh, high energy class focusing on the hips and opening the hips. And today I thought I would do the same type of class, but focusing on shoulders, really opening up and being creative with the shoulders. Does that sound like a good idea to you? Yay. Let's start with the roll down so I can check you out for a moment.
And so that you can get centered. Have your feet underneath your hips, elongate through the crown of your head in how here. And with an exhale, go ahead and peel down, rolling down one vertebra at a time, allowing your head to get heavy, your abdominals active. Inhale here with an exhale. Stack your spine, one vertebrae at a time. At the very end here. Lengthen through the crown of the head. Feel adequate weight in the balls of the feet. Inhale and exhale to peel forward.
Relax your head, neck and shoulders, but stay connected to your core. Inhale here and exhale to stack your spine and let's just do one more there.
I've got a good spring setting. I've got three reds in a blue preparing for footwork, but we're not going to start there and Keto, why don't you put your heels just a little bit on top of the bar, preparing for the pelvic curl open through your chest and shoulders. Feet are relaxed. Inhale here. Exhale, draw your abdominals active and pom articulating through your back. Notice her headrest is flat. That's important whenever the hips are above the neck or the head.
Articulate down one vertebra at a time and make sure that you take a moment to really put the pelvis back to neutral. Inhale, exhale to peel up. Chest is open. Head is relax. Keep those legs from splaying outward. Inhale here. Exhale to lower down one vertebrae at a time, lengthening through the spine, breathing into your body. Just one more pelvic curl here. Exhaling up. Wonderful. Feel the heaviness of the arms, the lightness of the head, and stay for a couple of breaths and see if you can press your pubic bone just a little bit higher, engaging the backs of the legs a little bit more, but without lifting the rib cage.
And one more moment here with your next exhale, go ahead and peel down, lengthening your spine.
Drawing back from that TL junction where the upper spine and the lower spine meet. Inhale, we're gonna add a little choreography on the next one. When we go to the right, we inhale in that deep position, straighten both legs, then use the exhale to pull back to center. Bend your knees here in to twist the other direction. Straighten the legs there. Use the exhale to pull back to center, and then bend the knees and we'll do one more each side. Perhaps maximizing your twist a little bit here, reaching the top leg a little bit longer and pull back to center.
Feeling that heavy neutral pelvis. Last one, top leg a little longer and gently pull back to neutral and bend your knees, holding the legs at a tabletop position. Reach your hands to the ceiling. Inhale here. Exhale to lift the head and chest. Feeling a nice fold underneath the ribs, waking up the ABS. Inhale to lower down and again, exhale to lift. Feel the abdominals kicking in, pressing the heels together gently lower down sense that the inner legs am the heels of the feet are pressing together.
Changes something inside your legs. One more time, we're going to breathe into the hundred. The body stays lifted the legs straighten, lower them as low as you can. Maintain the height of your ab curl and we pumped the arms. Inhale and exhale and in feel that the lift is staying consistent. The legs are still pressing together. The heels are pressing together if possible. Beautiful.
See if you can intensify that fold underneath the ribs with each exhale. Good. Make sure the pumping is determined but not, not, uh, I don't know. Frantic, right? It's with the termination. I think we have five more breaths. If I'm counting correctly. Beautiful. And Caden knows that. I'm just asking her to lift a little higher with each exhale. Beautiful.
Everything about this I love. Press those heels together. Heating up the body. Breathing deeper into the back body. Good. I'm going to take one more breath. I might be shy. One. Exhale all your air out and hold here. Press those legs together. Draw your knees into your chest and put your head down with your hands on your legs. Lift your head and chest again for me.
We're going to go right into the single leg stretch. So we're going to put both hands on the right leg, stretch the other leg out, focus on the drawing in as you switch. Exhale, switch the drawing in of the other leg with that pelvis nice and anchored so that you can wake up. You're so as are your deep core a little bit. Each time you pull that leg in, lift your body up just a little higher or make sure you haven't lost your way. Since that your legs are sliding straight out and in. We're going to do one more each side. Both legs come in and hold.
Lift a little higher. Place your hands behind your head, maintaining the height of the curl, moving into crisscross. Exhale to twist straight. The other leg. Lift a little more. Pass through centers. Stay lifted and twist and exhale to to beautiful. Pay attention to not lowering down as you pass through center each time.
Almost try to make that a picture where you're lifting a little more beautiful and we'll just take one more each side and here we go. Both legs come in. We're not quite done yet. K to bring your hands to your legs. Lift just a little higher. Place your hands behind your head. Press your head into your hands. Little pulses with your upper body. Five,
So we're going to start with the heels on the bar just at the high part of the heel. They're not actually on the arch, but I want there to be just a little connection. What I'm looking for is for you to feel this sensation of lengthening through the bottoms of your feet. Exhale to press out. The ribs are heavy in hell to come in. Feel the pelvis in neutral. We're going to get a nice flow here with the legs. Beautiful. Press the inner thighs together a little more good and just a couple more.
They're trying to keep the feet nice and stable. Gorgeous ribs heavy close to the stop or we're going to do little pulses. This is a small little movement. I want you to focus on the end, keeping the pelvis nice and heavy, the ribs heavy chest open. Now here I'm going to call this pumping where you go almost full range of motion without quite going all the way to straight without quite going all the way in and I can't tell where it starts or ends, rightK to beautiful work here. Two more with the next one. You'll go all the way to straight, pulling those inner legs in a little and come back in.
Place your toes where your heels are. So again, you want the balls of the feet on the bar with the toes relaxing over the bar. Go ahead and exhale to press out here. Inhale to come in, finding the flow of the movement. Think of drawing your whole inner leg a little bit together when you straighten your knee. Now I don't really want you to move your bones, but I want to make sure you're not missing an opportunity to use the inner legs. Beautiful. Last one, just like that. Little tiny pulses close to the stop or you're focusing on the back of the leg.
Nice stable pelvis here and if you need to go slower, you go slower. Good Washington. The knees aren't splaying out in, in the chest is open and now we pumped the legs. It's a little bigger in and out and in. Beautiful. So I can't tell where it starts or ends. And what I like to do is breathe for one or two and then exhale for one or two.
It really depends on your pace. All the way to straight with control. Come on in, heels come together. So we're gonna make sure that the V is not too big here and the inner thighs are active out should go. Exhale, zip those in her legs together and gently come on in. So again, pay attention to the ribs. Heavying up. And really, when I say ribs heading up, as you press out, I'm looking for an elongation of the spine, so I don't want it to feel compressed or scrunched or overworking. It's the sensation of lengthening the upper spine and allowing the ribs to soften. Good. Let's do the little pulses on the next one and here all inhale again for at least two. And then an exhale for two.
We don't want the breath to become really um, sporadic here and let it graduate into the pumping. So it's a bigger movement. It's almost like a jumping action, but the feet stay connected the whole time. Beautiful. Nice stability through the core. I love it. We'll take two more there on your final one. You'll exhale all the way up and come on in. Heels are wide on the bar.
Again, ankles are flex and a, a nice connection there to the whole heel. A little bit of connection to that upper part of the heel out you go, exhale and inhale to come in. So what I'm looking for here is that the feet are stable in space, that as you press out your inner legs or work, it's almost as if you're drawing your heels and inner legs together. The ribs are soft, the back spine is long, the tail is heavy. Good. One more time, little pulses.
So when we do this posting, the whole idea here is that you're really moving at your hits, that you're not changing your pelvis position. There's a soft but powerful stability. Good. Now move into the pumping. It's a little bigger and it's as big as you can make it. Let's say it differently. It's almost full range of motion, but not quite all the way straight, not quite all the way in. And make sure that you are able to keep everything stable.
Good. One last time. All the way up. Come on in the toes. Go where the heels are again, you're spreading through the balls of the feet with the toes long over the bar. Out we go. Exhale. You want to pay attention to your knees aligned over your second toe and watch that you don't turn out too much from your feet. Really that's turning out from your knees. But we want to uh, hold k to back a little bit here because she tends to, to try to maximize her rotation at times and we want it to be a really good solid rotation. Little pulses close to the stopper here. Good.
Try to keep the feet relaxed. Watch that the knee is not going out further than the feet. Beautiful. So that we're taking that rotation in the hips nice and clean, and we move into the pumping. It's up and down and down and up. And here it's just important to me that you breathe and that you don't hyperventilate. Alright, one more time. And then all the way to straight with the legs. Mm.
And come on in the theater close for calf raises. Exhale to press your legs to straight. Lower your heels down and up. One time. Bend your knees to come back in. When you press your legs to straight, pay attention to keeping the inner legs active two times with the feet. Beautiful. And then bend the knees and come back in. And then we're gonna go to three here.
I want you to press those inner legs a little more together. So a lot of times when we do the calf raises on the way down, people tend to go into hyperextension and the knees turn in a little bit. So the Q I'll give some times when that's happening is to really think almost about keeping the knees slightly bent and slightly turn the knees out. When you lower your heels down, that might be more to think about than you want, but it is useful. Good. And cadas counting up here. Are we on five? Beautiful. We're going to go up to seven.
Nice. And if you happen to be moving a little bit slower, that's okay. Do as many as you can. And then she's going to come back in and she's on six. Good. Keeping those knees from hyperextending. Keep keeping those inner thighs nice and active. Good. If you know you're a hyperextend or it can be useful when doing calf raises to roll up a towel and put it underneath your legs so that you have something to press against without over straightening your knees.
So I put my arm here for Qaeda just so she can feel that it's kind of a nice little assist. And we're on seven here. She's going to press out one more time for me after this. And do Francis. Beautiful.
I'm a huge fan of readjusting my foot so that I can relax and not have to work my foot so much. And I'm also a huge fan of using the bar to allow that foot to spread and to kind of massage the Fascia on the bottom of your foot a little bit. Stay on the same leg and bend your knee just a little bit. And notice the stretch shifts a little. You might not feel it as much, you might feel it more, it doesn't matter, it might change. And then go ahead and press up and switch sides. So again, we're going to enjoy the stretch and feel the ankle, the back of the ankle, the bottom of the foot, the toes spreading.
And you can kind of shift around a little bit and see if there's somewhere you want to go. And then bend the knee a little bit. Find your breath, feel your ribs heavy, your chest open, and then press out and bend your knees to come in. So at this point the head rest should definitely be flat because we are going to elevate the hips. I'm going to adjust the spring to two reds in a blue, which for some of you might feel like a little much, but we are going to do a bottom left with single legs here, which is is quite a big challenge. So the extra spring actually makes it a little bit easier to do. Okay. I've got Keto speed up a little higher, but I don't want them so high that she won't be able to push out.
I want you to make sure you're comfortable. So do a pelvic curl for me here. Keeping the carriage nice and still you want to press the pelvis up nice and high. Watch that the knees don't open and then lower down. We'll do two more before we move into single legs. Again, we're going to exhale to peel up here, pressing the pelvis high, feel the inner legs beautiful and feel those feet nice and relaxed. Kind of on the next one we're going to add on, so you're going to exhale to peel up forming, holding that lifted position. Let's keep the right leg on the bar and lift the other leg to tabletop position.
And now here you're going to press out five times. Exhale. You don't need to go all the way to straight. What's important to me is that the pelvis stays still, so it feels a little bit like you have to Tuck the pelvis as you press out. You're going to elongate the left side a little bit. The one that's not on the bar was that five. Here we go.
Come all the way in and lower down. Oh, keep the leg at table top and lower your spine down. I didn't cue that. Very well. Good. Let's keep that the same. Left leg at tabletop. NPLS lap. Oh me. Oh my right, good. Now you're going to put your left leg down for me. Good. You're going to lift the right leg up for me. Good.
You're going to press out and in so it balances out. When we, when we finish the exercise going up or down with one leg, there's two we want to kind of lengthen out through that right side. Tuck the pelvis a little bit more. Good. Beautiful. Cato good, and then the carriage will come all the way in. She's going to lower down keeping the leg at tabletop position. Listen to the queuing. We're going to peel up one last time. Keeping that right leg at tabletop. Nice. Nice, Nice.
Put the right foot back on the bar. Press your pelvis a little higher. Use your arms to assist a little. It's not wrong to use the upper back and lower your spine. One Vertebra at a time. Nice
Thank you. Now you're going to keep that leg at tabletop. You're going to take a breath. You're going to lower your spine, and this is the really brutal, challenging part. Take a breath. One leg on the bar, peel up. Beautiful. Good. If you needed to opt out of that, I wouldn't. I wouldn't fall too. You could modify. She's now putting the left leg down.
The right leg comes up and she's going to go out and in with that left leg. Here we go.
And then at the stopper on the last one, you're going to keep the other leg at tabletop. Here we go. Exhale to lower down one vertebra at a time. Nice work. We're going to go up one last time. Exhale.
And then we articulate down one vertebra at a time enjoying that final, final, beautiful bit of articulation. Absolutely gorgeous. Why don't you hug your legs into your chest for a moment. And here's where we want to change the springs. For our abdominal work. I'm going to say one red and one blue that's about one and a half springs for most people. And then you're going to want to find your straps, scoot a little bit away from your shoulder rest to make sure that you are in fact not going to get stuck. Set your arms directly above your shoulders and then float the legs to tabletop.
And let's just go back into heating up the ABS again. Exhale to press the body up. That wasn't a good cue and lower down. So what I want is for you to lift your head and chest and press your arms down, reaching a little bit more with the arms at the end. Thank you. Think about your heels staying together. Exhaling to lift head and chest, energizing the arms at the end, at the top of the movement. Think again about externally rotating the shoulders or rolling the rear underarms together. One more time. Exhale to lift and hold.
Straighten your legs externally, rotate your arms and your legs. Inhale to open the arms and legs. Exhale, pull in. Do it again. Inhale, think of lifting your body a little higher, especially keep it there when you open arms. Beautiful. We'll do three more just like that one. Nice. Staying connected to the core of the whole time. And last one, take your arms back to neutral position as with your legs and gently come out of that. We're going to put feet and straps. Gorgeous. So again, I like my straps to be close to my heels.
It's totally up to you there. It just gives me more room to move my feet. What's always important is that they're kind of even with one another. So I'm just helping Kay to out. We're going to start with the basic frog and then get a little bit, um, creative in health to bend your knees and pause for just a moment. Flex your ankles here for me and I want you all to pay attention to not letting your legs go as wide as you think.
I've been really enjoying not working as wide in the frog and really paying attention to a little bit more inner legwork. Exhale to press out. This will also be useful when we go into single legs. You'll appreciate it in health to come in and exhale to press out. So we're going to get a little energy here. Nice little flow. Exhaling out. Tail is heavy, abdominals are nice and active. Let's do two more like that.
And then we're going to work single legs pressing out. And one last time I'm going to come to the bent knee position and pause for a short moment. Keep the left leg still push out with the right leg only and gently come back to that same frog position. Exhale to press out. So ultimately, I don't want to know from your body that you're working one leg right? And now you'll switch sides. So three exhaling to press out and then you're gonna find that same connection to the heel. Good.
And it's a little bit of a neuromuscular game here where you have to figure it out, right? One last time. Give me two or three frogs with both legs. Exhaling to sort of smooth everything out and inhale to come in. And one last time. Good. And I should have said one last time. Now press your legs to straight and hold points your feet a little bit and then come up. So keep your tailbone heavy and see where your high end is.
Exhale to press down and sense where your low end is in hell to come up. Keeping the external rotation with the feet long. Now I don't want you to curl your toes too much. Get a lot of people grip with their toes. When I asked them to point their feet, I'm looking for long toes and Kate is doing a pretty good job with this. She's really good at that. Exhale to press down one last time, keeping those legs pulling together and then we're going to come up and hold, so we're kind of doing a long walking. The left leg stays up, the right leg goes down. It can go down a little bit beyond the carriage.
If we have the stability, we're an external rotation and you get a nice little stretch here and then come back up, meet the other leg, heals together, tail down, and then down with the other leg. So we're creating this wonderful scissor or split reach a little beyond and then come back up and again, exhale. So when I say a little beyond, you have to go all the way down and into the, the bottom of the reformer here. But it feels kind of Nice to get that openness through your hips. And the other piece that I'm looking at is making sure that the leg that's up is actually staying still and almost maybe even going a little further so that you're in this beautiful split position. We are an external rotation right now.
Exhaling, depress down. You certainly could do it in neutral alignment, but I like it better in external. And one more time please. Exhaling, depressed down. Alright. Playing with some more footwork here. The feet come back up and together and then come down to about 45 degrees. We're gonna find the opening position.
Inhale to open wide with a nice neutral pelvis and exhale to pull back in. Now we're going to go for flexibility here, so you want to make sure that within the rules you're trying to push a little further, meaning the rules that your pelvis is staying still. So we're going to find the wide position and you're going to stay. Now support this position right here. Most of you are going to want to put your hands on your thighs so that you can feel what it feels like to keep your thighs still.
You're going to keep your thighs still not the carriage and bend your knees beautiful to come to what feels like a deep squat position. Those of you that do dance, it's like a big second position. At this point, I want your feet to lower a little bit, but not your thighs. So much so that your feet and your knees are aligned on the same horizon there you've got it. Now keep the uh, thighs. Still. Keep a little external rotation in your hips and straighten your knees again. Beautiful. Now Kay does quite flexible. I want you to go up more here.
There we go. Keep your thighs still and bend your knees so you've got to stay in those deep rotators. Beautiful, beautiful, beautiful. So you're in the second position. If you're a dancer or a deep squat, I want the feet to go a little bit lower than you think. So it's almost like you're going to internal rotation, but yet you're not. You're letting the feet come in. Alignment with the knee, keeping the rotation external at the hip, and then open the legs wide externally, rotating a little more and let the carriage move here. Beautiful.
Keeping your thighs still accessing the hamstrings. Bend the knees. Good. Maybe I should've just told you to access your hamstrings the first time. That was beautiful and open out to the side. Feel the external rotation. Wonderful, wonderful stretch. Now Kato's got some pretty amazing flexibility here. We'll do one more.
Keeping the thighs still. Bend the knees. Beautiful. And then here, slowly lift your legs and bring your knees together. And that should feel like a really nice little hip opener. You might want to just pause with the bottoms of your feet together and take a short rest preparing for the long spine. Please make sure your head is down just in case you didn't have it down.
We're an external rotation here. We're going to inhale to a 90 degree at the hips and we're going to add a little bit of glute work to this today. Exhale to roll up without moving the carriage, so you've got to find that perfect sweet spot. Go a little higher if you can almost pressing your pelvis forward and pressing your feet slightly away from you and then open the legs for me here. I want you to almost press your pelvis a little bit more and legs a little away. Come back in. That wasn't a very good cue.
It's like you're extending your hips slightly away from you, but tucking your pelvis, bring your legs back together. Beautiful. And again, exhale, find those glutes, stay there, lower your spine, keeping the carriage still wonderful control, dropping the tailbone heavy, and then you circle the legs together in how to 90 degrees. Exhale to find that wonderful roll-up. Finding the backs of the legs, glutes, and hamstrings. Good. With your next exhale, you're going to open your legs and Tuck your pelvis a little more. Come back together with the legs open and talk a little more. Finding the backs of the legs here. Good. One more time. Open-End Tuck. Lower your spine. The key is to not open the legs too wide.
Shoulder width is about all you want. Circle the legs together. Last one in how to 90 degrees. Use the exhale to roll up. Find the backs of the legs here. Beautiful. Open the legs again. Three times one and feet together. And two gorgeous and three bring.
Keep the legs apart actually. And then roll down. Get the pelvis to neutral, and then circle the legs. And now you may take your feet out of your straps. So we're going to put the straps back on the pegs and we're gonna move into, um, some standing works. So go ahead and stand up. I'm gonna adjust the spring to a green spring, which is a little heavier than the red. If you don't have that option, you might want a red and a yellow for this. Um, or you can play with your spring, but I'm still just on one spring, a heavy spring right now you're gonna step up for the pyramid or the up stretch position. Heels are lifted up against the shoulder rest.
Arms are long and straight and you want to feel this length through the spine. So we're just going to start with the up stretch slide back on the inhale and in on the exhale. Upper back is active, beautiful. And we've got beautiful stable arms here. I've got a beautiful stable body. Each time you pull those legs and see if you can think about pulling the thigh bones together a little and see if you can feel um, you know, your deep gut working. What I'm looking for is the connection to the SOA as really, or your deep hip flexor. Just do one more there please.
And then keeping the arms nice and stable in space. Shift down to a plank position. Hold that plank for me. Pause for a couple moments. We want to make sure that we do get our hips low, but that in that position we don't lose our upper back position. Beautiful. Go ahead and shift forward a little bit [inaudible] and then push back. So we're going to go and whatever breath you want to work with is fine with me.
I find myself inhaling forward and exhaling back on the next one. Go as far forward as you can comfortably be and bend your elbows into a low pushup. Now your body stays at that height as you press your arms to straight. Bend your elbows to come in. So we're doing a nice, wonderful pushup here and press good. If you don't have enough spring here, you're going to feel very unsupported in the back position. So make sure that you feel safe with your spring. Good.
Let's just do two more of those. Notice that the body is sliding straight in and out. So there's a lot of arm work and after the last one with straight arms, you're going to lift your hips up for me. Lower your feet so they're flat and we'll be in the elephant for a moment. Again, lengthening through the crown of the head, feeling the upper back muscles active and the tailbone aiming up. Inhale out.
Exhale in. As you pull the legs in, see if you can pull those inner legs together a little bit. Feel that deep gut working. I keep calling it the gut because it's not actually the abdominals that are pulling the legs in. It is this. So as the hip flexors, this is gorgeous. One more and you're going to pull the carriage all the way into this stopper and hold good. Remove your right hand and rotate underneath your other arm.
Good. So you're going to reach that right arm, really straight and similar to the saw, you want to put your pinky finger on the edge of the reformer and notice where it is. Keep it there in hell to slide the carriage back and exhale to pull in. So we've got a really wonderful twisting elephant here and pull in. Nice notice again, the upper body is very still, the rotation stays consistent. It's just the legs moving. Good and pull all the way in and hold. Put your hand back on the bar. Pause for just a moment. Set your shoulders, set your abs, and we reversed.
So you're going to take that left arm and reach it through just beyond your other leg. Set the pinky finger somewhere. Let me just adjust you a little bit here. There we go. And out in in. Inhale and exhale to pull it in.
Bend your knees with an inhale and exhale to straighten. Look at that. Nice to me, Ben there in how to bend and exhale to straighten. [inaudible] good. Walk your hands back to the bar and let's go ahead and step off of the reformer. We're going to turn around and have a seat.
You're going to sit right on the edge of your reformer and we've got a light spring. I'm going to put a blue spring on. So there's a pretty extreme shoulder stretch, so you want to make sure that there's not a lot of spring. The hands are going to go on the bar with an overhand grip, which may seem a little bit funky at first, but, um, once you get into us Keto, scoot back a little bit. So you're real close. You do want your elbows bent in the starting position so that as you push out to straight, you've got this really nice, wonderful shoulder stretch, one to avoid hyperextending the elbows and think about spreading through the front and the back body. So this is the position we need to be able to do a lot of exercises in [inaudible]. So I, I really like this as a nice shoulder stretch.
So we're just going to bend the elbows in and keeps spreading and exhale to press the arms to straight. So you may feel a really wonderful stretch through your shoulder, the front of your shoulder and your bicep. Um, if this is too intense for you, put the bar down and it'll be a lot less extreme. Just do one more like that for me.
Place your right hand with the same grip on the bar and push the bar out. Push your body away so your body is going to stay upright by your elbow is straight. We want to really feel this little bit of external rotation here. Nice. The other arm is reaching on the diagonal. The body is upright and we've maximized the rotation. The next movement is a hinge at the hips.
It's going to be inhale to hinge back and exhale to sit tall. Good. So an inhale to hinge back, maintaining this wonderful rotation and adding just the slightest bit of thoracic extension. What that means is just a little bit of opera back extension and you're going to create that by just moving the head a little bit. Beautiful. Let's do one more there and then just be careful when you come out of it. You're going to sit tall, gently bend your elbow, release the hand and unwind. Take your arms out in front of you. Sit Tall and twists.
Take your left arm on the bar behind you. Reach your other arm forward, maximize the rotation. It feels a little bit like you're going on the diagonal. When you start the movement of the on the diagonal tore the left toward the left, hinges back on the inhale and exhale to sit. Tall. Beautiful connection there. So what we want to pay attention to is making sure that we maintain the rotation and that the majority of the movement here is actually a hinge at the hips and then sit nice and tall. The upper back is working, and again, a hinge at the hips. Nice, Nice, Nice. And a hinge at the hips. Last one. Just by arranging the head, we get that back extension and you can gently release and unwind.
Beautiful. Reach forward and grab your straps for me and then sit up nice and tall. We're going to go into a little chest expansion. Exhale to press back, open your chest, and inhale forward. So now your shoulders are nice and open. It should feel almost easy to do this. It will especially feel easy with this light spring, but we'll add a little bit to it. We want to make sure that you're sitting tall, long through the crown of your head. Inner thighs are nice and active.
With the next one, press back and then rotate to the right, pressing the right arm back and externally rotating the shoulder unwind. So you're gonna lose tension on the other arm a little bit. Exhale to press back now. Rotate with the left and go a little further. Good and unwind. Arms go forward. Exhale to press to your body.
Press more with the right arm and rotate and unwind. And exhale. Take the arms to your body more with the left arm and rotate and unwind. One more time each side, please. Exhale, right side rotation and unwind and left side rotation. Beautiful and unwind. Now let's put, let's put that torso press sit thing together with some straps.
So let's go right into it. You're going to bend your elbows and your thumbs are basically kind of near your underarms. Now I just want you to practice pressing right arm out, left arm ups, sitting tall, bend your elbows and come back in. Sit Tall, left arm out, right arm up. Feel upper back alive. Then to come in and again do that. So we're going to get a little bit of flow here, a little bit of an explosion, feeling good. Now we're going to add the hinge here. So you're going to hinge back, rotate to the right as you reach with that right arm and then come back in sitting tall and you're gonna hinge, rotate, reach with that left arm and come back in. And again, nice big reach and come back in and nice big reach.
Oh I love it. And if you really put more energy in the arm that's reaching back, you're going to feel more oblique upper back work there, which is really nice. And this will be the last one over to the left and reach gorgeous. Come back in, put your straps away. We're going to adjust the spring to a full spring. So I'm on a um, red spring, a full spring. You could be on a green or a red. Step off for me, Keto, we're going to go into the advanced shoulder push, so she's going to come onto her elbows with her hands braced on the shoulder blocks. It can sometimes feel a little squishy getting into this. So you want to make sure you pay attention to how you're going to do it.
So first she's on her knees with her hands. Really holding the shoulder blocks, elbows right underneath shoulders. You're going to get one foot on the bar and press out. Good. You want to make sure you feel comfortable with your foot position and your foot is pointed. Bring the other foot up so both feet are on the bar, the hips are low, or in a straight plank position. Here we're going to keep this nice and supported abdominals nice and active. I just want your head here now just push forward with the arms and pull underneath you. You can use the exhale to push forward.
You could use a different breath if you wanted to. This is quite lovely. Notice the body stays completely still. It's just the arms moving out in, in. Good. Let's just do three more here. Lots of Ab work, lots of shoulder work, and again, one last time please gently come on out of that. So you're going to kind of lift your hips, bring one knee in and find the carriage gracefully. And let's step up from there. Good.
You're going to come to a standing position for me. And this can be a little bit funny. You're going to want to be on a blue spring for this, but you may find that you want to try this with, um, without using the straps first because it is a big balance exercise and I want you to make sure you're comfortable with it. So, um, you're gonna take your left foot, which is going to be your standing leg and put it in the middle. Um, maybe an inch or two from the headrest, right? So in between the two shoulder rests and then you have to make sure your hands are bracing yourself on the shoulder blocks. You're going to reach around and hold just one strap and put that strap on the right foot.
Now this is where it can feel a little vulnerable because you have a moving carriage and you're standing. We're going to bend that left knee quite a bit. So we're in a big kind of squat position. Good. And the nasty here for a couple moments. Katie's got her right leg, nice and straight. Her back is nice and straight. This bought a left leg is is a bal, is a supporting arms are supporting. Now that right leg is going to extend back in alignment with her body using gluten hamstring here and then come back down where it came from.
So what we're looking for is actually to have to balance on a moving surface, which is extremely challenging. But if you stay in control, you should be able to do it, especially at this level, a little higher with the pelvis there. One last time here, lift and hold. Now here, I want you to go into external rotation and now straighten your standing leg and take that other leg up as high as you can. Five and back to neutral and full. Beautiful and back to neutral. And three good.
I'd like the elbow straight and two nice work. And one more time. And then make sure you pay attention to how you're going to get out of this. You're going to bring your leg down, bending your supporting leg, you're going to find the carriage at rest, and then you're going to reach down and gracefully put the strap where it came from. And switch sides. So you want to make sure you're standing on your right leg, it's kind of right centered between the shoulder rest.
And then it can be a little tricky to get that strap in place. Nice bent, supporting leg, aiming the tailbone back. Perfect, right there. And then that left leg is going to go up in alignment with your body. And here we're endeavoring to be a neutral alignment so I'm not an external rotation and lower down. Good. And again, exhale up.
I believe that's the last one. And pay attention to where you are in space. As you come out of this. She's going to take her leg down. Beautiful. And remember, if you're a little wary to try this for the first time or you're unsure of your balance, simply try it with some springs on and without using the straps, you could just extend your leg behind you. Beautiful. And we could press up here and do all of those things. Okay, so that's a wonderful series. Go ahead and step off. We're going to move into the mermaid and I have some variations on the mermaid today, so I'm on a red spring for that.
And why don't you face the front for me Qaeda. So the right leg will be out in front and the other leg will be tucked underneath. And the one thing I want you to pay a little bit of attention to is trying to get the the knee of the leg that's in front to be a little bit closer to in front of the hip. So that will sort of change where your body is a little bit, but it'll make sense later. So go ahead and press your arm to straight and start here. So we want to feel long through the crown of the head.
We want to feel this right arm, very stable and the core quite stable in to reach out into the laid out position. And we stay there. Now notice in this position your hip is gonna lift a little. I'm good with that. Make sure your ribs haven't flared. We're going to keep this position right here and now you're going to bend your right elbow and press back to straight. So it's quite a lot of tricep work. Quite a lot of shoulder stability work. And guess what?
Quite a lot of oblique work to nice. Press back to straight and hold. Stay here. Now you're gonna rotate till both hands are on the bar. Stay looking at the spring. You want to spread your shoulders, feel that deep rotation of the core and you probably have to move your handout so that there square with your shoulders. Now we're going to hold that. We're going to bend and straighten the elbows here. Beautiful. Notice that the back stays completely still is the arms move. Good.
One more time. And then hold. Now we're going to hold the shape of the body here. You're going to lift your back leg up and move it to the shoulder rest that's behind you. So the one that it wasn't on, and then see if you can actually lift that leg up. Ooh, Ooh, very Martha Graham. As someone once said, here we go. Now if you are capable of holding this position still, you're going to go into a little bit of upper back extension and pull the carriage forward with straight elbows and then you're going to push back down to where you came from. Gorgeous a little bit. So there's a lot of support here. Glute, a lot of a dominal work and a wonderful upper back extension.
Last one, nice pulling on your ponytail. I said I wouldn't do that. Puts your leg down, bring it back where it originally came from and unwind from this position with grace and with ease and we'll switch sides. So that's a like a full body workout mermaid actually. So when you set yourself up, pay attention to your front leg and allow the need to be closer to it in front of your hip just so you can get a better stretch through the glute. They're sitting up nice and tall here. Stretch the arm to straight.
Pay attention to the hand, not being too far behind you, but in alignment with your shoulder. Now you're going to inhale to reach out for me and stay. Pull the ribs back just a little bit. Keep the body utterly still here and bend and straighten the supporting arm. Now this is where you want to pay attention to staying in your external rotation. So if the elbow starts to go back, then I know you've veered off that path. Beautiful.
We're going to do one extra one on this side for Katie just because she had one that wasn't perfect. Stay right there. Beautiful. Now rotate around to put both hands on the bar. You might have to move your arm open a little bit so that you're square with your shoulders and we stay here. It's a beautiful head position. Beautiful upper back here, working with ABS. Bend your elbows. Nice. So now she's not in upper back extension my friends, but boy are you feeling your upper back muscles, aren't you good?
And we have one more here. Nice and hold there. Now you're going to take that back like you're going to free it up and move it back and lift up. Lots of glute work here. It's wonderful. In conjunction with the ads with the upper back. We now lift the head and try to find a little bit of extension and we pressed down. Good. Now for some of you this might be too extreme so you'd just put your leg back down. But we were looking on maximizing our um, range of motion here.
Beautiful. This is the last one. Put your leg backward, originally came from unwind with grace and precision and sit down and let's finish with um, a nice hip and hamstring stretch. And then, um, a couple of roll downs. So I'm gonna um, stay on a red spring. Actually I went down there for no real reason. Um, and you're going to come up to a pyramid position one last time, heels lifted and we're just going to do a nice, nice, um, full lunch here. Okay. So step forward with your right leg and put that foot on the bar. Make sure you feel comfortable with this position so the foot wouldn't slide. You want the need to be basically over the ankle, the hip to be low back, legs straight. Just sit with this for a moment.
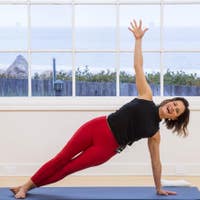
And then if you feel safe and comfortable with your balance, you're gonna keep your legs where they are, but lift your body up, taking your arms up to the ceiling. So we're going to just be slightly inspired by Yoga and create just a little bit of a Yogi feel here. Lengthen, lengthen up, give me the slightest bit of upper back extension, gorgeous. And then keep these legs exactly where they are and then place your hands back down on the bar. You're going to keep your left hand down, but rotate the upper body, reaching the right hand where the ceiling. Think of almost pressing your knee in a little bit in your shoulder across a little bit to find that extra bit of rotation. Now here, if you still feel safe and comfortable, you're going to straighten your front leg, keeping the rotation beautiful. Ultimately we want a nice neutral spine. We want a nice, neutral pelvis. I'm going to help my friend here a little bit.
If you feel safe with your balance, stretch the arms straight up and feel that yawning through the underarms, the lifting, perhaps extending the back ever so slightly in that thoracic spine. That's a beautiful position. Good. Taking another moment, just breathing and then come out of that slightly. Keep your legs where they are. Bring your hands to the bar. Your right hand is going to stay down and you're gonna rotate your spine. Reach up, holding that position. Think of bringing your knee across slightly.
Beautiful and then see if you can keep that wonderful rotation, dropping your pelvis slightly down, some of you, and stretch the front leg towards straight.
Exhale to peel forward. Relax your head, neck and shoulders. Allow your head to dangle your shoulders. Stay kind of plugged in. Have adequate weight in the balls of your feet, and then roll that
And Stack your spine one vertebra at a time and standing nice and tall. Here. Pause for a moment. Gently bend your knees. Feel that your ankles and your hips are bending as well and straighten. And as you bend your knees, allow your arms to float up
Comments


You are about the most Creative Instructor I have ever been with! Where & how do you think of these things? Wow!! The shoulder stretch was amazing and then with rot? Wow! I loved the standing foot in strap routine,now I just have to get over the fear of losing balance but we are always working on something, right? Miss you and Loved this class! : )
You need to be a subscriber to post a comment.
Please Log In or Create an Account to start your free trial.
