Description
About This Video
Transcript
Read Full Transcript
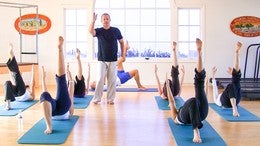
Hi, welcome to Peloton. I'm Michael King and walk into this series of sessions which we're doing as a progression. For me progressing into the method is not just about adding ever more levels, it's about getting more details about the movements and maybe of course progressing there is a little bit, a little bit more, but really listened to your body today and see how far your body wants to take you. So as always, let's start with our feet standing parallel and let's push into the floor and lengthen the whole spine. Now of course we've got the good pelvis, we'd been talking about that. We've got the nice align pelvis is not tilting forward and tilting back. But today, what do you think about the rib cage?
Imagine your rib cage is like a big church bell and we don't wanna be stringing that church bell forward. Looking inside, we're always swinging the church bell back. We want the bell hanging straight on top of that rib cage. And then on top of that the head got today was a bit a lot of time with their heads forward but on computers, on texting. But it's got a lot to do with placement of breath and good effective breathing. So let's think about the head lengthening up to the ceiling.
Put the shoulders down the back and connect those deeper muscles again from the pelvic floor, drawing those bones together from the pubic bone to the sit bone and gender. Just draw them in so you've got a nice support to your base. Gorgeous. Now let's get started. Breathing in and breathing out. Find a rhythm to the breath, breathing in and breathing out and start just circling the arms up and behind you. Now without a shifting the body weight. And as you're doing that, just bring the weight forward onto the front of the toes and then bring the weight back onto the heels and are, find that middle spot in the feet where you've got the weight balanced and the movement work equally done from the front and back and circle the arms as wide as you can. This area of the body gets really tight and really tense, so we need to free it.
Before we get to the mat in and breathing out one more time and now bring the hands down in front of you. Bring the hands in front in a V and we're going to open the arms out, stretching across the front of the body, lengthening a long spine. Connect the center, push it up and reaching out. Now keep revisiting the the body. Think about the feet. Keep that push down on the floor. Thinking about the pelvis, thinking about the ribcage.
The ribcage is not moving so you really get into this stretch across the chest and again, the head is on the spine. Anthony, let's stay with the upper body before it gets them out. Today what I'll do is just take your arms to the side, bring the fingertips together so the fingers of his head just in front of the sternum. Open the arms out and now here drop the arms down and then turn the arms foot back. So down and back. Now don't think of the hands doing this I think is a shoulder blade. So the shoulder blade is sliding down and lifting up.
Pat is sliding down her back and then coming forward we were thinking about the core stability has been lower around the center, around the abdominals, but really core stability has got a lot to do with the upper body. So breathing in and breathing out as it should be. Some nice movement going in there. I've put some little music on today so we don't hear the noises in the shoulders if it goes from crunching and cracking. So as long as it sounds like bacon cooking, going up and down, up and forth, breathing in and breathing out acid. Now let's take this a bit further.
This alternate. Let's take the right arm. Go right arm and left arm and then right arm and left up. I was a bit of a coordination test. There we go. Push it out and lengthen the reach. Good sitting still about the shoulders.
Think about the scapula moving and I said you should feel a nice glowing across the upper body here as we're doing this walking, not movement. So we need mobility in the shoulders and we also need some stability. Now we've got to model ones of these variations to do. Let's try it with the hands up with both hands pushing up and then take it back in and the gap. Anthem Santa's good. Now keep thinking about the center. Think about the pelvic floor. He got that rib cage, the n everything. Ah, okay. Now let's try alternating these.
So with the right arm up and then alternate. Yeah, if you needed a rest, if it gets just too much then just put the arms down. She circled the shoulders and then come back to us to really pushing up
Now slide the hands down. Sydney's from here. Today, what I want to do is just to get the low back going, Ben, tilt the pelvis under and then lengthen the spine out. So tilt the pelvis under curve and then lengthen the spine law again, breathing in and breathing out. Lengthen and imagine your spine like elastic. So as you tilt under, lengthen and make the spine longer again. Breathing in and breathing. Ah, get sent up a tilting up, reaching away two more times. Up One more time. And now slowly rolling back up. And now lift your arm up to the ceiling.
Now as you did with Malcolm on the last session. Or would you get the nice stretch down the side of the body. But for today, what I do is reach out, bring it forward, and now drop down and come back up through the center. So let's try to decide. Lift the arm up. So hips down, you're reaching away from that hip, stretching out. Uh, Anthony bringing forward, good center dropped down and then come back up. And again, take the armor, reach you through the thing, his hips stretch forward, diagonally, send to connected, rolling forward. And then coming back and again lifting up the in everything, bring the arm forward and rolling up and then lengthen out and also less time on the session with Malcolm. You're doing the preparation for the swan dive.
What I would you do today is do the standing, so take the hand behind. When you are laid on the mat, you're drawing the central way and you're stretching your spine long place either hand behind the back so you really feel that low back. Stay the same length, it shouldn't shorten. Now breathing in as you breathe out, lift the chest up and now slowly bring it forward. So remember the sensation from last time that you really on the mat you are stretching along and reaching away. He would have the same thing. Lengthen up where the in and now breathing out, lengthen up, reach, lift that chest up and then come back down.
I would just release it forward so he can bend a little bit. Change hands while you're down. Slowly coming up again for the end. I'm really out. Reach a stretch, reach, reach, reach, jewelry and slowly curving forward. Lengthen and coming back.
Taking a breath in, everything out. Stretch up to the ceiling. Feel the chest lifting to push that chest up, lower back, staying open. Keep the head on the spine and then coming back down. One more time on each side. Breathing in, reaching the chest up to the ceiling. Reach, reach, reach, up and down. Very last time. Feel the floor, the feet. We've got a beautiful floor today. Push on that floor. Keep the center engaged in jaw, that pelvic floor, lifting the chest out, push, push, push, push, breech and coming back down. And then rolling back up.
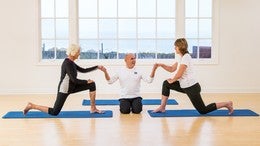
And just circle the shoulders. As I said, the shoulder should be free. So is there all noises when you're moving those shoulder blades and he's really needs to be working on the freedom a little bit. No, I keep them down the back. Put them in a good place. Stable and again, the bell and the rib cage and I push her onto the toes and now we're going to bend the knee, right knee on walk, and then change in lengthier side. So a little balance before we get to the back. Lengthen up pushing. And good.
Now if you are bending whichever knee you're bending, the opposite arm lifts up. So he's a bit of a coordination. So have the right knee bent and our change and the left the other side and reach and reaching, reaching up through the fingers. Lengthen up. So remember, plazas have full movement of the body. So through the spine lengthen it like it, like elastic.
Keep the center connected. Every movement you're challenging the body to engage in. Use that center. So the movements coordinated in everything. app Reading, Gap and pushing out. Good. One more time.
Lift up and lifting. Ah, and I bring both feet down and just as we started, circle the arms back. Now you can stay with the arm circles or here you can live both toes up and bringing it back down. So if you prefer just the arms do just the arms. If you can lift up higher, lift up a little bit taller. And as we get a little bit more progressed, we're going to bring the feet together and draw them in a little bit more. So how close can you get those legs wider? Paul's going to live.
Most stability he close is going to be harder, but here, connected center and now circle, push and open app length and reach. Good. Really in with the app. Yeah. Push one last time.
Last session we finished with a pushup. I'm going to start with a pushup this time on the verse session, but just to remind you first, as you start rolling down, think of the shoulder staying on with the body so they don't relax. As you go down, it's almost like somebody pulling your tee shirt back. So bend the knees slightly by the end and breathing out. Curve forward, rolling down. Take a breath in and then breathing out. Stack each vertebrae as you come back out. Now as you come back out, lengthen the spine a little bit more, stretched, taller, taller, and again, rolling down.
Connect the center and now either you can take the head down between the hands or you can bring the head forward. You choose we the end. As you lower breathing out, as you push back one push up. Good. Now slowly come back to your feet, roll back, sit back onto your heels and then slowly roll back to a standing position. You just come back up to Sunday. Okay, now slowly hands on the knees if you need them. Who all back up under the top of the movements? Circle the arms. Just big circle back. Let's try that again. So slowly rolling down.
I remember usually hands on the legs if you want. Slide them down and as you put the heads down on the mat, Chloe yourself, slowly. Good. Now from here, bring the energy lower and just breathe out. As you push away. I used to send to the push out, that's it. And as slowly take the hands back, sit back into the heels, roll back. Am I going to slowly roll up? Place the hands on the thighs and then slowly curve the spine up top. The movement. Big Circle. Circle app. Good.
Let's just do two more of these and then we'll go to the mat. So slowly roll down. Now try and make it as slow and as smooth as you can. So it's like you're coming home late at night and you don't let anyone in the house here. You come in this slowly low and the nice girl and the elbows out. As you push your way, connect the center, keep that center engage, take that body back to the feet, slowly roll, and then hands on the thighs and then slowly roll back up. Great. Excellent.
One less time. The best yet. Let's try and slow it down. So how slow can we do it? It's almost like a video playing in slow motion. Take you slowly. As you're coming forward, come down to the mad plays your hands. Bring the body way forward. [inaudible] does the mat long spine. Keep the head with a smile. Lower down. Pull the center up and then sit back onto your heels.
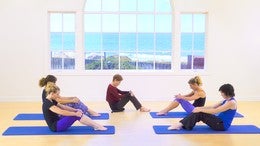
And again, one last time, rolling back up to standing position, right? And then slowly come back up and he again give 'em circle lifting up. Big Circle. Good. Let's roll down to the mat. Come on to the mat, come sit on the mat and have your feet facing each other. We're going to do the roll up. The role of what I've done today is bring a swing of the feet to the front here.
We've got some towels to help. If you do have tension in your back, sometimes putting a little towel underneath your back may help give you a little bit more support to take the movement a little bit further. So we're going to put two towels under here. If it feels it's too much, then you don't need the towel, then just take it out. Now reach the arms forward, reach the legs forward now sitting up tall. Lengthen up. Now from here, open the chest and really feel this like squeezing together. Get some really set the body up.
They'll take a breath in and as you breathe out to the pelvis under, remember Malcolm was talking last time about that dog's tail. Is the tail coming through the legs. Curve back. Take your breath in and then come back up. Let's do a small preparation first. Take a breath in and again, breathing out. Now as you're doing it, the shoulders slide down the back, the chest stays open. Good breathing in, breathing out, rolling. Can we back up?
Now you're more than welcome to continue with a small movement or we're going to try and take it down to the mat. Stick of breath in. As you breathe out, roll down to the Mat.
There'll be further shuffled forward a little. We call this the shuffled dance. Yeah, and now it plays here. So we want that head touching the mouth as you go back down. So he in and as you breathe out, rolling back control, that movement is excellent. And now again, squeeze the legs together and as you breathe out slowly roll forward. Use that towel if you do need it.
Of course the eventual goal would be to take the towel out and do the roll up with no towel. It's just giving you a little bit of feedback for the spine. If you do have tension that lumber, let's take two more of these rolling down with again now this time when you get down and put the head down and stretch the spine long, just good as behind you like elastic. Just get that spine and reaching out. Now arms up. Now as the head lifts up and your shoulders come away from the mat, breathe out ASIC, squeeze the legs together, curve forward and stretch over the legs. Shoulders down the back, lift up to the tall position, shoulders down.
And now again, rolling down, squeezing side those together.
It really has to do with the spine. So let's just try feathering with rolling. So from here as you go back, think of the base is fine and we're going to stop taking the spine from side to side so you're going straight back. You're just feathering it back down. Now just stop it, that movement and they'll come straight up so you can fend the down. It comes right back up or you can go straight down and feather up. I don't normally do both ways, but it's a way of just articulating the spinal [inaudible] and again, for people holding tension is a nice way of just getting that central release so nothing should move in the shoulders. The feathering is below, so you're really, it's like almost like a tiny snake beam from side to side through the grass really in, although I prefer the image of a feather than a snake.
And then slowly rolling back up two more times. Feather back slowly. I really control. Rolling back. Rolling, rolling, rolling. And then slowly rolling back up. Let's try the big feather. Now that means actually the fat is the same size, but we're going to row all the way down. So rural, back cuff, lengthen, lengthen, lengthen. The acid all the way down, all the way down acid and I'll take a breath in, arms back, lift the arms back up and as your head comes forward, stop rolling forward. Shoulders away from the mat, stretch and then lengthen out and come to a sitting position.
Today we're going to keep the legs straight in front of you for the spine twist, cross the arms in front of you. And now from here rotate to the side where the app come back to the center. Breathing in and as you trying to decide, breathe out to the other side. Now here what I want you to feel is it's not the arms leading. You come back to the center, it's the rib cage. So the rib cage is turning you.
You need to just shake the leg of is giving you a little bit tightness as it tightening up, right? So just turn to the side. But the rib cage is pushing a wrap. Good. Come back to the center, breathe in and breathing out. Turn to the other side. That's so that is the arms are following that ribcage. So the spine is long, chest is down, that's it. Drop the shoulders down, lift the chest up, come back to the center, breathing in and breathing out. Turn to the side. [inaudible] to the side.
Let them tall up. And again, other side reaching out. So spine is long. Think about this. Fine like elastic, reaching out. Think about the legs squeezing together, reaching up to the ceiling, coming back to the center for the end, uh, with the out and just shake the legs out. Good. Let's take the towels out now, but slowly bend the knees. And so just from that position, just take your knees to the side and roll down. Lay on the side and lay on the mat on your back. Now we're going to give that hip a little bit of a release. We're going to do some leg circles now with the feet parallel first, but keep the knees bent. We'll start with both knees bend.
Let's lift up the front leg first. Lift up this leg and hold that knee still fixed. Put the hands on the pelvis with both hands and just keep the pelvis still and lift the elbow slightly off the mat. Now the first lake circle I want to do is imagine from the knee, you're drawing a circle on the ceiling. So open the knee out and then bring it back. Good, nice circle. Try and keep the pelvis still so it really is just the thigh, this moving. Keep that pelvic floor engaged.
Use that center to stabilize the body. Good. Use your breath, breathing in and breathing out as you open that lake to the side, reaching out, trying to make the circle a little bigger each time without losing that pelvis. So your pelvis is stable and is that leg, this circling. This is a great movement. We're using that big deep leg muscles. It is. So as I was going to go, a lot of work and good relationships with the pelvic floor, so make sure that pelvic floor is engaged. It's stimulating that whole area of the pelvis as you're certainly open. And now slowly put that foot down and now lift the other leg, keeping the pelvis still.
Lift the elbow slightly off the mat and now start circling the other leg away from the body. Good. Breathing in and breathing out. I think about the space under your back. As you're circling the shape under your back, the space, the neutral spine you're keeping still, it's almost like cold air or cold water is under your lower back. And we want to keep it still with the outer as you circle around.
Great. Now let's go back to the first leg. Let the first knee up, but now with the leg on the mat, stretch our legs straight. So reach that leg still. Now we're going to circle a wet again away from the body. But as you're doing this now the leg is straight. Make it longer. So really feel like somebody pulling you like I am and you're stretching that leg away from you. Now the same time stretch the upper body.
So stretch the spine, keep the pelvis still and explore movement. How far can you go with the in and breathing out? Lengthening as the side. Good. Just two more and now slowly put that foot back down. Change legs, bend been the other knee up first and then stretch the leg on the mat. Now really make that leg on the mat, the working leg. Push it further.
Lift the other leg up and now start circling away. Keep the center engaged. Think about that relationship, the ribcage, the ribcage, and the pelvis is held. Your trunk is fixed, nothing is moving, but that leg with in through your nose and within our, through your math. Great. Little a bit further. Stretch out to the side. Good. Just two more and now place that foot down. Great. Now lay on your side. Turn on your side facing me that lay the head out.
Now if you want to is we've got the towel there. You can just put a towel between your arm and your head just to give you a little bit of comfort for the neck while you do this movements. Have you placed the towel just between your arm? Good. Now stretch both legs straight. He, I want you to connect to the center and start lifting first. Just the top leg. Now stretch that leg long. Reach it.
Take your breath into your nose and as you breathe out, stretch your leg even longer. So keep the leg in the same position. Just push it longer. Good. Now I want you to keep that leg fixed. It's not going to move, connect and center and lift the waste off the mat. Now here, all I wanted to do is lift the underneath leg up to touch it. And now put the underneath leg down. Use your breath, breathing out as you lift the leg up, and then breathing in as you lower.
Now if you've got your hand down, make sure you're not pushing on the hand and tense in the shoulder. It's very easy for the body to try and cheat and to find a way of doing it. Avoiding the muscles we wanted to use. So engage the center, squeeze the legs together. Great. Squeeze the legs together, up at the top with the energy. Lower. Breathing out as you lift up. Good.
Just two more times. And now bring the legs together. Keep them together, take them both down and as slowly lift both legs, up, reach, and then lower. Now lengthen your spine. Stretch the body length and the waist. Really in everything. Good. Remember the waist, you're trying to keep that little space underneath.
Almost like little insects are walking underneath your waist and we don't want to kill them. Keep the shoulders down, pushing away. Now this list of next time, lift up. Hold it. Flex the feet as you point. Lift higher flakes. Take them lower point. Lift higher legs point, lift up with the energy. Lower breathing out. As you lift up, we're reaching out. You're trying to keep those legs together as you're moving. Push up taller and just formal times.
Stretch head through the spine. Lengthen loud. Lastic spine. Good. Just two more. Reach one more time. Stretch up. Hold it up. Stay, stay, stay, stay, stay. And then slowly take the legs down. Rollover and sometimes facing the mat is easier.
Way To get over to roll over and let's do the other side. You guys strung it around, you're still facing me. That's fantastic. Good. Lay their head on the arm, some ASIC. Now from this position, stretch and lengthen. Now connect the center shoulders down.
Now let's start list the top leg. Place that leg, and I really make that leg longer. Shoulders down and now lift the underneath leg first. So the underneath leg is lifting up and then lowering the leg down. Again, lifting up. And Laurie, if anything, think about the inside thighs coming together. Great. Where the out as you lift, breathing in is again out as you left length of shoulder down. I remember the key here is that center.
So if you're working for the pelvic floor, draw all those bones towards each other using your breath and now keep the legs together. Now lift the legs, take the legs down, and now lift the legs up with the in a really out Ridgway stretch and push. Okay. Shoulders down the back.
Now this time let's up the holding a flex the feet point lift a little higher, flex the feet lower point, little higher, reach away. And if everything out point lifted a little higher and yeah, and again, point, stretch, shoulders down. This pelvis is stable and stack the shoulders as stacked. Lengthen, a little bit higher. Push. That's it. Yeah. Remember we always have two different sides of body. One is obvious out strong as light and one is that not so strong side.
So is it a good time to evaluate as you're doing these movements, which is your best side and which is the side not so great. Pushing out, reach away. Push this time, lift up and hold it. Stay there, stay there, stay there, stay that straight you with it further, little bit further lesson. We'll add fun and then slowly come down and roll in. Face your mat, sit back and just stretch back.
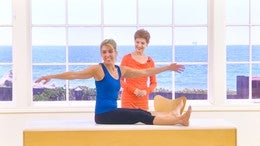
Last time with the leg poor pro, we were holding as a static movement. What I want you to try today is a little variation, but it was always, if you want to just stay on the knees, stay on the knees, come forward onto the elbows and bring the pelvis down onto the mat. Connect the center and the from here. As you breathe out, lift the pelvis up. Now we're going to keep the pelvis this back in the fixed position, so if you can lift the pelvis a little bit higher, weight in and breathing out. Hold that position, lent it up that now all I want you to try to do today is reach one leg away
Good try and I'm going to hold your pelvis and that will lift the leg a little way. Lift up a little bit higher. That and I'll take the leg down. Good. Again, the center. Remember those nice shoulder movements we use the beginning of the class. Use that shoulder stability to help use that center to help with it and breathing out, reaching away length and out. Good. If it gets too much, just sit back and release and just stretch and releases. We'll let the body come back. So sitting back, the key thing is always listen to your body. Like you know, if you come to us fresh in the morning and you've not done anything else, sometimes the body is going to severe a little bit happier than if you've had a long day and you come to the end of the day. So the key is always find the level that fits your body for that moment, but even actually for that day, but for that moment in time and there's a great deal of benefit from just holding this position and breathing.
If you can start adding the leg, start adding the leg or of course eventually we go to with straight legs, eventually become with straight arms and add the leg. So everything's about going up and down. The levels swing the feet towards each other.
Come to closer and now lay down on your back with a hundred as we've been building the a hundred we've been looking at keeping the head down. We've been looking at lifting the head up an up and down. Today what I do is just focus on lifting the head up and down and have a soft fist with the back. So lift your arms at the ceiling. Connect the center. So we're going to go first of all, from this neutral position as you bring the arms down, lift the head up and breathing out, and then go back down. Now as you lift the head up and the back touches the mat, feel like your back is kissing the mat. So lift up and breathing out and then breathing in. Come back down.
So it's almost like as a liquid spine, they're not. We're going for hard spine. You're going for a liquid spine with the if everything out, lengthen and keep the waist open so the chest is open and it's almost like the distance between the rib cage and the and the hip stays opens. Again. Take a breath in, so no creases in the t shirt we add as you lift up. Good. Now soft back. Sit back. He's just touching the mat. One more time. Take it down. We the and out. Breathing out this time.
Hold it up. Now say that. Now really focus on keeping the soft spine and as you do that, no increase intention. Just bend your knee and lift one leg up. Put the leg back down, breathing in, lift the other leg up, back down, and then put the head down and lift the arms up. So we're going to switch on that course. A switch on that deep stabilizing muscle. Bring the head forward, arms down.
Now keep it, lift one leg, keep that, take it down so that set tension the back. Keep it gentle. If the other leg breathing out, then come back and then put the head back down and then lift the arms up. One last time. Really in and breathing out. Now he a this time. Hold it. Keep the back soft. Lift one leg, keep itself. Now don't increase the tension of the back.
And now lift the second leg as in. I put the first leg back down and now put the second leg right down. Try that again. One leg lifted spine is soft. Use the core muscles second for the first leg down. Put the second leg down while less time lifting up, reaching up. Good. Hold the center now this time, lift the second leg. Hold it. Lift two legs up and stay there.
Now strong position. Breathing in. Squeeze the legs together. Breathing out, breathing in and breathing out. Hold that center. Reaching up. Eventually we're going to add the arms to just count the breath cycle, but I want you to focus on the back today with the in with the hour one last breath in and breathing out and put the head down and put the legs down on the Mat. Good. Now let's have the feet slightly open and we're going to finish with a nice mobility movement for the spine. Tilt the pelvis, so pelvic tilt. We're doing the shoulder bridge preparation. He will reduce, you wouldn't get that tilt to the pelvis, so he lent lower back.
And now lift the pelvis up. Take a breath in and roll the spine down all the way back and then release it back to neutral position again. Tilt the pelvis roller, take a breath in, and then slowly rolling down and then releasing it back to the neutral position. Now we're going to bring in again the Judas Aston feathering. So tilt the pelvis up. Go straight up. Now from here, feather down. Go from side to side as you're coming down. That's a good.
Let the spine go from side to side all the way down and then release it back down. Give them all of these breathing in, breathing out till the pelvis rolling up. Good long spine and now slowly roll the spine down, feather it down, feather it down just gently from side to side. And then coming back. Last time. Breathing in and breathing out til the puppy sender so that pelvic tilt lifting. I'm not from here this time. Stretch the thighs longer. Reach away.
Good Center rib cage. Take your breath in. Stay in that position. Just bend one knee up. Good. Put the leg down, lift the other leg up, keeping the pelvis position lengthen out. Take it down. Change legs this time. Lift the knee and now stretch the legs straight. Stretch up. Change legs really in bend the knee with the outlet, the other leg up.
Stretch up, reach, reach, reach, reach and down. One on each side. Lengthen up, reaching tall up. Good. I use that center. Good. Take you back. Lengthen, stretch. And I'll slowly come down and now feather down. So slowly coming down. Feather all the way back. Great. Keep the knees together. Just cross the arms over the chest.
Just roll the knees to the front. Roll the needs to me. Look to the back. Come back to the center. Breathing in and now reverse the other side. Oh Raw. As you go through the center, let the lower back again. Kiss the mat, roll over to the side, breathe in and breathing out over to the side. Lengthen up. Good Center. It's a nice release for the lower back. Stretching the by, really in really out.
Let the legs just roll to the side and then roll into the other side. Really app if you like the shorter blades. Stay touching the mat. So this kissing the mat as well so your shoulder blades are not coming away. Coming back up. Lengthen over really in one more time. Each side over to the side and lift up. And now come back to the center and just let your knees open out.
Let the knees drop over to the side, put the arms on the side and in this position as you breathe out, let the knees get a little bit wider. But think of the rib cage tilting back. Now your neck is longer stretch on neck, so the and the knees are just dropping out to the side really again with the AOD, tilt the pelvis under as it really feel that lower back. Trying to kiss the mat within the out. Lengthen
Why make it as tall as you can and let that out to the side. Reaching out tall as you can as you're reaching.
So we're trying to do slow stretching out. Reach, lengthen and push. Push an ad, reaching out and pushing it. That's off for the knees. Now with Malcolm, but last time you did quite fast circles, but we're not going to do that. We're going to rotate to the side and what do those feel like? You got to just hit your body and now keep the pelvis still and let the body just swing. So releasing out, pushing God, let it out. Push. Push massive.
Let the hands come a little bit lower so your knees are bent, pushing out acid. I look behind you. Beginning checkout. Who's behind, what's going on, whose back they're really in. Breathing out. Push. Uh, rotation is really important. We get up upper body, the thoracic moving to release it out and not come back to the center. Circle the shoulders back to our noise. Crunching, crunching, crunching. Open it out. 11 out. Open out. Good. And bring the hands together. Not just circle the hands. Now from here, thinking of the circle, because there's a side front, side, back.
So go side, front, side, back. We need to get a lot of mobility in our hands, especially for the, in the next [inaudible] episode we're gonna be doing, we're gonna be using a lot of the hands on the mat and we need to have mobility as well as stability on here. So we need to get these working out to circle the arms out. And now from here, let's go into wave. We're looking at some gorgeous big waves out there today. So let's get, let's mimic of those waves. So you're going up and our asset reaching out. I look at the hands, it's the hands that are making the waves reaching out. And now reverse the wave. Let's test the other side. Reverse I to all the tests are breathing, reaching, reaching. So let's get that arm moving our fingers together.
From here we're going to do open the middle fingers together. Open the big fingers together, open the middle fingers and little fingers and go middle, big, middle, little middle, big, middle out. Your fingers are not moving that safe. We want them going. Now a bit of a slow start. So middle, we call this star Trek. So this is your star Trek. Go out, out, out there, out, out, out there. Yes. I don't think this is a homework. This is, this is the homework cause this is the home wellness one. Reaching out, reaching, push, push, push, push, push and it was always good to keep this mobile.
We're going to be working now to finish because we spent a lot of time today like this with computers, with texting. So we're doing a lot of flection movements. I'm not really doing any extension movements. So I call this Spiderman for the hands like this. So you've got the Spiderman like this, thumbs on the top and Spiderman shoots his web out of here.
So we're going to shoot out, flick, flick, flick, flick, flick through, reach rich assets or try and feel like it's coming out through the base of the hand here. Now, little bit dynamic. You an angry Spiderman. Go, oh I'm angry, I'm angry, I'm angry. Go play, play, play. Like Basset. Go now a little bit quicker. Push. Push now don't, don't be, don't be doing this with the hands. It's quite strong. So the arms are not moving. It's should. That's it. The hands are just moving. So clean things that you do like this. Show me your hands are clean for dinner. So clean hands, clean hands, clean, clean, push, push. That's it.
But now bring the risk back. So you've got this curve. Flexion, extension of the risk here, pushing back, reach, reach, reach, reach out. Now you'll start feeling a burning down the top of the arm. That's a good thing. It's not a bad thing. It comes through as a different times. It shows really that you need it pushing. Now let's put a little rhythm and should go. One, two, three, one, two, three, two, three. M, push two out. That's it. Just go back to the circles or the wave.
If it goes too much, go back to the circles. All the wave pushing out. Reach. Push. One more time. I now have shaped the hands. It's always good to remind the, remind our movements and remind our body. We need the whole body moving and again, hands and feet. A really important, we'll look at feet on the next session, but just to finish a little bit of a coordination test. What did you bend your knees? Go Tap. Tap knows an ear.
Tap. Tap knows near. No as it, yeah. Be careful. We put this against tap, tap, tap, tap, nausea. So plot is is coordination, pushing out, pushing out, lengthen, pushing out, reaching versioning out. This isn't the dope practice, this driving, that's all. I'll say. Practices at home, but don't do it in the car. Pushing out nose and ear, nose and ear. One more time. Push nose. Almost. Almost. I was two years of that was to is two noses, nose near noses. One less time. Breathing in and breathing out. Thank you for joining me today.
I'll see you in the next session. Thank you.
Comments


I agree with her belief that it is politically incorrect and can only apologise that the specific area in question is one I am very unfamiliar with the do’s and don’ts of language but with hindsight can completely see her point. I can also see why to many it can be interpreted as offensive.
I have worked in Central and Latin American countries with many multiracial and native students and consumers. I have also worked in Africa, Asia and India and in my nearly 40 years of teaching, to the best of my knowledge, I have never before caused offense and strive to educate my colleagues and students about the necessity to be sensitive to how the language one uses can be received.
As a member of a minority group myself I have been the recipient of both verbal and physical attacks over my lifetime but have never allowed myself to respond with similar attacks. In addition, I also have never been an exponent of strong or bad language and swearing in either my personal or public life as I see that as a sign of poor communication skills and a basic lack of politeness and consideration for others. Modern societies overfamiliarity and acceptance of bad language continually leaves me dumbfounded that exponents of such seem to have no regard for others opinions. I say this purely to stress how upset I am that I have been the cause of upset, however unintentionally, and again apologies to those who know me personally for speaking so out of character.
So I know that I am very sorry that I have caused offense and know that this is a phrase that will never cross my lips again and thanks you to Linda for bringing to the attention of myself and Pilates Anytime.


What a joy to watch you teach with clarity and compassion and produce calm movement in those who participated. Thank you very much! I will be watching your videos as soon as I have time!!
Anna
You need to be a subscriber to post a comment.
Please Log In or Create an Account to start your free trial.
