Description
About This Video
Transcript
Read Full Transcript
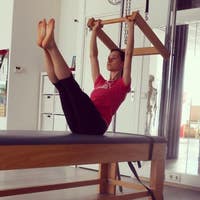
Good afternoon everybody. I'm here with Jennifer and Gajda, two wonderful PyLadies teachers, peers of mine, dancers and just fabulous people. We're going to be doing a beginning reformer to get day with the direct attention on the fact that Jennifer has had two hip replacements recently and she is getting back into shape so she has a lot of wisdom in her body but she needs to restore the full balance and range of movement within her hips. So it's this fine line of real therapeuting work and understanding that this is an athlete in training, not a beginner. So she has already amazed me. This has been how long since your surgery? Nine months. And she has a great career ahead of her for sure.
So we actually, we'll start with a little bit of mobilizing the joints to get the fluids going in the extremities because we often get quite tight and stiff and that affects all the fluid, a firing of the muscles internally. So let's have you ladies like this with your hands. We're going to work into the fingers and hands to begin with to have a nice square position. Rotate the hands out, stretch the fingers around, extend and stretch the fingers. Drop the palms down, roll them around and open. And now we're going to start to move out. Palms down, roll and out, palms down, roll and out, palms down, roll. So what we're doing, and now we reverse it. You're going to circle the fingers in, palms down, and circle the fingers in and out.
We're actually just waking up all the little bones in the hands and the wrists and all the way up to the elbow and the rest of the body is quiet. So we'll do that again. Circle out, down, circle out, down, circle out, down, and stretch all the way. Lock the elbows and just pull the arms apart. Reverse it, circle in, circle into, try to keep the tips of the elbows facing straight down the whole time. Now we do the same movement coming forward to you. Circle forward, circle forward and circle forward and stretch all the way out. Now you circle inwards, circle inwards, and circle inwards all the way by the shoulders. And again, circle out, circle out and circle out. So every time you work the hands, as much as you can, circle in and circle in and circle in, in front of the shoulders. Now we go up, circle up words, circle upwards, circle up in from the to the hands, really stretch and squeeze the muscles all the way.
And then circle inwards and circle inwards and circle inwards. One more time. Circle upwards, circle upwards and circle. Circle up and stretch and circle inwards and circle inwards and circle inwards. And now we go down, circle down, circle, Noun, circle down, stretch, reverse, circle up, circle up, circle up. And last one, going down, going down, going down and circling up and circling up and circling up. Very good. So just a little bit of opening up the energy.
I would like you ladies standing up. Just again. Get the knees going, Sinise and Fita together. Just circle your hands or on your knees so you have a nice long flat back that it's, can you bend the knees more? Can you take a deep circle? One way straight, circling the other way and again, circle one way and back and circle one way and back and reverse. So we're just taking the joints straight and we're asking them to have the range of movement that they're designed to have.
And sometimes if we're too rigid with our technique, we never kind of just explore that experience and come back up. Let's have you both sitting down again and let's take one foot and circle it, circle it, circle it, circle it, and reverse a circle the other way. As you do this, really opened the toes. Circle, circle, do the other foot, circle, circle, circle, circle, circle, and reverse. Very good feet hip with the part. And just as though you had a towel under, you, curl the toes in, lift the ball of the foot up, stretch and down, and again, curl, lift, stretch the toes and down and curl. I'm doing it with my hands and down. Now reverse. Lift the toes, lift the ball of the foot, curl it in, toes, touch, slide the toes out, lift, curl and slide.
And one more time. Lift, cur up, curl and stretch. Out. Now standing up, we use really flex the feet a lot. We do some pointing, but the toes are usually back like you to take one foot and curl it back. Now eventually you will want the foot. I think both of you are up to having the foot straight to you. Really bending the toes backwards and if you can, can you take your weight back onto that foot to stretch all the tendon and ligaments in that foot a lot.
So eventually you want to even be able to stand between both feet. The back of the, the top of the foot should be able to take that much weight. Usually it's a calcified and tight change sides, so take the other foot back and if you can, you eventually shift your weight back so you're standing way back there. That's it. If anybody can't actually take full weight with the leg strength, it's fine to bend the foot to start with in order to get all of that weight coming in. Put the foot down now sitting down again. Let's just go through a little bit for the neck.
So we're just working extremities magic circle under the chin. So you want this sense of from the top of the head through the tail very long. And then as your Chin presses into this magic circle, the back of the neck is getting longer. So you press down and up and press down and up. And the things these ladies are doing so well you want to watch.
It's very tempting to do that movement with the head poking forward and we're looking to cultivate the sensation of the neck being totally straight. And one more time
Bring the magic circle to the side. So you want again, a sense of a straight neck. And this is looking good. Both of you. I'm checking the skull on top of the neck. Now this is just a strength in that side of the neck. You will slightly push with your hand in and you hold the neck in a straight place and back.
So you're building that side of the neck
And the head is getting stable. Now this is the other part. As our jars are mobile joint, here's the jaw. Can you open that? The Chin does at the bottom of the Chin there. So you open your mouth by lifting the skull of the jaw. Yes, for us. Good. Yeah. Interesting to think of hinging from that part. Yeah.
Now the last one, as we have this movement, you will place the magic circle right in the area of the occipital bones where the skull is. You have to stabilize the magic circle from the back, get a sense of your neck being long and then can you look up at the ceiling and back to the next shortens a bit and it's pushing the magic circle down. But you want to be hinting more at the top of the, so no down here. So this stays long and that you just hindering in there and back. So you keep the neck long, you just getting the very top of the neck to hinge better. Yes.
So the neck way, it's like this beautiful long stem and the face and the skull is like a flower on top of the stem. How do you like that as your image? Better wash it. You don't shorten too much in there. Just to be aware of where the movement is coming from. All Kate. So those are a little warm ups of the extremities. Let's have you on your backs. So this is a beginner reformer workout. This is the grads machine. So the springs are consistent, the same tension, all of them.
These ladies are in second gear cause they're five foot eight, five, seven and we, they are both on three springs and all five toes are on Pele's V so not too wide here and out you go press and come back and press and back and press and backstage. Just warming up the joints, warming up the legs and press very good. Now keep the sternum nice and soft as you do this. And one more time bird on a perch. I'd like to really see both of you open the toes just for a minute to as you extend the toes over, I want them long, not curled under. So see if you can extend the this way rather than wrapping just for change.
Bring the heels down a little more. Yes. So we try and get these metatarsal is really opened up and out you go again, press nice soft. Imagine that the front of the sternum is just very relaxed. The rib cages wide in the back and the front of the chest is soft. So you're not kind of in performance mode, but your back is widening.
Very good. Onto your heels now and spread the toes. Why? Even more into the little toe and again out you go. Keep opening the foot. Yes. Excellent.
Keep opening that foot Jennifer. Press
So it's all opening up the back body and just the stomach and the powerhouse is supporting the front spine from the sprint. Bring that ribbon. Yes, and lift and lower and lift and lower and lift. Come back in. Now moving you both. This is the build up stability in the pelvis and in the hips. So you're both in two springs. Now press out to a long position and hug the midline.
Now you will be lifting your right leg out in my direction and up towards the ceiling as you now lower the bottom heel down, lift the foot up and then put the foot down. But stay long. So the trick here is when you shift weight, if there's weakness, you go a too far and you're in the ligament, you want to be in the stabilizer, lower and lift. Put the foot down. Jennifer. Really anchor the pelvis, better lower lift and are in the other thing you see if you can feel pressing out and up. So the back, it's even longer. Every time the leg lifts and down. One more time like this. Keep the lower back, very long, lower and back, and last one lower and lift. And then you needs to come back down and bend the legs to come in.
So for hundreds, because Jennifer says that there's tendency sometimes for the hip flexes to really jump in and want to do all the work. We're going to disengage your hip flexors. So let's have both of you hold the handles with your hand. Foot bars down. I'm keeping you on two springs right now. Keep the knees bent in. First of all, we're just going to do a practice run.
I'd like the shoulders coming off and reaching to the ceiling. Then lift your head up and look at your navel. And then reaching. I want to feel the sternum pressing in and widening between the shoulder blades. So the upper back curls and come back down. So imagine a hammock where the whole front body collapses into the back body, opening up the back body.
You need to lengthen the back of the neck enormous amount and see how much you can curl in the very high spine. So long arms and pull down and lift and hands hover. There we go. So you have these huge elongation in the upper back and lower back down. Just like that. Reach the arms to the ceiling guide or even more rich up.
So now before you come forward, can you find your pecks? Yes. I want you to work into the pex. As you come forward, contract your front body. There's your position, come back down. Rest. Very good work. Now that's your shape for the hundreds. You will rest the legs on the, on the foot bar when you're in the a hundred so no work in the lower power. So it's all about opening up the back and working in the high app.
So up you come with your body and hands are above the size. Start pumping energetically and guided. Can you lift up higher that to go even more. Spread the shoulder blades forward. Yas. So you keep trying to get this lift. There we go. Reach with the arms.
That's it. Deepening the Shawmut. Lengthening the lower back the whole time and soften and reach and open the hip flexors. Legs are completely relaxed and lower back down. Oh Kate, good works. We're starting to build the strength in the upper body. Short spine massage now. So let, don't drop those handles.
Let leather go through. No. So on these, you want the leather going through now B when you no, no, no, no, no. Hold the handles one in each hand. Let the machine come all the way in. Yes. I don't want the spring pulling it all. No pulling with your hands. Bend your knees and put your feet in the straps. You're both flexible enough to do that. That's it.
Make sure the strap is right by the heel so it's below the little bone on the side of your foot and pull your feet to your bottom. So press down. Yes. So here's your start position. Had rest should be down your arms. A Nice Day long by side. We'll go through this slow the first time. Extend the legs out to 45 degrees on this site. Piece of equipment. The leather should be just at the shoulder rest angle. Now the first movement will be tucking the tail and lifting the hips up.
So up you come with your bottom there and use your bottom to lift you up. That's it. So the hips work a whole amount. Bend the knees only to tabletop. Pull the feet toward your bottom an inch and then roll down in one piece using your powerhouse to let you get down there. Very good. Extend the legs at 45 degrees. Tuck the tail to lift the hips up, up, up, up. Use the hips to come up. Hips, hips, hips.
So I'm all the way guided until the machine stops moving. Then you bend. Now you can bend your knees, the tabletop, then you Paul, and you roll down. That's it. So have another go. Extend the legs out. Hips power the movement first. So the more you can get those hips to power, the more you'll build a huge amount of trunk stability, which will support the hips. And then you roll down keeping that angle nicely pure. Okay, get your feet out of here. So we're not doing anything. Very many reps. Unravel the straps and hook Clem over your head.
And I'm putting, bring your feet onto the bar. He put the part so you're just in a nice long position and bring both knees together. Just let them fall inwards and let both knees fall out to just test range of movement. But no shift in the sacred. Bring the knees together, open the knees out, keeping the trunk very stable. And again, bring the knees together.
And then bring the legs up so that their hip width apart. And take your left knee, bring it in towards the right without anything changing in the pelvis. Let the need drop out. Keep the pelvis from rocking again, bring it in, bring it out. So you're doing the same leg one more time, so you have to just stabilize the pelvis and find that rotation in the socket. Bring it back to square. Same with the other leg, bringing the knee in, take it out,
You'll be doing pulling on the straps. So you want to be on one spring and let's set you up the traditional way. So I'd like you both standing at the back end on the foot bar and place your hands on the box. So you want to be standing on the f? Yeah, you want to be up like this. Just to show you how you're going to press all the way out. So you're pushing the box out a little bit, lowering yourself down. And then I would like you sliding your hands through the handles.
This is just so you see lifting your legs up and then learning the machine come in. So you're ready for your exercise. So just your fun little tutorial from grots style entrance. So standing on the bar on the bar hands will be right at the front of the box. So you're in a plank position. Push the carriage out so the hands are under the shoulders and then bend the elbows, lower yourself down. Your shoulders should be flushed with the edge.
So both of you are too far over. Now get your hands slipped inside the handles and then hold the lever. So you get all that. You know that Jennifer, that'll make a lot of noise. Yes, hold a leather. Slide the hands right to the top so there's no traction.
Now you lift your feet off and then you, your arms are long. Jennifer, your arms along and then you let the machine come in. You know, I don't know why you're not there, but that's good. So pulling on the straps now, here we go. I want those same shape you were in for the hundreds where you're really closing the front ribs a little bit and then start pulling the arms back and opening the chest without closing and deep shortening the lower back. Come back down. So can you squeeze your shoulder blades on the way back, Paul?
But keep the lower back long and down. One more time. Pulling lower back stays long. I want these shoulder blades together and that's, these tips need to be much higher and back. Take your arms to the side for t shape. We're going to do the same quality. So all the way to the bottom of the leather.
Lift the arms up to the hands are in line with the shoulders. Do not lift lower, lower, lower, lower, lower. So we need the spine long. This part is where we want to get more lengths. Now pull back towards your bottom pool and open out.
And as you pull this time, squeeze the shoulder blades together, Jennifer and out and squeeze those shoulder blades together and back. All Kay. Good on your back stroke. So there's a tendency to want to do the movement and broaden. There's a bunch of variations I want. I really want to see if you could, do you see how the differences, you're getting the shoulder blade to contract.
It doesn't have much to do with the ribs. Really contracting the shoulder blades and going back just to strengthen the rom boy the Yas. Now we get to do the opposite. We close again to backstroke on your backs. I would like your bottom closer to the front, through your shoulders. F on the box. Curl your head and chest up again.
Lift that chest up just like you did in hundreds arms and legs to the ceiling, up, arms and legs open. Woopsie daisy, bend your knees and come back in. You're on two springs. That's no good. You won't make it. Okidoki so two springs. Here you go. Arms and legs up. I'm as an example, pull down and deepen. Soften the sternum. Wrap the shoulder blades around. Bend your knees to come back in.
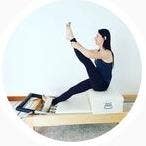
Arms and legs up open and deepen. Soften these leg muscles. Jennifer. No work here. Everything is here and in one more time. Soften the legs open but work in the powerhouse and come back in. I'm releasing the spring for both of you for right now. For teaser, I'd like you to work a lit walk. Get yourselves a little bit further back. So this is a nice thing for you. Try to Suss yes, the opening you want here, not here cause that's gonna that writes are long arms, long legs.
Bring your arms forward, roll up into your teaser and float the legs up. Soft quads down with the arms and up with the arms and down with the arms. And up. Soften the feet. Guider one more time. That's it. And now see if you can roll down with control through each bone in your back without falling. Yes, yes, yes. And everything. Open out. Keep these hips going a little bit more up. Duh, Duh, Duh, Duh. And up you come, rolled.
Come up soft legs down with the arms. Save arms and up and down and up and down and up and roll down with care. Rolling, rolling. And then release that the hips open that the chest open and release. Now hands over your head.
We're only doing two repetitions cause I don't want to overstress your hip flexors. Drop the straps to the floor and I'd like you both to come up. We're going to do short box on the long blocks of bring yourself up. Noisy little things. So we're not changing the box. No, we're staying with the box.
Just that it is you add a spring and I would like you to put your feet in the strap. Now the reason for that is I'd like to get the thighs more or less in line with your hips. Can you get your feet? Maybe move your bottom back a bit. Gajda yes. Can you get your feet to even lower maybe underneath. Underneath here? Yes.
You see how now you can hook a little bit? Yes, I accept I. I'm not trusting you. I will still want this in case you slip. Now what I want you to do is hook the feet. So as you're rolling back, you get the traction to create space in the joint and release the hip flexor. So we'll just do a test run here. How does that feel for you? Guidance under the frame? Yes. That yes. Yes.
It says feed hooked under the frame, right? Let's have you just have your hands by your sides of first time to feel the movement. I'd like you to roll back on your backs and articulate to right here. You really get to set the sacred room just to there and you see how you control. And now roll yourselves up again. Roll yourselves up. Good and roll down again.
Articulate and see what to feel the length opening up out of the hips and curl yourselves up. Now this time you bring your hands to your waist. So it's more like the traditional way. When you go into your back extension, the boxes just about here. So you want to bend above the box, not the floating rib area. You contain them so it gives you good feedback. So back you go. Same Way. Now can you anchor the ribs in and still open up into this park? Yes. Lovely.
Curl yourselves in and roll back up. One more time. The justice. Same Way. Rolling back, softening the sternum. See if you can hold the lower ribs and open the upper ribs. Open under the collar bones. Lengthen the back of the neck. Don't let it just collapse.
Curl in and roll yourself back up. Very nice work flat back. How did that feel? It looked good. How was that on your back? Awesome. So flat back may have the same position of the legs and the hips. Arms are above your head and see how much length you couldn't get out of the hips without gripping in the front.
So nice lift and now hinge back all the way from the sit bones. One long piece and come back up. So imagine you're hinting right from the hip soccer, Jennifer soft. Yes. Now can you find the spine working for you and come back up and what's that? Arms stay long. Just there as good for you. Yes, very, very good. Now just for minute, ground yourselves down to release the tension in your front trunk.
Just bend over.
So the shoulders relax down. Now bring the armpits in front of your hips, but stay long. Stay long, and then return a long diagonal to the right. So you're working the right obliques and back. Stayed on a slight diagonal forward and to the left and back. So I'm not looking at a bend. I'm looking at a long diagonal.
Both sides of the hips out and back. You want to be on a diagonal to the weight is into the stomach, other side and that. Now get yourself into a vertical plane, completely got by children's over the hips. And now when you bend sideways, you're opening up the side ribs. So different type of exercise. Come back up and other side and up. Now go into your rotation. So you twist from your hips to your shoulders, your square. Jennifer, bring this right Rubin. A bit long diagonal going out both hips. Stay down, come back up and center.
Good twists to the other side and extend and come back up. Center, pause. Keep the hips square, rotate above the hips. Keep this and lift this side. Twist and come back up. Other side, twist and reach. And now pause a minute, relax your arms down. Just we add detail to this.
When you twist, I want you to think that you're twisting the side. It's moving forward. It's like we have these two planes here. So instead of spiraling in the middle, I want you to think that you're twisting towards the plane that you're twisting towards. So let's have one. Yes, that's right. So, and look for the twist also in the side of the ribs and in the um, in the lats. So nice lift of the arms. This is your last chance. So you roll to the right. That's it. After that, it's all over. Yes. So really bring the right side into the left plane. Keep this down.
Now extend out on that right side. Yes. And come back up center. Now rotate the right ribs in. No, Jennifer, you're leaning too. You have to go in that direction. So you bring the right ribs to the left, more to the left, into the left side of the body. Now go out, extend on a long diagonal, staying weight. That's it. And come back up and forward and down. Good work. Yes. Believe it or not, I kept you much more even otherwise you were collapsing. So let's get rid of the sticks. Bend over.
Just give yourselves a little stretch and prepare. Yours is set yourselves up for tree. Again, the feet are going to be underneath. Hook your feet under. So you have this very long joint alignment. I'd like you very slightly to hinge backwards. So you're not on your sit bones, you're coming into slight flection and then bend the knee up. Think of lengthening your back even more. So try to relax. Yes, yes, yes. So just slightly externally, rotate the leg slightly internally.
Rotate external, inter external, internal, external, internal. Come to back to the middle. Anchor the joint out. So guide, I don't want you up and the in the sit, I want you slightly back. Yes. Just float the leg up and think of getting a length underneath. Bend the leg back. So try to relax in the front of the hip. As the leg gets up string pulling the foot up and down.
Lift the leg up and walk the heads up gently and you will start bring that hip further forward because it got shorts. You have to hike, hike it forward a little bit more, Jennifer. Right hip forward. You have to lift it up and move the sit bone even more for yes. And then as you walk down your leg, you want to really imprint yourself. And do you see how this leg rolled up? You need to get these hips really square. Come back up.
So you want to be really, it's all of this has to come under. You even more. Get the weight on both side. You're into the right hip. Get it. There you go. Bring this under and lengthen. Now as you rolled down, try and get this tail in the sacred, really articulated so you create all the space in the joint and curl up. And one more time.
So the hip and the femur are not close together. And then lift the leg up and down. So try to get, if you need to rock more back, Jennifer with a body or move the leg away from you more. Yeah. And up. So you're not creating such a tight joint, so you have room to have it floating and you're not creating tightness in there. And then walk your hands up a little bit and flex and point the foot check that you're sliding. The left sit bone forward. Usually you may, I would suggest just lifting it up and bringing it forward. As you roll back, pull the waist away. So Jennifer, come back up a minute. Guider you're fine. The moment you started going back, your psi rotated in a bit.
I want you to imagine someone pulling this thigh away and you roll down the say yes down the center of your spine in process. Good
Now we're going to do hamstring curls, so you want to be lying on your stomach. For me, I like the knees just over the edge. You need to come quite a bit forward. It means that you're hanging almost even more forward. Jennifer, and then can you hug the box? So this encourages this, the ribs coming in, bring them more towards your back. That's it's a, we're taking the diaphragm and we line it up completely with the pelvis.
So these three planes, neck, diaphragm, middle, diaphragm, pelvic floor are parallel to each other. Can you press the heat and open up the hip flexors? Knees can be apart, knees can be a part. So you have this length. Now let's have both of you turn in. So you internally rotate. The feet will move away from each other and externally rotate without. That's it. And internally rotate the is a pubic bone down on them.
On the box. That's it. And internally rotate and externally rotate. One more time like this, like internally rotate and externally rotate. Now internally rotate. Can you extend the legs out too long and bend them back?
I am going to set you both up to save time. Just do anything you want to go. [inaudible] you're getting straps on. Here's one. Jennifer, I want you on one spring. I think that is probably best for you too as you're both very slim.
So the kneecaps are just over the edge. Can you be with your chest a little bit lower down, both of you, not the head, the chest. So what we do is keeping the lumbar spine very long. Now hip a hip flexors open and pull the feet in towards your bottom. Yes, and back. So as you do this, I want you to concentrate on how the glutes and the hamstrings are working and back. One more time like this, but you're not shortening the lower back or the hip flexors and back. Excellent. Now take your right foot and work it twice, pulling towards your bottom.
So imagine someone punching this solar plexus area back a little bit and you find these pecs. Yes. Now what's happening when you're taking your solar plexus back, even more important is that you're creating length in the lumbar spine, which is what I want. So I almost don't mind if you're like completely slumped over to get the legs there. It just, when you get it long enough, the muscles relax and then you activate in here said like you now in your long stretch in your plank, and I don't mind how high your hips are and I want even more lift into here. So I'm looking to get this as long as possible. Yes, spread the shoulder blades even there you go and find the packs. Excellent. So keeping as long as you can. Lumbar spine, as long as you can press out, keeping the pex working and bringing the carriage in, keeping that lumbar spine long and press out in one piece and in one more time, press out to the hip flexors. Actually stay very long.
Bend your knees down and down. Stretch feet are in front. So I want the same thing. You may not be in the shapes you're familiar with cause we're prioritizing getting the length and the lift through here. Right. Good. And then press out again and then come in and just imagine up through the crown of your head as much length as you can. Press out and lift up and find that core set in the waste.
One more time. Tiny, tiny waist. The head stays long. Gajda and up. An elephant is next up onto your heels. Now same long lumbar spine. Can you lift the guided? Let have the feet totally parallel so they're a little bit turned out from the heel to the little toe. Straight line. Now can you both dig into the heel so much to the ball of the foot is off the mat toes.
So walk your feet inwards more if you need to. I want the whole foot off. Yes, yes. Open up the backs of the knees and lift up as much as you can. Even more. Can you lift the balls of the feet even more? Shift your rate up. That's it. The head is down, right?
If you need to walk your feet for the forward and now get only into the heel that where I'd like you for today. Good. Push the carriage out. Bring it in. Push the carriage out. Bring it in. Push the carriage out. Bring it in. Keep that back very rounded and the stuff that's it. And push and in and push.
And until you open up all the tissue in the back of the leg and push and in very good. Bend your knees all the way down. Coming onto your hands. Now walk the feedback and you're going to be in a tripod. So here you are. You don't want the feet all the way back a little bit more forward right now. So you're just kind of as, oh you are on all fours on the floor. Get a sense of the hips being square so you're not, you're not curled under guided your spine as long.
And can you take your right leg and lifted up and back behind you? Just a little bit. It's as though you're on your hands and knees and you're just lifting a little bit and back down and other leg. So what I want is, and back down. I don't care how high it is here are these two bones parallel to the floor.
When you lift the pelvis shouldn't move at all. So your state Yas, there you go. And the outs of this is the side that wants to flop around. Yes. One more time. First side and the other side. Okay. Now can you, here you are in this position, can you ground into the right leg and maybe lift the left knee just a little bit? How much external rotation can you create? That's it. And then the other side. So what I don't want to see Jennifer, is these hips lifting up in the air. I don't care how small better. So watch it. You don't go into big movement at the exp. That's it. That's right. So we really isolating the move of the joint.
Excellent.
One, two, three, four. I want to see that spine very long. Seven and eight. Very good on your back for running out of spring. There's dolphins out there, the magic of the ocean. As you work your powerhouse, the power's bringing it to you.
So toes and heels together extend all the way at the headrest is up and just go for nice alternating run. So as you do this, I want you to start to notice the same stabilizes you were working with at the beginning. It's really should just be hinting from the hips. And now what you're going to start to do, and you can go a little slower if you want, is start lifting one foot up, lifting it and lifting it. So try not to go out of the socket at all. Very good. And live
This side you have to really hold is a little bit of sinking into the joint happening there
And now you keep going and the foot comes in the air and lift the foot and prancing, and four and five and six and seven and eight. And rest. Ladies, you did an awesome job. Didn't over exhaust you good? Hey.
Move Within Your Range: Hip Mobility


Comments


You need to be a subscriber to post a comment.
Please Log In or Create an Account to start your free trial.
