Description
About This Video
Transcript
Read Full Transcript
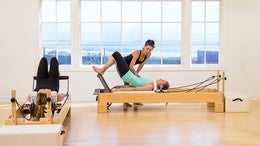
Hi, I'm Cristi Idavoy, and I'm gonna take you through my personal workout, and I'll give you a little bit of background of where I'm at right now in terms of what we're gonna do, where we're gonna go. So I had a baby 20 months ago, I had a C-section, and even before the baby I was experiencing some tight pelvic floor stuff going on that was creating some lower back ache and some pain around my tailbone. I'm still breastfeeding, so arms, upper back, really short neck and headachy stuff from running around looking down like this all the time. Everything we tell our students not to do, I've been doing it all day long. So the movements and the workout that I'm gonna take you through will be focusing on releasing the pelvic floor, getting some length through the flexor chain, and some strength and increased mobility through my upper back, and then just kind of integrating all of that, and again just really everything to just feel good.
So we're gonna start with a yoga block, and I've got a spring and a half, so one heavy and one half spring, and we're just going to lie down. Bring your headrest down because we are going to elevate the pelvis. You always want to make sure that you're centered on the mat, especially when you're gonna elevate yourself a little bit, and I just like to start with some release (sighing). Bringing the feet together, letting the knees drop out. If you're not comfortable letting yourself hangout this way, and by that I mean you feel anything deep in your hip socket joints as opposed to just a nice stretch and opening, you can also put a couple of blocks or pillows underneath your outer thighs.
I'm gonna let me arms release out at the sides as well, and just take a nice, long, deep inhale. (inhaling) (sighing) Allow yourself to sigh and really let go. Inhale slowly. (inhaling) (sighing) Let things fall and roll apart as they want to. One more breath. (inhaling)
(sighing) Then gently press into the outer edges of your feet. Bring your knees together. Let your arms release at your sides. Float your knees in towards you chest, and we're just gonna draw some little circles around the block with the pelvis. Listening to how the back of your pelvis, and you're really circling around the sacrum, how it feels against the block.
Sometimes you'll find some interesting, I call them like hot spots, where you've got a bit of an ache, or you find something that's bumpy. You're welcome to hang out on that spot and massage it out. Every now and again reverse the direction of your circle. I like to start with my eyes closed so that it encourages more and more introspection, to really just feel and notice what's going on. As the knees roll away from you, bring your attention towards your tailbone.
As the knees roll in towards you, notice how the tailbone and the sit bones kind of spread apart there, and when the legs roll away from you, they kind of come together. Again, every now and then reverse the direction of your circle. (breathing deeply) We'll just do one more circle. If you need to balance yourself out, go in the opposite direction again. Then settling into what feels like the center now, you can bring your hands onto the front of your hips to make sure that you feel level across the front as well.
Bring the toes onto the foot bar with the feet slightly apart. Inhale while you're here. Notice that your head, neck, shoulders feel easy and rested on the mat. As we exhale we're gonna lengthen all the way out, noticing the opening across the front of the hips. If you feel discomfort into your lower back or tension, you're welcome to put your arch or heels on the foot bar.
I love doing this. A lot of you have asked me why the block, and I apologize for not replying to all of the comments as much as I used to before the baby, but in essence doing the hip work with the yoga block does a couple of things. It increases awareness about where the pelvis is in space, and it's really important because we want the pelvis to stay heavy and quiet, the sense of the tailbone reaching long away from the crown of the head throughout the movement, so that the movement is in the hip socket as opposed to the pelvis or the lower back. The other thing that the block does is that because now my hips are higher than the apex of my thoracic spine, it helps to create a longer path for the movement for the flexor chain. So I don't necessarily think about it in terms of my hip flexor, but more thinking in terms of like the trains and through the facial systems and how things connect.
So really encouraging the heart and the space between the collarbones to fall heavily into the ground as we press now through the heels and lengthen back and forth. We're just gonna do a few more of these. As you're going, think of setting yourself into using the least amount of muscle effort possible. Like you're just a bag of bones that happens to breathe. Setting that sense of finding great efficiency while you can before we're working against the spring and up against gravity, and doing things that are a bit more challenging.
If we take time in the beginning of the workout to really create a sense of ease, it'll be more likely that we'll have greater efficiency when we are moving, again, against gravity and things get more complex. Now you'll press all the way out, and you're going to put your feet into the straps. So, again, that kind of self-talk: Self, use less muscle strength. You have straps on your feet. Thighs can relax.
Inhale while you can see your toes, and as you exhale, lengthen the legs down. Now here you can bring your hands onto one hand across the ribs and the other hand on the belly button, and as we exhale and lengthen down, it's really important to notice the direction that the tissues are expanding and are towards. If I exhale, (exhaling) I'll feel more of a rib to pelvis connection. Inhale, when they come out, let them expand, exhale as they lengthen down. (exhaling) So after having a baby, I'm noticing more and more since I've got the studio now that so many women, healthy, young, active women, are suffering with incontinence issues, with a lack of bladder control.
It's funny 'cause I recently wrote a blog and I'm sitting there thinking, well there's no information out there in the media about this, and sure enough there's a commercial for some pads. I won't mention the name of the company, but they actually have a pad on the market now for bladder control. So it's not a diaper for an adult, it's a lady's pad for bladder protection, and that just makes me really irritated. Because the issue is that these young, active women are working out all the time, but not paying attention to the direction that their tissues are expanding when they're loading their abdomen. So on the reformer in the Pilates environment, we'll go into circles now, it's a great place for us to exhale as the legs go down, put your hands on your waist, put your hands on your tummy, feel, listen, do whatever you need to do to increase awareness about that.
Because what happens is that if every time we repeat the movement we're having that dome and that bulging effect, in essence, we're pushing our organs out through our pelvic floor. It's not a tightening. I'm not squeezing or tucking or doing any of that stuff. I'm trying to keep my bones, again, through the crown of my head down through my tailbone, no movement, movement's in the hip socket, and my breath helps to create that sense of rib to pelvis connection. My intention is to create no tension.
My intention is to just feel ease of movement, lots of glide, lots of breath. (deeply breathing) And reverse the direction of your circle. Notice that the movement is smooth, that the tempo is even. We'll do one more in this direction. On this next one I'm going to exhale, find that sweet spot again where things feel really manageable, quite easy, externally rotate through the hips, turning the thighs out, and then start to separate the legs to the point where you start to feel a bit of a stretch.
Not to the point where you feel like you're a prisoner or you've hit the end, but to that point where you're like, oh, there are my inner thighs and their lengthening. Then as you're exhaling, press into the strap just a tiny bit, and there it goes. I start to find that space where the inner thighs get long and start to fatigue. Again, my intention is to let go. The end goal of the movement, woo, getting a good one today (exhaling).
I get very excited when things start to tremor that way, especially when I'm trying to release and not use any tension, 'cause it makes me feel like my nervous system is learning something new. My tissues are learning how to lengthen, this stretch feels so good, and then exhale and press, and now it's like, what, you want me to work and lengthen? And I can tell my right leg likes to work more, so I'm gonna try and press with my left just a little bit more, and there it goes. Keeping the glutes very relaxed. (breathing deeply) So as I mentioned earlier, that kind of achy lower back, sometimes the piriformis is a real pain in the ass, bu-dum-bum.
I learned those corny jokes from the physical therapist. So by waking up the midline of the body, it helps to relax those glutes, and vice-versa, right? My intention is to try and relax. We're only gonna do one more for a total of three of those. By trying to relax the glutes and the thighs, we really switch on the midline of the body.
Again, what's so exciting about it is that it's something that's happening as a result of the movement, rather than us saying, okay, now squeeze these muscles. (breathing deeply) Guide your breath into the back of your heart, into the back of the ribs and mat. As you exhale, really slowly drag the legs together. (exhaling) Take your time on that last one, and when your heels finally find each other, we'll turn it into some frogs. Bending the knees, let it come all the way in.
Now again, notice how the sitz bones spread, and as you exhale, keep that sense of ease and lengthen the legs. Simply noticing how the bones separate, sitz bones and thighs when the knees bend, and then inner thighs and sitz bones draw into one another. We'll just do that one last time. Then you can bring your feet to parallel, you can also keep them turned out if you prefer. We're gonna press up and over into short spine.
Move the block out of the way. Bend the knees, finding that frog position again, and then slowly melt the spine down. Try and get everything to release. Lengthen through the backs of the legs. Once your tailbone is down and the heels are close, then press your legs away.
Exhale, lifting up and over, bending the knees, and slowly melting down. Keeping the feet where they are so that the hamstrings get some nice length now, and then pressing down and through. We'll just do that one more time. (exhaling) This time I'm gonna slip my hands into the straps, keep my feet up at tabletop. Exhale the arms down, and then draw some circles.
(breathing deeply) Notice how the shoulder blades move against the mat or not. All right, sometimes we notice that they don't move, or it's hard to tell, and that's totally fine. Like keeping some tension in the strap throughout. Back of the neck feels long. The jaw staying relaxed is very helpful to keep the neck long.
I don't know if you do, but I still feel my inner thighs tremoring, which is kinda fun. Inhale now with the fingertips reaching towards the ceiling. As we exhale, we're going to press the back of our ribs into the mat and lift the head, neck, and shoulders. (exhaling) (inhaling) Inhaling down, exhale to curl back up. (exhaling) Again, when you're curling up notice that there isn't a whole lot of change through your pelvis and abdominal wall.
This is where we don't wanna see that dome, the alien sticking its head out. I've heard it called so many different things. (exhaling) And on this next one we're gonna exhale, curl up, hold ourself up there. (exhaling) Inhaling while we're up here. (inhaling) Exhale, reach the left leg out over the bar, and then switch. (rhythmic breathing)
Reach the hands actively for the foot bar. Notice you're able to talk holding this position. Last four. Three. Two.
And one, send both legs out, curl up a little higher, and rest. Oh, it hurts so good. All right, straps back down. We'll open the arms back up, separate the feet, and just rock from side to side. I love rocking with the feet wide apart 'cause it allows the hip to go further, and then it'll pick your ribs up and off the mat.
Before we get up and out of this position on the reformer, we're going to do a bridge. So we'll just bring our heels onto the foot bar. Arms at your sides, inhale, and as you exhale roll the tailbone towards the knees pressing down evenly through both of your feet, peeling your spine up into the top of your bridge as you inhale keep the back of your neck long. Exhale, slowly curling down. If you feel like you might cramp up, 'cause you're just on a red and a blue spring, or a spring and a half, don't go so slow.
(exhaling) (inhaling) Imagine your tailbone's gonna stay up at the top while the back of your collarbones, breastbone, ribcage, lower back, sacrum, and finally the tailbone release. Inhale at the bottom. Exhale, imagine that your ribs are gonna stay down. Really emphasize pressing down into the mat to increase that sense of moving one segment at a time. (exhaling) Now on this next one keep yourself down, bring your hands onto the shoulder pads, we're gonna shimmy ourselves down for some semicircle, might as well.
Another favorite, we're set up for it pretty well. You wanna make sure that your heels are on the bar, that your arms are straight and pressing against the shoulder pads, and be mindful here it's all about the sacrum, that you're really pressing up through the pubic bone and not letting your hips drop down. So keeping that sense of pressing up, we press all the way out to straight legs, send the tailbone down into the mat. As we're bending the knees send the sitz bones back up towards the ceiling, and peel the spine up. (breathing deeply) And then we'll let it flow like the waves crashing outside, really windy out there, big wave.
Fantastic after the baby and the surgery, especially this part. Gets that nice length across the abdomen. And we'll reverse. Again, think of leading with your tailbone on the way up, so legs go so long you float up. Keep your tailbone up as you curl down.
(exhaling) I could go on forever, but we'll just do one more, and then you're welcome to do the old grab the ankles trick. Keep the chin away from the chest as you press up a little further, and then bring your hands back to the pads, and we'll shimmy our way back onto the reformer, and we'll giver ourselves a hug. Let the knees separate. Give them a good squeeze. We can grab the outside of our ankles, or feet if we can grab them.
If you've got some bellbottom leggings on, those are helpful, too. Send your tailbone down towards the mat as you separate the knees, and pull back on the feet; a little happy baby on the reformer. You can press one and then the other. Again, really allowing the sitz bones to spread apart, and then pressing down evenly through both feet and the tail, and then let it all release. Bring your hands behind your knees.
As you exhale you'll curl up to sitting. All right, how do those legs feel? Mine are still a bit shaky. So now we'll do a little mermaid, changing it to one red spring. I personally enjoy the Z sit, but you don't have to do it this way.
You can also sit criss-cross applesauce. Basically, you wanna make sure that your hips are fairly close to being even on the mat, and most importantly that you're able to have a long spine in the center. You'll bring your hand just in front of your shoulder to make sure that your shoulder can stay away from your ear throughout. So you can do this, and then roll it back down. We want to keep that feeling of the shoulder rolling down and away from the center.
The other hand can come to the foot, to the headrest rather, inhale while you're here. (inhaling) Then we're gonna press up and over, and really reach long now through the side of the body. So we just really mobilize the spine a whole lot through flexion and extension with that semicircle at the end. Now we wanna do some side bending and wake up the lateral aspects of it. Think of the top ribs lifting up and over as the bottom arm presses down.
I like to think of the arm on the foot bar like a bicycle stand, and the breastbone and the rib cage like the wheel that's moving around that stand of the arm. And we'll do one more. (breathing deeply) Then take the arm that's in the air over and next to the other hand on the foot bar. Let the back hip come away from the mat, both hands on the bar, and just lengthen it all the way out. As you inhale, shoulders will glide wide.
Bring your breastbone forward and up, and you'll find that there's more weight on the hand that's towards the back here. Exhale, press all the way out, get very long. Shoulders glide wide, reaching the breastbone forward and up. Allow the back hip to stay in the air so that you don't feel the yucky compression around your waist. It should feel like a gentle squeeze around the waist, not like a forceful compression.
So you don't necessarily have to bring the carriage all the way in. Listen to your body to figure out what feels appropriate. Last one. And then we'll press all the way out. Slide that hand back to where it started.
Turn back into the side bend, let your hip come to the mat, and then bring yourself all the way up. Then we'll bring the top arm up and over, and do a counter stretch. Then inhale, bring it all the way up. Now change the spring to one half of a spring, one blue, half a spring. Your right hand is going to, or the hand that's on the foot bar, towards the foot bar, is going to take the strap.
I love to hold the strap this way so that it's holding me, so it's wrapped around the wrist, and then my hand is open, a trick I learned when I studied GYROTONIC, their straps have rubber bands here and hold around your wrist. It's just nice because when we start to grip, it like creates this whole pattern of tension around the neck sometimes, and this way you stay open and you can really emphasize a sense of direction in the movement. The free hand can come to the hip or onto the lower back. We wanna emphasize the movement coming around the ribcage. It's cool to do it with your legs in this position or criss-crossed 'cause it takes away a lot of the available movement in the pelvis to really get it up through the ribcage.
Inhale as you turn to look at the back. As you exhale, send one side of the ribs back as the other come forward, and the elbow comes across to the side of the body, and then bring it back and around. Inhale when you're here. Exhale as you pull against the tension. You're welcome to try the breath in the opposite pattern.
Again, do whatever feels intuitive for you. On this next one we're gonna carry the movement out further, reaching the arm out and towards the foot bar. Inhale. (inhaling) (exhaling) Exhale to twist. (inhaling) (exhaling) If you feel any strain up in your neck or shoulder, you're welcome to change it to a lighter spring or make the movement smaller.
So you don't have to press the arm all the way out. Last one here. Now, we're going to turn, hold it here. Bring your other hand to the headrest now. Take that side bend the way that we did.
So we often do this in a kneeling position. We want the elbow to reach forward, look down at your hand, and as you exhale, press the arm out, and then bend at the elbow. So again, wanna be mindful that both shoulders are staying wide apart so that the movement is happening at the elbow. (exhaling) It's hard to talk and have power in this exercise. Have to exhale.
One more and then we're gonna combine them. So I'm gonna keep my arm up, take a side bend here. You can look up and over, inhale. As you exhale, think of moving from your ribs rather than your arm. Coming back up, (exhaling) and now twist.
Inhale. Exhale. Inhale. Exhaling. So we're inhaling to twist to the back.
Exhaling to twist out over towards the foot bar. Inhale up and over into the side bend. Exhale, coming up and out of the side bend. Last time. (breathing deeply) And rest, drop that strap off.
You can bring both hands to the shoulder blocks. Round the spine up and over the leg. Take a breath or two there. Again, emphasize shoulders wide. Then we'll inhale, turn back to the side bend, come all the way up.
Notice the huge difference between one side and the other. I feel like I look like this, so we'll even that out. Turn to the other side. Now again, change it back to one full spring, or one red, and let's see if we can remember how we got all that going. Okay, so your hand comes to the bar.
Again, slightly forward of your shoulders so it's easier to keep the shoulder away from the ear. Inhale and sit tall. As you exhale, press up and over, long neck, and then reach back up and around. Enjoy these. Emphasize the top ribs, really lifting up as that hand presses down into the foot bar.
Only press out far enough so you can keep those connections. When we go too far out, it's really hard to stay connected to the hand on the foot bar, to that feeling of pressing down to lift up and around. We'll do one more that way, and then you'll hold yourself up in that side bend. Take the top arm to the foot bar, let your back hip lift off. Widen the hands, press all the way out.
Really lengthen through the spine. Shoulders wide away from the ears. Exhale, let your body come forward and up onto your arms, and then lengthen back out. (deeply breathing) Again, listen to your body. You don't have to bring the carriage all the way in.
And sometimes one side of the body's quite different than the other; honor that. Make adjustments based on what you feel. Both sides don't have to be the same, because they're not. We'll just do one more of these. And the next time that you press out you'll stay there.
Guide that hand back to the one on the bar. Turn back onto the side. Let your hip find the mat. Find that start position, and then bring it all the way up. Hand on the headrest.
Counter stretch, lengthen up and over, and then bring yourself all the way back up. We'll change it now to half a spring. And your other hand now is going to take the strap. Again, you can let the strap take you. Inhale as you turn to the back.
This hand can feel where your lower back is, and as you exhale it's your ribs that turn, the elbow comes across, and then it's your ribs that turn back. In essence, from your belly button down through your tailbone there's not a whole lot of movement; it's happening through the ribcage. On the next one we're gonna lengthen the arm out. Your eyes follow your hand. Something I play with a lot, especially on these exercises where you're moving against the tension of the spring, is with using sound, not just the exhale.
For example, inhale, and as you exhale make an H-A sound through the movement. Ha. Ha. Ha. Notice if you feel more power and like your body get lighter when you make a lot of noise.
After 36 hours in labor I discovered that. I'm just kidding, I learned that before in a yoga training, but, yeah, when you're in labor it's very helpful. We'll just do two more. (breathing deeply) Then we'll just go right into it on this side. Take the side bend, your hand can come to the headrest, shoulders wide away from your ears.
If it bothers your neck at all, it's always helpful to look down. Make sure your top elbow is forward of your shoulder just a bit, and then exhale, press out, and bend. Keeping the elbow more or less in the same place. Again, listen to your body. Notice one side might feel different than the other.
I can totally tell this is the I carry the baby more often on this side, so I'm gonna bring my elbow a little bit lower on this side, and make the movement a bit smaller. Really trying to keep width across my shoulder blades on the back and across the front through the collarbones. Last one, and now we're gonna combine the movement. As I exhale and press out, body comes up. Turn to look at your hand, then turn.
Let the elbow bend, turn to the back, inhale here. Exhale as your turn. Inhale to go up and over. Exhale as you press back up. (breathing deeply) So I can really tell how this shoulder integration into the ribs needs more work than the other.
And I need to become more of a lefty, and carry the baby with my right arm a little more. Last one. And we'll rest. Again, both hands can come to those shoulder pads. Feel like you're pressing back with the ribs, broadening the collarbones, and letting the crown of the head pour down.
If you feel pressure in your knees or hips, don't let your body drop so far. Then you'll bring your hand back to the headrest. Flow back into your side bend, and come back up and around. All right, notice how your shoulders feel. Move them around a little bit.
Shake out through the arms. And now we're going to change it to one yellow spring, and we'll bring the foot bar down, and we'll grab a long box. At first, we're gonna let our shoulders release. We're gonna lie facedown on the box, and you want your ribcage at the front edge of the box, legs come together, make sure that you're centered, lengthen the arms all the way down, and then just let your elbow soften and take a moment to release here. Take a deep inhale, (inhaling) and as you exhale, create a gentle pressure between the pubic bone and the box, or the pubic bone towards the box.
Not so much that you feel tension into your lower back. Just enough to feel a gentle tone around the backs of your thighs. You might need to really squeeze a lot and press down, let it relax, and then practice pressing down just a little bit so that your feet are reaching away towards the horizon, but you're not on overkill squeezing and lifting up, so finding that nice balance point. Inhale while you're here and let your shoulders roll up to your ears; roll them in and up. As you're exhaling, glide your shoulders back away from your ears, start to lengthen your shoulder blades down your back, keep your arms straight as you reach your breastbone forward and up.
Inhale at the top. Exhale, and lengthen back out. Exhale as you drag yourself forward, and again as we say Polestar, the breath is a tool, it's not a rule. Use the breathing pattern that feels it requires the least amount of effort and it supports your movement. (exhaling) I say the only real rule is that you don't really wanna hold your breath while you're doing this, or any movement for that matter.
Notice if you start feeling your triceps kicking in. If you feel tension around your neck and shoulders, check in with your thumbs. Make sure you're not gripping the sides of the machine. You're really pressing down making it feel like it's your armpits that are pulling you through your hands like they wanna separate a little bit. And then lengthen all the way back down and let that release.
Now, we're gonna pull ourselves forward and grab the risers. If you don't have risers or they're low, just bring your hands lower. Then let the shoulders glide up away from the ear, and gently glide them down. Go inside, notice where the crown of your head is in space. You're looking straight down at the floor.
From the crown of the head, travel through the middle of your neck, behind your belly button, behind the pubic bone, out through the tail, and through the feet. Is there a long line that connects? As the shoulder blades widen now, start to bend the elbows. Keep the shoulder blades widening, and pull yourself through. Hold it there for a moment and breathe.
Then slowly let it release. So slowly so that the tissues around your armpit, on the sides of your body, around your shoulder blades learn how to lengthen out to slow the movements of your arms going overhead. Glide the shoulder blades wide. As the elbows bend, still try and keep width across the front and the back of your heart. Hold it again.
You might find that tremor point like we did before. Then slowly release. (deeply breathing) Let them glide up to the ears when you lengthen, get longer. Shoulder blades wide. Keep going wide as the elbows bend.
Like you're making space to hold eggs with your armpits. Fingertip grip, the thumbs are free. Hold yourself here, and now add a little extension. Your ribs open up. The pubic bone presses down.
The toes press long. The back of the neck is long. It burns so good. Slowly bring the spine back down as you lengthen through the arms. (sighing) We're only gonna do two more of those.
Go really long as you inhale. Exhaling shoulders wide. Keep the shoulders going wide as you're pulling with the elbows, fingertip grip. Back of the neck stays long. The crown of your head is still in line with your toes till you get to that point where you're in a hold, and then reach your breastbone forward and up, pubic bone down, back of your neck is long.
Hold it and breathe. Find the upper back. Relax through your glutes. Slowly release down, and start to lengthen out slowly. Build so much energy, we don't just wanna let go of it.
(sighing) Get even longer, last one. Shoulder blades glide down. Elbows start to bend as if the elbows wanted to pull into each other and back. Start lifting the breastbone forward and up. And slowly releasing down.
It gets harder and harder to go slowly doesn't it? Nice big burn across those triceps and back. Let your hands lie down. Let your everything slide down. Bring the carriage back to park, and very carefully make your way up onto hands and knees, and just take a moment in child's pose.
Get your bottom down first, and then let your body come down. So if any part of you is up in the air, let it be your head. You can also stack your fists to support your head, but do try and get your bottom as close to being on your heels as possible, and just take a few breaths there. (deeply breathing) Notice if your heart rate went up like mine. When you're ready inhale, make your way up on to all fours.
Just for a moment since our spines are so warmed up let's do a little cat cowl while we're up here. Long through the crown and the tail. Inhale, stick your butt out, roll your shoulders back, and save your neck for last. Exhale, send your tailbone down, and let the movement ripple through your spine. You might get a little adjustment through your back.
Let your head release at the very end, inhale. Exhale, lead from your tail. Let your belly drop, shoulders broaden, chest opens, then your head comes up, inhale. Exhale, lead from your tail. (inhaling) One more. (exhaling)
And then find the long position. Bend your right elbow. Keep your left arm straight, and turn towards the left. Just kind of let your ribs drop down. Inhale, straighten both arms out, and we'll go the other way.
Keep the feeling of sending your sitz bones up through the back wall, so that your lower back doesn't collapse. We'll just do that one more time on each side. And then we'll step down. Thank you, box, we're done with you for today. We'll put the box back.
And now we'll come back and change the spring to a red and a blue, or a spring and a half, one whole and one half. Coming back up onto all fours, don't worry we're gonna give our upper body a rest now, ish. So tuck the toes of the back foot onto the frame of the machine, and then bring your right foot forward onto the headrest. Bring both hands onto the shoulder pads. You're gonna lengthen out through your back leg, and just find your lunge position.
You may or may not move the carriage at this point. It doesn't really matter. What matters is that you feel like you can press down and start to come up onto a fingertip touch. If that doesn't feel like it's gonna happen, no worries, just keep your hands on the shoulder pads for now. Start to lengthen the front leg out, and then bend the knee.
You don't have to go all the way to a straight leg. If you've got it and it's gonna go there, make sure you can get it back. Again, go as far as you can go. Listen to your body to determine how far that is. The next time that you bend your knee, you're going to keep bent, really press down into the right heel, and start to rise up.
You can bring your hands onto your hips. What you wanna notice is that your lower back is still maintaining some length. You may have a bit of an arch, you just don't want it to feel like it's crunched up. If it does, you can kind of hinge a little bit further forward there. The back of the leg, or the front of the back leg, may lengthen, and now we're gonna press forward again, and then bend.
When the front leg straightens, you have a moment to get your pelvis into more of a vertical position, and then keep it there as your front knee bends. Again, you can still have your hands on those shoulder pads and keep strengthening your body into this. If it feels appropriate, reach both of the arms up and over the head. Again, if your fingertips are still on the shoulder pads, keep them there, and the next time that your front leg straightens, keep it straight. We're gonna open both legs out, and then lengthen back up.
(deeply breathing) One more. And then we'll press out. Bend that front leg. Bring the arms back down onto the shoulder rest. Bring the leg back, and switch sides.
Find the lunge, lengthen the front leg out, and then bend the knee. Start to progress onto the fingertips. If it feels appropriate, start to rise up. Notice that your hips are level as best as you can. Keep both legs straight.
Rise up a bit more. Get your pelvis a bit more vertical. Reach the arms overhead if appropriate, opening up. Exhaling it (exhaling) together. (breathing deeply) Last one.
Press out, bend that front knee, return the hands onto the shoulder pads. Again, find that lunge position. Hold it there for just a moment. I should say push-up position, hold it there for just a moment, and then bend the knees. Bring the carriage into rest, and again do one more child's pose while you're here.
Let your hips settle back. Let your lower back release. Take two breaths while you're here. (deeply breathing) On the following inhale we're gonna roll our way up to sitting. Go ahead and step down from the machine.
Come up to standing. Bring the feet together. Look down at your feet in space. Soften at the knees for a moment. Notice that when your knees bend they travel over the centers of your feet.
Bring your hands onto your pelvis. Notice that your pelvis feels vertical. You can also bring the hands onto the front and back of the pelvis. As you inhale bring your arms up and over your head. Look up through the fingertips.
Exhale, reach up a little higher through the right side as you press down into your right foot, and then switch. And switch, as if you're gonna climb up and out of the room. One more on each side. Reach up through all 10 fingers. Lift up onto your toes.
Lift with everything. Lift with your heart, your eyes, your fingers. (sighing) And let it all go. Let your eyes close. Let your arms dangle.
Take a moment to notice your breath. Notice the way your body feels on the inside. Notice the way the space feels around you. Let your muscles go. If you have tension through your thighs or glutes, allow it to release.
On the following inhale reach the arms back up and over your head. Open the eyes as the arms come up. Bring your palms together in prayer. Bring them down into the front of your heart, and let your head bow down. Take a moment to feel gratitude for your amazing body that allows you to experience so many things and carries you through this life.
Thank yourself for showing up to the practice. And thank Pilates Anytime for this amazing platform. And thank you for watching.
Mention
 |
Christi Idavoy (Teacher) |
 |
Miri J |
 |
Gro J |
 |
Claudia K |
|
|
Astrid Schilchegger |
 |
Jessica M |
|
|
Laura G |
 |
Sarah M |
|
|
Tinsley |
 |
Barbara L |
 |
Jennifer |
 |
Hwanii K |
 |
Kathy C |
 |
Eli B |
 |
Brian D |
 |
Christie K |
|
|
Oksana M |
 |
Sara P |
|
|
Sarah W |
 |
Marci S |
|
|
Melissa G |
|
|
Whitney V |
|
|
iOS Cust256950 |
 |
Beverly L |
|
|
Joan B |
|
|
Jill G |
 |
Christine Morling |
|
|
Hilda G |
 |
Silke L |
 |
Jennifer S |
 |
Heather G |
 |
Katie H |
|
|
E.A. |
|
|
Denee D |
 |
Brand Girl |
 |
Connie M |
 |
Stacey S |
|
|
Anne H |
 |
Ida H |
 |
Merce Dita |
|
|
Mary Beth L |
|
|
iOS Cust205314 |
|
|
Lori |
Comments


You need to be a subscriber to post a comment.
Please Log In or Create an Account to start your free trial.
