Description
About This Video
Transcript
Read Full Transcript
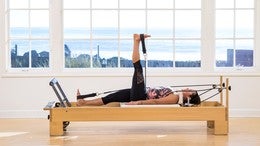
Hi, I'm back with another short, sweet, effective Reformer workout. So we're just gonna get started right away. I'm set up here with my footwork springs. I've got three reds and a blue and we're gonna lie back and warm up our bodies. So, settle in on your back here and begin with your feet all the way together and try to assess that you've got equal weight or not equal weight but equal space between your neck and the shoulder rests so you know you're centered on your Reformer and then separate your feet just a bit.
I've got my feet, the middle of my foot on the bar here for my pelvic curls. Inhale through your nose. Exhale, first engage your abs and do a nice pelvic curl, lifting those hips all the way up to a bridge position. Inhale here and use an exhale to then peel down one vertebrae at a time. Articulating through your back and going for the feeling of stretch or lengthening through your spine.
Inhale, use an exhale to peel up again. My bridges get a little bit bigger, a little more zesty as I warm up. At first I have a hard time extending through my hips. So make sure you're paying attention to not letting your hamstring seize up on you especially if you're one of those people that has a hard time getting the height. So take your time is what I'm getting at.
So exhaling to peel up. Lifting and sort of tucking the pelvis and trying to create the sensation of a straight line across the front of your body. Inhale there and use the exhale to peel down. On the next couple here just pay attention to what your feet are doing and try to keep the weight of the feet the same and what I mean by that is sometimes our feet wiggle around a little and try to feel where the bar is pressing into your foot and keep it in that same spot. Inhale and then use the exhale to peel down.
You'll do one more pelvic curl here. Nice and easy warm up for the spine. For the abs, for the backs of the legs. Here in this lifted position try to really tilt the pelvis a little more, it's like we're trying to go posterior with the pelvis. Find your right leg and lift it up to a tabletop position.
Tap it to the bar and lift it again two more times. And then change sides so we lift the left leg up to a tabletop position. Tap to the bar and two more times. One and two with both feet on the bar. Press your pelvis first a little higher using abs and hamstrings and then lower your spine down.
Beautiful, hold on to the pegs by your ears and sway your legs to one side. Just an easy release through your back. Come back through center and sway your legs to the other side. If your shoulders allow you to, hold the frame instead of the pegs which will give you just a little more opportunity for shoulder opening. One more time each side.
Then we're gonna get right to the working part. (laughs) Come back through to center with your legs. Engage your abdominals first. Press into the frame a little if you're holding. Lift one leg to table top and the other, feel the abdominals as we twist.
And exhale through to center. Now this is a twisting motion. So it should feel kinda nice on your back but it's also abdominal work so remember that. Use those abs to pull back. Work on keeping the knees glued together.
The feet also glued together. So it's the spine that's moving, not the legs. One more time here and we'll add on with the legs a little bit. So we inhale to twist and then straighten both legs keeping them glued together. Pull your straight legs back to center and then bend your knees.
Inhale to twist. Straighten and reach even more. Pull back to center and bend. And go again here. Inhale twist, straighten, pull back to center and bend and last time.
Twist, straighten, pull back to center and bend. Reach your hands up to the ceiling. Allow some blood to flow to your shoulders. Inhale, use an exhale to lift the head and chest up nice and high, softness through the shoulders and inhale to lower back down. Exhale to lift again and inhale back down.
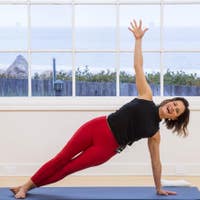
Now to try to feel your low back grounding into the mat as you lift your chest. And stay control or stay engaged in your abdominals as you lower down. We're gonna lift here and hold. Reach your hands up to your legs and lift your body perhaps a little higher, feel ease in the neck. Holding on to the right leg send the other leg out.
The toes are softly pointed and we change. Change. Change. Remember we're having fun when we're exercising right? So watch your face.
Make sure you're not grimacing or gritting your teeth. See if you can soften through the eyes. Perhaps a hint of a smile. Find a breath that suits you here, exhale. Exhale, quick inhale is what I like.
One more time. Both legs come in. Lift just a little higher again. Slip your hands behind your head. And continue with the legs.
Out and change and change. Change, change. (breathes) One more time, add in rotation. Here we go. Reach, I like to slow down just a little when I rotate.
Lifting. Focusing on the lift as you pass through center so you're not going down in space each time. Woo, my abs are working. Back to center, bring your hands to your legs. Lift a little higher now.
Tuck your pelvis and really round through your low back here. So I'm lifting my pelvis as much as I can here. I'm also lifting my body. Now, keeping that shape I'm gonna pull my knees in and try to make a forehead to knee connection. A big stretch.
And then I rest down. (exhales heavily) Now the footwork will almost feel like a break yeah? Let's put the heels on the bar. So the center of the heel is on the bar about hip width distance. Settle in again, make sure you're nice and even.
You have your neutral spine, chest is open and then out you go with an exhale and an inhale to control in. So the rules here. I say that a lot. I want you to really focus on keeping your pelvis nice and still, specifically when you come in. So as you come in, oftentimes it feels like we have to soften the tailbone down a little bit to do that.
Feel the inner thighs working. Especially on the way out, squeezing those upper thighs together. Now here we add a variation. Stay straight with your legs. Slightly bend your knees without moving the carriage.
Tuck your pelvis and lift your hips off the mat so you're like a little mini bridge. Keep the pelvis that same height as you bend the legs in and press out. So I'm not lifting and lowering my pelvis. I'm using my abs and the backs of my legs quite a bit. Press the legs to straight, stay there.
Slightly soften it you hear. Soften the pelvis back down and bend the knees in. Put your toes where your heels are and we'll do that in each position. Juicing up the backs of the legs. Exhale to straight and inhale in.
So take those first few repetitions to really set your body. Feel where you need to be. So for me, I'm often thinking about that softening down of my pelvis. Thinking about my inner thighs. I'm also checking in with my shoulders making sure that they stay open.
My breath and we'll do one more like that and then hold the legs straight. Now I say straight but I don't want them locked. So just slightly bend your knees to make sure you're not locked. Scoop your pelvis up, try to feel those hamstrings. Right here, right now, working with the abdominals.
Bend in without lifting the pelvis any higher and press out. So I'm really just floating my pelvis. It's like a mini, mini, mini, pelvic curl. And one more time. All the way, lower your pelvis back down.
Bend your knees in. Slide your heels together. Feel the heels tightly together. Feel the abdominals active, the chest open. Out we go, exhale and inhale in.
(breathes) Something I often say is that the breath is the music that we're moving to. So really use the breath to help you keep a rhythm or a flow. (breathes) Remember to control on the way in and squeeze those thighs together on the way out. Holding the out this time. Slightly soft knees.
Just slightly, scoop that pelvis up. Use the abs, use the glutes, use the hamstrings and bend in and press out. And bend in and press out. And one more time. Press out, lower your pelvis down.
Bend all the way in. Whoops I bounced. Find your heels on the bar in a wide position please. Slightly flexing your ankles. Again, assess that your chest is open, your pelvis is neutral.
Exhale, we press out. And inhale in. I find in the wide positions there's often more discrepancy between the two sides. So just check in with your body and make sure that you're using your two legs equally. That you feel, you may feel more sensation in one side when you're using them equally.
Using them equally. Let's do two more like that. And now we keep the legs straight but slightly, slightly bent. Tuck the pelvis and lift it up. Feel the glutes, feel the hamstrings, feel the abs and we pull in and it's quite juicy in my glutes and we pull in.
And again, and we pull in. One more time, out. Lower the pelvis down, articulating through the back and pull the carriage in. Replace now the toes on the bar. In the same wide position, engage your abs and out we go.
Don't forget to pull up a little bit through the kneecaps at the end of the movement so that you feel that inner quadricep, that vastus medialis oblique working. You also wanna feel the backs of the legs and the inner thighs working but the quads are in fact important. (breathes) One more time here. So keep the legs almost straight. Do that little pelvic curl using the abs, using the backs of the legs.
We're lifted and we bend in. (breathes) One more time. Lower the pelvis down. And come all the way in. Bring your feet once again all the way together and eyeball that you feel centered or that you are centered and then separate the feet and legs a little.
We'll press with the legs out to straight. Lower the feet under the bar, press up, bend your knees and come in and press out, let's go down and up two times. Feeling the control through the feet and bend and come in and press out three times down and up. (breathes) It's a nice energy, nice flow here. Hopefully you're starting to feel warm.
I know I am, bend in. And again. (breathes) And when I think I'm on six perhaps I skipped one, I'm counting up each time. (breathes) And we're gonna go to seven and that feels always almost impossible. But so good for our calves and feet.
Here's one, two, three, four, five, six, seven and then adjust your foot. So you can enjoy a nice stretch. So I always adjust your foot because I like to move my foot a little bit up in space so that the ball of the foot is on the bar and I can really just let the bar in and enjoy that stretch. I also like to move my foot around on the bar. Find something new so I've taken my foot up even more and I've kinda curved my foot over the bar like a little prehensile position and I'm getting a stretch all the way up to my glute.
It feels fantastic. And then we'll change sides and I'm gonna go right to the ball of my foot first on this other leg. I've got my other foot available on the bar just to help me adjust but you can certainly do whatever makes sense for you there. Sometimes I use my other foot on, on the top of my toes here to help give me more stretch. It feels really nice and again I'm gonna take my foot to a different spot.
I encourage you to find what stretch you need and what feels good in your body and enjoy that. Explore. So we'll press up with both legs. Bend in and then come up to sitting. So we're gonna come straight up to a sitting position and do a little bit of single leg work.
Kinda outside the box. So I'd like you to sit the very edge of your Reformer. With your two feet down about hip width. And sitting up nice and straight here your arms could be down by your side. You could even push into the frame if you'd like.
I just like to have my arms here and I want you to feel your pelvis equal on the two sides and just lift one leg up. Like a little marching and then change. So for many of us this will be no problem but for a lot of people, there's shifting side to side or forward and back. So I want you to try to really feel that your pelvis is equally weighted as you do this marching. And then literally we're gonna march with our arms too.
Again, this might seem a little bit silly but there is this idea of opposition happening here. Cross patterning, so let the collarbones really curve around. Just kinda feel that. Just kinda warming up the cross patterning a little bit. And then pause.
Take your arms down by your side holding onto the frame here. Walk your feet forward three or four inches. Shift your bottom off of the edge there. Open through your chest, engage your abs and feel yourself supporting yourself with your arms. So really holding yourself up here.
Now try to press forward just a bit more so it's all about the upper back pushing if you will, or working the upper back to push the body forward. So in theory I'm not even really using my legs right now. I'm just kinda holding myself up a little bit. And then come back and have a seat and going back to the legs here. Pull the feet back underneath you.
So start with your right leg and maybe just put your hand on your right thigh and straighten your leg. So we're gonna try to keep the leg still and bend the knee and straighten, so the thigh stays pretty still and the knee just bends and straight. But we're gonna do that five times. So this is three. I really want you to work to get the leg all the way to straight.
Four, and here's five now. Hold there, the leg is very straight. Lower the leg down and lift it up. One, and sit up tall. And three and try to keep the knee really straight.
Four and hold here five and change sides. Okay, so very simple movements but important for the wellbeing of our knees. So stretch the leg to straight. Perhaps just put your hand here to make sure it's not lifting and lowering too much. Two, I like a flexed ankle.
Three, sitting up tall, four. And then here's five, keep the leg straight. Lower the heel down and lift it up. Five times here. Try to feel that you're lifting up with your gut as well as keeping that knee straight.
Yeah and one more time. Nice, straight knee, hold it and then put your foot down. So take your arms out to the side sitting tall here. Take your arms forward, leaning into your legs. That's an option one.
If you're not able to stand up here that's all you need to do. Feel yourself leaning on your feet and gracefully come up to a standing position. Good, sit back down. Nice and gracefully and open up. Okay, so this is now the option two.
We use both legs, if you're pretty effortlessly able to get up with both legs, we are going to move into the option three which is a single leg standing position. Quite challenging to do. Stretch your right leg out to straight. If you can, flex your ankle. I'm not guaranteeing you this is gonna be pretty so don't expect yours to be.
It doesn't matter. You're gonna bring your weight into your one leg and you're gonna bring yourself up to a standing position and then you're gonna kinda reach forward and try to sit yourself back down okay? Just the act of standing up (groans) with one leg is quite a challenge. I'm only going to do three. I suggest three to begin.
And up, there we go. The arms help a little bit. You wanna challenge yourself even more, try keeping your arms down by your side. So changing sides, stretch the other leg out to straight. Take a nice open position.
I just like the way this looks. Lean into your foot and use your gut and up we go and this side's harder. Oh no. (screams) Okay, I told you. Might not be pretty and what's interesting is my right leg is generally my stronger leg but where I'm challenged here is using my left side to support the leg that's out.
So I found that to be a very interesting little imbalance as I practiced this and we'll do one more. So you can explore. Oh, aah. Okay, so see, it's not pretty. But I'm still gonna do it.
Even in front of you. Alright, so we're gonna move into some abdominal work here now. One blue spring for that. On our knees, here we go. Oops, if you've taken many of my classes you know I do the reverse knee stretch a lot.
It's one of my favorite exercises. So that's where we are. I've got my knees a little bit back from the shoulder rest. We're gonna round through that low back. Really create inflection of the spine and then pull forward a little with the arms.
Now pull in with the legs creating the deepest ball that you can from your spine with your abs. And then just the legs go back. Inhale and exhale to pull in. (breathes) Remember to weight through the tops of the feet and try to almost unweight the knees. You can actually work on unweighting the knees here if you'd like.
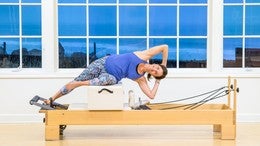
Just do one more and then we've got a variation. So bring in the carriage all the way to rest. Take both hands around to your right side mkay. So it turns out that my left hand is going to be my primary standing arm but I want both hands down mkay. So we're gonna lean forward onto the arms and try to put more weight on that left hand and then curl in so I'm rounding through the back but I'm creating some rotation.
My right knee is my standing leg, my left arm is my standing arm. Hold this position mkay? And you're gonna slide your back leg back and try to reach it to straight. Now if that's too much, put your knee back down and continue with both legs connected. Otherwise, lift that leg up in external rotation without changing your pelvis.
So you're really using your glute and now we continue to move. It's a balance game my friends. Exhale, don't go too fast. And inhale out. So my right leg is the moving leg, my left leg is really getting a nice, nice little bit of glute work there.
And if you are so inclined to work your balance, woo, you can try removing your hand. I find that to be just a little, little tougher than expected. Good, so I like to keep my hand down for now. Let's do the second side. So, I'm gonna take both hands, right next to each other, not too far out.
My right hand now is my standing arm. My left leg is my standing leg. I'm going to pull into my arms and try to keep my gaze directly over my right fingers here. My abdominals are holding me here and then here, if I feel comfortable you try unweighting the other leg and sending it back. You can kind of brace it on the frame if you need to.
If you're feeling a little unsure about your balance right. Otherwise you find your glute and you lift up and then you're gonna take that leg back a little and we pull in. (breathes) So while it's my left leg moving, I'm really supporting with my left side obliques and much more. And if you are so inclined, you can try taking the other hand away. I am just quivering like a leaf and one more time please.
(breathes) Beautiful, so let's move into some hip work here with one red spring. I would recommend putting the red spring on a hook and if that feels too much, like too much, go ahead and go down to a blue spring. For many people it is a little too much. So, I'm give it a shot. So we're gonna lie down on our side.
Now I always like, when I'm lying on my side to rest on my arms so I get that extra stretch through my lap. But if you need to modify, feel free to okay. So you can make sure that you're comfortable here. So make sure that you're not arresting up against the shoulder rest 'cause that can be a little bit uncomfortable. You're gonna use your bottom foot to help you just push out a little bit and then put the strap up over your foot here.
A little closer to the ball of the foot than the heel just so that the first exercise feels comfortable. And it takes maybe a little bit of finesse to get into the right position here but I'm looking for my thigh bones to be stacked basically. And my knee is bent so, just a little more than 90 degrees so my foot is kinda underneath me and then we're just gonna press out to straight here and inhale to come in. And exhale to press out. So a red spring can feel like too much for some people but for me it does feel good.
It feels like a strengthening exercise so feel free to modify with the spring tension if you need to, knowing that less spring is harder in other ways. So we'll do one more here, keeping the leg straight now, we're gonna take that leg in parallel alignment forward as far as you feel comfortable, trying to keep the pelvis pretty neutral and then pull that leg back and I like to move my hand here and let it come right to the point where it touches my body so I can feel that I'm in hip extension. So this is such a nice feeling here because you can't quite go to hip extension like that when you're, lying flat on the Reformer. Good, I'm gonna do five of those. That was two.
So feel that hamstring working as you reach back feel a little opening through your hip flexor and then also feel an opening through your hamstring as you reach forward right? So that's an active stretch. Okay so one more time we'll reach back and we'll hold it down there okay? And now with the legs straight and the strap basically pressing just up against your leg a little bit, I want you to flex your foot and lift your leg up and lower down. Now you can put your hand on your glute to help you remember to use your glute 'cause that's what we're looking for.
Lifting with the glute here. (breathes) It's the glute med probably, more internal rotation here. So stay lifted, take the leg forward. Externally rotate your thigh and now this is fun. Make sure you hold on to the shoulder rest here.
You're gonna take the leg up as far as you can without moving the carriage and as you take that leg behind you your pelvis is going to have to react a little bit. You'll stretch the spring, it's a nice hip opener here. Pause there, feel the glute working to support and then lift the leg back up where it came from just above the hip here and around out in front of you. Little bit of external rotation, we'll do that again. Up and over, big stretch there through the back of the leg and now into the hip flexors I take my leg behind me but I oops, I went further that time.
Here we go. So if you find yourself hitting your shoulder or hitting your arm or whatnot you just maybe don't go as low. I do like the feeling of taking my leg back though so I'm gonna try to get even more range and take my leg even more behind me so I'm gonna try it here actually to clear my shoulder. There we go. Woo, touched my ear, fun.
Just go cautiously as you, as you go way back there. Make sure you don't scrape anything with the strap but you can also stop before you get anywhere close to your body. And that feels nice. And we'll do one more. So I feel quite a bit of glute work while I'm doing this and we're gonna finish this with a nice little glute stretch which feels really good to me.
So here, take the leg around, bend the knee and rest the foot just in front of the thigh like that and then now see if you can really relax here a little bit. You can use this hand push up on your knee and get just a nice little stretch. Explore, through your glutes. (sighs) And it's quite easy to take your strap off from this position. Put it away and then we'll change sides.
Alright, so I'm just gonna walk to the other side it'll be a little bit easier. And so then lie down in the same way. Once again if it doesn't feel comfortable for you to be on your shoulder, feel free to modify. You could put a pillow down and put your arm in a different position. Put the strap on your foot and then set yourself up so your legs are basically stacked here.
Your abs are working, you have a little space underneath your waist and then exhale to press out. To straight and inhale come in. So I'm making my knee go just underneath the rope and I'm extending my legs so that my foot goes down with my body as opposed to out in front of me. That's something that can be a little tricky to feel. So feel the leg down and we'll do just one more here.
Keeping the leg straight we go out, forward I should say and then take that straight leg all the way back. And forward here. And wherever this other hand wants to be, I find actually by taking my arm behind me. It doesn't brush on my body quite so much and I'm not going for maximum here, I'm going to the point where the rope hits my thigh and then I kinda use that connection to extend just a little more versus letting the pelvis shift it all here, over very much. And back, and we'll do one more before we move into the, the glute lifts.
So take that leg back and hold it so it's kind of just a little behind you or straight out in front or straight down from your body and then flex your foot here, turn your knee down a little and we lift up trying to find that glute. In my mind, I'm thinking of reaching my heel sort of up and back. Sort of on the diagonal, you can probably see that a little better from this angle and one more like that and then take the leg forward in space. Find a little bit of external rotation from your hip and here's where you do wanna hold on to the shoulder rest. Feel free to hold on pretty securely there and take the leg up and around so that you get a nice little stretch through your hip flexor and then back up and around to the front.
And again, big stretch through the hip here. Trying to keep that external rotation. Oops, there we go. And up and around. So you just have to kinda pay attention where the rope hits your body if it is hitting your body and that's where you kinda can gauge whether you need to push a little bit more or a little less or not go as high or as low or whatever it may be.
It should be comfortable. So I kinda like to use it as an opportunity to feel where I am in relationship to where I was. And one last time please. Up and around. Big stretch there, nice glute work.
Then we come all the way around, bend the knee and put the foot just above the other thigh and just enjoy a couple moments of stretch there. This is also a nice, easy transition to move on. So I notice I use my toe down here to just kinda help me support and then I can come out of this a little bit more comfortably. Perfect, so moving on to some more, new stretch work. We'll keep the spring on a red spring.
Move it up to a button if you have that option or add a, make it a green spring instead 'cause you want it just a little heavier spring for this. I think, for support. But, you can be flexible. I'm on one red. So I'm sitting on my knees here and I'm sitting on my feet rather and rounded through the back with my two arms straight.
So then I pull the carriage up. As my hips come up, the carriage goes back. So just a classic knee stretch here. Remembering that the idea here is that the body stays still as the legs move. (breathes) And now we're gonna change just a little bit.
Pause in the middle. Take your right hand over to where your left is and perhaps even a little beyond and then take your hand down on the frame so it's just here for balance if needed. Really push with that right hand and feel that stretch through the side of your body and then continue on. (breathes) And one more time. So now we switch sides.
So walk your hands over. Take your left hand across on the diagonal and hold on, put your other hand down and you can use it or not use it, but really push with this left arm and get that stretch through your side body. And five of those. One. (breathes) And we'll come to rest there.
So keeping this spring the same for the down stretch. We're gonna undulate forward, engaging those abdominals and those hamstrings, feeling a nice openness through the chest after all that rounding. And then we slide back here. And we pull forward. I'm gonna make a quick adjustment my friends.
I really like it when my feet are all the way up against the shoulder rest so I'm gonna adjust my feet so that they are and try to keep them there this time. Now that's better, here we go. Inhale, and exhale or change the breath. Exhale, and inhale. Notice that it's the shoulders moving here.
The body is staying pretty still. Just one more, meaning stable. Pulling the carriage all the way and stay for a moment, and lift your heart even more. Try to levitate out of your legs, open the heart, look to the ceiling and we let that go. So, moving onto some arm work.
We're going to, I'm gonna take this spring to I don't know if you really need to change it. You need to be on a red spring or a blue spring. If your shoulders are a little bit less strong, go to a blue spring. I'm gonna stay on a red actually 'cause I like it. But I would highly recommend many of you to go to a blue spring.
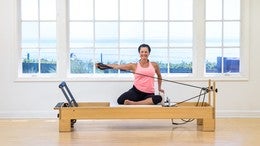
So here I'm sitting right at the very back edge here. And I'm going to stick my hands inside of the straps and then I'm going to scoop around with my thumbs so that I can press. So this will make sense when we get going. These ones are padded, so it's a little more challenging to do but that's okay, we can make it happen. So here I'm gonna do one chest expansion, right.
Let's do two so you can get the feel for that. Sitting up nice and tall. Nice to look at the view. Now my arms come all the way forward and open for a wide chest expansion. If your spring is too heavy, change it now.
Yeah, and let's do that again. A wide chest expansion, good. Now, we're gonna do an up. Lifting the arms up, that's where the spring could be really too heavy, change it if you need to. The idea here is to work the shoulders a little bit and flow from one to the next.
Pressing down, open your hands and press back. Come forward and open. Come forward and up. Press all the way down, open. Lift, wide.
Come forward and go up. Both arms working equally, let's do that one more time and press. Beautiful, wide arms. And lifting. And now, we are gonna circle it together.
From here, open wide. Lift up, control down. Press to chest expansion, this is our last one. Feel it, circle open wide. It's a little awkward to make that shift but it feels nice.
Hold it here. Lift up and come down, good. I don't know about you but that makes me feel my shoulders in a way that I really enjoy. Little bit of chest work here, so I'm on two red springs at the moment and I'd like you to put your knees on the very edge of the Reformer so they're hanging off a little bit. It's kind of a modified push up that we're doing here.
Now if you're not comfortable sitting on your legs like this then you can sit on your bottom and have your legs stretched out or you can modify in a different way. This happens to be one of my favorite ways to sit and I've been continuously working on it. So my hands are at about the width of my shoulders or a little wider than and I'm gonna bend my elbows trying to flatten out my back a bit and bring as high up as I can my chest, toward the bar. So I'm in like a deep push up position. At this point, I want you to stretch the bar open.
Spreading your collarbones and your shoulder blades. Now that's the place we return each time. The body stays the same. I'm pushing with my arms. So you wanna feel, pressing out and pulling in.
Pressing out and pulling in. What I love about this particular variation here my friends is we can do, a single arm push up. Well some people can do a single arm push up with their whole body, but, anybody can do this version. So here we go. We're gonna come in.
We're gonna bring the hands in a little closer together and you're gonna press out again. Take your right arm away, decide whether you can manage the spring. It is hard for me my friends. And I am going to struggle through three, I should not have brought my arm in so far but I am going to make it happen and three, good, we'll change sides. Here we go.
And wow, piece of cake, could do it all day long on the right side. So what's nice about this is I'm gonna go back to my weaker side. If you have a weaker side, do three more on your weaker side. This is a nice way for you to pay attention to your imbalances and perhaps become a little stronger on that weaker side yeah. Always a good thing.
Alright, this is all about strengthening today. I'm going to take one of these springs off and keep myself just on one red spring. You could use a green if you need the extra support and we're gonna do some shoulder pushing here. Mkay, so it's a little tricky to get in, into but I have a couple of variations here. Maybe I'll tuck my shirt in a little.
There we go. So, we're gonna place elbows down and hands up against the shoulder rest. Now I've got my knees together. I want you to keep them together and my knees are in a place where my toes can rest up on the wood chunk back there yeah? So I'm gonna support here for a moment and make sure I feel comfortable.
Press into the arms, into the elbows. Hold with the hands and see if you can unweight your knees. If you can do that then you try straightening your legs. Stay engaged in your abs. Bend your knees in and press out.
Try to fill your hip extensors so your glutes are working your hamstrings, your abs and let's keep the legs straight please. We press the arms out and we pull the arms underneath us. We push with the shoulders out and we pull underneath us and two more like that please. And one more. And we come underneath, bend the knees and put the knees down.
Option one, you repeat it just like that. Option two you wanna get stronger, we put one foot up on the foot bar. We press out to straight. Make sure you feel safe and you lift your other leg up. Same choreography, bend in.
Make sure your toes are in a spot where you feel secure. Press out. Bend in, press out. One more time, now hold with the arms. We go out and we pull underneath us and we go out and we pull underneath and one more, pull underneath.
Put one knee down, control yourself all the way in and sit in a child's pose for just a brief moment. Let your forehead rest. Let your back soften. And we'll come up from there. And let's close it up today.
One blue spring. Little bit of back extension, a little bit of stretching. Let's enjoy. So with your feet right underneath your hips here take a big breath up, take your arms down, roll down, one vertebrae at a time. Find the edge of the Reformer and then you're gonna extend out to a downward dog or a pyramid position.
Aiming your tailbone up and back. Reaching through the arms, feeling the stretch. Abs are still engaged, a little stretch in the hamstrings. Now here, we can round ourselves in from the low back but keep the arms out there and extend. And now I want you to keep the arms out there and extend your upper back.
So you have to let your shoulder blades come to your back body but my arms are still out in front of me. Reaching to straight, straight back that is. Or reaching out. Rounding in. We reach then forward again.
And extend the back. Reach forward again and round in. All the way to the stopper this time. So keep your hands on the carriage for a moment and really round through the low back. Let your head hang.
I was holding mine a little and then gently roll yourself up. And one final exercise here, I'd like you to step back just a little bit with your feet about hip width distance apart and then sit back and do a nice deep squat. So some of you will need to hold more with your arms but if you can just use the bar, or the edge of the Reformer here as a way to sit here, comfortably. Really relax your head. I'm gonna just take my body back a slight bit just so I have the right angle to hold on to.
That's perfect, relax your head and explore a little bit. What I mean by that is I like to do little circles. So I'm circling around the outsides of my feet and feeling what I feel in my ankles or my two different legs and now I'm going to linger just on my one leg. So I'm standing on my right leg and I'm gonna take my opposite arm up higher on the bar and just kind of explore whatever stretch I feel and feels like a good idea. Breathing in and breathing out and then I'm gonna change sides so now I'm moving my weight to my left leg and just kinda relaxing the head.
Take the other arm up, so that I get a stretch across the diagonal of my back. Breathing in and breathing out. And then take a hold with both hands. Take your gaze forward. And see if you can stand yourself upright.
(breathes) Bring your feet underneath your hips and just take a moment to set. Thanks for playing.
Intermediate Reformer: 40-Minute Classes


Comments


You need to be a subscriber to post a comment.
Please Log In or Create an Account to start your free trial.
