Description
About This Video
Transcript
Read Full Transcript
Chapter 1
Foot Warm-Up
Hello again at Sally Anderson. We are going to do a little bit of footwork, but that will take us into a reformer program that incorporates jump board, jumping plyometrics, like using that plyometric effect for strengthening, conditioning, and I see plyometrics as the bridge between strength and power. So trying to start working on creating a little more power response in the musculoskeletal system, also that builds energy, like kind of gets our heart rate up and adds a whole sort of extra element to training for everyone. So if I'm working with plyometrics, for specific athletes or people that are wanting to train specifically, I'll use a slightly different concept. But today, what we're going to do is literally jump and bound and use that that kind of movement to create another response in the body. You will have done your matwork warm up that we've already finished.
Now on the way to the reformer, I'd like you to get a magic circle, ultralight, magic magic circle to bring with you, and we're going to start with foot preparation where you'll need just a small ball. Now I have a reach charge Sally. I'll explain a little why I've got that when we do the work, but any small football will do will football, not a football. No. Ball for the foot, like a melt ball or like smaller than a pinky ball with a bit of firm texture.
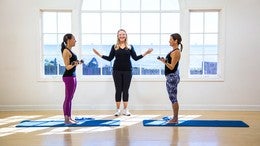
So we'll talk about that as we go. Let's go to the reformer. If you will start, we will start with our footwork prep. Now this footwork prep sequence could be in place of a leg and footwork category in a program. So you'll be able to use this as preparation or inserted into other reformer sessions you might do as a Anderson Legan footwork category. Now the lovely Sarah, the lovely Gia, are going to demonstrate and participate with me today.
They each have a recharge Sally. These have a little cord. This is why I use them for the footwork because the cord kind of lets the participant be in control of it. You can also get these with double Sally, no ball jokes, double Sally, that kind of give you a bit more bang for your buck if you want to use two at once on the foot. But like I say, find a smaller, denser Sally, and we'll start breaking up the tissue, getting your feet activated at the bottom. So ladies everybody lie back onto your reformer carriage, we have already set our springs with two red. Okay.
So two red springs for this footwork, or as Sarah likes, you can go a little bit heavier. We'll give you a little bit more response on the pull back in that we'll get to. So place the ball under your first foot, let's go right foot first, and just keeping the ball there stretch out to straight legs. Now this is just a little bit of rolling the ball. The other leg bends a little to allow that to happen.
So you'll roll I want you to roll up and down the foot. There's no right or wrong. Roll through the tissue of your feet top to bottom for me and just kind of get a feel for where the clunky spots are in your feet. Good. So as you see like that, just that cord let somebody be in control of if it drops, you can find it. But this standing leg is just going to allow the rolling.
What's nice on the jump board is that you have less forced gravity into a ball and you can kind of play with how much load and tension you have into the foot. So now that you've gone up top to bottom, let's go side to side and I want you to move the ball. So starting at the top kind of move the ball across the board rather than roll side to side. So we're gonna give pick up the heel. Yes. We can give it that's it.
I want you to kind of, and then move down the foot going side to side. Yes. Like I say though, nothing's wrong. If it feels good to get down in that heel and roll it around, do it. Good. And you'll find your tension spots, the places that might need a little pressure, you can stay and breathe into the pressure a bit like a pressure point. This is for you. Get those feet released and activated.
Good. Alright. And gently come back in and we'll go to the other foot. So you can extend how much time you use that little later if you want to. It gets a little bit joyful. Oops, see, and she's got complete control of the ball just like I said.
Perfect. Good. Alright. And so back out to straight legs. Find the ball under your foot. Get comfortable Anderson go top to bottom. And let the other leg just adjust as it needs to to help you roll through it. Yeah.
Growing is good here. But when you get to that groan, stop and breathe into it for a little bit just to let the ball kind of pressure point into the foot. You'll be glad you did. Good. Nice. Now don't do too much with your foot or toes.
Just roll. One or two more going top to bottom. Nice. Not trying to overwork feet or toes at Sally, and then come back to the ball of the foot and start your side to side. That's it. Moving the ball nice here.
Moving the ball not so much, rolling it. Nice. Good. And you will. You'll feel better on this side because your body knows what's going on. The brain's starting to kind of connect with how that works.
Good. Go all the way down to the bottom, then all the way back up to the top. Good. Nice. And see the focus just keeping the ball on the board nice. Alright.
Good. So that should have the soles of your feet starting to get some feedback from the ball. Let's take the balls out. You can pop it down beside your reformer. I'll take yours. Good. And now go straight back out to extended legs, feet hip width apart, so a generous hip width apart.
And I want you to do almost a little bounding. It's almost like you're going to leave the board, but you're just kind of not leaving the board, in between, and make it now about less about your legs, more about your feet. So you're just going to kind of roll through the feet. It can be kind of Sally if you want. It just has to move the tissues of your feet.
I just want them to move. Come up a little higher for me, Sarah. Just let me bring you up here if you would. Yep. And wider. Perfect. And then just yep.
So try not to control it too much, just let the feet move because we've got to get a bit out of these. Feet in a minute. Exactly. So two different variations. Sarah's got a little bit more movement. Whatever's good for you is good, just working those feet, and let's bring that back in nice Gia so it worked your feet. Beautiful.
I'm just gonna set you back. Make sure your feet are nice and neutral. And then you're going to press back out, and we're going to do Sarah's favorite exercise, the Mexican wave. You know, so that's the kind of action. We're going to start by lifting your little toes lift all the toes for me and put your little toe down next toe next toe next toe next toe next toe.
That was excellent. Good. And keep going that same direction. You're going to do five. Pick up the toes. Go a little toe down. Then fourth, third, second, first. Good.
Five this way, then we'll change it to the other direction and five the other way. Good. So in the action of this, we're just working the muscles and stretching between the toe joints. So the actual metatarsal joints, I want you to feel like they're expanding and getting moved. Good. And back into the other direction, big toes, second, third, fourth, fifth. The intention is there.
The brain is telling the feet. We love it. How many up to you, dear? Four. Four. Good. We've got one more. Beautiful. Now pick up those toes again. I don't mind if you even pick the four foot up a little bit, but hold on your heels and try and spread the toe joints apart while you're holding them up. And then place the feet back down with that very spread position, very nice.
One more, pick the feet up, and then spread the toe joints as you open the toes down into the board. Good. Hold that position now. Bend in to bring the carriage home, keeping your heels on the board. So I want you to be connected through heels on the board, and we're going into triple flexion. So to do this, press out through the legs is part one.
Rise up onto those nice spread metatarsal heads is too. Now you're going to bend the hip, knee, and ankle joint at the same time to bring you back down. Good. Alright. Press out rise up.
Now, find the board with your feet as you come back in, and press out. Rise up. Bend all three joints flex the hip, knee, and ankle at the same time, and the feet grab the board. Little faster, press out, rise up, and bend to home, stretch it out rise, grab the board, control it in. Good. One more out, rise, and get the sense of pulling back into the board with control.
That was your best one. Beautiful. Good. Now take the left leg into just a held position tabletop, little, I call this injured paw position, and we'll do a single. So press out through that leg, rise up, and grab the board flexing hip knee ankle good, three more out. Rise up, triple flex back in. Good two more. I hope you're feeling the feet working in this now.
That's the disassociating in all those joints makes the feet work to pull you back in a little more. And good. Let's just do one more. Change feet. Good. So the other foot comes down. Now make sure you've got that nice spread toe position we worked for and out, you go for five.
Press it out, rise up, bend at all three joints at the same time pulling back in. Try and keep those toes long. Good out. Draw up through inner thighs and bend in yes. So think of bending the hip and the ankle, the knee will follow out, rise up, and hinge. Beautiful. Two more.
Out, rise up, and triple flexion back in. We have one more. Good. Excellent. Alright. Both feet back onto the boards.
Stretch out to straight feet, feet. Good. All you freaked. So now I want to go into the lumbry calls exercise. Which can be done before or after the triple flexion. It's kind of it's your choice whether that helps inform your triple flexion or the other way around.
So what we'll do is stretch straight out long leg position, and then you're going to initiate from up high in the instep trying to pull the instep up off the board. So feel like it does start up near the ankle and then lower back down into the board. Good. Now the key thing is to keep the toes long. The toes aren't going to scrunch or do the work for you. There's no weight bearing on the toes. It's it is like doming, like blossom's misery, feet, Absolutely.
We want all that what I'm after is just focusing on keeping the toes long, keeping the instep doing the pull up, like Sarah is doing beautifully. So let's do six more just a yes, trying to pick up the instep, leaving the toes long, and it's hard and lower back down. Start from right up high in the instep, lift the instep and let the toes follow. Take a few months or a year to get this. It's fine. It'll send work up through your body as well.
You'll find that the inner thighs start to connect from the feet and let that lower. We should have about two more. I'm sure that'll be enough for everyone. Pulling the insteps up, leaving the toes long, good, and down. So that spread of the toe joints and length of the toes, Yes, Sarah, are really important key parts of making the lumbricles work through those insteps. Very nice.
And come back to your standing position, bend the knees to bring the carriage back in. So now we're going to go into our jump board or plyometric program, particularly that we've set up our feet so nicely to be able to jump with a lot of foot involvement and that's what I'd really like today. So enjoy that foot sequence. If you're continuing on, let's start our reformer. You will need your magic circle and your hand weights.
Okay. Let's go.
Chapter 2
Plyometric Workout
Hi again. It's Sally Anderson. Here we are ready to start our jumping reformer workout or plyometric workout. Remember we need a magic circle and a set of hand weights. On the reformer, I would like three red springs, or if you'd like a little bit more at a blue spring, so three to three and a half we would like to start with, and your head rest down, please.
So I'll just make sure the girls have got their springs on. While you set your reformer up. Good. We are on three red. And you have the head rest down. Now I'd like your feet to be just over the top of the footboard or the jump board.
So knees in line with your feet under the hip line, and just kind of wrap those toes gently around the board. Keep the reformer carriage at the stopper and you have the joy of the pelvic curl. So inhale to prepare then exhale curl up keeping the carriage at the stopper for me. These go over toes. It's a little different with your feet over the top of the board, breathing in at the top.
Breathe out, think of pulling the carriage to the stopper as your ribs lengthen down along the carriage Sally the way to tailbone down towards your heels. Beautiful. You've got six, breathing in at the bottom. Breathe out. Keep that wrap around the top of the board and feel like you keep the heels as close to the board as you can. They will lift send knees over toasters, you come to the top, take a nice deep inhale, exhale, come through, sternum to lengthen all the way back down, pelvis onto the bed. Good. At the bottom, inhale lengthen through the torso exhale deepen and curl keep those heels drying to stay close to the footboard, all the way to knees over toes, breathing in.
And breathe out ribs first, lengthen away, all the way to the bottom. Very nice. We have three more. So it's really starting to articulate the spine in a little more range. Following on from the mat work we did to prepare, feet are activated, feet are slightly wrapping, and hip extensors are really probably on fire now for reps, in I'd Sally, but that lovely position of the feet over the foot board really helps them to work a little more. If you feel like they're starting to work too much, don't forget you can put a little prop in between the knees to fire up the adductors.
But let's not and keep going. Ex hal all the way up. Good. Inhale at the top, keep the breath moving. Inhale nice and deep exhale roll away. Good.
All the weight at the bottom Anderson last repetition. Inhale prepare. Exhale deep and let that breath flow. As you send the knees over your toes, feel like the breath's still going to the top, inhale at the top, exhale roll all the way down. Good.
Alright. And once you're at the bottom, reach the arms out to the sides, palms facing up, and then wrap them in to take hold of the back of your shoulder rests or the little poles if you had the same reformers as us, and float one leg at a time into a little tabletop position. We're going to do the knees side to side. Inhale take the knees across, and try to keep the elbows back on the bed as you go. Exhale return to center. Good. Inhale reach that top knee across particularly. Keep the knees together and level.
Exhale scoop back. That'll keep us working in the torso, more so than sliding and letting the pelvis. And exhale back. Good. Inhale as you reach, keep the breath going as you reach and the opposite elbow back and down, exhale to center. Put two more each side, inhale across, and keep that top knee level, exhale scooping pulled back.
And again. Elbows nice and wide. Feel like you glue the upper arms to the reformer. Yes, so that you get the ribs wrapping, pelvis wrapping last set, breathing in. Exhale pulling the pelvis back. Last one. Inhale. And exhale back. Good.
Stay in the center. Take your feet back down to the board. Now we're going to set up on the board with your feet for leg and footwork. Bring the arms down beside you, and I'll have your feet hit with the part, finding nice spread toes, heels down into the board to stretch you out, and let's just stay out Do a little check down the body that your feet are under your hips, toes aren't scrunched, your heels are into the board, and it's just a natural neutral position. Good. I would like eight bend and press.
So you're going to bend the knees coming in, keeping the heels on the board, exhale press out. Good. Inhale, bend. Exhale out. Good. We'll do six more. Now you may want to bring the head rest up if that works better for you. That's perfectly acceptable.
We'll leave them down at the moment. The girls are good here, but make your choice if you want to bring it up. Good. And press good. Think of kneecaps coming straight up to the ceiling as you bend. Heels press to take you out.
I really want that connection of the heels, spread of the toes. And if you can add a little drawing up of the instep, not a not a full lumbricle lift, but just a little engagement. We'd like that too. One more for me. And then stay with your straight legs hold.
We're going to rise onto the toes. So all the toe joints even rise up and then lower the heels back down. We're staying out there and then rise up and lower the heels back down. Good. You've got six more. Rise? Now as you rise, try and feel the weight even across the toe joints, big toe, little toe, rising up and lowering down to the heels, find the heel connection each time.
Press into all the toe joints Anderson lower. Let's do four more and press into the board with the toe joints to rise up, lower back down. Beautiful keep that breath flowing. Last two. And last one.
Stay with straight legs. We're going into our triple flexion. Rise up, triple flex all the joints to come back in, stretch back to your straight legs. Good. Rise up, triple flexion, drawing into the board with the feet. Good. Press out.
Rise up. Now think kneecaps to the ceiling don't let them drop in together as you flex back in toes long and stretch. Rise. Bend all tree joints at the same time, stretch, rise, and bend. Let's do two more here. And arms are just soft beside you and try not to let tension creep in, just let the legs and feet do their work. Good. Last one here for me.
Back. Good and stretch back out. Now we're going to v position. Same thing. So find a v position.
Now for those of you, that who's, like, little, like legs need to be a little bit further apart in the heels like me, let the let the heels be a little bit apart. I want you to find the inner thighs together. So in that position, rise up triple flex to pull back in and find the heels down, and they'll come back together if they're slightly apart when you raise. So press out. Could rise up Anderson triple flexion back in. We've got six more.
Press out. Rise up, let the inner thighs do the rise, and back down. Stretch, up, flex good. Five more. You should be getting a nice sense of the work right from the feet up through the legs into the also there. And four. Good. So about now, you want to go to your happy place, you know?
It's all good. Good. Three more? I'm looking for a nod from g. I think it's three more. She's definitely a counter.
And flex back in. Let's do one last one. Press out, rise up, and bring it back in. Very nice. Press back out to your straight legs, send the heels around to parallel, and we're going to do one more set of six.
So rise up and triple flex back in. Keep it a little faster this time. Press back out, rise up, flex, and in. Press out, up, pull. Last three, press out, up, pull last two.
Good and last one rise up triple flex back in, then stretch back to your straight legs. Good. And here I want you just to do 12 prances. One, two, three, four, good, five, six, seven, eight, nine, ten, eleven, twelve, feet back down onto the board and bend back in. Good. Alright. I wanna take one spring off, please. So back down to two red springs.
And I'd really like two red springs. From everyone before you start adding springs or subtracting springs on your workout, try it with the two red springs for me. So we are going to start to jump. So press out to straight legs We're gonna start first just with an easy jump before we put our circles in. So I just want 10 finding the board. So you're going to just bend and jump gently.
Find your wave a tent. So jump and two three, four, good. Five, six, seven, eight, nine, ten. Good. So that pace I had you at we're going to do again, I want you to be a little more bouncy. Rather than having to get out. We're headed out, but on this one, I want used a little bouncy.
So one more set of 10 and bounce, bounce, bounce, good, five, six, seven, eight, nine, ten, and relax. Good. Now it's time for our magic circle. Insert between the ankles. I will sort yours for you, Sarah. Now, to put between the ankles, then bring the feet in trying to get back to your hip width. You won't get there and then stretch out.
Good. Circle between your ankles just above the ankle bones, then yes, as close as you can to your hit with the part position and stretch out. Look at that lovely tension on the circle. I don't need any more or any less. Alright? Parallel legs. I will have one set of 10, then we'll kind of come back together and see where we are. Alright.
Bend Anderson jump. Keep it bouncy and keep the circle still. And, you go. And one, two, three, four, 567-8910 and pause. Go back to straight legs. Stay there. Good. Sneak. All of you at home.
Sneak back in. Good. Nice. Now we're going to make that a bigger jump. I want you to exhale on each jump. Find your power from the Anderson, and you are now going to stretch the legs more. Keep that circle where it is.
Gonna bend and jump. Little slower so we get more out. I want airtime now. Airtime. EXhale.
Seven, eight, last two, one, and hold. Good. I want toes to sneak up a little, just an inch below the top of the board. Gives us a little more access to abdominals. You have one more set now. Before we go, I want airtime.
You're gonna stay out there as long as you can. Then as you land, land through to the heel and jump, away we go. And out. Good. Go airtime. Exhale. You gotta breathe. Four. Five. Good. Six, seven, eight, nine, And 10. Good. The reformers talking to us.
So are you in a thyes, I'm sure? Let me have the circle. So take the circle out. We're done with that for the time being you will be pleased. I'm sure. Alright. Circle is out. Doesn't mean we don't have more jumping to do.
Now I'll have you in v position. Please. So we will do 10 jumps in v, then you're going to do v wide together, land back down in the v. We'll kind of play with that. Alright. Start with your 10 in v position. So start with straight legs for me, and we're going to bend and go for our airtime, and out.
Good. Two. Good. Draw the inner thighs together as you jump, inner thighs, and exhale. Good. Six, don't forget to deepen abdominals to hold the lever of your legs. Nine, ten, and hold. Good. So now we will go together out together center. Alright. We we're aiming for six sets.
Here we go. Nice and loose and airtime, and out in. Good. Give me inner thighs land, inner thighs land, inner thighs land. Nice job. Sarah's a choreographer. I want I like it. Before I like our computer.
That's beautiful. K. Give me a message one. Right? I want no. But I'm loving it. You could do my version or Sarah's version. Very Sally. And let's do another run of legs together land wide, legs together center. We'll just do four more sets.
So I set being together out together in. Here we go. And out, wide, out, in good, out, wide, out. Don't hold your breath. Breathe. Very nice. Last one.
And land. Oh, beautiful. Good. Alright. Very good job. Come back to parallel. I want six jumps, then land into your right leg up in tabletop and change. We'll do 10 changes.
10 on the single. 10 on the single. Then you get a little moment to breathe. Yes. Alright. So from your parallel position, six doubles, then 10 alternating. I'll keep you going. And here we go. Out, and two, three, four, five, you get ready for singles, six, and change.
Two. Good. Three. Four. Keep changing. Alternate. 6.
Four more. Good. Now land on this one. Stay on this one for ten. Nine. Good. Now work the feet.
Feel like those lumbricles are landing and pulling up for you. Four more. Three, two, and change. One, two good use the feet now. Go for your airtime, airtime.
Exhale. Five, six, seven, eight, last, two, One, take a breather. Whoo. Okay. Mhmm. Happy place. Alright. Ben the knees to come back in. We're going to put our hands in the straps.
Alright. So take those handles. Straight up to the ceiling, and you may want to adjust off your shoulder rest just a little. Just rest your feet on top of that board for the moment while we get straight arms, and then float both knees just into a little held position, tailbone down. We're going just out to the hundreds position and back in four times. So exhale press out to the hundreds position, and I want the feet just grazing the top of the board if that works for you and back down. Three more, exhale.
Just graze the top of the board and scoop to bring it back down. Good. And two more. If you need your legs higher, take them higher by all means, look after your back, your body one more here, am I going to stay now? I I saw this with Christie Cooper, and I loved it. We're gonna do hundreds, breathing in, two, three, four, five, our, two, three, four, five genius.
And eggs have two, three, four, five. Good. Use it to calm the body while you get breath running around. Ex have very, very nice. You've got one more like this before we add legs. Good. Same, same breathing legs come up as you inhale two, three, four, five, exhale two, three, four, five. Good deep in the tummy. Let the thighs sink into the pelvis as you lift lower.
Good. Four more. And good. Inhale think of the chest lifting and coming energy up and over the head. I know. You've only got two more breaths to go.
Good stay there look how centered we are, bend the knees back in, bring the body back down, float your feet back down to the board. Good. Take a moment. So now put your handles back onto their hooks we're going to do a little more jumping, same spring. Nothing else changes. So bring your feet back onto the board, into the position, and stretch out for me, please. Good. So I want to start with a little combination that is jump land in the center, jump land wide, jump land single, jump land single.
That's a change. So center wide single change. That's it. Good. Alright. We will aim for six to eight sets. Let's see how we go. Good. Alright.
So starting with the bend and stretch in the center and jump wide to single to single good center. Wide, single, single center, wide, single. Good. The single other leg can be anywhere. In turnout, in parallel, up high, it's fine. Anderson, wide, single, single, two more sets, center, wide, single, single, good.
Alright. Oh, yes. We did we miss a last set? Good. Alright. Now, we're adding our arms. Center, wide, opposite arm single, leave the other one out there, opposite arm single. Center, wide, single, single, opposite arm to leg.
We're ready. Here we go. Start with straight legs. Start with arms to the ceiling, and you'll just jump and land in that position. So jump Anderson, wide, opposite arm, opposite arm, and center. Wide opposite arm, opposite arm. Good. Keep going.
Wide, and just use a few to get ready, and center. Wide opposite arm, two inside leg. Good. Three more sets. And opposite. Okay. Opposite is fine.
That's a we yes. She's the choreographer amongst us. Let's do one more set. Very nice. And center and land. Woohoo. Good. So lock that in, we we're coming back to it.
For now, bend the knees, same spring, put your feet into the straps. So bend back in both feet onto the foot board, stretch out with your legs first, and place one foot into the strap. Then the that leg stays bent as the other leg comes in. Perfect. Nice safe way to do it. Alright. Take a deep breath, settle the belly, settle the tailbone down, settle the tension in the shoulders, little frogs. So exhale press away to the top of the board, bend back in.
And press good. These just graze the straps as you come back in. Good. And four. Could go a little deeper and four more. Yes.
Try and just think of releasing the front of the hips on that return. The hamstrings pressing you out. Could last two. Press Lovely. Good.
Now stretch your legs straight up to the ceiling. I'll have five circles down and around. Press down circle around. Press down Good. Find the hamstrings to press you and release the hips around. Last two, one, and now reverse.
Circle and up the center. Good. Just keep it fluid. So feel like you're just moving the hips, getting some nice blood back into the joints. Good. Keep the tummies working so that your stable through the pelvis.
We have one more circle in this direction, then bring the legs back up to the ceiling, open out wide. Good. Just take one breath there, making sure your pelvis is flat on the carriage. You're as wide as you can be. We're going to do three closing the legs together. Exhel bring the heels around together.
Good inhale, open out nice and wide. Ex, how close the heels together, pulling on the straps, deepening the tummy, inhale back. Good. This last one, bring the heels together and stay together. Now, we're going to go into a single leg, bend your left leg and take the right leg out. And exhale back together, heels touch good, other side stretch the left leg away right leg in, press out. Good.
Nice slow pace today. Inhale reach. Keep the bent leg heel in line with your sitting bone. Press back to center. Good. And to the other side. Now Make sure the exhale gets the abdominals deep so that you have the power from the center as you bring the leg back.
One more each side. Inhale, press back together deepening the tummy. One last one. And hold. Now one more with both legs opening all the way for a nice big, deep stretch, exhale back together. Bend the knees back in.
We're taking our feet out of the straps. Once your hands are out of the straps now is the time to get your hand weights. And I think you know what's coming. One hand or for each weight or one weight for each hand. However, you'd like to work that.
Good stretch back out into your v position. So the combination we did center wide single single with the arms with the hand weights. Yahoo. Hands to the ceiling, holding those weights. Now you're going to stay in control through the shoulders while you do the sequence.
Here we go. And bend, jump, and out wide. Change. One, change two, to the center, open wide, change opposite, two beautifully done. And in in good to the center to wide, change. Keep going. Now as you go through this sequence, it's starting to sink into the body.
The brain's getting the coordination all sorted. Don't forget your airtime and your breath. Good. Now we're jumping here. The way we go.
Good. Keep going at your own pace from I'll let you breathe while you do it. Last two sets. Nice. Keep those elbows stretch. Don't let the biceps take too much of that load. Try and take it from the shoulders.
Good. Good. Ah, piece. Good. Let's put the hand weights down. That was everything I needed them for.
Good. And then back in, we're going to put your feet back into the straps. Alright. So one foot at a time. Exactly as we did before, keeping the bed under control through your bent leg in the strap, and back into your little frog position to start. Good. So bend the knees back in and do three little frogs for me. Exhale to centering the body, inhale bend.
Exhale press and back. Last one, hold, open the legs all the way wide. Stay there. You're doing leg circles here and circle lift. You've got eight each way. Lift four good.
Five try and get an even circle in the hip joint. Seven, and last one, hold and reverse. Good, circle down and up. You're good. So your job is to find the thighs moving equally in each direction in the hip joints. Nice, Sarah, nice year. Let's call that five, six, seven, eight, hold.
Keep the bed still, bring your legs straight to the ceiling, heels together hold. Now if you have put your head rest up at any stage, take it down now for sure. We're going to do a long spine without the leg circle. Keep the bed still the whole time. Ex hale roll the toes up to the ceiling.
Good peeling the spine up into your shoulder stand. Inhale, open shoulder width apart. Exhale roll down. Don't let the bed move. Once you're down, the heels come back together. Good.
Two more. Exhale up. Find that work in the shoulder girdle back of the shoulders upper arms, inhale open. Exhale come down. Oh, without that bed moving. Could. And once the pelvis is down, legs back together one more.
So keeping the bed still keeps all that focus in the hamstrings, hip extensors to control the bed. Inhale open. Exhale down. On this one, stay there with your legs apart. We're going straight back up, legs are apart for the reverse direction.
Up you go. Good. Inhale heels together. Exhale down. Good.
Inhale open. You've got two more only. Exhow roll. Good reach for the ceiling. They go right up. Squeeze together.
And down, you have one more left. Good. So we're just we're giving you a little centering why you work this lovely exercise up. Good reach for the ceiling as you inhale close the heels together. Exhale down.
And hold. Good. Bend your knees in. Take your feet out of the straps. Good. Feedback back to the board, hook the straps, and you're going to come up off your backs into kneeling at last. We all say. Awesome.
So I'll have you kneeling right at the front of the board to begin with, carriage to begin with, please. So on your knees, right at the front, hands on the board, I would like that bend of the wrists, but if that's not okay for you, just bring them over the top of the board sitting back on your heels, I would like to stay with the two springs for now. Press out with straight arms. Good. So push back and yes, your chest is going to come to your knees. So at this point, I want your head between your arms, if possible, or if you're a little restricted in the shoulders come up to where you've got a flat back.
I'm happy with that. We're going to bend and stretch. So bend the elbows, bring the crown of the head towards the board and exhale press back. You've got 10. In hell bent. So we're working on getting a nice shoulder, broad position, finding the control through the shoulders.
You should feel triceps. And think about arm pits pointing down to the carriage. Yes. Yes, and press back. Good. Try and come in a little further till you touch the board and press back. Good. Let's do five more.
Good roll the shoulders back extend keep the tailbone lengthening away as well. So dominoes are up underneath you. Good. Drop this one under a little more. Yes. That's it. That was good. Last two.
And last one, then bring yourself back into the carriage and take one spring off. Good. Alright. Then you're going to go back to the same position. So press out. Hands on the board. Jump.
Alright. So just feel your way. Yes. You're going to clear the bed, clear the board and out. Good. Elbows need to bend and stretch. That's it. Just find it. Good. Now you're just going to think of keeping the shoulders nice and stable.
Abdominal supporting your spine. Good. Nice. And what this does is gives a different dynamic to the joint of the shoulder, not too far out. Just go a little small and a little faster for me, Sarah.
So get a little bounding And think of this for somebody who's throwing a ball or all the things you have to do through the day to catch something. That dynamic in the shoulder joint is a really beneficial thing. So if you can get a little faster for another four, Three. Good. Two. One and hold. Left arm out to the side. Uh-huh.
Let's do six on one arm. So just bring the arm out to the side. Keep that drawing your shoulder girdle wide Anderson. Here we go. Six, five. Four use that, two.
One, I might have missed a three and changed sides. Good. So keep it small. Let the body start to find it and then adapt. You'll be able to get bigger and stronger as you build, stretch the opposite arm out, and two. Good. Stay nice and low. Three. Yeah. The left arm's always tougher for right armours.
Four, five, six. Alright. Come back to double arms and do a nice last set of six with confidence, with power. So down you go. And one, two, yes, you feel much better now. Right? Three. Four with less spring too, I know. Five and six. Beautiful. Good. Relax there.
Put your other red spring back on. So now we're back to two springs. Add that spring back again. Standing up into your up stretch position, please. So I'll have heels halfway up the shoulder wrists, and you are holding the front or the top of the board.
So just keeping your weights gently onto the board, you can look back at your feet and make sure they're alignment is nicely set up. Keep some weight on the little toe joint side and give me that lumbarical pull up. Alright. So just up stretch one for me here. The bed goes back and underneath you and exhale. And exhale. Good lengthening the spines in the tailbone out.
Five, six last four, seven, eight, nine, and hold. Now take the bed out about two inches, send the head up shoulders into slight thoracic extension. You're going to stay with the bed out and bend your elbows. Good. And back up. Now they're gonna bend down towards the bed.
Oh, yeah, baby. Keep that bed out. Good. And beautiful. Keep the bed back. You've got four more. Four. Good. You should feel the riders wrapping around.
And a little bit of tricep no doubt. Two more. And the last one, I think I gave you an extra one. Beautiful. Now drop the head shoulders back into your up stretched position. Bed comes back to the stopper.
I want five up stretch two or or pyramid to plank. That's an old, old term, but you'll get my drift. Inhale into your front support or plank position, exh, how pike back up. Good deep breath. Inhale. Good nice exhale tailbone high.
Inhale the crown of the head comes all the way out of the spine. Exhale back up two more. Inhale lengthen. Exhale. Last one.
And back. Good. Drop your heels down. Pull the lumbricles up. Long toes for elephant 10, please, long spine, and heels under. Two, three. Good. Keep the heels down and think about pulling the insteps up. Good, long backs.
Very nice girls here. Last two, one, and stay. Good. We're going to kneel on the reformer and do a hip flexor hamstring stretch. Now if this lunge position, it's a beautiful position, really nice and deep. If it's a little beyond your range at the moment, don't force it. We can stand on the I might have Sarah show you the standing one.
Nearing with your feet against the shoulder rest. Good. I'll have your right foot up here, please. Back to that wrapped toe position that we had in the, start of the footwork. When we go back into the hamstring, we're going to really press the heel.
To start with let's let's do this one. Yes. I'll talk through the other one. So set up here. It's nice and deep. This knee coming over the toes is where I want you. Now it's about the heel on the back foot has to be right against the shoulder rest. Good.
Straight arms, and you want to use that back heel to press the bed back about halfway, then inhale pull this knee forward over the bar. It's a deep position and press and pull the knee forward over the bar. I'll have three more and forward over the bar. So it's the in position I'm most after here. Heel stays back as you come forward.
One more. And good. Now press back one more time to that halfway. Stay there. Press the heel into the board and stretch this. Don't take the bed too much further out. Stay back in and let the hip come back, the heel go in, lengthen the back, hold the bed still.
Breeze. You've got three long breaths there. So if you weren't doing this full split on the reformer, bring your standing foot down and your other foot against the shoulder rest is a really nice deep position with the arms straight on the board as a way of stepping up into these. Good. Bring that in and let's change sides. So remember wrap the toes over the board at the top.
Good. Then we get that lovely position with yes. You might need a hand up with the up. We all do it. To put the foot on, perfect.
Now five of the first one, heel connected at the back. Keep it connected as you draw the front leg forward over the board. And two. Good. Head up. Good. Yes. It's that up and in position.
Sally think of lifting the torso on the way back in, two more with a smile. Yeah. One more. Good. And then this last one, press halfway out. Keep the bed still as you extend the leg, extend the back, press the heel into the board. Makes all the difference and breathing.
Good. And maybe a little bit of trembling if you'd like to as well. It's cool. Beautiful. You can come off. If you're stretched, you're stretched. Bring that back in. Good.
Very nice. Alright. Now we're going to come around to sit cross legged on the reformer facing the side, please. So we'll go down to one red spring. So one red exactly cross legged a little closer to the board than the shoulder wrists, and we'll start with the side reach. So hand next to the board will be on the board, the other arm out to the side.
I want you to press away and take a side reach over. It should feel really nice. Good thing to do is watch that yes you'll lined up over your tailbone there and bring that back up. You've got five. Good.
And inhale take it all the way over, exhale bring you back up. Good ribs to staying back over your pelvis. And up. You have two more. And stay ribs in. One last one. And back up. Good.
Stay there. The arm is staying out to the side that is off the board. The arm that is on the board will jump. Anderson. Yes, two, little. Make it little. And three.
And four, now you need to work with the opposite arm to the arm that's jumping and reach through the fingertips to keep the body over your hips. Good eight last two. Sit back with those shoulders a little more and last one. And stay good. Now the outside arm will wrap around to the board. So what I want here is that you're going to hold the top corner of the board. Right? The other hand presses into the board, press away till you get straight arms. Uh-huh. This gets a beautiful stretch.
Now you're going to inhale come up between your arms straight eggs, house scoop the belly press back. You've got five. Good. Straight arms the whole way. So you're pulling with the hand that's wrapped around pushing with the hand on the board. And come up between the arms and exhale scoop press back. Good.
Let's do two more. Inhale up. I couldn't really pull on the board, try and keep the shoulder down as you go back. Last one. Yes.
Good. And finish back up and into the board for me, bring the left or your jumping hand, because we got one more set of jumps, back to the side, arm out, reach, make this opposing arm strong and you've got 10 jumps. One, two. Yes, three. Four.
You can see how much benefit this is to a shoulder joint. But don't go too big too fast. Let's do last two, one, two, and relax. Let's turn around and do all that on the other side. We're good.
Good. So small little jumps and then let it build up to where you get more dynamics into the shoulder. It's great for giving it the understanding of how to be stable in a dynamic situation. Good. Alright. Start with your side over. So the other arm is outside to the side in a t position, shoulders back over the pelvis, and go up and over to your side bend. You've got five.
And coming up. Good. We're all a little tempted to be. Forward into this. But if it if you bring your ribs back and get that really nice clean lateral line, you'll get so much more length out of these low back muscles, lateral muscles. Yes. Good. Two more.
I do believe. Could reach to the board with that top arm and back. One last one. Beautiful. First set of jumps, tiny little jumps and two good. So if you go for a little bit of pace and let it work through the hand, and wrist a little like it does when you jump with your feet. Yep.
Six, seven, see, better, eight, like your right arm better, nine, ten, and hold. Now staying Sally, wrap the outside arm around to grab the back of the board. The other arm shifts to the front of the board, press out straight arms. There you go. Good wrap that shoulder down with the hand that's holding around. Inhale come up between the arms.
And exhale scoop and press back. It should feel nice. Good. And if it doesn't feel nice, if it's uncomfortable, reduce that range, make sure you build up. Let the body adapt. It takes time and it's a really good thing to do is to allow the body to step towards the next stage.
Good. And beautiful. I think we have two more. Am I right? And coming up one last one. And you good. And coming up.
Stay adjust the hand back to your jumping position. Out, keep reaching into the forearm and 10 little jumps, ribs back. And two, good. Amazing how much easier it is the second time around. Right? Five, six, seven, watch those ribs grow taller. Last one, two, and beautiful.
Good. Now you're going to kneel and face the far wall behind you, face the back of the reformer. We're still on our one spring. It's perfect. Good. So come back to where your feet are just off the back edge of the carriage. Yes. Now I like hands to be a little lower.
So if your reformer allows for it, bring them down around the silver poles or onto behind the shoulder rests, Otherwise you can be higher up on the shoulder rest, whatever feels good for you. Place your right foot back onto the board. Good there. So I'd like ideally heal in line with your sitting bone, But if that needs to be a bit lower, then you do that. Now stretch out with that leg, taking you away from the board there. Good. Let's just find a square of pelvis as we can get.
There will will be a little bit of adapting. And from there, you're going to bend and stretch. So bend the knee, press the heel into the board, stretch. You've got 10, then we jump for 10. Good. So find the work here to engage you up into the back of the leg ready to jump.
Don't forget we need abdominals supporting the spine pressing away through the arms. Who put that reform in there? Pressing away through the arms, keeping shoulders nice and stable. Good. And heads long. Are we up to eight? Beautiful.
Let's do two more. Good. Now turn that into a jump. Ben stretch. Good.
Now you need to really work on abdominal supporting the spine, pelvis staying stable in its position. It's slightly adapted. It's fine, but keep it stable. Five. Six. We'll call it that.
I think I'm wrong, but good. Last two. And pause. Good. Change sides. So knee comes underneath the hip.
The other leg comes up, heel in line with the sitting bone, unless you need to adjust it down for your body, abdominals up underneath head long, 10, bend and stretch, bend the knee, and think of the heel pressing into the board. That was a nice adjustment. And two, good Sally the time. You probably have to work more on abdominals and shoulders than you will. The leg will take care of itself. And this is five.
Keep sending the thigh bone up into the pelvis six. Good abdominals. Last two. One, and we jump, and one. Two.
Good. So you will try to get the heel as close to the board as possible because that keeps you in the back of the leg. But I'm sure you'll fill the work. It's kind of a hate to say it a little foolproof here. If you just jump, it'll jump. Eight. Try not to let the reformer bang know.
That'll be the one cue. And hold. Very nice. Now turning around, feet against the shoulder rests, hands up onto the board. We're going to have a little cobra. You're nearly there.
Couple of things. And you are done. Good. So kneeling with feet heals up against the shoulder rest, toes tucked Anderson then sit scooped back onto your heels. So round back. Yes. And I want the bed home, and there's gonna be just like a little inch between your heels and your butt there. Alright.
From here, keep the arms straight and press the bed out behind you. Good. Yes. Now come forward, lifting up into a Sally, yes, back extension. From here, scoop and sit back to the heels, keeping that little inch hold. Now press back.
That's tough on the shoulders. So go where you can then lift up bringing the carriage all the way home, then scoop the belly sitting back to your heels. You've got four more and lengthen. Press it back. Stern them up and back roll the clavicles over to the back beautiful and scoop the belly like that kind of octopus suction that we did in the matwork and press back.
Stretch, sternum's up, clavicle shoulders roll back, and then scoop. Like I punch you back, let's do two more. And extend, lengthen up, come all the way home to the board, and scoop up and over. Nice one last one. Good to keep breathing and hi exhale sits you back. Awesome. Alright.
One last jump onto your backs on your forearms. So feet will be up on the board. I'm gonna give you two springs to finish with. Good. Thank you, Sarah.
Good. So now you're going to be lifted on your forearms, thinking about keeping that nice lift of the back, stretch out to straight legs, you can see your feet here. While you're waiting, just give me a little lumbarical activation, a little bit higher. Good. You have straight legs and you have a lifted low back. The legs are not going to bend.
So work on maintaining your shoulder girdle and the abdominals and jump through your feet. Good. Yes. Yes. And you've got to kind of get a run up. There we go. Another 12123456789101112 ish. Alright.
Bend and come back in, slide yourselves back onto the carriage. Good. Relax. Give yourself a little headrest. Good. Just for comfort. All the comforts of home.
You are done for the most part. I will have you cross your right ankle over the left knee. And then draw your knees in for a glute stretch. Good. You earned it. So stay there. Wrap your hands around the front of the shin, unless your knee's a little tricky and you can be behind the thigh.
So draw that in. Find a stretch for your hips back of the hips, commonly called the glute stretch kind of gets in there too, draw that in, take a few deep breaths, just allowing the tension to release. And we've jumped every part of you, right? So I've given you little examples of definitely jumping, jumping through the lower limbs, arm jumping front, arm jumping side, think these sorts of things really add a different component to the control of the joints, but they feel good too, right? Change sides for me, left ankle in front of the right knee, and draw in. And over time, when you start to know which sides are your, you know, your stronger or your stretchier side or your better rotation sides, you can start picking the sides you prefer to start with and finish with. I kinda like to finish with the one that's a little trickier. So start on that side that's looser or better. So that's something you can add to choosing which sides you go with. Good. One last breath here.
Nice. No going to sleep. I think that's it. Up we come. Standing beside your reformer, and I will have just a roll down to finish. I like to start and finish with roll downs. I think they're a really nice way of centering and finding yourself in your postural position.
So breathe in. Let's just take our arms up nice deep breath reaching up and breathe out, let the arms come down roll forward, scooping the abdominals rounding the back softening your knees, stay there, keeping the abdominals deep, let your head shoulders relax, breathe into the back, and exhale stack the pelvis back up. Good. Very nice control, Sarah. Good. And you are done.
Give yourselves a clap. Thank you girls. Very nice.
Comments


You need to be a subscriber to post a comment.
Please Log In or Create an Account to start your free trial.
