Description
About This Video
Transcript
Read Full Transcript
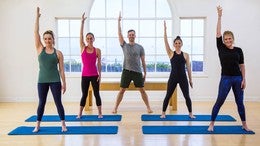
Hi, I'm Benjamin and I'm back with Mandy Qaeda, Andrea and Mary for part two of our three part series of exploring the mat work with a bit more of a gymnastic Lens. And in this class specifically we'll be working with blogs to introduce a little bit more upper body focused work for hand balances and planks. We'll be using yoga bricks. Um, but if you're in a fully equipped studio, you may also use moon boxes. And for most of these exercises you could possibly also do them without blocks at all, but they will lend us a little bit of a manipulation of the training environment where in and give us a different way to strengthen the upper body. So if you have access to blocks, I encourage you to use them.
We will start without them however, and we'll build on to things that we've explored in our first class. We'll get right back into it this time standing up to start just bringing your legs nice and close together. Take your arms out to the side so you guys make sure you're not standing right next to your friends. Make fists with your hands again. We're going to begin again with those shoulder mobilizations, so if that helps you the first time around, let's go back into that idea of making a fist to the point where that energy starts to come through your forearms into your shoulders and then all the way down into your back. We going to start those circles of the arms to begin with so you go up and back to start allowing your collarbones to truly expand and starting to note is now that we're standing, how that begins to shift our balance forward and back on our feet.
Arm Circles
Really stand your legs into the ground, isolate the movement into your shoulders who can really feel the our move inside the joint. Let's go ahead and reverse it. Easy and small desert. We'll be going fairly fast here. Increasingly making that fiscal rebut a little stronger so that our back is more activated throughout the range center. Nice and engaged. Three, two, one. Keep the arms still. Now we're going back into our wrist circles this time, so let's move them both in the same direction. Back down and up again. Keeping the rest of the body still, but still engaged. Just as much heels, nice and heavy into the ground. Strong legs. Let's reverse it in, out, in, out in. And we'll do the same opposite direction again with the fingers open.
Wrist Mobilization
So really let your fingers circle around. Stretch through the fingers and hands. With each one still keeping the upper arms lifted and your back fully engaged. Let's go ahead and reverse that. Reach and reach lifting out of the back and out of the waist.Two and one bring your hands together and behind your head. For our next part here, go ahead and press your head into your hands. Give yourself a quick little neck stretch here, creating some traction. Go ahead and pick up your heels, bringing your heels off the ground, but pressing your toes into the floor. Lower your heels back down. Open your toes slightly away from one another. So again, it's not a big turned out position just enough so that you can lift yourself onto the balls of your feet with your heels spiraling into one and lower back down. Just a little footwork here. Two more like that.
Releve
And lifting up and lowering down all this time. Keep pressing your head back into your hands and a nice vertical alignment from your heels through your hips all the way into the crown of the head. Come down again and take one more. This time you stay up on your balance. Doesn't have to be high. Heels barely peel off the ground. They stay together. Go ahead and bend your knees.Sit yourself down towards you heels any amount you can and then press back up to standing. Do it again. Sit yourself down any amount you can and push the ground away to lift yourself back up. Look straight ahead. Don't look down as not where we're going. Lower and lift for three more. You take yourself down. Open the knees wide. Push your hips forward. Stand back up. You've got to lowering depth.
Standing Footwork
Straighten up one more time. Lowering down key, even weight in all 10 toes. Push the ground away. Lift yourself back. Oh, we're going to stand on the balls of our feet. Lift the arms up to the ceiling. We'll try a standing roll down, keeping the heels away from the grounds, or tapping into our balance here for a second. Great. And bring your Chin over your chest that the arms come forward and down and see if you can roll yourself over your straight legs, bending the spine forward. All the while playing with our balance. You'll experience a shift forward and back into your feet. So let that happen, right? There's no need to nail this first time around.
Standing Roll Down
Worst thing that happens is your heels have to fall onto the ground for a moment. Once you're down as far as you can go, lower the heels, soften your knee, shake everything loose for a moment, let all of that go. And then we straighten your legs, pick your heels back up and roll yourself back up to standing. Finding that balance again. So allow yourself to wobble. Allow yourself to lose your balance. That's probably one of the best ways for you to learn how to find it.When the going gets tough, lift yourself back up. And once you're all the way upright, lower your heels back down that your arms come down. Shake it loose again and we'll do it one more time. Let's try to not be too serious about it. Yeah. Often when we play with balance, our body starts to freeze up a little bit. Let's just be a little more playful in the second round. Lift your arms back up.
Lift yourself up onto the balls of your feet against not a high lift. No, you're not going to fall very far. [inaudible] roll yourself down. See what happened. See if you let go of your control a little bit. What your body comes up with. Nice. Lower the heels down to give yourself a moment of rest to then set it back up. Pick your heels up off the ground and try to come back up to standing.
Push the ground away. Lift to the top. See nothing bad happened. Lower the heels down that your arms come out to the side. Nice work. Let's do one more. Lifted up. Nothing too loose up or roll yourself forward and down. Once your hands as close to the ground as they will get, let the heels fold onto the floor. Soften your knees. Restraint in the legs.
Pick your heels up, lift yourself all the way back up to standing. Yeah. Nice. All the way up. Arms lift that your heels come down at your arms. Come down, shake it all loose. Ah, that part is over. We're going to come down and to all, um, force onto our hands and knees. So go ahead and take position. Hands under shoulders, knees under, hips at shoulder and hip distance apart.
Arm Spirals
Going back into our elbow screws and our shoulders shrug. So we begin by placing even weight on both hands. Now today I want you to really focus on what that looks like in your palm. Suppress your 10 fingers down and make sure that they all kind of look like they're doing the same thing here. And once you feel like you have even weighed across both palms and all 10 fingers, play with the elbow rotation. Again, let your elbows rotate forward.Notice if your shoulders are coming along for the ride and see if he can leave it in the elbows coming forward and rotating back out of it and forward and out of it. So especially as we're approaching a class that has a bit of planking built in, you'll notice how much possibilities there are for us to align our elbows in these positions as we load into the upper body. So make sure that your body has an understanding of where those positions are and which ones feel the most supportive to you. Nice. Come to what feels like a neutral and most relaxed position of the album. Then actively push both pumps down against them that your arms are nice and engaged, activated and energetically locked.
Shoulder Shrugs
We go into our shrugs that your shoulder rates shrug towards one another. Push the ground away and lift and again, shrug it down and push to lift three more like that. Shrug and push. Start to notice if your weight shifts forward or back. No need to adjust what your body's doing. Just become aware of it.One more time down and arm when we're going to take that into circles now, so you're shrug your shoulders towards one another. Now let your shoulder blade shrug up towards your ears. Push them towards the ground and roll them back towards the hips. To circle through. One more time. This direction. Keep the arms energetically locked as you circle through really unlocking movement at your shoulder blade.
Shoulder Rolls
Reverse it after two usually feels a little funky because we're not used to moving our shoulder weights all that much. So just go on a journey here and see what you can unfold as your shoulder blades. Move around. Your back should feel like it. Nice little stretch at the end and then press into your hands. Come back to what feels neutral. Take your right hand behind your head from where you are.
Spine Twist
So we're shifting from two hands to one. We're going to take that right elbow up towards the ceiling. Adding a little twist to this. Try to keep both hips reaching back towards the heels. Open your chest towards your right and then fold back in.Bring your right elbow in towards your left elbow, keeping both hips side by side, and then open out to the side again. Remember last class we did a little bit of something similar with our hips. Now we're opening the top of our box while keeping the hips nice and square. One more time. Lift that right elbow up towards the ceiling. Think of stretching your head away from your hips. Very nice.
And then fold in elbow towards the opposite elbow. Come back to flats, right hand down, left hand behind your head, and we'll take the twists on the other side. Now just like in your footwork, you can use your hand on your head to push your head into, to create traction. Your neck. Then twist left elbow up towards the ceiling. Keep using your right arm into the floor. Riley, stretch across your collarbones and then bring your left elbow towards your right and twice more. Unfold into a twist. Get longer in your spine and fold back in.
Notice your hip shifting back. Perhaps they come forward just a little bit. Nice. And one more time. Lifting up had stretches away from the hips folded back in. Really finding that rotation through your middle spine and back to a flat line. Hands Underneath you remembering our crab transition from last time.
Cross your feet behind you. Sit down behind them to come to a seated position with your feet in front of you. Uncrossed and ready for our half roll back. So come forward on your mat. Stretch your arms out long in front of you and off we go. Take a deep breath in. Exhale, roll yourself back to the place that you can sustain and even bend ears to hips. Stay here a little bit longer this time. Keep reaching for the arms, soften through the legs and and pick yourself back up.
Crab Transition
Lift up nice and tall at the end. Think of both ends of your spine moving at the same time. Go again. Roll yourself back. Find a sustainable place. Feed Nice and heavy breath nice and deep and lift yourself back up. Sit Up nice and tall. Crown of the head lifts to the ceiling.
Half Roll Back
We'll take one more. Roll yourself back. He reaching the arms. Long deep breath in at the bottom that your ribs expand. Lift yourself back up. Sit Up nice and tall and get ready to roll all the way down onto your back. Getting o center nice and warmed up.Now we're going back into this idea of the dead bug preparation for a hollow body. Hold on a take it slightly on two diagonals this time, but it starts the same way. Your legs are at 90 degrees. Knees bend over, hips, shins parallel to the ceiling, hands at the front of your thighs. Push those two into one another just enough so that you can lift your head, neck and shoulders up. Here's where things go a little different today. Take your left hand to your right leg so you cross over. Stretch your right arm overhead behind you and take your left leg out in front of you so we have opposite arm and leg reaching away from one another. Just like our bird dog last time. Stay here for a second.
Dead Bug
Keep pushing me in hand into one another. Even weight on hips. Come back to center. Hug both knees in and release on down. Very good. Let's do that again. Lift yourself up. I promises the most complicated thing we'll do all day. Take your hands both against the front of your thighs and knees.We'll switch to the other side now. So cross right over to your left knee, left arm, reaches back, right leg reaches forward. That's a lot of right and left in one instruction. You guys got it. They'll make sure that both heads up evenly weighted into the ground as you keep pressing Hannani into one another and then fold both knees back in. Give him a hug and a squeeze. Relax it all down. Let's take one more each way and combine it with our hollow body hold, which as you remember is our a hundred position. Right hand left knee.
Take it across. Reach opposite arm and leg away from one another. Head, neck and shoulders are curled up. Now stay here. Keeping both hips nice and weighted down. Extend both legs and both arms so you add letting go of the push of hand and knee. But keep holding on to that engagement of your center. Bring your knees back in. Give them a squeeze and release back down. One more time. Lift yourself back up, hand to knee. Reach opposite arm and leg away from one another.
Press Hannani into one another to activate your center. Keep that reach both arms and legs away from one another. Stay here for one full breath. Exhale all the air out and bring your knees back in, release your head down, and then let your legs come along onto the match. Shake them loose for a second, and even though it feels like we've done the a hundred already 500 times right now without little exercises, we'll do a little bit of that today, right? So link those ideas together because there is a point we do the dead bug and the hollow body hole to help us understand the hundred a little better.
Hundred
Are you guys ready? Press your legs into one another. Reach forward through your arms and legs. Pick yourself up into your hundred position. Begin to pump the arms up and down. Breathing in, breathing out, breathing in, breathing out. Now we're not going to do a full set, but what I want you to link back to is a warm up from earlier that freedom in the shoulders that you found, not just where your hands are, but where your arm connects to your back. That strong sensation of connecting your arms through your back, but also reaching your legs out of the hips like we did in our standing footwork. One more breath. Inhale, exhale and bend your knees into your chest. Give yourself a squeeze, a hug.Release the head roll side to side. If that feels good and we're going into our roll up next, extend your legs out long which arms over your head. Flex your feet back. We know this one, so we'll go right for it. Inhale, lift up the arms, head, neck and shoulders. Xcel round all over the legs. Stretch your back open and with control. Come back down. Roll yourself unto your Mat. Shoot your legs across the room.
Roll Up
Reach arms overhead. Two more times. Inhale, lift, rounding forward, stretch over the legs. Remember you're balanced. Standing up a little bit ago. Roll yourself back down and how adjusting where your pelvis is in relationship to your legs. Help you there. See if you can use that here. Press your feet down, lift yourself up, round over the legs. Nice work. Come down with control.Keep worsening the heels into the floor and way from your center and once you're down, just reach arms overhead one more time and then let them come down by your sides and a little bit away from your body. Just like last time where we did our one leg tic talk, we'll now take it into a full circle, but we'll allow ourselves to have a bit more of a wider base of support through the arms. All right, flex both feet again, of course the yields away from you. Lift just your right leg up to the straight, up to the ceiling. Keep reaching through the heel length and away from you. It comes right back down in front of you. We'll do the same leg twice more.
Single Leg Lift
Reach and away from you, lifted up and bring it down. Remember, there's an active way to get your hamstrings to warm up a little bit. One more and length to lower. It's not a requirement to get to 90 last one. This time the leg stays up. You can point your foot to the ceiling. We're going into circles. The leg goes across. The hip is allowed to lift, but that right shoulder stays down. Circle that I down around and up, going again, Aircrafts and down, around and up.
Single Leg Circles
Left leg is still a lacrosse doubt around enough reverse, open doubt across and lift again, the hip can lift as the leg crosses the midline. You take one more, push the mat away with the arms. Lower that leg down. Check in. How does my right leg feel compared to my left? Probably a little. Differentiate them both. Lose for a second and we'll go to the other side. Both feet flex the left leg that lifts three times to take the leg up. Push the mat away with the arms. Chest is open, like comes down for to lifted up.
Single Leg Lift
He reaching your opposite heel across the room. Remember, this is the one that stays still and your circles lifted up. Hold, reach, Lacrosse. Lower it down on your next one. We'll add the circles in, lifted up. Point the third. Take the HIPPA, bring it across. Stretch your back open. Circle it down, around and up and to across, down, around and up. One more across, down, around and up. Reverse, open, down, across, and lift. Allow the hip to lift. It's a little bit of a spinal roll. There's a rotation happening here. Last one, open down, across and lift. Lower the leg away from you and down.
Single Leg Circles
Take your arms over your head. This part, you know as well. We did it last time. Pick yourself up into your hollow body. Hold legs, chest, arms. Roll yourself all the way up. Bend your knees. Come into a ball. Bring your heels against your seat. Knees to your shoulders. Catch your breath. See if you are building of tension that doesn't serve you right now.
Rolling Like A Ball Prep
See if you can let it go. We'll come back down the same way we went up. So you stretch your arms and legs forward. You Roll yourself into your hollow body. Hold arms, reaching by your ears, legs out in front of you. Hold it there for a moment. Show me your control and then release everything down. Beautiful. We'll do that twice more. Pick yourself up Harley body.Lift yourself up into your bog, gram onto your shins. Pull them into you. Come back down high, low body, hold, arms reached by the years. Legs counterweight the body and you relax completely. One last time lifted up. You get to roll like a ball. After this [inaudible] lift yourself up.
Bend your knees and have some fun. Roll yourself onto your shoulders. Forward onto the hips. Get onto the shoulders unto the hips, onto the tops of the shoulders. Now going a little farther back onto the feet and again, rolling back feed may touch the ground as he come forward because we are going into our squat. Next, roll yourself back again. See if you can land on your feet and hands. Push yourself forward onto the feet.
Rolling Like A Ball
See what it takes. Sit back down. Roll yourself back again, tops of the shoulders, taking your momentum with you coming forward onto the field. That would be an organic event. One more time. Rolling back tops of the shoulders. Come up to standing this time. Lift yourself up and roll yourself all the way up to standing when you're ready. Nice work. Now we're going back into our scales.
Rolling to Squat
This time we'll focus a little bit more on balance and on their shift from two legs to one rather than just on the hips square and us. But hopefully some of that will be maintained. Yeah, so think back of that previous exercise and how we lifted the leg from the ground as well. The knee stay locked throughout this exercise and we're going to make that fist grip again with our hands as our arms come out to the side. Make sure we have space to either side. It goes like this from two legs. Bring your right leg out in front of you. Bring your arms out to the side, lift a straight leg as high as you can, reaching through the back of the heel and then in one motion, put everything back together.
Front Scale
Maintaining verticality and a nasal lifted posture. Other side, take both arms out to the side, the from the back of the leg. Remind yourself of the squares and your hips and both directions forward, back up and down and you bring everything back in. We'll keep going. Arms outside leg lift up and pull back into center. Other side, arms outside the leg forward and pull everything back into center four more times. Take it out, bring it standing leg, press it into the ground, lift out of the waist and come back in. One more time each way. Right, like full. Pull everything in and get a little taller. Last one left leg forward.Bring everything back in. I lied one more time. This time we stay a little longer. Right leg both arms out. Hold for a second shift. Wait until you're standing heel. Press into your third. Let your hip stay side by side. See if you can lift the leg up a little bit higher and then release it back down. One last time. Left leg out, both arms out to the side.
Push the ground away and again, play with your balance and where the weight is in your foot. See if you can shift it back into your heel. It'll help us for the next progression of this exercise. Bring everything back into center. Turn your legs slightly out. We'll do the same thing to the side.
This time we alternate size like we did first time around, right leg out to the side, both arms out and come back in other side. Bring it out and pull it back in. Now that we're opening out on a diagonal, it might be more difficult to lift the leg high. Make it more about your standing leg being super committed. Start to finish. Pull back in and again, right leg up. Pull back in, left leg out. Pull it back in. One more time. We decided staying a little longer. Right leg stay shift.
Side Scale
Wait until you're standing. He'll lift out of the waist. Crown of the head up girl. Really fill out your back and pull everything back to center. One more time. Building a little stamina here and that leg lift both arms out, standing leg strong, left leg lift. Notice how much weight is shifted over to the outer edge of your right foot.Can you shift it inwards? Nice. Come back to center that all of that. Go shake out your hands for a second. Open your chest and we'll do a version of this going back in space, right? So come forward on your mattress a little bit so we have enough space. Make fists with your hands again.
Back Scale
If at any point you feel like that starts to get too aggressive on your wrist, you can always soft mop a little bit firm for most of us as a really good way to build some awareness and grip strength as we go. Take your leg back behind you and you notice the second you bring your right leg back behind you, a pot of dent into your lower back. So we're trying to avoid any excessive arching. The second you feel that happening, allow your torso to tilt slightly forward. Keep the foot flexed, both legs nice and strong and then pull everything back into center so the leg goes back behind you. The second you feel your lower back starting to arch, let it bring you forward. So you teeter on your standing leg, picking the leg up as far as your chest needs to come down here.And then you come back up going again, right leg back behind you. The leg lifting determines how far you come down. Slowly bring it back to center. And left sides, reach it back, lifted up so much it forces the torso forward and down. Bring it back to center one more time. Jump right into it and what you go, leg goes back, chest comes down, lift yourself back up. Final one, left leg, goes back.
Find that standing leg. And don't let anyone push you off of it and come back to the center now as well. Take one more each side and again, we'll stay a little bit in our balance. All right, so maybe back off on your range a little bit. Right leg goes back. Take it forward against the leg lifting that determines how far you go.
And now we'll remind ourselves of what happened last time around. Remember that squaring your hips off, it's really a three dimensional event. Can you let your right hip fold in towards the left just a little bit and pull your heel up towards the ceiling behind you at the same time? Nice. You feel that in your standing hip. Now come back through center and take it once much of the other side and much to be found here in the seemingly simple movement.
Take your left leg back behind you. We'll have one more. Take the leg up, brings the body down. Try to keep your hips square on this side. It's the left hip rolling down for most of us a little bit. That brings us towards square hips, that inner heel lifting up behind us. All the while we're trying not to lose our breath or joy of moving over this slowly come back up. Bring yourself back onto two feet and finally let it go. We're done with this one.
Single Leg Stretch
Let's get onto the mat and translate this right back into our plots. Work to a single and double leg stretch so you can go ahead and lay down on your backs, feet towards the center of the room. Go ahead and lay all the way flat. Pour your right knee into your chest, but everything else is relaxed on the mat right now. Right? So just going back to this image of standing up on our standing leg, which right now would be our left. You pull your right knee into your chest as strongly as you can using your arms.We're not single leg stretching just yet, but we're using the strength of the arms, really mobilize and maybe even massage the hip right now if you were to let go of your leg would probably fling away from you. So in order for that natural happen, I want you to engage your left leg, the one that's on the ground quite strongly. Maybe even flex the foot, use your back, open your chest, pull with both arms and see if you can let go of your knee now without it flinging away from the body. Hold it there for a second. Maybe get it in a little deeper into you. Notice how much strength that takes and then get your hands around the Shin again. Pull it in a little deeper and that that tension go. We'll do that one more time.
Try to keep the knee where it is and let it go for a second. Use the rest of the body to hold the leg there. Yes. Nice squatting. Action there. Hold the leg again. Pull it in a little deeper. Let's switch it out. Right leg long left knee in. We'll do the same thing here. So really mobilize your hip using your arms, massaging your thighbone into the hip, pulling it in deeper and deeper than you think you can.
Maybe even deeper than you think you should. Hold it there. Use the rest of the body to hold the leg there. See if he can have, find that strength inside your body to hold the leg where it is without using your hands. Let it go. See what happens. See if using your right leg on the floor a little more. Brings that knee hose into you. Yeah, and then hold it again. Palm it in a little deeper. Try that one more time.
So we're not expecting a big movement here, right? You may not see one, but you definitely should feel your body starting to work more fully from top to bottom to hold that leg in place. Let it go nicely. Guys. Pull the knee in deeper. Stretch the leg out. Long shake out both legs against the ground. Single leg stretch, super familiar movement. We'll go into it fairly quickly. Again, now that we know what we're looking for. Nice and even the weighted hips, right knee in head, neck and shoulders up, left leg long across the room, and then switch your legs. Switching and switching and switching and switching. Breathing, breathing app. Use the arms to create that same compression your hips again, letting both shoulder blades be lifted away from the ground nights and then send that leg across the room. Thinking of those scales we did standing up.
See if you can let the weight of your leg help you. Keep both hips heavy on the ground. Four, three, two, one. Bring both knees in. It's double leg stretch. It's another hallow body whole. Reach your arms by your ears, legs long and low. Exhale, arms come around and he's come in. Squeeze the lungs empty for more times. Inhale, reach, exhale, come back in.
Double Leg Stretch
Go again for three. Curl up a little high or allow your legs to reach a little lower each time. Because you've been rehearsing this all this time. Where can you go? Exhale. Last one. Inhale, reach. Exhale, arms come around. He's come in. Let's stretch out the backs of our legs. A little right leg up.
Single Leg Circles In Flexion
Hold on behind it. Left leg long in front of you. Let it be heavy so that both hips can be equally weighted. Pull the right leg towards you a little bit more. Lift yourself up a little higher. Now stay. Push the right leg away from you energetically so it lifts you up a little more.Allow your back to stretch with it. So really look for internal movement here more than a big movement on the outside. Do you guys feel the back of your legs straightening out a little more nice. No. Stay right there. Reach your arms forward. Keep your left leg lifted off the ground if you can, and make tiny little circles with your top leg across the middle.
End Up thinking of our arm circles we do in the beginning of these classes and how the circle happens. Really incite the join. Do the same thing here. It's a tiny field circle, but it's a big one inside the hip. Reverse it for three, two, one, switch legs, right, like drops, left leg lifts. Hold it for a second, pull it towards her to get a nice little stretch. See where your mobility is today, and then kick the leg actively forward so it pushes into your hands and it helps you find even more of a lift if you can puff out your back against the ground so you feel as stretch coming down into your lower spine. Your right leg is long and heavy, so both hips are down, arms come forward, legs stay. Tiny. Little circles. Four, three, two, one. Reverse four, three, two, one. Sam for scissors, switch the legs, arm stay and switch and switch and switch.
Scissors
Begin to bring your arms behind your head as your legs. Continue to scissor and switch. Switch. We're going to add a rotation soon for crisscross. Twist to the leg. That's up. Go twist, twist, twist, twist. You've got four and three and two and one.
Criss Cross w/Straight Legs
Bring both knees into your chest. Oh, and let that one go. Nice. That's what we did all those rotations for. Increasingly get ready for more of that. It'll come in handy later, I promise. Bring your knees into your chest, rock yourself up to seated, and we're going back into our spine. Stretch forward into an open leg rocker transition and we'll take it up to kneeling and that's when our blocks start to come in. All right, so bring your legs out in front of you. Open them as wide as your mat.
Open Leg Rocker Prep
Let's start with the arms in front of us for one here. Shoulders, nice and relaxed. Spy, nice and lifted. Legs energized. Feed flexed. Take a deep breath in. Use The exhale. Stretch your spine over the legs. Stay round. Roll yourself behind your hips to the point where you can lift your legs up in front of you. Begin to point your feet away from you. Maybe lift them up straights a day until you grab a hold of your legs right behind them, close to the ankle. That worked well. Good. So we'll do that again.Nice. Let your legs go. Let them come down onto the mat. Once they land. Take a spine, stretch forward all over your legs. That is your movement. We'll repeat it a few more times. Stay around. Roll yourself behind your hips. When it's time, lift your legs up in front of you. Keep them energetically lock. Reach up. Hold them behind the ankle. Nice.
Let your legs come down again. Keep reaching through the arms, the legs drop spine comes forward. We'll do it two more times, but about 10 times as fast. Rollies have back. Lift your legs up. Grab a hold, catch your breath. Just movements. Lower the legs down and take a stretch over your legs. Yeah. If the worst thing that happens is you do an open like rocker in the meantime, it's perfectly fine. One more time. Roll yourself behind your hips. Pick up the weight of your legs. Find your spine. Stretch forward here.
Yeah, join us when you're ready. Good. Find your bag. Opening years to hips, lower the legs, take another spine, switch forward. Awesome. And then we're gonna open leg rock for real. This time. Roll his out behind your hips. Pick up your legs when you're ready. Grab a hole. Make sure you have enough space behind you. Go for it. Have some fun with it.
Now Rolling back onto the shoulders unto the hips. Get rolling onto the shoulders unto the hips two more times. So a little heads up. We're going back into our crab transition. After this next one, you roll yourself back as you come forward, Cross your feed, rock over your ankles and land on your knees to come up. Standing on your knees. Separate your feet behind you. There we are. Nice.
Open Leg Rocker
That shorthand still works. This is where our blocks come in. So go ahead and wrap them from behind your mat. So again, we're using these yoga breaks today, but in a, in a studio setting you can use moon boxes for this as well. And for some of the exercises we're about to do, you can even leave these blocks out all together, but it's really nice to have a little bit of elevation for some of the exercises that are to come. And for those of us that suffer from any kind of wrist issues, um, in planks and the like, it's nice to have a somewhat more sturdy surface too sometimes so that we don't sink into a joint that isn't very lenient to catching our weight. Yeah. So for this one, I want you to come into a four legged position with your hands on the blocks right underneath your shoulders, your knees, knees right underneath your hips, just like we did before. From here, we start by shrugging our shoulders back together, just like in the beginning of class, pushing the blocks away to come back into our four legged position. And do that a couple more times to get used to being up a little bit higher.
Crab Transition
So the upper body then through the hips, take it down and take it up. We're going to add on as you shrugged, your shoulders actually aren't your back this time. So you pick up your eyes and your tail while your shoulder rates come towards one another. And as you push down into your hands, you immediately translate that into around spine, ears to hips. And again, find your arch sink into your shoulders. Really allow your chest to fully open for a second and then push into your blocks to come back up. Yeah, so for a second, we're almost completely disengaging the support of our shoulders as we find our arch almost sinking into the shoulders the way that we're not really supposed to. But then from here, find the support required to set your shoulders into play. See how your back starts to activate. Yeah, so it's a leave home to come back home situation. One more time.
Shoulder Shrugs
Arch sink. UNSYNC push the ground away. Round your back. Now keep the strength in your back as you find a straight line in your spine, Tuck your toes under and pick up your knees again just a little bit away from the ground so that now your hips on the height of your shoulders, you're in a plank like alignment. I want you to keep the muscles fired up that kept your shoulder supported earlier. Lower the knees back down, and we'll do the same thing. One more time. Sink into your shoulders, arch your back. UNSYNC the shoulders.
Cat Cow
Push into your round spine. Take your toes under as you find a flat line ears, two hips, and then pick up the weight of your knees. Last time we worked on those marches a little bit. We want to do the same thing here. Now having the elevation of the blogs will help us get a little bit more range out of it. First drop the knees and Tuck the toes last time.
Quadruped Floating Knees
Sink into your shoulders. Find your arch one more time. And before we go into it, I want you to pull the blocks a little bit back on your mat so it's sort of in the middle of your mat. So we have some space behind the blocks and some space in front of your blocks. How we're doing is they're feeling okay on your wrist. All right, then we're good to go. Take your hands right back on. We're going to start with toes, stark dander, knees under hips, hands under shoulders. Spine stays straight. It will not throw out the movement, but that's where we want to start and that's where we want to come back to, right? So you go ahead and pick up your knees, hips to the head of your shoulders, little marches.
Marches
You take your right leg forward and then you follow with your left. This time you walk all the way through bringing your knees under you and walking your feet in front of the blocks underneath your knees to push your hips up towards the height of your shoulders. So we're not in a full plank. Get that. It's an inverted table, top position. Nice. And then from here, you let your hips sink down again. Chin over chest. And like you're walking through, you're rolling like a bar shape. You walk back on your tippy toes back behind you into a kneeling position or a four legged position. You lower your knees down.
And if you work with these blogs, you now have an option. If you feel like you're too close to the ground,
Keep them super small as you gradually walk yourself through a squat. Position your bar position into your inverted tabletop with your feet under your knees. Push the heels down, lift your hips up. Think of a shoulder bridge here. Good. And then let your hips sink back down. Tiny little steps. Walk your feet back behind you until your knees are underneath your hips. Then you lower the nice as there you go. Good.
Lower the knees. Untuck the toes. Let's sink into the shoulders again. Unshredded their shoulders. Round the back. Tail under, nose down. Find a flat line. Tuck your toes under again. Pickup your knees. Take one more march all the way through. Forward, forward, forward, forward, tiny little steps. Pressing your feet down, lifting your hips up. Try to take any folds out of the front of your hips, heels, nice and heavy. Awesome. And Walk Yourself back one more time.
Tiny little steps back behind you. Good. Lower the knees down, and then from here, here's a little treat for you. Make sure that your blocks on the same height. I'm going to be talking to myself. Lean your hips forward, and think of your down stretch on the reformer. I want you to press into your blocks, open your chest, find your arch in this position, and then let your hip creases lead the way.
Down Stretch Variation
It's like somebody pulling you back by your hips. Your hands are still pushing the ground away. You arching until your hips are back as far as possible. At the end, you release your spine completely relaxed. It doesn't have to be aggressively flexed, just relaxed, and then push your hips forward to lead the way. Coming back into your down stretch. Keep your heels act of behind you.Push the blocks away with the heels of your hands. Keep the arch hip creases lead away. Let them pull you back and then let that resolve and your spine completely relaxing and rounding. We'll take one more round. Rolling forward. Hips push forward and space heals. Push back as your hips lower down into your arch.
If you feel like you have that in you in your back, you may even be able to straight your legs, pushing your heels back, letting your knees come off the ground, but keep pushing into your blocks and keep finding that nice lifted extension. Lower the knees back down first. Sit your hips back towards the heels and then again, let your spine just fold into a relaxed position. All right, remember our elephant walks from last time. We're going to do them this time using the blocks, but they're options at this point are not all that necessary for this exercise.
Elephant Walk
You can do them without it. Just a nice different environment to do them in. So come into a plank position from here. Hands on the blocks. You can shift your blocks forward a little bit. If you want more space on your mats, hands down her legs, straight, heels kicking back in one long line. Heels, two head. Remember, you don't have knees for this exercise. What you do have ankles and you need to use them quite a bit from here.Lift your hip creases up. Walk one straight leg in front of the other. Try to get you here in front of your big toe. Follow up with the other leg. Walk them on a tight rope as close to the blocks as possible. Maybe one day in between the blocks and out in front of you, but it doesn't have to be today. Walk yourself back again into a plank. Remember, this part can go faster.
We don't have to be as careful about how we come into playing. We're going to emphasize the walking ourselves in. Find your plank off you. Go lift your hips. One that comes forward, one follow up, two and three and four. See where you end up and then walk your way back into a plank. Very good. One more time. Even wait on both hands. Start. See if you can keep it.
So throughout the entire range, hip creases, lift, push the blocks away with both hands as one leg walks forward than the other and the other. Really find your maximum this time until your feet are side by side.
We stack your spine, let your shoulders relax them, your back. Shake it all loose. So this is an introduction to how we can use these blocks or breaks or moon boxes to replace some of the work that was originally done with the pushup handles, right? So some more gymnastic work, uh, more of that to come as we put all of these ideas together into a final flour. Thank you guys so much. Hope you enjoyed it.
Comments


You need to be a subscriber to post a comment.
Please Log In or Create an Account to start your free trial.
