Description
About This Video
Transcript
Read Full Transcript
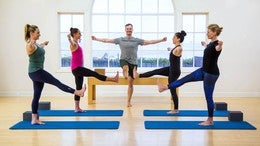
Hi everyone. I'm Benjamin Dagon hard and I'm here with Mary and Dreya, Mandy and Qaeda to explore some math work. This is the first of three classes they'll be presenting on just some good old math work, but with an infusion of some original ideas from, from the gymnastic work that is was originally inspired by. And um, with that there's a good amount of upper body strength that we are preparing for and loading our body in somewhat unusual ways perhaps. Um, so as you can see, we're already stretching and you might want to join as well. I introduced the class. You can see all my friends here that we're sitting with our feet or ankles completely bend the toes tucked under and are weighed shifting back into the heels, which is quite an intense stretch. But we're going to start off here to start building some awareness of how mobile that joint is at the foundation of our body. And with that, we're going to begin mobilizing our shoulders and building some mobility into our risks as well because we're going to need that in this class.
Wrist Mobilization
And you guys ready? Let's do this. Bring your arms out to the side and make fists with your hands. I will ask you to create a lot of tension in these warmups in all of these three classes, especially in this one here, we radiate some energy and strength into your hands, arms, and with that into your back. So begin to really press your fingers in towards your palm. Stretch your knuckles away from your center and keep your arms completely energetically locked, right?So without necessarily hyper extending at the elbow, you want to have a lot of energy through those arms until you feel how they connect to your back. From there only a wrist smooth. I want you to make circles with your risks in up and out. The eyes of your elbows move as little as possible so you're truly moving the wrist only as much as that's available to you. Starting to become aware of how mobile your risks are and how they might differ from one another. Let's go ahead and reverse the direction of your circles. Try to increase the range of your circles a little more each time.
Notice if your body is shifting forward in the meantime to get out of that ankle stretch, I know it's intense. If at any point you feel like you can hold it any longer, just untuck your toes. Now go ahead and lengthen your fingers out and do the same with your fingers length. Now circling through the risks, living a little bit of a Flamenco fantasy here for a second. Again, the rest of your upper body's completely still. Your chest is wide, your upper back is wide. Go ahead and reverse your circles. Arms might start to feel a little heavier too. That's a good thing, I think. Let's do two and one. Two, come back two fists.
Squeeze your fingers into one another and perhaps like me, your fist and fingers start to get a little sweaty here. That's all good. From here we do arm circles, very small circles up back in down. Thinking less about the circles, your hands making space and more about the circles inside your shoulder joint, right of way. Arm connects to your back. Trying to make those circles as smooth possible. We staying small, we're going a little faster and let's go ahead and reverse that forward up, down, forward, up, down five, four, three, two, one almost there. Make a your hands come together in a prayer and then interlock your fingers.
Arm Circles
We're just going to do a figure eight with your wrists here. Another mobilization for risks that that'll come in handy later once we start loading in how your ankle is doing. I see most of you already released. Let's go the other way, the way that feels weird. Exactly, and then from there, go ahead and let it go. Take weight into your hands. Release those poor feet. If you haven't already, in fact, for a second, just go ahead and shake your feet out against the ground. That should feel really good. After that stretch, and then go ahead and sit back onto your heels.
Wrist Mobilization
Start to notice if there's any increased vitality in your feet at this point. Hopefully there is. We're going right back into arm circles now. We're going to make them a little bigger again, all in their pursuit of getting a little more mobile. I want you to take your right arm out in front of you, make a fist with your arm, and then bring that on up towards the ceiling. Try to move in the biggest range possible, circling that arm back without twisting your torso or leaving your box, mobilizing that right shoulder going in. You take it forward and up.
Single Arm Circles
Try to keep tension in the rest of your torso as well. So even though it seems like you're just moving the arm, try to keep your centering gauge your spine lengthened. You're back toned. Take one more circle this way, complete it and reverse it. Biggest pain free range you have available. Really control the arm back up, forward and down. Do two more.Back up, forward and down. One more time. And a lot of our mat work, we don't really work through these big bold movements in the upper body, so it's a nice way to prepare for class like that. Shake that arm loose. We're going to take the left side now. So again, start with that arm out in front of you and create some energy. We're making a fist with your hand. Really Curl your fingers in towards the palm, lengthen up through your spine and then take that arm up, back and down again.
You're trying to keep that box, that point between your shoulders and your hips, the square's possible and working through the biggest range you can without losing any of that tension you build in your body. Just the good kind of tension up, back and down. Let's go ahead and reverse it to take the arm down, back and up, forward and down. Take two more. In the meantime, you might want to even press your legs into one another to create more awareness of your center. One more time, going back up, forward and down, and again, shake that arm loose. We're coming into a four legged position now, so just bring your hands down on to the mat. You can reposition yourself. In the meantime, hands under shoulders, knees under hips. We're working through a couple more mobilizations of the arms, shoulders, and upper body, and we're starting with the corkscrew action of your elbow.
Arm Spirals
So I want you to press the floor away with both palms, fully extended arms, shoulders over wrists. Begin to spiral your elbows forward in space of the soft part of your elbow starts to come forward in space. The bony part of your Alba's points back and then reverse that begin to move your forms out the other way. So this might be an invisible movement on your body, but you'll see how inside the shoulder joint, your arm starts to spin in and out. All this time your palm stays equally weighted across the floor.So all 10 fingers have an even amount of weight. And again, we're looking for a small movement that helps you mobilize through the upper body so that later on when we're going into our plans and our leg pulls and all that fun stuff, your body has a better blueprint of how to align itself come to center. So split the difference between those two extreme positions you've found or the one more thing here. Just a good old shoulder shrug. You allow your heart to sink towards the floor, your shoulder blade shrug towards one another. And by pushing the ground away, you come back to an lengthen position where your shoulder weight slide away from one another. Perhaps you even go beyond that to create a little bit of a hunchback engine. You Shrug back down, pushing the ground away.
Bird Dog
Nice. Again, we're not looking for big movement here, so really just feel your shoulder blade slide towards one another. That's all we're looking for here. And then simply by pushing both hands down, come back to neutral, maybe into a little bit of a round, a per back. One more time, shrugging down gerd and unshrinking coming back to what feels neutral and normally aligned from head to tail. You're in one long line. Bring your knees together and your heads against one another. So now you're really balancing on a tight rope with both hands, side by side underneath your center and both knees together underneath your hips. Going into a little bit of a bird dog preparation, which will help us with our swimming later on. Um, but it's mostly also an opportunity to become a little bit more aware of hip squareness. All right, so we're tapping into our lower body a little bit.
Shoulder Shrugs
Let's start this way. Your right leg extends back behind you. Your toes are tucked under against the ground. So similar to our stretch that we started with, we want you to flex that right foot and kick the heel back behind you. And then from here I call this one the twerk. Let's see if that makes sense to you.I want you to lift your right hip up towards the ceiling so you're spiraling your hip open to the side and then you actually let this hip drop back in towards your left inner thigh. And again, you twerk your right hip up towards the ceiling all the way, picking your right heel back in space and then let the hip come back down. One more time. Up and are the way down. And now find neutral again where you hips are side by side, which is a three dimensional event. We'll talk about that a little bit more as classicals on pick your right leg up off the ground now. So it's parallel to the floor and just like our bird dog, your left arm that extends forward against the leg. And we're going to stay here for a little bit. Find your breath, take a nice deep breath in. As you stretch your fingers forward, your leg back behind you. Try to find that long shade from ears to hips.
One more breath. Bring everything back to a center and we'll take the other side. So your left leg extends behind you. With your toes tucked under, kick your left heel back in space and begin to lift your left hip up towards the ceiling opening and rolling in that hip rolls in against the inner thigh of the leg. That's down a couple of more times. Lifting up, coming back down. Notice how you passively also started rotating through your lower back and middle back and you get a nice little stretch in there as well. We're mobilizing our spine justice marchers, becoming more aware of the squareness of our hips.
Take it all the way back down, and then find hip side by side again. Pick the leg up off the ground, keeping the hips as they are. Stretch your right arm forward in our position. We stayed for three deep breaths, lengthening out through the arm, lengthening out through the leg behind you. Notice if the head of the leg that's lifted as trailing back along with the leg.
See if you can keep pulling them side by side from your center and then take everything back down. Go ahead and sit back onto your heels for just a moment. And the next up I want to go over a transition that I call the crab transition crab. As in the Maddix, the size where we open our legs and we roll over our ankles and knees. We're going to use this transition quite a bit and the classes that are to come, so come back to your four legged position. We're going to set it up there. What I call the crapton transition is really just a crossing of your feet behind you so you can start it from here.
Crab Transition
You Cross your feet over to the opposite side. Go ahead and sit back behind your feed. So you want to move your body back until you sit on your seat and then you uncross your feet in front of you and you place them back down. We can take that so many different places. We're going to keep it simple and just do this. Cross your feet again, rock over your ankles and your knees into a four legged position and you're back to where you started. Let's do that again. Cross your feet, sit back behind your feet, uncross your feet. Set them down.Sit Up Tall, easy peasy. Switch the legs again, rock over your ankles, over your knees onto your hands. And there you are in your four legged position. If you kept doing the same legs, if you can switch it up for one more, cross your feet behind you. Sit back, feed and cross. Come forward. One last time and before we go into our last one, I want you to walk forward against the very front end of your mat so we have enough space to go into our next exercise after this next one. So you're almost going to give yourself a head bump here. Go ahead and cross your feet behind you. Sit back behind your feet.
One more time. Last crab transition, and then sit yourself up. Ready for a half roll back. Lift your spine up nice and tall. Just going into the nice little familiar pilates movement here. Begin to round your spine. Head to tail to the point where your feet start to get an idea against the ground and stay there for a moment. Take a nice breath in. Expand your back.
Half Roll Back
Exhale, lift yourself back up into a tall seed lifts, roof of your head lifts towards the ceiling. We'll go twice more. Roll yourself back, mobilizing our spine. Anchor the heels down. Take a breath here. Pick yourself all the way back up and take one more lifting tall. Roll yourself down again, see if you can take all that freedom and your shoulders, wrists, and elbows that we've built so far with you so we're not getting stiff in the arms as we're reaching. Pick yourself all the way back up.Sit Up nice and tall. Walk forward on your mat one more time. So that you can lay all the way flat with your head, landing on the mat, and then we'll continue. Roll yourself all the way down onto your back. This time. Keep your feet nice and anchored head releases and we're going into our dead bug, dead bug. You bring your knees over your hips. Your legs are at a 90 degree angle.
Dead Bug
You're hands are placed against the front of your thighs, fingers pointing to the knees. We're want to start nice and simple here so you will not see a movement happen, but you definitely feel it. I want you to bring your knees in towards you and push your hands into your thighs all at the same time. So no movement occurs on the outside, but inside you feel all that heat building. You feel your core starting to tone and you choose how hard you go on this. Let that go again. Drug your knees into your chest. Give them a hug, squeeze and go again. Place your hands against the front of your legs.Press your hands into your thighs, pull your thighs back into you. See if you can let that result in more freedom in the friends of your hips. At the same time, like your thighs. Just sink into your hips and then let it go. Drag your knees right back into your chest. We'll take one more and we'll add on.
Take your hands right against the front of your thighs. Again. Push the hands forward. Bring your knees back in. Let your arms play along. Now you pick up your head, neck, and shoulders. You bend your elbows more to make that happen. Keep pressing into your legs and we'll go into what we will refer to as the hollow body hold.
Hollow Body Hold
It's a good old gymnastic drill that we now call the hundred goes a little something like this. You extend your legs out in front of you, reach arms back by you ears, but your center stays as engaged as it just was and we're going to stay here for two breaths. Keep reaching up and back so you arms down and out to your legs. Your center's engaged against that. You bring everything back in. You'll release your head back down and we'll start the whole thing. One more time. Hands against the front of your legs. Push your hands forward. Drag your thighs back into your curl, your head, neck and shoulders up.Use the pressure of this preparation to get your lower back supported into the ground. Steel tight in your center. Extend your legs away from you. Reach your arms up and back by you ears. And yes, that's not where we have our arms for the a hundred typically would for this maneuverable. Hold them here. This is a warmup. The good news is there's no hundred in this class. Exhale, bring your knees back into your chest. Give yourself a squeeze, a hug that all of that go. And we're going to continue on building vocabulary for our progressions later. Bring your arms out towards your side and it doesn't have to be a perfect t is just a little wider than having them next to your hips. Alright, take both legs out onto the mat. Just let them fall for a second.
Single Leg Lift
Maybe drum out your knees against the ground for second. Yes. And then bring your legs towards one another. Flex both feet. Press your heels into the ground and in one motion, kick your right leg up towards the ceiling and slowly lower it back down. Keep flexing through the heel. You push it across the room. Press your left heel down, both arms down your torso, down and Zip your leg.Lift up and you'll reach it away from you as it comes down. Let's stay on the same like one more time. So right leg. One more time. Lift it up. Hold it there. We're not circling the leg. We will do that later. For now, think one leg. Take Talk. Your leg goes across the center of the body and you take it as far as you can without letting your right shoulder peel off the ground or your left leg moving at all. Nice. And then bring it back to your center.
Single Leg Tick Tock
We'll take two more on this side. Let your right hip lift off the ground. So if your foot touches your neighbor on the other side, that's just fine, but your right shoulder stays down. Your left heel keeps from moving. Come back to center. Take one more hip, goes up legos across arms actively push into the mat. Nice. Spring the lake back up, lower it down and we'll switch to the other side. Left leg lifts, reach long through the heel.
Single Leg Lift
Keep the rest of the body actively pressing down and then lengthen the leg as it comes down. Again, twice more. Lifting up. It's a very active and dynamic way to stretch your hamstrings. Stretch to the back of your leg. So don't think that the leg has to come to 90 degrees as it does on these ladies here. Any amount we'll do you pick the leg out to where it can stay straight at that point. Pick the hip up. Now let the leg go across the mid line.
Single Leg Tick Tock
Press both arms into the mat. That's the left shoulder that stays down here and you bring the leg back up, left hip drops into the madrassa twice more. It goes up, leg goes across your right leg. Try to avoid any movement there. Yeah, the one that's on the ground and then bring it back up. So easy to forget about this one. Take it up and over. One more time, but it's like you're standing on this leg and in a second we'll do exactly that. Stand on this leg. Beautiful. Bring the leg back up. Let the left hip crease sink into the floor. That your left leg come down.Shake it loose for a second. How are we doing? Doing all right. Okay, good. Moving on into a rolling like a bar. We're going to take it up to standing and introduce some more new vocabulary. You now already know what you're hollow body hold is right. Take your arms over your head. Press your legs into one another in one motion. Pick up your legs a little. You had neck and shoulders and your arms.
Hollow Body Hold
Stay by your ears and there you are in your hollow body. Hold from a second ago. Yes, that's it. And you stay here for two breaths, maybe three. We'll see and you release everything back down. Let's try that two more times. Deep breath in. What's it going to take for you? Take most of your body weight off the Madigan's gravity from your center. Let's see. Pick yourself up. Arms, head, neck, shoulders, legs.Reach them across the room. Press your legs into one another. Come to a sustainable place. I might keep you a little bit longer and then low everything back down. One more time. This time we're going to transition into rolling like a ball. Pick yourself back up. Find that hollow body. Hold that hundred position.
Now from here, roll yourself up. Go ahead and bend your knees into your chest. You deserve a little treat. Go ahead and roll it out. Roll back and forth unto the shoulders, onto the hips, onto the shoulders, onto the hips. This time go a little farther. Roll onto the tops of your shoulders and on to the feats they may touch. Go back again.
Rolling Like A Ball
Rolling back lifting ups a fortunate day or want you to explore playing with momentum a little bit. As long as that doesn't take away from your control. All right, so you roll yourself back tops of the shoulders onto the feed. On your next one, roll back again. Take your hands down next to your hips and push yourself onto your feet.
Rolling to Squat
Push into your hands to find that lift. Nice and try that a couple more times. There's really no way to do this wrong. Find Yours. Sit back down. Roll yourself back. What's the momentum you're going to need to land on your feet and to unweight your hips off the ground without crashing into one another. Sit back down and do one more. Roll yourself back. Lift up.
Come on to the hands, onto the feed. Take it all the way up to standing this time. All right. Roll yourself all the way back up. Shake it loose for a second so we'll keep exploring that. Yeah, but we'll get a little bit more playful with our rolling that cabal and future installments of this class. Next up I want to introduce some scales, which again is in a term that's borrowed from gymnastics and something that we see in some of the old original videos of Matt work when it was practice back in the day. So we'll do some of that today. This is the preparatory version of front scales.
Front Scale Prep
I want you to go ahead and pick your right knee up in towards your chest. Grab a hold on your Shin with both hands and pull the knee up towards you. Now remember now, little birth doc prep. Earlier we talked about hip squareness and how that's a three dimensional event. So the first thing I want you to think about is to drop your right hip until it's next to your left, right? Most of us will pick that hip hop, let it sink down, draw the knee in tight with both arms and then think about not just up and down through your right hip, but also forward and back and see if you can let both hips be side by side.Now think about your standing leg, drive that left foot into the ground, shift wade, so that it's evenly spread across the heel, the bottle of the third inner and outer, and then stay right there. Take your arms out to the side, make fist with your heads. Flex your right foot and kick the leg out in front of you. See if that changed anything in your hips forward, back, down and up. Bring the knee back in. Give it a squeeze. I'm going to do that two more times.
Find that your standing leg arms out to the side. Then drag your heel out and away from the body like you're pushing into a spring. Finding that balance. Bend the knee, hug it back in. Take one more standing leg. First you have wobbling is just great because that's how a body learns to find balance, right? They take the leg out in front of you. One more time. Find the strength in your upper body fists with your hands.
Good news is you're not going to fall far, so allow yourself to take yourself to your edge, which includes falling. Yes. Good. And then come all the way back in. Shake it loose. Just observed on judging. Let's go to the other side. Bring your left knee up into your chest, whatever that was I was, and we have a second leg. Bring your left knee up and in again. First Direction. I want you to become aware of. Am I lifting my left hip up? Can I drop it down?
And then think about forward and back. Can I bring my hips next to one another and what does that do to my standing leg? And once you have all that, forget about it. Bring your arms out to the side. Make fists with your hands. Flex the foot. Take it away from your body. Did that change your hip? Did it have to bend your knee? Bring it back in. Give it a squeeze.
Give it a hug. As I was standing, single leg stretch in a way, right? Arms outside leg goes out in front of you. Of course, over time this becomes more and more of a standing leg exercise than a working leg exercise. Bend your knee back in. Give it a squeeze. Give it a hug and take one more arms outside. Notice if that arms outside making fists engaging your bag, if that's helpful at all of that takes away from your balance. It should feel helpful.
Come all the way back in and give it a squeeze and a hug. Take the leg down, turn your leg slightly out. We're not looking for a dancers turnout as much as just bringing your toes slightly out, who have a wider base of support in your feet, and then we can take our leg out to the side because we will do our scales in all directions over time. We're going to start with our right leg. Go ahead and bring the knee out to the side and up towards your shoulder. You're going to hold it with your right arm and bring it in towards you. Ask yourself the same questions. Can I sink my hip down?
Side Scale
Can I have them side by side? What's my standing leg up to? And then go ahead and drop the leg down. We'll move to the other side. We'll take our sideways scale somewhere differently. Left knee comes up, focus on you're standing inner heel talking to myself. Really for you it might be somewhere else would make sure you're not buckling into the back of your knee. Lifting yourself out of the ground and switch over to the other side one more time, right? Whenever we go from two legs to one, verticality can sometimes be a bit of an illusion.We have to shift sideways a little bit, but make sure that your knee, your standing leg is not taking the load of that way that we're shifting. Take it back down with one more side to go. Left knee goes up, right leg into the ground. Roof of the head is growing closer to the ceiling. This all prepares us for our actual single and double lake stretch, which are squatting actions at the hip. We're going to do those next. Go ahead and release that foot down. Come to the front of your mat and if you have a way to lower yourself to the map, please do it. Otherwise, just make sure you get until your back safe and sound with mobile spines joins ankles risks and open heart to bring your right knee into your chest, left leg long. It's all single leg stretch.
Single Leg Stretch
Going back into some polarities vernacular here. Go ahead and drag that knee in towards you and switch to the other side. Breathing in and breathing apps. Keep on switching. Now that we've just done those standing balances, I want you to really celebrate the mobility in your hips, that feeling you just had squaring your hips off and also using the strength of your arms. To get a little bit deeper into that squad on one side at a time, four, four and three. Three allow them knee coming in to stretch your back into the mat a little deeper. Take one more set right and left. Bring both knees into your chest.It's double x stretch, which takes us back into a hollow body. Hold arms. Each bag, legs reach out long and low. We've already done it so many times so we don't have to do too many of them here. Bring your knees back in two more times. Inhale, arms reach back legs. We jumped long and low XL. Gather it all in. Squeeze your lungs empty. One more reach arms. Come around, knees come in, Rockies.
Double Leg Stretch
Have up to a seated position. Bring your legs out in front of you. This time of go into our spine. Stretch from here. Open your legs just about as wide as your mat. Flex your feet. Take your hands down right in between your legs onto the mat. Use your fingers like scaffolding against the ground so you've give your spine a nicely lift. Take a deep breath in, fill yourself up, and then round your spine forward with the XL that your fingers slide forward between the feet.
Spine Stretch Forward
See what that feels like today as you go into your spine switch. Inhale, lift yourself back up at the inhale. Really fill you up and bring you back on top of your hips to more of those. Rounding forward, mobilizing the spine, reminding yourself of your half roll back from earlier. Again, inhale, lifting yourself back up throughout these, really think about pressing your legs down into the mat to give yourself a nicer lift at the end. Try to maintain that as you go into your round forwards in over chest, that you arm slide out in front of you. Good and lift yourself all the way back up. Transitioning.Take your arms out in front of you. Roll yourself halfway back. So thinking of your half roll back again. There's an even Ben from ears to tail. See if you can pick up the weight of your legs, bending your knees into your chest. Grab a hold. Your body is still in that half rollback position. You unfold your legs from there holding the shape, but not the breath.
Open Leg Rocker Prep
You bend your knees back in. You send your legs out in front of you with control. Your body hasn't changed position and you'll sit yourself back up. And while we're here, let's take a spine stretch forward, round up and over your legs. Lift yourself back up. Pick your arms up in front of your shoulders.Roll back to the point where you can unweight your legs off the ground. Drag your knees outside ways. Grab a hold of your ankles, unfold the legs out into the rocker position. Bend your knees back in. Send your legs back out in front of you and sit yourself back up on too long legs and a nice lifted spine spine such forward from here. Rounding in very good lifting back up.
These transitions will become super helpful later when we want to become more improvisitory with this work. Roll yourself back one more time. Find your transition. Pick up the legs, bend your knees, grab a hold, lift your legs up, bend your knees back in. I know I lied to you. We have to do one more. Stretch your legs out long and low because I see some of us don't have enough space behind us on the mat, so make sure for this next one, you're really at the front of your mat. Walk yourself forward. Good. Lift your arms, lift your spine and take one more. Roll yourself back to the place where you can pick up the weight of your legs.
Open Leg Rocker
Bend your knees in. Grab a hold. Take your legs out. Now you can roll back and forth onto the tops of your shoulders, onto your hips, and I get rolling onto the tops of your shoulders onto your hips. Ask Yourself, can I take that freedom in my shoulders that I build from the start of this class into this exercise? Rolling back, rolling forward. Am I having fun when I was, I was. I've got questions to ask yourself and rolling exercise. One more time.Rollbacks. Lift yourself up from here. Cross your feet. Crap. Transition onto your knees. Separate your feet. Take your arms out in front of you and we take it right into our thigh. Stretch from here. So for a thigh stretch, especially if you have knees that are not okay with this exercise, um, there's a couple of adjustments you can make.
Thigh Stretch
One is parallel from knees to feed. The other would be slightly turned out with your feet together. Knees slightly open. I'll let you choose which one feels the most organic to you. All right, your arms are straight out in front of you. Your tailings, hands down the crown of your head lengthens up. You take yourself back just a few centimeters.You can keep your eyes on one another. You can give yourself some support here. That's right. And then pick yourself back up, pushing your shins down to lift yourself back up. Do that a couple more times. Take the upper body back, arms. Keep reaching forward, eyes press down. This will later on become yet another transition for us to standing up. Lift yourself up and forward. Take one more.
Take the upper body back. Press the shins down, lift yourself back up. I want to do one more and take this into a transition into standing. We're going to take our five stretch into a squad that brings us up onto our feed word I'll show you and we'll work on this throughout the next couple of classes as well. All right, it starts exactly the same way. You have your toes tucked under for this one, so come back onto your knees, feed our tech under arms, reach out in front of you and you begin with a thighs. Stretch.
Any amount that you can sustain now keeping your eyes straight out in front of you. Try to get your feet down flat by sending your hips back in space. Your chest will come forward to counter your wade. You did it, and then you come all the way up to standing. We'll find you in this as we go. For now, we're going into a rotation of the spine and we'll take our soft standing up. So let's all take a quarter turn to all right, open your legs a little bit wider than hip distance apart. And we're going to begin with the right arm up towards the ceiling.
Standing Saw
That's our lead arm is going to go to the outside of our left foot. So go ahead and reach across your body, bending down, taking your right hand to the outside of your left ankle. Press those two into one another. Inspiral your chest open, and now your left arm to reach up towards the ceiling. And our position, we'll hang out here for a second. So if you are seated on the floor right now, you would be in your saw position. Want you to become square on your hips again by moving your right hip back in space. Take a deep breath into your twisted rounded bag and then lift yourself back up.We're going to switch arms at the top so that you end up with your left arm up towards the ceiling and we'll take it to the other side. That arm goes across to the outside of your right foot. Press the two into one another so we can increase the spiral and rotation of your back. Move your left hip or away from you to get even more of a stretch in your left. Lower back on the side. Come back up. And now that we know where we're going, we go little Quaker right arm up. Take it down, exhale the air, bend your spine. Keep your legs energetically lock, lift back up, and take it to the other side. Left on leads, or reach it over to the outside of your right foot. The opposite arm.
That's up to the ceiling. Keep your hips square three-dimensionally. Lift yourself back up. We'll take one more and up right arm lifts. Take it across, move your right hip back in. Space is air lifted back out. We'll take one more with the left arm leading the way up.
Take it across to the outside of your right ankle. Nice you guys, and then lift yourself all the way back up to center. Take both arms up this time and open your legs slightly wider and turn both legs out. This is just a nice release for the spine. I call it the swing through. There's no official name for this. Begin by softening your knees out to the side and just bouncing your hips down towards the ground a little bit. Yeah, so like a mini squat action. From here. On top of that, I want you to keep your knees bent, round your arms forward, round your head forward and swing your hands right through behind you through the window of your legs. And then you lift yourself all the way back up, standing your legs into the ground on slipped, and then we start against soften your knees round forward, swing the arms through. It's like a horseback spine. Stretch forward spine.
Swing Through
Press your feet into the ground, lift yourself back up and we'll do it with a little more tempo and zest. Bend your knees and around. Forward. Swing through three, two, one. Inhale, lift back up and go twice. More. Rounding down. Three, two, one. Inhale to lift. Fill yourself up. Let it all goes. You swing through. One more time. Down three, two, one. Lift yourself all the way up that your arms come down to the side.Let's all face the center of the room again so you'll take a quarter turn to your left, come forward on your mat. Stretch the arms out in front of you. Remember how we came up to standing a little bit ago through our squad and thigh stretch. We can come down the same way, so we're going to try that next. Sit your hips back. This is where we can start. Fine tuning it a little bit. Your hips sit back. Your eyes are straight forward in front of you. Still try to keep your feet flat so only come down as far as you can.
Keep your heels down. Now from there, stand back up. Good. Let's take a step back so we all have space to do this properly. Let's do one more. So feed, stay flat. Your knees go forward. Your hip score back, your arms. Reach across the room. Your eyes stay above the hands.
Now from here to start to lean the upper body back and bring your knees forward and down onto the mat. You land in a thigh stretch. Exactly. And then push yourself up onto the tops of your knees. Crab transition. Cross your feet behind you. Sit behind your feet. Take your legs out in front of you. Stretch your arms towards your neighbor and roll yourself all the way down onto your back. From here. Nice work on those squads. Let it all go.
Release your back for a second. Stretch out your legs. Shake them loose. Bring your knees a to a bend. Take your feet down by um, close to one another in close to your hips. Bring your arms down by your sides. We're going into a shoulder bridge. Next. All right, so think of your thighs spreadsheets, the same shape. It's the same thing we're looking for in the friends of our legs. Begin with your feet about hip distance apart.
Bridge
Press them down to lift your hips up and actively think about stretching your knees forward in space. Like you're pushing your shinbones away from your center. Getting your hip bones up towards the ceiling and pushing the mat away with your arms. Take a nice breath into the front of your body here. This is probably the most lenient thigh stretch you'll take today. Go ahead and roll your spine back down like you're trying to sit down on your heels who really get longer as you approach the ground. Again, do that twice.More. Lifting up, just getting ready for a little bit of back bending or just coming up. Hips lift arms. Push the ground away. Think again about actively stretching your shins and knees forward in space as you push the mat away with the arms. Nice and then slowly roll yourself down. Creating that image of becoming longer as you approach the ground. Just one more time. Hips that up. I'm pushed to the ground away. Just lifts.
Yeah, chest lifting. What I mean is the back of your heart is pushing away from the ground. You're using your arms that merge. Again, thinking of that freedom we created in the very beginning of class in our shoulder joints. Slowly roll yourself all the way down.
Place your hands next to your rib cage flat on the Mat. We'll do a supported half Swann for this one. Both palms press strongly into the ground. Your hip bones are pushing into the mat as well. Everything else is going to lift you. Use the support of your hips and hands, pushing down to lift up your chest, your thighs, your feet, your eyes, your chest, the top of your rib cage.
Supported Half Swan
Everything about your hips and heads is lifting. You become even longer as you lower back down. We'll do that a couple more times. I want you to use the support of your hands and hips to fire up your back fully from the crown of your head all the way down into your feet. Lifting everything up, pushing their hands and hips actively down.Start to notice if your legs drift apart or if they can stay together. None of which is right or wrong. Just observe what your body comes up with here. Lower yourself all the way back down and just try on this. Next one to keep your legs zipped up. Start to finish. It may change your range of motion a little bit, but it might also keep your Backman out of getting into your lower back too much. Press your hands and hips down. Lengthen out, lift back up.
Almost think your head and your heels want to get to the same heights. See if you can make that happen and it'll lengthen as you lower. Sit yourself back over your heels. Just a little counter stretch. Push yourself onto the heels. Use your arms actively to get a nice round into your back, and just two more things to build more vocabulary for our flow later come up onto all fours again, you're on your hands and on your knees.
Cat Cow
This time your hands are shoulder distance apart. Your knees are hip distance apart. Your feet are untucked. Thompson with be pressing down. Heels spiraling up towards the ceiling. From here, go ahead and round your spine for a second. Press your hands into the ground. Make a cat's mine. Let your head drop.Try to build a nice even round from your ears all the way down to the hips. And then keeping shoulders over hands, hips over, knees reverse that arch your back. Good. Oftentimes we think of this as a very sick, mental or sequential movement. I want you to move your spine in one piece, so both ends of your spine, Benj towards one another into your rounded shape and both ends of your spine. Lengthen away from one another to find the arch. Good. Nice.
A couple more times. Rounding in and lengthening out into the arch show. One more time. All the while keeping those hips side by side showed as well. Organized. Very nice and arch. Come to a flat line from ear to hips.
Tuck your toes under this time and let your knees hover off the ground. Just a millimeter or so. From here, we're going to do little marches with the legs. Your shoulders stay right above the hands. Want you to take tiny steps with your right foot. Then you are left forward. One more, right?
Marches
One more left and then you start to walk yourself back into what looked like that four legged position where your knees are under your hips and you come forward again when going walk forward and back a whole set of three. Walk it back. You've got one more set after this. Take it forward. One, two, three, four. Walk it back. Two, three, four. Lower your knees for a second. Untuck your toes for a moment. Round your spine again, arch your back again. We're going to do the same thing one more time. Later on.We'll do this using some props to lift ourselves farther away from the ground and taking this into some more gymnastic movement. For right now, we're just taking these tiny marches on our hands. One more time, long spine, years to hips, toes tucked under, knees hover up. Take three sets walking forward for three, two, one and back. Two, three, four and again, start to notice as your legs come forward, your back may have to round a little bit to comedy that see if that can feel like a stretch. See if bringing more weight into your arms makes you use them more. So you press your pants into the ground. Take your knees down. After you've done your three untuck, your toes round your back once more, arch your back once more.
Find a long line one last time and we'll do one more thing and then we're done. Doesn't that sound great? Take one leg back behind you. Tuck your toes under. Add the other year in a plank. Why don't you do the elephant walk and it goes like this. I want you to pick up your hip creases towards the ceiling so you've falling yourself in half from here. And for the rest of this exercise, you do not have knees. All right, but you do have ankles.
Elephant Walk
That's why we stretch them in the beginning. I want you to pick up your heels just enough so that you can walk your ride straight leg in front of your left big toe. So heel two left big toe. And then take your left leg forward. Lift your heels as much as you must. Take one more step with the right and one more step with the left, and then walk yourself back into a plank. One, two, three, four. So we're taking our time, walking ourselves in there.We're getting out of it a little bit faster. Pick up the hips again. Left leg begins, reach forward. Try to park the heel in front of your big toe, lifting the hips up high and increasingly taking more weight into your hands. When you get anymore, just walk your legs back into a plank and we'll take one more set. Push the ground away with both arms. Lift your hip creases up, and then walk a long leg in front of the other four, three, two.
One day you will just walk into a handstand from here or something like that and walking back into a flare. You've got one more. Last one, I promise. Find your plank open. Chest and shoulders. Push the ground away. Lift their creases up and walk. Feet in. Four, three, two, one. Soften your knees. Place your feet side by side. Now walk your hands back towards your feet as well. Again, you can sock your knees as much as you must, should let your torso hang over your leg. Shake out your head, your shoulders, soften your knees even more to roll yourself up.
Comments


You need to be a subscriber to post a comment.
Please Log In or Create an Account to start your free trial.
