Description
About This Video
Transcript
Read Full Transcript
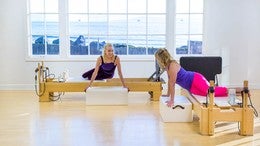
Welcome to Palladio's anytime. I'm Elizabeth Larkam. Thrilled to be here with Amy havens. My class today variable intensity interval training has four objectives to develop your cardiovascular strength with interval training, um, to develop your focus, your concentration, your brain on exercise to develop thoracic rotation and also to develop mobility in your hip joints. Keep in mind that it's best to leave two days or 48 hours of rest time, recovery time after each of these practices. That's to respect the, the collagen degradation and collagen synthesis.
And if you'd like more information about all these objectives, be sure to check out our references to set up your reformer, make sure that the jump board is firmly in place, have a long box and we'll start with the long box on the reformer. I like to use a yellow spring on some exercises, so if you don't have a yellow spring, I'd recommend that you use the blue spring on the lighter setting. Amy and I made sure that we have non-skid mats underneath our reformer legs and that will keep the reformer from slip sliding away when you jump. Now when you set your cord length, um, I'd recommend that the you have be about three quarters of the way up the risers. And when you, uh, set the cord length for the um, shoulder rests or the posts, we're giving you a couple of options. Amy has her cord lengths so that they're taught over those shoulder rests and my chords are taught over the posts.
I'd recommend that you start with the shoulder rests as Amy started and then as you become more familiar with the exercises, if you prefer to shorten the courts for more challenge for range of motion and control, go ahead. Now let's put the loops over the risers because you won't need the chords for many of the exercises and this will keep it a quieter environment. When you jump, we're going to start with developing mobility of the hip joints. So for this we have the long box on asymmetrically close to the edge of the carriage where you are standing face the jump board, slide your thigh on top of the jump board and on top of the long box, first mistake of the year blooper reel maybe. Alrighty. Lowering your pelvis. Now you share arms and push with your foot on the ground to slide the carriage back and forth.
As you slide back, lower your thigh, lower your hip joint. We have two more of these for a total of four. Next variation. Keep your torso where it is and you show your hand on the long box to push the box back. So the thigh, the leg on top of the box is taking a ride on the box away from the jump board. Now we're going to engage with rotation. Leaving the box here at home. Turn your pelvis towards your lunging leg, turn, pelvis, ribs, shoulders, neck, head and eyes. Looking over your shoulder.
And if you can't see your foot, at least you can see a shadow of your foot, or at least I can. And then turn the other way to look over your shoulder. And there's the same foot as you. Exhale, turn pelvis, ribs, shoulders, pointing your foot, neck, head and eyes and pelvis, ribs, shoulders, neck, head and eyes. We have two more of these coaxing, an internal rotation of your hip joint and then an external rotation of your hip joint. Last one of these, the box stays fairly steady as you rotate your pelvis, turn your pelvis around the head of your femur last variation returned to the first variation and extend your knee fully and come back in as you do this. Lower your pelvis, lower your thigh until it's resting on the box. Now the dismount of this is so important. Drag your thigh along the long box and then your foot plummets to earth and then you go, wow, I've got a new leg to stand on other side.
Now walk around, careful not to stumble over your new long leg and here's the box on the new side and then you Mount the box, one thigh supported by the box, one hand on the box corner and everything slides back and slides for exhale to slide back. Inhale to slide forth saying to yourself, wow, my two sides, they are so different and that is the human condition. Keeping your torso steady you, your hand to push the box back. Exhale to slide back. Have the idea that your body, your torso, comes closer to the jump board as you slide the box back time to rotate, turn ribs, shoulders, neck, head and eyes coming into internal rotation and then turn back around and to external rotation.
I suppose you could exhale to rotate and inhale to de rotate or for that matter you could inhale to rotate and exhale to D. rotate. Now we'll go back to the first variation slide all the way back, knee extension and the fluxion lowering your pelvis, lowering your thigh as if they could be heavy on the box. Coaxing a medial hip glide just in case you needed some new information to distract you from the intense sensation. Now for the dismount, use your hands to steady yourself and push up and you're like plummets to earth. Now we'll just put this box next to the frame near the shoulder rest because we'll need it shortly. Let's change Springs now we'll need a red spring. No more yellow, only a red. This are moves for your feet, articulation of your feet, doming of your feet or doming on parade, keeping your knees extended, lift your metatarsal and make your way sometime today, all the way up to the top of the plate, lifting your metatarsal and keeping your toenails visible upon arrival, reverse the direction and you vault off the ends of your toes and glide your heels down to the bottom of the plate.
Now we're going to make a V shape, so the right leg sets off to the right. The left leg sets off to the left and your feet are articulating doming on parade in a V shape. Upon arrival to the top corners, you reverse the direction and make your way down to the center of the plate at the bottom. And by now it has occurred to you that, Oh, there is a connection between the feet and the deep abdominals. Now we're going to go parallel to the board at the bottom, moving your way to the outside of the plate, toes directly up to the ceiling, and then we're going to make a triangle or an upside down V such that the big toes will meet at the top of the plate in the middle with all the toes.
Aim directly up to the top of the board, neither internal rotation nor external rotation, and then you make your way down the plate. Again, vaulting off the tips of your toes until your heels arrive at the very bottom of the plate. Now we're going to repeat the first variation again because there's an important point to bring up as your legs in parallel, make their way up the plate. When you draw your rear foot towards your forefoot, there is a direct connection of the neuro mile Fashional system between the soles of your feet and your deep abdominals. When you reverse direction and vault off your toes and slide your heels to the back, there's more of a connection from the soles of the feet towards the base of your pelvis, the back of your pelvis as opposed to your abdominals. As fascinating as this is, it's time to move on.
Now come up from here and this time we don't need the box. Let's leave the red spring exactly where it is. And um, Amy, you'll be standing on that side. I'm standing on this side. Um, you will have your foot on a pad forward where the Springs meet the spring bar, so your foot will be there and my foot will be on top of the jump port. So you have options, um, always have options and you can start with your foot where Amy's is and eventually make your foot up to where mine is. Now, Amy, you'll have a hand on the shoulder rest and a hand on the side of the carriage and all come down and put an elbow on the carriage. So bending your ceiling leg as you exhale, slider. Inhale to come in, steering your sitting bones up and wide behind you.
Exactly. Sliding up and bending the knee of the that's closest to the foot plate. Now external rotation. Turn your leg out. Exhale, slide out, whichever sitting bone belongs to the uh, lifted foot that's sitting bone aims away from the jump board. Now we're going to internal rotation.
Exhale to slide out. Inhale to bend. Each time your need bends, sitting bones widen as if you could broaden across the base of your pelvis. Broadened between the sitting bones to more here because it's such a fascinating concept that a broadening the
And um, here we go. You'll have your foot low. I'll jump my foot high and forward, holding onto the shoulder rest and the front of the carriage. Bend your ceiling leg. Exhale to slide. Inhale to bend. Exhale to slide sitting bones up and back.
And why externally rotate. Now steer your knee over your third toe when you need Benz and internal rotation in hail to bend. It's this internal rotation of the hip joint that facilitates a medial hip glide and helps to seat the femur head deep into the acetabulum. Amazing. Last two of these coming up and last one.
Caution on the dismount. Now have a seat on the carriage and they'll just save that pad for later and let's keep the red spring on because it's time for straight leg jumps. In this case, your knees don't bend. We'll work eight in parallel. Aiden, external rotation, Aiden internal rotation, and then we'll take the corners upright. Uplift down right down, left up, left, upright, down, lift down, right here we go. Have your feet close together in the center of the board and hands are at your pelvis or at your sides as you prefer with your shoulders. Here we go.
Lift up. Lift up. Right down. Left down, right heels to the outside. Up. Right up. Lift down. Right down. Lift up. Left up,
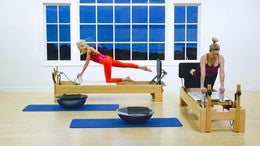
I think, I think I misspoke. Your boxes lined up with the edge of the carriage. I said a quad or pet abdominals. No, not yet. That's coming up. But these particular quadruples is for thoracic rotation. You'll have your um, cheekbone in the far corner of the show of the carriage reached the foot bar footplate hand to the close shoulder rest and the ceiling hand to the far shoulder rest pull with your bottom hand, pushed with the top hand as the carriage slides.
Eyes glide towards the foot plate as the carriage comes towards the flip plate. Eyes glide to the ceiling so the eyes glide opposite the direction in which the carriage is moving. Now change your ceiling hand to the same shoulder, rest as the floor hand and continue this motion. You could add planter and Dorsey flection of your feet, pointing the foot in the direction that you're going. Flexing the foot in the direction you're going away from.
Now bring the carriage home and come onto your forearms. Come on to your elbows as the carriage slides right. Hover onto one thigh as the carriage slides towards the foot plate. Hover your knee up. My mistake. You slide to the risers since right and left are so irrelevant and slide to the foot plate twice. More. Exhale to SLA.
Inhale to slide and hover. Exhale to slide and hover. Now bring your hands on the diagonal with your arms close to the far shoulder rest, and now your whole body is on a diagonal towards the corner of the carriage. Exhale to slide. Inhale to return X. hail to slide, pressing your elbows into the carriage.
So your broad between your shoulder blades. No winging scapula. Here she said to herself like a prayer, turn to face the other diagonal. Now your hands are aiming to the new corner near the foot plate. Exhale to slide.
Good thing we prepared that medial hip glide. Inhale to hover. X hail to slot in. Hail to hover. Last two of these so maybe I wasn't so far off track. The first part of the exercise was the rest rotation and the second part are abdominals. But wait, there's more. Now you come to kneel on the first diagonal, so your foot plate knee is down and your shoulder rest foot is down.
The hand closest to the foot plate holds onto the close shoulder rest and the other hand reaches across. We'll take small pulses now, exhaling with each pulse as if you could move the carriage further and further down the track. Hugging your ribs with your inner thigh change so that the far hand comes to the same close shoulder rest. And continue this motion pulling with your bottom hand, pushing with the top hand and coaxing the carriage further and further down the track. Come up from here and change to the new diagonal. Now your foot plate leg has the foot on the ground, the foot plate hand reaches to the close shoulder, rest the other take sweats, left.
Exhale and as you pulse and slide the carriage further down the track, your nose makes its way. Co I will say actually it's the back of your brain that makes its way closer and closer and closer to the carriage. Come up from here and put the top hand on the close shoulder, wrist cause you see it would be such a bad cue to say bring your nose to the shoulder risks. Do we have enough forward head posture already? Yes we do. So just change that idea and say, Oh, where is the back of my brain? Here it comes closer and closer and closer.
And since the motor cortex, the Sara, well the cerebellum is located there, why not? We'll just get the back of the brain closer and closer and closer. Easy coming up from here now and let's change to the new side. That's the thing about this programming, this sequence, we don't really allow time to celebrate each exercise. It's like we're always onto the next event.
So here you are with the box close to the spring edge of the carriage. Your knees are close to this spring edge of the carriage. Also thread the needle. Reach across and pull with the close hand push with the far hand eyes glide opposite the direction in which the carriage is sliding. It's as if the long closest to the shoulder rest, it's is the lung closest to the foot plate was moving in the direction of the shoulder rest.
The top hand comes to the shoulder rest closest to you and you resume this motion. It's a thoracic rotation with lateral translation. Sure it is, but sometimes it's just good to give something in name. Now, bend both elbows and come on to bear weight on your forearms, your elbows as you slide towards the risers. One to foot plate hovers.
Footplate knee hovers and then come back in and hover the riser knee. Exhale to sly. Inhale to hover. X hail to slide. Inhale to hover. Once more broad between the shoulder blades.
Now come to the diagonal, the diagonal towards the risers. Exhale to slide away from the footplate. Inhale to come towards Dorsey flection of your foot will make the abdominal stronger. One more. Where is plantar flection of the foot? We'll make the uh, the back of the leg, the spine extensors. Also stronger change to the new diagonal.
Exhale to slide away. Inhale to hover. Exhale to sly. Inhale to hover. Last two of these pressure of the elbows into the carriage will help to buck up the serratus anterior. Now go to the first diagonal and the outside knee bends and the sole of your foot is on the box.
The foot play arm reaches across to the close shoulder. Rest the rise. Her hand is on the far shoulder rest. Exhale to lower, lowering the back of your brain and the back of your lungs closer and closer to the carriage. As the carriage makes its way down the track towards the risers. Come up from here. Change arms,
And if your arms get in the way, I suppose you could just duck unless that's interfering with your Mike, in which case just don't come up from here. Let's leave the box right where it is because we've got some jumping to do. Put the red spring on and finally it's time for quote regular jumps with knees. Vending, same pattern as we did before, but knees bending now because we've just worked, um, the thoracic area to give your arms, your wings, some lift, take your arms wide to the side, just adjusting your mic box. So arms are wide to the side and we have um, regular jumps with knees bending.
Now if the shoulder rests are not optimal for your arms, and this is an irritation to your shoulders, for heaven's sakes, puts your arms someplace else that is comfortable for you. The reason I suggest having the arms outstretched here is that it gives some less compression to your ribs than if you had your arms by your sides. I just have to work this Mike box a little bit more. Okay, here we go. In parallel,
When you have the idea, you can lead through the little finger side of your hand. That gives a little extra boost to your jumps. Internal rotation and up and up and up and up. It also helps me jump if I lift my eyebrows up. Now corners upright. Uplift down, right down. Lift up, left up, right down. Left down, right toes to the outside. Upright up, left down, right down, left.
Uplift up right down, left down, right heels to the outside. Upright. Uplift down, right down left and you can use up. Left up right. Stop. Multitasking. Oh my God. All right, and finish. Now the next time that we have the arms outstretched, we'll try different internal and external rotation to see what facilitates the lift. We're getting rid of this spring now and let's just put the box at the back of the frame so it'll be outs out away from us.
Okay? No, we're
As you bend both knees, slide the carriage and take the back of your brain in the direction of the carriage and come up from here. Knees extended. Now as you bend your knees, do that again, except that you turn your head, neck and eyes to look through. The shoulder rests at the bottom of the risers. Now take a new diagonal, the diagonal in the direction of the risers. Bending both knees, pulling with the close hand, pushing with the far hand sitting bones spread up and wide as you lower your chest bone towards the carriage and come up and turn head, neck and eyes, lowering their ear towards the carriage.
Turn to the new diagonal top of your head towards the corner of the carriage pulling with the close hand, pushing with the far hand bend and knees extended turn, thoracic shoulder girdle, head, neck and eyes. Stay on this side and bring your aunt, your inner thighs close together. Your feet close together. Chest bone is still above the space between the shoulder rests. Neither knee bends. Both knees are extended and we take off again, exhale to lower.
Press firmly with the big toe that's closest to the foot plate and come up and do this again with head, neck and eyes. Turning to look through the shoulder. Rest towards the risers. Change to the diagonal towards the risers. Exhale to lower. Inhale to come up in this second variation.
Both knees are extended and the motion occurs because your pelvis changed. Diagonals moves over the head of your femurs. Exhale to lower pulling with the close hand pushing with the far hand and you turn
Change to the diagonal towards the risers. Exhale to lower.
With and without rotation in all of these motions, I'm determined to finish the phrase here changed to the new diagonal. What's implied here is a rotation of the thoracic spine because your hands are on the shoulder rests that are moving at different vectors. Turn to the new diagonal with respect to the thorax, so this is encouraging thoracic mobility in these particular uh, vectors. Now we'll take advantage of that thoracic mobility in our jumping. It's one red spring again and this time arms wide to the side or towards the ceiling as it suits you. Amy. This time stay here.
This time we will do the parallel external and internal rotation with two feet and then we'll take single leg jumps, parallel eight, eight external rotation, eight eight internal rotation eight eight and then we'll finish with a celebration of the corners. Three variations. A game. Work with this. It's actually fun. It just takes some patients for the sequence. Okay. Now arms wide at a distance that serves you well from your ribs, probably not too far behind or that would make the lung splay off of the carriage. Don't do that too much load on the thoracolumbar junction, but perhaps your arms a little bit forward of center.
Here we go with eight jumps and up and up as if your wings could move you a loft. Five and six and seven end external rotation, bringing the tops of the backs of the inner thighs.
But I need a lot more room from my left side. Obviously sign going to be quiet and put that tongue right down. Left external rotation up and up. And it's Ziff your hands, your arms, the sides of your lungs could conduct you to go aloft. Left leg append to. And I need my tongue now down left.
Mm mm mm Hmm. Internal rotation. Up and two and three and five and six and seven, and here comes the left side. Append to. It's as if your abdominals could jump your foot up. Five and six. We're getting ready for the corners. Here we go.
Up right up. Lift down, right down, left uplift upright, Dan, lift down right he toes to the outside. Up, right up, left down, right down, left up, left up, right down, left down, right heels to the outside. Upright, up, left down, right down left. He'll sit the outside up, left up right down, left down right and finish.
Now we're going to combine the thoracic rotation with our spider woman variation. You'll need your foot pad down close to the Springs. Your supporting leg is in line with the access of the shoulder rests. You have a foot on the foot pad and two hands on the shoulder rests exactly bend your lifted leg as you exhale, you slide the carriage down the track, coaxing your whole torso closer to the carriage and then come back in. In. In all cases. It's a direct lowering of your torso, but not a rotation as we did before. We have two more of these with the intention of keeping both elbows extended, the intention of both elbows extended.
Now we'll take four more allowing the top elbow, the leading elbow to bend, and then both elbows straighten as you come home. Excellent Ben and come up coaxing in all cases a little bit more length of the fan of the abductors from the pubis area towards your inner femur. Easy on the dismount now and we'll change to the next side. Oh, so you're supporting foot is in line with the shoulder rests. The clothes, the foot plate hand is on the close shoulder rest.
The riser hand is on the far shoulder rest and your foot is somewhere that suits you. Starting with your sealing leg bent. Exhale, both elbows extended as you coax the carriage down the track and return X hail to lower your whole torso and come up. We have just two more of these with elbows extended. She said to herself, trying not to cheat so early in the game.
You will be able, she said, shamelessly leading the witness to bring your whole torso even closer to the carriage coaxing, a little bit mobility, little bit more mobility through your thoracic area. Last one of these coming up and through your shoulder curdle area. Now coming down from here, it's time for a blue spring off with the yellow on with the blue and let's go for our knee pads now. So you'll have a calm some knee pads on the carriage of quite close to the Springs. In this case, you're going to have your knees very close to the spring
Your hands are on the shoulder rests and Amy, this is our strike, a match move in which your heels kick. Your sitting bones will take eight on both legs, eight alternating and eight each. Here we go and brush and suspend and suspend. Getting off the tarmac as quick as you can. Five in one leg at a time. You could have the tip of your tongue to the roof of your mouth behind your upper teeth and your gaze towards the level of the top of the risers.
That will encourage spine extension one leg at a time, or at least it will discourage upper thoracic flection, which is probably a better way of putting it as if your heel could kick your sitting bone and your abdominals. Jump up as your shoulder blades away from your ears, other leg and two hand and 3m that for pressing into the little finger side of your hand in order to give a better support for your shoulder blades on your thoracic wall. Good for us. Now let's go to [inaudible] bridging with rotation. So let's put three red Springs at the top, three red Springs, no more blue. And in this case, the headdress needs to be down.
So down with the head rest and we'll slide on into place. Have your, um, let's see. Have the foot, which is closest to me, so it'll be in contact with the foot plate and my foot that's closest to the ocean. Then the other foot hooks around, behind inner inner, uh, knees close to each other. As you inhale, the uh, back foot leg falls open to the side without sliding the carriage back. As you exhale, it's a bridge with rotation. So the um foot that's standing on the foot plate that need drives directly towards the ceiling.
The other leg is encouraging rotation of your pelvis and your lumbar spine towards the opening leg while you are up. Stay up and translate towards the side and back. Translate towards the opening leg. You are translating coaxing the whole pelvis to move diagonally up in the diagonal direction of the opening leg, not just the lateral translation, but it has a diagonal vector while you are up, cease the translation and puts a whole metatarsal head. The souls of your toes on the foot plate.
Push back scissoring your inner thighs towards each other and come forth and push back. As you know, it's very bad manners in Pilates and bad for your neck to turn your head back and eyes to look at the camera in order to establish rapport with the viewers. So I'll be looking at the ceiling for more of these. Anyway, you get the story. Don't turn your head to look at the monitor. You look straight up at the ceiling because your shoulder girdle isn't turning, but your pelvis, your lumbar and lower thoracic are come in. Close the open leg to the lifted leg and return the new side awaits the front of your heel in contact with the foot plate in line with your sitting bone. Cross one foot behind as if your ankle could, your inner ankles could snuggle up to each other as you inhale, one knee falls open. Exhale, lift, turn and rotate.
Keeping the carriage at home translate diagonally up in the direction of the side of the opening leg. It's as if you get a little bit of a boost from your lower gluteals. Always a good place to turn when you need a boost. That's what that's actually why we're doing this. There is a method to this seeming madness. It's not just around them.
Don't get yourself twice more up in the dye that will connect your low front ribs. This is your pelvis, translating, not your thoracolumbar junction puffing. Close your outer thigh to your inner thigh or the outer leg to the inner leg and come down. Now I've got so fascinated with my own queuing that I forgot to push back. So come up again. My mistake. Here we go. From the sole of your metatarsal is pushing out and increase the rotation spiral towards the uh, opening leg as
So like a corkscrew, you encourage the rotation to continue for more of these getting a boost from your lower glutes. Last two, close D, rotate and land. It's time. Now for sideline jumps, we need one blue spring and no more red. So off with the red on with the blue. You know, it's just a shame that we don't get a chance during this exercise to a stop and celebrate our accomplishments. But we're on the clock. We're driving here.
So come to lie on your side.
And here we go. In parallel, turned out, turned in eight each and append and two and your foot stays right in line with your sitting bone. Now turning out into external rotation, this top ilium, the ASI ES needs a little bit more encouragement to stay forward and the knee drives over your third toe internal rotation. Now be quick to leave the jump board as if you're being goosed from your sitting bone. Now we're going to take the I lied before, but I'll fix it later. So now we're brushing into hip extension [inaudible] as if the motion of your arm could encourage hip extension in external rotation.
Now, internal rotation reaching low and long on the diagonal, drawing your low pubic, your pubic bone towards your XY Foyt process. And up now the new side of weights. I've been teaching long enough to know that when you make a mistake, you should own it. Don't cover it up. Don't ignore it. Don't think me. Make a mistake. Oh no, I made a mistake. I said your first four and then I completely ignored it.
So your first eight, your foot is in line with your hip joint. The second eight you can dress it up with your arms and add hip extension. Okay, I came clean on that one. Now when you sit on the carriage slide, both sitting bones off the edge and come to lie on your side, we'll start with your hand on the shoulder rest or on the ilium as you like. Here we go up and and three and four, five and six. And lift up your ribs and lift up your waist.
External rotation. Append to be quick to leave the jump board. And now for internal rotation, encourage the ceiling ilium, the ASI ES to stay forward and lift up your ribs and lift up your waist. Now we'll take the next state brushing into hip extension and you can dress it up with your arm work.
So let's change our Springs. Let's go to two red Springs off with the blue and on with two reds. Now the cords that you had prepared at the very beginning of our class, they are ready for you now so you can either put the chords, Amy goes, Amy's go around the shoulder rests mine. Go around the post and come to lie on your back and take the loops on the souls of your feet and take arms wide to the side. Hips are an external rotation with your heels touching at the midline.
As you exhale, the carriage slides towards the foot plate. As you inhale, sitting bones towards the ceiling, bringing your hands in the direction of your feet. Lift your sitting bones higher
Stang on the carriage as long as possible as you roll up sitting bones towards the ceiling with internal rotation of the legs. Bring your hands in the direction of your feet. Bend your knees, knees, touch, feet wide. Exhale to roll down in internal rotation. Push out big toes touching. Now all toes, both knees. Aim to the right arms wide pike roll up long on the, on the side of the waist. Uh, that's closest to the ocean.
Bend your knees over the opposite shoulder, bringing your hands towards the loops. Roll down your spine. All toes, both knees to the same side. Arms open wide pipe. Slide the carriage in time. The movement of your hands towards your feet along with lumbar thoracic fluxion.
Lift your sitting bones a little bit higher as your knees bend and roll down your spine and push out. Now heels together. Legs in external rotation. Rest your arms at your sides as the carrot slides. Bend your left knee and slide your left heel along the back of your right leg so your right foot is towards the ceiling. Keeping your left knee bent. Open both legs to the side, keeping your left heel close to your sitting bone.
Push with your left heel. Meet it with the right heel at the mid line. Internally rotate. Turn your toes in your knees and bend your right knee and slide your right thigh along the carriage. So the sole of your right foot comes closer to earth.
Open your left leg to the side and pull in with your left leg. As you've take external rotation. Bend your right knee, slide your right heel along the back of your left leg, keeping your right knee bent, both legs open wide to the side from your right sitting bone to your heel. Push to the midline. Match it with your left heel internally rotate. And as the carriage slides, bend left knee.
So your left foot goes in the direction of the floor. Open your right leg and pull in. Now we're going to make this a bit more poetic, um, as if you were, um, painting clouds. So we'll have more of a rhythmical flow to this starting with your left leg bending. So you slide the carriage in. One, two, three. Open both legs, two to three, push to the midline. Three to three, turn in, four to three over the edge and pull in other side. Glide in.
I'm making a continue us flow from one position to the next. Turn in aim to the floor. The straight lifted leg takes a loop to this side, an arc to the side and pulls in. And we'll have two more of these. Three, two, two, three, three, two, three turn in full, two, three open. Then five close in, six your own private waltz before it's time to jump again.
Okay. When connecting the dots as they say in open abduction and close. Now off with these loops, let's put the loops around the risers again and let's get ready for quad. Repaired jumps for the quadriped pit jumps, we're going to need one blue spring, so on with one blue off with two red, no more of those. We're going to need the mats for the knees. So place them not right beside the foot, this foot bar, but more in the center of the carriage with the [inaudible] so that you can have your knees in the center of the carriage stand on the, you know, we can take either knee Amy.
So after my right left symphony of the last queuing, I'm determined not just to say right and left anymore. Best laid plans for new year's resolutions. Bring your other heel to the top of the plate. Now we're going to take eight jumps in parallel. Eight turned out, eight turned in. Here we go, UPenn and two and three and tip of your tongue to the roof of your mouth, behind your upper teeth. Eyes up at riser level, external rotation.
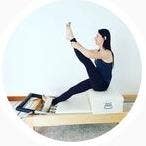
Draw your low front ribs up to your spine, broad between the shoulder blades, seven end and eight finish. Now it's time for standing. So for this we'll get rid of our knee pads, stow them, and for standing you have options. I would recommend a blue or a yellow. I'm going to work with a yellow Amy with a blue on the hook, I'll have a yellow on the post.
Now you'll adjust your cord length so that the D-ring can go on top of the shoulder rest. So give a gentle tug until the D ring is in place. And then make sure to secure your cord into the cleat so that when you're standing you will be secure. Now not only are Amy and I using different Springs, but I'm going to further differentiate such that I will use the magic circle. The magic circle helps to keep you honest in making sure that the, that the hands are in line with the xiphoid process with the sternum.
Amy's more advanced in this exercise than I, so she will navigate without a ring. So the magic circle is optional. With or without. Now we're going to face the diagonal towards the shoulder rest. So for that reason, you'll take the
I'll put the loop around the magic circle and we'll both bend both knees. So turn to look over the shoulder that belongs to the back foot. And as you inhale, extend both knees and turn to look over the shoulder of the front foot. Inhale to bend. X hail to come up. Now do this again, but don't turn your head. Keep your head, neck and eyes aiming where your toes are pointing.
It says if the light bulb on the top of your head would get closer and closer and closer to the ceiling, now turn your head opposite where the ring is aiming. So you look opposite and then you turn opposite. So it's actually the thoracic area, ribs, shoulders, head, neck, and eyes are looking opposite where the ring or your hands are going. Keep the same loop and come to stand in the sagittal plane on the carriage so that you're lined up between the Springs and the shoulder. Rest the magic circle if you have it belongs at the bottom of your ribs.
Turn, um, pelvis, ribs, shoulders, neck, head and eyes. To look over the shoulder. I'm closest to the risers and then turn to look over the shoulder closest to the foot bar. Now, yes, your pelvis and lumbar and the rest of your spine are turning. However your knees are steadfast in their ability to track over your second and third toes. Second variation. Keep your gaze, nose, head and gaze where your toes are pointing. So you turn your shoulder girdle, ribs, pelvis, and spine. Turn where your hands are going, but your head, neck and eyes don't turn.
Now you look over opposite where your hands are bending both knees and
Turn everything towards the risers, steering your knee caps directly forward. Now we'll take an inhale to rotate. Exhale to rotate the other direction.
And exhale, aim your gaze where your toes are pointing. It took 15 exercises, but finally we get to be together here. Eyes to eyes, nose to nose. It's fantastic with your shoulder girdle. Turning your gaze opposite where your hands arms are going in.
Hail to rotate. Exhale to return.
So we're onto the second side now and we're well organized to bending both knees to look over the shoulder closest to the risers. As you inhale, you climb up the own spiral staircase of your spine. Exhale to come down in hail to rotate.
Always tracking your hip, knee, ankle, and foot in the correct sagittal alignment. Turn your gaze opposite where your hands and or the ring are. I butchered that phrase opposite where the hand or ring is [inaudible] or something. [inaudible] now keep the current loop and turn to the sagittal alignment so your feet are perpendicular to the Springs. Place the hands in line with the bottom of your XY foot.
Turn everything in the direction of the foot plate as you rotate and come down. Inhale to rotate head, neck and eyes. Looking where your toes are pointing.
The loop that's in the front of you and change your orientation, your diag, and all to the diagonal, the corner of the carriage closest to the Springs. Bend both knees, turn pelvis, ribs, shoulders, neck, head and eyes towards the risers. As you inhale, turn towards the foot play
Easy. Now let's put this loop down. Careful on your dismount. Amy, a pleasure to be with you. Thank you too. Thank you everybody. Thank you for being with us at [inaudible] anytime. We'd love to hear from you. Thank you everyone. Bye. Bye.
Comments


You need to be a subscriber to post a comment.
Please Log In or Create an Account to start your free trial.
