Description
About This Video
Transcript
Read Full Transcript
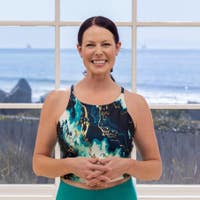
Hi, I'm Erin Wilson, thank you so much for joining me for a mat class today. This is the first class in a series of six, and today we'll be focusing on the Pilates principle of centering, or finding your center. So make your way down to the mat, and we'll get started. You might find that having a thick towel or a blanket will make some of the exercises more accessible for you today. So have that close by and ready to go.
We'll begin on our back, so make your way down there. And without being too specific, we're gonna place our feet, knees bent, but just placing our feet and legs in a comfortable position, whatever that feels like for you in this moment. And just letting our arms rest by our sides. Feel the floor, feel the mat, feel what's underneath you, and take some inventory. So if you notice that your head might be tilting back, or there's a straining sensation in your neck, now might be a great time to place that towel or that blanket behind your head.
Notice where your upper back is on the floor, and if you can feel it. Notice where your pelvis is on the floor. And just noticing if there is a little bit of space underneath the lower back or if there isn't. We're just taking notes of what we feel happening in the way that we would naturally lay down here. Starting with some abdominal activation exercises, we're gonna take both hands, and we're gonna try to find the front of our pelvic bones here.
So once you know where they're at, try to figure out where the middle or the heel of your hand is. We're gonna place them right on those two pelvic bones, with the fingers pointing down towards the pubic bone. Let them rest there. We're not pushing down, or doing anything specific. Take some deep breaths, and just feel if there's expansion around your fingers, around your hands with your inhale.
And as you exhale, notice if the hands and the fingers can slide closer together. Do it again. So we breathe in, we feel if the hands and fingers can sense an opening sensation, they're sliding away from each other. And then as we exhale, can we feel them sliding towards each other. As this is happening, you hopefully notice your pelvis doing a bit of a tucking motion, or the lower part of your back feeling the floor more as you exhale, and the pelvis tilting in a downward motion towards your feet, or the lower back elevating a bit off the floor with your inhale.
Couple more times. So we're just figuring out where our pelvic musculature is, where the deep abdominal muscles lie within our pelvis. From here we're gonna transfer our hands closer towards the sides of our ribcage. So, if you're like me, you might have to go around the ladies, and we will figure out where the sides of our ribs are, and we'll put our hands in the same position. So nice spread fingers.
Nice and wide on the ribs here. As you take your breaths in, see if you can feel the ribs expanding outwards into your hands, and as we exhale picture the fingers in your hands sliding towards each other, or the ribs coming together. And we'll do that several times in a row. So at your own pace. There's no right or wrong here with the breath, as long as you're breathing.
And then as we continue to exhale, and continue to feel the hands sliding towards each other, can we picture the ribs not only coming together more as we exhale, but also sliding down towards our pelvic bones, and maybe the pelvic bones sliding up towards the rib cage. And then as we breathe in again, all of those bone masses open and expand away from each other. And as we exhale the pelvic bones, our ribs, everything slides together and closer. Just give yourself one more long breath in, and one more long breath out. And we'll pause right there.
Taking one hand, we're gonna try to place the fingers only, so just this section, we're not trying to put our whole hand underneath the side of our lower back. And we're gonna see if we can figure out where that space is between the bottom of our ribs, and the top of that pelvic bone. It might be kind of short, it is for me personally. I'm gonna try to place my fingers there. Now if shoulder flexibility does not allow you to do this, take that hand instead, and try to find the space in between the base of your ribs and the top of that pelvic bone in the stomach region instead.
So we have our hand where it's comfortable for us, and as we go to take our next breath out, we're gonna try to picture pulling that side of our back, that side of our abdominal musculature into our fingers, feel the bones moving here. And then as we inhale we're gonna try to lift that side of our back away from our fingers. It might not actually disconnect, but it's the idea. So we'll try that a few times. So the breath out, trying to pull those stomach muscles there, those abdominal muscles deeper into our fingers.
And then as we inhale we're gonna expand our abdominals, and feel the tension release away from the fingers. And just do that one more time on this side, so trying to figure out some activation into the obliques. We're gonna use this to start moving our legs here in just a moment. So we'll take our hand out from that side, let it rest where it's comfortable. Same thing on the other side.
So feel for where that space is underneath the side of your lower back, just the fingers. This might be the shoulder that doesn't wanna do it in your body, and that's okay. Find the side of your waist instead. And you wanna imagine pulling that section of your abdominal musculature down into the floor. So we'll do a few on this side.
Keep the breath moving. So we're focusing again on the inhalation, releasing the pressure off of our fingers, and the exhalation, trying to feel those muscles drawing down into our fingers. And of course the pelvis is definitely moving as we do that. One more breath in at your pace. One more breath out to feel that connection.
And we're gonna go ahead and add on some leg movement. So we can slide that hand out. We'll go back to the first hand again, and now we might position our legs a bit differently. So we're gonna walk our feet somewhat closer together, they might already be there. And we're looking for about a fist width apart.
For most of us, that's about where our sitting bones distance is, but feel free to go a little further apart, or even narrower if you need to do that for yourself. Feet done have to be that close to your glutes. Make sure it feels comfortable for your knee joints. So we take the first hand, we find that space. As you go to breath out, we're gonna connect those abdominal muscles into our fingers, and simultaneously pick that leg up.
The shape of the leg stays the same. Breathe in here. As we exhale, deepen that connection into your fingers, and place the leg down. Inhale, release, exhale as we find the finger connection. With the abdominals we pull the leg back up.
Inhale here. Exhale. Again, we deepen that connection as we place the foot down. Inhale again. You gotta breathe at some point, right? (laughing) exhale, we pull down first.
We pull that leg up. I find that if we're constantly (grunting) trying to really grab with those abdominal muscles, place the leg down again, we find ourselves not really breathing in at all anymore. We're either holding the exhale or we're holding our breath. But slide that hand out, we'll go to the other side. Same idea.
Take a breath in. As we exhale, connect to those abdominal muscles, into your fingers. Pick that leg up. We're imaging the leg is light here. Inhale at the top.
We exhale, we keep that connection in those abdominals on that side as we place it down. Breath then releases it. Exhaling, again, find your fingers, feel pressure there, pulling the leg up. Breathe again. Find that connection.
Pulling the leg down. And we're pretending as if our abdominals are moving our legs, but that's not physically happening. Take a breath in at the top one more time without losing the connection that you feel on your fingers. Place the foot down. And we'll release right there.
So if possible we're gonna place both hands, all the fingers underneath the sides of our low back. If that doesn't work, we'll go onto the sides of our stomach here instead. Breathe in. As we exhale, we're gonna again find those two sides, pull the abdominal muscles into the fingers. Lift one leg up.
Breathe. As we place it down, we're gonna try to pick the other leg up. So we can inhale here at the top, exhale as we switch the legs. Inhale here again, exhale to switch the legs. So now we're putting a lot of force in the pelvis, and we might notice little bit of tension happening in the neck area.
So our pelvis is the mothership of the body. Whenever there's forces pulling against it, or wherever it wants to move, everybody kind of follows that lead. We'll do one more on each side, trying to maintain the connection that we're feeling of our lower back on the mat, or on our fingers. And when you think you're even side to side, place both feet down, relax everything there, and we'll rest our arms next to us. Coming into some bridging positions here, you might wanna slide your feet in closer to your glutes.
And if you have together hip flexors, or a tighter lower back, you might benefit from having the feet slightly wider for these first few repetitions. If you're not sure if that's the case yet, stay with the narrower distance, the fist width apart, and you'll be able to tell after the first one usually. So we take our next deep breath in, as we exhale we gather all of the abdominal muscles, and we scoop them into our lower back so the lower back finds the floor. This time we're gonna peel our pelvis away from the ground, and as soon as it comes off of the floor, we wanna try to hone in on the glute muscles back here. So they belong to you, feel free to place your hands on them if that's comfortable.
And just notice if there's a tone that you sense in them. If there isn't, you might be up too high. If all we sense are the lower back muscles here, I might wanna bring my upper body down a bit, try to keep my pelvis higher than my chest, and hone in more on the gluteal muscles. Deep breath here at the top, as we go to breathe out, picture the ribs sliding down towards your pelvis. Stomach muscles are sinking down into our lower back, and the glutes are gonna try to be the last things that touch the floor.
The breath in sends the tailbone towards our feet, elevates the lower back away from the ground, into that neutral curve. And we do it again. So breathing out, we scoop into the abdominal muscles first. We stand firmly into both feet, peeling our pelvis and our spine away from the floor. The highest, you could pause at the top of your shoulders, or the backs of your shoulders.
Deep breath here at the top. And, again, as we exhale, picture the chest sinking down in between your shoulder blades. The abdominal muscles, all the organs sinking down into your lower back, and eventually our pelvis is the last thing that finds the mat. Breathing in. And we'll just do that two more times.
So other things we can test out or recognize that might be happening in our bodies, or if we don't have even weight in our feet, if we're feeling like we're favoring one foot over the other. And then finding some pressure in the middle of our heels, and on the tips of our big toes so we maintain a sense of center in the inner thighs and through the center of our bodies. We're coming down again, breathing in at the bottom. We'll make our way up one more time. So it starts by activating those deep abdominal muscles before we even put pressure in our feet.
And then honing in on the glutes and the backs of our legs to really hold us up here at the top of the movement. Continue to breathe. This is another one where it's easy just to hold your breath, or to forget to inhale much at all. And then we get to the bottom, we'll release right there. Walking our feet and legs in all the way together.
If you know that you have, again, tight hip flexors, tight lower back, feel free to scoo, inch worm the feet down further away from your pelvis. And we're gonna start getting into some upper body activation exercises here, the upper abdominal region. So taking our hands, interlacing our fingers, we're gonna slide them behind the back of our head. And we're gonna see if we can feel the base of our skull with our thumbs. Once you know where that is, try to dig your thumbs a bit into those areas, and we just wanna be able to see our elbows out here in our peripheral vision.
Imagine the shoulder blades are wide behind you. If the elbows are too wide to begin with, we're telling our bodies we're going into extension, and we're actually gonna try to do the opposite, right. Going to flexion. So we wanna bring those shoulder blades wide, and give that upper part of our back some space. Squeezing the inner thighs together, as we breathe out, pull up on the base of your skull with your thumbs, and curl your head and shoulders off of the floor, looking just beyond the knees here.
Take another breath in, and as we go to exhale, can we roll the upper part of our back, and the back of our neck to the floor again, just like we did with the bridge. So it's just the opposite direction, right? We did pelvic curls a moment ago, now we're doing upper back curls. Inhaling, again, as we exhale slide the thumbs up the base of your skull, curling the upper back off the floor. Breathing in here.
As we exhale, can we think of each individual vertebrae in the upper back lowering down before the back of our hands meet the ground. Breathing in. Keep this motion going. Gonna try to give us other ideas, things that might be helpful to get more out of these exercises. So as we're here at the top, when we go to breathe out, can we think of squeezing or pulling these lower abdominal muscles down into our lower back as well.
Straight rolling your upper spine down to the floor. And we'll give ourselves a couple more. The more that you press your thumbs into the base of your skull, that can help relieve some neck tension, and it can also help us activate the muscles around the shoulders better. We'll give ourselves one more, and then we'll add on with some rotational movement. So upper back, mid back, tips of the shoulder blades at the most, and we're trying to keep our pelvis relatively still as this is happening.
Adding on with some rotation. So as we bring our head and chest up this time, we're gonna pick one shoulder blade off of the floor, and try to bring that whole side of our shoulder towards the opposite hip. Lower yourself back down. We'll stay on that side a few times. So thumbs slide up the back of our skull.
Opposite shoulder blade leaves the floor. And if it doesn't that's cool, it'll be time, give it a minute. Lower yourself back down. Just think about it. We'll do two more to the side.
Rotate. And whatever side we're going towards, think of pressing that leg more actively into the opposite leg. So I'm rotating to my right, I'm gonna press my right knee more into my left knee, and come back to the center again. Take a moment, reorganize your arms if you need to. And we'll take it to the other side.
So we slide the thumbs back along the back of our skull. We pick ourselves up, we rotate the other way. Opposite shoulder blade is trying to leave the floor. And we roll back down. Again, we pick our head and chest up, rotate with it, and lower everything down.
Find the side of the leg there. So we wanna think of pushing this leg now against the other leg, and that helps us stabilize our pelvis and our lower back's position, but it also helps us connect a bit deeper into the obliques, 'cause there is a connection that our adductor muscles have to our oblique muscles. That's our last one. Find the center again. We're gonna let go of our head, and we're gonna slide one of our legs down on the floor.
So picking up the opposite leg, hands are gonna either interlace again behind it, or feel free just to hold on wherever it's comfortable. And we're gonna go into a version of the roll up. So as we press our leg into our hands, naturally that's gonna pick your head and chest up, and then we wanna keep pressing our leg into our hands so that we can continue to pick ourselves up. We're gonna pause just behind the tailbone here, so remaining in spinal flexion. And as we roll down, press that leg into your hands, but pull your hands into the leg.
And we're trying to smooth the ride out all the way to the back of our head. Breathe in here. So we breathe out. We start pressing that leg into our hands. We try to let it help us get up.
There might be a moment there where you have to rock forward and back a few times, so let that happen. The roll up is a challenging exercise for many reasons, and this is just one variation that might make it more successful for you. One more time pressing the leg, find that sticky spot, we all have it in our back. Rock a couple of times through it until you can get up from there. And even on the way down, it might feel like you collapse a little bit here and there, and that's all right, we're just noticing what's good for us, and what needs a little bit more help.
So taking that foot down to the floor, we're gonna change 'em out. Grabbing behind the back of the thigh. Same thing. So we start pressing the leg into our hands. That's gonna help pick our head and chest up.
And then we continue to do that until we can roll up just behind the tailbone. And then as we roll back, the gaze is straight out in front of us until we can't see our leg anymore, and then we bring our leg with us as we place our head down. We go again. Curling our head and chest up, pushing the leg into our hands. We still scoot back in the abdominals here, lifting, and then once again pressing into our hands more, trying to match that resistance the whole way through.
Rock forward and back a few times, do what you gotta do. It's okay. Hopefully there will be thousands more roll ups in your future. This doesn't have to be the back or break one today. And we'll come back.
Now we are gonna roll up one more time just to sit up. This leg gets an extra one. And then once we're sitting, we're gonna go right into the rolling back exercise, or rolling like a ball. So the nicest way to set ourselves up for this one, especially if you have a tighter lower back, like I do, is to place our hands behind the backs of our knees before we pick our feet up. There are other options, hands on the shins and the ankles, we'll get into those later on.
So we wanna think about where we ended. So we were just behind our tailbones. We're in a little bit of a tuck of the pelvis, stomach muscles are still scooping back, and then without changing anything we've got nice wide elbows here so that our shoulder blades can stay apart. We're gonna lift our feet off the floor, and just figure out where our balance is. Okay, from here, take your eyes down towards your pelvis, and they're just gonna stay there the whole time.
As we're ready to breathe in, we're gonna knock ourselves off balance, and we're gonna come right back up, kind of, where we started from. And we'll try it again. So as we roll back, we wanna keep scooping those lower abdominal muscles deeper into our lower back, and we're picturing our tailbone curling up to the ceiling as soon as our pelvis comes off the floor. And if you don't land every one that's okay. Other things that might be helpful, pulling up on the backs of your knees the entire time, whether you're rolling back, but especially as we come up, that helps put the breaks on.
Give yourself one more. Coming back up. And once we're here we're gonna place one foot down on the floor, slide that leg long, and we're going back to the two hands behind the other leg again. So start pressing this thigh into your hands. We're gonna try to roll back with control.
Moving through the center of our body here. And then once our hand lands, this might be another moment, we're about to get into some stretches for our hamstring muscle group here, the back of the leg, but if you have tight hamstrings, you might feel a lot of tugging on the neck area. So feel free to put a pillow behind you there, or your towel or your blanket. So continuing to press this thigh into our hands, we're gonna keep the foot relaxed, and just try to extend our knee. See where it's willing to go, and then let it bend back down again.
So we keep pressing our thigh into our hand as we're starting to straighten our knee. And what that's helping us do is maintain a nice stable pelvic position, 'cause a lot of times we trick ourselves into thinking I'm stretching my leg a lot further than I actually am because the whole pelvic bone is either hiking up to the shoulder, or my butt's lifting up off the floor, right? Lots of ways we can give ourselves the illusion that "Yeah, I'm getting really stretchy here." Like "Eh, not necessarily." One more time we're gonna hold the straight leg there. And then we're gonna take this right into another stretch. So take that knee down, and as we extend it again we're gonna attempt to flex our ankle this time.
Ooh, that's more fun. Bend the knee again, relax your foot, and try that one more time. As the knee is extending, try to pull the whole forefoot back towards your knee, dorsiflexion, and let it relax as you bend your knee. Okay, taking this foot to the ground, slide it away from you, we'll grab onto the back of our other leg instead. So same idea, pressing that thigh into our hands, keeping the foot relaxed, and attempting to straighten this leg.
And then just bend and let it relax. The pressure of the leg on the hands is always there. Stretching it up again. If the knee is not getting perfectly straight today that is okay. You've got a lot of time, hopefully, to get more flexible in our bodies.
Start adding on the ankle motion, the foot motion, flexing it back, and then relaxing our foot as we bend. And we'll give ourselves one more. So extending through the knee as much as it's willing to give us today, flexing the foot back as much as it's willing to give us today, and relaxing as we place the leg down. Now we'll stay on this leg, go ahead and extend it up again. We'll keep the foot relaxed.
We're gonna open our arms out to a T on the floor. Palms can be up, or palms can be down. We're gonna try to cross this leg over the center line of the body. If it's your left leg it's going to the right, if it's your right leg it's going to the left. From there we're gonna take it down towards that opposite ankle.
We're gonna swing it out to the side, and pick it right back up. Now the other option here is to do this with a slight bend in the knee. We're trying to maintain a pelvic position, and trying to feel stable, so here's where all of that centering that we did in the very beginning, honing in on all of these deep abdominal muscles, can be very helpful to help stabilize our trunk and pelvis. We'll give ourselves one more circle this way, find the ceiling and pause right there. We'll go ahead and reverse it.
So as the leg goes out to the side, you wanna try to keep this opposite pelvic bone heavy on the floor. So that's where the finger exercise underneath our lower back, those are the muscles you're now trying to hone in on, to stabilize this side of the body, much like we did a moment ago. And pick it up, we'll give ourselves one more circle. And as we finish that last one, let the knee bend, and we'll go ahead and slide this leg down on the floor. Grab behind the back of the first leg again.
It's always nice to set ourselves up first before just straightening the leg up on its own. So we're pressing that thigh into our hands, we're extending the leg up. The other idea you could have here is to bend the other leg. This might make the ease happen more in your hip joint. If we don't need that, we'll keep the other leg down, letting go of this leg when it feels like it's ready for it, and now we cross over the center line of the body with this guy.
Bring it down, bring it around and pick it back up. So we are pretending that our abdominal muscles are moving our leg in the air. Everything is originating from the center of our bodies. The bottom leg is reaching long, there's energy everywhere, and we'll get one more in this direction. We'll pause at the top.
Go ahead and reverse. Same idea. But, again, because we're going the opposite way, we're taking leg out to the side first, can we hone in on the side of our lower back, on the opposite side again. And there's other versions of this exercise, and we'll get into those later on as well. Last one here.
Once the leg is up, we bend the knee, we grab behind the back of it, we give ourselves one more assisted roll up, press that thigh into our hands, roll ourselves up, and we'll be getting into the next exercise, which is the spine stretch. So this exercise can be very challenging for a number of different reasons, and this may be where you want to sit on your towels or on your blanket. So I'm gonna go ahead and sit on mine, organize yourself to sit on yours. And if you're feeling pretty flexible in your body, pretty flexible in the hamstrings, and your back, you might not need to sit up on anything at all. So we're gonna take our feet and legs about the width of our mat.
This is another one that's not necessarily a right or wrong, if you feel like you need to go a little further apart, that might be better for you as well. So if we can we're going about the width of our mat here. Hands are gonna rest on our legs. I have strange long arms, so even with towels under my butt I can still push down on the floor. But if that's not accessible for you, you can take your hands on your legs, pull into them, and try to help yourself sit up taller.
So I'm gonna use my hands out here, push down, and just really try to get up on our sit bones. Okay, we're gonna leave the feet relaxed for now, we don't need anything extra gripping in the leg muscles for now. Sitting like this is hard enough in itself. So keeping our hands on our legs for now. Taking a deep breath in, we're picturing there's a wall behind us, and the first thing that's gonna leave the wall is the back of our head, so as we tilt the chin down we're gonna open up the back of our neck area, and then from there, as we start to curl the rest of our upper back off of the wall, we're doing the chest lift exercise that we just did a few minutes ago.
Now the mid back is gonna peel away from the wall. Our hands are just continuing to slide down our legs, and the last thing that's remaining against the wall is the lowest part of our back. So the exercise is called spine stretch 'cause we're stretching our spine, right? (laughing) but it's so much more than that. There's that internal lift from the abdominal muscles that we wanna try to maintain, so it's almost as if we're trying to tuck our abdominals up and under our ribs. As we take our next breath out, try to picture the mid part of the back finding the wall first, the upper back finding the wall next.
Don't forget about the back of your neck. We tend to skip over that section. And then eventually the back of our head finds the wall. All right, if the wall idea's working for you, great. If not, we'll try something else.
Deep breath in again. As we breathe out, we bring the chin down. Feel the back of the neck lengthen first. Okay, as the hands slide forward, we picture what we did before, let the chest fall in between the shoulder blades. So that area in between the shoulder blades is opening.
Picture the front ribs narrowing together, and the back ribs really widening. And the lowest part of our abdominals, that low pelvic area, really trying to scoop into our lower back. Use that low scoop to start the process of sitting up again. Hands sliding along our legs. Don't forget about the back of your neck, it's that little double chin thing that we're looking for.
It's the only time a double chin's okay. Bring the head up. (laughing) Or the only time we probably want a double chin. And we'll try that one more time. So double chin it. Hello.
You should be able to talk like this. If you're really double chinning it your voice would sound like this. And then we keep going from there. And we keep rounding. And all of this is happening because the abdominal muscles are staying very active.
And the nice thing is you might get a little further every time because now we've acclimated to the exercise. The brain's telling the body how to figure things out. We're coming up from one more time, and then once we're here we'll go ahead and pause. We're gonna bring our legs closer together for the spine twist. So the closer the legs come, usually the tighter things feel, not the looser.
So this is where, again, sitting up on something can be very helpful for this exercise. The other thing we're gonna do today, if we need the help, is to bend our knees. So we'll flex our feet back, we'll keep the legs close together. Feel free to have a little bit of space if that feels better for you. And then the only thing that's really important in this exercise, or the most important thing rather, is right up on the sit bones, so we're trying to be up and over our pelvis, 'cause that's gonna send our spine in a more lifted position.
Okay, arms are either gonna be out to the sides, this is one way we can try. Otherwise, I'm gonna show our hands are behind our head, thumbs are at the base of our skull, and the elbows are once again in our periphery. So we wanna picture pulling up the back of our head a bit, and pulling up our ribs out of our pelvis. As we breathe out, the legs stay still, and we're just rotating from the mid upper part of the body, and as we breathe in again, we're gonna come back to the center. So this could be an exhale as we rotate, we're going the other way now, and it can be an inhale as we find the center.
Now if we're smart, which we are, we probably went to our less tight side first. I love going to my right. Find your way back to the middle. I don't like going to my left so much. So you might find that it's more difficult or you feel tighter in your back or around your ribs going to one side.
We all have one side we prefer to rotate towards, just the way it is. But it's great 'cause we get to break it down sometimes and really recognize that's happening in our bodies so that we can try to get better mobility where we're tight. Find the center again. Now if you did have a tighter side, we're just gonna do a couple extra to that side. So as you breathe out, lift up taller as you turn that way, and then inhale is gonna bring you back to the center.
Go that way again. Lift up taller as you turn, and the inhale finds you back to the center. Legs are squeezing together. They should be getting a little fatigued here, it's hard to sit up like this. Find your way back to the center.
We're gonna let go of our head, let the legs relax, and just get lazy here for a few moments. Stretch it out, and release all of that tension in our back. All right, coming off of our towels or the blanket. You might find that they're helpful to place behind the back of our head for these next couple of exercises. So we'll be getting back down on the floor again.
Have those close by if you think you'll need them for neck support. So making our way on to our back, we're gonna bring our knees into our chest, and for now just allow your body to reacclimate to the floor. There might be some residual tension that you're sensing in your back from that last exercise we did. So holding onto our legs here, we're gonna start letting go and extend the legs up towards the ceiling. They might not go fully straight, and that's okay.
Arms are gonna come down onto the mat next to us, and as we bend the knees again, we're just gonna hug 'em right back into our chest. So as we extend the legs up, we're gonna think of drawing the abdominal muscles down into the floor, down into our back, and then bending the knees, and just giving our back a little stretch. As you explore, extending the legs further away from the body, that sensation of honing in on the abdominal muscles is gonna get stronger and stronger as far as the sensation goes. So we don't want to extend them further away from our body than where the lower back can maintain its connection on the floor. So if you find that you can't breathe well, or it's just a strain on your lower back, you might not be ready to have the legs that low yet.
If you have a more curvature in the back like a sway, that's what I have, it's very difficult for me, especially with my head down, to go that low with my legs. It's next to impossible not to lift my lower back off the floor. So this is about it personally. Bring the arms back in, hug the knees in. And we'll give ourselves a few more.
Wanna squeeze through the inner thighs here as the legs are extending, grab back on, give 'em a hug. And it's that idea constancy of the legs are going one way, but the abdominals are pulling in the very opposite direction. And we'll give ourselves one more. So we extend the legs, let the arms come down, bring 'em in, hug 'em in tight. Transferring our hands to one leg, we can go both hands on top of each other on top of that knee.
We'll do another version in a moment. The opposite leg is gonna extend out in a diagonal. Same idea here, we're pulling this knee closer to our body, and we're stretching the opposite leg further away from it. As we breathe out again we're gonna change the leg, stretch through that one, draw this one up tight, and then switch again. So we're pulling intentionally on the leg that we're holding, but we're picturing someone puling on the foot down there, and reaching that leg even further away from us.
Every time we change legs, it's just like the leg changes we did in the very beginning. We wanna deepen that abdominal connection, the center of our body, pulling those muscles deeper into our back. And we'll give ourselves one more like this. And if your arms allow, with the head down it's a little harder, but we're gonna take one hand, if you're holding your right knee, the left hand's gonna be on the knee, and the right hand's gonna find the outside of your shin or your ankle. You're gonna press against your hand that's on the knee, gonna press against the shin hand, and then switch.
Right hand would come to the inside of the left knee, left hand would come to the shin of the left. Push into both of your hands, and switch again. So we've got left hand on the right knee, or the inside of the right knee. Got the right hand on the outside of the ankle area there. We're pushing into both hands.
And release. One more time. Press against your left hand with the knee, press, I'm sorry press against your right hand with your knee, press against the left shin, and we bring both knees in, hug 'em nice and tight, and we'll release our legs right there. So placing our feet back down where they were for the bridging exercise, so if we have our feet closer together, more in that fist width apart, sitting bone distance apart, that would be a little bit more challenging potentially. Feel free to have your feet a little bit further than that.
Taking a deep breath in, we feel everything nice and open again in the center of our body. As we find our next exhale, we're gonna scoop through the abdominals, we're gonna feel the lower back imprinting into the mat. And as soon as our pelvis leaves the floor, our glutes are engaging. And we're gonna figure out the height that we can be in where I can still feel my big toes on the ground, we can definitely feel the center of our heels, and it's not a ton of effort in the back extensors here, it's a lot of effort in the glutes, and in our hamstrings. So as we stand on the left foot, we're gonna pick the right heel up off the ground, and nothing's gonna change.
Something else you can check yourself with is hold onto your pelvic bones again with your hands, place the right heel down. Stand firmly on the right foot, we're gonna lift the left heel off the floor. And we wanna feel the pelvic bones are not shifting here, they're trying to maintain their levelness. Place the left heel down. Same thing again.
So we go back to the right heel lifting up. So even though the heel's off the ground, we wanna try to maintain the glue contraction that that leg has. Place the heel down. Left heel is coming up. Keeping the pelvis level, trying to keep that left glue engaged, and take it down again.
If we feel ready, you can always put your arms down any time you need the extra help with them. We're gonna lift the right heel up again. We're gonna really stand firm on the left leg now so we can take the right leg up to a 90 degree. Place the right foot down, find some weight there, try to figure out where your pelvis is and how it can be level again. Left heel lifts.
As the left heel comes up, and the left leg comes up, nothing else changes, place the left foot down, stand into that leg again. And we just keep alternating. Right heel comes up. Right leg tries to lift without changing anything in the center of our body. Place the foot down, stand back on that leg.
Find the glute again. Pressing into the heel is very helpful usually to help find the glute musculature even more so. Left foot goes down. We do one more on each side. Right heel's lifting.
Right leg is coming up. Place the whole foot down. Stand on that leg, right. You gotta really find the connection that you need there in order to pick the other side up. As you place the left foot down, if your hands are still on your pelvic bones, let them rest on the floor.
Try to find equal pressure here in your feet, equal connection in the gluteal muscles, your hamstrings. And as you're ready to breathe out, soften through the chest, soften through the stomach, rolling down through the spine, and letting your glutes be the last things that touch the mat. All right, stretch the leg that's closet to your screen on the floor. We're gonna be rolling onto that side. And here's another moment where having your towels, or having the blanket in between your arm here might be helpful for neck support.
You could definitely do this position as well. Little more challenging to find the length in the waist that we'll be looking for. You can also fold. Or if you can put your arm in front of you, and just put your pillows right here for your head to rest on, that would be great too. So I have the shoulder mobility to length my arm like this.
I have too much shoulder mobility if we're being honest. So this works well for my body, but make it work for yours. We're gonna set our legs up in a slight forward diagonal. So picture where the whole body is here from your pelvis up to the head. We wanna try to line that up against the back edge of your mat, that way your feet are towards the front lower corner of your mat.
Top hand is gonna be in front of the chest somewhere, spread the fingers out, that will be helpful in a moment. And we're just gonna feel the side. If you notice that the hip bone down here, the side that you're laying on is uncomfortable, that's another place where you could put your towel or put your blanket. It's very common. That used to bother me for years.
And then I probably gained a little bit of weight, and it doesn't anymore. So here we are squeezing the legs together, drawing through the center of our body. Again, we wanna think of the inner thighs, so even if your inner thighs don't touch each other, imagine hugging the space there. Maybe put the towel there. We're gonna try to push the bottom leg up against the top leg so that they both come off the floor.
And then we're gonna place them back down. So this is the whole movement, and it's harder than it looks. Personally, this is my least favorite exercise, it's very challenging for me. So we're picturing, again, the bottom leg doing most of the work. But as the legs are lifting we wanna maintain the space right here.
Or think of maintaining the space between the bottom of the rib cage and the top of the pelvic bone. And we just keep moving. We're definitely using our hand here, we're definitely using our arm, and if you put a little bit more pressure towards the pinky side of your hand, that can help keep this top shoulder away from our ear. So as the legs lift, we think of the abdominals lifting up even more, and then letting everything come down. And we'll give ourselves just a few more like that.
Your feet might barely come off the ground. The less they lift, probably the better your doing the exercise. If they're coming up quite a bit, we're probably rolling back and compensating somewhere else. Give yourself one more. Push 'em up, bring 'em back down.
And we're gonna pause there. So as we come up from that side, we're gonna be spinning ourselves around to do the other side. So if you do have a blanket or anything else that you might be using to help support your neck, definitely bring that along with you. So as we get ourselves acclimated onto this side, figure out what you need to do as far as your head positioning goes. We're gonna take the leg slightly forward, so again they're towards the front lower corner of the mat, our body's are along the back edge.
We take our top hand, place it in front of your chest somewhere. It could be out here, it could be closer. Again, make it work for you. So we stretch the top leg, we think of the top pelvic bone getting a little bit further away from our shoulder, and then we draw in deeply through our abdominal muscles. Bottom leg pushes the top leg up, and both come down.
And they both come up, and they both come down. So the reason for having the leg slightly on a diagonal, we'll play around with other variations in the other classes, is it's a little bit easier to hone in on the adductor muscles, so on the bottom leg, and it's also a bit easier to hone in on the oblique muscles, the sides of our waist. When the legs are directly underneath us, a lot of times it's easier just to only feel our lower back kicking on. So hopefully this is a way that we can hone in on the deeper, more centered muscles that we're looking for. Give yourself one or two more.
Again, using your hand here definitely, trying to hug the elbow maybe a bit closer to your body. Keeping the top shoulder away from our ear. And we'll lower down on that last one, and we'll help ourselves up. So we're gonna transition right into an exercise called the mermaid. So the bottom leg that you were just lying on, that is gonna bend in front of you.
So we're gonna be in an externally rotated position with this leg. We're gonna try to take the top leg in an internally rotated position. So sometimes the hips don't like to rotate inwards as much as they do outwards. This is where you could sit with the externally rotated glute, you could sit up on your cushion again, and that might make it easier to rotate this back leg. Either way we'll do a few rotational movement patterns, take this hand to the floor.
We're gonna allow this back glute to lift up. It might have already been off the ground. And then we're gonna see if we can put it back down towards the floor. So we're gonna pick it up, your body's gonna rotate as that happens. And we're gonna rotate it back and down.
One more time. Pick that glute up, rotate with it, and bring it back and down. So just lubricating the hip joint a few times there. Letting both arms reach out to the sides, trying to sit up tall. We're gonna shift our ribs, our shoulders over to the side that has the externally rotated leg.
Let that hand land. So reaching through the diagonals here on our arms, trying to feel very open across the whole center of the body, the whole chest area. And as we take this arm around, we're gonna bring this back glute with us, and then we're gonna try to place this hand either on the floor, or if it doesn't make it that far it might have to go on the knee of the externally rotate leg. Breathe into your back. This is a difficult position to try to keep inhaling into in particular.
And as we let go of the light arm we just reach and find that diagonal again. Take a deep breath. If you find that you're cramping in the front of this hip here, it might be better to sit in a cross legged position, or sit with your legs in a diamond shape. One more big breath in here into our back ribs. Open the top arm, find the long line, and we'll lift ourselves up.
So changing the leg position, and this is where we get to notice what leg likes to be externally rotated maybe more than the other, and same thing with internal rotation. So this is my right side, if you're facing me this is the left leg for you, and then this guy would be behind. So, once again we'll put a hand on the floor, we'll pick the pelvis up, we'll rotate a bit with it, and we'll bring it back down. Just moving through the hip joint. So our pelvis moves over, the head of our femur, and then the head of our femur moves inside the pelvis, so we're doing a little bit of both on this one.
One more time. And we'll put it down. See if we can pick our arms up, lift our body up tall. And then we're just gonna shift to the side, placing your hand down. If you're mirroring me, this is the left hand down now.
Right arm's gonna reach up on that long diagonal. And as you take your right arm around, let it land wherever it can. So the hands might not line up straight across from each other, and that's all right. Make sure you can breathe. We're in a pretty deep twist here, and the breath can get very lost.
Pushing down into the back hand, we're gonna reopen our right arm, find that stretch, and just one more time bring it around, let it land somewhere. Try to put some weight into your hand. So even if it's on your knee here, push a little bit maybe into it, and then lift up through the right arm one more time. Find that long position, and as we sit upright we're gonna come out of the shape with our legs. So spinning ourselves around, we'll be coming on to our stomach next.
And this is where you might wanna place a towel underneath your lower pelvic area to help comfort and support your lower back. You might also wanna place a towel underneath your forehead if placing your hands on top of each other is not gonna feel that comfortable for you. So spinning ourselves around. If possible, we'll place one hand on top of the other, and we're gonna let our forehead rest on the top hand. I'm gonna keep my head elevated just for the sound not to be strange on your end, but definitely let your forehead rest on your top hand.
So think of where your elbow points are. We're gonna press a bit down into them, just to find some activation around our armpit areas, our chest a little bit, and then release that pressure. And we'll try it again. So, pressing into the elbows a little bit and releasing that pressure. And we'll do that one more time.
Pressing into them and release. As we separate our hands, if you have the towel there you can keep it there, 'cause you'll be putting your head down anyways. We're gonna organize our legs here first. So if we can take our legs closer together so that we feel the inner thighs, those upper parts of the inner thighs trying to engage, trying to squeeze together, that's great. If that means that it just sends your whole lower back into this kind of thing, maybe go a little bit further apart with the legs first.
Next we wanna sense where our pubic bone is, and if we can gently imprint that into the floor, not just from squeezing our butt to do it, but from lifting the lower stomach muscles, the lower abdominal muscles away from the ground a bit, now our hands and forearms are next to our sides, we're gonna press into our elbows again. Feel that connection into the sides of your shoulders, the sides of your armpit area, and release it. Head is just hovering off the floor, or your forehead can be down on the mat. Press into the elbows again, and release. So we have the inner thighs connecting, we're pressing the public bone lightly into the floor.
We're lifting those lower abdominal muscles away from the floor. As we press into our elbows this time, we're gonna start dragging our hands down the mat, even though they're not gonna move, and start sending your chest and your eyes out in front of you along the floor. As we start to lower the chest down, keep pulling downwards with your arms until your head finds the mat again. Release everything. Relax your legs too.
Wanna try to keep the tops of our feet on the ground here. So we squeeze the upper, inner thighs closer together, we try to imprint the pubic bone to the floor, try to think of lifting the lower stomach muscles, abdominal muscles away from the ground. Pressing into the elbows, and then as we pull down on our forearms, on our hands, we slide the chest through our hands. Eyes are going along the floor, and we slowly release. And we'll try all that one more time.
So relax everything here. We usually get a stronger connection when we can fully release the muscles, and then try to fully contrast them again. So once more, squeezing the upper, inner thighs, pubic bone to the ground. Can we lift the abdominals away from the ground, even if it's just mentally? Pressing into the elbows and then pulling downward energy on your forearm and hands as you stretch your chest through them.
Lowering down with control. We lift our elbows up so we can push into our hands, coming off of our stomach, and then just taking your knees about shoulder width apart, trying to round up through the back, and then just sitting back as comfortably as it feels for our joints. And take a few deep breaths. And whenever you're ready to make your way up, we'll slowly bring our bodies upright. And that is it for today.
Thank you so much.
Begin Pilates: Start Here!


Comments


You need to be a subscriber to post a comment.
Please Log In or Create an Account to start your free trial.
