Description
About This Video
Transcript
Read Full Transcript
I'm Joy. And I'm joined here with Kristen Briatty and Tiffany De Martin. And in this class, we are going to explore the wisdom of the spine. The wisdom of the spine. Our spine is our central column.
Everything we do, all of our movements emanates in and off of. And the way we communicate with the world is through that movement, through our spine. Listen, back pain, is one of the leading causes of disability. It's costing the healthcare system billions of dollars. But most importantly for you, if you wake up with a stiff back or back pain, it makes your life smaller, right?
You're more protective of your movements and it creates an element of fear. So here we wanna try to unlock the potential, reduce the fear and give you opportunity going forward, right? Because everybody wants to garden, wants to walk the pyramids, wants to get up and down without feeling pain and discomfort. And some simple exercises can really help you. So with that, let's get us started.
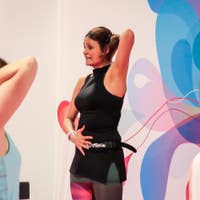
I have these guys seated in a chair. I'm gonna ask Tiffany to use a roller. And I got Kris in here with a band. If you don't have either of those things, that's fine. Take a towel, roll up a towel.
You can put a block in between your hands, whatever is gonna work for you. But I do want some feedback in in your hands. Tiffany is gonna press into that roller, hold her arms out in front. Kristin is actually gonna pull out into the band. They are two very different experiences of the arms into the upper body and the spine.
And you can play with both of those. So if you have a towel, pull out, if you have a block, press in. Now, let's just start simply by keeping them very sort of stable in their seated position and just inhale arms, come up overhead and exhale arms, come down. Inhale arms come up, exhale arms come down. And when I say stable, I don't want you to do anything particularly forceful.
But what I'm looking to see is as those arms come up, are they integrated into the rib cage, right? Or are they moving? And are they unstable? And last one, arms up and arms down, good. Arms straight out in front.
And let's have you just rotate to the right, looking off to the right, come back center, rotate to the left, come back center. One more time and to the right and comeback center. So what are we doing? We're starting to juice up the spine and release. We're starting to juice up the spine just naturally easily by mobilizing through the upper body.
Now, one of the things I didn't mention here is, as you're sitting here, you've got your head over your ribs and your ribs over your pelvis. These are three main centers of weight that our spine has to support and navigate. So we're gonna do that one more time, just the arms overhead. And I want you now this time to think about being rooted through your seat, as you let your arms rise up overhead. So give me that sense of going down through your seat and rising up, and a funny thing happens, your core gets a little bit engaged and that's exactly what we're looking for and then lower down and let's have an inhale on that.
Inhale, root down, to rise up and then release. And Kristen, we're gonna ask you to keep your eye gaze forward and arms up and down. Beautiful. Last one, arms up. Great, so now we've got that movement of the arms coming up overhead.
Let's put it, let's put some of these movements together. We're gonna do an exercise called around the world. So let's start with arms coming up overhead and let's have you side bend to the right and then bring the roller or the band or the towel in front of you side, bend to the left. Then look up at the ceiling and hold. Now, go to the left and come around, come around, come around, come around, come around and take a moment and hold, good.
And then to the right again, and take a moment at the top and inhale and then exhale, go around the other direction. Great, now bring the arms down. Now, listen, I wanna give you license to do something. Now that you have that movement pattern, can I ask you to put some flow into that and you at home, out there, do this at your pace and you guys, I'm gonna ask you to do the same. So let's have you inhale arms up, exhale, go around the world around and up and go around the other way and up it's okay.
Let this go. Don't judge it. Just feel what you feel. Where is your spine sticking and rest. Where is your spine sticking?
Where do you have the mobility? What is it that you wanna focus on and work on today? Sometimes when we move really slowly, we lose a sense and sight of what that is. Alright, let's have you put down the rollers actually. Tiffany put that behind you.
Kristen, you could put your band alongside of you. Now, we worked on the thorax and the shoulders in terms of the rib, the spine. Let's work on the pelvis. So you're sitting up nice and tall. Again, find the balance of the head over the ribs, over the pelvis.
And if you wanted, you could even put one hand, right under your belly button, fingertips towards your pubic bone and the other hand behind you on your sacrum. And let's have you just tip back into one hand and lift up and tilt forward into the other. And tip back into one hand, and lift up and forward into the other. Now, if you want, you could also take your hands and put 'em on alongside your hips. You know what we're looking for?
You're going back up and forward. I'd like to think of the pelvis as a wheel here and turn that wheel back. Turn the dial to zero and then turn it forward. So let's have you go back up and forward. Good.
Now, as you go back, notice you're going into what's called spinal flexion. So let's let you go a little farther into that. Arms out in front. Tip back off your sit bones and allow your spine to flex. Sit up tall, bring your arms down and let your chest open.
Bring your arms in front, tilt back into flexion, sit up nice and tall. Bring the arms behind you and go into extension. Let this happen naturally, right? Again, don't judge it. Your emotion and your movement of your spine right now is yours and unique to you and to your spine, but let the breath and the movement and the rocking the pelvis be what is directing that?
Awesome. Great. Now, very often with low back issues, discomfort to actual pathologies, we tend to lock up or seize the lower spine. One of the ways in which we can access that is through our legs. So let's get a little mobility in through the hips.
So I'm gonna ask you both, if you wouldn't mind widening your stance and what you'll do is you'll turn your pelvis, yeah? And then you come back center. Now you'll turn. And let the pelvis, the turn of the pelvis drive the turning of the legs. So you're changing from one sit bone to the other.
The pelvis turns and what'll also happen is the legs are gonna follow. One leg internally rotates, the other externally rotates and come on back. Good. Now I'm gonna ask you to reverse that thinking. Can you move the pelvis by moving your legs?
So turn your legs and let then the pelvis and the lower spine respond and then come on back to center and then go to the right. There you go. Come back to center and go to the left. So did that change a cuing change anything for you? Okay.
So we can move that by moving the pelvis and the legs are gonna respond or you can move the legs and the pelvis and the lower spine are gonna respond. Great, awesome. Now, hands behind your head, please interlock your fingertips. And what does this do? Well now we're closing the chain here at the head.
We're getting a really direct interaction into the ribs. You find your rootedness into your seat. We've now given the spine feedback. So instead of open chain and just easy flowing, we're now creating some muscular connection into the spine. So just press your head into your hands and what you'll feel the little muscles along the back of the spine really start to light up.
Feel them and feel how they elongate or decompress the spine. Now, exhale, and just relax that. One of the things about inhale, lift and exhale release. One of the best things you can do for the nourishment of your discs is axial, elongation and compression. It's just this little motion that happens from all those little muscles along the spine.
It happens when we walk. It happens when we stand up and when we sit down and it's part of what stimulates the discs to be nice and strong. Now you're gonna take that axle elongation, look up at the ceiling and extend, and then you're gonna bring the elbows forward, but keep your head pressing into your hands, as you flex forward, keep your head pressing into your hands. Now, press into your hands to rise up. All those little muscles up along your spine are getting really excited and active and they're moving you into the extension and then use your core to bring you forward.
Let your elbows come forward into flexion, beautiful. Now again, press your head into your hands. Come on up, rise up, rise up, rise up, rise up, look up and then exhale and come forward. Great, now you guys are gonna sit up, take your hands off from behind your head and how does your spine feel? You have more mobility now.
Now that we tapped in there, we can now start to really play with organizing the spine and mobilizing the spine. Good, alright, we're gonna take that. And we're gonna move from seated to a kneeling position. I'm gonna have you do two different positions. So Tiffany, I'm gonna take your chair.
I'm gonna move it back here. Kristen, let's take your chair and let's have you kneeling in front of it. So now again, this concept of closing the chain or changing the relationship to gravity, will change the way the muscles are gonna respond. So it'll help us to strengthen the spine as well as mobilize the spine. So here I've got Tiffany on the ground.
She's got all, all four points of her knees is two points. Her hands, two points, two plus two is four. And then I've got Kristen, who's gonna put her forearms down. And those are her four points. Look at the difference in their position.
Kristen is more on an angle. Tiffany is more parallel to the floor. These are gonna be great for you and give you a huge opportunity to decide how you wanna mobilize your spine today. This is going to give you a little bit of a more freedom. So if you feel stiffer today, I would say start here.
This is gonna give you a little more connectivity, your choice. So we're gonna start with something called cat cow, but we're gonna start small and we're gonna look at it from the relationship of the pelvis. Again, I imagine there's a dial here and you wanna turn that dial. So you've got these nice, strong supports that are your leg bones or your femurs, and we're turning the pelvis on top of that. And then you're gonna turn the dial the other way, right?
And then turn your dial. And then turn. And what starts to happen now that you can step back and look at the rest of the spine, as you turn the abdominals drawing in and up supporting the front of the back. The back of the body is lengthening and we're starting to get some nice reflection of that movement through the shoulders and through the head. And just a couple more.
The other thing I like to look at here is what's happening at the level of the shoulders and what is the rib cage and the thorax doing, same thing. I've got a nice base of support here in these arms and at these shoulders. And that thorax really can come up and around at nourishing the shoulder joint and the hip joint. Beautiful. And let's lengthen out.
Simple exercise, but let's now add a little something to that. I wanna add a little bit of rocking to that. So we're gonna start with our cat. You're gonna round your back. Then you're gonna pull your sit bones back and you're gonna kneel back.
As you kneel back, you're gonna straighten your spine. Look up. Your elbows can bend if you need to and pull your sternum forward and through. And come back up to your starting position, curl back, rock back, straighten your spine, bend your elbows, pull the sternum through, curl back, come down, take your sternum, come through and up and back. Good and notice again, the difference between being on the chair and changing your angle versus being closer to the floor.
Here, we're gonna get a little more arm work engaged. Here, we're gonna really be able to focus on getting that sternum through and having sort of our Titanic moment. Yes. Right? And great.
Now let's have you sit back into child's pose. Super. Okay, now, Kris I'm gonna take your chair because we're gonna move on to sort of the next level of this progression. And again, you can take this and back off or move into whatever you're feeling. So for all fours, please, with the hands on the mat, and what I wanna get into here is a knee float.
So tuck your toes under. Don't arch around your spine. But see if you can just lift up off the ground and float the knees and then come on down. So what are we creating? We're creating stability here in the lumbar spine.
We're creating stability across the upper chest, upper back. So lift up and then come on down one more time, lift up and then come on down. So this is our first test. If this is like grooving cool for you today, and it's accessible to you today, we're gonna add a little motion on there and it's not easy. So again, no judgment, 'cause you're gonna lift up, hold it.
Now, I want you to turn your wheel, that's your pelvis. I want you to send your sit bones out behind you. Turn your wheel of your pelvis. Send your sit bones out behind you. Turn the wheel and sit bones.
Last one, turn the wheel and sit bones. And then down. These guys are giving you a lot of mobility on that. You may have less mobility. You may be really struggling with the stability part.
That's all great. But what I do want you to see is what, every time we turn that wheel, how much nourishment you're getting here at this joint. And then as you lengthen out how much the spine is responding all the way up through the head. It's really some glorious stuff. Super.
Okay, now I wanna go back to our rocking cat, but I wanna add something to that. Don't be satisfied with sagittal work. We're not bunny rabbits. We are human beings. We walk by-laterally and in all different directions and all across all different planes of motion.
So it's round your back just like we did before. But this time I'm going to take my sit bones and point them toward the left, your left foot. You're gonna go down. You're gonna circle at the bottom and you're gonna come on up, curl and go around. So it's our around the world again, but this time from the pelvis and then notice this nice lateral side bend that's happening, as you go from one side to the other.
Yeah. And let's go stop there. You gotta do the other direction and is one side stickier than the other, right? What are you guys feeling here and notice how the arms go overhead. So we're integrating again, those arms with the trunk.
Great, super, alright. We're gonna stop there and come back onto all fours. Now can I have you come all the way up into high kneeling? Okay. So I understand that this position is not always comfortable for everyone.
As a matter of fact, this position may actively be difficult on your knees. You'll notice that Kristen, in order to avoid cramping in her feet is putting the mat underneath her shins and underneath her feet. Would you like to do the same Tiffany? Mm, I think I'm okay. Okay.
The other option here for you is if you just take a couch cushion and put it under your shins so that your knees, aren't touching the floor, to give you a little more support and stability. So I wanna work on the hips and the pelvis, again. So now you're here in high kneeling, take one leg forward and really work on opening that hip joint and just slide yourself forward and come back and just slide yourself forward and back and forward. Make this small. I know you guys have lots of range of motion.
Keep this small. Just forward and back. So I am looking at this leg and how this leg is coming back or behind the pelvis. And then the pelvis rides up on top again. Okay?
Make sure the pelvis rides up on top again and then go forward. Good, super, hold that there. Now can you turn out your legs? And when you shift, you're gonna shift off to the side. Now everybody has different rotation in their lower leg.
My goal here is that as you shift off to the side, the knee and the second toe are in line with each other, go, there you go. Some of you may have more rotation in the lower leg as Tiffany's is showing you, but for the most part, for most of you, keep the knee and the second toe tracking. Now look at what they're doing. They're getting more into their adductors and their abductors. Your inner thighs and your outer thigh.
Great, come back to your high kneeling. I'm throwing this in. Arms out in front, for a transition, a quick thigh stretch. We discovered that they don't like this one and then come on up. Not easier today.
And another quick thigh stretch and up. Great. And now let's transition to the other side. So the first thing, you're on top of that femur, shift, the pelvis forward and then come back, make sure you ride high. Shift forward and ride high.
Shift forward and ride high one more time. Great, okay. Now let's have you turn out. I did the other side. I'll do this side.
And the knee tracking over the second toe and what we didn't add before on the first side, but what you can add here is if you wanted to take that left arm and reach it out and up and add the upper body. So just reach as you reach. Yep, you can add some upper body movement, any upper body movement that works for you today. If you have some really awesome music on in the background, maybe some Janice Joplin, right? You could throw that in and you could move the upper body in whatever way that suits the music and the mood you have on in your house.
Awesome, okay. Back to high kneeling. Now, one more time just to shake that out, we're gonna do thigh stretch, but this time, can you open your knees out and keep your toes together? And then let's have you lean back and up. See, that's my preferred hip position.
And back and up , last one and back and up. So Kristen likes external rotation. How did you find that? I still dunno. Alright, let's take you down into child's pose and rest.
Okay, so I'd like to get you guys standing. So you two at home, please come and stand up with us. And if you have a roller or something that you can hold in your hands, that would be great. Again, you can use a towel, but a roller or something that's a little wider than your shoulders that you can press into even better and if you have nothing, you can use your arms, but imagine you have the roller. Okay?
So with your legs together, gently pressing into the roller, we'll do a sidestepping lunge to your right. And as you sidestep to your right, I'd like you to rotate to your right. Come back center, boom, rotate to your left, center, hold right. And center. Take that hold moment to readjust and left and center.
Now stop. We're gonna add to this. Arms are gonna come up overhead and you're gonna do that sidestepping lunge, rotate and bring your arms down and then up hold. And it's down and up hold and the same thing, right? And up, hold, left and up, hold.
Great, now we're gonna add one more thing to it. We're gonna add a heel raise to it. So it's right. Rotate. Hold.
Bring your arms up and rise up and down left and then hold arms up, rise up and down and right. And hold arms up, rise up and down and left and hold rise up and down. Now I'm gonna surprise these guys. We're gonna do that all one more time with more flow and just two sets of each okay? We're gonna go to the right arms are down in front of you, ready?
It's right. And center, boom and left and center, boom and right. And center, boom and left and center. Boom, arms up and go. And go.
Good, you should be heating up. Sorry. And go. And go. Great, arms out in front.
And it's to the right, come center, arms up, rise up and down and left and center and up and down. Right and center and up and down and left and center and up and down, great. So part of what happens is if we think too much about it and we move too slowly, we lose the power that we generate just through the movement. That was terrific. Thank you both, okay.
Let's take this into squats. So put that roller down. If you, again, you don't have a roller, a chair in front of you would be terrific. It's just squat and press out and then up and squat and press out and up. Notice how everything we're doing is integrating the arms, the upper body with the lower body and the hips.
Well now what if we add a little bit of spinal mobility on that? So let's go into your squat and hold it down and press out. And as you push forward, round your back, you're really drawing in. And then as you come back to neutral, you rise up. Squat down and as you squat down, push the roller out or the chair out and curl.
And as you come in, rise up. Now, press down, push out and curl, push down and rise up, feeling the use of the feedback of whatever it is you are pressing into, giving you the lift of your spine as you return. One more time. Great. Okay, so everything is progressive here.
If that feels good, we're gonna add one more thing. I'm gonna get you guys a couple of balls. You can put those rollers behind you. Tiffany here's a ball for you. Look, this ball is literally just a prop to use and to hold for this exercise, which is prepping us for getting up and down and for rotating our femurs and our pelvis, ready?
So starting wide stance, a little external rotation. Ball goes to the ground. Ball comes up to you. Ball goes to the ground, comes up to you. Ball goes to the ground, comes up to you.
Last one, ball goes to the ground, up to you. Take the ball in your right hand, rotate to your left. Put that ball down in a lunge and bring it up. Now, go to the other side, rotate and down and up. Rotate, touch the floor.
If you can, don't judge it. But notice also one side might be easier to get to the floor than the other. It's good information. One more time. And one more time.
Good, hold it to the center. Widen your stance. Now how far down can you come? Now tilt your spine? Arms down.
Put the ball down and leave it there. Awesome. Okay, step back a little bit on your mat and let's focus on just on heel raises. We just did this with the roller in your hands. I want you to press down and lift your heels up towards your sit bones and then lower back down to the floor.
Press down and lift up and lower down. Now, add your arms, arms up, rise up and then down, press down to go up. Feel the floor under your feet as you roll through your foot. And on the last one, I'm gonna ask you to rise up and I want you to hold it up there. Hold it up there, hold it up there.
Hold it up there, hold it up there. Can you get higher? Can you get higher? Can you get taller? Can you feel the connection all the way through your core, giving you the length in your spine.
Now, as you come down, really press your heels into the ground. Good. In that right there, that moment, feel your feet. There should be a lot of sensation in them. Feel the lift up through your quads, through your lower spine.
Good. Last thing we're gonna do, arms out in front, legs are a little bit wide. You're gonna be a big, not that wide. Little bit wide guys. Closer, closer, closer, closer, closer, big hug and round your spine.
Open your arms and just look up and wherever you are right now and a big hug. Round your spine. Sit up, open your arms again, wherever you are. Don't force it. One more time, big hug and then open.
Great, bring your legs together. Inhale arms, come up overhead. And then all of that energy comes down through your center. Let's do that one more time, shall we? Big arms up overhead?
All that energy down through your center, Tiffany. Oh. Down through your center, whoo. All right, we're gonna do it one more time. Ready everybody arms up overhead.
And there you go. Down through the center. Beautiful.
Empowered Aging: Pilates for Menopause


Comments


You need to be a subscriber to post a comment.
Please Log In or Create an Account to start your free trial.
