Description
About This Video
Transcript
Read Full Transcript
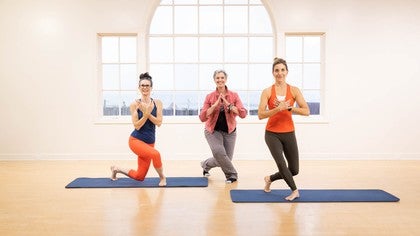
I'm Joy, and with me today is Kristen Briedy and Tiffany DeMartin. And in this class, we are going to explore the powerhouse. The powerhouse is sort of in the Pilates world an ancient artifact of how we started talking about the core, it's your powerhouse. But what we're really saying is that your strength and your power really emanates from your central core and throughout the rest of your body, the pelvis and the legs and the arms and the trunk. It is really important that you understand and know how to strengthen and be safe so that you can support your back, you can support your neck and your hips, that you can perform all activities with ease, and as Joseph Pilates says zest.
Okay. So now with that, we are going to start with an exercise called bridging. Bridging is something that I'm sure you've all seen in exercise classes all over the exercise world, whether it's Pilates to physical therapy and yoga, but we're gonna make some particular, give you some particular ideas and thoughts as we bridge. First of all, you'll notice that I have Kristen and Tiffany at levels here. I've got Kristen with her foot on something that's relatively low to the ground, and I have Tiffany with her feet on a chair.
If you don't wanna use a chair, you can also put your feet up against the wall, provided you don't mind that you may have footprints on your wall. That's totally up to you. But the idea is to lift the feet higher than the pelvis so we can give some lift to the spine, okay. So here, Kristen's got her feet pressing down and she's gonna press down and she's gonna pull her heels toward her and she's gonna articulate up. Tiffany is also gonna, she's gonna flex her feet and she's gonna press down and articulate up.
Okay. And then she's gonna roll down. So this is an articulated bridge, we're gonna have you do both do this together. You're gonna exhale, start with the pelvis, curl the pelvis under and lift up and then articulate through your spine as you're rolling down. So are we working on spinal mobility? The answer is yes, you guys are gonna keep going while I chat to these guys.
Are we working on strengthening through the back body? The answer is yes. One more time, articulate up. And now hold it up there. When I say strength and through the back body, I want you to imagine pressing down and pulling your heels toward your sit bones while you reach your femurs or your knees over your toes, that's gonna immediately activate you behind the pelvis, activate you in through the lumbar spine to support the pelvis and the lumbar spine.
Now from that support, roll yourself down. Okay. So I might be looking at you from the front, but make no mistake, we are working through the hips, through the lower spine and the whole back line or the whole back chain, including your hamstrings. Let's do that one more time, press down, pull those heels as if they're trying to pull toward your sit bones. Let that be what drives the pelvis forward, reach your femurs and your knees over your toes. And from that place, you start to roll down, it gives you more freedom of your spine, 'cause you have more stability through the back of your legs and your hips.
Nicely done. Great. Okay. So that's one thing I want you to think about when you're bridging. Next, let's change this a little bit.
We are gonna play with something called a bent knee fallout. I'd like you just to let your right leg fall out to the side and bring it back. Let your left leg fall out to the side. What I'm looking for here is that the pelvis stays, relatively stable, you might have a little bit of movement, but the thing is I want you to notice, does one side fall out with more ease than the other? That's giving you a lot of information on the differences between your right and your left side.
Really good information and good to know. Good. Now let the right leg fall out, and let's hold it there. What if we bridged in neutral here? So press down, again, pull your heels towards your sit bones and bridge up and then lower back down.
Ha, a different sensation, isn't it? Press down and lift up and roll back down. One more time, lift up and back down. Super. Now did you notice when you bridged up, you actually want your pelvis wanted to move in a direction.
So again, you're gonna keep that right knee out to the side, you're gonna lift up and you're gonna rotate to that knee. Hmm. Another sensation, and then down. So we're working now the back of the pelvis and the hamstrings and the legs that come on up and rotate, and come on down. And one more time.
And down. Super, legs together. Okay, let's go to the left side. Now it's stay neutral here and just hover the pelvis off the ground. When you're there, really get that sense of trying to pull your heels toward your sit bones and lower back down.
And you're gonna hover up and lower back down. One more time, hover up and lower down. Now keep that left leg falling out. And now I want you to rotate the pelvis. Ready?
Come on up and rotate and then come back down. Come on up and rotate and back down, and last one. And legs together. Okay, so hamstrings, pelvis, lower spine. Okay.
Let's do one more thing here, same move with the bent knee fall out, you're gonna let the leg go out to the right. This time, articulate up the right side of your spine. Now I can isolate the right side of the spine and slow in a little rotation here. Now roll down that right side of your spine and see if you can find one vertebra at a time until your right hip bone drops down and then articulate up again. So this is a lovely way to start working on just little rotation in the spine and massaging alongside the erector spinae and the sides of the spine while keeping the pelvis and the hamstrings active.
Great. Come on down, we're gonna do the left side. So legs come together, open out on the left. Articulate up. Now question for you is what are you feeling right side versus your left?
And roll down. Does one side feel stickier than the other? Are they both working evenly? When I find that there's stickiness, I might then pause and do some mobility work, which we've done in other classes like these. And then I might come back to this exercise and see if we've evened it out, and you guys can rest.
Super. Now I have one more bridging exercise that I really wanna show you here, let's have you put the balls of your feet, either, if you're on a wall up against the wall. In this case, Kristen is gonna do it on top of this arc, and here Tiffany is gonna have her feet on the edge of the chair. And she's gotta make sure she's pressing down and pulling that chair toward her. Let the knees open a little bit, and the heels come together.
It's really important to let the heels come together because what I want here is that connection into the heels to drive into the legs right up into the back of the pelvis. We're gonna work the small muscles called the external rotators, hence the external rotation of the legs. If you have a lot of external rotation, don't let them just fall out. I want a diamond shape with your legs. So now heels together and now in the neutral, lift up the pelvis, hold it, slowly lower it down.
That control down is really important, it's eccentric control, lift up, and then control it coming down. It's eccentric control of these really small, fine muscles that are in your pelvis that go quiet and go dark, especially if you have any low back pain issues, discomfort. Wake these guys up. And great, and rest. You can bring your legs together and you can pull your knees into your chest.
Awesome. Okay, everybody good? Did you wake those guys up? (laughing) Okay. I will move this out of the way, you can rock a little left and right.
And then we're gonna come to sitting. Now, Tiffany, if you'd roll off to the side and come on up and Kristen, you can sit up and take that off. Let's have you sit with your knees bent, arms straight out in front. And here's what I'd like you to do, make a fist for me, and a lot of your arm energy is forward. Okay.
So your energy is going forward, but now I want you to curl back. Good. Hold that for a second, now take that energy, that forward energy and pull yourself back up. Okay. So you're gonna curl back.
Don't lose your arms here, give me a lot, really a lot of energy here. Curl back, curl back, curl back, curl back, curl back. Good, now push me forward Kristen, push, push, push, push, push. Good pull me back. Push me forward.
So the idea here is I'm not there, but you wanna imagine you're pulling in and you're pushing out. Nice. Two more. You'll notice for both of you, your feet are less likely to pop up when that happens, and if you at home, if there's an issue with your feet popping up, you can put your feet underneath your sofa, you can put it underneath a counter of some kind. Good.
And last one. And come on up. Super. Let's have you come up to high kneeling now, and we're gonna face forward. Okay. So I mentioned eccentric lengthening when I worked the back of your body.
So we started with back body, right? Lower spine, hips, back of the legs, hamstrings. Now let's work on quads. And we're gonna do a little eccentric lengthening, so just lean back, feel that stretch and come on up. This one is a kiss, ready, it's lean back, kiss the stretch and up.
If you have knee issues and you wanna put yourself on a bolster, on a cushion, by all means, do that. And if you even just wanna take this to standing and maybe bring your knee, your leg behind you to try to get a quad stretch, go for it. One last time, just a little bit of a lengthening through the quads and up. Great. So we did back body, we warmed up the front, now let's work on the side.
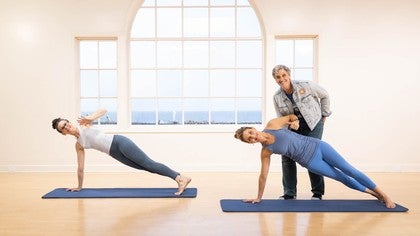
Let's have you put your left hand on the mat, lengthen out your right leg. Super. And lift that leg up. Now it's lower and lift. And I'd like you to point and flex your ankle.
And you know what? I'm not even gonna cue it because everybody is unique in which they prefer to do when and where. So you have license to do whatever you want, but just move your ankle along with your leg. Got it. Good.
Two more. And one. Hold it there. Now small little pulses up, up, up, up, up. Three, two, one.
There should be a little bit of a burning sensation happening. Now I do want you to flex your foot and toe down, internally rotate, externally rotate, internally rotate, externally rotate. Two more, last one, in and out and come on down. Woo, and up onto your knees. So this will be the first time that I say to these guys, let's do a thigh stretch and they go, okay, yeah, because now they have some relief from the side stretching.
So here let's again, just have you lean back, just kiss that stretch and then come on up and lean back and up, and back, and up. Good. We're gonna do the side stretches to the other side. So right hand is down, left leg is out and let's start by lifting that leg up and just holding that leg up. Okay, now lower and lift and please add the ankle movement, but do it to your timing, your pacing, and what you're comfortable with.
What I do like about this, and I'm gonna keep you going here is press down with this hand, which gives you the stability of the side body. And imagine you're pulling your knee towards your hand. And what you do is you close this whole inner chain, gives you a lot more power. Go ahead, hold that leg up there, little pulsing. And then you're gonna keep that leg up there and it's internally rotate and externally rotate and internal, external, three, two, and one, and then come back up to the high kneeling.
So here's a deal that little sequence, you can do that as often as many times, and for as many repetitions as works for you, find that little burn and then come out of it and then go back into it, right? You wanna build endurance in these muscles, you don't wanna just tire yourself out or burn yourself out too quickly. Okay, so let's now take you back to sitting and we're gonna lie supine, and actually Tiffany's gonna do a little setup for me. So she's gonna get the pillow we have, we have a little band for her and a wedge. And the reason for this is we're going to go into some pretty significant abdominals.
And for many people, curling the upper body leads to unnecessary strain in the neck. So we're gonna try and back out some of that strain while still getting the benefits of some of these exercises. So for Tiffany, we're gonna put this band on and I want you to put it on a particular way. So here she's gonna bring her legs up, I'm gonna come around the tops of her feet, gimme a little more space. You wanna have a little space between the legs.
We're gonna wrap it and we're gonna wrap it. So now I know that band is not gonna slide off her feet, right? And I know that she actually has some mobility between her legs. Okay. So the very first thing we're going to do is feed her down and simply work on moving the pelvis.
And a little bit of a sort of imprinting, if you will. So heel of your hands on your hip bones, fingertips on your pubic bone and see if you can let your pubic bone or the fingertips rise up higher than the heel of your hands. So your pelvis is gonna rock or tip. Right. And just go from the belly button to the pubic bone.
And just feel that rocking motion of the pelvis. We need that because we really wanna find a comfortable place for your lower spine. I don't want you to jam the small of your back into the mat when you're doing these abdominals, I also am gonna be lifting your legs, I don't want you to lose control. So I've gotta find that nice place or that balance in between the two where you have control in the abdominal work and you're comfortable, but you're not unstable. So now find a place in between the two where you're comfortable.
Great, and then bring your knees in towards your chest. Kristen, you're gonna put your hands behind your head. And Kristen, I'm gonna ask you to bring your elbows forward and curl up. So Kristen is gonna give you the advanced version. Tiffany is gonna give you more of a challenge through the legs or a modified version.
Now curl up as much as you can, Kristin and hold that. We're gonna do a toe tap, right toe down and bring it up, left toe down and bring it up, right, left, and right, good, and left. Now here with Tiffany, she's gotta push through the band, it's a whole different experience than it is for Kristen. Left. Good, one more time.
Right, and left. Terrific. Now hold it. Kristen can reset. Go down, hang on Tiffany.
Kristen's gonna come on up. Both legs are gonna tap down, ready, tap down, and I'm just wanting to make sure you're stable, that I'm not seeing a ton of rocking happening, there might be some natural movement happening, that's groovy. But what I don't wanna see is a distortion between the ribs and the pelvis. Yeah, two more and bring those knees in as close to you as you can get them. And last one.
Great, now tuck your knees in close to your elbows, tuck those legs at nice hip flexion, single leg stretch, send one leg out and pull the other leg in. So it's an opposition, with the band, it's a really nice opposition, right, 'cause you get that band, you gotta push out and pull out against. Good. Now can you gimme a little more rhythm with it? And go, and go, and go, go.
Three, two, and one. Rest. Pull those knees in and the legs are gonna come on down. Okay. So I'm gonna have Tiffany take that band off.
And then let's have you both, we're gonna go to a rolling up. So we're doing the dreaded roll up. Everybody's got their thing about, I can't roll up, I can't roll up. Everybody can do some version of this. You do what works for you and is right for you right now.
What I would like to have both of you do is lengthen your legs out because we just did so much where you compress in towards your center and you're gonna take your arms up. Tiffany, bring your fingertips to your shoulders. Tiffany is gonna do a shortened lever version of this. Make a circle Tiffany, make a circle Kristin, and reach your arms forward. Now notice they've got their fists, right, they're gonna pull me back, you're gonna roll down.
As you roll down, lengthen your legs, lengthen your legs, lengthen your legs, circle around, make your fist and come on up and then roll back down, circle around and make a fist. Hold it. We're gonna do that again, but wait a minute, stay up Kristen, we're gonna do that again. I really want you to gimme a lot of energy out. I want you to sit up as tall as you can.
That energy and your breath is what's gonna get you back up. Ready? You're gonna roll back down, straighten those legs out, open up, circle around, make your fist energy, boom, and then come back. Focus on your breath, inhale (inhales sharply) and exhale and reach. Good, last one, you're gonna go back down.
If you need to, you can put your feet against the baseboard underneath something to help anchor your legs and rest. But actually I think you guys did a great job and the more you can use that energy through the upper body, the more you'll find you can get this roll up in one form or another. Okay, How you guys doing? Great. Great.
All right. We're gonna take this to standing. So recap, we're working in the powerhouse. I don't care if you're 15, 55, 85, we all have power inside of us that we wanna unlock. And we wanna find it through really smart exercise, and we started with bridging to work the back body, and then we moved into some of the kneeling side to work the side body.
We worked some of that front body. Now let's take this into the legs and do some leg work. And I wanna tell you, this is a great way to also bring up your own internal heat and create some flow and energy in what you're doing. Let's just start with the feet. You will notice, I always include feet and balance in what we're doing.
Listen, again, I don't care if you're 15,55 or 85, feet and balance, hugely important. So let's just start with heel raises, rise up onto the balls of your feet, and then come on down. Now you're probably going, what? Just rise up onto the balls of your feet and come on down. Think of lengthening through the crown of your head and pushing the floor away with your feet.
And the other thing I like to think about is lifting my heel toward my sit bone to really get me up on top of my toes, up and down. Great. One more and now settle into the ground. Find your feet, feel where your pelvis is in relationship to your ribcage, in relationship to your head and find the length in your posture. With that, wherever your feet are, just open them out just slightly wider than your hips.
And we're going to go into something called a squat. So that's a little too much of a turnout Kristin. So here's the deal with Pilates instructors, is we're really not good at squats and lunges. And generally as a general population, we're not good at squats and lunges. We're gonna get good right now.
Put your hands on your pelvis. Okay. This is about lowering your pelvis. So bend your knees, flex at your hips, lower your pelvis, and then go up. Come on down, lower your pelvis, go down, go down, go down.
Hmm, and then come on up. So now you're gonna watch Tiffany, she wants to tilt that torso forward. I want you to lower your pelvis more, lower your pelvis, pelvis, pelvis, and then come on up. Okay, now give it a rhythm, it's down and up, and use your arms, down and up. It's the weight of the pelvis is down, fully up, down, fully up, down, fully up, down, up, last one, down and up, hold it.
Now we're gonna add heel raises. Okay. You're gonna go down and you're gonna go all the way up into a heel raise and up and then down. And when you press those arms back behind you, it's gonna help give you that lift 'cause your back body is gonna get more engaged. Remember that back body we activated, very first thing we did?
Three, two, good, and one. Awesome, come on down. Okay, from this position, they're laughing at me, I just want you to know they're laughing at me. I hope you're laughing as well. You're gonna turn to your right, your right leg is forward.
Stagger your stance even more. Now lift that left heel up. And so you feel your weight more on your front leg and on the toes of your back leg. Bend the back knee, go straight down, straight down and up, straight down and up. This is a nice, lovely opportunity to eccentrically lengthen the quad on the back leg, while also working the hamstring and the glute on the front leg.
You're gonna do three, two, (exhales sharply) and one. You should be getting warm at this point. Hold it there. We are going to add a single leg balance. So you come on down.
Now as you stand up, bring that leg in front, balance. Good, reach back and bring that leg up and balance. Reach back. Try pressing your arms back behind you as you balance, reach your arms out in front as you go down. Balance, there you go, down and up.
Two more at your pace. That's all right. Last one, last one. And then stand. (chuckles) And bring the legs down.
So here's the deal with that, you guys are on a mat. If you're first, if you're feeling insecure, come off the mat, number one. Number two, put a chair in front of you or alongside you to help you with some of this. It's really okay because the movement and getting the most outta the movement is what's important. Okay, so now we're facing this way.
So now I will have you open out and externally rotate a little bit more, not too much. And we'll go into a curtsy lunge, and a curtsy lunge is take your right leg back behind you and descend down like you're meeting the queen, right and up, and then let's go the other way and up and then come on down and up, and look at the arms just naturally go. Right. I believe it was the queen (indistinct) and she would be very proud of you right now. And look how nicely you descend down. And one more each side.
And beautiful, rest, hold. Good. We're here. Turn, face the window. Now we've reversed, right.
So the left leg is forward. You're up on that back heel. And I want you to come on down and up, and down and up. That back leg is working like crazy, it's an eccentric lengthening of the quad on the back leg. Your heel might be shaky a little bit, especially if you're really up on the balls of those feet, and the front leg, you've got the hamstring and the glute working.
Good. Now let's take it to a single leg balance, you ready? Let's try it. You come up, bring the leg in front, bring the leg in front, balance and then go back and go down, come on up, balance, back and down. Good, up and balance, back and down.
Kristen's finding more balance with her hands on her hips, try that because it's a really nice tactile cue. Two more. Last one. Great, turn and face forward. Gonna go back to that curtsy lunge with a single leg balance.
You're gonna reach back, let's have you reach back with your right leg and then as you stand up, lift that right leg up, then reach back and go down, and up, and down, and up. Last one down, look at that, how the balance is really starting to kick in and then let's do the other side. Bring your legs side by side. And now let's do the other side. Ready, go down and kick up, and down and up.
You find what works for you today. And again, if you wanna have a chair next to you, that's awesome. Super. Bring your legs together. So there we have worked the back body with our bridging.
We worked the side body with our sidekicks. We worked the front body with some of the core work. Now we worked through the legs in our squats and our lunges, including the ankles and finding our balance. So there you have it, you put all that together and you create and generate a lot of power in the body. You create and generate a lot of potential in the body and do not judge how much you should do or how hard you should do, just give it a try and use whatever you need in and around you to help you be successful.
Empowered Aging: Pilates for Menopause
Comments
You need to be a subscriber to post a comment.
Please Log In or Create an Account to start your free trial.
