Description
About This Video
Transcript
Read Full Transcript
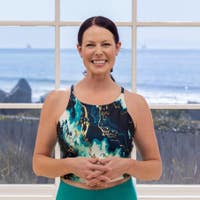
I'm Erin Wilson, and today's class we'll be focusing on functional strengthening exercises that help us move through our daily activities. You'll need a pair of hand weights. I'm using three pounds, but if you have the option of using lighter or heavier weights, feel free to make choices according to your strength level. You might find the standing exercises to be more comfortable with athletic shoes on. However, I'm choosing to be barefoot.
So we'll begin by standing with our feet parallel about the width of our pelvis. And we just wanna look down. If you don't have shoes on, think about spreading your toes out on the floor. Even if you do have shoes on, imagine where all of your toes are and try to press into each individual toe that way. So we wanna start by feeling some weight shifting back towards our heels.
And then the weights are just gonna rest right here at our pelvic bones. So looking straight ahead, we're gonna soften our knees an inch or two, leave them there, and then think of just tilting your pelvis back. Automatically, your upper body should hinge forward. We're attempting to keep our back flat. You don't have to go perfectly parallel to the floor, stop somewhere along the way and we're just gonna stand back up.
So the hip hinge motion, we'll keep moving, the hip hinge motion is one of the most important things we do in daily life. So this is how we can safely initiate bending down to lift up objects and how we stand up from sitting in a chair. So we hinge. We wanna feel our pelvis as basically just rotating over the top of our femurs. So the upper legs are staying the same.
And every time we lean forward, we're gonna think of lifting our chest up ever so slightly. So we're trying to avoid rounding our shoulders and rounding our upper back. So we're feeling our hamstrings hopefully kicking on. Just a pulling sensation there will usually happen, but if you sense anything negative, anything sharp, even tension in your lower back that's more on the sharper scale, definitely back off. Don't hinge so low, or maybe do a very small movement in this direction.
We'll do a few more here. Pull your abs in a little bit as you hinge forward. Just have some awareness of where they are underneath your belly button. Pulling 'em away from the floor again, and we'll stand up. From here, we're gonna take our feet a little wider.
So we'll figure out where they should be. For more of a squat position, we'll be bending our knees next. Our weights are gonna rest in front of our thighs for now. So generally speaking, a squat, maybe shoulder width apart or a little wider, slight bit of turnout in the feet, but you'll make the adjustments as you need to. When we start doing the first one or two, it'll either feel right in your knees or it'll feel like you have to go wider or narrower.
So arms in front of us. We're gonna start with the hip hinge motion again. So as we tilt our pelvis back, once it's slightly behind us, we're gonna bend our knees and just let our arms either slide down or reach in front of our knees, standing up all the way. And we just wanna feel tall. We don't have to push our pelvis forward here at the top.
So again, think I stick my butt out first. Then we start bending our knees. We stand up and just feel our pelvis right in line in between our feet. Hinging back again, we go into the squat and we stand. Every time we hinge back, you wanna stay light on your toes, heavy in the heels.
And every once in a while, it's worth it to look down at your knees. We're gonna try to keep the knees tracking over the mid part of the foot. I have really tight ankle joints, so I have to hinge a little bit more intensely just at my hip joints. My knees don't bend as deep because my ankles will not allow them to do that past a certain point, but there's no pain there. It's just how my body moves, how my body does this motion.
So if you're doing the same and you notice that you're not maybe leaning forward as much as I am, that's okay, right? You probably have looser joints than I do at your ankles. Let's give ourselves a few more. And every time we reach down with our weights, make sure you're not rounding the shoulders, right? Don't follow your weights to the ground.
If anything, we're keeping a chest lifting up, trying to keep our eyes straight ahead. Let's give ourselves one more here and we'll stand. We're gonna stay in the squat position. We're pulling our weights up to our shoulders this time. We're gonna go into an upward movement.
So don't feel like you have to go too high too soon if your shoulder joints tell you it's not a good idea. So we're gonna start from our squat again. So as we hinge our pelvis back, bend our knees, we're gonna gather all of our strength down here. And as we stand up, we'll press our arms up to the ceiling. As we stick our butt out and bend our knees again, bring your weights down to your shoulders.
So we're pushing everything up, bring everything down. It's a nice way to build up some coordination. Reach and bend. So same thing here. If your eyes can stay straight out in front of you, that's usually gonna tell your upper body where to remain.
It's a nice way to keep the upper back flat and the shoulders open. Let's give ourselves a few more. And then reaching again overhead, especially with weights. I reach up to grab a plate, a bowl, a cup, something even heavier sometimes. I'm gonna need all these muscles to help me move that effectively.
One more here. From here we're gonna be focusing just on the shoulders. So we're taking our arms in that half position. We just went from the shoulders straight up. So somewhere in between, where the upper arm is basically in line with the top of the shoulder is where we're gonna start here.
Soften the knees a bit, keep pulling your abdominals in to support your back. From this shape, we're gonna open our arms out to the sides, making a goalpost position. We're gonna simply close them back in. So we'll do this several times. So just loading the shoulders, getting those muscles heated up.
And then working into external rotation of the shoulder joint, which, again, can be kind of sticky and not our most strongest muscles usually in the upper body. Let's give ourselves two more here. And we're just keeping that upper arm on the same line and space as best as we can. From the narrow position, we're gonna reach straight up again, bring them back down to that 90-degree, go out to the wider shape, straight up from there, and back out to the 90 degree. So we close them in.
Not too narrow, right? It might even be wider than what I'm doing. I've got really loose shoulder joints. Okay, so it might be not as close to your head when your arms reach overhead. We're all gonna look a little different here.
As long as there's no pain, we're doing great. So as we open our elbows and press up, we're always imagining the top of our shoulders, as the arms extend, just softening down a bit away from our ears. It's really easy to overuse the trapezius muscles and do more of a shoulder shrug to try to get our elbows to extend that way. If they don't wanna straighten all the way, that's just fine. We got a couple more right here.
Hopefully we're feeling some heat, going on the top of the shoulder muscles. We'll finish with our wide shoulder press, and pause right there, bring your arms down. All right, we're gonna be moving into some lunging movements. So if you've ever had knee issues, even hip issues, lunging might be a little tricky in your body. So you don't have to go too big with these.
And I'll try to give some modifications along the way. So we'll place our feet in a much narrower stance this time. Think about the width of a fist or so, or sitting bones distance apart. And let's just see where we'd wanna go. Let your arms relax next to your sides.
Pick up one foot, take a pretty good step forward, bigger than where you would walk, maybe not by too much though so soon. Take that same leg, push off of it, and step it back. We'll stay on that side a few times. So bunch of options here. Depending on how far forward we're going to lunge, your back heel might come off the floor.
That would be a lot more work for balance, which is great. It's also a nice way to pivot from our toes. That's a lot of walking right there. Rolling through the toe joints and we'll step back. The other thing to notice is if you leave your body weight behind, right, and don't take it with you, you'll kind of feel this leaning and maybe a little bit of a crunch in the lower back.
So imagine, right away as the foot comes forward, take your body weight forward over that leg and kind of leave your body weight a little forward as you step back. Let's do one more on this leg. Lean forward with it. Keep your body weight going forward even though you're stepping back. Let's try the same thing on the other leg.
Odds are, you chose your favorite leg first. So this is my not so favorite leg. Let's see what it wants to do with us today. So we'll take that step. First one's always interesting, usually doesn't count.
We're like, ooh, where am I? What's going on? And then push off and come back together. Let's try that again. So this is the leg that you don't generally dominate with.
I don't take a step up onto a set of stairs with this foot initially. It might feel less familiar. That's a good thing though. We wanna work the side that maybe is a little less active throughout the day. So keep going, body weight forward over the leg, push off, and come together.
And then as we land, we have to pull back in our abs a bit here to help us put the brakes on. Back extensor muscles are also helping us with that. And stepping back. I'm landing heel to toes. When I push off, I'm going heel to toes.
You might be going toes to heels as you push back, and that's okay. Push it back one more time. We go forward and one more time together. Adding on, we'll move to the first leg again. So if we lunge forward on our leg and we push off and come back, can we take that same leg behind us?
What does that mean? I'm gonna have to pick my foot up, lean forward again. And now I'm in a longer lunge potentially, 'cause I'm trusting it when it's in the back range versus when it's in the front. We'll step it together right there. Same leg again.
Take it forward and come together. Same leg again, pick it up, step back, bend the standing leg, and come together. So going backwards, not usually as familiar, neurologically speaking. The brain's like, oh, I go this way too. So again, really good stuff, creating new neural pathways.
All of this helps build our awareness of what's around us in space. And your lunge might be very small. Your lunge might be bigger than what I'm doing. It doesn't matter. We'll do one more to the back, making sure the knees, pelvic bones are pointing straight ahead.
Do the same thing on the second leg again. So we'll take that lunge forward and we'll come back. The weights are here just to add extra weight to our body weight already. So we're building more bone density just from doing that. Come together and again, we go forward and together.
Take that leg back. Hold on for a moment, right? Might take an extra second when it's in the rear direction. And together, take it back, and together. Let's do a few more here.
We can start adding on some arm movements if we want. Going back. You could always go lunge and do a little hammer curl. Come together, you could take the lunge back, do another hammer curl. Lots of options if you wanna add your arms.
One more front. Let's go for a little hammer curl motion. And one more time to the back. And that's it right there. So from here, we'll open up our stance more shoulder width the part again, and we'll start focusing on the muscles in between our shoulder blades and the back parts of our upper arms.
So we're going for a pretty parallel stance. Bend the knees halfway. It's like a half squat, but we're still gonna think of hinging our pelvis back and coming into a really flat spine. Palms are gonna face each other. We're gonna barely bend our elbows.
We're gonna try to stay that way. So as we open our arms out to a T, soon as they get further out to your sides, think of lightly squeezing your shoulder blades together and then bring them down. And that's our whole movement. So muscles in the upper back, muscles in the rear part of the shoulders, not a super strong area a lot of the time, especially as the years go on, we kind of forget about these guys. And it's very helpful to improve a posture in our upper back.
So checking out with your neck position, make sure we're not just dropping our head, right? But we don't have to look way out here either. So if we think of our chin, that slight tucking energy, and this feels some length in the back of our neck right there. Okay, let's give ourselves a few more. If you have the heavier weights, you're gonna probably feel these a lot more intensely.
But with the lighter weights, doesn't feel light to me. Squeeze, come down with control. Let's give ourselves two more like this and we'll give ourselves one more here and together and we'll stand up. All right, moving on, we'll be working into some external rotation positions for our hips and for the lower half of the leg. So we're gonna find a small V.
Weights will be optional. You can just hold onto 'em the whole time. We're gonna potentially take our arms up into a front raise. So again, working the top of the shoulders here. Sometimes this angle, especially with a heavier weight, might be too much.
So feel free to skip that part or do this without weights, but still lift your arms. So we're gonna go into a side lunge. Pick your least favorite leg 'cause it's more fun that way. And we'll step over to that side. So we have the feet still turned out.
We'll be bending that knee. Lean your weight onto your leg over there. Now the straight leg, if you're very tight especially, you'll feel a lot of good stretch hopefully in the adductor muscles. From here, we're gonna reach both weights towards the front of that shin. And as we stand together, we'll hold the V, soft elbows, pull your weights up, no higher than shoulder height, bring them down.
Let's go to that same side again. So we step out, bend that knee, push your pelvis back. we're still in the hip hinge, come back together again, lift our weights up. Same side every time. Land and lunge, push yourself together, lift and come down.
So I've got my weights touching. If your weights aren't touching, that's okay. Just try to make sure the arms are lifting about the same speed. So we step out, reach down, come together and lift. Let's give ourselves a couple more to this side.
And again, if those weights are together, just kind of feels better, right? Feels like it's more whole. One more here. And take a moment. Reorganize your feet if you need to.
Let's try one slow going to the other side, right? 'Cause we don't know what this side is gonna bring. So as we land, we're gonna bend our knee. Take a moment again. Make sure our knee can line over the center part of our foot.
Really push your pelvis back and then see what the inner thigh muscles feel like on this leg. They could be a little bit tighter, they could be looser. All of that might designate that you don't go as far in your lunge or maybe stay a little bit wider if you're able to do that. So let's take our weights down towards our shin. Let's push off, come together.
This is all familiar right here in the middle. But usually, again, by the second or third repetition, the brain's figuring out what's going on. Oh, we switched sides? Okay. We're reaching down, come together and lift up. So stepping out.
Okay, it's more coordination. So if you find that you're doing things more in parts, that's all right. Eventually see if you can smooth out the edges. So you land, you bend, you reach, you stand up, you push off, you come together, you lift, right? Finding more of a flow through the movement as time goes on and the pattern becomes more familiar to your brain.
And together and up. Let's give ourselves just a few more. And you can stop anytime of course. These are the sneaky movement patterns that catch up with us the next day. Usually sore minor thighs after something like this.
Together and up. We'll give ourselves one more here. And together and up. All right, from here, we'll start working the tricep muscles, the backs of the upper arms. So we'll go back into that stance where we're maybe pelvic width apart, shoulder width apart, something like that.
Hip hinge again, soft knees. We'll pull our upper arms right against our sides. Be careful not to pull 'em too high. It's a different angle on the exercise. So our upper arms are gonna hug right next to our ribs and then the forearms and hands are gonna extend back.
And just let 'em bend. So because we're in a hinged position, can we imagine pulling our abs in, maybe doing just 20% effort so we can make sure that we're stabilizing and supporting our lower back. Reach and bend, and reach and bend. Things that might help activate the triceps even better, if you picture pointing your index finger further behind you, sometimes that allows the elbow joints to straighten that much more. And we don't wanna just bend right away, right?
We're trying to hold the elbow extension for a couple of seconds so we know we didn't just use momentum to get there, we're really using our muscles. Let's go for four and three. Try to hold them back, two, and one, and we'll come on up. All right, next exercise is again for hamstring strengthening. It's also a nice way to work some extra balance.
You might find it helpful to hold onto a wall or a piece of furniture close by and just use one of your weights. So we'll walk our feet in more narrow. Again, think fist width apart, like we were for the first more hip hinging things. So from here, we're gonna lift one heel off the floor and we'll just keep our toes lined up. We'll put our hands and weights on our pelvis.
We're gonna stick our butt out, soften the standing legs knee, and then keep hinging forward. So we're isolating the hamstring activity on the one leg. So we have our kickstand foot. And as we lean forward and come up, we just wanna make sure that the standing leg, the knee isn't bending more, isn't straightening more. So again, it's just that pelvic motion over the head of the femur.
If my balance is feeling good, I'm gonna take my toes off of the floor and we're gonna hinge again, which means our free leg is gonna swing a little bit behind us and it's kind of come right underneath us as we come up. So if your hands are at your pelvis, push your hands and weights a little bit into your pelvic bones. Sometimes that can help it feel more solid. Other things that can help, keep picking your chest up, right? Our upper back muscles have a lot to do with standing on one leg as well.
They help our balance out. We're gonna hinge again and come back up. Lots of wobbling around here. And hopefully, our ankles and lower leg are getting a nice burn. All those intrinsic muscles that support our foot and ankle, we need those to be really strong and support us all day.
We're gonna go to one more here, and we'll come back up. Place that foot down, shake out the standing leg foot. Hopefully they got a nice little burn going on. So planting our feet again, fist width apart. We're gonna lift the other heel up, leave it there.
Use your kickstand foot, and you might just keep using the kickstand foot the whole time, it's fine. So hands at our pelvis, you can always drop 'em down. You could also try to take 'em in front of you. We'll explore all those options next. So arms down, arms at our pelvis.
Let's hinge again, and come up. Keep looking at the same spot out in front of you. A lot of times that really helps with balance. Okay, give yourself a couple more. And if you're like, "This is good enough for me.
Yep, not ready to lift my foot off the floor today." That's fine. We'll come up on this next one. If it is feeling like a good balance day, let's take our foot off the floor. And as we hinge, the important thing here is to make sure both pelvic bones are still pointing straight ahead, right? And as we hinge forward, they're both pointing straight down to the floor.
So we're trying to not rotate and twist from our pelvis and our lower back. All right, if we wanna add on some different arm movements, we'll let 'em hang. Keep rolling the shoulders back in our mind. And the hardest thing of all is to face our knuckles forward and the weights can really start pulling us down at that point. Hinge and come up.
Keep the legs really close to each other. Try not to let that back leg get wild. We'll give ourselves two more. Hopefully there's a nice burn again going on up the whole leg. Last one here.
We'll put our foot down, shake out the standing leg for a minute. That's a lot of work. We'll be making our way down onto our mats next. So make sure you have yours ready. And we're only gonna use one of our weights.
If you have two smaller weights, you might find that putting the two together for the next series of exercises will work out really well. Otherwise, one of the weights is gonna be just fine. So let's make our way down onto our mat and we will be laying on our side. So you might find that a pillow underneath your head is gonna be helpful and more comfortable. If you have a thinner mat and a really hard surface floor, you might also find that a pad underneath the side of your hip, towel, cushion, anything like that might be more comfortable as well.
So we're coming down. I'm gonna support my head and neck with a hand underneath it. If this works for you, feel free to take the same position. Do anything else that feels better though. Our bottom leg is going to be bent 90 degrees, give or take.
So this is not an exact position, but we wanna be able to use it as a little bit of a kickstand against what's gonna happen with our top leg. Start with one of our weights. And then after a few repetitions, you might find that you're able to add that secondary weight. So all we're attempting to do with the weight here is to add more resistance, add more effort to the lateral hip muscles. And we'll talk another ways how to do that.
So we flex our top foot and then making sure the top pelvic bone is stacked over the bottom pelvic bone. Let your weight and arm rest on your leg for now. And as we lift our leg up, we're maybe going just slightly higher than hip height, but that's about it. And then we'll take our leg all the way down to the mat. So as we're lifting up, you have the option of just letting your weight in your arm continue to rest on your leg.
Or as the leg lifts, you might find that pushing gently down on your leg with your weight in your hand will create some extra resistance, and that'll wake up those lateral hip muscles even better. Let's do two more like this. And just take some inventory. If you're already feeling plenty of work in your lateral hip muscles, feel free to stay right there. If we wanna add that secondary weight, we'll stack both of them on top of the thigh.
Same thing, you can just let 'em sit there, let your hand be on top of them so they don't roll off. Flexing our top foot as our leg lifts. Okay, a little extra weight now against those lateral hip muscles. If we want the whole thing, we're gonna push down on both weights as our leg tries to lift up against them. And there's our resistance and our weighted hip lift.
So let's give ourselves four more like this. And down. And three. You don't have to take your day out on your leg though, so, you know, you're pushing down but maybe don't be crazy aggressive about it. One more time.
We go up and we're lowering, and hopefully we found our lateral hip muscles right there. So we'll take both of the weights off and we're just gonna go into a nice thigh stretch. As we pick up our leg again, start bending your knee. And I will say if your head is lower, you might find it's harder to reach for your leg back here. So if you can hold onto your ankle, great.
If I have to prop myself up even more onto my forearm, that makes it a lot more accessible to grab our leg, right? We're all different. You might be very tight in the front of your hip flexors. You might have to bring yourself up. If none of that is working and you have pants on, feel free to take one or two fingers, hook 'em inside your pant leg, pull it back.
None of that works because your knee doesn't flex that much, take your hand to the front of your thigh, squeeze the glute, and then push the thigh back using your arm. So we're just gonna hold the stretch for a few moments. If you're holding your foot or ankle, feel free to gently press your foot into your hand just to mix up the stretch. When you release the pressure, think of pulling your heel another centimeter closer to your glute. All right, so let's let go of our leg, we'll help ourselves up, and we're gonna try the same thing on the other side.
So grabbing our weights. Let's start with one again, 'cause each hip is different. Might be the less strong hip on this side, it is for me. So let's start with one of our weights first. You can always opt to use no weight as well.
So we've got our bottom leg vented at 90 degree. We've got our top pelvic bone stacked over the bottom one, flexing our top foot, and just letting our arm and weight rest on our leg. Let's pick it up, see where it goes, and bring it down to the mat. And we'll pick it up again and bring it down. So your weight, your arm, things might slide a little up and down the thigh.
You know, just move it around according to what's working for you. Sometimes moving the weight up a little higher towards the hip, this is easier. Okay, of course the lower it can be or the closer it can be towards our knee, that's gonna work those lateral hip muscles even bigger. So we're gonna go one more time up, bring it down. If we wanna add that secondary weight, let's go ahead and pick both of them up.
Find a place to stack them on the side of your thigh. Put your hand on top of the weight, so they don't roll off. Flexing our foot again. And then we lift and we lower. And now if you haven't done so already, just like we did on the first side, you can try pressing down on the weights down on your leg, right, as your leg is trying to lift up.
So we can do as much or as little of that as it feels right. If I really wanna challenge those muscles today, I'm gonna give my hand in the weights a decent amount of pressure as that leg is pushing up against them. Let's try about three more of these. Stop anytime. Hopefully things are getting a little tiring.
Two, they are for me. One more time. We go up and we come down. And we'll put the weights off to the side of our mat. And then if we're in a good position already, we'll keep our hand under our head here.
We'll bend our top knee, grab our foot or ankle, and then we know the other options from the other side. If it doesn't work on this side, prop up onto your forearm and grab your foot this way. If none of that works, 'cause your knee is not flex past a certain degree, maybe you can grab onto your pants or you can push your hand against your thigh and encourage the leg to move back. If we're holding onto our foot or ankle, you can start gently pushing your foot into your hand, hold that for a few seconds. And then when you release the pressure, think of pulling your heel maybe a centimeter closer to your glutes.
Don't be too aggressive with it. There's a lot going on here. These muscles are generally tight for all of us. From here, we'll be transitioning onto our backs and you'll have the option of using one of your weights for the next exercise. So once we're laying down, we'll extend the right leg straight down on our mat and the left leg is going to be bent.
We'll be using our left foot for some leverage, but it's not an exact position where it should be. It's gonna be individual for each of us. So after the first one, hopefully you'll know where to move your left leg around so that it's gonna work better for you. We'll take the weight in our left hand. And for now we're just gonna reach our arm up to the ceiling.
All of the leverage and pressure is going to be on our right arm. So you might find that having it off to the side of your mat is a better setup. If you have broader shoulders, you might find having it closer to you is a better setup if you don't. So two things, we're gonna be rolling on towards the right shoulder and we're gonna try to push ourselves up onto our right elbow. If we have the strength, from here, we're gonna push up onto our right hand.
And as we're ready to come down, we'll lean onto our right elbow again, we'll roll onto our right shoulder and eventually let our head come down. So this is a very functional exercise for getting up after laying on our backs, getting out of bed. So again, we're gonna roll towards the right shoulder, our head comes up, push into your elbow, push into your hand from there to sit up all the way. That's an option. Come down to our elbow, come down to the shoulder, come on to our back.
Now because we're holding weight up here, keep moving, 'cause we're holding weight up here, that's working a lot more forces against the center of our body. So that makes it a lot more challenging. So if you are really struggling with getting up and going through this movement pattern, put the weight down, grab onto your left thigh, help yourself up this way initially, and then eventually maybe let go of your leg. And without the weight, let your arm reach up somewhere. Let's give ourselves one more to this side either way.
Roll shoulder, elbow, hand. And one more time, elbow, shoulder, and head. We'll swap it out to the other side. So we'll hold the weight in our right hand this time. Right leg is gonna slide in, left leg goes down.
Totally different side. So the first one, just figure it out. Where does your right leg need to be? Where does your left arm need to be? What's gonna work?
So let's see if we can roll towards the left shoulder, left elbow, left hand. We're sitting up and come back down. Left elbow, left shoulder, and release your upper back and head. See if the weight's working for you, great. If you tried to get up on the first one and it was really tough, try one more.
And if it's still a big struggle, just focus. on having your arm up in the air without the weight. Or again, grab onto your right leg with your hand and give yourself some help. Okay, very functional movement here. Lots of benefit.
Roll shoulder, elbow, push up, elbow, shoulder, and back. Let's go ahead and do two more. Shoulder, elbow, push up. If we can, we can speed it up. So ultimately, we would be able to get up a little more quickly as we practice this movement more and more.
As we come down on the last one, we'll let everything settle in. Slide the right leg down, just put our weight down off to the side here for a moment. And we'll let both arms reach back, stretch through both legs. Just feel the length in your whole body. All right, we'll bend our knees in, we'll bring our arms down, roll off to one side or however it feels best for you to sit upright.
And then we're gonna sit in a comfortable position. So take a pick. It could be cross legs, diamond shape, straddle. You could even stand here. And we're just gonna move through some nice arm stretches after all that exercise we gave them earlier.
So we'll take our left arm, we're gonna cross it over. Right arm's gonna come underneath our left elbow. And then we're just gonna gently continue to pull the upper arm closer against our chest. So we're stretching into the deltoid muscle here on the top, little bit into the bicep muscles, and of course the backside of the shoulder. Take a deep breath in.
And then as we exhale, we'll come out of it. And then we'll take our right arm out in front, hook the left arm underneath it. And then same thing here. Use your left arm to guide the upper part of your right arm closer to your shoulder. I've got really mobile shoulders, so don't worry about it looking like this.
It doesn't have to look like anything. We're just looking for this stretch here on the back of our arm. One more deep inhale, one more exhale. And then we'll take both arms, we'll stretch 'em up towards the ceiling. And as we go out to the sides, maybe bend your elbows just to find a nice stretch across the front of your chest.
And as our arms get closer to the floor, we'll straighten our arms again and we'll let them rest wherever they say they want to be. Thank you so much for joining me today.
Begin Pilates: Functional Practices


Comments


You need to be a subscriber to post a comment.
Please Log In or Create an Account to start your free trial.
