Description
About This Video
Transcript
Read Full Transcript
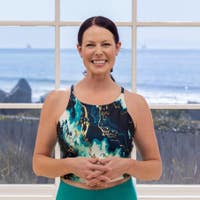
I'm Erin Wilson. In today's class, we'll be focusing on movements that are safe for bone density awareness. To begin this class, let's make our way down onto our backs on your mat. If you need a pillow or any kind of support behind your head when you are laying down, go ahead and put that in place for yourself right now. We're gonna start with just an abdominal activation exercise, something to wake up the centers of our body, and it's an idea that we're gonna put a lot throughout the rest of this class as far as how to hold ourselves in a better position for most of these exercises, where it's gonna really support our spine the best.
If you have osteoporosis or osteopenia, all of these movements are gonna be safe for you. So we'll place our feet a comfortable distance apart and we just wanna take some inventory of what we feel behind us. So if you can feel the flat bone of your sacrum just sinking into your mat, hopefully there's a little bit of space underneath your lower back, but if there isn't, don't necessarily correct it. Just notice if there is space there or not. And then the upper part of our ribcage, backs of our shoulders and the backs of our heads are all trying to touch the mat.
So let's focus on the lower part of our spine here. Both hands are gonna come low on our pelvis and we're making this open diamond shape, this open triangle position where the fingers are pointing down towards our pubic bone and the thumbs are pointing in towards our belly button. So as we inhale, we can allow that area to move, kind of lift up underneath our hands. But as we exhale, we wanna picture closing that triangle closer together and we'll notice how that gently tucks our pelvis and maybe imprints our lower back into the mat without forcing it from pushing into our feet. Your next inhale is gonna open the triangle and again, as we exhale, try to feel your abdominal muscles pulling your hands closer together and feel how that moves your pelvis in a slight tucking motion.
As we inhale, the triangle's gonna open and that's gonna slightly tilt your pelvis down. So just waking up some of the stabilizing muscles here around the lower back, around our lower abdominal, our pelvic region, and we'll use those quite a bit to encourage some stability into the lower part of our spine as we get into some leg movements later on. One more time, so we'll breathe in. We'll feel everything opening, and again as we exhale, we're gonna connect the hands closer together. We'll try to feel our lower back finding the mat without pushing into our feet.
Okay, from here we're just gonna place our arms down, let everything relax, and then if you need your hands there still, not a bad idea, maybe keep doing that, but as we go to breathe out again, we'll walk our feet closer towards our glutes. Make sure that they're pelvic width apart. And as we stand into both feet, the minute our butt leaves the mat, we're gonna try to squeeze our glutes here and we're just lifting straight up. Holding our position at the top. Let's check into some places around our feet.
Can we press the big toes down into the mat a little bit deeper? Can we feel the arches of our feet trying to lift away from the mat? And can we feel the centers of our heels really pressing down heavy into the mat as well? From here, we're gonna keep our spine flat and think of our pelvis leading the way down. So with a straight back, we're gonna lower ourselves until our pelvis taps the mat again.
As soon as it does, we'll contract through our glutes, we'll lift our pelvis back up and we'll find the high point for us. It might be higher than where I'm at, it might be lower. And the idea here is to keep our chest relaxed and feel all the efforts in the backs of the legs here, our glutes, our hamstrings. The last thing we're really maybe noticing is the lower back extensors, but they're hopefully not doing the majority of the movement. If all you feel is your lower back, bring your level down a bit with your pelvic position and think of pushing down a bit heavier into your heels, almost dragging 'em back towards your glutes.
Hopefully that lights things up a bit differently. Okay, we're gonna lower down all the way again and we'll go a little bit quicker here. So we're gonna lift straight up. Pretend like you're hugging something in between your knees, so the knees don't just wanna splay out to the sides. Lower straight down.
So it's strengthening, hopefully glutes, hamstrings, back extensor muscles, all of the good stuff, all of the important things we need for daily living. Let's give ourselves two more here. Straight up. And just straight down. One more time, we'll go straight up.
And one more time, lower yourself to the mat. We're gonna be adding on a leg lifting movement next, so feel free just to stay with the basic bridges that we've just done or we'll add on. So we're gonna press into both feet. We'll lift straight up, we'll find the high point of our bridge. And then we just wanna hone in on our feet here.
So without lifting a leg yet, can you imagine pushing down more on the right foot? So just by putting more weight on that foot, hopefully the right glute kicked on a bit heavier. If it feels like you're ready to lift your left leg, we're gonna bring it up to a 90 degree. Just hold for a few seconds. It should be challenging all the good muscles here on the backside of the right leg.
We'll place the left foot down. Try to find even pressure in the feet here just as a middle ground. And then we'll push down more actively on the left foot. Think specifically your heel and your big toe. When you think you're ready, we'll lift up the right leg and just feel what's going on on this side.
Sometimes one side feels weaker, one side feels stronger. It's very normal, but we don't usually know what that is until we do an exercise like this. Place your right foot down and again, feel the same pressure underneath both feet. Let's press more actively down the right foot again, pick the left leg up. Hold for a few moments.
Place the left foot down. Try to find equal pressure there for a moment. And then we push down more actively on the left foot to bring the right leg up again. Hold there and we'll place it down. So a breath pattern, we'll go back to the right leg again, standing on it could be an exhale to lift our left leg.
Inhale is gonna put the foot down. Next exhale is gonna lift the right leg. Inhale to place it down. We'll do one more to each side. You can go slower than this if you need to.
You can also go faster than this. One more time, we bring the right leg up. We put our right foot down. One last time, feel even pressure under your feet. Think of the abdominal softening down into your back and then we're just gonna lower straight down from here.
As your pelvis lands on the mat, pick up your feet and legs and then just give 'em a nice hug into your chest for a few moments. From here, we're gonna move both legs into that 90 degree position. So the further away our thighs are from our chest, or the more directly our knees are over our hip joints, it's harder to hold our legs out here. So feel free to bring them in a few inches and maybe relieve some of the tension that you might feel in your abdominal wall, maybe even into the back. So if we're able to, we're gonna keep our knees right over our hip joints and we're gonna make that triangle shape again with our hands.
Find your pelvis, so fingers pointing down towards the pubic bone, thumbs kind of pointing in towards the belly button. And as we exhale, we're gonna lower the right leg down. Keep the shape of that leg, but at the same time, think of pulling your fingers together, because your abdominals are squeezing inwardly. As we exhale again from down here, do the same feeling with your hands to bring your leg up. So we'll inhale here, let things expand.
Exhale to slowly lower the right leg down. Think of sliding your fingers towards each other. Inhale here with your foot on the floor. Exhale again, squeeze your fingers towards each other. Lifting the leg back up.
We'll do two more on the right side. So we inhale here at the top. As we exhale, think the abdominals are sinking down into your lower back as the right leg lowers to the mat. Just breathe there for a moment, inhale. Exhale again as if your abs are pulling your leg back up.
Really try to find that connection that our body, that our center has to our limbs. One more time here on the right. So breathing out. Controlling the movement of our leg lowering. Inhale here at the bottom.
One more time, think abs pull down into our back first to bring our leg up. We'll hold here for a few seconds. Reorganize if you need to. Same thought going on on the left leg. So we inhale.
As we exhale, pull again, abs down into your lower back. Control the movement of the left leg to the mat. Put it down there, put some weight on it, inhale there. Exhale again as if your abdominals have something to do with lifting your leg up. That's where we wanna feel like we're initiating it from.
Inhale here at the top, exhale we lower down, control. Inhaling at the bottom. Exhale, how much deeper, right, can we think of our abs pulling away from our hands, our hands pulling towards each other. Two more times here, lowering down. This is definitely where you might feel some extra tension around your neck.
So that might be a nice indication. Put something behind your head if you're gonna try this again. One more time, we lower down with the left leg. We breathe in. Exhale is gonna pull the leg back up and we're gonna place one foot down, followed by the other.
And just let everything rest there for a few moments. From here, we're gonna slide our right leg down on the mat. We're gonna grab behind the back of our left thigh and knee and just start pulling our leg towards our chest, opening up the front of the right hip and maybe even getting the nice stretch here on the back of the left glute. All right, we're gonna go into some hamstring stretches first and then we'll continue into some circular motions and really warm up the hip joints. So as we push our left thigh into our hands, our elbows are gonna straighten out.
When they have nowhere left to go, see if you can start straightening your left leg up. Now, it might not go perfectly straight and that's okay, but if you're pressing your leg into your hands while you're trying to straighten it, at least we can pretty much guarantee we're not trying to hike our pelvis up or get ourselves to stretch out in a strange way or something that's not gonna be as effective to lengthen our hamstrings. We'll go ahead and just bend our knee here. Keep pressing your thigh into your hands regardless. And then as we try to straighten it up again, we'll maintain that sense of pressure and we'll go ahead and bend it down.
On the next one, we're gonna straighten it up to stay. Feel free to keep your foot relaxed. If we can though, we're gonna try to flex our foot back and that usually sends all kinds of fun sensations down the leg, ha-ha. So if we're holding our position here, we see if we can let go of our leg and we're just gonna open our arms a little bit wider than the mat so we have a better sense of stability from our upper back. Maintaining our pelvis on the mat, the whole body nice and flat.
We're gonna cross the left leg slightly over the midline of the body towards the right. From here, it's gonna lower down and we'll make a small oval shape with our leg to pull it back up to the middle. So we're crossing over to the right, bring it down, trace that oval on the ceiling, back to the middle. So here we are again, as our leg is moving around, especially as it picks itself up again, can we picture all of that effort that we've had throughout the movement so far of pulling down in our abdominals to guide the leg back up to the ceiling? So we're thinking of our abs moving and helping our leg do this motion.
Although we know that's not exactly true. We go one more time this way. Cross it over. Circle around, find the ceiling. Take a moment, grab behind the back of your thigh, bend our knee just to release out of it.
Press it back up again. If your knee's slightly bent, that's fine. Same thing with with the foot, let it relax, no problem. Open the arms a little wider than our mat. Reversing the direction can be a little tricky.
So as we go out to the left, you wanna think of keeping the right pelvic bone really heavy on our mat. Lower your leg down, cross it over, pull it up to the ceiling. We go out again. Bring it down, cross over, pull it up. As the leg is lifting towards the ceiling, can we think abs are pulling down into our lower back to help lift our leg back up?
We go two more this way. Feel how still everything can be on the mat. One more time. And from here, we're just gonna bend our left leg, slide it down on the mat. Shake it out a couple of times.
A lot of work there. Bring the right leg in towards our chest instead and then just take a few seconds. It should be a nice way to open up the front of the left hip, pulling the right knee up towards our chest and then as we're ready to start getting into the right leg, we'll push our thigh into our hands. Let the elbows straighten out. And then when they have nowhere left to go, try to straighten the right leg up towards the ceiling.
Totally different leg. Okay, it could be your better leg, you're not so better leg. This is my tighter leg today apparently. Really feeling this one. Take a few seconds and then just bend your knee back down.
We keep pressing our thigh into, our hands are gonna straighten our leg up again. Maybe straighten-ish. The ish is good and then we'll bend it back down. And just one more time. Straighten-ish your leg.
If we're willing and we're able, we're gonna keep our leg right here. Try flexing your foot back. Oh, that's not so much fun on this leg today, but we're gonna go for it. All right, if we're ready to let go of our leg in this position, we'll open the arms out just a little wider than our mat. Same thing here, we're gonna cross the right leg over to the left.
We'll start bringing it down, oval it out to the right and pick it back up to the ceiling and cross over again. So we know the leg's doing its thing, but can we put our thought into the center of our body here? So trying to really stabilize our lower back and stabilize our pelvis underneath us against the movement and the weight of our leg. Let's give ourselves two more this way and just a nice breath. It could be an inhale on one circle, it could be an exhale on the next.
Hold the leg on the ceiling. Grab behind the back of our thigh. Let your knee bend, just take a moment. Okay, pressing our thigh into our hands. We straighten our leg back up.
Flexed foot, relaxed foot, soft knee, right again, make it work for you. Arms are a little bit wider than the mat here. Hone in on those lower abdominals, lower back. Everything's solid, we take our leg out to the right, trying to keep the left pelvic bone really heavy here. We lower down, slightly cross it over as it comes back up and a big movement here and we go again.
So feel free to take it pretty far as long as you feel really solid on the mat, right? As long as that left pelvic bone is in flapping around all over the place, we're good to go. So your circle might be a lot bigger than mine. We got three more here. And give yourself two more.
Keep working through your breath. And last one, we pick it up. From here, we're just gonna bend our leg. We'll place our foot down on the mat and then you can use your foot. We are gonna turn onto our sides here, so you can use one or both feet.
Maybe just wiggle over to the backside of your mat and then we'll go ahead and be turning onto our sides here. So we might need a pillow. You might find that your bottom arm is not enough support, you'd like a pillow in between your arm and your head. But we'll be in this position for the next several minutes. So make sure that it feels comfortable and you're not just gonna be thinking about what your head and neck are doing the whole time.
Stacking our legs, so we wanna take a moment to set ourselves up well, 'cause we'll be here for several exercises. So the thing we are looking at for the most is the top knee to try to be right over the bottom knee. If it's slightly behind the bottom knee, you can pretty much guarantee your pelvis is already rotating backwards and we're gonna try to keep our pelvis really stacked. So check out where your knees are first. And then we also want our knees to be a little bit below the hip crease here in the front.
If it's right up in line with it, a little bit too high up for a lot of these exercises. So think just an inch or two lower than that. Insides of the feet are together. Picture your heels in line with your tailbone. Top arm's gonna have some options.
So we'll start by placing our top hand behind our head as well. And we're gonna keep our legs glued together. So as we lift our top elbow up, we're gonna follow it backwards and we might not go that far, okay? Ideally, the knees have stayed together. Okay, so maybe that's an indicator of how far you could go in this position.
And when you're at the end of your range of motion, just bring that top elbow around and bring it in front of you and that's gonna unwind us so we're all on our sides. And we'll keep that going, so top elbow's gonna lift up, it's gonna open, we're just following it backwards. If anything, think of the top knee sliding a little bit past the bottom knee. And then as we breathe out again, we'll go ahead and fold ourselves all the way onto our sides. One more time like this, so we'll pick our elbow up.
We'll let our head just rest back in our hands. So a little extension, little bit of rotation, but our pelvis and our legs are trying to stay still. The next option would be to take our arm and reach it more up towards the ceiling and then let our straight arm guide us back. Make sure that your bottom hand can still support your head. And sometimes just having a longer lever gives us a bit more movement, little bit more mobility, but it also might mean that it torques your back too far.
So listen to that. Feel free to just keep your top hand behind your head the whole time. We're gonna go one more here. And we just breathe as we move and as we come back around, feel free just to place your top hand in front of your chest. Feel free to also take your bottom arm and do anything else.
So you can maybe prop your head up here if this position's no longer working for you. So the insides of our feet are gonna stay connected. We're gonna be lifting the top knee up and down, but before we get there, grab onto your top pelvic bone and think of sliding it down towards your feet, right? So we just tried to lift a little bit of space underneath us and the other thing that's trying to happen, as we lift our knee up, we don't want it to come from hiking our pelvis up towards our shoulder. So we're gonna keep our pelvis nice and heavy here and then start picking our top knee up and down.
The other thing that's helpful with having our hand on the top pelvic bone. It's helping us not roll backwards to lift our knee. It's a really easy way to cheat in this exercise. That's what I would do, 'cause it's a lot better. So we keep the knee moving, we keep the hip moving just inside of our pelvis.
So again, lots of stability effort going on, pulling those abdominals the whole time, right? That should kind of be a nice given thing here just because of the way that we're setting ourselves up. So we keep that going. We'll give ourselves about four more of these. So external hip muscles, really important stabilizers.
They help support our lower back. They help us stand on one leg, and one more time lifting up and coming down. The direction we don't get is often in the hip joint is internal rotation. So we're gonna be flexing the top foot, go into dorsiflexion there. The knees stay connected and then we're gonna think of the top part of the lower half of our leg here just coming up and then coming back down.
So nothing has changed in our pelvis, right? So as the top lower half of the leg is lifting, we don't wanna feel like we're rolling forward now to make that happen. And we're also trying to concentrate on the top pelvic bone not sliding up and creeping up towards our shoulder. So you might find that you have a lot of good internal rotation on this hip joint. It might barely be moving much at all.
All right, this is the side of the tire that doesn't get as worn out. So it's really important to try to move our hip joints in all the different ways they're meant to move. And we'll give ourselves about four more here. Pick it up. Feels strange, sometimes there's some cramping that can happen in the side of the hip on this one.
So feel free to take a minute if that's happening for you. Work that out, last one here, pick it up. Bring it down, and we'll pause right there on that side. Help ourselves up and we're gonna repeat everything on the other end. So moving our legs around.
If you've been using a pillow to support your neck, you might wanna use that again on this other side. And then let's set up our legs, set up our pelvic position really well. So looking again at the top knee, making sure that it's right over the bottom knee, not behind it, but also not in front of it. That's another option, right, another opportunity. And then we want our heels to be in line with our tailbone.
Think of your pelvis already dropping down towards your feet. So let's take our top hand behind our head and then as we start opening our top elbow, we'll let our head fall back in our hands. We're looking up towards the ceiling and we're trying to keep our legs stacked and keep our pelvis very still. Figure out where your end of range of motion is. And then as we bring our top elbow around, we're just gonna fold onto our side again and we'll keep that going.
So this side, you might go further. This side might feel more restriction. We're not looking to force any movement though, so listen to your back and when it says to stop, just stop right there. We are never gonna be the same, okay? But if there's a big discrepancy or you notice you don't have nearly the amount of mobility on one side versus the other, that might just be something to work on in the future.
We'll give ourselves one more here and then we'll possibly add on the arm extension movement. Breathe as we go. Nice inhale back here can feel good. And then we'll come all the way onto our side. So if we wanna try with the arm extended, we're just gonna reach it out in front of us first.
Pick it up towards the ceiling and then we'll keep letting it reach behind us and the longer lever just might feel different as far as the stretch and the movement goes in our back. But if that's too much, right, you feel pulling in your back in a negative way, it's probably too long of a shape here with your arm. So feel free to fold your elbow again, place your hand behind your head and do these last ones. All right, as we come around, we can just place our top hand on our pelvic bone and then we're ready for those clamshell exercises. So the insides of the feet are gonna stay connected.
Let's be a little bit more active with grabbing onto our top pelvic bone and encouraging it to push down or reach down towards our feet. As we hold that shape, we're gonna pick the top knee up and we'll bring it down. All right, so again, an easy exercise in theory, but a lot of ways that we can cheat and not use this more specific deep, external hip rotating muscles that we all have, right? So if you're feeling a lot of effort in the front hip flexor and there's a lot of gripping there, maybe stick your butt out a little more. Try that.
The other idea would be to reach your top knee further down towards the end of your mat as the leg is lifting up. So all of these options are gonna possibly change the exercise for you. We're ideally trying to feel the muscles all around the side of the hip and glute here kicking on. We'll give ourselves four more. All right, check in with your pelvic bone and keep encouraging it to drop down towards your feet.
Keep thinking of the underside of your body lifting away from the floor. Last one like this. We pick it up and we bring it down. Now for the weird ones, right, the internal rotation. So we're gonna flex our top foot.
The knees stay connected this time, but we're still encouraging our top pelvic bone to reach down towards our feet. Lift the lower half of our leg up and then bring it back down and almost right away, for me at least, I can totally feel which side I'm better at this with. This is my better leg for internal rotation. Okay, but I also have scoliosis in my back, so that has something to do with it. My pelvis sits differently because of the shape of my spine.
So you might notice in your legs as well one side had a lot of range of motion, one side maybe not so much. All right, same thing here. If you're cramping or feeling anything overly gripping in the front of the hip, okay, that's totally normal, especially if you're not used to doing this kind of movement pattern. So we're exercising muscles potentially that don't get a lot of action, but they would like to have more. We get three more of these.
And we'll go for two more here. And our last one. Bring your leg down. And once again, we'll put our hand on the mat. We'll help ourselves sit up and then we're basically just gonna find a comfortable sitting position.
So I'm gonna choose a diamond shape. You could also go cross legs. You could also choose to sit up on a pillow or two at this point as well. but it's a place where you can feel your sit bones underneath you. So I gotta move some stuff out of my way.
Really try to settle your pelvis into the mat. And then you wanna be able to hold onto your legs somewhere. So depending on how you've sat, it might be your shins, it might be the backs of your knees. Just find a place where you can get a decent grip on your legs. We're gonna use our arms for some help, for some support here.
So if we think of pulling up on our legs, like we're sliding our hands up the shins or up the knees, think of lifting up through your whole body. So from the front of the body here, we're drawing the abdominal muscles into our back, but now because of our arms helping us, hopefully we're feeling the lift of our entire spine. So take a few seconds. Notice how much or how little you need the help of your arms. And then with holding on, we're gonna start bending our elbows and just send our flat back position forward.
Now, you might just go a centimeter, you might go five inches. We're trying to keep our back really straight here. And even though we're holding on with our legs, we should hopefully feel the back extensor muscles having to kick on to put us in this position. All right, from here, we're just gonna straighten our elbows and bring our body over our pelvis where we started from. So the thought is to pull up on the legs first and then send your chest through your upper arms, reach your sternum towards your feet, find those back extensor muscles kicking on, and then move yourself away.
If this is good enough for you today, stay right there. We're gonna add on with some arm movements next though if you're looking for more of a challenge. So we'll pull up on our legs, pull up through our back. Send your chest forward through to your feet, not necessarily through them, that would be cool, but through your feet. Here we are, we're gonna hold our shape, bring the chin down a tiny bit so we feel some length in the back of our neck and seeing if we can hold ourselves here and let one arm reach out.
It doesn't have to go high. Just let it reach out somewhere where it's not a big strain, but it's a challenge. If we can, we're gonna let go of our other leg and reach the opposite arm out. We're gonna hold ourselves here. Keep breathing.
Place both hands down on your legs, again, with the bent elbows. And then as we straighten our arms, we'll send ourselves upright over our pelvis again. So we'll keep adding onto that. So we pull ourselves up tall, we bend our elbows and lean forward. Reach your tailbone back there.
Keep the chest moving forward and up and away. Chin comes slightly down so we know it's not just the neck doing it right. Chin's slightly down. Let go of one leg, reach that arm out somewhere. Let go of our other leg.
Pull in from the abdominals still, they're still supporting us. Both hands come down to our shins with bent elbows and as we shift back, our elbows extend. We'll do that one more time, adding on more. So we lift up and lean forward. Chin comes down a tiny bit.
One arm reaches out. Other arm reaches out. From here, we're gonna take both arms and maybe move them back another inch or two and bring them back where they were. And move them back an inch or two and take 'em forward where they were. We'll get three more of these.
So we're thinking of moving our arms from disengaging our upper back muscles that much more. And as the arms go back, think of the chest, pushing forward that extra bit. Bring your arms forward where they started from. One more time, hands come to our shins. As we send ourselves back, we'll release right there.
Hopefully that woke up your back muscles quite a bit. We'll close the knees together and we'll get into some weightbearing on our arms. So if you have a thicker mat, a nice thing to do for wrist tension issues, potential there, is to put the heel of your hand on the mat, but have your fingers on the floor. The other option would be to face your fingers towards your feet. This doesn't work for me.
My wrist has an old history where I broke my wrist and going this way is not fun. So I prefer to turn my hand out to the side. It's less pressure, less tension on my wrist. Feel free to do the same. If you don't have any issues in your wrist, feel free to point your fingers towards your feet.
So we're gonna place our feet the width of our shoulders more or less. We want them to be wide. Eventually, we might put some weight into them and lift our pelvis up. For now though, we wanna figure out where we need to be. Everyone's shoulder width is different.
Your hands might have to be off of the mat. All right, so depending on where it feels like you could put some pressure and put some weight into your arms, that's where you wanna line your arms up and line your hands up. And we're just gonna keep lifting up through our chest here. Keep the tailbone dropping down into the mat. As we go to bend our elbows, that's gonna send our bodies back and feel the pressure shifting towards the pinky sides of your hands if your hands are pointing out like this.
And then we're gonna extend our elbows and push ourselves forward. So this would be our modified version of a tricep dip of working the tricep muscles. If we want more challenge, we're gonna push down into our hands first, we're gonna push into our feet next, lift our pelvis up. The higher it goes, the more movement you have, the more range of motion you might have in your elbow joints. So holding your pelvis there, we're gonna bend our elbows again and press them up.
It doesn't matter if your pelvis is off the mat or not. We're getting some good weight-bearing activity on our arms and we're working our tricep muscles and we're also working the shoulder extensor muscles. Okay, those tend to be an interesting group of muscles around the shoulder, not usually the strongest areas. We'll give ourselves about four more here. Put your pelvis down anytime.
And just again, feel that weight transfer pinky sides of the hands as the elbows bend, a little bit more towards the thumb side of the hand as they extend. One more time. And then if your pelvis is off the mat, go ahead and put it down. And as we come off of our hands, let's go and just fold our hands over the other way. Give our wrists a little stretch.
Call this the karate kid movement right here. And then we'll put our feet and legs back in that diamond shape. So bottoms of the feet can touch, they don't have to. You can have a little bit of space and you can also play around with having your feet closer to your pelvis or further away. Just again, make sure you can sit in a pretty comfortable position here.
So all we're gonna get into is a stretch, hopefully opening up our hips. Maybe even opening up the inner thighs. So exactly where we were before for the spine stretch, for the back extension exercise, we're gonna be holding onto our shins or holding onto our knees again. This time, however though, we're gonna lean forward, keep the flat back, maybe not as intentional. So be a little bit more relaxed about it.
And then just very gently, we're gonna be pushing down on one of our arms and let yourself lean a little bit that way. And then come back through the middle and then use your other arm, push down on that leg, lean your body a little bit that way. So two things, you might also be getting a bit of a stretch in the lower sides of the back. And we're just being gentle with our pressure here, not looking to overly force it. Go one more to the second side.
And then once we're back in the middle, again, our back is still flat and then you can maybe change just your hands on the insides of your knees. You might walk your feet in a little closer and then just play around with a gentle press down on both knees this time. Don't take your day out on your legs, just a little bit of pressure. Breathe. And then as we release that pressure, we can keep our legs in this shape.
You can go into a straddle or anything else that might feel more comfortable. And then we're gonna take that into a nice chest opening position. So we'll place our hands behind us. Probably just fingertips on the mat, whole hands is fine. Do what feels best for you.
And then if you have the tighter shoulder stuff or broader shoulders, putting your hands just outside the mat might be better. But the idea is to push into your hands. Think of rolling your pelvis forward, rotating the upper arm bones back. And then of course, that's gonna help lift our chest up, which is the whole point right now. Get some nice extension from the upper body.
Get the shoulder blades a little squeeze. Get some stretch through the bicep muscles. And then as we're ready to slowly come out of that shape, we can just take our hands onto our legs again, nice long inhale here. And breathe it out. Thank you so much for joining me today.
Begin Pilates: Functional Practices


Comments


You need to be a subscriber to post a comment.
Please Log In or Create an Account to start your free trial.
