Description
About This Video
Transcript
Read Full Transcript
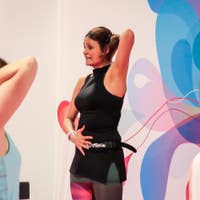
Hello, everyone. Welcome to today's lesson. It's going to be on the reformer. We have this beautiful body here with scoliosis. So I'm gonna prescribe the ideal workout for her and still give her some resistance, have her move because the beauty about movement is you actually obtain results.
So let's get to it. Here we go. Let's stand at a corner for me, please, align your sits bones to the corner of your platform on your back, heels together toes apart. The weight is on the metatarsal, and I want all the toes to be part of the equation, right, with the a in heel, press outs and with your exo bringing in. You can use three or four springs depending on your ability, but you wanna make sure that you do an do not over activate your quads with your inhale outs and exhale in lengthen. Yeah. Notice where her eyesight is, as a little bit more forward, So she can elongate the back of the neck.
The pelvis is neutral. No imprint of the spine. Yes. Because you want to make sure that when you stand up, you still have that neutral pelvis and neutral spine. One more time for good measure. And on your arches for me, please. Arches with the feet slightly rotating out, the knees together.
We need to honor that Tibia, that torque of the Tibia on the base. So from that position pushes out and brings it back in. Remember, if you press the heels forward, you're gonna activate that whole back line. So put the emphasis on the heels reaching forward. You are draping the metatarsal, but also try to not to grip on those toes. Two more, please.
Find that rhythm of the wave and release on your heels for me, please. The wave goes out and in, and inhale, and exhale. Again, honoring that torque of the tibia at the base of the leg, keep your feet slightly turned out. Your legs parallel. That's gonna activate your outward rotators of the hip.
So it's very important that while you're doing footwork, you're strengthening your lower powerhouse. Two more. Last time, and release. 10 and stretch for me, please. Place the weight on the first and second metatarsal for me, please.
Every time you press the heels down, you try to elongate the front of the hips even more. Now as you lift your heels up, see if it can activate your lower abdominals. Right. So lengthen the back line, activate your pelvic floor. Good.
Using the breath. One more time for good measure, please. High on your toes, bend the knees, and now you are ready for 100. You keep exactly the same springs you've worked, your footwork. With your axle come up into a 100 position.
Ideally, your toes should be eye, eye level. Your hands above your thighs, six to eight inches movement up and down. Find that outward rotation of the shoulders. So what I'm what I mean by saying rotation of the shoulders, find that wrap this way, and hug your scapulas to the front of the body so you can activate your upper abs. Six to eight inches of movement with your arms. Now if you feel that your lower back is being involved, bring the legs up for five counts to three, four, five.
And with your in, he'll bring him down to three, four, five at eye level. Again, because we want to be able to eventually do this exercise the original way. One more time, finish your exhale at the top and release. Good. Grab the handles of the right hand for me, please, swing the body to the right, remove two springs. So, ideally, you want to have two red springs if you're working in a diff on a different, reformer, needle the handles with the straps, leg circles, and frogs. For the, the leg circles and frog, Freda, I want your head to be up so we keep that nice elongated neck as well as your lower back.
Mhmm. Let's start with the leg circles. Roll down for me. Please length those legs nice and long. And I actually want you to work the outward rotation of the hips.
So as you circle the legs out to the side, I want you to rotate outward. And then bring the legs parallel. Turn those legs out about 15 to 25 degrees outward. Not so wide. It's not a ballet turnout. It's just a natural rotation of the hips.
Right. Keeping your pelvis neutral. So try not to tuck under. If there's a little bit of space between you and your lower back, that's fine. Because guess what? You're gonna have to activate your obliques. One more time for good measure for me, please, and reverse.
Down up and around one. Good. And the same rhythm as the wave goes two. Good. Again. Find that length of the legs. Muscles that you're looking for are inner thighs, hamstrings, glutes, rotators of the hips, pelvic floor, and, yes, your psoas as well.
Very good. Excellent. Bring the legs together for me, please, and frogs. Inhale as you extend those legs forward and with your ex or bend the knees. Imagine you're pressing 200 pounds as you extend those legs forward. Now, Keep that connection of the legs and draw the carriage back in. Again, with your inhale, imagine 200 pounds, you should be shaking at this moment because you are working your stabilizer muscles That's what Pilates is all about. It's about finding those muscles that keep the integrity of your posture. So one more time for good measure, please. And stretch stretch stretch.
And release. Excellent. Very nice. Grab the handles. You're still on two sprains, coordination from me. Please bend the knees into the chest.
There's a slight rotation of the hips. So your knees are towards your ears. With your inhale, like, in those legs longer, longer, longer, open close, and with your exhale bringing it in. See if you can meet your knees halfway with your forehead. I get inhale, lengthen those arms, stretch those arms longer, open close. And see if you can lengthen that lower back. Now you can make an imprint of your spine because you're creating a c curve long lower back roundness in the thoracic, long neck. Good. Beat eight counts for me, please. Inhale.
And we beat two, three, four, five, six, seven, eight, and with your axle meet your knees halfway, Freda. One last time. Here we go. Inhale. And beat one, two, three, four, five, six, seven, eight. And with your x, we'll bring it in, in, in, in, and release. So that's the warm up section of the workout. Now let's go and set up your long box, please.
Place your handles in the hooks and off to the right side, please. Set up your long box, keep a spring inside of the box so it's accessible for you, and we can just flow from one exercise right into the other. Now we're about to do flying eagle with one spring, one red spring, if you like. Bar up and place the pad at the back end of your box. On your stomach, please, the knees are chest off the box, hand, thigh, hand, thigh. Good.
Bring yourself a little bit more forward to see if you can bring your chin above, yes, the bar. Try not to open the elbows out because that totally disconnects your scapulas to the front of the body. So your elbows are either forward or slight rotation of 30 degrees from the scapulos with your inhale press those legs long for me. Please stretch those legs as much as you can. Bring your head up a little bit higher. Yeah. Crown of the head reaches forward there.
Scapula's float towards your ears and towards your hips, towards your hips, towards your ears, one more time, rotate the shoulders back, and close the carriage by lifting the chest up Now, Freda's gonna get to work her right side of the lower back by reaching that left arm up to the ceiling. Reach, reach, reach, reach, and bring it down. Now the other side linked it, now she's gonna strengthen her left shoulder. And, yeah, stability on the right lower back. Yes. And stability in the shoulder.
Those are one more time. And those are the structures that she needs to focus on. To balance her scoliosis. We're not correcting scoliosis by no means, but we're strengthening those muscles that have been compromised. Close the carriage all the way down for me, please. All the way in. And we start all over again. Ready.
We open the carriage, scapula's towards your ears, scapula's towards your hips. And mobility notice she's not bending her elbows one more time. Now I can give her another cue, or you can take another cue yourself, connect your hamstrings and glutes and lift the chest up. So those legs don't drop. Can you connect with your hamstrings? There we go. Right arm up to the ceiling for me, please.
And bring it down. So ideally, you want to be able to bring either arm next the ear. Last time, inhale, and stretch. And with your inhale, push the carriage away. And bend the elbows and bring it in. We're gonna do this one more time to work one extra repetition on her lower back, her right lower back.
One more time, scapulars go forward and down. And with that outward rotation, she closes the carriage. Now lifting that left arm is gonna activate that right side and bring it down. Good. One last time, and we're gonna do one extra on the right side.
And now she's gonna push the carriage away, scooping the abdominals, closing the carriage by bending the elbow slightly at 30 degree angle, step down with the right foot to those side of the reformer. Excellent. Bring the bar down for me. Please bring your pad underneath your reformer. And now you're ready for pulling other strap. Now I like to do our the archival pulling of this trap, which means it's a full expression of the whole body.
You're not only gonna work your outward rotator. So the shoulders but you're also gonna work your hamstrings, inner thighs, and glutes. So you start with the legs on the bar. You find that c curve. So there's a bit of elongation on that lower back.
With this position, you activate your rotators of the shoulders, and pull the arms back. The height of your feet should be the height of your head. Good. And with your ex, you'll bring it down with control and find that scoop of the abdominals. It's sort of like the reverse of the teaser. Again, here we go. Give me that outward rotation of the shoulders. Remember, this is not necessarily a backbend. You're trying to open the chest. Yes? So try to keep the chest on the platform.
Give me that outward rotation. The height of your head is the height of your feet. And with your ex, we're bringing it down. She does a beautiful job. Excellent. Grab the end of the strap.
Open the arms into little tee into the tee. Notice her out the her thumbs are up of the ceiling, because right away, she's activating her outward rotators. And that's what this exercise is truly about. With your a inhale, rotate those shoulders back. Yes. Glad the scapula is down to your hips.
And bring it down with control. Make sure that you do not over activate your traps. Again, with your inhale, give me that outward rotation. If you're over activating your traps, that means your serratus is not doing its job So really try to find that wrapping of the shoulder blades forward as they glide down and back, height of the head, height of the feet, and with your ex, so bring it down with control and release. Grab the handles with your left hand for me. Please come up to your left side, and let's add another spring.
So now you have two red springs or two just red springs period. Hand foot, hand foot and come forward to the front edge of your box. You wanna make sure that your one inch inside of the box with your shoulders, with your annual double leg stretch, extend up to the ceiling, open, and reach forward lengthen, lengthen lengthen, and with your exhale, we turn back to center. Again, inhale, up, open. Can I see that c curve and the thoracic exactly what you were doing in your coordination? This is another version of coordination or 100.
Yes. Very nice. And reach, reach, reach, reach, reach, and bring it in with control. Remember, your hands are over your thighs. Extend forward and hold. Two, three, out to the sides, up to the ceiling, and one. And extend those legs forward, hold, two, three, out to the sides, up to the ceiling last time, and stretch the body forward, lengthen, find that length, find that two way stretch. Yes. Out to the sides, excellent out to the ceiling. Oops, and release. Grab the handles for the right hand for me, please, swing the body to the right. Afficiency of movement is so important in the classical system.
Not only does it save time, but it moves you from one exercise to the other to create a cardiovascular workout as well. So here we go. Press those arms to the side to the body. Continue with that outward rotation of the shoulders, arms and legs are parallel to each other, bring your arms down to your thighs and reach them up higher one. Try to keep the back of the neck nice and long, and that goes the same for your lower back. Hold. Can you lengthen those arms even further forward?
Forward forward. And with your ex, so lengthen that lower back, stretch those legs long for me, please, and head back. Good. Again, smooth arm circles. Here we go. First, come up into a teaser and circle the arms up and around. One, look directly forward for me, please. Two, and see if you can lengthen the back of the neck a little bit more. Three, finish it out the top. Arms and legs parallel to each other and bring it down, lengthen that lower back, lower back, and reverse the circles on the next teaser. Here we go.
Mhmm. Almost feel like you're wrapping your shoulder blades underneath the armpits. And then from there, you circle up one. Good. Leading with the pinky. So you don't turn your shoulders inward and you activate your outward rotators and with your excellent coordinate down, down, down, down, and release. Grab your handles with the right hand for me.
Please come up to the right side, and now you are ready for shore box. Place the handles at the back end of your reformer so they're out of the way. Head rest down. Surebox, place the stick up against your box, and place the pad on the front part of your box right at the edge, not in the middle. You want to be able to have mobility of your pelvis as you move up and down back and forth. Remember, short box is mobility of the pelvis on stable hips.
You're stabilizing your hips through the strap. By pressing the legs out, you're activating your outer thighs. For her scoliosis, we're gonna do bent tree first to sort of help her find that balance between right and left. So Freda, bring the right knee into your chest for me. Please, she's sitting on top of both of her sit bones.
And as you can tell, when she brought her right knee into the chest, both sides of her back even out. Now with the inhale, she's gonna lift up an exo body forward. With your inhale, pull the pelvis back, back, back, back, back, making sure the pelvis is square. Leave the sacrum on the box. The most important thing about the hug is to be able to connect your sacrum to the box.
Now round the upper body up and forward, like a roll up, like a rolling like a ball. Now find that neutral spine again. So there might be a little bit curvature, and that's what we want. Now round the upper body forward and that lower back elongates, the pelvis scores back evenly. Think of narrowing the hips so you find stability in the pelvic floor.
With your exhale upper middle, lower abdominals, and scoop the abdominals sit up nice and tall. Find that neutral lower back again and with your exhale round the upper body forward for the last time with your inhale, take it back back. So you fill up that side, keep the sacrum right where it is, end with your exhale, upper, middle, lower abdominals. The last thing is the pelvis coming forward. Find that neutral spine again, crown of the head up to the ceiling.
And let's switch to the other leg, please. Keeping your pelvis squared, bringing your left knee into your chest, opposite hand to opposite knee, like you're doing single leg stretch, lengthen the spine first, and then round the upper body forward with your ex so with your inhale, take your pelvis back. Connect your sacrum to the box. It's very important that you do that before you go into a backbend. With your exhale come up, upper, middle, lower abdominals.
Now let's sit up nice and tall for me. Please up, up, up, up, Find that neutral pelvis, find that neutral spine with your ex around the upper body forward again, tilt the pelvis evenly. Imagine narrowing the hips as you go back so you activate your pelvic floor. Now from that position, exhale upper, middle, lower abdominals. And with your a and he'll roll up one more time, we can see that the shoulders is losing its, ah, connection.
Now one more time for me, please, with your ex. So wrap your scapula to the front of the body. Yes. Now there is the squareness of that shoulder that I was looking for. Very nice. Keep that sacrum in that right where it is. An upper middle, lower abdominals. And sit up nice and tall. Find that neutral lordosis and release. Both feet underneath the strap.
Now she's ready for the hug. Yes. We did all that work for the hug because that's what the hug is really about. Finding a nice neutral spine with your exhale round the upper body forward. Fill up the the hollow side with the angel and let the pelvis tilt back exactly what you were doing with the one leg. For her, body. I want her to point her sits bones down. Yes.
So you can she can lengthen the front of the hips, and with her exhale comes forward one. Again, inhale. Not everybody. It's that cue is not for everybody. For very hypermobile people, That is a great cue to make sure that they don't go into their hip flexors.
With a inhale, she goes back again. And now you're gonna see it again. Point your sit bones down for me, please. Ah, lengthen that lower back. And there's that length of that lower back that we're looking for upper middle, lower abdominals. Since we already did single leg, hug, we're only gonna do one more x around the upper body forward for me, Freda. Good.
With your inhale, take your pelvis back. Connect your sacrum. Yes. Make sure that your sacrum and lower back, yes. Now see if you can maintain that as you exhale, it could be abdominals upper, middle, lower abdominals, and stretch the body forward for me, please. Very nice. Great work.
Sitting up nice and tall, please. Now you're ready for it. Flat back. I'd like to start with the hands in front of your chest. With your elbow slightly opening out, yes, and with your inhale reach forward. Allow the scapulas to rotate forward and then let them rotate upward.
You're looking straightforward with the inhale chest to the pelvis. That's all. Go back. Now every time you return back to center, collarbone in front of the hips, and honor that lower curvature. Now she's gonna breathe into her lower back to go a little bit further back. Yes.
So all you're doing is just moving the pelvis back and forth. You're using your inner thighs. You're using your whole lower powerhouse to create this action. Inhale. Now find the inner thighs again to bring yourself back to center. Good. Two more times for me, please. Inhale. Breathe into the mid pack so there's somewhere for the rib cage to go into.
That's it for you. Excellent. Last time. Here we go. Inhale. Breathe into the right side, right lower back so you fill up that space. Nice. Very nice.
Many of my favorite exercises, especially with someone with scoliosis, is the twist and reach forward. Not only go forward, are you gonna open and stretch that collapsed side, but you're also stretching the opposite hamstring to the other side for me, please. Careful with the rib cage, Freda. Lengthen that myth thoracic. So there's somewhere for the rib cage to go into. Yes.
And up. Good. Spiral from the thoracic. Wrap your left serratus to the front of the body and scoop the base of the rib cage for me. Please Now can you maintain that length of that right side and center? One last time for good measure.
Here we go inhale and breathe into that right side again to create that space. And side to side for me, please. We're going to do two side to side chest by tilting the pelvis side to side. Yeah. So the both sides of the body lengthen and center. Now to the other side, check this out as she goes over.
Beautiful. Now she balances both sides of her lower back. One more time. Inhale? Good. Making sure that the leg, the thigh stays on the box. It's the pelvis that tilts like a boat. Now she's a mover, so let's give her something she can enjoy. From the pelvis tilt to the right, Now find that bend of the thoracic. Yes. Good. Look to your left.
So you honor that, structure of your neck to the other side for me, please, from first from the pelvis, keep your right leg down. And then bend from the thoracic lateral flexion. Now find that two way stretch, come back to center, and gorgeous. Very nice. Twist and reach back for me, please. With your inhale, go back, close the ribcage, scrub the abdominals, and x, or bring it in one.
Good to the other side for me, please. Breathe into the mid back. So there's somewhere there's somewhere for the ribcage. There we go. Much better. Good. Do me a favor, Freda, everybody, do me a favor, go straight back, flat back. Now, give me a twist on the thoracic, and come up in that twist.
Beautiful. One more time for good measure. And he'll go back. Just from the thoracic. Now find your inner thighs and pull the pelvis forward with your inner thighs and center.
Very nice. Excellent. One tree on each side since you already did, tree with a bent leg. Now this time, we're gonna do a full treat. Ready. Bring that right knee into your chest for me. Please extend the leg up to the ceiling. One, extend the leg up two, and extend the leg up three.
Come up leg one, two, three. Flex and point your foot three times. One. Make sure you're sitting on top of your sit bones now circle the foot. It's important that you keep that articulation of the ankle and feet continuously throughout the whole workout. With the a in heel, lift up nice and tall for me, please put your exercise the body forward. Now remember, this is mobility of the pelvis on stable hip. So think of the pelvis going back evenly.
Now she's connected with her lower back. Now she's able to climb down the leg one, two, three, chin to the chest, naval deep, and upper, middle, lower abdominals, sitting up nice and tall, up, up, and with the actual stretch of the body forward. Good. Sitting up nice and tall for me, please. Grab the inside of your ankle. And take that leg out to the side.
Lift yourself up taller. Now give me a c curve with the upper body and take your pelvis back. Now it's very important that when you use a box, that your box is no higher than 10 inches. Doing so with a higher box, you're not only gonna overstress your hip flexors, but also you're gonna compress that lower back. So be aware of that. Here we go. Across that leg over the other side, and we're gonna stretch the IT band flexing your toes back, scoot the abdominals and elbow deep.
And this crossover do not go beyond your sacral position. Once you hit the sacrum, then round the upper body forward. Yeah. Sitting up nice and tall. Twist the body to your right for me, please think of your stomach massage, length not lower back, and this is a great exercise for Thrida. For, for Freda to activate both sides of the body. Ben that leg, cross it over, plagues both hands behind your back and stretch the body forward, please.
Beautiful. Good work. To the other side, please. Sitting up nice and tall, crown of the head up to the ceiling, honor that lower curvature of the spine. And this is where we start seeing the disbalance. Right. So narrow the hips for me, please Think of bringing your inner thighs together with the a inhale lift yourself up and one, again, and extend up and two, extend up and three, climb up leg one, two, three, flexing your foot three times. One, two, and three, and articulate the ankle by circling, imagine you're playing castanets and reverse, that's how much mobility we should have in our feet.
Lift the upper body up and forward and with your exhale stretch the body forward articulation of the pelvis. Let the pelvis tilt back narrowing the hips. Again, bring think of bringing your hips together. And one, two, three, go back. Change to the chest, naval tip, upper middle, lower abdominals, sitting on top of your sits ones for me, please, and round the upper body forward, pick the cherry from the tree. Yeah. Breathe into your right side a little bit more, and we can see right away her imbalances.
But we're gonna correct this on the baby chair and the Cadillac. Take that leg out to the side for me. Please and lengthen the spine first. Give me a c curve in the thoracic, connect your left lat, and with your a and he'll go back and enable deep, deep, deep. Think of this as your open leg rocker or preparing for your open leg rocker. Yes. Nudge into the chest, naval deep.
Find that serratus first upper, middle, lower abdominals. Give me that outward rotation of your supporting arm, length in the body. Nice and tall for me. Please long neck. Long back.
Cross that leg over to the other side, flex the foots, make sure your hips are narrow. And with your inhale, take your pelvis back evenly. Mhmm. And come up point your feet as you can see one side overpowers the other. That's why it's very important to prescribe unilateral exercises for a client that has scoliosis.
That way, we are in ensure that the hollow side also works just as much as your the stronger side. Put that right hip back and really excellent. Set up for a long stretch series for me. Please bar up. You already have two springs, so you don't have to worry about changing springs or anything.
Bring your headrest up. Place the pat on the headrest and tick your box with you as you return the carriage awaits. So, hand foot, hand foot, And we're gonna continue working, with Frida's, scoliosis. We're gonna do five regular long stretch exercises. So here we go, press out.
And with your ex, so bringing in one. Again, a, and he'll press out and exhale two. As you can see, she's starting to correct both sides, and now both sides are coming to the party. They're actually activate it. And to activate just a little bit more, we're gonna pick up your left leg, please first. Notice what it happens when she pickups her left leg.
Push away. And exhale bringing in one. Good. Kron of the head reaches forward chin up about five degrees for me, please. Keeping, keeping the pelvis square, careful. You're starting to collapse. And that's the side that she usually collapses.
On to the other side. Now this is the side that's important for us. She's gonna force to work on that bright side even more. Yes. Excellent. Two?
Keep the front of the hips nice and long, Freda, no gripping in the hip flexors, and place your right foot up against your shoulder as the other foot and knees dim. You're still working on two springs. The whole series is done on two springs. Down stretch with the a and he'll go back. And with your ex, so careful.
She's a dancer. You can tell. Try not to push so far out. Stay within the muscles, not your joints. Look forward. And with your ex, he'll give me that outward rotation.
Two, keep digging the heels into the shoulder rest for me, please. Do not disconnect the heels from the shoulder rest, especially on their close. One more time, with your a inhale. Now I want you to keep the integrity of your lower back as you go into a back bend. So no dumping into your lower back.
Reach the arms forward. Can you come up into an upright position first? Good. Now from here, with your inhale, without jumping into your lower back, lengthen the front of the hips, wait, lengthen the front of the hips more do not dump into your hips. Do not dump into your hips, lift out of that lower back and back, back, back. Use your hamstrings, and come back to center, and fold yourself in half for up stretch, please. You're still on two springs.
Lift the ribcage up, and with the a in heel push away, lengthen both sides of your lower back, And with your ex, you'll bring it up with control. Remember, you're working from the upper abdominals and careful with the back of the neck. The back of the neck is nice and long, as well as your lower back and pull up two. Again, inhale. And careful. Drop the head.
Look at your belly button. Keep looking at your belly button as you push away. And, yes. Now give me single knees off. Push away. Stomach is in. Bend the knees. And press out and bring it in with control again, inhale, push away, bend the knees in.
I want her to really use her at the back of the legs, and I'm also preparing her for the actual knees off, because this is what the knees off should look like, not the shoulders over the bar. Drop the heels down for me, please. Point the sits, once up to the ceiling, And this is when a lot of good work happens as well. Push away from me, please. And exhale one, again, inhale, and exhale two.
Careful not to jump into the wrist as you're doing this. You're closing the armpits. You're lifting the ribcage up to the ceiling. And one more time for good measure, and you're pointing your sit bones up as well. This c curve happens in the thoracic.
Remember that, not in your lower back. Place your right hand to your the side of the body. She's working in the stronger side of her lower back, but also the compromised shoulder with the a inhale. She's gonna push away and with your exhale pulled in. Again, two, and three to the other side, please.
Armed to the side of the body. Now she gets to create some stability on her right lower back, and he'll push away. An XO one. And you can see that both sides of her back are activated and they're pretty even right now. Good.
And now switch and push away. Single leg elephant with the, you know, draw it in one. Good. Connect this hamstring to this lat one more time and switch legs without letting go of the ribcage, please. Push away. Pick up the leg second. Yes.
And one. Near the hips. Two. Last time, hold and step down for me, please. Good, stomach massage, four springs, four springs. You can do two reds and two blues. Hand foot, hand foot, and place your buttocks on the pad.
The c curve again. Ideally, you want to be able to sit as much as you can on your sit bones and not to collapse into your lower back. So can you round the upper body a little bit more forward, please? Open the elbows out to the sides and with your a inhale push away and heels down, heels up. And one. Good. Again, inhale. Two. Notice her scapulas, wrapping to the front of the body, you see the muscular structure in her back and truly connecting with her serratus anterior to find that stability of her shoulders as she presses the heels and lifts them up with her lower abs. One more time for good measure.
And now we're gonna do one leg. Take one spring off and extend that right leg forward. With your a inhale, keep yourself up and rounded, Freda. One. Yes. Again, inhale.
And now she's able to balance her body out, and you can see that her scoliosis in the lower back, it's pretty Pretty unnoticeable. One more time for good measure, please. And to the other side. Here we go. Six and six in, he'll push away, heel down, heel up. One. Good. Two, three, find the lowest part of the stomach to lift that heel up, two more.
And last time, Both feet on the bar for me. Please reach those arms forward up to the ceiling and back, and now she's ready for flat back, reaching back. When you do this exercise, always keep in mind to connect with the lats. And lengthen that mid back so there's somewhere for the rib cage to go into. One, again, inhale.
Good. Keeping your elbows soft. If your shoulders are crunched upward, you can always make a fist and place your hands right up against the shoulder rest. To give you more space, and you can lift up a little bit more. Two more for good measure, please? Last time, and remove another spring, both hands in the middle between the legs and reach both arms forward. Reach for my shoulders and with your a inhale lengthen, and with your ex, we're bringing in one. Again, inhale.
Two. Good. Can you reach more with your right side, please? As you exhale. Good. Now careful with the back of the neck. Relax. Yes.
One last time. With your inhale twist the body to the right, and good. Breathe into the right side and center. Good. And twist. Good. And breathe into the right side again. Grab the bar with both hands for me, please, and stretch those legs out.
Okay. Bend the knees for me, please. And off to the right side. Need stretches. On your back, rounding the back, scoop the abdominals, find that connection of your shoulders with the a inhale. She's gonna push away and with your axle in.
And two. And three. Four. Five and hold. Right arm next to your thigh. Good.
With the inhale, push the character away. Accent one. Accent two. Three, four, and switch. Now she's gonna work her other side. One, two, her hollow side.
And in. Now arch for me. Please give me that outward rotation. Open the heart with your a in hook. One. Care for the back of the neck. Two. There we go. Three. Mhmm.
Four. Five, and hold. Careful not to dump into the lower back as you draw the care chain. One arm, right hand to your thigh, and push away. And one, two, three, four, and switch the other side. Mhmm.
As she works her right side, she's strengthening her left lower back. As she works her left arm, she's working her upper shoulder round the back for me, please. Knees off the ground and right foot forward. And one, two, three, four, five. And switch for me, please. Now she gets to work the right lower back in.
So push with the right lower back. There we go. Good. Fill it up with your inhale, exhale, and both legs out. Both knees in. And off we go, please, running in place on your back.
So as you can see, we try to activate the muscles that have been compromised because of the scoliosis. And you could see that her body as she moved through the workout was created more balance push away from me, please? And running in place one. The back? Yeah. You saw that again. Right?
There's a difference between moving from your core or for from your legs. If you're moving from your legs, your reformer is gonna keep walking forward. If you move from your core, then everything stays the same. Can you look forward a little bit more linked in the back of the neck? Both heels up.
And bring it down. Second position for me, please. Lift the hips off the ground. And with your inhale, press out. And exhale, bring it in one. Mhmm.
A inhale, press out. And bring it in two. Two more. Last time. And roll down one for about a time.
Stomach is in. Swearing the legs to the right for me, please, heels together and stand up. And excellent. Now let's move to the baby chair. The baby chair is one of my favorite apparatus. This is, like, this is where I live because it really connects you with the upper powerhouse.
And for Frida, we're gonna be able to even work more on her hollow side and get some breath in there and also connect with her upper body. So cross the arms in front of you, please. Have a seat, the chair, and scoot back. Bottom of your feet together, please take your arms, your hands behind you, grab your handles, and let's start in boxing position. Open the elbows out to the sides and press those arms in this position.
Your palm should be facing down. From this position, make sure that you're not tucking under. Right? You're still on top of your sit bones. Right now, ideally, because you are in this inclined position, your spine should be pretty long at this point, especially with all the work we've done so far. So with the, you know, press forward, Freda.
Good. We're still working on her finding that outward will of the shoulders. So she's gonna rotate from her rotator cuff up to the ceiling. She's gonna stabilize that shoulder and with your elbows and wrist, she's gonna turn the palms down. And then return back into a boxing position. Notice that when she connects with her rotators, push away again for me, please.
Her arms don't hyper extend. The minute she goes rotate up up up, up, The minute she goes out of alignment, then her elbows start hyper extending. Good. And there her there are her elbows. Very nice and strong. One more time.
From this position, I want you to reach the body forward, but first, find that outward rotation of your shoulders, turn the palms and face it inward. Now activate the serratus by reaching both arms forward. And back. Just the scapulis. Two, keep the back of the neck nice and long. Three. Keep reaching those arms forward.
Palms down, and return your body back to boxing position. Very nice. Good. Bring your elbows down to the sides of the body for me. Please make a right angle with your elbows. Elbows glued to your body. And to keep working on the, on the shoulder position, just rotate from your shoulders out.
And bring it in. One. Good. Keep rotating out. And two. Right now, we're just prepping the body. We're priming the body to be able to connect the mobility of her arms and shoulders properly.
Good. And excellent. Bring your hands to the front of your shoulders from this position for me, please. I'm sorry. I'm I can't see you very well, but can you go to the there we go. We wanna make sure that we have the same light on both sides with your a inhale reach those arms forward for me.
Please reach forward more, more, more. From underneath the armpits, lift the arms up to the ceiling. When she does this, she's gonna find more space in her neck, and she's gonna be able to take it the head further back. Thank you. And bringing it down with control.
Again, inhale, reach those arms forward, serratus, and lift the arms up to the ceiling. The great thing is that her left shoulder that is compromised because of her scoliosis is now just moving and bend the elbows for me, please, which is awesome. Last time, and he'll reach forward, reach reach with that left shoulder more. Careful, but keep the integrity of the spine in alignment with a chair. And up, up, up, up, up, and bring it in for me, please. Reverse, arms up to the ceiling, allow the scapulose to rotate upward. And as you press the arms down, the scapulose rotate down.
One more time. And we can see the imbalance on the left shoulder, right, and in, you know, up, up, up, up, up. So she's closing that left shoulder a little bit too much. Careful. Would the your your elbows, try to find that outward rotation of your shoulders, Freda, and your serratus so you don't hyper extend the elbows one last time. This is called triangle, by the way. Now, we just do one more time, soft elbows, bend the elbows into your body, and really good. Elbows in, your palms are facing inward.
Now we're gonna get to the really needy of this work. Right arm up to the ceiling and place your left hand on the waist. Now we're gonna breathe into the right side and look to the right and bend over, over, over. Perfect. And come back to center, and bend that elbow forward and bring it down.
Good. To the other side. Here we go. And lift up. Please your arm next to your face. Look to your left, and bend over Keep your back up against the chair, Freda. Your whole spine up against the chair, and come back to center.
Good. Again, try to use the chair to give you the ideal alignment of your spine. So go and to the left and keep your spine on yes and come back to center. It's a little tricky because sometimes you think of the spine of your shoulder, that is not necessarily a case. You still want to connect your shoulder to the front of the body like you did in the first exercises. Can you pull your head back a little bit more? Head back more? Come back to center.
The whole spine up against the chair? And this is the exercise that she needs the most, is the twist. And you're gonna see that right away. As she reaches the arm up to the ceiling, she keeps it next to the face. Now she's gonna wrap her shoulder blade to the front of the body and twist. Stay right there. No more than that. Good. Now we turn the the lower back, mid back, upper back, and then bend the elbow and bring it down with control to the other side for me, please.
But forward, And this is where she needs the exercise. Wrap your shoulder weight to the front of the body. Yes. And you're gonna see her shaking because there's there's some instability there that she needs to obtain. And that returned back with your mid lower, middle lower back. And bend that elbow.
Let's do this one more time for me, please. And here we go. Yes. Good. Give me that outward rotation without leaving the chair with your spine.
It's only the right side of your back. You can see her pectoral muscles trying to find that stability to the other side for me, please. And that's one of the things that we're missing in the classical. I think sometimes because we're so focused on shoulders down, shoulders down, that the front of the body never gets activated. We're always in a retraction instead of, protraction of the scapulas. The scapulas just like your arms have to have mobility.
Excellent. Very nice. Bring your arms over the shoulders for me, please. Cross, place your feet flat on the floor in a pilates stance, crossing arms forward, lift up. Lift the arms out to the ceiling for me. Please open the arms out to the sides, and now let's finish on the Cadillac. Thanks. Excellent.
Good work. Now to finish your workout, let's move to the Cadillac. We're gonna go we're gonna do the shari exercise, shoulder roll down, and the mermaid. So on your back for me, please, the kneeling mermaid. From this position, make sure your heels are up against the parallel bars to measure the distance between you and the bar.
I personally like to do the heels because when the feet are on the bar, I want the he the arches to be on the bar. Now if you want to teach the parakeet the roll your shoulder roll down on the toes, then you would point your feet like so to connect with the toes on the bars. So for me, I like the heels because the heels sort of balance the front and back line of the body. On your arches for me, please. So shoulder width apart.
Mhmm. With your a inhale, bend the knees. And as you extend the leg out, I want you to feel that neutral pelvis. Now as you bend the knees, you're gonna keep that neutral pelvis. I need you to elongate that lower back as you straighten the legs. The articulation is gonna happen in the thoracic.
So lengthen that lower back, push the bar with your legs, and peel your sub off. With the left leg, you're gonna kick over the head one, two, and then right leg one, two. We usually start with the hollow side, scoop the abdominals, roll down one for about a time. What does that mean? Well, when you kick with your left leg, you're working on the right side of the body. Yes. When you're kicking with your right leg, you're working for the stability on the opposite side of the body.
So here we go. We're gonna do this three more times. Screw the abdominals. Now peel yourself off one vertebrae at a time, kick with the right this time, one, two, and left one, two, one more time, one, two, and keep that bar exactly where it is, melt your sternum down, melt your heart down, melt the base of the rib cage, melt the belly button, and lengthen that lower back, bend the knees, and extend those legs. Long. One more time for good measure.
And the reason why we do three times as opposed to four times is because we want to, oh, we want to, overload the hollow side more than the stronger side. And we kick with the left one too. So she balances with her hollow side, strong side, hollow side, and screw up the abdominals. Keep your legs long. Keep your pelvis exactly where it is.
We're looking for the articulation of the thoracic. Good. Pelvis neutral, exonos, legs, and nice, and long. Mhmm. Keep that pelvis neutral. Good. And this is what your footwork should look like.
Ban the knees for me, please. Now, gently, you're gonna release the bar with your feet. And now let's come up. Beautiful. Let's come up into, let's go to mermaid, please, kneeling mermaid, opening the arms out to the sides with your hand. Slightly forward, about 30 degrees, so it stays on the angle of your shoulder blade.
Yes. I like to press the bar down at the same time that I press my opposite side to the thigh. So that way, this body can connect with both sides of the trunk, open the arms out to the sides, and that's what? And also, For someone with scoliosis is nicer on the reaching of the arms over the head, and you're gonna see that in a second. So as this body presses down, not only is this body activating the right side, which is her stronger side in her ladd, but also the left side. Now watch this.
She's gonna bring that elbow forward. It's a healthier healthier mobility of the scapula, and then she looks over to your left. And reaches. Good. Very nice. Come back to center, keeping that hollow side connected, and open the arm out to the side as you open the arm out. Press both arms down to the side of the body, activate the hollow side.
Now bend that left elbow forward and reach it over the head. You wanna make sure that the rib cage is closed and your arm is press into your head and look over to the left to honor the neck structure. And come back to center for me, please. And open the arms out to the sides, and one more time for good measure. Good.
So on the right side, we're creating stability on the hollow side. Yes. Very nice. Careful now to dump into your arm. Now with your left elbow, reach out to the ceiling. And close the armpits. Sometimes you might need a little the student might need a little bit of assistance.
Thank you. Rotate that shoulder back and scoop the abdominals. So as we're strengthening the hollow side, we're also stretching the stronger side of the scoliosis. Turn around for me please of the lower back. Let's be specific. Right. Open the arms out.
So now we can see that we've pretty much have stretched that hollow side, and they're starting to look pretty even now. Right? Now she's gonna press the arms down. And this is where the importance of this exercise comes for the left side. So now we're strengthening the left lat the left part of the shoulder, which that tends to be the weaker side in a scoliosis that has an s. Again, you can see that she's really connecting with that side and sort of balancing the right side as well. Mhmm.
One more time, or this is the third one. Right? This is the fourth one. Press down. This is it. Right. Exactly. And here we go, scoop the abdominals and bend that elbow forward.
Now this is the key of this side. We're gonna stretch the hollow side that sort of tends to collapse. Because this side takes over. But now she's finding that stability, and I'm gonna the stability and also the the stretch, I'm gonna ask this body to keep that length so the muscles on the right side of the lower back stay active. Yes.
And open the arm out to the side. And good. Connect. Notice she's strengthening this part of the body, right, and she's stretching this part of the body as she bent over to the left side. I don't she doesn't need any guidance with the bar, but I highly recommend that as a teacher, you guide the student with the push to bar, especially in the classical class, because this brings her much happier. Excellent.
Very nice. Last time. Mhmm. Pull that right hip back so your pelvis is squared. Right hip back. There you go. And reach over.
Look to the right for me, please, so you honor the structure of the neck. Mhmm, wrap, mhmm, length and length and length and And really. Excellent. Step town. And that concludes your workouts.
Great job.
Classical Pilates: Classical Apparatus


Comments


You need to be a subscriber to post a comment.
Please Log In or Create an Account to start your free trial.
