Description
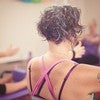
Click here to view a preview of Madeline's recently released workshop Support the Arms: Thorax to Hand
About This Video
Transcript
Read Full Transcript
Okay. So this is going to be a shoulder girdle support your arms, a little movement class, uh, just connecting, getting some mobility in the shoulders and some connection into the core with it. So it's just a little nice shoulder sequence. So we're going to start seated. So you're sitting on a box and if you're on a short box, go ahead and cross your legs cause I really need to have your pelvis in a nice upright position. Uh, you can do this sitting on a chair at home, could sit on a physio ball, doesn't really, as long as your pelvis is level. Okay? And then you can find your spine. So let's find a few landmarks to begin with it.
I want you to be aware of throughout the movement class. Okay. So first split your hands on your lower ribs. Not so much in the front, but more on the side, in the back. Whatever's comfortable and actually look down. Okay. So look down at your lower rib cage. All right. And see that the connection, it's like a, um, it's a v connection coming down this way.
So the lower ribs is if you have little suspenders on these lower ribs that are connecting to the vocation, not squeezing the ribs in this way. Okay, so you're not trying to pull this in and close this down. Try that for a second. Just like put on a Corset, you can't breathe. Correct. So it's not that it's more that this side ribs are dropping back this way. Yeah. Can you feel a connection? So if you look down, you can kind of see that.
Now maintain that. Can you hold that position and from the sternum. So put your one hand on your sternum. Keep the other hand on the lower rents here. All right, now keep this connection you're feeling with the lower ribs with the pelvis, and then just bring the sternum up. Do it very slowly so you don't come forward with Lucette rib connection. So you're gonna see that you're kind of looking down at the floor, right? Right.
So that's okay. So keep that connection. Now bring your fingers now come under your collarbones here. So we're maintained. We're just building on top of each step. Layer by layer. So take the clavicles now, the collar bones and then see if you can roll them up and back this way. And you're gonna feel the base of your neck kind of move backward.
And you might even experience that your shoulder blades in the back. I've kind of fallen downward without you pulling them down. Yes. Good. Okay. And then let go. And then I want you to keep that experience of the base of the neck back. And then I want you to like open your face, feel your face open and almost like it's moving forward. Yeah.
Does that make sense? So it's just kind of an opening. Good. So now we have this connection from the lowest reps up through the head. Okay. So I want you to bring your arms down this way. So your palms are facing out. This is why we're sitting because I have to be able to hang your arms.
I want you to think of like an inverted v. Does that make sense? So the point of the V is the top of your head and then exaggerate the arm. So it's really a v position. So they're not just hanging loose, but you're actually opening up and now spread your hands a little bit. Right now what happened to our lower rib connection? I just became aware of mine.
So it's kind of connect back into that and then get that sternum in clavicles. So can you feel the inverted v from the point of your head through the arms down this way? Very good. Okay. And now we're going to deal with some cervical neck movements. So take your hands up and hold the back of your head as if you're creating like a little cap. You can interlace your fingers and really get a good hold of your occiput.
Now if you have tight shoulders or any kind of pain or impingement, you can go ahead and have your arms and you can actually play some this way instead of on your head. So hopefully you're comfortable here because I want to do this now with your hands, you have interclass hands. I want you to think of pulling one hand this way and this hand this way. Just do that a little bit and see what happens. You're attached to your head. So if you pull your your left hand, your head's going to turn with it.
You see what I mean? Pull. Pull your fingers a little bit. Can you feel how that happens? So that's the action. I want you to be aware of the back of your head. Okay, now come back to the center. Now what I'm seeing in some of you in the neck, right here is a little bit of tension. So the part of that is cause the elbows are being pushed back. See what happens to that. And then you lose the rib connection as well.
So bring those elbows forward a little bit. I don't want forward this way, but it's just in so that you feel this line connecting down into here. Hmm? Can you feel that? And now connect into the lower ribs and Elongate your spine up from the top of the head and do a little like nose wiggle. So you feel that your neck is free and you're supporting through those lower ribs? Yes. All right, so we're gonna turn our face to the right. But what I want you to do is feel the back of your head turning to the left first. So back of the head to the left. Your face goes to the right.
Move your head with your hands, and then bring your head back to the center. So again, move the back of your head to the right in your face is going to turn to the left. Good. And then move your head back and do that again. So moving the head in one direction and the back moves your face. Your awareness is on the back of the head. And then come back.
And if you could imagine you have eyes on the back of your head. It's like your eyes on the back of your head are looking to the right and your real eyes are looking to the left. Does that make sense? So the movement of your head is coming from the back. And again, one more time and breathing in and exhale, center breathing in. So we're really getting just the cervical. Don't let your ribs or shoulders rotate too much and come back. All right. So now we're gonna do a two more times each side as you're turning your head to the right, can you feel your heart moving to the left?
See if that's a possibility to you. And then come back, move your head in front your head to the right. Can you feel your heart moving the opposite direction and come back. And again as your face looks to the right, the hardest rotating to the left and come back. And one last time turning the heart as well and come back to center. Very good. So now we're going to look up and down, but what I want you to do first is we're going to think about the heart.
So just kind of lift the heart a little bit and then lift your eyes and look up and reach to your elbows and then bring the heart back and down. Now the heart's going to move down back and then it's actually going to go up in the back. Does that make sense? So it rises up in the back. Now the heart is going to come down. It's kind of making a little swing. And then it's going to come forward and it's going to go up. And then the heart's gonna move down and that is swinging back.
And as you look down, it's actually moving up and back and heart moves down, comes forward and it lifts and floats up. Very nice. And bring the heart down and back and let the heart sink and go up. Now up and back and then come center and good side to side. So drop the heart down into the right.
Go ahead and come back to center. So the heart's going to drop down and go to the left. What does that do? It sends your head to the right and come back. Does that make sense? Yes. And down. Move to the opposite direction as your head goes and come back and down.
Sideband, good center and a very good. And let go of the arms and just let them hang. Take a couple of breaths and just feel your neck. No, just kind of move. Should feel a little lighter. Yeah, a little less tension in your neck. Very nice. Okay, so now inhale, bring your arms up.
Now we're going to do a high v. So now we have The v here is an Upright v. The point of the V is down into your pubic bone. Yeah. So we're going to connect the fingertips down to the pubic bone, right. And then bend the elbows and come down and do the inverted v. Feel the top of your head. Connect into your lower ribs. Good.
This is work to kind of, I feel lift through the body. Good. Inhale and come up upward. V. Connect into the pelvis and the pubic bone. Let the elbows release inverted v. Open the palms out. Stretch. Open the arms. Find that connection of the arms to the floating ribs.
One more time and up rich
So what this looks like as you bring your shoulders in, they go up, now reach you, your elbows go wide. Let your scapulas just drop. You don't have to pull them down. They just drop and then drop down and in, up, out and down. And pause for a second. I'm noticing that elbows are hands are in front of the elbows. Can you see that? So that's a little internal rotation. So bring your hands, bring your elbows forward more. Let your hands fall behind you. Let them fall back. Roof. That's a stretch right there.
That's the position I'd like you to be in again, in up. Reach your elbows out and down. The shoulder blades are circling in a flat position this way down. So they come in, they go up and now you reach and they widen and come down in a, we call these coronal shoulder circles. Coronal is this plane of motion here. Very good.
I'm gonna do one more and uh, okay. And then let the arms hang. Shake them out. Yeah, do okay. Cactus again. So get the hands falling behind the elbows here, right. Hands flat. Not just loose hands. My really opened up the hands. Now what I want you to do is take your left hand and see how your internal rotation and CV and dropdown.
This is where you get to see all the tightness in our shoulders. Good. And then bring it back up. Just easy. Just let the weight drop.
And what I'm seeing a little bit is the arm is dropping. See the elbow and the space is dropping. So it's just the forum going down. So we're doing a pivot around the humorous here. Rotate. Good. Alright, now let's do it together. We're going to start with the right hand and you're going to drop down.
I want you to inhale and look to the left. Exhale, come back to center. Inhale, look to the right. Exhale. Come back to center. Inhale,
It's a little different to look at the arm and let it internally rotate. Yes. And up and in. If you're getting tired, fatigued, or feeling like nerve, there's like a neural stretch going on. You can certainly rest. But this is our last one. And come in and relax. Shake it out. Yeah. Good. Alright.
Alright, very good. We're gonna do a couple of nerves stretches that are very useful. So we're going to do a radial nerve stretch first, right? So what I want to do is reach your handout, cross your thumb and hold onto the thumb. Okay. And then you're going to flex the rest this way. Turn your shoulder in.
So you might be feeling a stretch already. Yeah. Okay. Now see it was turning the shoulder and it's okay if it comes forward a little bit, but don't over exaggerate that. If he can see if you can just find that rotation that we had is kind of why I did some of that. Right. And really flex the wrist here this way. Yep. Okay. And now let your head lean away. [inaudible] okay. And then bring the hand up a little bit. If you're at Max, just stop right here. Okay. Now bring your shoulder towards your ear and your ear towards your shoulder.
Just shrug a little bit and then release and let your head fall and reach arm boy. And again, pull it in. And really she might notice that that neural tension starting to lighten up. Right? One more and in and reach away and maybe [inaudible] go up a little more. Cause is that easier now? Huh? Okay. And relax. Just feel your arm and your neck now. Nice. Okay. Other hand.
So you cross the thumb, grab ahold of it, turn your hand in and you gotta flex the rest as much as you can. Okay. All right, so first just bring the arm up and get to that point and back a little bit to [inaudible]. You'll know when you hit the line, it's a distinct neural line. There you go. And then start to let your head go away. Oh scaliness this is really good. Alright, now ear to shoulder, bring it together. We're shortening up through here and away, ear to shoulder and away. Do you notice how the tension releases as we're doing this?
So we're putting slack in here and then it's allowing to slip through that thoracic outlet. One more time. In and out, and then a little bit higher. Well, easier, Huh? And then relax. Whoo. Okay, let's do this. Let's, um, we're going to exhale. Reach our shoulders up. Just breathe out, put everything on slack, and then inhale. And when you inhale, really feel with the domes of your lungs are right here. People don't realize that as long as they're right here. So when you really fill up this area, okay? So exhale.
Just let your neck relax. It shouldn't be tense. Just letting it be slack. And then inhale, fill up the lungs and exhale last time. And inhale. Go ahead. Okay, now we're gonna hold a tray.
How much can you bring the fingertips? So reach across and go ahead and pull this way.
Don't lean into your hand. Bring your arm up in your hand to your center of your head. Very good. And then release. The true test is go like this with your hands. Do you remember doing this as a kid in your junior birdman? That man right now. How about those ribs? Can we connect into those lower ribs? Can you reach your elbows out?
Can you bring the base of your neck back and really open your eyes and release? Very good. Okay, well let's come onto a quadro pad position now. Or actually we're going to stand, I'm sorry. Standing circles. So we're going to stand. All right. And you can actually move the boxes out of the way cause we're gonna stand and then we're going to work our way to pad position. All right, now we have an option. You can use a one pound or two pound weights. Nothing heavier or some balls come weighted.
You can hold a soup can if you have at home. If you have, you know, what'd you say? A water bottle. It's better than a soup cans. Too much salt in soup cans. We don't do canned soup. Okay. We'll put the weights down to with just nearby because we, it's just an option. If you feel enough of a stretch and an opening, this is for fashional opening. We're gonna do some arm circles.
So we're going to start with the right hand and you're gonna bring your palm up. All right. As high as you can up and over it, and then turn your body and reach behind you as much as you can. See that's the action. And then come forward to scoop up. Inhale. And then exhale, circled far back as you can really roll the shoulder end. So the action is external rotation here. And then as you reach back, the head of the humerus is rotating over. Okay. And let's do the other arm.
So for some of you, if this is enough of a stretch and difficult for you, do not add weight. Okay. However, for these advanced [inaudible] teachers in this room, this should be fairly easy, but it feels good. Reach away behind you. So let's try it with the weights. So let's grab a holds. You just hold one or two, but circle up.
Good. Other arm and lift and back and lift. Back. Lift. Rotate back. The last one left. Rotate back.
You don't have to touch it, but I want to point to you. What you're going to do is the lower tip of your scalpels going to press into your rib cage, which then brings your hand back behind you and then release. So move from here. This comes back into the rib cage and you bring your arm back. Good. See, bring your arm down. So just feel, bring the arm from behind your back down. Bring this right arm up so you've got the action now. So breathe in and back and release to try to go a little further each time back.
But it's moving from the Scapula, not from the hand. Scapula back. Good. Now what happened to our ribs? Don't go back and lose your rib cage. Couple more. Keep this lower connection. Try to feel that lower tip. Great. And other arm coming up. Lower tip of the scapula moves into your back and that's what sends your hands behind you and release and back. Nice and release.
So it's a lower trapezius working back and release back and really swatch the rib cage. Some of you, the ribs are coming forward. So as you go, I get a little bit out of that counter. So to really isolate the lower trapezius, you want to really stay connected to the front so you can repeat that again if that was enough. Or we can do it with a hand weight. So we're going to lift up right and back and release and back. Be careful the rib. The other thing that happens when you do one arm is shifting to the side and the rib cage, right?
So don't let allow that to happen to stay stable in the ribs. Very good and down and other side and reach and really stay connected here at reach and release. Good. Little further back and release and back and release. Very nice. Okay, let's cut the stem. Okay. Let's come. Put your weights down and then come stand on the back edge of your mat. Okay.
Then what I'd like you to do is in standing, we're just going to roll down to a quadruped head position. Okay? So rolling down, just nice and easy onto your hands and knees and then walk out to that quadriped head position. Okay. We want the hips over the knees, shoulders over the wrist. And now look at your wrist line. I want you to notice that across the wrist is a straight line so you don't have uh, a diagonal on the bones at all here so that you've got your weight. Now with your elbows here, turn your elbows out completely.
So they're facing forward. This is where we tend to hyper extend for those who can do that and now totally turn them in. Do you feel like when you totally turn them in, how it kind of tightens up and shortens near the Pinky side of the wrist here. So we want to be in a place where neither one of those two things are really happening. So what tends to happen with the elbow creases is that they tend to be looking at each other crosswise this way. Very good. So that's the alignment. We're really going to work four.
And then I want you to feel that your lower arm bones are moving in towards the mid line. So you're, you're actively pressing inward this way without actually sliding your hands. And at the same time you're widening across your shoulders in the back. All right, so this is work just to be in this position. All right, so from here we're going to do a little cat camel exercise. So inhale here. Now push your shins into the mat for me so you're really active. And then exhale from the sip phones and the tailbone. Curl the back.
Try to feel that the lumbar curve, you're lifting your pelvis up off your thigh bones and then release your shins. Move from the tail, connect into your ribs fund, be concentrating on your arms, drawing them in, and now it's tail bone goes back, your sternum goes forward, reaching forward and come back to the center. And again, let me take a look and curling back. Push your shins into the mat so you can really drop the tail. Lift the pelvis up the thigh bones. Let your head just hang, don't over push with the arms and then move the pelvis back. Sit bones reaching back, coming through the neutral. Continue moving.
Sit bones go up. The sternum comes forward. Okay, and come back to neutral. Okay, rest for a second. Come up off your hands. I want to show you, we're going to add a little elbow bending. Okay. So what you're going to feel on the wrist is the elbows are going to turn and they're going to go towards the floor. We're not going all the way down. We're just going to do, we're just going to unlock the elbows here and turn them this way. So you're going to start to feel the weight a little bit more on the Pinky side of your hand, but at the same time, my body's not going to go down like a pushup. Okay?
This is the trick you want to try to do is you want to go up with the chest as the elbows are bending. So I'm really not going down at all to see that. And it's not a huge band. And this is about some people have more extension. Maybe you go more than your elbows will bend more. But for me, this is about as far as my spine can lift. You see I'm going up and I'm pushing into my hands and then I'm going to curl and I'm going to push back. Now I want you to exaggerate now and push yourself back further.
So I want to get a stretch through this part of the back. Okay? So it's a little more exaggerated kind of cat camel. Okay, great. Here we go. So let's start with the curl first. So go ahead and inhale. As you exhale, curl, and then start to push your arms back, back, back, back, back, back. So your armpits are now way off your wrist. That's it. But keep curling. So you're lifting the lower spine up. You should feel a nice long stretch and the very nice, and then bring it back to neutral. And in, here we go.
Turn the elbows in. Go towards the Pinky side of your hand, but bring your breastbone up as your elbows bend, your elbows are definitely bending. They have turned completely in. Bend your elbows more, but go up. Go up in the chest, bend your elbows more. You're not even bed, bed, bed, bed, bed, bed. Go up with your chest. Ah, and then curl. Straighten the arms. Good. Lift the spine. More curl. Lift the thigh. Bones should be off your thighs, the hip bones. I mean hipbones up off your thighs. Yes. And then come back. Let's try that again and start to bend. Really Bend, but go up.
Turn your elbows in. The elbows have to rotate in as you bend, as you're bending. Yeah. As you're bending though, as you're bending, that's it. Bend your elbows. You're not bending your elbows. You're dropping your chest. Then then that's it. Go up with your chest. There it is. Then down, lift your chest up and push away and rest. Okay. It come off your hands. That's a hard concept here. So watch one more time. I hopefully you can see it. All right.
So basically what I'm doing in my arms is my elbow creases are facing inward. Not totally in, but just on that, like towards my thumb. Okay? And when I bend my elbow, they start to turn inward this way. That was come in, that's, I'm bending in this direction. Okay, I understand. That's what I need to see. Some of you are trying to lift your chest, but your arms were never bending.
It's, it's a, it's a balance between how much you're bending and how much you can lift. It's an extreme amount of work in the upper spine for extension. All right, so it looks like this. So I'm rotating in, but I'm bringing my chest forward and up. Can you see them bending? I mean, they're bent.
They're facing in and I'm going up and then push to stretch that out because that's a really deep stretch there. I've tried it one more time. All right, so here we go. Elbows are facing your thumbs. Let's say the inside of your elbows facing your thumbs. Very good. All right, here we go. Curling. So push your shins down. Exhaling, curl, really lift the lower back up so that the pelvis is up off the thighs. You're not just bending in the knees, you're lifting your pelvis up off your thighs. So don't go so far back if you can't keep that lift. There you go.
And come forward now with the chest turning those elbows. Very nice, good and beautiful. That's it, Bandon. Lift your chest up. You got it. Then more bend. Yes. And then curl. One more time. Beautiful. Curl back. Let your head go. Lift the pelvis up off the thighs and bring it back. One more time. Doing a little lift without going down.
We're going up with the arms up and running. Good. And then come back and rest. Okay, let's come down onto the elbows. This way. We can rest here. Okay. I'm going to do a little shoulder stretch. No, back yourself up a little bit on your Mac so that you have room to stretch your arms out straight without coming off your mat. Okay, so here we are. We're going to be with the elbows in elbows in line with the shoulders, elbows in line with the wrist. Second Finger. Straight ahead. Yeah, so our wrist is not a deviating either in or out. All right, here we go. And now drop your sternum towards the Mat, not your lower rib cage, but just the sternum. And then push your elbows into the mat and lift the sternum up, right? So the sternum is going to drop, which makes your shoulders come in a little bit.
And now lift from the sternum and press your arms into the mat. Very nice. Now stay in this position and then start to push backward. So sit back onto your heels. Keep your ribs connected into this. Keep your shoulders wide, just easy. And then come back center. Get your armpits over your elbows.
Some of you might want to walk your knees back a little more so you get a little more range and the rest is a little bit, I know. [inaudible] funny. There you go. That's a little better. Alright, and push back again so you can go a little further. Nice. Don't let your elbows splay out. The Elvis need to stay inward and then bring your weight back. But for some of you are more flexible and this feels good to you. Go ahead and bring your foot back. We're going to go into a plank position, come into the plank and then lift your hips up and reach back.
So we're getting a little more weightbearing in the arms and a little more length. And then bend your knees and come down. You can bend them together. Okay, let's try that again. Some of you, I don't want you going up onto your feet if you can keep your arm stable in this position. So some of your start and display your elbows out is not good for your shoulder to be in that position with your elbows like that. So don't do it. It's okay. We're not being judged on this. So be really true to your own body. All right? So your choice, whether you're staying on your knees or if you're going to try going up.
All right. So and again, so I'm just worried about this elbow. Get it in a little more. Yeah, there you go. So try to keep it there. Okay, go one more time going back. Great. And lift the hips up. Keep the width. Watch the lower rib cage so that it really stays lifted. Don't push too much. Yeah, bring those in more. [inaudible] there you go.
Now just reach through your hips and not your shoulders so much. There you go. Very good and nice. Very good. And bend the elbows and come down. Very good. Okay, now we're going to be still in the quad. You're right. Okay. So we're going to do is bring our hands in front of us with the arms straight.
And what I want you to do is cross your thumbs and actually turn your hands out this way. Right now, here's the contrast. What you're gonna want to do is this with your elbows to say that. So I don't want you doing that with your elbows. So I want your hands in a little v like this, but can you spin your elbows inward and keep your hands in this turned out position a little bit? Yeah. It's hard, isn't it? It's his engagement in the arms. Yes. Okay. So in that position, I call this the tiger stretch. You ever see your cat stretch with their legs, their arms or paws or whatever out in front of them in the front.
So that's what we're gonna do. It's a little tiger stretch. So you're going to push forward with your arms and lean back and sit. Don't let your head drop down. Keep looking out at your thumbs with it and look down at the Mat. Good. And reach back, reach arms forward, and then come back up.
Inhale and do it again. And exhale, pressing back. Feel the width of the shoulder. Now don't let your neck short and you should actually look down at the map, but don't let your head drop below your arms. Does that make sense? Yeah. So keep the neck long. There you go. And come back up and again, and one last time. So this is a little more extreme stretch. Watch the elbow creases and they're very good you guys. That's it. Good.
And come back. Okay. Come sit up and just rest your hands this way. Do it. Okay. Is it feels good, doesn't it? That little less tension in the, yeah. Okay. Very good. So now we're going to do is come onto our backs, but this is how I'd like you to do it and it's kind of a continuous thing. So we're going to be back on the quadro position.
I'd like you to take your right leg and cross it over. Okay. And then you're gonna take your right arm, slide it through, come on to your side. Okay. And roll onto your back. A little transition here. Okay. It's lying on your back with your arms down by your side. Good. So just take a moment here and feel the bottoms of your feet, right.
Feel your big toe ball into the mat. That center of your heel into the mat, right? Pelvis, nice and relaxed. Good. Alright, now inhale, reach the arms up so that they're at 90 degrees. Palms facing each other. Okay. We're going to do is what I call scapula reaches. So we're going to start from the base of the Scapula. So the right scapular. First I want you to rotate your hand outward so your thumbs coming out and reach your scapular towards the ceiling. That's gonna. Lift the shoulder off the mat and then turn your hand back so your palm is facing in and let your shoulder drop other arms. So reach, turn your palm outward and let the shoulder blade reach towards the ceiling.
And then place the shoulder blade back down. And again, inhale as you turn, reach the Scapula. Exhale, turn it back. Other side. Inhale, reach. Exhale coming down. Now we're going to do the opposite. Turn your thumb in towards the midline so your arm is spiraling. Inward palm is going to face out and do a reach here it's a little different feeling. And then turn your hand back out, spin the hand in, reach it up. Exhale down. One more each side, turn and reach and place it down so you keep turning your palm out so it gets a knights rotation and lower back down. Okay.
Keeping the arms here I'd like you to do is you're gonna take an inhalation and bring your arms back over your head. But don't go too far. Let's say from 90 to maybe 120 or something, if that makes any sense to you. But just a little ways back. Good? Yep. Rewind a lot of you just a little bit. Rewind your arms some. Some of you are too low with your arms. Can you bring them up towards the ceiling more? Yeah, there you go. Do you see?
I'm what? I'm going to do a progression here so I don't want you to go to the end. So now connect into your lower rib cage here and you're going to take a breath in. And as you exhale, I want you to drop the sternum into the table. She could have dropped downward and just look up. Don't lift your shoulders up. Just look towards your pubic bone. Look up and look at your pubic bone.
Check into your ribs. How are they? Keep them connected. Lower the base of your neck down in your head, and then inhale, move your arms a few inches more back. Now hold it in this position. Inhale, exhale, drop the sternum. Bring the head up, looking towards your pubic bone, maybe the tops of your knees, and then lower down. Base the neck head and reach a little further back.
Hold the position there in house so your arms are moving with you. Exhale. You can see how that connection as I move my head up, my arms move with me and I'm lowering back down and reaching a little further back two more times. Inhale, exhale. Connecting the arms into the obliques here and lower back down. Reach a little further. Last time. Inhale, exhale and curl. Good and lower back down. Good.
Now continue moving the arms all the way down so your thumbs are on the mat. If that's uncomfortable in your shoulders, then just bring the arms around and down by your side. So this should be a position for someone whose shoulders are flexible enough that are comfortable to rest on the floor. Okay, I'm going to move forward because I'm not resting on the floor. Okay. We're going to do a little bridging from here, keeping the arms in this position. So take an inhalation as you exhale, curl the pelvis rolling up. Now I only want you to go to the shoulder blades, right?
So you're going to keep the weight on your shoulder blades and lift the pelvis as much as you can. And inhale, exhale, roll through the spine all the way down to the neutral. Connect into the ribs again. Inhale, exhale, curl. Drawing the ribs down. Now lift through the hips just onto the shoulder blades, reaching the knees over your toes and rolling it back down. Getting a nice length in the spine, connecting the ribs one last time.
Inhale, exhale, curl. Reaching up. Good. Inhale there. Exhale, roll it back down. And once you come down to neutral, take another breath in. Exhale, start with the shoulder blades. Slide them down and let the arms just float up. Feeling the weight into the shoulders and lower the arms down.
Very good. All right. Inhale. Exhale is just bring the right leg up. Tabletop, follow with the left. Okay, and extend the legs up. Good. So inhale, bring the arms up overhead again. Exhale. Now you could leave your arms by your side if you'd like and bring the position here. Now inhale, exhale. And I want you to float the arms and your head up slightly off the mat. You're not coming very high. You want to connect into the armpit, into the rib cage and just drop your Chin Nice and easy.
Just looking at your feet or you can keep your head down. So we're keeping the shoulders down. Flex your feet and do a little lower. Point your feet and come back up. And again, exhale. It's a very small movement. Keeping this very still connecting here,
We're going to do a little shoulder stretch and turn your head to the left and then roll the shoulder out. Palm up, left shoulder rolls in, palm down. Look towards the right. Roll the shoulder out, palm up. And again, so we're turning the palm over. Yeah. And turning back to center. Good. And turning and come back. So you're looking at the hand with the palm up. Let's start this again. Some of you are lying with a v that's too high. This should be out in a t position. So let's look center.
We're going to start with the right arm. It's gonna stay facing up. You're gonna look to the right and roll your left arm in and come back to the center as you roll the shoulder out. Very good. And roll the other shoulder in. Turning your head at the same time and roll the shoulder up. Very good. One more time. Each side ad roll in. Turn the neck roll and come center. One more time.
Rural and look and come center. Good. Now we're going to do with the reverse. So you're going to look to the right, but roll your shoulder in
So if you're at home, you could um, get a pillow or a small towel to roll under your head to support it. Or it's okay to have your neck just side bend here. It's a nice stretch. And what I want you to do is reach a arm long. The top arm is going to need to do a little twist and come back and make sure that your knees are at 90 degrees. Some of you are lying a little bit too open. So you're reaching here.
So reaching out and reach across and just roll and then come back to your arms or so now. So this may be your exercise if that's enough. Okay. Otherwise I'm going to have you do is reach past and now make your arm come over the top. You're making a circle on the floor all the way around. Keep following your arm with your hand all the way around. You're going to keep making a complete circle. Come over your hip and continue all the way around to reach past your arm.
Keep making a circle. So the idea here is you're making like a pinwheel with your arm. Nice big circle and rotating around. Just rolling forward. Let's do one more time. Reach past your arm. Roll it over.
Now you have to connect into your ribs in your core and you're gonna roll your shoulders up. So here you are in line with your arms in a tee. I'm going to run out of space, but now let your knees fall and roll onto the other side. Okay, so let's do that together. Bring your arms overhead now from here, start rolling onto your back. Connect your knees. You're not twisting, you're kind of moving in one piece. Your arms come out to a t, other arm comes over head and you roll onto the other side. Very good. All right, so reaching that right arm or some of you it's left, but reach arm pass and circle the arm overhead. Good. All the way around. We'll make them one full circle all the way around. Come over your hip and just look jury eight in this motion.
There's no right or wrong. This is just to get a full little twist. Let surrender into the floor. So let the weight of your body open up the spine. Keep breathing, let your head fall motion. Opening the back. One more circle and around
Great. Huh? Feeling so relaxed. Now I'm going to make you work a little bit. So we're gonna do a little front supports. Okay. Front support and a little back. So I'd like you to do, it's really optional what you'd like to do and what levels. So let's come up onto hands and knees. Quadro pat again. So all their alignment we've been talking about with the wrist and the elbow, this is important. All right. So for some of you, you might just want to walk your knees back and find that nice plank position.
Maybe bend the knees here in this position here. And then what I'd like you to do is to find that elbow rotation down again, lowering your body and then exhale pushing up. And you want to try to do that without letting your sternum lead and your shoulders slide on the back. You want to keep the scapula stable and you're lowering your body down in a plank and you don't have to touch the bottom right. Keep the scapulas from moving inward towards your spine.
Try to keep them wide. Spiral your elbows in and feel the spiral comeback. Good. For those of you who want more of a challenge, you would try to do it with the legs straight and find the same rotation in and pushing away. It's a little bit harder. Good. Two more times and stretch. Good. Find the spiral of the elbows and the wrist. Mary. Nice and push away and rest.
Very nice. We're gonna do a few back dips, so come sit this way again. Let's arrange our hands so that the fingertips are in and I'm looking for that straight line of the wrist on both sides. I am going to take more of a bridge position here. All right, so we're going to come up into bridge this way and the net can be just forward. We're not going to look up her back. We're just going to look forward and I want you to do is just try to lower it with your elbows. Let your hips come down.
So we're going to sit a little bit and then use your arms and press and use your hips a little bit easier this way. So back down. Feel the elbows stay connected to you pressed and you lift. So this way we're getting not only the arms are getting some hamstrings and gluteals with it as well. Really plant your feet and reach good two more times down and stretch last one down. You can always stop when you're tired and up and hold and sit down and rest as I feel risk feels pretty good, doesn't it?
Having that alignment's not that stressful. If it's feeling a little stressful, you can just do little circles, inner class your hands and just kind of make figure eights in through here. That's fine. All right. Little Mermaid. Okay, so we have a couple of choices here. All right, so for those of you who feel like that's enough effort in the shoulders, we can do it in a side bridge this way. So I want to show it for our audience out there, right? So we're just going to press down and you lift up and the ideas to try to feel the rib cage lift up. So the shoulders right over the elbow. Lift up this way. Hmm.
And hold the position that to check your neck so it's not forward. And then sit back. Okay. Not so bad to try this palm up. So we're going to have, and then lift the rib cage up again. Be a little different. We're more in the ribs. Make sure you're not sitting back in your hips that you're really lifting straight up. So it's your choice whether you like to have that or this.
And I'm okay if that's enough of a work, you could continue doing that. Or let's do the mermaid with the hand facing fingertips out this way. And again, I'm looking for this weight of this bone over the base of the thumb and second finger. All right, so with the legs bent, arms here, think of lifting the rib cage up and you're going to extend the arm out and straighten the legs out. So your one on top of the other. How about your elbow? What's it doing? Is it stretching out or can you keep your weight there? Very good. Push away from the floor. Just hold the position. Yeah.
Nice, good. And then bend the knees and come down different. Huh? Try play with that a little bit. So go up in the mermaid and do that with your elbow. You're going to see it's a lot harder to hold and a little more compressive. But with the idea of this alignment of the elbow right over that thumb, it actually connects you in. It's easier to feel. All right, let's do it two more times. All right, ready? Inhale, press up, straighten the legs. Good. Chest Open. Connect the ribs. Enjoy the moment.
Breathe in and down. One more time and up. Good. Feel your neck, the base of your neck and your face. Enjoy it. Having fun. Opening the chest. It's at hartline. That feels wonderful to open. Go ahead and come down. All right there side. Well since we did some on the elbow, let's make sure we're even on our bodies, right? So you want a long bent position.
And I actually think of the heels lining up with the buttocks here too so that you're not too bent. All right? So coming up good and down. Watch the rib cage. There's not side bending. The whole thing has to lift. Connect through here, alignment of the head. And it does help to kind of engage the legs too, right? Inner thighs and down. So maybe that's your exercise.
We're going to do three with arms up here for the advance people. Check out your wrist and your elbow. Ready to go. Here we go. Inhale up straight in the legs, connect the ribs, feel your head breathe in. It's just like breathing in and set easy, Huh? And breathe in and open.
And last time breathing in and then rest. Good. And come around and let's just, um, let's sit up again. So actually you don't need your boxes. You can just sit cross legged and face me. That'd be nice. Okay, so just sitting upright and just turn, bring your right hand across or your left hand across. Right hand behind you. And don't push your twist. Just be in a comfortable position. Actually, can you all look kind of in line with your sternum?
So you're going to be looking more towards maybe the edge of this window. Yeah. So I don't want you in a full twist yet. Not with your neck. I want your nose to stay over your sternum this way. Yeah. All right. So field both sit bones so you're not leaning on one sip on more than the other. All right.
And then grow your spine long by lifting up through the front of the body without sacrificing the back. Inhale. Exhale. Turn your rib cage a little further. Don't overturn your neck. See if you can just turn your chest. It's going to be very small. Inhale again. Lengthen and exhale. Turning the shoulders. Feel like you're just turning your heart to the right.
Don't over crank your neck. One more time. Inhale, exhale. Turning the heart. Good. And come back to center. Other side. No, just sit for a second center. Can you feel the twist? Yeah, so we don't need to crank on the neck to look behind us. Okay. All right. So go ahead and cross and pay attention to where's your nose. If you are breathing out, the air should hit your sternum.
If you blew right through there. It's a funny cute, but that's kind of shows you where your, your nose should be and your neck. All right, so here we go. We're gonna inhale, lengthen, exhale, and turn a little bit again, it's more like the hardest. Turning to the right. Inhale, lengthen, exhale, turning. And you could just let the neck be easy in, turn with it. And again, inhale, lengthen and exhale. Very good. And then untwist. Nice and easy. Very good. Okay, now come sit at the end of your mat with your knees bent and find a nice upright position so you can hold your knees and kind of lift your spine up. Good at, and get you to make two fist and place them in between your knees here and then engage gently. So imagine your hands are like an egg, so you want to hold it, but you don't want to crush it and you don't want to drop it. Okay? And you should feel when you do that, that there's a direct connection into the pubic bone area. All right, and we're going to inhale here. Exhale.
I'm going to start to roll the pelvis back. Just your pelvis to keep your shoulders over the hips as your hips move back your pelvis, your shoulders will move back with it, but your shoulders don't lead. Yeah, the pelvis is moving back until your arms are straight, so you should feel that lower rib area again. And then inhale here. Exhale, engage your egg and curl forward. Bring your shoulders forward, your nose, over your pubic bone, and then roll through your spine and sit up again. Inhale, exhale, start at the pelvis. So the tails curling under the pelvis is moving back. The shoulders and the neck are just floating along with the pelvis. Good. And then once your arms are straight, engage the egg. Exhale, bring that over and come up. And now bring your arms out in front of you. Same feeling in the legs. So even though your fists aren't there, inhale, exhale and roll down. This time I want you to go a little further.
Allow the back of your head to move and float with it so your eyes are actually coming down a little bit. Don't go all the way down, just part of the way. And then exhale, come up, feel the lower ribs and then sitting up and again and rolling back. And then we'll gradually gonna make our way down to the floor, but not yet. I'm going to do two more. So just to the lower ribs maybe. Hmm. Good. Exhale coming up and lifting up. And again, exhale to the low ribs again, but not all the way down yet.
Nice and easy. Let your head float. Don't tense your neck. Good. And come forward. Inner set up. Alright, last one. Lying all the way down. Lower ribs. Very slowly. Roll through, bring your feet in, bring your arms by your side. Take a wide stance with your feet and allow your knees to fall in. So they're just resting on one another. Bring your arms up, palms facing each other, and then over cross your arms.
So you widen your shoulder. You can even just talk your shoulders a little bit and let your arms just rest. Feel the weight of your arms on your chest, relax your back and just breathe [inaudible]. Okay. And just rest and just stay there. As long as you're comfortable.
Mention
 |
Madeline Black (Teacher) |
 |
Julia R |
 |
Vanisha T |
 |
Tova A |
|
|
Marta M |
|
|
Wendy K |
 |
Carolyn B |
|
|
Luci |
|
|
Talie L |
 |
Katarina S |
|
|
Diane G |
 |
Natalie I |
 |
Theresa L |
 |
Kristi Cooper |
|
|
Julia V |
 |
Hannah M |
 |
Valentina P |
|
|
Patricia A |
|
|
L bedard |
 |
Inma F |
|
|
Kerry |
 |
Kimberley P |
Comments


Thank you Madeline!

Thanks for this nice class
L


You need to be a subscriber to post a comment.
Please Log In or Create an Account to start your free trial.
