Description
About This Video
Transcript
Read Full Transcript
Hi, everybody, my name is Benjamin. I'm here with my good friend and colleague, Carrie. And we're here to share a full studio workout with you that focuses on handstands, and specifically trust building into handstands. We will be focusing on three aspects that I think are super important when attempting a handstand, one of them is to simply get used to bearing weight into your hands. The other is to organize your plumb line when upside down which is a position we don't find ourselves in often.
And the third one is to build mobility in the shoulder and the torso to be able to be upside down for longer periods of time. The classical Pilates work has ample opportunity to work on that skill. You may not be able to do a handstand but you will still be able to benefit from this workout. It'll address the full body, we will just use the work in it's more original, gymnastic nature to try and find how far we can go into a handstand. It will be many different piece of apparatus we will visit throughout this sequence.
We will start against the wall however, not using any apparatus. And we'll just get started, are you ready? I'm ready. We're gonna start by focusing a little bit on shoulder and thoracic mobility to see how the shoulders feel with the arms over the head. And how we can organize our plumb line against that.
We will start against the wall, and I call this exercise the TSA exercise because just like at airport security, I want you start with your legs a little bit wider than hip distance and your hands right above the head. Making sort of a diamond shape between your thumbs and your index finger tips, elbows wide to the side. The heels are all the way back against the wall, so are the hips, so are the shoulders, and the back of the head. Your hands can actually start slightly away from the wall so that your shoulders are not fully extended just yet. There's not a lot of movement that is going to happen here.
We're working pretty internally. And what I want you to focus on is really drilling your heels down into the ground. Feel the weight of your body press back into the wall. And focus on the back bottom rib first. And try to make as much contact as possible.
You will probably find that things start to happen internally where you start to feel your center awaken. And now with that feeling, draw your elbows back until they begin to touch the wall. We're gonna stay here for a few deep breaths, pressing the backs of the hands down into the ground, or rather (laughs) into the wall, opening the elbows wide towards the wall. All the while drilling the back bottom ribs towards the wall as well, we'll take one more breath here. Inhaling, exhaling, and then fully releasing from there.
We're gonna do a second round of that facing the wall. So unfortunately, gonna have to ask you to face the other way, (laughs) and away from us. And you're gonna stand really close to the wall here so that now your hips are actually touching. The nose is touching, perhaps your forehead too. And your hands are touching as well.
From here we're gonna focus on lengthening the tailbone down, pressing the feet into the ground to stand up as tall as possible. And then again leading with the elbows, begin to lift your arms away from the ground, until your hands follow suit, opening the front of the chest. Once you're in that position, you've reached your maximum point where your arms can't go back any farther, refocus on your ribs again, and see if you can make small adjustments here. Play with lengthening your tailbone down towards the ground, drawing the front ribs together, without really feeling rigid, always making sure that your breath can flow in and out. And we can see that the body is working quite hard here.
Even though there's not a lot of movement happening. Let that go, and then you can turn around again. Feeling a little bit more open there? Yes. This is a good way to see how mobile your shoulders are before we even get on the reformer and do our thing there.
The second thing we'll do here is a vertical reach. So one more time, I'll ask you to turn around and this time your arms will go up against the wall. You can stand fairly close to the wall to start. But make sure that your palms can fully press forward into the wall as you stand here. Create a feeling as if you're trying to drag your palms down against the wall while lifting your chest ever so slightly forward and up.
You'll start to find that those sides of your shoulder blades wrap around the middle, and the armpits want to come closer to the wall. All at the same time, continue to feel like your hands are dragging down as if you are trying to pull yourself longer. I'm gonna stay here for about three to five breaths because this is pretty intense, as you will feel when you're actually doing it. Continue to press your feet into the ground, and build an awareness of your plumb line organization here. I just want a final breath again.
See if you can make small adjustment, where you can find unused space somewhere in your back, all the while connecting your shoulders into the wall. And then let that go, feel free to do this more than once if you find this very challenging. We're gonna go into our last mobilization for which I'll ask you to turn sideways. You can face me right here, you stand all the way against the wall, we're drawing a big circle with the arm along the wall. Here are the rules of the game, you are allowed to twist your spine, but only as much as you really need to.
For this to work well, try to engage your body fully, stand on both feet make fists with your hands, open your chest, stand as tall as you possibly can. And create some traction and tension in your arms by making fists. The left arm is now going to reach forward and up along the wall. Hopefully still touching it, from the hand all the way down to the shoulder. And then see if you can complete that circle with as minimal rotation as possible.
But when you do have to rotate, please do. You can always step away from the wall if you find that this gets too dicey through the shoulder. Once you've completed the circle, let's go the other way, this looks great. Going down and back, getting the heels nice and heavy into the ground, ribs organized, backwards, tail lengthening down, the arm comes forward, slides down by the side, and let's face the other way. Feel free to repeat this more than once, if you have trouble performing a full circle here.
But since we have a lot of exercises coming up, we're just gonna do one round each way, just to really test how much does my spine have to rotate, how mobile is my shoulder, how much movement can I bring to my shoulder blade, the humoral head, as the arm circles all the way forward and down, and then we're gonna let that go. So we have some activations in the body. Now we've tested the openness of the chest, mobility of the shoulders. We're now going into a fairly regular Pilates protocol on the reformer. So now that we're warmed up, we're gonna get on the reformer, do a few typical, classical exercises here.
What I will address in these exercises, other than what I would usually talk about, is how these string back together into our handstands later on. So we'll look at plumb line organization, we'll look at weight bearing into the shoulders. And we'll talk about the mobilization off the torso in these exercises. We might leave a few exercises out along the way, just to make it relevant to the handstands. So you can go ahead and lie down on your back.
We're gonna start with footwork here. I have her set up on four springs on a Gratz Reformer. The heels are together, the toes are apart. For this session, this exercise is all about letting this movement travel throughout the entire body. And finding that freedom through the ribcage that we found earlier on the wall.
So once you feel like you're secure in all ten toes, go ahead and press out. (exhaling) We'll take 10 repetitions here. Again, just continuing the warmup and going into our pilates protocol, if you will. And while you get yourself warmed up, what we're really looking for here is that freedom we found in the ribcage as we pressed our arms into the wall. And all those warmup drills we did a little bit ago. And see if we can find some of that here.
So we're not bearing down into the ribs, we're trying to figure out how can I use my back against the carriage as I travel through these leg presses here. Going out, (exhales) coming back in. That same freedom through the chest that we found against the wall, we're trying to find some of that here as well so it'll serve us later. Yes, in our handstand later, our biggest challenge really is to try and align our plumb line perpendicular to the ground. So this is beautifully represented here by just having that support of the carriage, back against us.
Start to notice whether your back is arching, or whether you can keep yourself evenly weighted. Each time you come to that full extension, let that movement travel all the way through the body, beautiful, out, and back in. We'll do 10 repetitions of each here. To then, come into our tendon stretch, another great plumb line organization exercise. Just give me one extension out and pause for a second.
Especially on this one, notice whether you can let that movement travel through the hips, into the back bottom rib, out through the crown of the head, which is something we'll address quite a bit in the exercises to come. And then lower the heels all the way down. Keep that length from the back, so the heels to the back of the head, and lift back up. We'll just do a few here. (inhales) Start to notice again, how do your ribs behave as you go up and down, as your body experiences the load of the springs underneath you. And can you hold on to that openness in the chest so that the breath can travel through as well.
Up and down, last one, lift yourself up, come all the way in, and then lower your foot bar down with your feet. We're getting into a hundred position, we're not gonna add any pumps today because what I want you to focus on is the idea of bearing weight into your arms, organizing your spine, lengthening the legs out of your body and just seeing if, again, can make small adjustments to our ribs, relay to our legs. Press down and lift your head, neck, and shoulders up. And we're just gonna stay here and breathe, alright? So while we do that, we're just gonna exercise in and of itself.
What we're trying to accomplish is the sensation that our legs truly begin in the lower back, right around where that back bottom rib is, and then from there, that's also where our arms begin. So as you stay here and breathe, continuously and evenly push into both arms, reach the legs far away from you. Breathe steadily and calmly, and then let's just come out again for a second, to reset and set it up one more time, same exact thing. So the pilates call this maneuver the stretch and pull, let's think of stretching the legs out of your body, stretching into the straps, pulling them down, and then really finding that space between your shoulder blades wide, and the ribs deepening down, and from there, the legs lengthening out. And even though the arms don't pump here, I would say this still constitutes as a warmup, right?
Slowly (laughs) release all the way back and down. Come up for, to a seated position for just a second. I'll let you remove two springs, so we're now on two. It's a nice little break to come up to seated. We're gonna flatten the headpiece down.
And we're going into a piece of overhead. We're not going all the way up and over just yet. I really just want you to press your arms down by your sides and lift your legs up to 90 degrees. And hold that position for a second. As you stay, you're continue to push evenly to both your straps, find that fold at the hip, and again, see if there's any play to how your ribs relate to the mat in a way that doesn't feel rigid or stiff, and allows you to breathe fully, reverse out, lower the legs, lift the arms, we'll do that again.
Arms come down, legs lift up, staying open in the front of the hips and long through the back of the body, including the neck, including the openness of the chest. And then lift the arms, lower the legs, one more time, just that, arms down, legs up. If you find yourself having trouble lifting the legs all the way up to 90 degree here, it's fine to stop before that, that don't means that we're not going into the next portion. We'll go into an overhead right after this one. Arms come down, legs lift up, pause there.
Now from here, I'm gonna step on the Reformer for just a second, I want you to press up into my hands, and lift yourself into a shoulder stand. And this is where we can, for the first time, work in that upside down plumb line alignment. Find that give in your ribcage, again lift up strongly, while keeping the front of your throat open. And then push into your straps evenly to slowly lower yourself all the way down. Gorgeous, nice, see the weight on the hips at the end?
Lower the legs, lift the arms. And you got two more on your own. Arms down, legs up, roll over, find that alignment again, yeah, it's a little harder if nobody's pulling you up. Press (laughs) down into your straps, lower yourself back down, and release one more time. Up and over, think about evens, right?
So become really curious with how your ribs are side by side, and whether you can find even alignment there, it'll serve you later on when you have less time to think about it in your handstand. Because there's 500 other things to worry about there. From here, we go into coordination, bend your knees and elbows in, let's do this one super old school with a head down today. So really release it back, find that give through the ribs again, folding back and down, arms come down into the mat, legs extend long and low, pause there for a second. So we stand in the air, footwork style, right?
The arms take some weight, the torso has to realign itself. Again, there might be a piece of your back that starts to lift as this happens. Let's keep pushing into the handles. Bring the knees up and into you, bend the elbows. And we'll just do it like that today.
Arms down, legs out, long and low, pause there for a second. Align your plumb line here, keep the chest open, keep pushing into the handles, bend your knees up and in, elbows gonna go a little quicker, three more times. Inhale out, pause, exhale, bring your knees up and in. Elbows bend at the end, last one. Knees go up and in, elbows bend, and that's that.
Take the straps into one hand, sit yourself up, we're gonna drop one spring so we're now left with one spring here. And we're actually going to face the other way, so we'll just go and face the foot bar here for rowing back. I'm especially interested here in the overhead portion where we press the handles up and overhead. So sit yourself back against your shoulder blocks. Press your legs into one another and we'll go from the chest first, the straps pass under the arms, the arms go up and forward, lower down, lift all the way up, and take a big circle around, repeat that twice more.
You can go fairly fast here, my main objective here is to try and really mobilize the shoulders. Almost think of shaking your shoulders out a little bit. So that we create some openness there that we'll call on later. All the way up and around, flex your feet, take your hands down, by your sides, roll down, press out, pause here for a second. All right, later, our hands there, we're gonna push into your hands, really think about that here.
Push through the heels, and then with great control, roll yourself up, carriage is still, mostly, and then the arms come out and down at the end. Again, rolling down, pressing out. Think of that same big circle at the end, open the chest and shoulders, and just like against the wall earlier, allow your shoulders to maybe even go a little bit back and down, just for today, one more time. Rolling down, pressing out, roll yourself all the way up, stay with the tension on your straps, arms come out and down, if possible keep the legs long, forward, called lifting, your hands, change the grip. Your hands go right next to your ears.
Now think about what we did on the wall, right? Our little TSA exercise, give me a little push forward into your hands, against that puff out your back ribs a little bit, alright, so whenever I say close the front of your ribcage, I'm not really looking for constriction as much as extra space in the back, and a connection of your arms all the way down. We're gonna take the arms straight up from here, lifting up and out of the way so we're back in our overhead position, or overhead prep position, rather. And we'll take it back down, we'll go again, straight up. And straight down, think of this as a test to see, once you've found that connection, how high can you actually lift the arms up, and if they can't go up right next to your ears, that'll give you some information as to what's going to be possible later when we try and go upside down, onto our hands, beautiful job, one more time, lifting up and stay, and what happens if we took the arms just an inch farther back from here, nice.
And then open the elbows wide, we're just gonna do one more from here, even if that means we don't go all the way up. Nioe, there's some beautiful heat coming off your back. I think things are working, that's gorgeous. And then we're done here, now we'll move the shoulders again, get a little differently for pulling straps. You can step off to the side for a second.
We'll set up the long box, staying on one spring. Now for this one, we're gonna look a little bit more at opening the thoracic spine, again opening the chest. And seeing what comes there, set yourself up so that your shoulders and your knees are evenly far away from the edges of the box, and that your legs have a little more support. Let's actually bring it forward a little bit more so we can work on that full-bodied alignment. Strong grip with both hands, legs strong, reaching back, hip bones pressing down, take the arms straight down and back behind you, and pause there for a second.
Alright, let's think again about the work we did on the wall earlier, so instead of just lifting the chest up, can you stretch the arms farther back, lift the back of your ribcage almost into my hand here, stretch the legs farther back, and then slowly return, all while keeping that effort, building a connection from your lower back into your shoulders, into your arms. We'll do that two more times, down, back, think forward rather than up, back through the toes, all at the same time. And slowly return, letting the straps return you in. The last one, arms go down, arms go back, chest can pull forward, but doesn't necessarily have to come up. Nice, keeps on lengthen the lower back, that's so good.
And slowly return, we're gonna go into our T-pull from here. Arms outside, again working on thoracic mobility so that's what you're looking for here. Let's go three times, pull straight back. Keep the carriage almost in place as you return the arms wide and open, two more times. Nice, so we continue to progress through opening the chest with all these different loads coming at the body, letting the shoulders handle those.
Hopefully that will help us later on organize our body well, you can release down for a second. Let your head drop, let your legs drop, just to have a moment of a counter-stretch here. Take a deep breath in, (inhaling) exhale, let's lengthen the lower back out after all that hard work. And then step off to the side. We're gonna do one more exercise that takes us into a backbend from lying on our stomach, it's the breaststroke.
We often think of the breaststroke as an exercise that takes us all the way up into a backbend. Today, I actually want you to stay flat and keep the arms in front of you right next to your ears and let them just circle out to the side through T, all the way back behind you. Take the straps in front of your body. As you set up, step over and again, make sure your knees and your shoulders are evenly far away from the edges of the box here. All right, the hip bones are anchored down into the mat, so it might even mean that your thighs lift a little bit up.
Hands can be parked underneath your shoulders or at the front of the carriage, depending on where your body is in space. From here, we'll kick the heels to the ceiling once or twice and then extend your arms and your legs at the same time, pause right there. Body stays flat. Really feel how that strap tension pulls back into you. Think about your wall reach from earlier, your back ribs working against that, and then slowly take your arms through T, all the way back behind you.
The crown of the head swims forward. And we'll do that again. Two kicks, so one, two. Extend at the same time, feel that tension for a sec, really settle into that. Your arms will be overhead in your handstand later.
Arms swim out to the side, back behind you. Two more times. Traditionally, there is a backbend here. We'll leave it out for today, just really focus on this piece of pushing into handles against the ribs, reorganizing themselves. Let's do one more, kick stretch the arms and legs, push into the handles.
Take a big circle here, all the way back, opening the chest, and then be done here. You can step off to the side. Let's get rid of the straps and the box as well. We're gonna set up for the long stretch series. Where finally we actually bear some weight into our arms, bringing our shoulders right over the wrists into the foot bar.
So this is where grip strength starts to come in a little bit, right? In order to mobilize our wrists for what we ask them to do, hopefully later, we'll start to build some actual strength into that here. So let's let that be our focus for long stretch. You can take your hands to the foot bars. Step foot by foot in.
And let's take a moment here to figure out how far can you curl your fingers around and underneath the foot bar, almost pulling your chest through the arms, like pulling straps we just did and then find that space between your shoulder blades, puffing up into my hands back here. Think of the wall again and how your shoulder blades came around the body as you did your arms overhead for that TSA exercise. Now, from here, let's go out, pressing out, and bring the chest forward to start coming back in. Beautiful, we'll repeat that four more times. Let your focus here be not to go so far out but really maintaining that alignment and that weight bearing into your hands and that reinitiation of your chest coming through before the springs start to close, gorgeous.
Lower the knees after the last one, come all the way in. Bring your feet against the blocks and then lean your hips forward. Now again, for a handstand, we don't necessarily need much of a backbend, but we do want to make sure that our shoulders and our thoracic spine is nice and open, so let your focus here be to really lift your sternum forward and up against your heels kicking back to avoid hinging into your lower back. From here, let's go four times. Press out, come back in.
The same grip is applied here, so if you can, get your knuckles all the way underneath the foot bar so you can really work on some strong fingers and open up the wrists for what we're going to do with them later. Two, come all the way home, last one. Pressing out, pull yourself forward and in. We're going into a variation of upstretch now that gets us into our first little handstand test. We'll do a regular upstretch to start just to set the focus on spinal articulation, openness, and weight bearing into the hands.
The legs press back as the hips come down, and this rounded spine with the upper back puffed up will bring the carriage in, and then roll through your spine, letting your head be heavy, letting your hips be the last thing to resolve and release. Gorgeous, that was awesome. We're gonna add a step to this, right? If your upstretch looks this good, we can make it a little more interesting for our handstands by pushing the feet back like we did before, hips come down. So far, everything is the same, but this time, we come in so much, the heels begin to peel off the shoulder blocks.
We're gonna try and keep them there as we lift the back of the heart up to roll back against the shoulder blocks. So there's a moment of that handstand kick up that we'll work on a little bit later in the open space. Let's do that two more times. Come down, pull yourself all the way in, beyond where the springs close to then roll yourself up through there, really emphasizing opening that space behind your shoulder blades. Last one, press out, come in.
With the heels off the blocks, roll yourself all the way up and from here we go into our elephant. Step the feet all the way forward towards the end of the carriage for this one, so it's a variation that we will use to mimic a little bit of what needs to happen later on as we try to drive the hips up and over the shoulders in the actual handstand. We're still not there yet, we're still just warming up. Make sure your feet, your heels, are right underneath the hips so you don't have to push back through the knees all that much. And that you can evenly divide your weight between your hands and your feet.
Think the first movement is to lift your ribs up, sort of right here into my hand, and from there, push your arms and your legs away from one another in an effort to get even longer through your back and pull yourself back in. So, this position, you can keep going, changes the focus of the exercise somewhat. We're not going to experience that much space through our back. We're getting a little bit closer to what our pull up on the wunda chair will be, which is in our very near future. And it helps us find that connection from our lower back all the way into our hands and all the way down into our feet.
Two more times, pressing out. Pull yourself back in. Final one, come all the way home. Step off to the side and we're gonna set up for a few tendon stretch variations that continue this idea of the elephant with the feet forward that we just started on. Let's use a sticky pad right against the front of the carriage.
If your springs are not already set up that way, we have two on the outside so the feet have a space to drop into. I like to start this exercise seated on the foot bar facing the shoulder blocks. Just to take a moment and press the legs out, letting the weight of the springs push the hips into the front of the foot bar, so you might have to come forward a little bit there, exactly. It should almost feel like you're in danger of falling down into the springs, so that the second you press your legs out, you feel the trust of the carriage holding you in place. Right there, do that a couple of times, actually.
Bend your knees back in. While you're here, work on opening the chest, almost like you're doing a little bit of chest expansion there, opening the chest wide, collarbones expand. On this next one, keep the legs straight and long, bring your nose down towards your knees, and just like that elephant we just did, really feel that back rib puffing out to lift yourself all the way in and up. Bring the carriage to a full close, amazing, nice. From here, go right back out, press out.
It's not about how far you go, it's really about the coming back in, because it's going to be relevant for our focus today. A couple more like that, pressing out. Pull yourself in, nice. You're going really nice and far here already, which is great, which means we're gonna add on for you. You press the carriage back out to that same spot.
Now since your hips are in front of the foot bar, go ahead and open your chest forward, like you're adding extension here, and then lift your ribs back up into my hand to pull yourself right back into start position. Let's try that a couple more times, pushing back, open through the chest, mobilizing the thoracic spine, come back into flexion, pull yourself back up, last one. Pressing out, open through the chest, reverse it, ribs draw back, pull yourself all the way in until you hear those springs close. Bend your knees and have a seat on the foot bar for a second that was awesome, nice work. What we're gonna add to this is to take one leg back behind us because later on, when we go into our handstands, there's that moment where we wanna kick the leg up behind us and hopefully catch our hips right above the shoulders.
I think tendon stretch is an awesome way to practice that. So we'll start the same way. Press the legs out. Lift yourself into your start position. This is the most precarious moment.
You take the left hand between your legs so that your left foot can go around the foot bar back behind you. And then while you look at your hips here, allow the left hip to drop a little bit and make sure the sides of your waist are evenly long and you have even weight in your hands, nice. Allow the right heel to drop, scissor the legs apart as you push into the spring and then use the back leg actively to pull yourself back up. Nice, and again, press through the right leg. The ribs stay round, or the spine rather, stays round the entire time, and let's do a couple more here.
Beautiful, almost think about kicking that left leg up behind you in order to come into what one day will be a handstand. Actually, not one day, it will be today. Take this leg around to recover. And let's go right to the other side. Right hand goes through, right leg goes behind.
Take really a moment here to square off your hips, which is not just side-by-side but also forward versus back. More often than not, the right hip has to come back a little bit and maybe lift just a smidge. Beautiful, right there, awesome. Push through the left leg, and both arms scissor the back leg back to lift your back up, nice. Let's do a few more, pressing out.
Even weight on both hands, couple more to finish. Press out, lift back up, last one. This time, almost allow this hip to drop a little bit, square yourself back off, so nice. Then take this leg around. Ah, that one is done with.
(laughing) Nice work. We're going back now to taking the arms overhead a little bit. Semicircle is our next exercise. I'm gonna take the foot bar down for this one. I am not working with a stopper here because I want her to explore really full freedom through the thoracic spine and chest.
Good. You can explore whether making fists against the shoulder blocks is an option that your arms like better. Watch out for your elbows hyperextending and your wrists just not being in a good, supportive position. This looks great on you, so we're gonna work right here. Let's take a moment to feel both hands push back in order to get your knees closer to me, letting your tail almost curl forward towards that spot between the knees so we get an awesome thigh stretch in here as well.
Why not, right? We are still doing a full body workout. Now from here, allow the spine to drip into that open space between the front of the carriage and the springs. Focus on the quality of your push through both arms here, right? The second you go too low, you might lose that connection to your arms.
We're gonna focus on that more than anything else today. Go ahead and press arms and legs away from each other and while pushing back into the arms, roll yourself back up, again looking for that connection back into the arms so the carriage doesn't move all that much, which we can also do without the stopper. Roll yourself back down, press back out. You go as far as you can keep that strong connection into this very open position through the chest. Lift yourself back up, come in.
Beautiful, one more time, rolling down. Pressing back, lift yourself back up, reverse it. We go a little faster on the reverse. So, again, just a few things to look out for here for yourself as you experience this movement is as you keep your arms pushed over your head, how much movement is there possible in my spine and through my ribs? Similar to what we did in the small against the wall earlier.
All of this will benefit us later on. We have come all the way in, roll yourself back up. Let's do a little stretch here. You can grab onto your ankles if that feels nice. Lengthen through the sides of the waist here, open through the chest.
And then take your hands back to the shoulder blocks, pull yourself back on and step away. We're done here. Two more things before we leave the Reformer behind. We go into our knee stretches, round and arched. Getting back into some more spinal mobility now so that we can call on that while taking weight into our hands.
So use your arms really strongly here from the start. Almost think of this more as a shoulder stretch than as a knee stretch, just for today. All right, so as your arms push, can you puff this space into my hand, letting your hips stay in place going back and forth? Explore going a little slower today, maybe even a little farther. Just to see where this connection gets lost.
Beautiful, three, two, and one. Come all the way in. Change the configuration of the spine with the same focus on the when do you lose the connection from your lower back into your arms, how far can you go, how slow do you need to go to really focus on that? Nice, that's it, and come back in pressing out, coming back in. The good news is we're not going to do knees off today.
Always good news, but the bad news Not that there is bad news, but what we're gonna focus on instead is really keeping a strong connection through hands and feet throughout the entire time. Let your heart lift forward and up, see if your ribs can give you more movement there. Nice, two and in, that's it, last one. All the way home, and just to cool down let's go into running quick and dirty. Let's add two springs so we're on four springs.
And think of this just as your cool down for the Reformer portion. After that, we're gonna change apparatus. So go ahead and press out. Let that movement travel through your body and release. Leg by leg, ah, focusing on your breath again, opening through the chest.
So you see how we can use the Reformer protocol on the exercises we do all the time and just tweak the focus a little bit to hopefully find some more space in our chest, a little bit more focus on our shoulders working. There's actually quite a bit of extension that's happening. All of that will be useful for what's going to happen next. Come all the way in, and step off to the side. We're going to use the wunda chair next.
All right, so now we're going to use the wunda chair, and specifically the mechanics of the chair that helps us come up into what feels like the beginnings of a handstand, we're not quite there yet. And again, keep in mind, this is not about the finished product, this is just to see how can we use the thing that we just warmed up for to actually get some body weight off the ground. We are going to use this exercise, the pull up, on a fairly heavy spring setting. I chose a middle and a high spring on a Gratz wunda chair here, which is more than people typically would use for this exercise, but I want this A to be successful for your body but also to really see how the initiation works in your body and if we can use that support that the chair provides to fine tune and tweak it a little bit, again looking at rib movement there and seeing if we can get the hips ultimately all the way up and over the head. All right, so with this heavy spring setting, just go ahead and stand in front of the chair, taking your hands sort of to the side and middle of the chair to then press the pedal down with both feet.
Make a connection there similar to elephant, right, where we had the feet a little farther forward today. Release the head down, lift the space behind your heart up and then begin by just feeling as though you're pulling your hands and your feet towards one another. Try to mimic this idea again that you have even body weight in your hands and back into your feet and then lift the pedal just one inch off the ground. And take a moment there, start to notice there's more weight in the hands now, can you still even it out, and can you still even out the bend through your spine from your head all the way down to the tail to then come back down. So even though we're limiting the amount of movement, we're actually amping up the intensity ever so slightly.
Lift the pedal back up, just an inch will do. 50/50 weight hands and feet. Can you pull your hands and your feet towards one another and then perhaps climb up another inch here without losing that even bend in your spine. Amazing, and then lower the pedal down with control. We're gonna do a couple more here.
Right, so ultimately, that is what is going to happen a lot faster if we weren't planning on kicking our legs up and catching ourselves into a handstand, which again, we're not gonna do, not yet, and probably not later either, but this initiation is really super important and this is a safe way to test it, amazing. Now on this last one, let's see how far you can take that all the way up, again, maintaining that even sense of weight between hands and feet, even bend through the spine, even weight between the two hands, and then your tail lengthening down towards the heels to lower the pedal all the way back towards the ground. Awesome stuff. To open up a little bit more of our thoracic spine here, we're gonna add a little twist exercise because we haven't done much of that yet. Go ahead and turn towards your left, keep your left foot on the pedal, and cross your right foot in front of the left here.
Your hands travel over to the side of the chair, drawing in towards one another. Again, check in for a second whether your wrists are happy there and whether the space behind your heart can lift up so that your head can drop and your spine has an even bend throughout. If you can, peek at your hips, make sure they are square with the side of the chair as well. Just like before, we're gonna lift up just by one inch. Hold the lift for a second.
Instead of coming higher, see if you can press more into both your hands to lift the space behind your chest up and then slowly lower yourself all the way back down. So again, we're limiting the range of motion, we're working on a clear initiation, and see if we can align and realign our shoulders there. Remember that we're here to build trust and to ultimately carrying all of our body weight up into our hands. Let's do a couple more, lifting up. If you want to find more rotation in the spine here, you can even let your right hip hike up towards the right shoulder ever so slightly.
Again, not lifting higher, just making small changes to the spine, lower back down, we'll take one more here. Press through both hands evenly, right and left, so that the space between the shoulder blades is wide and open as far as that is available. Remember how your shoulder blades came around on the wall in our first exercise. Lower all the way down, let's go over to the other side. Very nice job.
So really, what we're looking for here is to mobilize through the thoracic spine and see if we can translate all those concepts we've been working on in elephant and all those other exercises into a twist. Lift just an inch, hold that for a second. Think tail chases the heel to lower back down. We're gonna do that three more times, lifting up, even weight between hands and feet, even here, and lower back down. Last two, lifting up.
Think left hip a little towards left shoulder to intensify the work through the side of the waist. Last one, lifting up. Monitor even weight between right and left hand. Lower all the way down, and then face the chair to step away. Nice work.
Just to counterstretch a little bit, go ahead and grab your hands behind your back, pull them down towards your heels, lift your chest up, almost like a standing pull strap, just to open the chest again. Because we will do one more exercise here that takes the body into that same range. This time, we're not going to be supported by the chair, but we have our hands on the ground. So, I call this one the pike. It's often called the handstand preparation as well.
We're gonna face away from the chair. I will change the springs to two bottom springs for her. (metal clanging) And this is how we start. Go ahead and place your hands down in front of your big toes. And then one foot at a time, place your feet up on the pedal.
And we'll just spend a moment here. All right, so this is the first time that we're actually in something that very much looks like a handstand already. The hands are right underneath the hips, there's a good fold at the hip that we've been warming up for since overhead prep. From here, feel even weight into your hands. Check in with the texture of your fingers and how they can press into the ground.
This is what's gonna happen from here, pull your feet towards you, let your tail lengthen towards the heels, and see if you can get the pedal down towards the ground. And then by pushing evenly into both hands, allow the pedal to rise back up, lifting back up to the top. Allow that to happen, right? We wanna have the springs almost a little heavier than you can manage so that they can assist you on the way back up. Lower with control, push through the hands, and lift yourself all the way back up.
And if you have a prop, like a spread eagle board, this is actually a good moment to use it and place it underneath the pedal just to allow the pedal to stop just before it crashes to the ground. So we'll leave some spring potential on there. Push through both hands to lift yourself back up, amazing. All right, this will be our last one. Again, allow your ribs to adjust so that your tail can move towards the heels to lower the pedal.
Lift yourself back up, pause yourself if you can. Let's see if we can take more weight of our body into the hands by lifting one leg up. This looks super secure, nice. Allow your hips to be square, remind yourself what you did in that pull up twisted that we did a little bit ago. Lower that leg back down, let's go to the other side as well.
A great way to test if everything went well so far, whether you can actually take most of your body weight into your hands. Looks amazing, take that leg all the way to the floor to step off and then roll yourself all the way back to standing. Nice work, we're getting pretty close to our handstand now. We're gonna leave the wunda chair behind of this. We're going to do a couple more things on the Cadillac before we take it to the barrel.
So here we are on the Cadillac. We're going to be working with our leg springs and the push through bar loaded from below. I'm adding two exercises in that I think will lead you to better success as we go to the barrel later, where we explore the handstand a little bit more in detail. We're almost there. We're going to start with some leg spring work, where your head is towards the leg springs, your arms will be overhead, pressing into the poles.
All right, so before you even have your feet in the springs, think about your arms pushing back into the poles against the back of your rib cage dropping down into the mat, similar to how we warmed up and similar to how you will be on your hands later on. You can go ahead and bend your knees into your chest, and we'll put the straps around your feet towards the heels and connect them. We'll start with a few frogs here just to get the sensation that this begins not in your feet but back in your hands. So think the first connection you make is your hands pressing back, your ribs dropping down, your hips lengthening away from the ribs, and from there, your legs extend all the way out so that by the time your legs are straight, there's a full connection back into your hands. Go ahead and bend your knees back in, let the springs carry your knees in nice and deep.
And go again, hands, ribs, hips, into the legs, and bend back in. We'll do a few more like that. Later on on the barrel, there will be a moment where I'm gonna ask you to jump off the barrel, where we need to figure out a way to adjust your tailbone in such a way that it locks your legs in the air. It'll make sense when we get there in a little bit. But this is an exercise that prepares us for that very moment.
It's the magician or the hover where your legs press out, you pause. Now, because your legs can't extend out any further, we're now putting our spine into this. Lengthen your tail towards your heels like you're trying to stretch the spring out more with your spine lengthening out, your hips lift up as a result. Lower the hips back down, then soften your knees back in. We'll do that a couple more times.
Press out, back through the arms, out through the legs. Lift yourself back up. And once you're up, test. Can you still push through your arms rather than pull? Nice, lower the hips back down, fold your knees all the way back in.
Let's do one more like that. Press out, lift up, pause here. And just like at the wall in the very beginning, can you make small adjustments to how your ribs float in the air to the length of your lower back and your tail lengthening back towards the heels. Let's open, close the legs for a few beats. Just to challenge that stability and that alignment that you just found.
Make sure that you breathe, right? (breathes deeply) And then hold the legs together, lower yourself all the way back down, fold your knees back in, and let's give the hips a little stretch here. Soles of the feet together, knees open, hands on the strap. And we will refer back to this exercise once we get to the barrel. Excellent exercise to learn how to do jumping off the stomach.
I hope you'll see the relationship once we get there. One more exercise we'll do here, you can go ahead and take the straps off, is our press up and sit up. We're gonna use the push bar for this with a spring from below, so I'm gonna attach whatever safety measure you use on your Cadillac. And a spring from below, you can position yourself with your head underneath. And bring yourself back far enough so that the bar is approximately right above the chest or collarbone.
Your legs are long in front of you, your elbows draw in towards the body here and your hands are at about shoulder distance. Right, the first thing we're gonna do here is a very simple press up of the arms extending long. Once you're there, feel how the bar pushes back in your hands and allow that to result in your shoulders dropping back and your chest opening wide. Against that, that support you feel from the bar here, again, check in, is there any movement possible through the ribs that feels supportive and strengthening? And can you let your legs be active here as well so that it doesn't just become an arm exercise?
Slowly let that spring tension subside. Bend the elbows back in. We'll do that a couple more times just to get used to that. Straight arms, nice open chest, supported backs of the shoulders, a long body here, beautiful plumb line organization. Arms bend back in, this is gonna be our last one.
We're gonna add on once the arms are straight. That relationship to the bar now remains as the spine starts to articulate up against the bar, so like a roll up, head, neck, and shoulders lift up. Peel yourself away from the ground and continue to evenly push through both arms into the highest lift that you can sustain, avoiding letting the ribs pop forward to lock yourself into position, going just to that place where you uncontrollably shake. And right there we stay for a breath to then slowly come back down, the legs lengthening out in front of you as the spine slowly unrolls itself back onto the ground. You can bend your elbows at the end (sighs) We'll do that again (laughs) Stretch the arms forward, let the backs of the shoulders drop, chin over chest, peel yourself away from the ground.
Focus on keeping an even push through both your arms. Notice if any rotation happens through your ribs here, notice if there's even weight on your hips. And then while pushing up into the bar, roll yourself down, so both things happen at the same time. Release your head, bend the arms, we're gonna add one more thing on here. Come up once more.
Arms up, chin over chest, lift yourself to the top, and once you're there, remind yourself that your arms do in fact begin in your lower back, right? Try to make that connection as you bend your arms out to the side, think of the TSA exercise from earlier, and then press back up. Think of your rowing back exercise, the overhead lift. It's the same thing but we're on the slant here. Notice whether your ribs start to misbehave.
Keep even weight on your hips. Let's do one more, stretching up and roll yourself all the way back down, release your head, bend the arms in, and let the bar go. Make your way away from the push through bar. So now that we worked on all those things, you've already learned a lot about what your body is able to handle when it comes to taking your arms over your head, putting some actual weight into it, whether it's spring tension or your body weight. So now, I think we're ready to take a closer look at that handstand.
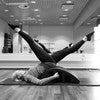
Let's go to the ladder barrel. All right, so now we're at the ladder barrel, which, by design, is really a gymnastic piece of apparatus that Joseph Pilates used in his studio, and I'm pretty sure he was inspired by the pommel horse and other pieces of equipment that people used for gymnastics at the time, so it's a great place to invite a more playful piece of the practice. So, now that we've been focusing on the pieces that have to fit together in order for us to go upside down and have enough trust in our body to catch us there, we can use the barrel to fully support us into the exploration of a handstand. So, again, you don't have to be able to do a handstand to be able to explore it here. And it comes straight out of everything we've been doing so far.
The first exercise we'll do is the grasshopper. So just go ahead and slide yourself over, taking your hands down to the base of the ladder barrel, close to the ladder but making sure that your head does not get too dangerously close to the ladder here. Allow your legs to fully drop down and your spine to fully relax just for a moment of just feeling your hands against the ground, adjusting them evenly side by side. The moment we'll be interested in the most is the moment that the legs kick up behind you. We've been talking about it quite a bit today.
Think of this as an arm exercise so that the legs lift up as a result of the hands pressing down, similar to what we just did with our leg springs. So think hands press down first to lengthen the legs back and up to almost vertical or totally vertical. Bend your knees to stretch the fronts of the hips. Re-extend the legs and for today, we'll keep things simple. Allow the legs to drop back and down, let that resolve in your spine.
Completely releasing as well. That was awesome, we're gonna do a couple more. Press through the hands. Let that travel through the rest of the body. Keep the fronts of the hips open as you bend your knees, stretch back up, reach the legs back and down.
Allow your spine to fully recover, and we'll do one more here. So press down through the hands, lift the legs back up, bend your knees back in, restraighten your legs, let your legs fall back and down. Again, fully let the spine recover. That was awesome, walk your hands up the ladder to push yourself back to find your way off the barrel before we go into our next exercise, which is one that is not often seen in the work. It's called jumping off the stomach.
It's a pretty intense exercise, but it really drills that moment of takeoff we're looking for in a handstand. Right, so there's a piece of grasshopper in here as well that focuses on that weight bearing into our hands, as well as keeping the chest wide and open, but we'll bring a piece of that magician we did with the leg springs back in here. For this one, your hands will be on the lowest rung. Your body aligns itself right on top. Again, make sure that your head is not too close to the ladder here.
There's a slight bend to the elbows so that you can be well-positioned. We'll just line this out first. With the elbows slightly bent, and just like in your grasshopper, allow your arms to push into the laddder to kick the legs up behind you and then lower them back down, right? So you have a moment where your body gets a little bit lighter on the barrel. For right now, don't take off just yet.
Push through the hands, stretch the legs back and up, and lower yourself back down. So you can see beautifully on Carrie how she uses her fully body in that moment, right? Do that again, push through the hands, lift the legs up, and then lower yourself back down. Release the head for just a moment. Now, what's tricky with this exercise is that it's very easy to default into the lower back and just whip your legs up from there.
So that's where the magician comes back in, where I want you to think of how you lifted your hips up off the Cadillac just a little bit ago and use that moment the second you're airborne, all right? So now, this is going to result in an actual jump off. As you push into your hands, kick the legs up, send your tail back to the heels, and lower yourself back down, bracing through the abdominals. That was amazing, let's do two more of those. Lift up, kick back, and lower yourself back down.
Last one, legs lift, tail reaches back, release. Go ahead and go all the way off the barrel here and back to standing (groans) Super invigorating exercise for sure, right? Obviously, a pretty crazy, out there exercise but if all the pieces have made sense so far for your body, you will actually quite enjoy this one, especially if you wanna go into a handstand, which is our next and final step here. We're gonna take our hands back to the base of the ladder, where they were for your grasshopper. We're gonna add our jumping off the stomach a little bit in here, now I will support this exercise to take Carrie into a full handstand.
So while she takes a moment here to take her hands evenly into both sides of the rail on the ground, remember, what we're working on here is to organize our plumb line once we're up and upside down, similar to how we stood against the wall earlier right side up. So here, think about your hands pressing down first, kick your legs up like you're jumping off the stomach, and then find yourself in your first handstand of the day. Curl your tail up towards the heels and just like against the wall, while you're breathing, is there room to your ribs to move toward the ladder? Is there a better, more efficient alignment? I'm barely holding onto you, this is awesome.
I'm going to take you back to the barrel, lower yourself down, allow your spine to fully release. Amazing, right? So you've been building trust towards this all this time. I do recommend having somebody spot you for this, right? Somebody who has experience spotting this, but all the pieces at this point are in place.
We'll do two more, kick the legs up, I'm right here to catch you (gasps) Hold yourself up, amazing, lengthen your tail up towards the heels. Again, find spaces in your spine that are still able to mobilize to find alignment that is sustainable, where your breath can travel through. Deep breath in, amazing adjustment there, and then slowly take yourself back, and lower all the way down. Final one, press through the hands, lift the legs up. I'm barely holding on.
You're doing it all by yourself right now. Press through the hands, find that openness in your chest again. We've been working on this all along. Extend through the hips just a little bit more, you got it, nice. Take the legs back and down (sighs) Walk your hands up the ladder.
That was amazing, and there is our handstand. High five. All right. We're gonna do a couple more handstands. Now that we've explored them here with the support of the pilates apparatus.
Of course, the ultimate question is can we do it away from the apparatus? So, you have two more exercises that you can do that are still super supported. One of them will use the wall, one of them I will step in as an assist. And there's our handstand. So, we made it through our first handstand on the ladder barrel.
I wanna finish with two variations that you can do, even if so far your handstand still has not been successful. Using the wall and using the concept that we explored in the pike on the wunda chair, just using a static wall, which is often a little more reliable and maybe a little bit more trustworthy to explore being upside down. So, for this exercise, one of the things I would like for you to look at at home as well is to check in with your wrist mobility to measure how far away from the wall you want to be. So, just go ahead and face me for a second and take your arms straight out in front of you. And then just go ahead and peel your fingers back towards your elbows just to check in with how much you can bend at the wrist without lifting your arms, without starting to arch in your back, and you might find that you have ever so slightly less than 90 degrees of wrist flexion there, which probably is then an indication that we don't necessarily want our wrists to be there when all of our body weight is in it, right?
So that might then mean that we want to step a little bit farther away from the wall, but we're looking good right here. So just go ahead and lower your arms down. The next thing we want to measure is how long our leg is so that we can figure out how far away from the wall we are. So go ahead and face it, and lift one leg up, place the heel right in front of your hip against the wall to measure. Your standing leg, your standing foot is where your hands are going to be, right?
Because you are in a pike, your hips are over your hands and your leg length away from the wall is a really good way to measure. So just keep your left foot where it is as you turn yourself around so that you can put your hands right there, exactly. And then we'll start one leg at a time pressing a foot back into the wall, carefully pushing into both hands evenly to lift the hips right above the shoulders. So you can go ahead and move your torso slightly away from the wall here, Carrie, nice. Find that movement through the ribs again, and while half of your body weight is absorbed by the wall, it's a really good place to play around with that push of both hands evenly into the floor.
If you can breathe in this position, you feel like you can play around with it a little more, just like on the chair, we'll lift one leg up towards the ceiling. As long as you can maintain contact with that foot against the ground, you might even take that leg back behind you, which you're already doing. This looks amazing. Make sure that that left hip doesn't come along for the ride. Great adjustment, then take your foot back against the wall.
We will do the other side as well, so the leg lifts up. As the leg extends back and perhaps splits away from the wall, make sure that that same side hip doesn't fall backwards and that your lower back is not picking up the slack. You can take this foot all the way down to the ground now to make your way up to standing, slowly rolling yourself all the way up. Enjoy the head rush (sighs) Nice work, so if you find that you can't really do the pike on the wunda chair or that on the barrel you don't have anybody spotting you, this is a really great place to further now explore how far you can go into your handstand. Final test is to do it with no apparatus at all.
Except for me, I'll be your apparatus, all right? You can stand right across from me, and essentially, you will be jumping up into a handstand and I will catch you right here. So, if you try this, you can do this against a wall if you don't have a friend around who can spot you. But think again about the second that your hands make contact with the ground. It's what happened in grasshopper.
You want to find that connection, travel all the way through your chest, through your torso, into your hips, and into your legs so that the back leg, just like our tendon stretch on the Reformer earlier, has the power to kick you up and bring your hips over your shoulders. And I'm right here to catch you, or otherwise if you use the wall, just know that there's no way that you can topple over. So from here, just bring your hands down in front of your feet, kick one leg up behind you, and lift yourself into both your hands. Nice, lower that leg back down to come back. Think more about that back leg lifting you up as you take weight into your hands, so really, just like a one-legged grasshopper.
Bend down and lift up, nice. Hold for a second, think there's a ladder against your back like on the barrel. Beautiful, and lower that leg back down. Lift yourself back up. We'll do one more on this side.
Rolling down, kicking the back leg up, yes, lifting the leg to meet the other, again, I'm barely hanging on. Can you lengthen your tail up towards the heels, push more evenly through both hands, lower the leg back down, lift yourself all the way back up, and just for good measure, let's do the other side first. We always pick our good side to start on. Let's see how this goes. Left leg leads the way, lifting you up, hold the position, draw the other leg up, find those adjustments through both hands evenly, right?
If you just think about symmetry here, you'll probably find good alignment through the shoulders. Lower that leg back down, and lift yourself back up. Amazing, two more times. Rolling down, lifting up, kick yourself to the top. I'm gonna lift you, have you lift that second leg by yourself, lower the leg back down, lift yourself back up.
Whoa, good, last one. After being upside down so many times, it's totally okay to lose your orientation ever somewhat. Push into the floor, yes, good, lower the leg back down, lift yourself all the way back up to standing, (sighs) and you are all set. I hope you enjoyed this class. Again, don't make it about the finished product even if you don't get into any of these full expressions at the end, you'll probably start to get a little bit closer to developing the skill and the trust that is required to do the handstand.
Thank you so much, thank you so much. Thank you. (man sighs)
Mention
 |
Benjamin Degenhardt (Teacher) |
 |
Kris |
 |
Heidi VDB |
 |
Tricialee F |
 |
Jean A |
 |
Jill C |
 |
Connie M |
 |
Avishag H |
|
|
Amie C |
 |
Michele M |
 |
Analia A |
|
|
Jennifer H |
|
|
Kay F |
 |
Holly Holland |
|
|
HK |
 |
Riina M |
Comments


You need to be a subscriber to post a comment.
Please Log In or Create an Account to start your free trial.
