Description
About This Video
Transcript
Read Full Transcript
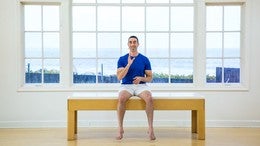
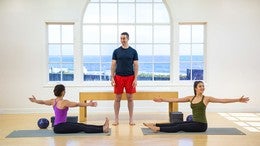
Hi, I'm Jared Kaplan. You are watching moving environments match one. I'm here with marimba and Karus. We're really excited to give you a prop based class. Where did that prop go? Oh, there we go. Thanks. Flies anytime. So you need one dowel rod.
The purpose of this is to help you with your sensory input. You're going to be tracking your spine and movement through the input of this. These guys have not done this before, so you at home as well. This is gonna be an experience for all of us to start with. I want you to come down onto your mat.
You're going to place the dowel between your inner ankles and your knees.
If you have a thicker one, that's fine. If you need a roller at home, that's fine as well. The size doesn't really matter. It's about getting that emotion through your hip joint, through your lower leg. As you go to the right, I want to think about really weighting the outside of your knee, and if for dollar drops, just reset it. As you're going into the left. Think about weighting the outside of your left knee and allow your hands and wrists to receive the same kind of weight. You can start to go a little bit bigger, keeping your feet quite heavy, rolling to the outer edge. Anchor the opposite inner knee, and then rolling to the other side to anchor the opposite.
As you go left, feel the inside, right knee as you go right. Feel the inside left knee. Let's do that two more times. So you're really using that dowel rolling to help inform the action of your femur inside your hip joint. This is going to come in handy later on. Great. Then come back to center. From there, I want you to come to a simple shift, so take your dowel rod, you know, place it on your spine. I'm gonna show you sideways so you get a sense, you're gonna think about the base of your sacrum touching the dowel, your middle back, and if you can with your head, depending on your hair, you're at the back of your head touching as well. From there, as best as you can, come back to all fours, adjust your devils so you can balance it. If it rolls around a bit or falls, just reset it. It is going to move slightly. Set yourself up and put your attention back to your inner and outer knee.
From there, I want you to slide forward. Try not to change any of those three points of contact and slide back. So I'm going to help these guys out as you go. Just use your own hand to adjust the positioning. Start to take a nice, easy front and back sway. Great. There you go. If your hair's kinda making it hard for this, you can always reset the Dallas.
So it's just your middle back and your sacred and touching. So the only thing I want you to pay attention to is those three points of contacts too. If you have a bond or your hair's in the way, go a little bit bigger for two more times. Great. Come back to center. Same idea. You're going to shift side to side. Remember where your knees were really anchoring into the floor. As you swing to the right, feel the inside of the knee.
As you swing to the left, feel the inside of your right knee as you swing right inside left knee as you swing left in her right knee. Do that two more times. Feel your shoulder joint adapt as well. Nice. So just prepping the motion of your hips, your spine with some nice, easy weight-bearing. Great. And come back to center. We're going to take that into a circle. You're gonna lean into the right, you're gonna slide forward. You're going to lean to the left and come back. Continue this direction.
Really pay attention to how your weight is pressing through both all extremities of your hands, all the surfaces, and the entire surface of your kneecap. Nice. As you're doing this, the point of the dowel again, is to give you sensory information for how your spine is organized. While you wait. Bear in this multiplanar environment. Let's reverse directions. I want you to go four times. Make sure your elbows are nice and long.
Send your breath as you're really concentrating to fill up the back of your rib cage. Yeah. Nice. And you know one more time, feeling the width of your shoulder blades as you receive weight through the shoulders and come to rest in a center position. So feel again both inner and outer edges of your wrists and your knees. You're simply gonna take the right knee about an inch off the ground. Yup. And then back down left knee. Same thing. Simple decompression.
Taking care as you go that you're really sensing your weight through the dowel as a reference point for your spine. So that moving environment idea again is you're tracking your motion with help the Dallas, both a teacher and an assist makes it a little more challenging so you can really connect in and sense your body in space. One more time. Each need decompressing. Just to warm this up, this is going to help you feel the coordination and control of your pelvis. Same thing with the arms. Ground the left arm. Take the right hand just off the ground. Good.
Ground the right arm, push down, take your left hand off the ground. Nice and easy. Now as you're really sensing, I want you to keep that breath flowing. This is just simple. Don't be too rigid about it. Not as rigid as this for sure. One more time. Each good, nice and simple. A little bit vague, needing action while still feeling your spine. Let's go opposite and hand as knee.
So right hand comes off the ground. Left knee, just an inch. Good and back down. Don't go more than one inch. It's really small and you will feel the smaller that you do this, the more work you're going to get in your spine and if you drop the stick reflexes like a cat, just catch it, put it back on. Keep going with us right hand off the ground, left knee at the same time, feel that counter rotations. You don't rotate the pelvis or your trunk. Nice.
Just getting your nervous system to focus in and hone on that organization. Great. Let's go one more and down. Now stay where you are. Take a deep breath in. Feel again. Get yourself organized. Get your spine, allowing itself to touch those three points of contact. Send your right heel straight back and your left arm straight forward. Don't go so far. The tip over there. Yep.
Back in opposite side, right arm, forward, left leg, back. Uh huh. And back in. You're going to have to really navigate how far you go to maintain your control. I'd rather you take a moment, set it up and then restart. Then try to do a bunch of reps in. It's kind of moving all over the place.
This is specific as a warmup, so the later work will be easier to feel when you go two more times. You can start to add a little tempo. If you're stable, good back in. Feel that length across your whole spine, reaching out. Add the arm and leg. Feel yourself moving away from the floor while maintaining your curves. Good back in you. Go reset for a moment. Put weight again on all fours. Feel inner and outer hands in news.
You're going to take your right elbow and your left knee, you're going to bring them forward into a circle as far as standing, it would look like this right arm, left knee, circling around slow motion only go as big as you can. Keep the dowel on your spine on queue. Reset. Go again. Let's have a little fun with it. Take a moment, find it, and you can take that arm either as big as you want to get the back of your shoulder working or if you want to make it small cause you're really fighting to find your control. That's great. Go to where you are today. Same thing for the hip.
How much external rotation can you get without your pelvis rotating off of center? One more time.
They're making it look pretty good. I haven't found yet. Let's go twice more. Good. So three-dimensional. Even though it's really specific, you're getting the whole shoulder complex, the whole hip complex to really move. You're still breathing. You're getting yourself grounded as you go. All right, nice work. Rest for a moment. Let's take the Dow wall off of your spine. Okay, so now we're going to go into a prone position.
I'm going to show you guys before you get into it. So I want you to lay face down in a place the dowel right below your bra line and playing your elbows just in front and a comfortable shoulder position. Nice and easy. You're going to use the rotation of the dowel forward to come into extension. Some of you had done this with a ball.
I want you to use the dowel to get that action. Same idea. So mobilizing your thoracic spine. You can join me now. Come on down. Get that small, simple glide. As you sense the roller moving like you're needing dough through the mat. You can traction the weight of your hand as you pull forward and then let it release as you come back down. So this is small, but really important for that mid upper thoracic spine to get into extension.
Allow your eyes to see forward as you go and back down. So let's just do that prep twice more. My hope is that this makes exercises like swimming a little easier for you. Waking up those extensors last time, traction through the arms to rotate the sternum and chest forward into that little glorious backbend. Then back down, you go from there. Let's make it a little more challenging. Take your dowel rod. I want your palms face up.
You're going to bring your head and forehead to the mat. Let the devil rest in your palms. Decompress your head directly off the mat. Hold that position. You're going to feel your hamstrings. Turn on white, long legs. You're going to slide the devil forward.
Do not change the position of your head. For now. I want you to keep your arms on the ground. Keep the float slide back with your elbows underneath you. Bring the head back down. Inhale, rise up. Reach the arms. So we are going methodical, or is it gonna?
Sneak into some real work here. Keep your extension, drag the arms underneath you and then rolled your chest back down onto the dowel. Roll up again. Just the head coming away from the floor. Mid back extends. Reach the arms, bring it back in. Keep the height of your extension looking a little in front of you and roll back down. Last time, head rises up. Reach the arm. Feel the width of your shoulder blades. Now we're going to add on hold here. Raise the arms. It might be an inch, it might be six. Bring it back down.
Bring it in. Roll back down. Hello back body. Rise up. Reach, arms up. Notice as you go. Bring it back in. Do your arms really want to internally rotate as you reach forward. If you're noticing your shoulders, hunch.
Can you use the weight of your pinky on the bar to help you stay externally rotated? Come back down one more time. Float up. Try to keep even surfaces on the dowel. As you push forward, raise the bar. I'm losing my left side, but working on it back down and in. Take a moment. Take two deep breaths.
Reach that bar forward as you rise up, holds raising the bar one inch. See if you can really use your Palm as a reference for your shoulder girdle. Right leg comes off the ground. Switch left leg off the ground. You knew it was coming right leg off the ground. Switch left leg. Get a little tempo here going nice and smooth. Alternating legs.
Now push the bar further forward. I want you to think of the fingertips and toes driving out into length. If you find yourself getting fatigued, enrolling in, use that Palm again as your reference 0.2 more times. Reach and both legs down. Bring the arms in and lower down. Take a breath.
We've got one more variation. Roll the chest up, reach the arms out, raise the bar, legs. Add a rotation through the arms. So likens swimming. But I want you to use the weight of that doll as a reference point for your trunk rotation. You'll notice that I'm keeping my eyes still, but allowing myself to roll across my chest. Two more times. Reach and arrest. Woo.
A little bit of work. Okay. You can take the devil off to the side. You're going to come on up and I want you to go into a kneeling position.
Just want to show you the position and then we're gonna move through. Okay? So if again, you can get three points of contact, please do so if you find you're here nice and easy, see how far back you can go. If there's any strain, don't force it. Okay. So from here what I want you to do is simply push up to tall knewing keeping that stick along your spine. Great. And then sit back down. Good. Let's do that again. So the first thing I want you to do is actually to hinge forward from the hip joint. Then push through to your top annealing.
Yup, great. Hinge to come back. Reverse. Sit towards your heels and then back to vertical. Good again. Hinge forward, fresh to hip extension. Great. Hinge back. Good. Let's go a little bit faster so you get that action through the posterior hip to push forward. Now when you're tall, kneeling or you're going to hold and bring your right leg forward, you're going to hinge forward. Then come back to tall kneeling.
Bring that leg back behind. You hinge 45 degrees. Sit back and come up tall. Repeating that left side. Here we go. Long spine tracking your stick. Hinge forward. Left leg comes up. Hinge. Don't go anywhere yet though. Come back to vertical. Replace the leg back down.
Reverse the hinge and back to the tall. We're going to add on. Here we go. Leaning forward. You got it. Press through the floor. Reach up. Keep three points of contact. Right leg rises, hinge forward from here. Stand up. Total vertical foot underneath you. Recheck that stick. Reversing. Same leg goes back. Here's your lunge.
You're hinting then tall. Good. Replaced the leg back behind you. Got it. Hinge. Sit on back. Nice. Second side, same thing as you're moving through. Can you feel that same organization you've been working on as you propel from the ground through the hip joint? Yep. You'll notice some of the common mistakes a lot of us make.
As soon as we go forward. It's the upper back that reaches. Can you get your whole spine to go from your hip joint while you're moving fluidly? One more time. Each side, get your breath going again. Feel your back spread out so you feel that middle point of contact. Watch as you go forward here that you don't collapse the upper back. Nice. Whoo. Getting some work going. Slow. Bit deadly here.
Good. Last time. Coming all the way back down. Okay. We're going to change this up. You're going to sit with the dowel in front of you, so I want again, your position of your risk to influence what's happening with your shoulder joint. If I preface my thumbs, I'm probably going to be internally rotated. If I can make my pinky finger more of a priority, watch the rotation of your arm as it follows that. So just pay attention as your hand position across your carpal bones influences the rotation of your glenohumeral joint.
It's gonna be important as we go through this. So nice and easy to get this going. I want you to have a light grip on the dowel. You're going to do a simple roll down watching that you don't end up in your little caveman position here. So pushing from the pinky finger through the scapula begin to roll down.
When you hit the bottom, they seem easy. Draw the roller up your spine. Pause at chest level, rotate the elbows in until you can't bring them towards each other any more. Push the bar overhead when you can't reach any further bowel at the top of the head and rolls through to seated. Again. Nice simple pattern. Come vertical press from the scapula or your pinky edge. Roll the pelvis. Try to keep the bar pushing as an anchor point and then draw the bar up your thighs, up your trunk. Pause at your chest, rotate the inner elbows. Allow your wrist to move.
Then push few of those scapula broad across the back and bring your whole body back up and over. Let's do that three more times. Vertical. Add a little tempo. Rotate those upper arms in their socket. Roll the spine down, elbows wide as you pull the bar up to your chest. Then pause. Swing those elbows. Allow the wrist to roll. Keep weight on the pinky side as you push overhead, feeling the connection from your rib cage through the arms.
Using that dowel to motivate your forward motion. Inhale, little flow reach, roll. Pull up, elbows broad. Open that back. Spin the elbows. Push the bar. You'll notice if one side is a little stickier.
Take your time to get the form nice and smooth so you can add some juice to it. Again, reach through the back, roll the spine down. Pull the bar up, broad elbows, rotate connects. Reach whole body. Curl forward and swing through to seat it. Ooh, fighting. Take your dowel. Place it across your feet.
Little stretch here. I want you to go as wide as you're comfortable. If this is too much for you, go ahead and bend your knees. Give yourself a chance. Take a moment here. Just take a stretch. As you hang into it, you may want to increase your lever a little bit. From there, I want you to take your left hand to the middle of the bar.
Swing the right arm alongside you to the right and allow your eyes to look towards your right thumb on your right kinky if you can on the mat. Yeah, so it might not be as far. And then from there I want you to pull with your left arm to traction your spine, up and over your legs. So using that shoulder girl to get some space. Breathe into it and then relax. Switch arms. So little stretch, but you're working through the stretch. Hold it your right arm.
Take your left arm to the side, pinky along the mat so you're not too high up. Then pull with your right arm to find that nice spaciousness through your right low back and then use that to help you rotate. Good switch sides. Again, left-hand center, right arm. Ouch. Pull through that whole side. Now pause here for a second. As you're pulling, if you have a difference, if you push with your right leg versus the left, what I want you to do as you rotate your upper trunk to the right is actually pushed through your right foot, so you're really deeply getting the lower portion of your right spine to rotate a little different. Yeah, and then reverse right hand center, rotate left. Take a moment. Now on this side, you're going to push with your left foot as you allow your deep spine on the lower side to rotate to the left. And if you're not sure about that switch, you'll feel the Slack come in.
Then take the Slack out. You'll feel some other obliques waking up. Come back to center, take the stick in both hands. You're going to take that to a modified saw. You're going to push forward. Feel that same rostering through your feet as you spin to the right. Bring the dowel with you. Go down on that right side. Take one arm off.
Keep the push of your arm. If you want to hook your foot to get that traction, give it a shot. Then coming up tall. Take both hands on nice and simple. Push forward. Rotate the trunk from there. Reaching over, hook on if you need to. You can take your legs a little bit apart. If that's more comfortable. Take the stretch. Let's go one more time each. Sit up tall. Press forward, rotate.
Establish that rotation. Hinge forward. Lock in. If you need to pull through, take your stretch, come back up, press forward, rotates, lock in if you need or you want. Use that input to help you stretch through and come on up.
The dowel at the front of both tires pushed down to really get a little bit of tension going. Options if you want a little more work is to flex forward or say on your back. Simply reach one leg straight out from where it is. Bring it back in. Keep tension on both legs. Reach the other leg. Nice easy prep for dead bug positions. Stability.
Reach out.
You're gonna place your left hand on the right knee. Reach the left arm. Sorry. Left leg, right arm. Keep that pressure going. Bring it back in. So simple, diagonal, right hand to left knee. Reach the opposite arm and leg. Bring it in. Make a cross between the arm and leg and reach.
So as much as this about the reach, I wanted to use that dowel as a reference point to keep pressure good. Again, if you need a little more challenge, you can come up into forest selection. Maintain that as you switch. Again, simple action intention is to get both the reach and the push together. One more time, Mitch.
Rotate to your bicycle position. Breathe, curl up. Use both hands to set the dowel. Then left elbow. Curl into it. Check that your thighs at 90 degrees. Rotate, shake and bake. Breathe in. Reset, right elbow, left knee, twist, curl forward. Left elbow, right knee, Swiss re. It's the opposite side. Good. So just again, using that dowel to keep your body organize as you move through. One more time. Left side, rotate, reach and back in. Go ahead and roll on down. Nice work.
Stay here on your back. Take the dowel in your left arm please. It vertically along your left leg. I'm going to draw your left heel towards you. Stretch your right leg out and feel your outer thigh along the inside edge of that doll. From there, really easy. You're gonna push your pelvis up and rotate and then roll on back down.
Nice and easy. Roll through your foot by pushing down. Get the hip to open up. The only thing I want you to focus on is keeping your outer thighs stable, vertical against the dowel rod. It does not count. If you go here, you got to keep it vertical so you can visually see it. One of the reasons I love using this as a prop is you have visual references as well as kinesthetic. Two more times, letting your hip joint open up, getting that full rotation of your pelvis on your femur. Let it stretch open. Roll down last time.
Maintain vertical through your lower leg and back down. Good to switch sides. Dow goes in the right hand along the right outer thigh. I'm going to check visually that I'm organized and vertical. I'm going to establish that contact and role so my pelvis rolls to the left and then back down to the mat. Use all points of contact on your foot.
So now I want you to come to standing for round one and take the dowel. You're going to sit on it. So nice, easy stance. Their feet about hip width apart, maybe a little bit narrower. Go ahead and bend your knees. Your torso will be about 45 degrees here. All your eyes around, let's say eight feet forward of use. You're not too far down, you're not too far forward. Sit. So you feel both sits bones on the dowel. Plant your feet. You can visually check that you're not on the inner or outer edge.
Nice and spread. What I want you to do is arch your tail to the right. So you're gonna tip the dowel and then arch your tail to the left. This is really small. So just getting that little action right and then back left. Then let that go and bring yourself to center.
So if you imagine the dowel was a level, make sure it does not tip right or left. Instead pushing through the feet. You're going to rotate your feet like you're skiing to the right, rotate to the left. As you're doing that light grip on the dial, you shouldn't be like pushing into it nice and smooth so you can sense your environment. So you get this flow going through. Your feet should feel kind of good. Massaging across the metatarsal is trying. Again not to go so far that your pelvis has to shift. So take the time that you need to sense your body. Moving in space, warming up from the foot, the ankle, the knee for the next exercises. Two more times.
Skiing to the left, skiing to the right. Last one, Dallas. His level is the only intention here. Good and back to center. Keep that center position and you're going to unweight the right foot. Take a little balance, bring it back down.
So like the decompressions you did Quadro pad, left foot. I want to use that environment so you're not hiking the nice, simple action, but really loading up the back of your leg through the foot. Huh? This looks small, but it is not easy. As you go. Notice if you have a tendency when you lift your left foot off the ground, does your dowel tip over?
Can you arch your tail just enough to keep that Dow will level as you unweight your foot? Test your little balance here with your knee. If you need to use the whole foot again, thinking of the inside edge of your left. Sorry. Right big toes. You go to the right, the inside edge of your left foot as you go to the left. Nice. One more time. Right side, good small little decompression, left side, adding on right away. Go to the right. Now that you've prepped the pattern, take your left foot forward. Touch in front of you. Take it side. Now when you go side again, watch you know, hike up and then go back around you.
If you can bring it back to center. Nice and simple. Forward other side. Dow will stays level. Be attentive as you go to the side. Uh huh. And and bring it around. If your buck gets in the way, work with it and bring it back in. Let's go twice. More. Right leg stays down, left goes forward. Sense your pelvis in space.
The dowel is your assistant. Little laser line, staying level. Nice back in left foot, stays down, right, goes forward. Good, nice and organized to the side. Back behind you. And in one more time again, deliberate pace so you can sense your body. Organize your form, increase your motor control while still working out. Last one. Here we go. Nice around to the side, to the back. And uh, good.
You're then gonna take your dowel behind your back. So right hand for me is my easier hand. I'm gonna use that. Choose whichever arm is better standing. Same alignment as you had on all fours. Same laundries you to stayed where we're going around the clock.
So you're going to sit a little bit, bend your knees, you can move to the back of your mat here. From there, what I want you to do, take your right foot forward, touch straight ahead of you. Take it to one o'clock, two o'clock, three o'clock. You can know all the way around. You get to seven o'clock, which is out to the side. Then bring it back center. Go again. So staying vertical for these not in our hinge line. So at 12 then at one two. Yep. You got the idea.
Three o'clock again, think about where your pelvis is. You're not hiking up out of it, especially when you get back behind you. One more time through here. 12 o'clock nice and smooth. One o'clock. Feel that standing leg working. Three reach through that leg. Nice and big. Keep your curves and back up.
If you want to switch arms now is a good time. Switching legs right away, left foot forward reach and reversing the clock. 1110 all the way around. You're going to go to a five o'clock on this one. Happy hour somewhere. Reach through. Bring it back forward. 12 o'clock Oh 11 see again if you're working here with detail, you can still keep the hole in mind all the way to five.
Bring it back in last series. Here we go. Front around to the side. Nice. Carry around to the back as you go. Keep tracking that spine here. Good and back up. Nice. From here. I want you to come to all fours one more time.
So hands towards the front of the mat. The Dow will go back onto your spine. Reestablish your three points of context, context, content, contact. Yeah, there you go. Three points of contact. From here, we're gonna go into a pushup variation. If you have the strength, I can look with the dial on my head. If you have a strength, I want a full pushup. If you need to modify, say with your knees down. All right, so you're in quadruple ed with three points of contact.
Take a moment to organize yourself. Be attentive to your contact points as you slide your right leg straight back. I'm going to adjust so I don't fall off the table, right leg slides straight back. Come into your plank position in your plank. Really feel again, three points. Here's your pushup.
If you need to bring the knees down, do it now. I want you to go all the way down, all the way up. Hold three points of contact. Sense it. Bring the right knee down, left knee down. Let's try that again. So organize first. This is all about sensing your spine, right leg back, left leg back. If you made it here so far, you're doing great. Try a push up. Keep your spine nice and easy. Reach up, right knee down, left knee down.
You got one more of views. Gotcha. Here we go. Three points of contact. Take whatever you can as you go through. If it's just coming up to the plank and that's all you can do today. Great. Work it beautiful. Give it a shot.
Keep all three points touching. There you go. Nice. And bring your knees back down. Good job. Come on up to standing for me.
I want you to really anchor the base point and your mid back. You're going to bow the top of your head and I want you to feel one vertebrae at a time that we all love to talk about. But now in contact with some sensory input, I want you to only go down to about your mid back so you don't lose contact through that middle point of your spine. Roll back up, little S a light massage here as you go. So full height, decompressed bowel, the top of the head, and just visually and visualize and feel your spine rolling through and coming back up. Let's do that one more time, a little bit of a release before we finish up. Roll down and roll back up. Nice work. So I hope that was a really useful way for you to think about how to program with one prop in lots of different environments. Thanks for watching.
Mention
 |
Jared Kaplan (Teacher) |
 |
Copycat |
|
|
Rina S |
|
|
MICHELLE P |
 |
Maryam |
 |
Fiona |
 |
Jodie |
|
|
Kimra Z |
 |
Nikki D |
 |
Goncagül Ö |
 |
Birgit N |
 |
Jennifer S |
 |
Michelle Unzueta |
|
|
Amy S |
|
|
Christine Lynn T |
Comments


 My pleasure!


Jennifer don't borrow - STEAL EVERYTHING! =) Let me know how it goes to improve your clients' function, movement pathways, and workout?!


You need to be a subscriber to post a comment.
Please Log In or Create an Account to start your free trial.
