Description
About This Video
Transcript
Read Full Transcript
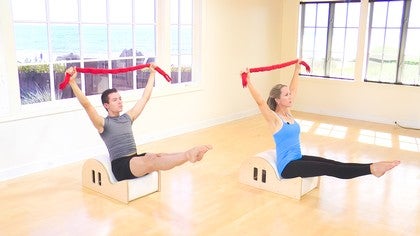
So there's several pieces of equipment that Ron, um, developed perhaps more than other teachers. One of those is the spine corrector, um, also known as the barrel or the arc. Um, he also developed more work on the pedestal and on the Guillotine Tower, um, than, than most of the other teachers, um, simply because he had access to those pieces of equipment. Um, with the spine corrector. Um, he worked, uh, for a year with Clara Pele's. Um, Ron was an alcoholic and in 1967, Easter of 1967, um, interestingly enough, the year that Joseph passed away, uh, Ron became sober and he never took another drink again. Part of his recovery process was going to New York and working with Clara [inaudible], um, privately and that he would go to AA meetings in the afternoon. Um, a lot of the work that he did with Clara was on the spine corrector and, um, he worked very precisely on the spine corrector. And, um, uh, this is the spine corrector that, that he preferred. Um, this is called the Clara barrel after Clara Pele's. So I'm just gonna talk a little bit about what we call the anatomy of the spine corrector. Okay. This, um, ledge in the front is, is considered the lip of the barrel. This would be considered the incline. And Ron was very specific about where the pelvis was placed on the incline.
So sometimes we placed it a quarter of the way back, halfway back, three quarters back or all the way back into the crevice. And when the hips are placed in the crevasse, we consider reaching the hips or the sitz bones down into the crevice. When the hips are placed on the lip of the barrel, we're thinking of purchasing or lifting up away from the barrel. So it's always in relation to where the pelvis is on the spine corrector. This is the front of the arch of the barrel, the top of the arch, the back of the arc, the rim of the barrel.
So it's a very simple piece of equipment, no moveable parts, um, but there's a lot that can be done on the barrel and, um, it's always, uh, about precise pelvic placement, um, and precise spinal articulation. So it's a wonderful piece of equipment. Um, Ron felt that a lot of exercises were being taught on the barrel, um, that perhaps weren't as, as related to spinal articulation as they could be, should be. And he, he felt that as teachers we needed to go back to the, the true intention of that piece of equipment start very simply with two or three exercises that relate to that piece of equipment, then develop a body of work from there. So what I'd like to do is just relate the, the Clara barrel. I'll chew other barrels that are out there and talk a little bit about why Ron chose to work on this specific spine corrector. Um, so that, you know, so here are two examples, um, of, of spine correctors and there are many other examples there. Um, this is the Clara barrel and this would be the foam a barrel, but which has many uses, um, as five valent. Both are by balanced body. Um, this is a wonderful piece of equipment, but I just like to point out a couple of differences between these two barrels so that you can understand why we choose to use this feral. Not that there's anything wrong with this. It has many, as I was saying, wonderful uses. Um, but this lends itself more to a movement program and more char syllabus. So one of the differences is the defined placement for the pelvis.
You'll notice that there's more of a more of a, um, Kravis more of a defined placement here. Um, on this feral. It's more of a rounded placement so it becomes a little more difficult to place the pelvis on this spine corrector. The other difference is, is that the arc of the barrel. So on this spine corrector, as I contract back into this fine corrector, I immediately have a place to, to place my lumbar spine so that I can engage more through the front of the body. Then I can articulate back over the spine corrector with, um, a sense of where my pelvis says, where my lumbar spine is. And there's no question about which parts of my spine are moving and which parts are maybe a little tighter. And then I'd come up, if I go to this spine corrector, as I roll back, it's a longer distance. So if there's someone who's maybe a little weak or through the low abdominals, um, there's a tendency to fall back into the spine corrector.
The wonderful thing about this barrel is that it is a gentler slope or a gentler arc. And so it's easier for many of our clients to get their spines all the way over the barrel. It takes a little bit more work, um, to articulate this fine over the, the Clara barrel. Um, but it's really that work that we're after working the spine, working the spinal extension. So hopefully that gives you a sense of the difference between the two barrels. And I'd like to go through some, some specific movements on the Clara barrel. So now we'll show some very simple movements on the spine, correct training.
Again, going back to the original purpose of the spine corrector. Um, I believe why Joe developed this piece of equipment in the first place. So I'm going to ask David to mount this fine cracker. Um, we have a specific amount for each piece of movement. Um, so he's standing and before he, he mounts the spine correctly, he's thinking of taking those seven standing centering cues that are so basic to our work. Lifting up through the feet, through the mid line, placing the pelvis, placing the shoulders, and little longer through the neck. And then let's take four parallel please. From here in heel, reaching forward and exhale, lengthen up and again, reaching forward and lengthen up two more times reaching forward.
And then place the heels just underneath the knees and let's press the hands back into the front of the barrel. So in this position we're thinking of placing the sits bones right on the lip. We want to get a little more length through the lumbar spine. Think of lifting up a little bit more through here, a little bit more through your chest, up, up, not back. That's it. So from here, what I'd like him to do is focus on a very small, precise, low contraction. Take a deep breath in and exhale, contract back, opening up your lower back. Inhale, lift and exhale, contract back.
And again, inhale, lift up out of the sitz bones. Exhale, contract last one, lifting up and contracting back. And then hold that contraction. Let's take three more breaths. Back to touch the back to the spine. Correction. Each breath opens your back a little bit more. You can use your hands one more time and back shine.
And then just holding that position. Take another deep breath in and try to deepen that contraction. And again, inhale. So just this is a deep abdominal exercise. And again, inhale and try to hollow out a little bit more. Last one, inhale and exhale.
Good. And take another deep breath in. And exhale, curl the body for inhale, lift and exhale. Find that low contraction. Take another breath to reach the spine to the spine. Pressure, opening up the front of the head. And again, full breath to curl forward, lifting up out of the hips,
One more time back and curl forward from here. We'll take a full breath to roll to the top of the art. Notice how the arms follow the movement, bring the arms back so they're perpendicular, and notice the neck and head placement. So he's not [inaudible] show an extended neck. So he's got extended through the neck.
He's reaching out through the crown of the head. Take a deep breath in and exhale. Curl forward from here. And again, full breath to length and back to the top of the arc. Let's roll back a little bit further. So the shoulder girdles right on top of the barrel. And again, use your breath to bring you forward.
Gun and lift the shoulders and press the shoulders down. And again, longer through here. Beautiful and down. And again, shoulders up. Place the shoulders. One more time. Ah, and place down. And then keeping the shoulders down.
Think of curling your spine through the shoulders. Using your breath to that forward contraction. Place the hands right at the end of the barrel and curl forward and feel that lift all the way up through the spine. And then just lift the arms laterally and press down.
Live and place down. And again, contracting back this time all the way to the barrel is back us a little more open now, reaching the arms forward, set the shoulders, and let's take a full breath back to the top of the arc. She'll come back a little bit further. That said, now take another breath to reach all the way over the arch. Tried to touch each bone to the barrel, reaching long through the fingertips. Take a breath to lengthen in that position, reaching out.
Inhale, lift the arms. Exhale, lengthen the back of the neck all the way into the frame and then deep in the contraction and reach forward. Let's do that two more times, so notice how he's keeping his lumbar spine flexed and he's isolating. Extension, the thoracic spine, reaching long or beautiful. Inhale, lift the arms. Exhale, lengthen the back of the neck. Find that upper contraction and then just deep in the contraction and reach or word. Nice David. One more time. Try to keep a little more reflection through the lumbar spine.
Work that thoracic spine over the barrel. Stretch out through the crown of the head of the [inaudible] fingertips. Inhale, lift. Exhale length and into the frame. Notice how he's not leading with his shoulders. He's leading with his trunk. Beautiful. Place the hands at the end of the barrel.
That's [inaudible] and curl forward and feel that like, ah, through the middle. Nice. And then just circle the arms around placing the hands on the barrel. And from here, lift the hip Sab, and let's curl the hips forward. Oh, opening up the front of the pelvis. Press the barrel away from you. Reach your hips behind she keeping the chest on the ceiling and placed the hips and the crab. Let's do that two more times. Inhale straight up. Exhale, curl the hips.
Oh, opening the door chest, keeping that extension. Reach the hips back behind she, let's go back to the Kravis. Sorry, said, and again. Inhale, lift. Ah, x tail curl forward opening. So see if you can lift up a little bit more through here. That's it. I think of keeping your chest on the ceiling, reaching the hips all the way back behind you, all the way to the crevice. So there's this extension, is that okay? Okay. So let's bring the heels in close to the barrel.
The clothes through the heels are to the barrel. The more hip flection there is. So the more emphasis on differentiating pelvic placement from, from the lower extremity, reaching the arms forward. So from here I just like to work on a spine stretch. Think of placing the pelvis and then take a full breath to bend the spine forward into contraction. And we want to take an even curve. Good.
So each time we extend the spine, we want to think of flexing the spine, taking in the opposite direction and then take a full breath to lift up and out of your hips, placing those shoulders down. Nice. And again, full breath to peel the spine. Hollowing the front of the body. Deep breath in and rolling. Uh, let's see. A draw the shoulders down one more time and peel more through here. That's it.
Deep breath in and roll up and down this time holding that flection.
And then from here, contracting back into the barrels who we're opening up the front of the hips, articulating the lumbar spine. Come back a little bit further on that first breath just to there. That's it. And then full breath to curl forward out of the barrel. And let's do that two more times. Oh, open the front of the hips of keeping the pelvis. Place, shoulders down and PLCs forward.
So just finding that differentiation between the lumbar and the pelvis and curl forward and let's roll back again. Rolling through the lumbar spine
And again, top of the barrel
Nice. Your head's almost there. Lift the arms and look through the frame and come up and over. Good. So I know that David can get there and two or three repetitions, if your clients are not close to touching the barrel or you're concerned about their cervical spine, just have them come out to the tabletop position that that's a safe position for most of our clients. And then again, roll back
Following the three basic pieces that we did on the spine corrector earlier on, I'd focused on spinal articulation. Um, will now present three more advanced pieces of Fletcher's syllabus on the spine corrector. Um, these are just for demonstration only. So if you'd like to learn these pieces, find a qualified Fletcher teacher and um, they will be happy to teach you. So we'll start with a piece entitled circumpolar motion.
Okay. [inaudible] [inaudible] [inaudible] [inaudible] okay.
Pilates Legacy Project: Ron Fletcher Methods
Comments
You need to be a subscriber to post a comment.
Please Log In or Create an Account to start your free trial.


