Description
About This Video
Transcript
Read Full Transcript
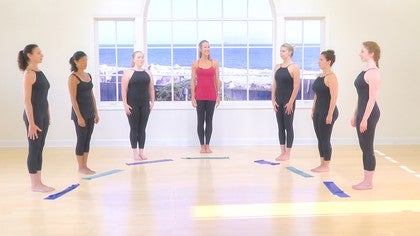
Hello, I'm curious, Sabin and I'm teaching a short segment on self hands on. I'm one of the, one of the wonderful things about going to a [inaudible] studio and working with a teacher in person or the hands-on cues. And what I want to show you is how you can use some of those same hands-on queuing, um, to not only bring more awareness to different parts of your body but also make yourself more independent of the Palati studio. Um, and so this is also a wonderful way for teachers to cue their students in class to actually have their students place their hands on themselves. Ron was a huge advocate of this Ron Fletcher. He felt that we should touch ourselves, understand how we're put together and be friendly so there was a sort of essential quality to his teaching. Um, so I'm going through a very few of the hands on cues that we use in the program today and these are cues that you can use at home.
So what I'd like for you to do is again, draw the legs together as you already are all Fletcher teachers and, and feel the weight evenly balanced between the feet. And I want you to think of the floor, um, not just as the floor, but think of the floor as hands on cuing. So use the floor oppositionally to feel your feet. Inhale, lift the toes up and exhale. Press and lengthen the chose down. And again, lift the toes up and lengthen them down. As you lift the toes, feel the arches of the feet lift.
Keep the arches lifted as you lower the chose and again up and down, and then pressing to the ball of the right foot again, using the floor. Reach the heel and feel that pressure into the floor, pressing to the ball of the left foot and three and again, lengthening through the toes as you press up, reaching long through the heel, pressing up, lower down. Two more times, pressing up, feeling the floor into your feet last time, pressing up and lower down, and then think of the next base of the body. So I think of us having three horizontal basis, the feet, the pelvis, and the shoulder girdle and three vertical columns through the body, the legs, um, through the girdle of the body. You have a little, there we go. And the neck. So three horizontals, three verticals. So let's think of the next horizontal base in the body.
Placing the hands just on the outside of the hips and think of cupping the center of your hand right around to the greater trow canners so that outer femur bone inhale, release the muscles around that bone. Exhale, engage them. And just notice if one side starts to engage before the other, release and engage. And again, narrowing the pelvis without pulling into a turned out position. And again, release and in case [inaudible].
And notice how this begins to engage the pelvic floor as well. And again, last too, and press into center. I stand, see last one and into center. And then place a hand right at the [inaudible], the base of your belly, right of the pubic bone. And place another hand low on the back. And again, release those bones apart and exhale, draw those bones together. So think of drawing your pubic bone to your sacrum and again, release, handle a little bit lower. Michelle on the [inaudible] back on the bat and together. So think of stabilizing the pelvis side to side, front to back two more and pull into center as you pull into center.
Think of lifting up and out of the hips and then lift the toes up. And let's come to a turned out position. Again, place the hands on the lateral hips and lets think of using the hands to facilitate movement through the pelvis. So press the hips off to the left and then well the hips back to center and press the hips to the right, assisting with your hands and pull to center. And again press to the left, pull to Saturn and press notice if you have more movement on one side or the other. Last to reach a little further if you can, and pull to center last one and pull to Saturn arms down by the sides. Lift the toes up.
Coming back to parallel and let's come into a dummy play. So just bending the legs, place the hand right on your low belly, right on your low back. Curl the pelvis forward and feel that action assisting with your hands and then extend the pelvis going into an ant interior chill. So the tailbone goes out behind you. Full press to curl the pelvis forward, feel the low belly muscles engage and then reach out behind shoe two more times.
Hurling forward and back. Last time, curling forward and back. And then think of placing the pelvis right in the center, right to left front to back, and lengthening the legs. Lifting up out of the hips. Good. Now thinking about the the core of the body or the middle of the body.
Place your hand right around your belly button and another hand in the same part of your back. And take a deep breath in. And as you exhale, think of sandwich, singer, drawing the hands together. Inhale, release the hands apart. Exhale, draw the hands together so you can find the weaker spots in your belly by sliding your hands either down or up. And then use the breath to facilitate this movement. Two more. Release and try Anna last one and in an ah, and then place the hands right up underneath the ribs. Take a deep breath in. And as you exhale, think of taking the weight of the ribs off the pelvis and feel that length between your ribs and your pelvis. Inhale, release. Get the hands beneath the ribs so it's a slight cupping of the hands and lift up and out of the hips. And again, release and less.
Some of these may work better than others for your body. One more time and pull in enough, placing the fingertips right on the right, on the top of the pelvis, right on your hipbones. And then place your thumbs right at the base of the ribs and think of prying the ribs up out of the pelvis. So this works better for some inhale, release the weight of the ribs down onto the pelvis. Exhale, lift up. So we're trying to create as much length through this region of the body as we can. Stretching our last two, uh, last one and up. And then placing the hands right on the lateral ribs. Shoulders are down.
Breathing into the sides of your ribs. Facilitating that lateral breath. Deep breath in. Ah, and feel how the ribs lift laterally as you inhale and glide down the body as you exhale. And again, keeping the chest open as you exhale.
And then wrap the dine up and around the rib cage. Take an end in either hand so you're cinching yourself in, and then feel the expansion of the ribs into the band.
Place a handwrite on your sternum and then place another hand right on the, on the back of the ribs. So lower ribs and think of breathing those two hands apart. Take a deep breath in. Yeah. And again, deep breath in. Two more times.
Lifting the sternum and gliding the sternum down. And notice if you have more of a tendency to breathe into the front or the back, try to breathe equally in both directions. One more time. Deep breath then. And uh, hey, arms down by your sides. Now let's think about the, the shoulder girdle. So I'd like for you to place fingertips right at the tips of your clavicles. Good. And think about widening the clavicles h time we act sail.
So take a deep breath in, draw the ribs down and reach the clavicle bone. Shows collarbones wide into the room. [inaudible] two more. [inaudible] last one. And then what I'd like for you to do is place a hand. Let's place the right hand right underneath the left. So we oftentimes in [inaudible] talk about connecting the shoulder girdle or the upper extremity into the back. Um, one of the ways that we want to do that is through what Kathy grant calls the piano muscle.
So coming from the pinky finger through the tricep into the back and finding that connection for a lot of our clients and a lot of our, a lot of us, it's very difficult. So just touching right here, take a deep breath in and exhale. Think of wrapping your armpit forward and feeling that connection into the back and again, release the connection and then find it. Let's do that one more time on this side and find it and then just do the same thing on the other side. Placing the left hand, inhale and exhale and still feeling the lift through the rest of the body. Notice if one side is more connected than the other, if it's on the last one, and then just drawing both shoulders are, find those muscles as you press the shoulders down, working for bilateral symmetry and press down. Relax through hands Nancy and press down.
Another thing that that's a common issue that a lot of us have is forward head. And so there are three cues that I've found that are helpful for me and for my clients. Want us to place the fingertips right at the tips of the jaw. So right at the tips of the jaw. And then just give yourself a little facelift. So just feel that lift and then just release into your default position and then press up and find that lift and notice how that lift translates all the way through the body and release. And then find that left. Second cue is to place the fingertips right at the tips of the ears.
So it's like Spock ears and again, find that left and it usually either the jaw line or the tips of the ears, uh, work better and truly and notice that translation all the way down the body and then place a fingertip right at the center of the head. And this is where Ron said, we're all hanging by a thread and one of my clients said, well, at least the thread, the thread needs to be in the right place. So right at the center of the skull and feel that you're dangling from that thread. You're reaching your crown up to the ceiling and then just release into whatever your default position is. Good and press the crown of your head up into that strength.
Feel that lift all the way up the body and truly in an image that you have that string there. So arms down by your sides, image that string and lift up and never lose it. Good. All right, so let's come down to the floor. Um, I'd like for you to all face in and we'll come down to the floor lying on your backs and from here, bend them leg sense. So the heels are in line with the sitz bones and place your hand again on your pelvis. And I'd like for you to place your fingertips right at your pubic bone. And one of, one of the wonderful things about touching yourself is that you can touch yourself in places that perhaps you don't want your teachers to touch you. So fingertips right at the pubic bone and feel it's almost like a triangular base that you're creating. Take a deep breath in and exhale, keeping that triangle parallel to the floor.
Simply engage your abdominals and think of placing your pelvis without curling it. Take a deep breath in and exhale. Stabilize your pelvis with your breath. And again, so we want the Asi s bones, these hip bones and the pubic bone to be parallel to the floor. This simply facilitates this placement. Inhale and exhale, and then take a deep breath in and exhale, curl the fingertips towards the ceiling, feeling that pelvic curl. Take a full breath to length and in place the pelvis down.
Serve right around your belly button and make a wait with your hands to one hand right over the other. Take a deep breath laterally into your ribs and try to move the belly as little as possible. And then exhale, close the ribs and feel that connection into the floor. And again, deep breath in and exhale, imprint, keeping the pelvis where it is, and an parenthesis, spine last one. And in print, gliding the hands up to the rims. So again, one of the wonderful things about the florists that you can feel what your spine is doing. As you breathe, take a deep breath into the hands and exhale, glide the ribs down your body. Fill the hands with air and exhale away from the hands, gliding the ribs down the body two more times. And exhale last time.
Deep breath in and exhale. And then placing the right hand right in the center of your sternum. Place the left hand on top. And think of the hands this way. So flat hands. This is um, breast phone breathing. So Eve gentry call this breastbone. I think it's an, again, it's an anterior posterior action. Inhale, feel the lift or the lilt of the sternum. Exhale, glide the sternum down your body and allow your hands to sink to the floor.
And again, deep breath, filling the lungs. Exhale, glide this journal a little bit more, your exhalation. And again, as you exhale, feel the neck length in as well. Beautiful. Two more times. Deep breath in. Exhale completely ribs heavy to the floor.
Last one, deep breath in. And exhale. Then placing your hands right at your occiput. Serve right at the base of your skull and just do a little nod yes. So lift the Chin up and lower the chin down and notice how those muscles engage as you extend your cervical spine, your neck, and they lengthen and release as you lower your challenges. Feel what happens.
So just a slightly forward head position, um, creates a lot of pressure on the spine, placing the hands right around the head. Make your head heavy into your hands and then use your hands to traction your neck long into the, into the room. And exhale, flex your neck and curl forward and feel that length through the back. Take a full breath again. The head is having and lengthen the neck out into the room. So try not to use your abdominals for this, the abdominals.
Follow the movement so it's inhale traction and exhale, stretch. Then the abdominals engaged as you curl up, make your head heavy and reach out.
Last one. Good. And let's all roll to the front of the room. So just roll onto your signs, that scent and come into your Fletcher Ball. Curling the tow center, facing the front of the room and roll up to a standing position. Actually steering your Fletcher Ball for a second. Reach the heels to the floor in place the hands just on the outside of the ankle bones and then tracing the outside of your body. Take a full breath to draw the hands up to the knees.
Take a full breath to draw the hands to the hips. It's just something Ron used to do quite a bit. Draw the hands to the rib and then traced up through the neck, sides of the face and press all the way up palm street together over head. And so all the way up to the ceiling, turn the backs of the hands to me and press all the way down. And then from here, let's reach the arms out to the signs and try the right hand across the body and think of unfolding the chest, touching yourself as you do so.
Begin Pilates: Tips for Success
Mention
 |
Kyria Sabin (Teacher) |
 |
Maggie L |
 |
Julia T |
|
|
Cheryl B |
 |
Corinne M |
|
|
Hydie |
 |
Ursula C |
Comments


"Gently pull ONE HAIR from the crown of your head. Don’t tug or pull it out! All you have to do is to gently pull upwards and imagine that it is pulling up your spine. You should feel as if your spine is being gently lifted through the middle of your pelvis."
It always makes people laugh - it's fun and playful.
You need to be a subscriber to post a comment.
Please Log In or Create an Account to start your free trial.
