Description
About This Video
Transcript
Read Full Transcript
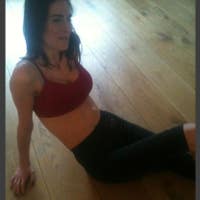
Have you ever been in Pilates class and felt like one of your hips or your low back on one side was really achy or you couldn't really access your hip on one side, your roll up or roll down feels like there's either a pulling or a catching sensation, something just doesn't feel even? A lot of times the teachers will identify in the classes as well when someone's doing a bridge and they can't really keep the pelvis level, that's often a telltale sign that someone was a sacroiliac problem. We often call it pelvic girdle instability or a malalignment of the pelvis. We're so dominant on one side, so it's very, very common for, especially women who have more mobility in their pelvis, especially at times of their menses, when the estrogen levels go up, relaxing is stimulated in the ligaments, and the pelvis gets a little unstable. Then they do some big circle exercises or some exercises that are asymmetrical and putting a pull on the pelvis, and then suddenly the pelvis goes out of alignment.
Or they bend over to pick up a child, they're putting a child into the van with this twisted posture to try to get a child into this car seat in their vans or in their cars. So there's often lots of ways that these things can happen. I've had people riding horses that fell off a horse or had some significant injury like that, but sometimes it happens and you don't know why it's happening. So Amy has said that she's had some issues with her pelvis, that it is a little unstable at times and that she has some pain on the left-hand side. And she notices it mostly in the roll up.
We also noticed it in some bridging activity. So I'm gonna have her do a roll up. I want her to mainly see how it feels to roll up and down, and then she can share with us what she's feeling as we go along. So I often like to get in front of the client to see if there's any shifts back and forth to see if, as she rolls up, is there a catch or a pulling, an asymmetry? And was there pain with that?
Little catch. A little catch, and that's on what side? On the left side and right over the sacroiliac region? Mm-hm. Okay, is there any pain going down your leg at all?
No. Okay, and then rolling back down. Do you feel that same? Just a little pulling, yeah. Little pull on that side, okay.
So what I wanna do is see, I look a lot of times to see, is there a leg length difference? She has a shorter leg on the right than the left, just a little bit, not major. And then is there a pelvic rotation or torsion? She definitely has a posterior left anterior right. I'm not so worried about which one at this point, but I wanna know if the pelvis is asymmetrical and how is it that I'm going to get it back into alignment.
So I'm gonna do one more thing with her before we start. Bend your knees and move into a bridge. And again, I'm gonna get at the end of the table so I can see her pelvis. And then if there's, sometimes there's a catch or a pull at the beginning of the bridge when they start to flex. And then try that, and then coming back up, articulating through the spine.
There you go. And now drop your hip on one side. And then back up. And then drop it on the other side. And is there a pull on either one of those?
Not too bad. Not too bad, okay. So now, what I'm noticing is, I'm seeing her, she's shifted to the right. Her pelvis has shifted to the right of her body. Now, shift right and left like a typewriter.
You know what one of those is. (laughing) I'm old enough. Exactly. And do you feel a catch or a pull on either one of those? Not really a catch or pull, just I feel like I could keep going to the right.
You could go over to the right. And I don't feel like I can get over there. She's blocked when she goes to the left. Yes. So I'm gonna use the roll up and the shift to the left to see if what we do helps.
So I don't wanna do physical therapy with her. I'm a Pilates teacher. So I want to be able to do something with her that she can actually use her own muscles to fix her alignment, and she can also use it as a home program. I've been working on this program for many years. I've had a lot of success with it.
My Pilates teachers in my studio often use this to correct alignment in their students if they find that they're off alignment. All right, so I want you to put your right leg over and your left leg under. So take your legs up to above your hips, hold on to the broomstick, and then I want you to push your right knee into the broomstick and your left knee into the broomstick at the same time. You're doing an isometric pull. What's happening here is as she pushes this leg forward, she's activating the glut on the right side and the hip flexor on the left side.
So what that's doing is pulling her right pelvis into a posterior tilt, her left pelvis into an anterior tilt that's hopefully gonna correct her alignment. So I'll have her do that five times, holding five seconds each. And you're not supposed to stabilize your pelvis. So you don't pull in your muscles of your abdominals, you don't stabilize your core. You try to keep the pelvis relaxed, but just using the hip flexor, the hip flexor and the hip extensors and see if you can move that pelvis.
Okay. Okay. This is four. Four, good. And then release.
And one more. Nice. So you're keeping your arms straight, you're keeping the dowel steady, and you're just pushing and pulling as if you're trying to break the dowel. (laughing) All right, good. Now, I'm gonna take a yoga strap and place it around her leg, so this will abduct the pelvis a little bit and make it more easy to move back into place.
So you need a stiff strap. It can be a belt, like a leather belt, or something stiff like that if you don't have a yoga strap. I'm a big fan of using what you have at home and not having to buy a whole lot of products, so. All right, now I'm gonna hold onto the strap, and then you just tie it in a knot if you're at home by yourself. I want you to pull hard and allow the legs to pull on the pelvis, and then release.
And again, pull. Good. And release. And pull. Nice.
And two more. So this is not about strengthening. This is about moving the pelvis. And one more time. Good.
All right, excellent. It's a girl. (laughing) Okay. All right. Now we're gonna take the yoga block, which makes a perfect tool.
You can use a basketball that's full, that's firm, to pull, and then you're gonna squeeze. Okay? And you can leave the feet down and squeeze a few times. Let me bring it up a little bit, there you go. So hang onto it.
This helps to adjust the front of the pelvis, 'cause the pelvis is like a ring. You've gapped the pelvis, you've rotated the pelvis, you've gapped it, now you've pulled it back together. It's an osteopathic technique that many osteopaths have used and physical therapists have used to restore the alignment to the pelvis. If you feel stronger, you can bring the legs up like that and squeeze. So it's up to you.
And then we'll see if that, first we're gonna see if that made a difference in her alignment, and then we'll see if it made a difference in how she feels, so. Mm-hm, okay. Okay? Yeah. Place the feet down and then straighten your legs.
And then I'm gonna look at the alignment here. Okay. It looks better. Now, let's see about the leg length. And that looks better too.
All right, so bring your knees to your chest before you just jump into the roll up and just make sure you feel okay. Okay? And then you're gonna put your feet down and slide your feet out a little bit more and do a pelvic tilt into a bridge. I don't wanna load the spine right away. I wanna have her gently move into some flexion and then rolling back down, articulating through the spine.
Sometimes people will have pain on the first bridge, so don't give up. Do another bridge and see if that feels better, 'cause often the first one will be a little bit painful and then the body will kind of adjust the joint positions, and then it gets a little better. So I do two or three to make sure. If it doesn't work, you can try it again. You can do the whole sequence again and see if it helps.
And if it doesn't help the second time, you might wanna refer the client to a physical therapist. Okay? Mm-hm. Great, all right. Now, let's try your roll up.
Mm-hm. Okay, might feel a little weird at first. Sometimes what I like to do is use the springs to assist them to go up, and then really focus on the way down. It's just a little more forgiving to use gravity to assist the movements. Much better there.
It feels much better? I can feel the same thing. Okay, do another one. It's pulling up just a little bit. Okay.
Yeah, second one's better. Yeah. Yeah. Yeah. Right, so a lot of times, again, I like to use assistance on the first one.
Sometimes I even do the bent knee roll up and get you in there. Nice. Okay, now bend your knees and I wanna see about the shift. And then peel up to your top of your bridge. And then shift your pelvis to the left.
Ah, wanna do that left one. Okay. That looks a little bit easier. Still a little rotation at the end of that. That's something that we would wanna work on.
Great, now how does that feel as far as, I know it wasn't painful before, but. Good. Is that feeling a little easier? Yeah, easier. Okay.
I'm a little curious about going around now, whereas before I feel like I couldn't go. Yeah, okay, all right. Now roll down. Now that we have Amy in the right alignment, what we wanna do is help her strengthen and stabilize that alignment. So I call this my pelvic stabilization routine.
So they do the push-pull with the broomstick, the pull apart, the pull together, the pelvic tilt into the bridge, and then some abdominal work. So I'm gonna put my hand underneath her low back and feel the back extensors to make sure they're relaxed and she's not in a tuck and she's also not gripping and trying to create that neutral under her back. So I want her to be in relaxed low back musculature. All right, now lift one leg. And I wanna watch to see if the pelvis moves as she lifts one leg, and hold that position.
Now breathe in and breathe out to lift the other leg. And I'm gonna really feel her lumbar spine and I'm gonna put as many fingers as I can on each vertebrae of the lumbar spine to see if any of them pop up, 'cause that's when you can really tell if someone has some instability, is one of the vertebrae will often pop up and you can't feel it if you're not, you can't see it, but if you've got your hands under there you can feel it. So now, think of a pool of water under your feet, and I want you to inhale and dip your toe into that pool of water, and then exhale to take it back up. So I really want you to anchor when you do the next one. So when she put her right foot down her pelvis rotated to the right.
So it was minuscule, of course, she has pretty good control of her body. That was better. So I put my other hand under her left side of her pelvis to have her anchor that side down, and that kind of activates the obliques a little bit. Can I do it again? And then, yes, press the right foot down, keeping the pressure on my left hand.
Perfect, that's it. So I'm really neurotic about this because I want to make sure that when I get the pelvis in the right alignment that they're able to activate their abdominals. Often when there's been back pain for many years or surgeries or complications, even internal digestive problems can cause some pelvic torsion because of the fascial and scar tissue that pulls on the pelvis. I wanna make sure that they can activate the abdominals. So she can obviously activate her abdominals, but I'm gonna be really careful about how she keeps the pelvis steady as she moves her leg.
I want the dog to wag the tail, not the tail to wag the dog, right? So she moves her legs around, I want her to be able to stabilize her pelvis. So place the right foot down. I'm gonna help you anchor this side, and then exhale, take it back up. Excellent.
So left foot down. Yeah, she's got it. That's better. To progress, I'm gonna take the pool of water farther away. So you're gonna extend out.
That's it, so it's if the leg is going one way, the low back is going another way. And then bring it back in. Exhale, extending out, reaching. And then back in. And then the right leg.
Reaching, and then lower the leg. And I'm gonna be very careful about making sure the belly doesn't bulge, the pelvis doesn't move, and the low back doesn't rise off my fingers. And then back in, and then this side, and then exhale back down. And then as you take it back up, once the leg comes up close to you, inhale. On the inhale it tends to inhibit the abdominals, so sometimes I have people just exhale throughout the movement, and then inhale in between the movements.
Okay, now the progression would be bend the knees a lot. Now you're gonna do two feet. So it's touch and then exhale, lift, and then a little bit further. And all the while I'm palpating that lumbar spine to make sure she's not cheating. She would never cheat on purpose though.
(laughing) Extend the legs out. Oh, I'd love to pop my belly out. Yeah. (laughs) Then, of course, with the head down, this is a lot harder. But I wanna stabilize her body in neutral alignment.
So lower all the way, as far as you can, stopping there. That's it, 'cause as soon as her legs go any lower the back comes up. So I'm gonna stop her there, lower, and then back up. And again, this is a lot harder because her head is down, the abdominals are lengthened, so they're not as strong in that position. I don't really wanna strengthen her in that curled up position.
I wanna strengthen her in a long spine position. So one of the things that people ask a lot of times is that if my pelvis is rotated, what should I do if it's not corrected, or I need someone to help me correct the alignment? I don't feel that people should do strengthening exercises if their pelvis is rotated because you're strengthening the rotation. So if you do pelvic stability exercises and core control work with a rotated pelvis, then you're actually strengthening what you don't want. So I wanna make sure that the client either has someone to help them that can see the pelvic alignment, or that they have a clue that, wow, when I feel that in my left side, my left side of my pelvis, then I know I'm off.
And I'll fix my pelvis doing the technique, and then I'll exercise. So every day before Pilates class, you go, you lay down on the mat, you fix your pelvis, or you get the teacher to look at you, fix your pelvis, and then go through the class. All right, next exercise. Lower the right leg out to the right. We call this bent knee opening.
And then it used to be called bent knee fallout, but that sounds like too letting go, you're just not controlling it. So bent knee opening, and then back in. So when you open too far, you feel the pelvis shift up. If you open too far on this left side, you wanted to go farther then you really should, and then your pelvis rotated. So I want you to think of keeping a connection between the left ASIS and the right ribcage.
That's it, so you don't try to go too far, which is what a lot of dancers will do, yeah? Trying to get more turnout, and then it goes into your pelvis, so. Yeah. There you go. And then to progress, you're gonna go up into the dip the foot in the pool position, or the 90-90 tabletop, and then lift up.
That's it. All right, now open the right leg out to the right. Inhaling to open and exhale to close. And often, I will tell people to anchor that side, especially on this exercise. There you go.
And sometimes people just can't find it. So I'll have you press into my hand, and that helps you anchor that left side. Can you feel the muscles on the back of your left side of your waist? A lot. Good, okay.
Now, I'm gonna help you find those and then come back in. Now you find them yourself and do the same thing on that. So where I'm sensing the instability with Amy is that when she moves her right leg, her left pelvis is unable to stabilize. And it's minor, but her problem is minor too. She can actually function.
She's not limping around and using crutches, you know? Right. But she'd like to feel good in her body, so. That's it, nice. And you can certainly extend the lever arm, so you can go up like this, and then open out to the side.
Now, you love this exercise 'cause it's so challenging. For someone like Amy, she wants something challenging to make it feel like she's working. Yeah. That's it, good, 'cause she's such a good mover. All right, now this one.
And anchor that right side, and often I'll press her to help her anchor. Yep, good, and then come back in. Okay. She can do four or five repetitions of each one. The next exercise is bridging, so you're gonna peel up to your bridge.
And that's the, that is, yeah, that is the pelvis and spine moving a little bit. There's a little bit of articulation. You could just do a lunar liftoff and not articulate the spine. Now, you're gonna hold here and lift one leg. And then back down, so I'm watching for hiking of the pelvis and I'm also watching for dropping on one side.
That's often what happens when someone doesn't have strength in the glutes. She obviously has that. This is not the issue for her. That looks really good. I'll often use a altimeter reading.
So I'll put the dowel across the pelvis, and Amy, hold onto the dowel and press the dowel against your pelvis. That's it, so you press it against your pelvic bones and you look to see, 'cause some people can't tell if their pelvis is dropping. So you can watch in your peripheral vision to see if one side of the dowel drops. So if you could show one that's not so good. There you go, so it would look like that sort of.
Yeah. And it may even be more subtle than that, but it shows up quite a bit in someone that can't control that. All right, and then roll back down. And then the next exercise is in side lying, 'cause we're gonna work the pelvis in all directions. So you're gonna roll to the right side, and then if you need a pillow for the head you can certainly give that to the client.
Are you okay without a pillow? Mm-hm. Okay. And then I want her to lengthen as if she's against a wall, head, mid back, sacrum. And you're gonna lift just slightly through the side of your waist, so you're not in a side lying, sagged, side lying position.
And then, keeping the pelvis stacked, what I'd like you to do is keep your feet together and then lift your knee to the ceiling, exhaling to lift and then keeping the ribs connected. Yeah, 'cause she wanted to shift the ribs forward as she did that. Yep, these simple exercises sometimes are so challenging. Excellent. So you do three or four like that, and then three or four, I call it the fire hydrant.
So you're gonna lift the whole leg up. And you're watching to see that she keeps the length between her ribs and pelvis. Excellent. And one more. Exhale, lift, and then float the leg above the other leg, and then bring the knee toward the chest.
Inhale to bring the knee toward the chest. That's it, and then exhale, send the leg back. Press the heel. You're keeping the knee at a 90 degree angle. This one's really important, because this is where she's gonna start to challenge that left SI joint.
She's gonna extend if she doesn't have a lot of hip extension. So I'm gonna really hold the pelvis here for her and press that leg back so she gets some hip extension. I want you to think of a set of bungee cords from your pelvis to your ribcage connected here. Now, press that leg back. That's it, and then inhale.
And then exhale. She's putting on her poker face here. And then inhale forward and then exhale, send the leg back. And that's okay to hold on, that's good. Yeah.
So I'm really holding that pelvis for her right now. Now you're gonna do it on your own, and so you really gotta hold on with your abdominals as you extend that leg. That's what's gonna be vulnerable for her. Okay? And then come back to here.
And then, of course, you can go into the full side kick, going up on your elbow and then sweeping the leg to the side, but this is really the basic stabilization. Of course, you do it on the other side as well, okay? Mm-hm. And then go on your stomach in prone. So you can hit pause, do the other side if you're following along.
Place the hands under the forehead. And then we're gonna bring the tailbone away from the head, so think of lengthening. So there's a little pelvic tilt and then come out of it. And then I want you to feel your pelvis just resting on your anterior pelvic bones and your pubic bone. And then, as if you could let an ant crawl underneath your belly, that's it.
And then release. That's it. I'm just making sure that she can do that abdominal contraction without changing her pelvis and spine position. I don't want her to do a tuck. So I don't want to see that.
I want her to be able to lift the belly and support the spine from the front and the pelvis from the front as she does this. Okay? So now letting the pelvis rest in that neutral position, slight lift to the low belly. Now, I'm gonna move this paraphernalia out of the way. Let's have you flex your left foot underneath like that, and I want you to press your heel back.
I want to get that knee straight first, 'cause I wanna target the glutes with this. If she bends the knee when she does it and lifts her leg, go ahead and do that, you can see that the hamstrings work and the glutes don't really work here. So keep the toe on the floor, send the heel back, straightening the knee. Now, lift that whole leg up about an inch or two. So that's really all the hip extension that she has.
If she does any more she's gonna start to extend through the lumbar. And then come back down. So another cue would be to keep your pubic bone down on the mat as you lift, that's it, and then come back down. Now, I wanna see, can she really keep that lumbar spine steady, and don't let any of those vertebrae drop as she lifts the leg. That's it, that's plenty.
And then take it up about three quarters of the way and pulse. One, two, three, four, five, six, seven, eight, nine, 10. And then taking it down. So she did a really good job with that. Was that painful at all on that side?
Mm-mm. Okay, now flex this foot, press back. So I'm also assessing as I'm working, too, to see how she's doing with this. And then lifting up, and do three or four lifts. Exhale to lift.
So again, we've activated all the muscles around the pelvis, the abdominals, the hip abductors, the hip extensors. That's it, nice. And then pulsing up, one, two, three, four, five, six, seven, eight, nine, 10. So you should really feel a good, or feel and see, a good glut contraction there. Okay?
Now, you can come up onto your elbows, and I call this the sphinx position. You're gonna place your hands down on the mat, just flat down like that. And then let's do a little belly lift here. And does that hurt to be in that position at all? She has a lot of lumbar extension here, so I want her to lift up.
I don't want her to just do a butt tuck to lift up. So she could squeeze her butt and pull her tailbone down, but I want her to lift from her low belly and then draw the sacrum down and the pubic bone up. So I want her to emphasize more that pubic lift. That's it, nice. Now, can you bend your right knee, or that knee, left knee, (laughing) Then back down, that's it.
And then bend the other knee, the other right knee. And down, that's it. I'm going to expose her a little bit, there we go. Nice, that looks great. So you shouldn't see any sinking in the lumbar and you shouldn't see any pelvic anterior tilt when she does that.
Yeah, exactly what it should look like, yeah. Great. So that means that the dog is wagging the tail. The tail's not wagging the dog. Great, okay, and come back down.
All right. That makes a great preparation for planks or push ups. So you go into quadruped next, hands and knees. That's it, and then extend your left leg back, just like you did when you were in prone. Right arm forward, so we're gonna add the upper body into the mix, and then lift.
So simple little quadruped exercises, and then taking the shoulder down, right, like that, and anchoring that shoulder to your back. There you go, and making sure that the low back is not sinking. As you do it, touch the toes and fingertips to the floor and then back up again. I want you to imagine the shoulders like a crane and you're drawing down with your armpit as the arm goes up, and then arms straight. That's it.
Press your armpit into my hand. That's better, okay, arms straight. All right, now come down. Let's do it on this side, so we can see some of that cuing. That's it, and then pressing the armpit into my hand as your arm goes up.
And then you don't need to raise it quite that high. You can just reach it down, and then armpit presses toward the floor. That's it. And, beautiful. And then lifting through here, stretching long through the leg.
Great, and really making that pelvis be level. So I could put a tennis ball right here and make sure that she could balance it. Exactly, and then shoulder stays down, armpit stays toward the floor. Good, and that's it. And then come back down.
And then lastly, if you were strong enough, you could go into plank. So straight back, and then doing little push ups with the arms straight. So these are called shoulder blade push ups. So down, and then lifting up. And again, making sure that she doesn't sag here.
And then, of course, the ultimate would be to do a leg pull, so that you lift one leg, keeping that leg, right, and you can shift your weight back and forth, doing the little fancy movements of the ankle. That's it, nice, and keep that lift through here. Beautiful, and then lower yourself down. Exactly, and move into child's pose. And you can pray and thank God it's over.
(laughing) But really, if you don't follow with that pelvic stability work, it often doesn't stay in place. And people tend to have to get treatment by chiropractors or physical therapists over and over again because they keep going out of alignment. But if they can learn to activate the muscles that support the pelvis and use them in their daily life, so you're taking all of these exercises up into function so that you show them how to lift, show them how to pick things up, get in and out of a car, get in and out of bed, put things up on a high shelf, just the normal things that you do every day, that's really helpful for keeping that pelvis stable. So I hope that helps.
Comments


You need to be a subscriber to post a comment.
Please Log In or Create an Account to start your free trial.
