Description
About This Video
Transcript
Read Full Transcript
Hi, I'm Tom McCook. I'm here at Pilates Anytime with Erin, and today we're gonna teach you a short tutorial on body activation, specifically the back chain of the body. From too much sitting in our current lifestyles, the muscles in the back of chain, especially the glutes, the mid-back, the lats, tend to get weak and it's hard for people to find them well. If you learn how to activate them, you can do it a couple times a day, just as a stand-alone practice. A great way to keep your body balanced and your posture strong.
The first one we're gonna do is related to the mid-upper back. So, I gonna have Erin hold a ring, and you don't have to hold a ring, it could a notebook, it could be anything that you can hold at mid-chest level. I'm gonna have her come in front of me, to the side, like so, and all she's gonna do is lift her elbows high and wide and now pull the shoulder blades straight back to engage your middle back. And when you do these activation techniques, think of holding them for 10 seconds. You actually wanna feel that your upper back gets warm.
You'll feel, oh, okay, there are those muscles. Hold it for a count of 10, and then she'll gently let it go. That's basically the muscles that retract the scapula, the rhomboids, the middle fibers of the trapezius. But now, we're gonna add to it is the muscles that run close to the spine. So, if you think of the lower part of your neck, think of the thoracic spine is here, then the neck curves the other way.
What I want her just to practice doing is first retract the shoulder blades, the same way, now retract the base of her neck, so what she feels is her thoracic spine extends a little bit. Now, she's adding the activation of her mid-back and the muscles close to her spine. Do you sense that? Mm-hmm So, now it's upper back extension and a retraction of her scapula muscles. Again, she's gonna hold that for about 10.
This is a great way to help people reposition the head better and learn how to use the upper back so they restore functional strength. And then, she'll let it go. Now, from there, to go to the side body, I'll take the ring and we'll face the camera. We're gonna focus on the lats. So, the lat is the muscle attaches to your upper arm, underside of you upper arm, and goes all the way down to the back of the pelvis.
It's the only muscle that connects the arm to the pelvis, and it's a puller. It extends the arm back. So, we're gonna do mid-range first. So, Erin's gonna put her left hand under her right elbow. Now, set the right shoulder back and down, and on the axle just strongly pull the elbow into your hand, so you feel a strong contraction with the lat.
And she's gonna hold that for a count of 10. So, that's a strong contraction. These muscles tend to get weak, and they're important for posture, gait, moving. That's it. And now she's gotta let that go.
We'll take side two. So, it's pulling down, she's setting her shoulder back, she's resisting the elbow, straight down, going for a strong contraction, and gonna hold it for a count of 10. That's right in there, huh? Yeah. There you go.
(chuckling) That's it. And then, she's gonna let it go. So, think of that as the mid-range of the muscle. Now she's gonna go into her shortened range where she's gonna take her right arm back and actually think of pulling the arm down and back, standing into the arm so she feels a strong contraction in the lat. That's it again, hold it for 10.
We're isolating one side at a time right now, but once you feel it, you can do both at the same time, with this particular exercise. And she's letting it go. And as a teacher, I'm just cueing to see if the muscles are working. So, she's taking her shoulder back, she's gonna reach the arm down and back. There's a little bit of internal with the arm, 'cause of the way the lat attaches, and she's feeling a strong contraction.
That's it. Now we're gonna do the two together. So she'll take her shoulders slightly back, pull 'em down and back, and now pull from those back wings, those muscles. Pull down and back even more. There we go, even more.
Where're those guys? There they are. That's it, nice and smooth. Beautiful, and let that go. Now we're gonna combine lat and oblique.
Your obliques rotate the pelvis, they also rotate the upper body. So, she's gonna take her right arm by her side and put her left hand against the front of her right hip. Now, as she pulls her right arm back, she's gonna press her right hip forward into her hand. So she feels lat, oblique. That's it.
You get a sense of that? Mm-hmm. There we go, that's it. We'll do that for 10, and then she'll let go. And now, she's gonna take side two.
Now she's pressing her left hip into her right hand, and she's pressing her left arm back. So, it's a rotational activation from her pelvis and an extension of the arm. Beautiful. And then, she lets it go. Very nice, that's workin'.
Now we're gonna go right into the legs. So we have the glutes. If you need to when you do this, you could use a roller or the wall, if you needed to. We'll see how it goes without. We're gonna do the glutes in the shortened range, so we're gonna take the right foot a little bit off the ground, and press the leg back to fire the glute.
That's it, and feel a strong contraction from the bottom of the butt all the way to the top, and smooth the breathing. That's it, you wanna wake it up. You've been sitting on it all day. It gets a little suffocated. We wanna actually wake that guy up.
And then, let it go, and we'll take side two. It's not so far back, so you wanna make sure you don't arch the lower back. Just feel like you're pressing down and back and you feel the glute from the bottom to the top. Isolating this way's a great way to learn how to turn your muscles on more. We tend to spend a lot of time on stretching, but activation is the other side of the coin, and a really important part of it.
And then, she'll let it go. Now we're gonna do it again, but we're gonna add the extension of looking up, and when you add that back chain extension, it gives you a little more hip extension. So, we're gonna take the right leg back slightly, low to the floor with a flexed foot. Now, as you push back, as we inhale, look up with your gaze, and then lower your gaze, and do that three times. Notice as you extend, you can push back a little more, and lower, and one more.
And down, and we'll take side two. We'll take the leg back, flexed foot. As you inhale, extend the upper back and press the heel back, and lower the chin. That's it, and again. Extend, and down, and one more.
Extend, and down. Beautiful. Now, we're gonna take that into mid-range of the glute. That was shortened range, so for mid-range, just take your right foot forward, bend the leg into about a quarter lunge, and put all the weight on the right leg. Imagine the back leg is a rudder.
You can take it off the floor if you wanted. Now, with the right foot, she's gonna press her foot through the floor and back, and feel how that turns on the glute. (chuckling) Now, feel the glute, you also feel a little hamstring. Now, feel that and breathe, relax the shoulders, count of 10. You're firing that mid-range, which is an important thing.
A lot of hamstring pulls comes from an unactive glute. That's it, and then we'll come back up and take side two. Quarter lunge, most of the weight, if not all of the weight, on the front leg. Back leg is just for a little bit of stability. Press the front foot through the floor and back, strong contraction in the glute.
There we go. Awesome. Now, switching legs again, we're gonna feel the whole back chain contraction, and this will be an interesting piece. So, in this position, take the arms back. Now first thing, retract the scapula, retract the base of the neck, start to look up, press the arms back, feel the lats, press the front leg down in back, and feel that connection from the mid-back, the lats, and the glute.
One more breath, and then we'll switch sides. That's it, so nice and smooth. So, first thing, she's got a good balance in her lower body. She retracts the scapula, turns on the middle upper back. She retracts the bottom of the cervical spine, that extends the upper back, turns on the lats, and presses the front foot through the floor and back.
Two more breaths. And one. So, now we're gonna go to the second side. Erin's gonna turn to the side so you get a different view, and I'm gonna come over to this side. So again, the first thing she's gonna do is retract the scapula, retract the base of the cervical spine to start to extend and how that cervical and thoracic blend into each other, pull the arms down and back to turn on the lats, let the back knee bend just a little bit.
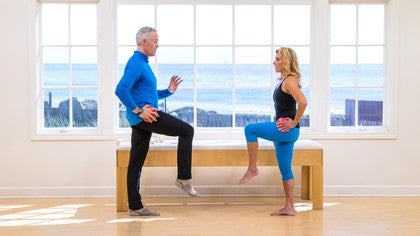
Now, with the front leg, press it down and back through the floor, so you feel the glute, the mid-back, the lats, and take two more breaths. Beautiful, one more. And release. Now, after you've done that contraction for your glute, what you can do to help release it is contract your hip flexor. She's gonna lift up her right knee, put her hand against the knee and push the hand and the knee into one another for a count of 10.
And resist. It's good to keep your hip flexors able to contract, 'cause they tend to not just get tight, they get weak. You might find contracting them actually loosens them. And then, let it go and we'll take side two. So, lift and resist.
Smooth breathing. That's it. And again, 10 seconds or so, and then we'll let it go. That's a sequence you can do. Just stand up from your desk, whatever you're doing and do that contractions for a few times a day, 'cause losing that ability, our extensors in our back chain, is actually creating a lot of problems in our posture and our body.
From there, we're gonna come to the wall. So, now we're at the wall, and this movement is a stretch for the pec minor in the chest muscles, and an activation of the mid-back, from a lot of sitting and lifestyles, is a huge imbalance for a lot of us in the front to back. This is a great way to do a very simple, effective movement to help that. So, Erin's gonna put her left hand on the wall, with her fingers facing you, a little below the shoulders. She's gonna put her right hand under her armpits so she's feeling the muscles that slide the shoulder blade down.
Now, as she does that, she'll press her arm into the wall and start to slowly walk her feet to the right, turning away from her hand, and only go to the degree that she's feeling the stretch, and she can keep her shoulder back and down. And now, walk back into the arm, so she's gonna do a little samba with her arm. Now, as she walks, her shoulder blade moves away from the spine. Now, keep turning into the arm a little further. So, she's getting the full range of her shoulder girdle around her body, and now she's gonna walk out again.
You get to do your own little personal wall samba. Now, if somebody tends to hyperextend here, you can have them bend their elbow a little bit. That's helpful. And then, she's gonna turn back in. We're gonna do it one more time, and then we're gonna add something to it.
That's it, so I'm cueing her to keep her shoulder low. Now, this time, as she's in the open position, she's gonna bend her elbow just a little bit, look up with her thoracic spine, and just resist her hand into the wall and towards me, like forward. Then take three diaphragmatic breaths. So, the shoulder's pulled back and she's getting a nice stretch in her chest from that activation. One more breath, and then she'll slowly walk back into her arm and let her arm come off the wall, and we'll take side two.
Now, she'll put her hand on the wall, put her other hand under her armpit, draw those armpit muscles down, now slowly walk towards you, just to where she's feeling it stretched. You don't want it to be too nervy. You will feel a little nerve action, and she's gonna turn into it. You don't want to hold the nerve stretch very long. And then, she'll walk back again.
She's rotating the body around her shoulder girdle, and then she turns back in, shoulder stays low. Now, this time she's gonna open, bend the elbow just slightly, press the hand into the wall and forward, and as she looks up, take three diaphragmatic breaths. That's it. Two more breaths, and one. And then, gently release, we'll rotate into the arm, and let it come off the wall.
That's kind of nice. Now, she's gonna put her back on the wall. This is a contraction series, similar to what we did standing, but with the use of the wall. She'll have her feet about six inches away from the wall. That's it, and then bend your knees a little bit.
That's it, so, the first thing, now she can use the wall for her head to press to, so she can turn on her back extensors. They go all the way up to the back of the skull. So, the arms, I want her to open them a little bit away from the body, so think of the arms and the head form an A-shape, like the letter A. The first thing I'm gonna have her do is retract the scapula, so the shoulders will come back. You will come slightly up when you do that.
Now she's gonna retract the base of the cervical spine, and that extends the relationship between the upper thoracic and the cervical. Now, she's gonna lightly press her head into the wall, not hard, just lightly. Press the back of the shoulders into the wall, and press the whole length of the arms into the wall. That's it, now, feel that contraction. So, it's lats, it's middle back, it's spine extensors.
That's it, and hold that for 10, and she'll just stay there but she'll just relax for a moment, and we're gonna add the legs. She's gonna do the same thing. So, first thing is she'll retract the scapula, retract the base of the cervical, press the arms back, lightly press the head back. Now, press the hips away from the wall, even further. Keep pressing, that's it.
So, she goes into the hip extension. Now take one heel and slide it back so it touches the wall. There you go. Now, press the heel into the wall to feel the hamstring and the glute. That's it, smooth breathing.
So, now you've got the whole back chain, the support of the wall for leverage, smooth breathing. That's it. And then slowly release, and we'll switch legs. You can just take the leg back and I'll take you through the sequence. That's it, so first again, retract the scapula, retract the base of the skull, or the base of the cervical, press the arms back, the head lightly back, hips away, press the heel into the wall so you feel the whole back chain from your hamstring glute, spinal muscles, lats.
One more breath, and gently release. So, there's your wall full back chain contraction. Now we're gonna finish with a few standing movements that'll stretch the muscles you work, and also work them in a little more integrated way, of the front, the back, and the sides. We're gonna start with a stretch for the spine, 'cause you just did a lot of contraction along the back, so now we're gonna do a stretch for the whole back chain with muscle activations of the front. So, we're gonna bend the knees a little bit, and Erin's gonna interlace her fingers in the front, and she'll press the heel of her hands forward.
On the axle, she's gonna nod her chin, set the shoulder blade low and wide and around to the whole spine. Feel the waistline pull back, shoulders set low, let 'em drop a little bit, there, there you go, and just breathe into that. Feel how you're stretching the muscles along the spine and you're activating your obliques. That's it. Now, from there, again, hold that for 10, breathing smoothly.
Now to release it, she'll release her hands, let the pelvis roll over the legs a little bit to deepen the hip crease, interlace the fingers to the back. Now pull the shoulder blades back, pulling them back, lift and extend the chest and reach the arms back slightly. Hold that contraction for 10. That's it. Now, we're contracting the back chain again, crease in the hips, legs slightly bent.
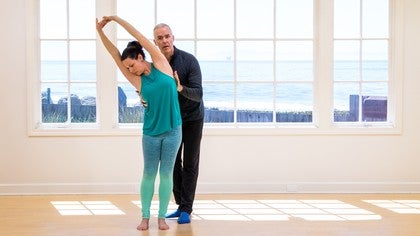
Then she'll release again, interlace, press the arms forward and go right up to straight spine. Now, look down to your right, set your shoulders low, and I want you to shift your hip a little to the left, and now side bend to the right, and contract from your armpit to your hip. That's it. So, now she's contracting her side body, she's breathing into it. Now, let her hips go to the right, come back up, look down to the left, contract from the left armpit to the left hip, and side bend to the left.
The hips will shift a little bit to the right, and then breathe into that. Take two more breaths. Now, lengthen up. Keep the arms up, set the shoulders low, feel like you're pressing the right hip forward like you did earlier with the oblique activation, and turn your spine to the right. Now, look back over your shoulder with your eyes.
Take two more breaths, spiral back to center, now press the left hip forward, turn left. That's it, looking back, and breathe into that. And, back to center. Take a breathe, holding the line, press down through your legs, reach through the heel of the hands, and then gently release the arms and let the arms float down. And there we are.
That's our contraction series for today. I hope you enjoyed. Please practice, try it out, and we hope to see you again on Pilates Anytime. Thank you.
The Teacher's Corner: Embrace How You Teach
Comments
You need to be a subscriber to post a comment.
Please Log In or Create an Account to start your free trial.


