Description
About This Video
Transcript
Read Full Transcript
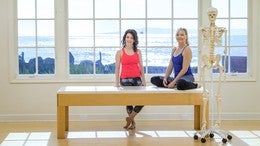
Hello, I'm Rebekah Rottstein and I am back with another wrist tutorial, a year later. So I'm also here with my friend and colleague, Ruth Alpert, my partner in crime for tutorials apparently. We've been doing a number together year after year and I wanted to take a step further discussing the wrist and one of my favorite topics, weightbearing through the wrist. So you may recall in the last tutorial, I spoke a bit about mobilization techniques for the wrist, particularly how you can unrestrict the restricted fascia that might prevent movement, necessary osseous movement or movement of the bones. Let's take just a one minute or 30 second review of some of this.
You can see very beautifully here the radius, I'm calling this the radius strikes back because the radius has a beautiful circular structure or feature here at the proximal end and it literally looks like something you'd see in a toolbox, almost something that you wouldn't expect to find in the human body. And it so perfectly rotates, so that's how you remember which bone is which. The radius is the one that rotates. And the radius has the primary weightbearing structure and also when somebody fractures a wrist, more often than not and especially I would say from age 50 and older, if it's an osteoporotic fracture, it's usually the radius. It's known as a Colles fracture where the distal end of the radius breaks as they're stopping themselves from a fall.
The ulna is U for the funny bone side and this is the other structure, but as you can see, it's not the primary weightbearing structure. So we talked about some fascial releases last time and this time I want to talk about how we can load the tissue even more, so both the muscle and the fascial systems. Muscular and fascial systems. So let's actually get down to the ground Ruth. So we're going to go in quadriped position and I'm specifically having you, yep, with your hands on the ground because for these exercises we're going to do I think there's too much cushion here with the mat.
Now there is a couple of schools of thought on the hand positioning and I should first explain that my own experience over the past year and interest that is with the loading that we're doing is also based on other movement forms that I've been studying and I want to call out a little bit that some of this comes from Etoportal movement systems, so both studying from Eto, as well as from Roseanne Serpico of New York Movement Company in New York, as well, obviously in New York, as well as my practice buddy, Johnny Lahood. So the idea with traditionally in yoga you would see more of the middle finger forward and maybe in Nyanger, but in other more contemporary forms you're seeing that it's more the forefinger that is pointing forward and that's also what we do in the Eto work, as well. So, I'm gonna have you just practice that right now with the forefinger forward and one of the nice things about that is it also changes the relationship of the radius. So the first thing you're gonna do is simply go forward and back here, just a little bit, just loading and unloading. I'm gonna hit your head.
She's gonna hit my head and I'll scoot back a tiny bit, and loading and unloading. Now pause, so load it again and this time I want you to back off and open your hands out to the sides and then spiral down and go off the forefinger and go back down and spiral out, bending the elbows and returning and pushing up. Yep. And bending and opening exactly. And returning and pushing up.
And once more. Lowering and spiraling out and returning and pushing up. Now continue staying there, actually I should say pause for a moment, hold the position and now spiral from the elbows. But actually let's bear the weight on it. So you're gonna spiral in and out, in and out, in and out, in and out, in and out, two, one.
Next, you're gonna place the hands the opposite direction. Yes, and you're gonna bend the elbows back so that you feel a big stretch through the side of the wrist, you okay? And return and again one, or actually I really can't count, can I? That's number two. My weight on it?
Yep, you're gonna put your weight into it. And then back to off. And put your weight into it and back it off. And then you're gonna keep your weight into it, wow, without backing off, peeling away. (laughing) And now pause, go forward again.
This time let's go on to the back of one hand. Curl your fingers in, yep. Push all the way in here and straighten the elbow. And now spiral there through the wrist. Keep that wrist, or excuse me, keep that elbow locked.
Yeah. So, going into that hyperextension is okay here. You might feel a great stretch through the forearm. When I learned this it was such game changer for me because I hadn't ever been able to get that area of tightness to open. Try the other side.
So, again, you're on the back of the hand. You're gonna curl your fingers inward and hold it so it really intensifies the stretch. So I'm curling the knuckles in, yeah, pushing even further in, yep. I know. And just do two more spiraling and last one.
Yep, but notice what happens when you bear weight on it again. Do you feel how much looser it is and it really opens up the tissue, but now we can start loading it much more. So I'm showing a little bit today of how you can do this on the chair because the chair I find more than any other apparatus is where this becomes really, really relevant and I experience it, a number of my clients say my hands or my wrists hurt when I'm trying the chair work and so I've been doing some of this as well with the chair to help open up the challenges that they're having or address some of the challenges they're having with the chair, but it's also been very strengthening for the wrist. So come forward again. Now, go into a plank.
Mm-hmm. Lift one foot and let's see how this could apply to the leg pulls. So shift your weight back, yes, and shift your weight forward. Good, switch legs. And the other side.
Back and forward and so. It's very different. It's very different. Exactly, so there's two things, there's also the fact that your hands aren't on the mat, but I encourage you to see what that feels like because especially for people who have wrist challenges, this can be really, really helpful to have the hands directly onto the ground. I personally prefer it because the challenge with the hands on or the hands on the mat is that all the weight as we just saw in the skeleton here is going through the radius.
So that means that the pressure is loading directly through the center here, which means that the heel of the hand may sink more, creating even more extension there in the wrist where it might make it more uncomfortable. However, yeah, so it often feels a lot better to do it either on a yoga mat or to do it directly on the ground and then you also have so much more feedback through the receptors of the hand. Makes it stronger. Yeah, it's really amazing, right. So that's one option that I want you to consider.
Another thing is place your hands here again and now tuck your toes. Now let's go into a down dog for a moment as long as you feel that the mat is secured and is not going to move. Now bend your knees, lift your heels and start walking your weight over your hands, so start walking forward, walking forward, yes. And now lift your heels, lift your heels, yes. So that you're almost bearing, you really are bearing much more of your weight through your hands.
How does that feel? Do you feel a direct relationship to your trunk? I'm on my feet. You're on your feet and come back for a second. So I'd like you to, from here, walk your feet forward, yes, so that you're really pushing the ground away with your hands.
Do you feel that? And this could be a great preparation, see if you could push the ground away, yes, so that you relaxed a little bit more through the upper traps and hold that. You're gonna keep holding this for 30 seconds as I blabber on because we're gonna build some of the endurance for you here. This is a great preparation for some of the chair work, so finding some of the isometric holds and finding the positions that people will be in the chair before they're moving, I'm sorry, I should say before they're on the chair with an unstable object, helping them find this position through the ground can be really useful and you can come up. So it's a nice way to practice building up some of the load and we talk a lot in osteoporosis world about how you're gonna build load through the tissues, right.
And this is a nice way of experiencing how you can also build more strength through the wrist, especially because aside from some of the arm work that we do, I think we could use the more work through the wrist and discover how we can better utilize these structures known as our hands when many people complain about the pain that they experience to the wrist and then I think that often becomes an excuse not to do the weightbearing that is so critical for many of us. So thanks for joining us.
Comments


You need to be a subscriber to post a comment.
Please Log In or Create an Account to start your free trial.
