Description
About This Video
Transcript
Read Full Transcript
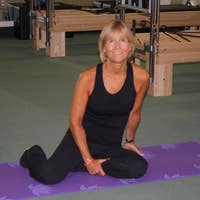
This is Nicole, thank you for volunteering. She's gonna be the next model for this pelvic health series, so we're gonna do the same assessment. So Nicole, you're gonna take your hands, place the base of your palm at the top of the pelvis, on those bones and point your fingers towards your pubic bone. And what we want to notice is, do we see that one hand is more forward than the other? And what do you feel?
Just looking at, you're not sure yet, don't move around too much. Actually, when I look from the side, I see that the left hand here is a little bit more forward. Yeah, you could try it, like rotate a little to the right and then rotate a little to the left. Does that feel like you have a little more ease in it? Yeah.
So I think you like to rotate to the left. Good. Okay, now turn and face the window. And then we're just gonna observe, can we tell if she has more weight on one side of her legs or not? Does she favor her right side or her left side?
And you know, she's pretty balanced, we'd have to really pick, yeah, like shift to the right a little bit, so put your weight on your right leg, yeah. See that this is what we would see some people standing like. Now shift to your left leg. Yeah. You kind of don't like that, do you?
Shifting? Yeah, to the left. Not really. Not really, it feels more comfortable to go to the right. That's, yeah, exactly.
So I think if we were going to split hairs here, it could be all right. Maybe she favors standing on her right leg a little more than her left, but it's not that important really. It's when you're looking at someone and you really can see the difference that it's important. So this isn't something that we really need to worry about. It's not that I'm worrying either, but to be concerned about.
Okay, so cross your arms and we're gonna do the hip drop here. So, here's the top of her ilium. She's gonna slowly bend her right knee. And what we're watching for is that lowering of this side, away from the rib and how the rib will translate over to this side. And that was pretty good actually.
And come stand up and now we do the other side, bending. Okay, so here is, yeah, we can see that this goes forward. Like she showed us with our pelvis, with the hands. So this is going forward, and come back. Let's do it on the left side, one more time, go a little slower for us.
So go ahead and pause right there. So here's where you start to wanna rotate around right? To that direction, you wanna rotate this way. So there's something about this hip joint as well through here, okay, and come back. So for Nicole different than Erin, hers is more of a hip joint, maybe pelvis, then rib cage.
Her rib cage didn't do a lot of shifting or sitting in one side as the previous body. Okay, so let's do some movement around that. Oh, we didn't do the hip sway, I'm sorry. Place your hands on the (indistinct) we did this way, but I wanna be a little more specific about it. Yeah, a little bit lower.
So even though we test her swaying and noticing that she actually was more comfortable on her right than her left leg, we still wanna watch. So then sway a little to the right, good. Now, stay there. Now what we wanna see is that, is there a little drop of this hip, which I'm actually not seeing too much of that. So again, it could be the right hip because in order for this to also drop a little bit, that right hip has to adduct.
So my hunch, right now my intuition is telling me from my knowledge that it's not maybe so much about this, 'cause her hip drop was pretty good, but more maybe perhaps a restriction in the hip here. All right, so come on back and her thoracic was fine. So shift to your left, yeah. And I do see it, I feel that come down a little bit, just a little, you don't have to shift your ribs, but come on back. It's a very slight thing.
Well, actually your, yeah. Your ribs actually shift to the right, no, come back. Don't try to force it. I just wanna see what your natural movement is. Just shift one more time.
Yeah, that's better. I think you were trying to make that happen, okay. But nothing really big, and it wasn't, like anything really exaggerated or anything. So to help your movement improvement, for strengthening, to me, I'm gonna focus more on the pelvis and the hip. So let's come on to the mat and we're gonna start with just very simple pelvic clocks.
But I'm gonna introduce you working with your hip joints with the pelvic clock. So when we normally do pelvic clocks, we're thinking about the upper part above the pelvis and using the abdominal area to do that motion. Usually is what we're thinking about. But I want you to think about your hip joint. Now, this is a heavy block.
So, you're gonna hold the block and I want you to think of the block like an egg. So you're not trying to squish it, you don't wanna break it, but you also don't wanna drop it, okay. So you can feel how that activates your inner thighs there. So remember from the anatomy pictures, the adductor connection into the pelvic floor connection. Okay, so first we'll start with just imagining that you're wearing a clock, and the 12 is up at the top kind of navel or just below the navel actually.
All right. So go ahead and just kinda, you're doing a posterior tilt. And what I want you to think about is that left side, coming back a little bit more than the rights, that's it. Because that's your, there side. Oh, that's your right side, sorry, your left side coming back, exactly, and then roll forward.
And now come down towards your pubic bones. You're gonna feel your tailbone and your pubic bone kind of dropping downward, which puts you into some hip flection, you feel that? And engage the block just a little bit, there you go. And now roll to 12. So just kind of tilting back and you're kind of just thinking about that left side.
You don't have to do anything in particular, just noticing it, and then roll towards your pubic bone. Excellent, and one more time, 12, we're just warming up. 'Cause I'm really interested in her doing the diagonals to work on that pelvic rotation and then come back and they'll find a more level place in between those two points. Okay, now we're gonna go from side to side, which is also known as three and nine o'clock, but it doesn't matter which one's three or nine. But go ahead and just find, try to roll from side to side, not diagonal, just side to side that's okay, good.
So I want you to imagine, okay, come back to a level position that you have a little tiny ball on this hip bone here, and you wanna roll the ball all the way over to that hip bone. So imagine that, so roll the ball. Perfect. And I want you to use your adductor of your right leg against the block. Now come back, that's it.
And then come back to the level. Let's do that again. Roll the ball to the right and use the right leg into the block. So, I'm creating that adduction effect on her hip. You feel that, yeah.
And then come back to level, we're gonna repeat that. Roll the ball to the right, use your right adductor. Excellent. And come back and you're gonna do one more. Roll the ball, use the right block.
Really nice. And then come back, let's try it to the left. Roll the ball to your left. Use your left adductor. That's pretty easy for you, huh?
Yeah, okay, let's come back. Let's do one more to the right. But you notice the difference, right? So really use this leg against the block, there you go. Okay, and then come back.
All right. Now we're gonna do some diagonals. So all you wanna do is think if you have the ball idea that there's a ball here, and you're going to roll it to this corner over here. All right. So go ahead and roll the ball and use this leg, your left leg into the block, great.
And roll the ball back and use the right leg into the block and see if you can really bring that right side, there you go. And then come back and then roll the ball down. Use this leg, your left leg, good. And come back to level and go again. This is kind of this, a good range for you.
This is your ease, okay. Now come back to level. All right. Let's see what happens when you go to this corner and this corner. All right, so let's go here.
That set, are you going here, that's fine. And use this leg and then roll the ball to this is gonna be the tough one right down in here. Use your left leg, there you go. And then roll it. So this diagonal is your challenge.
Now you're starting to hike a little bit. Yeah, it's okay, perfect. And then come back and roll, use your legs. Nice and roll, use your right leg. Shaking a little, that's good.
Yeah, it's okay. And come back, let's do two more. So this in all the movement patterns, this diagonal going back and forth is good for you to work with. There, you use that right leg. Exactly, now come back to level.
Excellent, okay. I'm gonna take the block now. It's a lot of work on your adductors, you might be shaking a little bit. Okay, so we're gonna do is your pelvic bridge, all right? But this is how I want you to think about it.
I want you to think about, first of all, your knees starting to reach over your toes. So, we're gonna start with the Dorsey flection of your feet. And that might drag your pubic bone and your tailbone down a little bit, so don't worry about that. It will put you in a little bit of hip flection, so find their feet and pull, that's it. And then start to come up, and start to roll towards 12 o'clock.
So we get that full hip extension. Very good, exactly. And then you can roll through your spine, nice and easy, and then roll your pelvis back to level. Good. So your first action is your feet and your knees, and then roll, think about 12 O'clock, really opening the front, nice and roll it down.
So we're moving through the hip flection. Okay, and again, reach and pelvic tilt for hip extension. So we're feeling those glutes, right? And the hamstring connection. Roll down, excellent.
And we're gonna do one more and you're going to stay up. So roll the pelvis, come stay up. Now I'm gonna ask you to just dip your right hip down towards the floor and lower a little bit, like lower down. Like you're going to sit, but then you change your mind and you come right back up. Okay, now dip this side.
Come rolling down up, you changed your mind. Come (indistinct) I'm just joking. I'm joking, it's okay. Yeah, so dip your right down. We're going to yeah, and go down.
So we're getting that pelvic rotation. Now change your mind and push through this leg, that's it. And down, you gotta use your adductor here, there. And come back up again, use your adductor here, roll down. So we're getting that hip flection, she starts to flex, but then she has to push up and use this leg.
I could also keep the block in there to really challenge you with that, but I can use my hand, use this one, come down. That feels good, doesn't it? Up and down and up. Now, I'm gonna have you do, go ahead and go one more time down and up. Now, come to the center.
Now we're gonna do two in a row just to your left. Use that and come up, use that, good. It's just for that pelvic rotation. I just like throwing in a calm level and then coming down rest, awesome. Lot of hip joint there, even though we're using the spine.
Okay. So stretch your legs out straight for me, for a moment. Good. Great. Now, what I want you to do is imagine someone's gonna pull your leg and slide your heel away from you, your right foot, slide it away.
And just notice, see how that comes down, yeah. And then come back and reach your left leg for me. Okay, so it's a little bit harder. Is it not, yeah. And that also creates this adduction we need on this leg.
Okay, so come back. So based on that, we're gonna do your left leg. So I'm gonna take this ball and put it under your heel like this. Okay, all right. What you're gonna do is you're gonna be very active here, you're gonna press down on the ball so that you kind of feel the back of the leg by the sit bone.
That's yeah, I'm trying not to let the ball, don't press so hard, relax for a second. Again, I don't want you to pop the ball. I just want you to put a dent in the ball, but don't pop it. Yeah, and keep your leg. It connect into your midline here, right?
There you go. Now push down so you feel the back of your hamstring here? Yes, there it is. Did you find it? Yeah.
Now maintain that and roll the ball away from you just slowly, that's enough. Okay, now point your foot, keeping that depression on the ball. Now pull the femur into your socket. You can kind of sock, but don't hike your hip. Just try to pull the leg in.
There you go, so you're gonna feel again, that inner adductor into the pelvic floor. Can you feel that flex and push and roll. So I call this leg reach, so go ahead and reach point. Very good. Now think of the femur coming into your socket and then you level the pelvis.
Good, flex again, push down and reach. Oh, that's good, point, pull it in, flex and reach. Excellent point. So we're doing this as the hip drop, basically, yeah, very good. And reach.
Good, we'll do one more. Good and rest, okay, bend the knee. Now, straighten both legs out again and do the little leg reaching again, right and left. Go back and forth, we were just testing. Oh, does that feel better?
How's your right feel? Does it feel sticky or good? It feels sticky. It feels sticky, okay, good. Let's do the other side then.
Sometimes, doing this with people, you do the one side and they feel really level. So then I wouldn't do the other side, but I noticed that if it's really a myofascial restriction, you'll start to feel like, yeah, I did a really good job of getting that more mobile, now the other side needs it. So we'll do a few here, which is good for this right adductor anyway. Good. And then point your foot and draw the femur in.
Okay, now pause for a second. I want you to be aware of your rotation, 'cause you started to go into that rotation here. So don't overreach, push down, feel the hamstring and just, that's it. So you are more mobile here. So point your foot and draw the leg in.
Good, so you don't have to go to your end range. Just feel, there's the end of the movement, you feel it? Perfect. And come in, reach and lengthen, very nice. And notice without overemphasizing it, keep going.
Notice how this is coming up, so you're adducting on your left leg. That's it, reach, come in, very nice Nicole, reach, much better. You can actually see like, to me it's like a taffy pole, you're getting that nice length and gliding through there. Okay, just one more. Awesome, okay.
And rest and bend the knees. Good, okay. So now I'm gonna challenge you a little bit more, standing on one leg, so let's stand up. Okay, so the block for you. So I'm gonna, for pumping to both sides, okay, cause you're pretty balanced so we might as well do that, but we're gonna emphasize like different things.
So stand with your right foot on the block, you can hold on to here. Good, okay. Excellent. So imagine now take your left foot off and make it level with the block. So you kind of feel how your pelvis is level.
And now what I want you to think about is, and you can use your hands. So that's good that you're actually standing on the inner edge of this foot, your right foot. So you want your weight. So I wanna see her legs sway a little too, yeah, this is why you have to hold on. Exactly, okay.
And make sure that now your ribs have to go with you. There you go there. All right, so this is a lot of work. Can you feel this is working and this whole hip is working and your ribs look great. Okay, now all you're gonna do is reach your left foot towards the floor, small amount.
We're doing a hip drop again. Nice. And then bring it back to level. And again, reach, Nicole that's wonderful, keep going. You're gonna keep moving for repetition.
So if we watch like the center of her T12, basically, and where her little logo is here on the pants in the middle of the sacrum, these two points are staying over one another. So that's wonderful. That really shows you that she's not trying to do all the movement from her rib cage. So she's having to use the support of the mild fascial core here to maintain that support here. This is not easy and you're doing a brilliant job.
It's really great. Good, very good. Let me do a couple more. Very nice, one more. This is such a great example of pelvis on femur.
Okay, let's switch sides. Okay, very good. It's okay to be holding on, that's good. I'm just gonna make sure your ribs are in the center. Now, getting the inside of your left foot, really want to feel that hip, remember the hips sway, so we want that bone to go into the socket, that's it.
That requires you to work here and here, this might be a little more challenging. So drop your right leg down. There we go, and then coming level, good. And down and level and down, level. As you go down, you wanna breathe into this side of your ribs, that's it.
We wanna maintain that alignment between T12 and S2, that's it, good. Down, up, you feel that in your obliques, having to do the work? Yes, good. You're gonna do two more. It's a great oblique exercise here.
Great. Nice, okay and rest. All right, come on back to the front, let's see what happened. Okay, so place your hands here again. So we didn't see that much difference between you and the right and left, but it does seem to me that that is more back, even though it was slight.
I know it's subjective, but okay. Now turn around. And we're just gonna notice your stance, where your weight is on your legs. Yeah, I do feel like you're now actually you have more, you're standing on that left leg. Can you feel that contact?
Yeah, excellent, okay. I'm just gonna move that so we can look at your ribs here, let's do bend the right knee. Nice, do you see how she shifted over there? That was really nice. Okay, and come back and then left, awesome.
Really good, okay. Put your hands on the greater choke canter and you're gonna sway to the right. Good, and come back and left. The feet are doing nicely. Come back, and one more each side.
I just wanna feel myself, you feel that go in. This goes in, yep. And then go back and then same thing on this side, yeah. And come back. Okay, excellent.
Thank you.
Pelvic Health: Pelvic Assessments and Tips


Comments


You need to be a subscriber to post a comment.
Please Log In or Create an Account to start your free trial.
