Description
Elizabeth is using the Allegro 2 Reformer, however, if you have a different Reformer, her models are using Studio Reformers to demonstrate.
About This Video
Transcript
Read Full Transcript
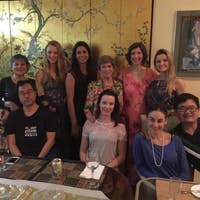
Welcome to is anytime. I'm Elizabeth Larkam. I'm so happy to be back in this gorgeous studio with you here to teach one of my favorite new classes. It's called sequencing for success. The reformer star. My colleagues are here with me too. Here is Ronda Pressner. She's the owner of fit wise Palase and wellness in El Sorito.
Daniel holder's here from Salt Lake City where She's part of pinnacle performance and Norris. Tom Wilson is here from Chicago, Illinois where he's the owner of [inaudible]. Just yesterday, Nora shot two new programs, so don't miss his new classes on any anytime. As you can see we have preset, a rather elaborate construction. The jump board is in place. We'll use it on a couple of occasions. It's just easier to put it in place at the beginning of your program. And we also have some platforms that are perpendicular to the carriage.
Right now there are no springs on the carriage and you can see that my colleagues have a box that's placed, um, just the same height as the reformer carriage. So rummage around and find just what you need to make a platform off the edge of the carriage. Um, because I'm working on an allegro two, which is closer to the ground, I'm going to use a foam roller for a different option. We're going to start with lateral translation of the thoracic area with respect to the pelvis. Sure we are. Here's how we're going to do that. Place your sacrum onto the box or onto the roller and then come to lie on your back on the carriage so that you have your lower ribs, middle ribs, upper ribs, shoulder girdle, and head supported by the carriage. Now she tells me in your neighborhood there is a head cushion.
It would be a really good idea to get that head cushion. As I said, now she tells me reach for your head cushion and put that underneath your head so it'll be a little bit easier for you to access your abdominals and the connection of ribs to pelvis. So as we were saying, here you are allying on your back. Adjust the carriage so that your elbows will not poke the shoulder rests and check to see that the back of your waist is on nothing. So put a some fingers at a couple of fingers at your navel and right opposite your naval will be the posterior process of spinus process of l three. And that will be not touching anything, not touching the carriage, not touching the box. It's free in space for your lumbar Lordosis to be present.
The head cushion is supporting your head and anchor your heels on the box on the platform there. Now Danielle, if you would have the pads of your fingers and thumbs like so touching each other and then your thumbs, we'll be at your [inaudible] process. Um, Norris, if you would, um, cross your arms across your torso and Rhonda if you would hold onto your elbows. And then I'll be in, um, taking a page from the yoga playbook from Goma Casa arms, and now we're going to anchor the left heel and left side of the sacrum. Inhale, slide your ribs to the right. Exhale center anchoring your right heel. Slide your ribs to the left.
Lengthen the side of the waist to which you are going. It's a small motion. Your sacrum is anchoring down onto the box, aiming the corners of your pubic bone down towards the box. For right now, let go of your respective hands and arms and place pads of your middle fingers at the corners of your pubic bone. Anchor your left heel in the left corner of your pubic bone.
Glide to the right as you inhale to your right lung. Exhale, come to center. How's that for a run on sentence? Okay. Anchor your right heel and the right corner of your pubic bone. As you inhale to your left lung glide to the left x sales center, create a ground force with your left heel, your left corner of your pubic bone center. Create a ground force on the right side so you can slide to the left.
Inhale to your right lung. When you go to the right. Inhale to your left lung. When you go to the left. Now replace your arms in the current, in the previous position, and continue this action. I'm going to talk to myself now. So those of you as per usual, those of you that are in Goma, cos in arms as you slide the carriage from side to side, raise your elbows up until they are in front of your nose or your third eye or your forehead. And then as you continue sliding the carriage from side to side, lower your elbow bows in the direction of your pubic bone. Now plant your left heel firmly and cross the right thigh. That's the entire right femur over your left femur.
Continue this action gliding from side to side. It's my intention to keep the foam rollers steady as she might appreciate. It's a little more difficult because the nature of foam rollers is that they roll as you slide from [inaudible] side to side. Continue to inhale to the back of your ribs to the back of your lungs. You have a ground force only with your left heel on the ground.
Now aim your left sitting bone towards your left heel. Also aim your sitting bone towards your left heel because as you can feel, the right side is open chain. UNCROSS the current thought. Cross the new site on top. Now your right heel is in line with your rights sitting bone and as you slide from side to side, if you have Goma Casa arms with one elbow crossed over the other, you can bring your elbows, sliding them in space high above your forehead and then sliding them down in the direction of your pelvis. The reason for all of these arm arrangements is that they will encourage thoracic flection bringing the spine between your shoulder blades down in the direction of the carriage so that this lateral translation is driven more by the anterior [inaudible] bleak sling system and not by the erector spina are the spine extensors.
Now uncross your arms or let go of your arms and anchor your upper arms and your elbows or your just your upper arms onto the carriage and with both knees bent, bring your shins parallel to the ceiling. Now creating a ground force with your upper arms. It's a lateral translation of as we were doing before of your thorax with respect to your pelvis. Here's a little bit more detailed action. Plant yourself in the center on your central access. Aim your left sitting bone slightly to the right and then shift your pelvis to the right. Come back to center.
Aim your right sitting bone slightly to the left and shift your ribs to the left and come back to center. Now as you aim your left sitting bones slightly to the right, push your left heel, the footprint of your left heel away from you as if you were going to Elongate your left side. Elongate the left side and slide to the right. Elongate the right side and slide to the left. Creating a ground force with your shoulder blades, with the back of your ribs, the back of your lungs, and no small amount of work with the upper arms. Now good luck to everyone, especially me. Interlace shift fingers.
Create a ground force through your sacrum and continue this action from side to side. Your elbows are straight, your fingers are interlaced, your palms are pressing into each other. Elongating the side of the waist to which you are going. Lots of abdominal work here, activating all the different layers of the abdominals and the anterior obliques thing. Plant the soles of your feet and we're going to turn around now so that you have your pelvis on the carriage and your ribs and head on the roller. Let's do that now. So you're thinking, Huh?
The description of this course said it was for the star. Yes, indeed. Lateral translation of the thoracic area is necessary as a precursor for side bending to make the star possible. Here you are with your head cushion underneath your head now, so just relocate the head cushion. Remember that the back of your waist, the posterior spine is process avail. Three is on nothing and plant the souls of your fields, the soles of your feet on the carriage for the moment, but the pads of your fingers on the corners of your pubic bone and begin the lateral translation of your pelvis. With respect to your thoracic spine, your thorax, your shoulder girdle is fairly steady.
If you have here yoga arms, your Goma Casa arms, then they could start four slides to glide your elbows up, moving your shoulder blades on your rib wall and force slides from side to side to slide your shoulders down. Keep a ground force through your left foot, your left heel, and cross your right thigh on top length in the side of the waist to which you were going right sitting bone elongates away from your right ear lobe as you inhale to the right lung. That will take you to the right, aiming your left sitting bone a long way from your left ear lobe as you inhale to your left long. So that would be inhale to the right. Exhale, center in Hail to the left. Exhale, center lengthening the side of the waist to which you are going.
Place your right heel in line with your rights sitting bone and resume. On this side you have the lateral line, meaning the right heel to the right pelvis to the right shoulder blade. That entire lateral line is serving, um, is has an anchor through your right heel. Meanwhile, the left side of yourself is open chain because the left sitting bone doesn't have an anchor onto the ground. So in that case, there's a diagonal, a ground force, diagonal from the back of your left shoulder blade to your right heel. Now as is always the case, as fascinating as this is, it's time to move on. So bring your arms down to the carriage and both sides are open chain.
Now you can have your shins parallel to the ceiling or if it suits you, you can have your knees bent and the soles of your feet towards the ceiling. Choose the one that you prefer for that. Keep your arms on the carriage and elongate the side of the waist to which you are going. Aim your right sitting bone and your right heel a long way from your right ear lobe. Inhaling to the right lung, edit out the fringe dance now and keep this a a lateral translation. Focus on the left heel, the left sitting bone.
Inhaling to the lower lobe of the back of your left long elongating the side of the waist to which you are going. This is unrelenting abdominal work. Sometimes it's useful as someone acknowledges the fact that you are doing a lot of work. Okay, I'm acknowledging it. All right. Keep your sacrum anchored and take your arms straight up to the ceiling. Palms together, fingers interlaced, wavy, feeling a little bit like, Ooh, where is my ground force? Anchor your sacrum via the corners of your pubic bone and if you are on an unlevel surface, you could blame that.
Or if you notice a difference between sides, of course you could look for reasons in the environment or you could look for reasons in yourself. Okay. Plant the souls of your feet. Take the head cushion away and may come. Bring yourself up to sitting. So there you have it. A comprehensive exploration of lateral translation of the pelvis and the thoracic area with respect to each other, which I assure you will serve you well for proximal control of the star. Please now take your platforms away and put the boxes at the head of the carriage because at the head of the frame, because we're moving on to use the jump board next, moving on to activating the feet. Now we're going to use one, I'd suggest one red spring on. So go ahead with the red screws and come to line your side. Reach for your head cushion as you do so, so that you can have a little bit of support for your neck slide.
So both sitting bones are off the edge and then come to lie on your side with the head cushion between your ear and your upper arm who shout to a straight leg back up a little bit. So you have support for your lower leg and place your right heel. That's your ceiling heel in line with the very back of the jump board. Here you are on your side and we're going to make a dome of the foot plant the sole of your foot and draw your heel forward. This will immediately connect the sole of your foot to your deep abdominals via the mile.
Fashional continuity that as you know from your studies of Tom Myers work and Robert Lipes research, et Cetera, the entire mile fashional web connects all aspects of yourself and is the great communicator, the great highway of proprioception. Sometime this afternoon or sometime today, your foot will reach for all the way forward on the foot plate and then you could propel yourself back. It would be preferable here to keep. Don't let your toes curl, keep your toenails visible to the ceiling and make your way all the way back to the middle of the foot plate will spare you the difficulty of going all the way back into hip extension. Upon arrival or soon bend your knees slide on in and the new side of ways you may have experienced a similar exercise, the Yonda short foot exercise in supine.
I'm always impressed how much more difficult it is to do it with just one leg at a time. In sideline on the new side, flip around, both sitting bones are off the edge. Slide on in. Positioning your head cushion, push back and back your pelvis up so there's support for your underneath leg and your heel is at the back of the jump of the jump board. Now new information, lift up your ribs and lift up your waist off the carriage and use your ceiling hand to hold underneath
Lift up your ribs and lift up your waist, vaulting off the souls of your toes and gliding your heel backwards until you arrive with your heel at the level of your sitting bone. Bend your knee. Slide on,
The long loops will go around the back of your knees. Um, before you do that, check the length of your um, straps and just make sure that the cords are indeed the same length with the pads of your fingers at the corners of your pubic bone. Internally rotate. As you exhale, keep your knees touching and aim your heels down towards the springs. Point both feet. Circle your knees wide to the side and as your feet separate, your knees go wider. Knees together, feet apart.
Exhale to come down. Points your toes and circle your knees wad to the side. So we have internal rotation moving into hip extension and Dorsi flection. Keeping your sacrum in contact with the mat and opposite your naval opposite the postier spinus process of the lumbar spine. The back of your waist is on nothing.
As you exhale, the little toe side of your foot comes down into the springs. Internally rotate and I have been saying knees together, but you know they don't have to touch so long as they're aiming in the direction of each other. That is just fine. Settling the back of your ribs, the back of your lungs in contact with the carriage. Inhale to open. As you exhale, sliding your ribs in the direction of your pelvis. Now have your shins parallel to the ceiling, leaving your arms down on the carriage where they are. Bring your knees directly above your hip joints. Dorsey.
Flex your left ankle, so pull your left toes back and as your left leg opens to the side, press the back of your right thigh into the rope. Keeping that cord a key into the loop, keeping that side steady. Exhale to close the left foot points. As you inhale, Dorsey flex your right foot. The right leg opens. Stand your ground through the back of your left thigh. Exhale to close. We'll add on to this.
As your left leg opens left, turn your head, neck and eyes to the right. Turning your head mechanize to the right will provide a counterbalance, making it easier to abduct your left leg even more and come back turning your head, neck and eyes to the right so that your left ear listens to the ground below you. Your right knee opens to the side, arms straight up to the ceiling. Finally, I've got this right. Palms together, fingers interlaced. As you inhale, press your left pan to the right, turning your head, neck and eyes to the right. Exhale, come to center, standing firmly through the back of your left thigh, pressing your right hand to the left, turning your head, neck and eyes to the left. Exhale, come to center. Give some attention to your stable side. That would be the right side. In this case, the right corner of the pubic bone aims down in the direction of the carriage aim, the left corner of your pubic bone down in the direction of the carriage as your head, neck and eyes turn to the left. Now keep your head, neck and eyes steady and open your left leg as you press your left hand towards the right. You might notice, or I should say, it seems to me that when the head neck and I stay steady and do not counter balance rotation, that there's even more demand in terms of proximal control, keeping both shoulder blades and the back of your pelvis in contact with the carriage. Once more, you can accentuate that proximal control by pressing your right hand to the left opposite the opening leg. Well, do you think we could put any more detail in that? Probably, but we shouldn't take the loops off the back of your knees now and come out of this one. Okay.
That's a lot of proximal control and emphasis on the ability of your femur to abduct in the hip joint because that's a requisite part of star. Now we're going to change to focus on the arm work and for this we'll need a yellow spring. So off with the reds. Now for sideline, um, are more for shoulder abduction. You will need your head cushion again and the one yellow spring, both sitting bones are off the edge. Come to lie on your side. Now move your pelvis towards the back of the carriage so that there's room for the carriage to support your underneath leg.
Reach for the loop that's in front of you and take the long loop around your palm. If after you do a few of those, you find that you would prefer to have more resistance and greater range of motion. Feel free to move your palm into the short loop, but we will start with the long loop. Lift up your ribs and lift up your waist. Inhale to prepare. As you exhale, draw your right hand down and your both feet will tilt upwards towards the ceiling. Inhaling, fingertips sweep the ceiling or right shoulder blades starts to descent. Pull down. Inhale to come up. Exhale to lower and up giving proximal attention to the initiation.
The shoulder blades starts its descent down the rip wall. The second leg variation will be to open one leg like so. Here we go. As you inhale, open, exhale to close. Inhale, lift up your ribs and lift up your waist. Or You could exhale to slide your shoulder down towards your pelvis. The third leg variation.
Flex both feet and abduct. It could be abduct on the inhalation or abduct on the exhalation. Right shoulder blade always descends. Now we're going to make a a quarter circle of the arm so it, yeah, she
Open your leg and close twice more. Open and close and open.
Have the idea that you could lift your right long up off the table, keeping your left hand where it is. Bring your left shoulder down, left shoulder blade down in the direction of your pelvis. That's what starts the motion. No, we're going to do both. Feet are going to tilt towards the ceiling. Exhale to pull in Hale to come down. Shoulder blades starts the motion.
It's as if the little finger side of your hand, arm and shoulder blade. We're connected. What do you mean it's as if they are okay now toe stay touching. Inhale to open you one knee to the ceiling. Exhale to close our simplified version of the clamshell. That's right. Left shoulder descends.
Left knee opens to the ceiling and down once more proximal initiation. Now it's the open like the cover of a book. Abduct the whole leg to the ceiling. There you go. And close. Inhale, exhale to close. Lift up your ribs and lift up your waist, doing your best to shore up your proximal stability.
We're going pull the arm down now as select lifts and as your leg lowers, bring your hand forward to the ocean wall and a quarter circle to this ceiling. Here we go. Add up the arm as your leg lifts. That's right. Pulling your arm down there, Norris. That's right. And then as your leg lowers, bring your arm forward and around. Exhale to pull down.
Inhale to come forward and sweep to the ceiling. Exhale to pull to your side and come around. Reverse the direction of the arm. Circle forward and then back around and forward. Back, round and up.
Twice more shoulder blade descending on your rib wall. Come up from here.
And just when you're worried that we're going to start doing a program [inaudible] for pole dancing, let me just explain that the medial glide of your femur is so essential for pure abduction of the hip joint. Okay. So you aim the corners of your pubic bone to the, um, corner of the frame and you have one hand on the jump board or your forearm on the jump board. The other hand is on the corner of the box. Lower your pelvis down towards the ground and slide the carriage back with your right hand and come forward and up. Exhale to lower and sly. Inhale to come up, coaxing a little bit more.
Ease of glide into your upper adductor attachment area and encouraging the ball of the Femur to Nessel into the hip joint in its gliding position. Now back your knee, up from the edge of the box just a little bit. Glide down and back and pushing into your right hand. Turn your pelvis to the left so your naval aims to the left. You're looking over your left shoulder and then return down and back.
And then around your pelvis starts the rotation. Bending your right knee, bringing your right heel to the outer border of your right shoulder. Twice more down, back and around and in, down, back and around and in. Change now to the new side, which will require to relocate the box. And here you are on the new side.
I was so intent to get to the new side. I forgot to celebrate the wonderful feeling of differences between sides. We'll do that next. Okay. Aiming the corners of your pubic bone towards the corner of the frame. Have your knee on the box and support yourself with your hands, your arms. As you exhale, steering your front knee forward over your toes, lower your pelvis in the direction of the ground.
Now continue that lowering as you use your left hand to push the carriage back as if you could create some traction for these tissues here, elongating that area and come back there. Perhaps you notice differences between sides. Well, there always have been differences between sides. Continue this action. There always will be differences between sides and pilates. Instructors will always have work. Now as you slide back, as you lower slide back, push with your left hand for stability and rotate.
Turning your pelvis to the right, elongating the front of your right hip joint and drawing your lowest front ribs in and return retrace your path over your shoulders. She said to herself, lower your eyebrows. That's right, and turning your pelvis towards the right. That's always, always a good cue for me. Lower your eyebrows and lower your voice. Hmm. Okay. Little less anxiety would be just fine. Turning your pelvis, ribs, shoulders, head, neck and eyes. We have once more here, one more to do and then your hip joints. We'll be happy to add a up for the dismount. Use your arms to support you and drag your leg up off the box.
Drop your foot down on the ground. Appreciate the good feeling of rejuvenated hip joints and put the box back at the head of the carriage. Your hip joints are well prepared now for um, sideline foot in straps. For this, we'll use the yellow spring. We're all set. It would be useful to have your head cushion in place. You can appreciate that many of these moves, that sequence for success in the star require being in sideline and it's important to to, um, have other positions to practice as well.
That's one of the reasons why we did the standing medial hip glide movement prior to the sideline foot in strap. All right, here you are on your side or at least everybody else's there. I'm a little slow to get there, so. All right. Hey, get on over here and back your pelvis up and it's the ceiling strap that goes onto this loop that goes onto your ceiling foot. Okay. Now you've already had the loops around your knees in um, supine. So you have done a short lever motion from your hip joints. Now it's a long lever, several variations of this internally rotate at your hip joint, aiming your toes diagonally down to the ground.
As you aim your sacrum behind you, you'll sweep forward into hip flection, sustain internal rotation, and create a diagonal pattern so that your internally rotated heel aims up and back behind you. This is your flight path. Now Inhale, lift up your ribs and lift up your waist. Exhale to come down, or for that matter, exhale. Perhaps you'll notice that it's a little bit easier to sustain your trunk control or, well anyway, there are differences. Perhaps you can sustain your trunk control more readily with inhalation.
Perhaps with the exhalation. Keep your sitting bone aiming towards the foot plate. Now come to parallel to abduction. And now let's say just avoiding rope burns on your shoulder. We'll have parallel up here and down here parallel abduction
Now we have quarter circles of your leg forward. Lift up your ribs and lift your waist and come around another one of these forward. Up and around reverse. Huh? And around stand your ground with your sacrum. Avoiding Rope Burns on your cheekbone and on your shoulder.
Now I'd just like to mention that the lower leg can be activated in the abduction like the following, open your leg and then the lower leg will lift, will tilt up or go into external rotation. So here we have another variation, which is an optional one of both legs being active.
Okay, note to self. That was a mistake, Huh? Oh well. Okay. Then we're going to take the loop from the front. Now just to be different. So come to line your side [inaudible] and take the loop from the front back, your pelvis up, and let's see how this angle is different. Okay?
Your leg will be all the way forward in front of you towards the ocean. This need to move my pelvis back. Okay? Lift up your ribs in waist. Sweep your leg back with internal rotation. So we have internal rotation at the hip joint. Left toes are aiming down towards the ground and left heel is aiming up and back behind you.
It's a diagonal pathway up and back. And as you can feel, the higher your leg goes, the greater the tendency it is for your right lung to rest down on the carriage. Resist that tendency and lifted up one more of these with internal rotation. We'll come to the simple abduction. Now, not that it's easy, but it's simple. Ah, go and close.
Inhale to open X. Hell to close. Twice more open and close length in the left side of your waist and length in the right side of your waist, legs, quarter circles. Now forward, open a round to the back. This might reach up and around to the side, I should say. This might remind you of the sideline, a high kneeling side leg kick, reverse direction. Exhale to come by. Inhale up and around you see much less tendency for rope burns when you use the correct cord, which is the one in front of you. Now we will return to abduction and as you close your left leg, your right toes come up so you externally rotate your right leg.
The legs are moving in opposition.
Now I find it would be such a good idea to give you, um, reformer options so you could see how you can operate when a reformer is on the floor without legs. How do you use an a two et cetera. And what I find is that the um, jump, the foot strap is now underneath the jump forward. So I just need to free it from the Jump Board, Huh? Which I can do great. And we'll be all set for the short box mermaid. Now place the box asymmetrically so that the um, what would be the back of the box is even with the edge of the carriage that way there will be a larger overhang here, which is by design.
And when you sit on that box at sit at the back of the box, there won't be any danger of it tipping backwards. You can have your foot underneath the show, the foot strap here. And then there is an apron of box. There's enough real estate of the box on which you can place your foot. Now as you know, it's always important to credit your sources and I learned this particular version, this set up uh, from Alan Herdman. Um, please access his, his work on Palladio's anytime after you finish watching Norris's new programs, you'll be busy with us all day long, seated at the back of the box. With your foot forward, we will start with the leg in external.
Cross your arms across your torso. Now side bending your ear starts the process, ear, neck, shoulder and ribs. As you go internally rotate and you are well prepared for that and your rights sitting bone will come off the box. You are stabilized via the Dorsey flection of your right ankle and your right hip joint is in internal rotation. Now to come back, send like a corkscrew your right heel away from you externally. Rotate and bring your right sitting bone onto the box.
Here you are the, I'm a little teacup series. Inhaling side, bending, ear, neck, shoulder and ribs. Internal rotation. Ear listens to the ground as you come up, reach your right heel away externally, rotate your right leg, pull your right lung down towards your right hip joint and you will return. Inhale to prepare as you exhale. Side bending, lateral flection, internal rotation of your hip joint as you exhale right sitting bone aims down, right lung aims down and your leg goes out of the way.
Now a wide sweep of your arms just because you can side bending and bring yourself up proximally and side bending. Lots of arm variations here. We can just be added for a while, but I promise Christy, I wouldn't. Okay, now the next side awaits. Change the box to the new side and steadying the box here. Have a seat. Now you can see it's easy to sit stable on the back edge of the box and bring your left foot all the way forward.
You will be an external rotation of your left hip joint. Your right leg is an external rotation and stabilized by the box crossing your arms across your torso. A reminder to bring the volume of your ribs directly above the volume of your pelvis, so don't be on the front of the ship. Look at that. Ships could be everywhere there, but we're not on the front of them. The thoracolumbar junction is right on top of the sacrum side, bending right ear listens, ear, neck, shoulder and ribs internally, rotating your left leg right ear listens to the ground as you come up.
Draw your left shoulder down, left lung down, your left sitting bone down. Externally rotate and come to vertical anchoring your left sitting bone. Inhale to prepare. Exhale, side bending. Take the longest possible arc from the little toe side of your foot to the top of your head. The exhalation organizes your return left lung comes down, left shoulder, left sitting bone.
We'll do two more of these with the arms like they are exhale to go over.
Bring your right arm in front and the left arm above your head. Side bending way on over the longest. Reach from little toe side of your foot to little finger and bring yourself all the way up. Change now and we're on our way to more work with the jump board. So the jump board is in place.
All we need to do is put the boxes at the top of the carriage top of the frame for sideline jumps. You'll need one blue spring. Take the reds off and you can use your head cushion also. Or You could just rest your ear on your arm slides. So both sitting bones are almost off the edge. And then come to line your side
Place your right hand on the carriage or on the shoulder rest. Lift up your ribs and lift up your waist. Now we're going to take a jumps in parallel and then turned out and turned in bending your knee, checking to feel that your heel is in line and in contact with the foot bar with the foot plate. Lift up your ribs and waist. We'll take eight of these. Here we go. One, two, three, four. Suspend at the top six, seven and continue in external rotation. Aim the right Asi s forward. Suspend
Here we go. Sure. Push. Lift up your ribs and lift up your waist, keeping the right a s I s forward.
Two more that we did those medial hip glides. Change now to the new side.
Lift up your ribs and lift up your waist and steady yourself with your left hand as you like. Aiden, parallel bending your left knee. Here we go. One, and upon landing, steer your left knee forward over your third toe. Don't let it fall towards the ground.
The left side of your pelvis continues coming forward as you sustain external rotation at your hip joint. Continue in internal rotation,
Come up from here and let's take the jump boards away so you can take your foot plates off. We're done with them for now. Let's work on the organization of the shoulder blade, the shoulder girdle, and the arm. Now again in preparation for star for this, you'll need one yellow spring, so off with the blue on with the yellow and we'll need the short box in place. Now the short box is going to go over the low foot bar, so bring the foot bar all the way down and then that foot bar is going to make a platform on which you will place your box like so position the box so it's on the frame and it's supported by the foot bar and that way you will have a a box platform that's on the diagonal, a little bit of a tilt. Make sure that the corners of the box are firmly supported and come to the carriage with your arm in a bit of abduction of it, a shoulder abduction with your elbow slightly forward of your shoulder joint so that your arm is in the plane of scaption. Position your legs as you can be comfortable for your hip joints and for your knees. If you prefer to have your knees slightly closer together, that's fine as well.
Now your left hand will go on the top of your right shoulder as a reminder that the proximal initiation is that your shoulder blade descends. Actually, I suppose it would go underneath to try to reach underneath the inferior angle of your scapula. Pressing down and then pressing wide through your left collarbone as you push away, roll inward or pronate through your forearm so that your thumb pushes away and then your little finger pulls in. Here we go. Exhale to push away. Inhale to shoulder blade descends and it ab ducks. It slides down from your ear and away from your spine so that you can make more distance for your collarbone, more width across the front of your torso.
At the moment as we do this, the focus is on the proximal organization, the initiation of humeral abduction. Now we could go a little bit more slowly and increase the range of motion. Go further and come in proximal initiation and go further adjust as you like to get the best ground force because as you go further away, you need to be able still to push down and out and come in down and oh, place this hand now on the side of your ribs reminding those ribs to collect into your spine. Of course, I realize this is side bending. However, don't just hang there. Collect yourself. Last one here. Exhale to slide out. Inhale to come forth turning towards the risers. Try the other side.
Now
Exhale to slide out in Hail to return. Create a ground force with your left elbow, your left forearm broad and across your collarbone. No, hold on. Underneath your left ribs your left. That's right. Probably your left ribs push away and come back in. That's gorgeous. Norris. Push away long from your left ear lobe once more to the top of your left shoulder. Now to go further, bringing your elbow in a little bit closer so you have a greater range of motion. It starts the same scapular depression.
Slide up. Encourage the bending and come up. You encourage the side bending by, lengthening the distance from your left elbow to your left greater toe canter. And we'll take two more of these. Slide down in a way
Stay on this side. And as you slide out, lift your right knee, lift your right leg [inaudible] and come on in. We'll take three more of those. Press down out in a way. And here you have your mini star. Last two. You can keep your right knee bent.
We'll stay with short levers off your legs, not letting your left lung drop to the ground. Contain yourself there with your ribs and your waist. Come back in, turn to the risers. And we're now going to uh, go into bridging for lateral translation of the pelvis. Take the box off, put the box at the top of the frame for bridging.
We're going to need the foot bar all the way up and to red springs to red.
Lift your left foot up and put it down. Shift more to the right. Stand your ground on your left foot and lift your right leg up and put it down. Lengthen the left side of your waist. Shift your pelvis to the left. Lift your right foot up and down.
Shift more to the left and lift your left foot up and down. Come to the center. Interlace your fingers with elbow straight with your directly above your xy FOI process. Shift to the right. Anchor the right foot. Lift your left leg up and cross it over your whole right thigh and uncross it and put it down. Shift more to the right. Stay on your left foot on your right shoulder blade.
Lift your right leg up and cross it over. Level your pelvis. Anchor your right foot. Shift to the left. Push your left hand to the right. Lift your right leg up, cross it over and uncross. Plant your right foot in line with your sitting bones. Shift more to the left. Push your left hand to the right. Lift up and crossover.
Left heel in line with your sitting bone. Again, shift to the right. Press your right hand to the left. Lift your right leg crossing over and on. Cross put it down. Shift more to the right and lift your left leg up.
Cross it over and then cross last time. Inhale, lengthen the left side of the waist and shift to the left. Stand your ground. Lift your right leg up, cross it over and on. Cross plant your right foot. Shift more to the left. Push your left hand to the right. Lift your left leg up. Crossover and UNCROSS. Come to the center.
Land your pelvis, but your arms down. Here's a single leg bridge. Lift your pelvis straight up. Lift your left leg up as you push back with your right leg. Open your left leg to the side abduct. Open your left leg as you bend your right knee crossover.
Push back open and crossover. It's a parallel abduction keeping the light from your navel aiming directly at the ceiling. We have two more of these. It may be useful to remind your navel light to shine a little bit towards the left towards the right so that your pelvis doesn't turn to follow your left leg. Place your left heel in line with your left sitting bone, your right up. Lift your pelvis straight up and your right leg comes to the ceiling.
As you push back, abduct open and then cross over the midline. You could flex your foot as you abduct and point your ankle. Plantar flection, Dorsi flection and planter flection, Dorsi flection and Plantar flection. Keeping the right side of your pelvis level with the left. Last one, the light from your navel, either to the ceiling or slightly to the left. Bring your foot down. Bring your pelvis down, roll to either side, and make your way up from here. Now we're going to stand.
So for that, bring the foot bar all the way down. We'll need one blue spring for standing and position yourself inside the foot bar or outside the foot bar, depending on your model of allegro model of reformer so that your toes are even with each other. So this time it's neither hip flection nor hip extension, but just even parallel here. Place your hands that your hip joints and aim your sitting bone down in the direction of the ground. Now if you find when you are, uh, standing here that the height of the reformer carriage is cranking your hip up so that you are unleveled already and in Lumbar side bending, I'd suggest you have a little bit of a platform.
So then you know you've got the box, you're all set and Norris has his boxes. Well, we're ready for that. So hands that your hip joints aiming your left sitting bone towards your right ankle. Plant the sole of your left foot down as if you could create a strong impression into this sand at the beach with your foot. Push out and slide out.
Now keeping both, um, knees extended when the carriage slides in. You will rock the pelvis, rock your pelvis to the left and then rock your pelvis to the right so it's rocking your pelvis. Finally, our version of a nightclub act. Well maybe. Anyway, it is a rocking of the pelvis unlike the lateral translation that you did previously and you can appreciate that your pelvis is rocking over the head of your femurs, a medial hip glide and a lateral hip glide. Rocking and rocking, preparing your pelvis to be well organized for the star. No, stay out there with a level pelvis and side and hold on to your wrist. Pull towards the pulleys. Hold on to your elbow.
Reach for the risers. Hold onto both elbows, side bending with your ear, listening close to the ground. Interlace your fingers, turn the palms away from the top of your head. Reach for the pulleys. As you shift your right greater tro canter to the right, your left ear listens closer and closer and closer to the ground.
Bring yourself up right and bend your knees. Relocate now transfer to the new side. Positioning your feet so that your big toes are lined up on the same line. Parallel line to the edge of the frame. Place your hands at your pelvis, aiming your rights, sitting bone in the direction of the ground, slightly towards your left ankle bone. Push down with your right foot and slide the carriage out.
Keeping both legs straight. Now it's um, pelvic on leveling. Sure it is. Rock your pelvis to the left and then rock your pelvis to the right. Keeping both knees extended the carriage slides because your pelvis changes its position over the head of your femurs aiming your, uh, what is it? Your tailbone, your sacrum straight down in the direction of the ground. So don't let yourself be in an anterior pelvic tilt here. That would cause too much lumbar compression. All right, your pelvis is moving over the head of your femurs in this frontal, the coronal plane. Lumbar side, bending tail wagging.
Level your pelvis now and reach towards the risers. So your [inaudible] right hand holds onto your left wrist side bin towards the risers, right hand holds onto your left elbow. Both l both hands hold onto their opposite elbow. And now interlace your fingers, turning your palms away from the top of your head. Reach your hands towards the polies and slide the carriage in left greater trow.
Kantar goes, left as your right ear listens closer and closer and closer to the ground side. Bending here, finding the greatest length from your left heel of your foot to the left palm of your hand. Come up from this now and climb off from here. Uh, Danielle and Norris. You could put the boxes back where they came from now and we'll go to our, um, standing on the carriage, the downward facing dog, or actually the plank series. Um, it could be done in downward facing dog, but we'll do this as a plank. Bring the foot bar, um, up now.
So we'll bring the foot bar to regular positions and we'll have a red and a blue spring, probably in the lighter setting. Adjusting that as you like so that you don't have too much compression through your wrist joints. And we'll do this first, this downward dog, and then as the plank. So come on to the soles of your feet and the palms of your hands sliding the carriage back here. Collect your lowest front ribs up towards your spine, sitting bones up and back behind you. Keep this rhythm going and hover your right hand off the foot bar.
Replace Your right hand. Stand your central axis steady and lift your left arm slightly off the bar. Replace your left hand. Keep your central axis steady. Lift your right leg up and back behind you. Keeping Your Right Asi es towards your inner left ankle.
Bring your right leg down. Keep your pelvis steady, extra weight to your heel of your left hand and lift your left leg up, aiming your left Asi es towards your inner right ankle. Put your left leg down now press into your right hand and your left foot simultaneously. Lift your left arm and your right leg up and back. Standing your ground on the diagonal, creating a ground force through the heel of your right hand and the sole of your left foot. Change now to the new side, equal weight on all four points and then lift your left leg and your right arm, the longest distance from the little finger side of your right hand to the little toe side of your right foot. Now lighten the spring up just a little bit because we're going to go into a plank and do something similar. Test the spring out to see that you will have enough.
I'm forced to hold you there and bring your heels slightly up onto the shoulder rests as UX sales. Slide the carriage by. Stand your ground here and shift your whole central axis towards the right and shift your entire central axis towards the left. Push through your left hand and your right foot. Shift to the right. Push with your right hand in your left foot. Shift to the left.
Okay. Then shift and shift. Last two coming up and last one, come to the center. Come back in, come off of this. Now it's time to change into, um, the star version and we'll have the foot bar all the way down for this now. So bring the foot bar down and test your spring to find the spring that will be suitable to you. Um, if you are going to have your hand on the foot bar when it's all the way down and your pelvis on the carriage and your feet here.
So we're going to have a really, um, a really short lift here. Okay? So fine, just enough spring to support you, but not so much that you are, um, have too much compression in your wrist and your shoulder. So as you exhale, slide your shoulder down, plant your feet and hover your pelvis, slide back and forth just a little bit there. Okay, open your arm, take your arm above your head and bring it down. Take your arm above your head and down twice more, over and down and over and down.
Sit your pelvis down, land yourself and change to the new side. Turn around. Now if you find that on your model of reformer, the foot bar is too far from you. Of course for shoulders stability, feel free to use the frame of the care of the, the frame of the reformer, the wooden frame there. So with these spent, plant your hand as you would like it and lift your pelvis up and slide and come in. At first you keep your arm down and then as it suits you, you could take [inaudible] your arm above your head and return and above and down shoulder descends and as you practiced, once more nestles into your rips land, your pelvis and you finished with that mini star. If you're satisfied with that and you find that's exactly where to stop, then that's your star and you could continue that one as we continue with additional variations, bring the foot bar a little bit higher now.
You will have your left foot forward and your right foot back behind you. Now the position of your arm, your hand will be such that it's in line with and slightly forward of your shoulder joint. Make sure that your hand arm is not back behind you. It would be just shading towards the plaintiff's scaption pressing into the heel of your hand. Minimizing your risk compression climate board here with your feet against the shoulder rests. Hold on underneath your ribs as you test this out the side plank.
A reminder to have your collar bone wide at your arm above your head. Four sides support and down and a bar.
So for that you have the option of putting the headrest up to give you a better support for your, uh, foot. Had rest comes all the way up. Yes. Now you will have a more narrow base of support. Your right hand, slightly forward of your shoulder joint and your right foot will be nestled between the shoulder rests right on the edge of the headrest. Stack your left foot with your right foot.
We are well prepared for abduction twice more here or right shoulder descendants
I look forward to seeing you next time on [inaudible] anytime.
The Teacher's Corner: Sequencing for Success


Comments


 Your Classes Elizabeth ~ THANK YOU :)


PS: For those who don't know Joan, I hope you will.
Joan Breibart

You need to be a subscriber to post a comment.
Please Log In or Create an Account to start your free trial.
