Description
About This Video
Transcript
Read Full Transcript
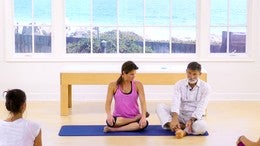
Welcome to Palladio's anytime. I'm Elizabeth Larkam so honored to be back with you for the my sixth year with Palazzos anytime and really it's a privilege to be with you, the Global Palladia community. I'm delighted to share with you my express oof workout, the one that I take with me worldwide when I travel. Um, I've really enjoyed, uh, getting the introduction to the EU with Daniel Odetta who is an Australian osteopath who created the UHF. The UHF has the most fascia friendly material and shape I have ever met. Let's begin.
You'll come onto your side with the most convex aspect of the oof on its side right underneath your armpit so that your lateral thoracic area is suspended right over the move. Now you can use a head cushion to support your neck here if you would like. Otherwise, just sink and sink and sink. Having the idea that your floor along is getting closer and closer to the ground. Roll a little forward, turn your palm down and roll back. Turning your palm up. Exhale forward. Inhale to come back.
All the wild thoracic side bending and rotation change. Now to the new side. Push yourself up, swirl the Hoover round, and here you are with your new armpits suspended right over the crease of the UHF side. Bending of your cervical spine. Exhale to lower inhale. You could side bend to the ceiling and each times sink a little further to the ground. As you roll forward in the direction of spine flection, turn your palm down as you roll back. Turn your palm up. Exhale forward.
Inhale to come back. Having the idea that you could yield or soften through the lateral aspect of your rib cage, turning it more into from a cage into a rib Ascott that's cradling your organs. Spin around. Now the narrow part of the UHF will be supporting the side of your waist, so instead of thoracic side bending, it's Lumbar side bending and rock your pelvis top sitting bone down, top sitting bone up. So it's side bending of the lumbar spine.
Maybe it's easier for you to see it here without my hand over my thigh. Now rotate so the pelvis turns navel towards the ground and then navel towards the ceiling. Rotating the pelvis in the direction of the ground and in the direction of the ceiling and the ground and the ceiling hand behind your head as your knee goes forward. Have the idea of turning your chest bone towards the ceiling so you have an oppositional rotation of the pelvis and lumbar spine versus the thoracic spine twice more here. Each time your top knee glides more heavily past your bottom knee while you're here in oppositional rotation.
Then start the rocking of your pelvis again, tailbone towards the ground, tailbone towards the ceiling, down and up, and creating a ground force with the side of your waist into the UHF. Push yourself up. Reach your top leg long and turn around to the new side. The narrow part of the move is forward and you come onto your side side, bending of the lumbar spine, tail wagging towards the ground and towards the ceiling towards the ground and ceiling. Pelvis rotates forward and the pelvis rotates back.
Inhaling, thoracic rotation upward. Exhaling down the top knee and thigh. Slide heavy on the bottom side. Rotate and resume the tail wagging the side, bending of the lumbar spine, pushing yourself up from here. Turn around again and this time we'll go from lumbar side, bending into expanding so your top leg will go back in hip extension.
Your bottom leg comes forward and hip flection. Both palms are out, palms wide and fingers spread. Exhale to come in, flection and rotation. As you inhale, you expand from center y to par.
Both are possible. Both are useful. Spread your palms wide, your fingers spread. Keep the big toe side of your foot in contact with the ground and take the longest possible distance from the sole of your foot to the opposite hand. The sole of your foot to the opposite hand. Let the back of your ribs, the back of your lungs be cradled by this resilient material of the oof. Push yourself up. Spin around now to the other side.
The [inaudible] will cradle this side of your waist. Inhaling palms wide, fingers spread. Derive your top leg back behind even as your lower front ribs are connecting towards your pelvis. The UHF will support you in rotation on the way to extension. Once again here, while you're out there, inhale, take the longest distance from the souls of your feet to the palms of your hands, collecting your lower front ribs to your pelvis.
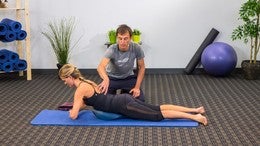
Push yourself up. Now we've been working in sideline with thoracic rotation. Now you're going to come onto your front on the UHF and you're probably thinking, oh dear, this is another channel. This is not the workout I was expecting, but just keep your focus, your concentration on the fact that the resilient material of the oof, we'll bring some, um, some softening, some yielding to the connections where the ribs meet the sternum. If you find that this is too much pressure on your sternum or on your diaphragm, then you could move down and so that your breastbone is not on the most convex aspect of the UHF. Or if the pressure of your pubic bone on the move is uncomfortable, you could move further up now rocking your hips, your torso from side to side, toes tucked under as you shift your weight to one side side bend and slide your knee towards your opposite elbow side, bending and opening the front of the hip twice more.
Now you could go right out into a hip opener from the front. Think the hip openers you would do in Yoga, but with the resilience support of the oof and shift your weight from side to side with internal rotation of the hip joint, your forehead can rest on your hands or you can press your forearms into the ground. Now bend up one knee, take a hold of your ankle with your same hand. Forearm is on the ground. Roll to your side, lifting your thigh and then internal rotation. Inhale, extension and rotation. Exhale, flection and rotation. Turn your palm the other way. Turn your palm outward so that your thumb is up.
Looking over your shoulder on down the opposite hand comes to your ankle. Dorsey flection will help to stabilize your knee and Dorsey flection of your ankle will also help to activate your abdominals. Turn your palm the other way, palm outward. So it's internal rotation at the humerus. If all is going reasonably well, your hand takes up both hands.
Take a hold of your ankle, press back with your ankle, Dorsey flection of your lower leg, and kick your thigh up and lift your chest bone. Tongue up, eyes up, and you'll have supported x horror extension or not. Now slide your knee out to the side. Take a hold of your ankle, your Shin, or your foot. Turn to look over the same shoulder. Turn to look over the opposite shoulder, coaxing your lifted knee closer and closer to the uh, steady side knee in order to coax a little bit of internal rotation at your hip joint. Now turn your palm the other way. Getting a ground force from your elbow and your hand turning your thoracic spine, your ribs, your lungs. Take a hold of the new side.
Inhale to turn. Exhale to return, turn and return, and your palm the other way. Now you'll take a hold of both ankles, shins, or feet. Rock to one side. Hover, one thigh, one knee, rock to the other side and hover. Shift, anchor and lift. Shift, anchor and lift both. Shins kicked backwards. Shoulder blades.
Slide down the light from your chest. Bone coming forward. Chin in chess, bone tongue and gaze up easy. Now let that go. Press your palms into the ground. Dorsey. Flex your feet. Lift up a little bit. Push off your toes and rock forward.
Thoracic fluxion. Inhale, depress up. Exhale to rock forward. Inhale to press up.
Come onto all fours now so that the the valley, the concave aspect of the oof will be a cradle will be a place where you can nessel your kneecap, your knee cap, your Patella in the groove of the Ooh. Now your palms are wide. Your fingers spread. Creating a long distance and axial elongation from your coxix out through the back top of your brain and hover your knee, shin, and foot off the ground. So this is turning your pelvis around the head of your supporting femur rotation of the pelvis. And the lumbar spine. Leave the opposite hand from knee on the ground and reach the other hand across.
Rotating your pelvis around the head of your femur. Bring your hand to your elbow and bring your hand to your shoulder. Change now to the new side. Your kneecap. Your Patella is cradled in the groove of the UHF and resume. Turning your pelvis around the head of your femur.
Doing your best to keep your central axis central. Don't squish out to the side of your supporting thigh. Bring your opposite hand across so you have opposite hand to knee are supporting you with the anterior Oblique slings system. Your hand to your elbow, aiming your psis up to the ceiling and your hand to the shoulder. So the material that we just finished, you were using the opposite diagonal for support.
Now we'll load the lateral line as they say in our business load the lateral line. We'll start the same. And then shifting your whole central access over to the side of the thigh you're standing on. Bring your hand across. So now you're standing on the same side, hand in the organizing your shoulder girdle. Bring your hand to your elbow, drawing your PSI s towards the ceiling. Think tail up and spine long.
If you're from neutral spine on the way to spine extension, step ball change and we're onto the new side knee in the groove of the oof. Hover your sitting bone up and back behind you. Reach your hand across. Keep Your Asi es towards the supporting knee and bring your hand to your elbow and bring your hand to your shoulder.
Now when you come to lie on your back on the move, you have many different options. I refer you to Daniels, um, workouts and discussions and introductions to the UHF that are on Palladio's anytime where you can get detailed tutorials on how best to position yourself and your client on the UHF. Um, needless to say, um, you have, as I mentioned, you have many different options. Uh, one is to have your cock six near the um, con near the tail end of the oof and then to come to lie on your back. Now there are large, medium and small, oops. And for every structure and every exercise, there's an optimal size. Oof. Many people would feel more comfortable having a head cushion underneath their head. This is my express workout and I'm fine without a head cushion, but let's just say that a, if you would prefer one, uh, by all means cushion your head so that your cervical spine is in optimal, uh, placement. Slide your legs out long. The contour of the UHF will yield a little bit with your weight even.
So it will encourage in this orientation, it will encourage spine extension. If I were to give way to that, we would have a situation and then this would be Pele's anytime. This would just be a bad anytime. Alright. So collect yourself even though you're in the environment of the Oomph, drawing pubic bone up in the direction of the xiphoid process. Sustain that abdominal control as you reach out long pressing the palms of your hands into the ground and sending the soles of your heels away from, yeah, not giving way with the abdominals and getting compression in the lumbar spine. Don't do that.
All right now stand the soles of your feet in contact with the ground, keeping your palms on the ground. One hand comes to the opposite elbow and reminds the shoulder blade that it can glide and slide on a good day on the rib wall. Change now and stand the new palm into the ground. If this is not convenient for your shoulder blade, your shoulder joint, or your wrist, then build up the floor and put a a some pads so that you have your hand at the level that's kinder for your wrist. Encouraging your shoulder blade to glide and slide on your thoracic wall.
Both palms on the ground. Now shift your weight to one side and hover your heel. Push with the right foot. Roll to the left, lift the right heel, push with the left hand roll to the right and lift the left heel so you have a movement conversation between the palm of your hand and the sole of your foot. Meanwhile, back at the abdominals, everybody is busy.
Polish the wall chains down, up, cross over, up, down, up CHRO. Don't cross change down, up. Cross over, up, down, up and palms on the ground down. Crossover down. Stand your ground with your supporting foot, sending your heel outward.
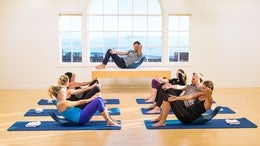
We'll give you a little bit better control over the what could otherwise be a wild ride on the access to the move. Then we'll continue with palms together. Fingers spread. Gives yourself a wide base. Yeah, maximize your basis support here. This kind of exercise is what I refer to as high novelty, low risk because it's very novel to be on the resilient surface of the oof, but it's very low risk because the resilient surface of the UHF is forgiving. It will cradle you, it will give you lots of proprioceptive feedback, and furthermore, your close to the ground so no one's gonna get hurt if you roll slightly off the side of the plant, both feet, palms behind your head. Inhaling, elbows wide to the side. As you exhale, aim your Bentel boasts towards each other. Nod your nose downward.
Press your tongue into your lower lip to activate the abdominals. Move your gaze behind the cheekbones of your face and use the ground force of your spine, your pelvis into the move to roll up and roll down with rotation. Inhaling, as you exhale, press your tongue down to the right. Move Your eyes down to the right, slide your chest bone and roll.
Press onto your foot. This will give a feedback to the foot pad. Pressure sensors. Not that I could say that quickly, but the foot pad pressure sensors of which there are primary and secondary ones. The pressures from the Ou von to all those footpad pressure sensors. Stand on the convicts aspect of the UHF now and rock forward and back when you put pressure and activate the appropriate receptive feedback from those foot pad pressure sensors.
That information is given neurologically to the most vulnerable aspects of the lumbar spine. L Four l five l five s one. You could check out Phil beaches, uh, uh, the polarities anytime workshops with Philip and beach and osteopaths from New Zealand in which he explains the importance of the feedback from the soles of the feet to the vulnerable aspects of the lumbar spine. Now you stand on one foot and you stand on the other. Translate your central axis to climb up high on your inner thigh and then come down hill in hail to climb up high x. It helps if you lift your eyebrows. As you can see, as you inhale to this lung eyebrows go up.
Now while you're here, have the idea that you could shake your shoulder girdle away from your occiput, balancing your head on your neck, shaking your shoulder girdle down the rib wall. Easy on the dismount. And as you might expect, the new side awaits really important to give, um, a different contour experience, a different experience of contour the ground. You know, I could try to fix that phrase, but it's not gonna happen. So we're gonna leave it as it is and move on. It's really important to give different surfaces to the sole of your foot, rocking forward and back preparing the foot pad pressure sensors for balance.
It's changed now to the other side, the new side. It's as if your sitting bone could push the UHF down and the oof will push back at you. You know, I've spent more time on foam rollers than I have sleeping in the last, uh, 35 years or so and my foot pad pressure sensors are very happy, uh, to have the opportunity to prepare, to stand for standing, to stand on the move. Then I do a much better job of standing on other surfaces when the foot pad pressures sensors are awake. Inhale, shift your weight laterally and climb up high on your hip joint. Exhale to come down hill.
This is a lateral translation of your entire central axis, different from a hip swing that's for some body else's channel. Now bounce on the [inaudible]. This bouncing is a little bit of, it's very slight plantar endorsee flection. It's an action of your ankles as if you could shake your shoulder girdle right out of your ears. Easy. Now on the dis mount there is a a different angle now, so your one foot will be in the groove of the UHF in the saddle of the move and the most convex aspect such that your second toe is right in the groove and you can create a Bunyon correction here if you'd like because the oof is a little, is this visible? It's not. If my head's in the way I, okay, you can create a Bunyan correction by if this big toe is near the second toe, just move the big toe aside and rotate it in the corrective way.
That's another workshop so that now you are standing well centered in the groove of the UHF. Stand your ground there and then bring your second toe forward and you shift your weight a little up and shift your weight back. Inhale to bring your whole pelvis forward and now lifting the back heel a little higher each time. And this will coax some pliability into the Plantar Fascia and come forward and up high there. Reach back and down with your toes.
Change now to the new side. Stand one foot in the groove of the UHF. Your second toe is lined up with the groove. The first toe is making its Bunyan correction there. Coaxing a little bit more length of the Plantar Fascia and then your second toes forward.
But shift your whole pelvis forward and up and back and down. Careful she said to herself and to you not to supinate on the back foot. Bring the medial Malleolus towards the big toe side of your foot. Inhale to come forward and up, bringing your back heel way up high and easy on the dismount. Now hours of entertainment. Not right now, but when you're, you know, in your home or studio with your [inaudible], you can certainly vary the angle of your foot access with respect to the oof groove.
Now we're going to finish this express with um, oof squats. So as you inhale, then both knees aim your sitting bones wide and reach your fingers down to the ends of the oof. It sounds like the ends of the earth. As you exhale, bring your hip joints forward and up and stand high on your femur heads. This time when you take the squat, aim your knees straight ahead, wipe your heel slightly to the outside and rotate your torso so that your hands come to one end of the [inaudible]. Bring your hip joints forward and rotating your, uh, your thoracic area. Have the idea that your pelvis turns away from your thoracic spine.
That will help to ensure that it stays straight ahead. You have to do a little compensatory cuing heals, wipe wide in order to activate the gluteus medius. Easy on the dismount spin. You have arounds. Climb onto the downhill slope. Climb onto the uphill mound, steer your knees wide over your third or fourth toes, sitting bones spread wide as your fingers reach towards the edges of the oof.
Exhale, bring your woe, woe, woe, woe, woe, woe. Bring your hip joints forward and up. Turn towards one side sitting bones wide, pelvis, having the idea of turning opposite the thoracic spine, and then rotate the thoracic area in the opposite direction. Rotate. Don't let your knees follow your chest bone or your lungs.
Keep them directly forward and forward and forward. Careful on the dismount. Thank you so very much for joining me. I look forward to seeing you again on Palladio's anytime. Please do checkout all the [inaudible] material on Palladio's anytime and let us know how it goes for you. Thank you so much. Bye. Bye.

Mention
 |
Elizabeth Larkam (Teacher) |
 |
Cher |
 |
Peggy B |
|
|
Sarah W |
 |
Eimear G |
|
|
Cynthia G |
 |
Genevieve F |
 |
Anne B |
|
|
Luana P |
|
|
Donna |
 |
Danielle D |
 |
Amy V |
|
|
Viera W |
|
|
Pam W |
 |
Ida H |
 |
Tahmour B |
 |
Silke L |
 |
Sue G |
|
|
Mary A |
 |
Pamela T |
|
|
Cheryl L |
 |
Nikki Naab-Levy |
 |
Beth |
|
|
Ann S |
|
|
Anita L |
|
|
Susan B |
 |
Lynn P |
Comments


You need to be a subscriber to post a comment.
Please Log In or Create an Account to start your free trial.
