Description
About This Video
Transcript
Read Full Transcript
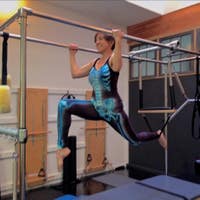
I'd like to share a reformer class for older adults with bone loss that are fairly fit and healthy. Now, these girls don't qualify as older adults, not just yet anyway. So, they're gonna demonstrate some of the exercises that would be great for building strength in the legs, especially. And really beefing up the workout a little bit to make it more of a strength training workout. I use the one repetition max concept.
So that means that, within 10 to 12 repetitions, I have to bring the muscle to fatigue. So if I'm trying to strengthen the legs, I need them to get a little bit pooped by that tenth or twelfth repetition. If they can do 15 to 20 repetitions of an exercise, it's going to be too easy to actually build bone density and it would be more focused on endurance. So, I think that a lot of times footwork on the reformer is more of an endurance exercise and a coordination exercise and a breathing exercise, which is a wonderful exercise. But I want to use it more for building strength in the legs.
So I'm going to ask that they put all the springs on the foot bar and then, depending on the type of reformer that you have, you set the springs to the heavier setting. Now, of course, you would never start with that position or with that setting in a new client, right? This would be an experienced client who has been able to progress from doing maybe three red springs or three standard springs to all the springs, to the second gear, progressing gradually. So you increase the load gradually over time. And you certainly don't get the person to really go to that high intensity level on day one.
So one of the ways that you can tell if the reformer is set too heavy, is if they can't do eight repetitions. If they can't make it to eight, it's too heavy so you need to back down a little bit. Alright? That being said, let's get started. So we have Michelle and Candice.
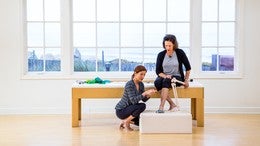
Thank you for being our demo girls. I want to have you stand exactly as you are and just notice the position of your feet. So Candice is in her preferred external rotated position. I love catching people when they're unaware. And Michelle, she knows me pretty well, she's got her feet together nicely.
She got lucky. So with the feet closer together, you're going to prevent the arch collapsing, you're going to prevent the shelf of the tibia collapsing. So if you have knee pain, the opportunity with the feet apart it allows for the arches to collapse. It also shuts off the gluteus medius. So I really want to get that active throughout this whole lesson and really facilitating those muscles within this lesson.
Alright, so with the feet together we're going to start with an inhale. (inhaling deeply) Shoulders lift, toes lift. Exhale. (exhaling) Toes are like the fringe on the carpet. So if you're vacuuming and you go over the rug that has the fringe on the edge, it comes up and then it blows back down.
And then again. Breathe in through the nose (inhaling) and then exhale through the mouth with a shhh. (slowly exhaling) That gets really good activity in the abdominals. (inhaling deeply) And down. Excellent.
So connecting those tripods of the feet to the floor and I bend and fold at the hips, keeping the torso vertical for a moment. Knees apart, feet together. So feet stay, yes, that's it. That's gonna get more activity in the gluteus medius and prevent the arch collapsing. Standing back up.
Inhale. And then again. Exhale, reach. Inhale to fold. Exhale, reach.
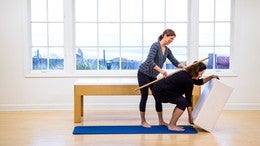
So it's just a little parallel plie to start with, inspired by Ron Fletcher's work. Alright. Now we're going to turn this into something Ron Fletcher didn't like so much was the squat. So we're gonna hinge at the hips, we're gonna have the hips hovering right above the reformer. Now notice where they're positioned on the reformers.
Standing back up again. So that was a beautiful hover, knees apart, feet together, hinging those hips back. And they're gonna hover just one inch off the reformer. And the right cheek or the outside cheek is right off the edge of the reformer. So then, when they lay down, they're going to be in the correct position.
If they were standing in the middle of the reformer, they would end up, with the mount that I'm going to do, their shoulders would be through the uprights. OK, so now inhale, hinge at the hips, hover. Excellent. And then exhale, stand. Excellent.
Inhale, fold at the hips, heart lifted, tail feathers lifted. And stand. One more time. Go ahead and sit all the way down, carefully with control. Excellent.
Sitting up tall, hands pressing against the reformer. Sitting tall, using that to engage the shoulders. That's right. Lengthen the back of the neck. Now, lift the right arm up and across.
That's it, do a little rotation. Inhale, lifting up and return. Opposite arm lifts. (inhaling) (exhaling) And again. (inhaling) (exhaling) Now laying on your side, log rolling to your back.
So you're going to stay in a neutral position. At this point right now, head rests are up. I actually prefer headrests down for as much of the workout as possible 'cause I want to encourage the correction of that forward head posture if you have it. So I'm going to bring your headrest down. And certainly, if someone has a kyphotic curve, I would keep the headrest up.
Now, the other thing I want to do is test to see how strong these are. So put your heels on the foot bar to start with. Pull the toes back, centering the heels. And I want the feet narrow because that's gonna help to get the better position of the hips and getting the musculature of the hips working a little more. If the feet are wide, you get less work through the hip muscles and less work through the quadriceps.
So I want heels on the foot bar, pull the toes back, knees slightly apart. And then I'm gonna get under here and see if she's got the neutral position of the spine. Perfect, thank you. And then, let's go ahead and press away and let's see how that feels to you. Inhale to come down, anchoring the pelvis like a tripod on the mat.
And then, what I want to feel before she actually even starts moving, is that the paraspinal muscles are relaxed. Right? She doesn't need to be gripping or creating that curve underneath the lower back. She needs to be in her neutral or optimal position with a lengthened spine. So placing the pelvis, lengthening the spine is what we want.
Now, press away. How does that weight feel? Fine. Heavier, maybe, than usual? Yeah, a little.
A little bit? OK. And then, great. Now bring your toes... She's in that externally rotated position again.
I want her in parallel. There ya go. So bringing the toes together, or her bunions together. And then try to separate those toes. And then come back in.
Alright. Stop for just a moment. And then just check in with your pelvis. I'm actually going to get the toe separators for Candice because I think she should work in that position with the toes because she has the bunions. So I'm gonna go ahead and put those in.
I did a tutorial with Candice on helping her with the toes and I would like to put those in at this point. OK, wow. Those feet look a lot better like that. Let's push this in. Yeah.
Get that little massage while you're working. Alright, so feet back together, heels centered on the foot bar, and then let's pull the toes back, and then check in with your spine. Feel your lumbar spine to see if it's relaxed. You're not pressing your back into the mat but you're also not lifting it off the mat. So it's just in this calm, relaxed state.
As soon as you press into your feet, if you've got your hand under your lower back, so, I do want you to put your hand under your lower back, and then, if it hurts your shoulder you can put your palm down, but I want you to feel that your back muscles are relaxed, you have a slight inward curve in your back. Now, I've seen Candice and Michelle before. I know what the shape of their spine is so they should have a slight inward curve. So when you press into your feet, you're gonna feel those back muscles contract and that's normal, so don't worry about that. Alright?
Breathing in, and breathe out to press away. So we're gonna have them get to at least eight repetitions. I want to make sure that they can at least get to there. And then, if they can do lots and lots more repetitions, then the springs need to be a little bit heavier in order to do muscle strengthening and bone building. Excellent.
OK, so let's go halfway out, hold there, and pulse it. We're gonna pulse and do an inhale, inhale, exhale, exhale. (inhaling) (exhaling through teeth) (inhaling) (exhaling through teeth) (inhaling) (exhaling through teeth) (inhaling) (exhaling through teeth) (inhaling) (exhaling through teeth) (inhaling) (exhaling through teeth) (inhaling) (exhaling through teeth) Last set. (inhaling) (exhaling through teeth) So they should feel a lot of work right here above the quads. Alright, now, heels wide on the bar.
All the way to the edge of the reformer foot bar. Now go out as far as you can. Opening the hips as wide as you can. Feeling that stretch of the inner thighs. Now draw in about ten percent and that's where you're gonna work.
Breathe in and breathe out to press. And return. And exhale, reach. And return. And press.
And return. And press. And return. And again, we'd usually do around eight to ten repetitions. We're gonna do a lot of variety so that you see all the different positions so we may not do all the reps today.
Good, come all the way back down. Let's go to parallel on the foot bar and feet about hip width apart this time. So, yeah, great. Toes pulling back or feet pulling back, toes relaxed for Candice. Now I want you to push out to straight legs.
Stay there for a moment. Check in with your back. Are you in the neutral pelvis position? Back muscles should be relaxed. Now, I want you to spiral your thighs inward so that you internally rotate through the hips.
So remember, Candice likes to be in that externally rotated position, so I want her to be in internal rotation. I want you to press out into my hands a little bit. Excellent. Is that feeling OK? Now, connect the pinky toe to the outside of your leg an then come down.
Yeah, that looks great Michelle. So pressing that pinky toe toward the outside of your legs. The knees will naturally come apart as you extend and then come together as you bend. So really working that internal rotation. I love to do this for people that spend a lot of time in external rotation.
I also like to do this for dancers and foot strengthening 'cause often, what people will do is they go into that sickling foot position, they'll roll out on the heels and my key for fixing that is gonna be putting my hand in between the ankles and squeeze your ankles together into my hand. There ya go. So that will get her perineal a little more active. So do that one more time. Squeeze in with your ankles.
That's right, there ya go. I know. What are you feeling? You feel the inner thighs working? Yeah.
And the outer shins, right. So it's different muscles working in the legs. It's very foreign for her, I bet. OK, stopping there. Now we're going to go to the balls of the feet.
And this is gonna be a great position to work Candice's hammertoes. So I'm gonna help her wrap those toes around. I want the metatarsals at the top of the foot bar. So, see how Michelle has her toes on there? I'd rather have the metatarsals on there and just have the toes draping over the edge like that.
That looks good. So then you're in a narrow foot position. Exactly. Now, go out to straight legs. And I'm gonna try to help Candice keep her toes relaxed.
Now if this is ever too heavy, I can decrease the spring tension for you. So you see how we're trying to get those metatarsals to wrap around? And that's what will help fix that extension deformity at the MTP joint. Beautiful. And we're gonna keep the heels lifted for right now.
You're doing just right. You don't need to do anything. But I don't want the heels to sag underneath the foot bar just yet. We're gonna do that in a moment. Keeping those heels suspended in space.
Looking good. Nice. Alright. Now, let's go out to straight legs. Sink the heels underneath.
So you're allowing those calves to stretch a little bit. You're allowing the arches to wrap around the bar a little bit. So wrapping around here, sinking those heels underneath. Now rise up on your tippy toes. And I'm going to watch to see that she maintains the contact points of the first metatarsal head and the fifth metatarsal head as she works.
You're good. Now I want you to... Do you feel like you're slipping off? No. OK, she asked me if I wanted her to move down some but if she's not slipping off, I want her to stay where she is, if possible.
Yep. Good. So you're working those calves and keeping the wrap of the toes. So what she likes to do is grip her toes into the floor when she stands up so I'm trying to reverse that pattern to have her stop doing that. Now, I want you to do it with relaxed toes.
So just let your toes be like fringe and just stay really relaxed and lengthened. Yeah. Beautiful. That looks good. I'm really getting her to work just through the calves without gripping through the toes.
Keeping the toes relaxed. Not too much pulling back. Right there. There ya go. Excellent.
Nice work. OK, now, stay there and I want you to spin your heels outward. We're gonna go into that internal rotated position again. So that's often weird for people. It is not a lot of people do internal rotation on the reformer.
Now you're gonna bend your knees. They're gonna touch together. Same thing you did before, keeping those heels apart and working through the thighs. Now, where do you feel this? So more the outer thighs, exactly.
So I love this for opening up the back of the pelvis, for piriformis syndrome, anybody that has sciatica. I think these are great movements to do 'cause it really opens up through the outside of the leg, gives a little stretch to the ileal tibial band, and really helps her to be able to control her feet while in the internal rotated position. Now, for Michelle, she's already in internal rotation. She actually needs to go here. So I'm gonna change her foot position to heels together, toes apart.
External rotation would be better for her. She needs more internal rotation. Good. So you can always just change the foot position very easily in your clients to help them focus on what they need to focus on in a group class. Wonderful.
Now, stay where you are with your feet. Just have your feet parallel so you're a little bit apart. Straighten out your legs. Push all the way out to straight legs. So not into a hyperextension position, but also not avoiding full extension.
Bend your right knee. Let your left heel sink under the foot bar. And I'm gonna watch to see if the hip just kinda drops or rotates inward. I want her to keep her knee pointed toward the ceiling so that she's really working through the outside of the hip to control the uncontrolled descent. Yeah, that looks great Candice, nice.
Now rise up on your tippy toes and change. So then I just watch as they work. Doing more of an idea of, not how many they do, but really looking at the quality of the movement. How is her foot looking? How are her toes working here?
Her toes should be relaxed with this. So I want her to stay relaxed in the toes and I might touch them to help her soften. And she's really working through the calves and up through the whole leg. Stabilized pelvis. Beautiful.
OK, coming on down. And you might not do all of these positions in one lesson, but these are just some varieties that you can think about. Alright, now we're going to bring the feet all the way together. And that kind of gets the feet underneath. (train whistles) Hi train.
(train whistles) And so that gets the feet all the way together, gets the better activity through the gluteus medius and now we're gonna see if there's a weak leg. Alright? So, both of you put your weight on your left leg first and lift your right knee to a table top position. And just holding that, and then I want... Oh, I love that.
That looks really good in your foot. So I want that foot to be relaxed but not completely just flopped. But for her, her foot tends to be tense and stiff so I actually want her to stay fairly relaxed, but also in a neutral ankle position. And then, for Michelle, if her foot is kind of floppy, I might have her put more energy into her foot 'cause she tends to be a flat foot, little bit more floppy in the feet. So, pronator.
And so I'm going to have you stay relaxed, you're gonna pull the toes back. Alright, now push away. Good. And you can get people going and then try to see, what is it that you need to focus on. So then you get the movement going and then you go, OK, Candice I want you to remember to relax your foot.
She could point her toes. That would actually be good for her. But she likes to keep energy in her feet and I might, again, have her stay relaxed and then, Michelle's going to keep those toes pulled back. And then, for another couple of reps, go ahead and point your toes. Yep.
And you could do the same. Yeah, exactly. So you can vary the position that they go into. And, of course, you're looking at this foot. You're doing a great job of keeping that ankle stability.
I'm going to feel the subtalar neutral position to make sure she's maintaining that throughout the movement. And she might be getting a little shaky now. So, she's getting a little shaky and I want that. I want her to shake. I want her to work a little bit.
Excellent. OK, stopping there. And then change sides. You could also do the little pulses, too. I like those.
Really dynamic work is great for your bones. Great for your muscles. Alright, so you're gonna flex your foot, you're gonna point, and go. I wouldn't have Candice go into the flex because that's going to just accentuate her hammertoes. So, I'll keep her either in a point or a relaxed position.
There we go. Inhale to return, exhale to press. Checking that subtalar neutral position. You can really feel how she likes to externally rotate so I'm going to have her push out into my hand. Now, if I just pushed her over, it's not teaching her anything.
So I want her to press her heel into my hand. See how that brings her knee more into internal positioning there? That looks good. Now, what do you feel in that? Right?
So she feels her glute. Yeah. I always want people to feel their glutes. The other thing is to press the back of your hamstring toward the mat. Yes, keep going, keep going.
If she doesn't go into that full hip extension, she's never going to get that glute to work. Alright? So I want her to get that hip to open up in the front. Again. Inhale, that's it.
Awesome. One more time. How you doing, Michelle? OK. Great.
Now, you could certainly do heel raises on single leg. So let's try that really quickly. Go on the other side. And then press away. Good.
Sink the heel. Lift up. Fold at the hip to come down. So drive that from your hip. Press away.
Sink the heel. Exhale lift. Inhale return. Inhale to press. Exhale sink.
Inhale lift. Exhale return. So you notice, I did different breathing patterns. You can do either one. Whatever you want the client to focus on.
And sometimes I let the client choose the breath pattern that's gonna help them the most. OK, let's show the pulsing. So we're gonna lift the heel. Come halfway down. See if you got it in ya.
Alright, so, slow pulses. Ready? And. (inhaling) (exhaling) I'm gonna help her get the pace. (inhaling) (exhaling) (inhaling) (exhaling) So I just come over here on the carriage and put them into the right pace if I need to, alright?
I'm helping her get the pace. That's it. And so then they kinda come along with me when they can. And sometimes I have to tell people, just breathe normally, we'll get the pace and then we'll do the breathing later. Good, alright.
Coming all the way down. Yes, she's getting the ahh. I love that. That makes me happy. Alright.
But as long as it's not hurting your knee. So, alright, now come onto the other side and let's do the full press out. We'll do four times, OK? So pressing out and then sink. So you press out first.
You do the heel raise. Sink. Exhale lift. Inhale return. Exhale to press.
Inhale sink. Exhale return. That's it. One more time. Exhale.
That's it. And return. Good, now go halfway out. Try to get your pace. Yes.
One breath for each movement. (inhaling) (exhaling) So it's fifty percent of the air in with each sniff, fifty percent of the air out with each blow. (inhaling) (exhaling) Last set. (inhaling) (exhaling) Coming down. Now, you can all see that I don't really care how many they're doing exactly.
I'm mostly concerned right now with form and alignment. As they get better and I don't have to worry so much about form and alignment, then I can pace it a little more quickly. I can make sure we're doing the same number of repetitions on each side. But I'm much more concerned about, with a client I'm not that familiar with, to make sure they're doing the right form and alignment. OK, from here, we're going to decrease the springs.
And we're gonna let those legs rest. And I want you to take the straps into your hands like you're sleepwalking. I'll help you find them if you... Yeah, they should be on the silver post. Now straighten your arms, reach the arms toward the ceiling, so letting the shoulders come off the table, and then slide the shoulders down.
And notice that you're just sliding your shoulders up and down as you're working. OK? Now, pulling the shoulders down and then try to pull the shoulders away from the pads. You're probably jammed up in there with the footwork that we did, and one thing that I did not mention about the footwork is that you can use pads for your shoulders. So a lot of people will need pads for their shoulders.
They also might need a yoga mat underneath them. So that keeps them from sliding up into the pads 'cause sometimes that can be uncomfortable. So that being said, we're going to pull those armpits down toward the pelvis, collar bones open, stopping there, and then taking your feet up to a tabletop position you're going to keep your toes pointed. Both of you can do point toes. That's it.
Lead with the pinky side of your hand and pull the fingertips down to the mat. And I want the inhale to come up, exhale to pull down. I want the hands in more of a cupped position so that you don't let your wrist just flop backwards. So your fingertips are touching the mat but the back of your wrist is not. Or the heel of your hand is not.
Yes, good. So when you do that, it actually connects you to the back of your armpit, which is wonderful for the lats, the teres major, and some of the back of the rotator cuff. Beautiful. Come up to the top. Open to a small V.
Same thing, lead with that pinky side of the hand and then coming up. Exhale to pull. Inhale to release upward. So we focus a lot on shoulder organization and alignment and then we would start to add in more of a challenge for the abdominals and the legs. So they're in a neutral pelvis position for right now.
Now, let's go out to a T position, a little bit of a snow angel. So this may be a problem for people that have carpal tunnel or radicular pain down the arms so I would have them do a little bit less range of motion so they don't trigger that pain. But doing this stretch is actually great for flossing the nerve, so you want to actually do a little bit of that if you have an issue with it. So we ease into that position if you have pain with it, and then stop just short of that pain, and then come down. You don't want to avoid it altogether because it will never improve.
Excellent. And, of course, if there's starting to trigger pain that's staying. Alright now, from here, see if you can keep your feet in that tabletop position, toes pointed. If you feel like you're cramping, you can certainly flex your feet. OK.
Elbows on the table. Pressing the elbows and shoulder blades down at the same time, fingertips pointed toward the ceiling, hands open. Alright, now lift the elbows just a tiny bit off the carriage and then do the same thing. So, you can do a tricep press. So we'll do four times like that.
Exhale pressing down. Inhale, take it up. Nice. That's good. One more like that.
Keeping the elbows exactly where they are, take your hands to what I call the penguin wing position. So, just like that. That actually activates the rotator cuff, getting that infraspinatus and teres minor working. And then flap your little penguin wings. It's one of my favorites for rotator cuff.
So I often think of being under a low ceiling. And then sometimes I have to see if I can encourage a little bit more. So, is that OK? Is there pain with that? OK, good.
So if there's pain with that, I would take her in just a little bit more. OK, and let's see how much range you have. Yeah. So, you can see that Michelle has a lot more range of motion and external rotation than Candice does, and the shoulder is something she's dealing with as well. OK, now let's go back to the elbows floating position and we're gonna add the legs as a challenge.
So we're gonna keep the head down to protect them from spine issues with osteoporosis. We're gonna extend the legs out and the arms at the same time. Good. Open, close the legs three times. One, two, three.
Bend the knees first, bend down the arms. Perfect. Alright, extending out. Open, close the legs. Now with the breathing.
Inhale. Good. Stretching in. Breathe in, stretching out, exhale. (exhaling) Inhale, bend the knees.
Continue the inhale and bend the arms. Exhale stretching out. Open, close the legs. You got it. That looks good.
Nice. Last one. And rest. Yeah, two, and three. And bend the knees, then bend the arms.
One more for good measure. That was good. OK, now feet on the bar. Heels a little wider than the hips. Let the straps go onto the posts.
I'm gonna add a spring. So they're on three red springs now. They were on two red springs for the previous exercise. Alright, so now feet slightly wider. We're gonna work a little on spine articulation which has been a little controversial with osteoporosis.
So we're going to lengthen the spine and then exhale, peel up just to the top of the sacrum. OK? So your sacrum is right along with those little hip bones that poke out, or the ones that you wish poked out a little bit more. And then, stay there, breathe in. Keep it there.
And then, go up to your waistband. So that's the juicy part where you get that L5, L4, L3 moving. Hold there. And then go up to just the lowest ribs. And that's where we're going to stop.
So we get a little bit of articulation through that lumbar. No big load and deflection through the thoracic. Stay there, breathe in. Breathe out, roll down to your waistband. Breathe in, stay there.
Roll down to the pelvis, top of the pelvis, top of the sacrum. Breathe in and breathe out. Roll down all the way to your pelvis. Beautiful. One more time like that.
Breathing in, breathe out. Peel the pelvis up. Lengthening before you go. And then, next breath to the waistband. Yeah, I can see the shudder happening in the abdominals so that's great.
And then, ribcage stays down, kidneys stay down, pelvis lifts. Hold that, breathe in. Breathe out, press away holding that position. We feel the opening through the front of the hips. Beautiful.
Let that open. Good. And then sometimes people aren't strong enough to go all the way out at first, so that's fine. Come back in. Breathe in.
Breathe out to press away. So the pelvis just hovers off the mat. Really getting those hips to go into extension. Getting those glutes working. Beautiful.
Keep going, two more like that. Exhale, pressing away, lengthening here. And then come back in, stop there. Come all the way to the home position. All the way back home.
Breathe in there and then full breath out as you roll all the way down, letting each vertebrae articulate, one at a time. Lovely. Bring the feet and knees together. And then just rotate your knees from side to side allowing some nice rotation through the spine, not forcing anything. Absolutely holding onto those shoulder pads if you want to.
And this time, try to rotate with your ribcage down. Keeping the ribcage down. Yeah, really great. And then back to the center. Nice.
OK, I'm taking one more spring off, going back to two red springs. I'm trying to minimize as many spring changes as possible. Hold onto the straps, press out to straight legs. So, I'm going to be kind of neurotic about how I get you into the loops. So you're going to do feet in the straps but I want you to be mindful about how you get into them.
Keeping your pelvis in neutral, bend your right knee towards your chest, place the foot into the right loop. Good. I try to get people to do this on their own so they can do classes. Now, press into that loop, keep the pelvis stable, and then lift the left leg up. So she's already using the abdominals, she's using all the principles that we've been teaching her, instead of going into what I call the diaper change position to get into the straps.
Now go to your sweet spot. And I call the sweet spot the 45 degree angle. So push out to straight legs. All the way straight. So go down just a little bit.
And look how she positions her feet. She loves that external rotation. So I'm going to put her back to parallel. And then, I love to notice these things about people's default patterns. Press down a little bit further.
Now I'm going to go down and get a coffee and I'll be right back. (laughter) That should be OK, though, right? And then, Michelle loves parallel so she doesn't like external rotation that much. She likes internal rotation or parallel. Alright, now keeping the parallel alignment, we're going to hinge at the hips and come up to the top position.
Now, I'm going to tell her when she should stop by feeling her lumbar. So right now she's pressing a lot into her lumbar. I want you to press into your tailbone more. There ya go. So the lumbar spine is gonna work here.
The lumbar paraspinals are gonna work a lot. Come to the top of the movement. As soon as the pelvis moves, that's when I know it's the end point. Alright? The hamstrings are pulling on the pelvis.
Now press down. Go all the way down until you're standing on the floor. So I want you to think of standing on the floor. Your hips are open. And Michelle, you can bring your legs down even more.
Think of the back of your hamstrings touching the mat and then Candice, that's it. That's as far... Now, when she goes down this far, her back is arching. So I'm going to bring her back up. That's your position right there.
Perfect. Yes, Michelle, that looks great. Alright, now come up. I'm going to ask Michelle to work in external rotation. You're gonna stay in parallel.
Nice. And then coming back down. So you guys all know this exercise. It's very popular. People love it.
Nobody will leave my studio until they get to do this exercise. It feels so good. And we're using it more as a hamstring lengthener. We can use it a little bit as a sciatic nerve glide, as well, by going into internal rotation. So that's gonna be a tough one for you.
But, we'll see if you can get there. Alright, now pressing down. So, neutral pelvis, most important part. And then we start to deal with the legs. So now, come down.
Now spiral the thighs inward. Now, she's already done that position in footwork and now she can do this here, keeping the neutral ankle alignment. Now, keeping the big toes together, coming up. Michelle's gonna be really good at this. She's already loving that internal rotation.
And then, pressing down. The idea is that you keep your pinky toes pulling toward the outside of your legs and you press through the ball of your big toe. And that will keep your ankles in the right alignment. And the nice thing is, if you look at your toes when you're at the top of the movement, when you can see your feet, then you can see if they're all ten in a row. Alright?
If the pinky has dropped down, then you've lost the position. So we're working more through the feet, making sure that the legs are in the right alignment, more so than the spine. So, it's a different focus of the exercise. And what I like about this is that, when she gets up to here and she's internally rotated, she may get a sciatic nerve stretch. So you could get some tingling numbness down to the foot or toes.
You would come out of it a little bit or make the range of motion smaller if that's happening. Nice work. Alright. Yeah, you feel some hips working. OK, good.
Now, go back to parallel. Now enjoy an opening stretch. And then you can do your circles here if you like. Lovely. Alright, I'm gonna put her in parallel.
Yeah, so I want you to stay in parallel the whole time as you work. It's not near as much fun for her to do it this way. So, I usually have them work in the position where I'm trying to correct something and then they can go to the preferred position for a few reps and just enjoy the stretch. So I'm giving them, like, an optional moment. So you can go in whatever position you like, Michelle.
Yeah, and then Candice, if you want to do a couple in external rotation, enjoy. Lovely. OK, now, another little variation that I like is to bend the knees into parallel position. Now, do the whole piece, the circles, with knees slightly bent. That's good.
Now, it's so irresistible to try to straighten you legs out when you push out, so just those slight knee bends going in and out. That's it. Really nice. It makes the hip muscles work really hard to maintain that position. You're not just relying on the fascial stretch.
Yeah, it's a lot more work. Takes all the fun out of it. Alright, now do a couple more with the stretch and enjoy. Nice. And you can go the opposite direction as well.
OK. My last favorite is the happy baby pose. So I want you to bend your knees, heels together, frog press, right? And then hold onto the buckles, just below these buckles here and then, maybe onto the straps here, and then pull down. Enjoy the stretch.
Not for total hip replacement, obviously, but it feels so good to the hips, opens through the pelvis. Really nice hip stretch. How's that feeling? Good. Good.
You good? Alright, feels good. Nice, and you can do a couple of frog presses. And then we step out of the loops. Good, alright.
Now go back to parallel and step out mindfully. So, bending the knees and then take one foot out. Keep the pelvis in neutral. That's why it's nice to do that stretch before you step out. (laughter) And then put this foot on the foot bar.
Keep this knee straight. That gives you some slack. And then take the strap off. Right. Good.
Come all the way down. And then, sometimes I have to help people find the loops here. Good. Alright, well done. Beautiful.
Alright, now we're going to roll to the side. Come off mindfully and have a seat. Place your hands behind you with your fingers pointed backwards. And just do a little chest stretch. Inhaling there.
(inhaling) And then exhale, return. And then inhale, stretch. And exhale, return. OK, now, I'm gonna leave the foot bar in this position and have you go into quadriped. So you're gonna put your hands on the frame one red spring on the hook and then on two knees.
And you need a knee pad, right? Michelle has a sore knee that she tweaked playing volleyball on the beach. Alright, so putting the pad under your knees and then the feet are gonna go in between the shoulder rests and then what I'm gonna focus on for Candice is really getting those toes to curl under. Yeah, like that. So she gets that stretch, making sure the bunion is in a good position and we're not encouraging a bad position, keeping the heels directly over the metatarsal heads.
Perfect. Now put your hands on the gray frame. So it seems odd to have the hands on the frame with the foot bar up, I'm sure, but what happens a lot of times with people is when I tell them to move at the hips they'll push the carriage all the way back. So, Michelle, show that for a second. So, when you're not doing it right.
So, yeah, so that is not actually what I want. I want a hip hinge. So you're gonna stay in your neutral position and then, Candice, we're gonna get you in a neutral position. I like the face right over the foot bar because that really gives you the opportunity to lift the neck away from the foot bar, shoulders down, that's it. Now shift your weight forward just a little bit so the shoulders almost touch the foot bar.
So this is gonna stay very still and then you're gonna press your legs back. So just a hinge at the hips. Nice. And this is a great preparation for knee stretches. And then press way back, way back, way back.
Yeah. And so with that red spring it's getting more and more tense so she's really having to work through the hip extensors. Yep, and then I can change it very easily by just changing it to a lighter spring, putting a blue spring on instead of red, and then they get more of an abdominal work. That's it. See, she really has to keep the idea of bungee cords from ribs to pelvis as she extends here.
And then we can go on to a yellow spring even. Let's see how she does with that. And I sometimes with stronger clients go into a no spring. Yeah, that's nice. So just maintaining that neutral position.
That looks really good. Head's not dropping. I could use the dowel on her back if I wanted to. Excellent. OK, now I'm going to go back to the red spring.
Michelle, can you change yours? Yeah. Perfect. Alright, extend your right leg back behind you. I want you to imagine that you have a glass of water on your sacrum.
Roll that right pelvis down and then push back. Excellent. And then forward. And press it back. So maintaining that position, even with one leg.
Lovely. Good. OK, then switch sides. And then other side. And then four times on that side.
Exactly. Exhale sending it back. And I'm gonna have you bring this hip down just a little bit. So if she had a glass of water on her sacrum, she could keep it balanced there. Nice.
Good. And I can pick up the pace, as well. Bring both knees down. We could go quickly. So you're pressing back.
One and in. And two. With both knees down. Two and in. So that really gets that dynamic control.
Lovely for surprising the bones. Nice. OK, now, keep your toes tucked under and then sit back on your heels and give yourself a little stretch. This also will help to stretch the metatarsals to help that great toe extend a little bit more for Candice. And then staying out of the round position.
So, again, we're assuming that she has low bone density and we don't want her to go into a round back so we're gonna let her stretch here. She can lengthen through here to stretch the low back a little bit. So you're lengthening that tailbone away but not humping up through the mid back. So keeping this connected as she lengthens here. Lovely, alright, that looks really good.
Alright, coming up to kneeling. And we're gonna turn around. We could do some hug a tree, we could do some tricep press, some salute, you know, all of that, but we're going to focus more on the back with this particular class. I'm going to shorten the straps. So she's just gonna turn around and place the straps against the headrest.
OK, come all the way to the pads. When I have new clients, I either use the box for seated position or I have them sit on their heels. So, for Candice I'm going to have her go into that tucked under position again. If that's a problem for your knees, Michelle, you're going to stay with your feet pointed. Feet pointed is going to be easier to distribute the force across the shin because you don't want her to have her weight all on her kneecap because she's painful there, right now.
Yeah, I'm gonna stay up. So is that comfortable for you? Yeah. Good. OK, now you're gonna put your feet flexed.
So I have them in different positions. Michelle pointed, Candice flexed. So every opportunity I have to stretch that toe, I wanna do it, as long as it's not getting too painful. OK? So she's gonna start with this position and I'm gonna make sure she knows what she's doing here so I'm actually gonna spring the springs pretty heavy.
They're gonna do, like a lat row here. And please don't go yet. I'm gonna be here to support her. Michelle knows the exercise so I'm sure she's gonna be fine. And then pull the elbows back and down.
That's it. I have three red springs on there. And then draw the shoulders down and back. Yes, that's it. So usually the lats are very strong.
You can do a lot of springs here and it's less about core control and more about muscle strength of the back. Alright, now come up to full kneeling. I'm gonna look at her to see, how does she do with that. 'Cause I can tell she has tight hip flexors. Which she's pretty good.
She's actually in a very nice, neutral position. Doesn't look like she's having to work very hard. I do want her to lift through here a little bit to get a little bit of a stretch to the hip flexors. Now, see if you can do the rowing, OK? So do another set of rows.
Straight back. Now, you're gonna notice that the springs are kinda short so I want you to grab here. If I need to shorten... Not on the buckle, but right here. If I need to shorten the straps some more, I can or I can have her back up a little bit.
So, yeah, this is really different because it's heavier than she's used to. So she has to really work through her back in order to maintain the position. My hand is here so in case she feels like she loses control, then I've got her. Alright, I don't want to be around the throat. I don't want to be here because I would have to bear hug her in order to keep her from falling forward.
So I put my hand right on the sternum. Yeah, and feel free to go into kneeling. Yes, that seated position is fine. That's fine. One more.
Good. So I'm really keeping openness to the collar bones, pinching the shoulder blades together as she does that. It's less about getting the elbow really far back than it is about opening through the chest. OK, stopping there. Alright, I know those are quite heavy.
I'm gonna change your springs, Michelle. You can stay seated. That's fine. I got one red spring on the hook now and we're gonna do a bicep curl. So we're gonna think of drawing the shoulders down and back, anchoring the shoulders on your back, taking your hands palm up in the loops, and then touch your forehead.
There ya go. Nice. And then come forward. Breathe in. (inhaling) Breathe out.
So I'm really cueing anchoring downward with the shoulders, openness through the collar bones as she touches her head. Right? And that looks like it's too heavy. Alright, so she's having a hard time getting to her head without compromising, so I'm going to change it to a lighter spring. I put on a blue spring.
That's more doable. There ya go. Looks good. So I'm really focused on trying to keep her shoulder girdle in the right position as she works. Stopping there.
Now we're going to go to a W position. Alright, I'm going to change the spring, Candice, to a red, 'cause this is going to be a lot easier for you. OK, so pull back. Elbows bent like a hitchhiker. Touch my fingers.
Yeah. See, now she's going up into the upper traps. So we're gonna open out through here. That's it. So I'm gonna show her what I'm doing.
How's that? So we're watching to see that your shoulders don't come up. You don't have a lot of range of motion. So that's OK. And I might have you sit down so you can really focus on your shoulders and not have to worry so much about balance.
And you can point your toes if you'd like, if you're tired of being in that position. I could also get the box for her if that didn't work for her knees. So now let's see what you've got. It's still a little heavy. That's too much tension, too.
So, I like to see that because then I know that she's either got decreased range of motion or she's a little bit weak. So let's bring it to a blue. And then, that's better. I like that. That feels better?
Mm-hmm. Then she's not overflowing to the neck. So again, you want to look for two different things. One is decreased range of motion. Two is, is the spring too heavy.
So, the easiest thing to do is start by decreasing the spring tension and then see how she does. That's good. One more time. Beautiful. That's nice.
Alright, now, we don't get a whole lot of rotation in osteoporosis work so I'm going to give you a little rotation. You're going to take the one strap. We're going to leave this one down. I'm going to take the... Red spring is good, Michelle.
OK. Red spring on Candice here. Alright? And let's take the left hand in the loop and then rotate to the left. Look over your left shoulder.
Spiraling up. Yeah, that looks good. So allowing a little bit of rotation there. Exhale, rotate. Inhale, return.
One more time, rotate and return. Good, I'll give you the other one and then, rotation on the other side. And exhale to rotate and return. Thinking of bringing that shoulder blade into your back pocket, spiraling upward as you rotate. Beautiful.
'Cause as the back of the neck lengthens up, the shoulder blade will naturally go down. And I don't want the elbow too low. I want it a little bit higher so that she can learn how to control that arm without going into the neck. Alright? So this still stays down as the elbow goes up.
Beautiful. So I'm really cueing so that I can get that shoulder blade wrapping around there. Nice. I can feel it. Yes, you feel that.
OK, so then, Michelle, take it down and around. Like that. So I'm gonna pull. Yes. So that lengthens here.
We're using the right muscles. Great, OK. Now, if you wanted to go into the thigh stretch here, I tend to teach the thigh stretch first on very heavy springs. And then, three reds, yeah. Short straps so we get a lot of help with it.
Coming all the way up. You OK with that? And then either pointed or flexed toes. Arms straight. So then, scoot back a little bit more.
You want the straps to be taut before you start. And one thing that's safer with some of the work on the kneeling position, is to wrap the toes around the edge of the carriage. So sometimes that helps with stability. But I'm gonna be here with Candice. OK.
Now, hinge back and let's see what you've got there. So it's so nice with those three springs, right? And then coming back up. And so, as they get better at it, then you would start decreasing the springs. So that's going to put more resistance to the thighs, the rectus femoris.
And again, one of my favorite exercises for patella femoral pain. So they might have a little discomfort while they are doing it and then it releases over time. One more time. Great. Alright, well done.
You guys OK on your knees still? Alright. So you're going to go into all fours, holding the frame. Knees up? Knees up against the pads.
I'm gonna cue that in just a moment to get you in a better position. I'm going to lighten the springs to one red spring. Probably one blue would be good. These are a little tighter because they're on the back gear so one blue spring for this one. Now, shift the weight so that your knees are behind your hips.
The hips move in front of your knees. Yep. And the hands are just under the shoulders. And then you're in a neutral position. Alright?
So now, what I want you to do is maintain that neutral position and then pull your knees toward your hands. Yes, exactly, without moving the spine. Alright? Perfect. Four times like that.
Exhale to pull. Inhale to release. And exhale to pull. Inhale to release. Last one.
OK, now we're going to go into... She's starting to use her upper traps a little bit so we're going to pull those lats down a little bit more and anchor here. Now do it one more time. That's better. So you really have to use those lats and triceps.
Now I'm gonna have her lift her low back up a little bit into more of a flat back. So Michelle, bring your... Yeah, perfect. Lift here a little more, Candice. So I want her to go into a slight amount of lumbar flexion and then, keeping the thoracic spine stable.
OK? Now pull the knees under the hands. Yeah, that's it. There ya go. There ya go.
That's it. Nice. So you want your thumb on top of the reformer so you don't run over it. So put it on the frame. And scoop.
So you get a tiny little scoop of the abdominals and it really works the abdominals nicely. One more time. Keeping that lift here. Beautiful. OK, sit back on your heels.
Take a little rest. And then come up to standing. And we're gonna put a red and a blue spring on the hook. Alright, good job. Now, placing your right foot just under, just in line with the edge of the carriage.
And your right foot in line with the carriage. And put your left foot on the shoulder pad. I'm gonna do Eve's lunge and some variations. So I'm gonna have you put a foot here on the shoulder pad and I'm going to really pay attention to what's happening in her foot to organize so that she doesn't accentuate her bunion, OK? Perfect.
So I don't want this position, like jammed into here. I see that a lot with that foot jamming into there. So I want this kind of in a high heel shoe position. And I also... I think this is OK but you're probably going to come away from there.
Alright, now, from here neutral spine, open collar bones. Push straight back with that left leg. Nice. And then return, coming in. So nothing moves from the pelvis to the head.
I'm going to give you a little cue here to lift up right there. A little more. Yeah, so the headlights of the pelvis are shining kind of at the baseboards of the floor. I would say, Candice, even lift more through here. That's nice.
There ya go. So the leg is like a pendulum, swinging under the pelvis. Pressing back and return. Inhale. (inhaling) That's beautiful.
OK, stopping there. Hold those legs straight. And then glide back as if you're going back into the splits. Yes, nice. And then coming forward.
So you get this really nice hamstring stretch. And we're really looking at how does she stabilize the pelvis? Is the ribcage balanced over the pelvis? Does she drop on this side? I always feel like I need to be an octopus when I teach Eve's lunge.
Nice. That looks great. Yeah, Michelle's pretty flexible so she sometimes has to hold back with her exercises. (laughter) Exactly, there ya go. That looks good.
Really keeping that connection of rib to opposite, left pelvis to right ribcage. So cueing that opposition is helpful. OK, so last one. Stopping at the top. Now bend the right knee and go back.
Now it becomes a hip flexor stretch. So I usually hold the shin steady and then keep your back leg straight and go up and down. Inhale to come up. So this shin and foot doesn't move. Just your back leg moves.
That's it. One more time. Nice. And of course you could add a fun little stretch at the end. And then lift your left arm.
Stay here. Lift it up and over. Stretch. Left waistline lifts. Beautiful.
So you get that left psoas stretch. Come back to center. Stand up. Walk around to the other side. Let's do the other side.
So you're not walking around in circles, right? OK, so lining up your foot pretty much in line with the end of the carriage and between the frame and the carriage. And then other foot is in a high heel shoe position. Not really a stiletto, but like a sensible church pump. (laughter) OK.
So I want your foot a little further in front. That looks good. And now I gotta check Candice's foot. Beautiful. Her bunion's going to be good as new by the time we...
She won't even know she had a bunion by the end of class, right? Right? And it's just all the focus of the class. If you forget about it, then it doesn't change. But if you start to think about where is my foot in every exercise it makes a difference.
Alright? So, straighten back and in. (gasp) We have dolphins. Oh! (cheering) We got blessed by the dolphins. Awesome.
So can you keep your body in the right alignment as you look at the dolphins? That's good. That's real life stuff, yeah? Awesome. Do a little rotation.
Really keeping everything in the right alignment with your pelvis as you rotate to look out. Beautiful. But that's how it is in real life, right? You don't get to think. We're doing bend and straight.
I know, the dolphins got you all excited. I love it. It's probably the only studio in the world where you can do pilates and look at dolphins. Beautiful. Now both legs straight.
Glide back. Let's do four splits there. So just really trying to go into the splits without changing your pelvis position. And your hamstring on the left is what's going to get a lot of work here. Beautiful.
That looks great. So for Candice, her cue for her body is to keep the right pelvis lifted a little bit. It tends to drop when she goes back. She's doing a really good job of organizing through the shoulders. I love it.
Alright. And then, let's bend the left knee. Keep the right leg straight. Now here's another cue that I use a lot is, back of the hand on the pelvis, lift the right thigh up above the knee. Not against the knee.
So right thigh is lifted. Now go back. So it really gives her that sense of stretch through the psoas. So that's one cue. And then the other one is to make sure she's not shifting in the tibia of the front leg.
Keeping that steady. Right. Guys, that's really the ultimate disassociation exercise. You're really making sure that the spine is stable as you're moving that hip. Great for runners, great for anybody that walks.
Any human, really. We're always focusing on that hip extension. Good, alright. Last one. And then, stretch lifting the right waistline up and over.
Oh, that looks so beautiful. It's always those photo opportunities. Oh, there you look for the camera. Love that. OK.
Now I'm going to put a balance pad under Michelle's foot and see if she can stay balanced and change the focus of this exercise a little bit. Putting the right foot against the pad. And then, Candice, I'll let you, you can do another set if you'd like. Straight leg? Uh-huh.
And then take it back and forth. So she's going to keep this leg not in a split 'cause it might slip. So you want to keep this one stable and then go back up and hold this. Stop here. Now I want you to bring this leg in and out.
There ya go. So that's the one I would do. I wouldn't do the stretchy ones with this underneath 'cause it could slip. So you want this foot to be really stable. Tibia really solid.
And then you put your fingertips on. You already got it. She knows where I'm going. And then she's gonna go into hands either forward or on her hips, balancing there. One more.
That leg is warmed up. Yep. And stopping there. Good job. So I could lighten the springs for that, too, if it's too challenging for her.
That was great, though. You did great on that. Awesome. Alright. Now what I want you to do is go and grab your boxes.
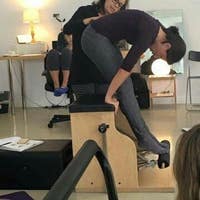
I'm going to be very mindful and you're going to be very mindful about how you pick those boxes up. We did another tutorial with Candice on how to pick up the box so we're gonna see how she does. So you're gonna place the box on and put it on as a short box now. OK, let's see how we do. (thump) Beautiful.
Coming over to the reformer. Standing here. And then, bent elbows, palms up. And then hinge at the hip joints and coming back up. And hinge at the hip joints and stand back up.
So we're doing some squats. Yeah, that's OK. We're gonna hinge at the hip joints and stand back up. And keep the box lifted a little bit higher. Shoulders down.
And hinge and stand back up. Exactly. Hinge and up. So this becomes an exercise. So at this point here, you could go into short box series, long box series, you know, any of those exercises.
Exactly. So go ahead, placing the box on the reformer. Let's do a long box. Yeah, long box. Right, that's it.
OK, so from here we're going to have the foot bar exactly in this position, OK? And then... Actually, we're gonna need it down. So we're gonna face away. We're gonna do pulling straps.
And then one red spring on the hook. And then laying on the box facing longways. Chest right over the edge of the box. And the straps will be short. Actually you don't have to put the straps in the lengthened position if you're doing...
A lot of time with pulling straps I'll have people that don't like gripping so they can really make the straps short with that and then that way they can put their hands in the loops and keep their hands open. So I make them super short so that the, if you were looking at home, you're organizing it so that the strap is just hanging barely on the floor. And that's how you would organize the straps like that. OK, so let me make sure I've got that even. OK.
And then, or you can hold onto the straps as Michelle will do, on the rubber part. OK, so you're gonna take the straps and put them across your hands like this. Yep. Just karate chop, kinda. That's it.
And with your thumb. Yep, like that. Good. And keeping your hands open, pull through the water as if you're surfing. You're gonna go out and surf with those dolphins.
And then just keeping a neutral spine. And then sweeping the hands back to your side seams. And then return. Beautiful. Last one.
Or, sorry, three more. And then come forward. Inhale. (inhaling) And exhale to pull back. (exhaling) Inhale to return.
One more time. And pull back. Stay back with your hands at your hips. Lift the chest as high as you can, extending through the thoracic spine. Return, and then reach the arms forward.
And again, pull back to your side seams. Inhaling here. Exhale to lift the chest. Inhale to lower. Exhale, return the arms.
Now, you can reverse the breathing. Inhale to prepare. Exhale to pull back to your side seams. Inhale to lift the chest. Yeah, she does better with that.
And then exhale, return the chest. And then inhale, return the arms. One more time like that. Exhale, pull back. Inhale, lift the chest.
Exhale, return the chest. And inhale, return the arms. Lower the straps to the floor. Stepping off mindfully, off the reformer. And then placing your feet together.
Yep, going out of your preferred position and into a vertical posture with the feet planted into the mat, lifting the toes. Inhale. Exhale. Place the toes down. Spread the toes apart.
Shoulders lift. Toes lift. Back to where we started. Bring your hands to your heart. Close your eyes.
Repeat in your mind. May I be happy. May I be well. May I be strong. May all my friends and family be happy, be well, and be strong.
And may all beings on our planet be happy, be well, and be strong. Returning the light to your eyes, bringing a smile to your pelvis, smile to your collar bones, and a smile to your face. Thank you for joining me. Thank you.
Beginner Reformer: +50-Minute Classes


Comments


You need to be a subscriber to post a comment.
Please Log In or Create an Account to start your free trial.
