Description
About This Video
Transcript
Read Full Transcript
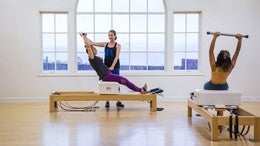
Welcome everybody. I'm Amy Taylor outbursts from the plotty center in Boulder, Colorado. And this is Jen. And we're going to do a chair class, like a 30 minute chair class, and we're gonna focus on continuation of the theme that we did and some other classes I've, I've filmed on maintaining the suppleness of the body through textural qualities, making the texture a lot more spongy. So it's absorbent instead of tough and hard. And that's all the way to the bones, the spine bones, the Shin bones, the elbow bones, all of the bones can sometimes get a little bit hard too in Pilati. So we want to keep them spongy. Okay? So we're just going to start with footwork, but then we're going to do a little more side bending twisty stuff as well.
All right, so you're gonna start with your elbows lifted. That's right. And we're on, we're on a low medium on a garage chair. You could go a low high or on a an XO or a center line could go to two or two, three, something like that. All right? So we go inhale and exhale. And after, as you start now, Jen, just kind of move your toes back a little farther. Right? So you want to be on the balls of the foot, you want to be on the long bones and have 10 free toes.
Pilates Stance
Right? Cause otherwise you're holding tension and instead we want open energy. That's right. Good. And then you're going to stand on your fifth metatarsal a little more than you're used to because everybody likes to stand on their big toe a little too much. Right? So come back up for a sec and then just put more weight even if it doesn't touch because everybody's foot pedals different. But try to stay on your fifth metatarsal. Yeah, lift all 10 toes a little bit. So you know you're pushing through, you got it right. And even here, you don't really want to put pressure on that. You want to put pressure on that.That's the way, right? And then we could have also a sense of the fibula being a little lights, a little toe, not there yet. Stay out there. Right. And that doesn't necessarily mean your knees have to go wide, but it might feel like they do because that's actually happening in the foot. Yes, good job. So you have a little bit more of the soles of the feet together versus the inner arch together.
Then let's go bird on a perch and even here you might just have a little more weight on the fifth metatarsal again and inhale and exhale, and you have a sense of kind of width through the fibulas and even lift through the allness so that the arms have a float in them. You got it. Inhale and exhale, and I don't mind, especially for some women if you need to, to go a little bit wider because we do tend to be wider in the hips, sometimes knees together as a little much for some people. And then inhale, exhale, inhale, exhale. One more time, and then we'll come to the heels. And as you start getting into your body, you start feeling like that you're pushing the feet away from your lungs, right?
Arches
And you're doing it as much with your feet as possible as opposed to say your quads, right? So your feet do it so that we don't lock anything in between your feet and your lungs or in between your hands in your lungs or in between your hands and feet and your brain. So the whole thing is open. That's right. Inhale and even on the up movement, you're in charge versus the spring. And then we'll go back down and we'll get onto the balls of the feet and we'll keep the pedal still, but a little levitated and lower and lift the heels and you can go parallel on this one. That's right. And lift the heel. So you're keeping the spring down with the ball of your foot pressure, right. And your lift all 10 toes, just a little so that you're using your feet and you're really articulating.
Heels
And the same feeling again that we want to be just a little more on the little toe. So the foot glides right under the Shin and not up the inner. So much are not on the inner, it'll actually feel like up the in are more.
Tendon Stretch
You can come a little narrower knees. Yeah, out go. But you're still using that fifth metatarsal side, right? You're not just using it, but you're also using it. Good job. K stay pointed and just do some pumps like eight palm straight. Lift your toes a little bit so that you don't slide forward and then have to grip to keep from sliding forward. Right? Yeah. So the ball of the foot is really doing the push and then the whole body absorbs the force the whole way you got it.
Toes Parallel
And then last one and then come up and then just release your spring and slide your feet off and step off. And let's turn and go the other way and we'll do foot. Ankle. Okay. So you're going to come up to your wood pretty close. Exactly. One foot on the pedal. And then even as you go to push the pedal down, push it with your foot, push it with the ball of your foot as opposed to your quad. Okay. Hands come to the chair. Knee comes to the front, kneecap just off, right? And then you lower and lift.
Achilles Stretch
And even here we're feeling a little bit of a lift through the outer side. So we're not locked in the knee so much. We're standing in the musculature. Sometimes I just say use the red, not the white. Right? So you're not using your tendons and ligaments so much. You're using your meat to support and move your bones around without any tension. And when you come to the top, don't fall into the hang here, stay in the contraction of your foot, stay in the hip, good job. And then we'll switch fee. Good. Right? So you don't kind of release and hang in the white, you always stay in the contract dial. Nice red, juicy stuff where pumping is happening. Yeah.Good job. Better on this foot. Yeah. And then the fifth metatarsal works as much, and maybe you emphasize it just a little bit. For a little while because we don't like to use it. Yes. And it's one of our kind of flying buttresses as well, like on a Gothic cathedral that help maintain the upness of the structure with less effort. They're already like built in and last one, good job. And then place that foot down and then just step back a little bit, like six inches and we'll do standing push down. All right, so you take a nice circle and you curl your spine forward.
You place your hands on your pedal and then you push and I, here's the rub, right? You're trying to not push with your back and then roll back up. You're trying to push with your hands from your feet, right? So you really start to feel that you're doing a little less tensing and hardening here. Stay right here for a second, Jen. Tiny swan out like the littlest bit. That's right. Okay, so you're not hardening and then you flex the front of you versus harden the back of you much better. Yes.
Push Down
You can even pull your shoulders onto your body a little bit and not stretch through that. Just bend, just bend much better last time. Just stay down with your bent muscles and bend and straighten your elbows. You're not holding your spine in your back. You're holding your abdominals to keep your spine flexed, good jobs so you can still breathe because you haven't tightened your back up. And then when you come up, it's really easy to try to pull your shoulder blades apart, but just bend your spine back up. And when you go to come off, use your abs and not your back so much. Anyway. Right?Your back has to work, but all right, let's go honest front standing, pumping. All right, so you're going to press down, right? Get down and figure out where your foot really needs to be. Because otherwise, sometimes we're not where we want. Lift the heel up very, very high, but still lift all 10 toes a little bit, right? So you're not leaning on your toes, you're standing up in your gut and then you push with the ball of the foot and up. And if you push with the ball of the foot instead of the quad, maybe we start getting an up, maybe a little higher heel.
Single Leg Press
So you push down like you were doing foot ankle to do it. Exactly. Sometimes they think they're just these certain key movements. The foot ankle point is in almost every exercise in a way. Kind of similarly to how chest expansion is in kind of every exercise. Exactly. And then one more push, beautiful job.And then pick the leg up and switch so that it's a movement and not a position that we hold and then use it to pump. Right. So it's like you're doing foot ankle the whole time. A, B, a common you foot ankle. Nice. So you absorb the work in your feet. You don't necessarily, you know, grip and pump your quad, but your quad is working, doing what the foot requires it to do. Yes. And your back is floating like a piece of seaweed.
It might look still, but it isn't held. It's movable and you can breathe and then last one and then come on up and place your foot down. Nice job. Okay. Let's say we're going to stop for a second and we're going to change our springs and our setup a little. Okay? Okay, so we're going to do the up and down now and I up the springs a little bit cause I don't want her to overwork. If you had used heavier springs on some of the earlier stuff, you could stay on the same springs. Okay? So let's step down with the right foot. And again, your Kinda foot, ankle it down so you're stepped onto your foot. All right, you got it.
And then left foot comes to here. Beautiful. And then let's go here, right? That same lift of the onus a little bit and a little sense of weight on the fifth metatarsal and lightness in the fibula. Good job. Okay. And then you're going to curl for a little bit more. There you go. And you rise up.
Going Up Front
You want to go right up in the line of the back leg and go back down again, right? So you're going to stay kind of in this diagonal forward a little bit. That's the one, Jen. Nice job. So you don't have to tighten your back. Okay, let your arms come down a little bit in curl. Just a little. That's the one. There we go. Got It. Good job. Inhaling and exhaling. Now the next one, we're going to go inhale.We're going to come halfway down, curl a little bit more and pump the back leg. Find a little more curl, little more. That's right. And here again, we're pushing with the foot like you are a cheetah and you were taken off. Yes. Good job. And then press down and we'll switch feet. Right? So the goal is that we have so much strength in the hands and feet, so much kind of motor cortex energy to the hands and feet that everything in between says a little more softball. So if you had to run 75 miles an hour, you could cause nothing would block you. All right?
Mountain Climber
So we're gonna press down the foot does it. You step up onto your other foot and you use only the muscles that the movement requires versus you predetermine everything you're supposed to use. And then you will slow yourself down quite a bit. And make it way less efficient. So you kind of want the movement to trigger the muscles, the spraying and the forces that are at work to trigger the muscles.
Going Up Front
That's right. So you can rise and lower and stay quite flexible. And then we'll come halfway down, little bit of a curl and pump your back leg. A little tail under more. Yes. Oh, better job. Right? Find your power source to push for your foot.
Mountain Climber
Yes. And then you can go on down. Nice job. So that it would be a kind of direct connect from the soles of the feet to the so as to the ABS, to the hands to the brain. Right? So that we wouldn't have like I've got to hold my back, I've got to hold my hip, I have to hold my knee. We just have, I've got feet and I've got brains and I've got hands and I've got brains and everything in between is open for communication and movement. Right? So let's actually go right into upside down. Push up here and see if you can feel the same idea.So you're gonna press on down and you have a little prayer foot, the same ideas that standing on your fifth metatarsal a little bit more toes are movable because they're for balance. And then you maybe even soften your calves a little bit and lift your arches a bit more. So you put your weight forward in your foot over there where I ate. So the weight is here, it's not back here. That's the one. Relax your neck a little bit. Yep.
Pull Up
And you do have to get your feet where you want them, but you don't want to so much lift your calves right as you want to lift your arches. Oh Nice Jen. Good job. Right. Soon as the calves get too tight, then the spine starts to tighten. You just want to feel like the spine rolls this way and rolls back that way. Now see if you can give up just a tiny bit of this, put this on your hands and then put the weight on your hands and stay on your hands. Nice job.So I always am just looking for places that look harder than they need to be. So that we can keep a nice flexible spine. Beautiful job. Last one. Big Inhale and exhale. Beautiful. Okay, step up. Now we're going to go into a little twisting. We can stay just like this. So you're going to come and face this way. All right, we'll do, um, we call it the snake. I think. I think we may have made it up.
I'm not sure. But you're gonna put your left foot and press down and bringing a little closer to you and we're still on that same spring. Press on down. Okay. Then you're gonna put your hands right here and you're going to cross this foot over. Okay. And then you don't have to tense or anything. You're going to bring this shoulder down, right? So the shoulders stay square to the front of the chair. Hip Stay Square.
So you gotta to lift this up just a little bit. Okay. And then you're going to do side up and down. And our goal is kind of that your spine feels like a slinky. Like when you move your slinky from hand to hand, as long as you've got a hand there, two hands, two feet, you can do, that's it. You can do a free or spine movement.
Side Pull Up
Okay, good job and come down and gently step off. And this one is really nice for scoliosis. Um, and the two sides can be quite different from one another. So go ahead around. Okay. I said crossover. Press down and then take your hands to their head. Is relaxed. Spine is relaxed. Like how could we just take tension out of our spine first? Put all your weight in your hands and feet and then use your abs to move because nobody is so tight that your abdominals can't contract so hard as it is you're trying to square off, which makes you have to twist, right?And then you try to pull that underneath side up a little man. Margo, Jen. Yes. Nice. And then last one. All right. And then gently down. Good. Good, good. Cool. Okay, so we're gonna take your spring back down and we're gonna go into twist on hip. Okay. So we're going to take it down to maybe a two and a single spring. Okay, come around over here. Let's lie on your right hip first. So you'll face me.
All right? And then you're going to take two hands to the pedal. Yes. And then these feet are straight out. So we're trying to get, and I'll help hold gel a little bit right now. Lift your upper body up a little bit. Is there not enough spring? Maybe I didn't give you enough spring. Okay, let's give you a little more more. Every chair is a little different, right? So just a little more. A lot more.
Okay. Okay, so we're going up to a three. Okay. And we'll try it again. I want my elbows to stay straight. Well, I don't mind so much about elbows. It's not a thing for me. But lift your belly up so your spine is lifted a little.
That's where you want to be, right? So you're organized and held right here, and then you're going to bend and straighten your elbows and go on the heel of your hand. That's right. And every chair is a little different too. You're trying to be perpendicular. Right. And we also would like the legs up a little higher, but you're not falling with your upper body, your twisting, beautiful twisting and the weight is on your hands versus your back. Right. So that when you push, you get an auto abdominal knit and then last one good. And then go ahead and come up. Nice Woo.
Side Body Twist
And then the other sides we're focusing just a little bit on the twisty stuff so you can feel it.
So they aren't hanging off you. Beautiful. There we go. Jen. I could tell because she took her weight right off of my hands. Nice job. There you go. Inhale and exhale. And one of the reasons, right, that we don't want tension in the spine other than we don't want attention in the spine so we can breathe. Beautiful. Nice job. And then last one and come up. You got it.
So you're going to have, go ahead and shins down, right? You're gonna put your right hand on the side and then we're going to take the left arm up. So kneeling, mermaid, kneeling side bend, have a little bit of a curl so you're not arching and then fingers face forward. Okay. You side bend, but you push the spring with your hand and you come back, got maybe move your hand back. One half a degree. That's it. Okay. Ribs in. Yeah. And then side bend and your hand does the push.
Kneeling Mermaid
So your spine is free to bend and you come back up. That's right and free to breathe. So you can inhale and exhale and you could have that little sense of Kinda light flying buttresses so that you're not locking down. And then last time you going on over and then we're going to bend and straighten three times and straighten and straighten and push and then you come up. But don't lock your arm to come up. Yeah. Nice job.And we'll go the other direction. So every time, and because it's so often women that we're working with, you know our tendency is if I locked this joint, I feel more powerful. Right? But then we're not actually building much muscle strength or suppleness where she kind of building in this hard tenseness. So you know, so make the springs doable for you instead. And then you side bend and push and it's like your body weight pushes so you don't have to stretch your arm quite so much. Yeah, keep it kind of bend. Don't push your shoulder away from you. Yeah. Bend your spine instead. Right.
So we might have a tendency to kind of shove here. Oh much better. Right. So you don't change the length of your body or your joints or anything. You just bend your spine and it all goes together and it all comes back. And then last time we'll add our pumps and you stay over with muscles that hold your spine so that your shoulder is free and even your spine is free cause use in muscles and not joints. Nice job. Very nice job.
And then we'll come back up. Even there he kinda stretched away. Did you feel it? A little bit. And we also often have one shoulder that does it more like, well we'll, we'll start to come up and we'll sort of pull off the hand instead of actually just rise with the hand keeping. Yeah. And bend the spine. You got it. Exactly. Okay. We're going to stay on this spring and we're going to do one that kind of isn't done that often. All right. Asymmetrical. We can do it just like here.
So you're gonna come up and you're going to lie on your belly facing that way you're going to be like lower ribs off the front edge and some of that is a height issue. You might have to come back a little bit for Jen. Also your chair. So you're going to put the heel of your hand. They're exactly fingers point forward. Right hand technically goes out here. Right. And again, we're not so much holding it here as we're holding it here a little bit.
And here if that's too hard, then I just put that hand right on the front of the chair. Okay. And then you just press and straighten. And your task is, how do I find that crazy heart for some of us that I'm not going to twist to do it. I'm going to come from my feet through my soul has to my hands. Yeah. Good job. And lift your legs just a little bit. Nice. Jen can see how it wants to pull you. Excellent. And then come off. Right. So how do we get the force, you know, if you were a cheetah and you pushed off these two feet to land on these two feet, how do we get the forest to go right through us to those instead of do something, whatever else it might want to do. Okay.
Single Arm Press
So let's come to the other side. All right. It's gonna lie in your belly. Yeah. And every chair is different. You might scoot towards your hand a little bit just because of the chairs. Also go out on a diagonal quite a bit, but that's very, very nice. Okay. Even this arm is not a hard thing. It's like a bird wing. Yeah, there you go.
And you will find one side very different from the other on this one. Good. Shahab and how do you get it to go through, even though it's your right arm through the center of your body? No. Okay. And we have a stronger back. So you might even just a little more, lift that leg up. Yes.
The elbows are actually bent and we have that lifted. Own us. What I've just been saying lately, cause we like to drop that, but actually it's up like you were, you know, playing the saxophone or you were dancing. So I'm going to be like this, right? So it's up. And also it's a little more like bird wings. It's like light here so you could put weight in your hand instead of in your arm. Okay. So that as you press down the spine would go up and over a little bit and come back up. And in Hale and some of these you could play with the breathing a little bit.
Spine Stretch Forward
It can be kind of Nice to exhale into this one if it doesn't make you just tighten or bear down. But sometimes you actually want to feel like my abs. Actually contract it very nicely. So the spine was free cause the ABS, did it go Jen job. Right. And this stays quite light.
So the spine is what goes down. Exactly. And let them come up with you.
Turn and face the other women to take the spring up one notch and we're going to do seated tricep press. Okay. So yes, switch back a little bit. You'll be pretty close to your chair. Fingers face forward. Okay. Same idea. You could have flex fleet feet are pointed feet and I might've gotten you one degree too close to scooch out. Yeah, cause when you go back, when you lift the pedal, you want to feel like your elbows can really bend. Nice. And then you press and you inhale and you exhale.
Chest Expansion
Good. Inhale and exhale. And how do you put yes, the work so much into your hands that the shoulders free to glide, the elbow is free to glide. You're not putting tension in your spine, your lungs, your ribs, they're free to expand and be moved. Exhale, one more. Inhale, exhale. And we all need that one. That one is really a good one. Okay, now carefully. Yeah, you gotta be careful when you come out of that one and then we're going to go into one that isn't done very often. We call it leg press on hip.Lowest Spring. You got right. If you're on a nice hard floor, then you want to have maybe something for under your hip. So we're going to face that way first. You're going to put this where your hips going to go. Your top foot is going to go. Prayer foot around this. So in other words, you're on the sole of your foot, right? Versus like the inner edge.
You will have to figure out like where the heck actually I'll still sit on your chairs so it doesn't go sliding. Okay. This leg has three choices, right? So you get out until that straight, but you're on the sole of your foot. Like this was a hand and you were holding something. Right. This leg can be straight in front of you. It could be 90 degrees right there or it could be behind the chair.
Side Leg Press
Then you exhale and then you inhale and you ax, hey, and you inhale, let the foot do that piece so you don't grip that. Let the foot do it. Nice job and out. And then you don't even so much as shorten as you side bend and then you come back up and we'll just do one more. Then yeah, you get to give yourself a nice little release and then carefully up. And don't be surprised if their feet slip off sometimes. I got it. Okay, let's go to the other side. How was that? Spring was a too light.Yeah, the leg back is a little stabilizing. Yeah, so I've seen pictures of Joe doing it every which way, but we were kind of taught this one to begin with. Okay, so you got a third to start down so you know where you are relative to it. You find the sole of your foot, which is actually quite challenging for most of us. We've all sprained ankles and whatnot, so this is kind of congested in here.
Boy is good for that and good for finding your arch, your interline to your so asked to your diaphragm. So then you lift the pedal that stretches you. Then you inhale and you exhale and you use your foot. Your foot does a nice Jenn, right? Exhale and then don't even do the extra bearing down.
Just do the foot far enough and then release and side bend the other way and then pull it together and then release inside bend, big opening and then exit. That was a little bare down right. Again, try one more. Make the foot, do it. The foot tells you what to do and then you can release out of it. You got it. Nice job. Nice. Nice, Nice. Nice. Okay. Let's do kneeling. Head press. All right. We're going to stay on a light springs.
You're going to put your knees right there. We're going to stay on one low. Okay. That's mostly because there is fear around the neck, but honestly, if you can put your weight on your legs and on the top of your head and channel it through instead of grip, hold, resist. It actually feels awesome. Okay. You tell me, so you're going to put your hands, I think you might be good, but your hands on the pedal. Press it down. You're going to come to a little head stand like crab. Yeah. I'm going to just move the chair slightly so you're not too crunched.
You put some good pressure here, right? So you're not really kneeling on your kneecaps. You're really pressing with your shins. You move your hands to the floor. We have a light spring on it and that channel it through you, that slinky feeling, right? So your head has control and then you pick the head up and that don't come too high. And then press down against a forward right here.
Kneeling Head Press
So you're over your head and just pick it up and then put it down. And you can probably stay forward just a little more. That's it up. We go forward into it ads, better den so that it stays here in your abs. Yes, the spine remains free in the abdominals. Do the contraction and then last one. And when you go to the floor, this time you put your hands back on the pedal. You pick your head up, lift your spring. Not for everybody, but it actually surprisingly feels really good for most people. So all right, and then we're going to come up and we'll finish with kneeling cat. Okay, so we'll push this back just a little and we're going to go a low low.So they have a little extra spring than you might even be used to so that you could release tension in your spine. And not fear it. And let's just, you know what? I'm going to give you a little more, cause these springs are a little different. Okay. So she's kneeling here. Same kneeling we just did so that you're always on your Shin Bone, right? With a wide calf versus you're on your knee or even your quad too much. Okay, maybe scoot back. An inch does. So she's got a little more clearance. Okay. So you can take your arms up. You Bend your spine, your spine is flexible, you just roll it right down.
You put your hands on your pedal and then you feel like you don't have to push it with your back. You push with your hands nice. And you come back up and your spine just like a slinky. Your ears end up between your elbows and then you curl back up and your head goes through the window of your arms. Very nice job. And your head tries to stay through the window via abdominal contraction that flexes your spine, your spine flexed by abdominals. Go down one last time and stay down and do some bend and straightens cause you gotta pull them more weight back here. Right.
Kneeling Push Down
Take your elbows wide behind your head. Yes. Keep your head way forward. That's the one, right? So the forest comes from back there like we did in backstroke and swan. So good. So good than last time. Stay straight. Stay curled. Use your abs. Don't stretch your arms or anything.Just roll back up again. All the way up. All the way. So good job and finish. Nice job.
Comments


You need to be a subscriber to post a comment.
Please Log In or Create an Account to start your free trial.
