Description
About This Video
Transcript
Read Full Transcript
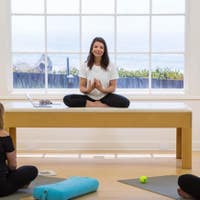
Hi, my name is Georgia and this is class one in a six part series for c-section and traumatic birth recovery. This class is called acceptance after birth. A lot of things change in your body and this next series of exercises is meant to give you a little bit of empowerment over your body. If anything feels uncomfortable or causes pain, please stop right away. These exercises should feel good in your body.
So let's start with a breathing exercise. Let's lie down flat on our backs. Anytime you're going from sitting to laying down, be sure to lie down onto your side first and then move your way down slowly before rolling flat onto your back. Okay, so I have a pillow supporting my head and neck and a bolster supporting my needs. My feet are resting gently on my bed. From here, I'm gonna place my hands spread wide rate to the base of my rib cage and down to the top of my hipbone and just let my hands rest gently on top of my abdominals.
The goal of this is not to tighten our abdominals, but to bring awareness. Putting extra pressure into this space too soon can cause damage and be quite painful. So let's start with a nice long, full three-dimensional breath into your hands. And as you exhale, just release completely. Allow your legs to settle into a comfortable position.
As you breathe in, feel your hands expanding gently, nice and low. And as you exhale, just feel the weight of your fingertips resting on your abdomen. Take a nice long full breath in, expand. And as you exhale, relax. So we don't want to tighten our transverse abdominis yet, but we do want to bring some awareness. And for me it always helps to bring in a color.
So visualizing the space right from your hip to hit up the sides of your body. And right to the base of the rib cage, I want you to imagine a rectangle and you choose what colors suits you best with your hands resting on the rectangle. Take a nice long full breath in. And as you exhale, just visualize this rectangle lighting up. We're not gonna tighten anything or contract. We just want to visualize and bring some awareness into the transverse abdominis.
We take a long three dimensional breath in like a balloon, and as we exhale, visualizing this rectangle lighting up. Let's try that one more time. Big Breath in. Okay, and as you exhale, visualize that colored rectangle lighting up. Good. From there I make sure your shoulders feel wide. Your hips are released in your legs are supported by your bolster.
We're going to take our arms straight out to the sides in a t position. Bend at your elbows so that your fingertips are pointing straight up to the ceiling from here. As you take that long three-dimensional breath in, let your fingertips drop backwards towards your ears and as you exhale, the arms rotate back up and then your fingertips point all the way down towards your toes. Again. Inhale, big expansion as your fingers glide all the way back towards your ears. And as you exhale, rotate your arm bones all the way back down towards your toes. Inhale, rotating all the way back.
Just remember to keep your elbows supported by the bed and then exhale. Feel that rectangle lighting up as you rotate and fingertips point towards your toes from here and let your fingertips point up to the ceilings and then reach your arms straight up to the sky. As you take that next breath in your arms arc all the way back as far as feels comfortable and you don't want to feel any tugging or pulling on your incision here. As you exhale, let the arms sweep out to the sides and then down towards your hips. Inhale, three dimensional breath as your arms are up. And again, let your incision be the guide to tell you how far back your arms should go.
Exhaling as your arms sweep all the way down towards your toes. Inhale up and back. Exhale, sweeping the arms out to the sides and down to the toes. Let's do one more big arm arc up and back.
Perfect. From there, I want to start to move the rib cage around just a little bit, so keep yourself in a really comfortable position. And we're going to start just by allowing the breastbone to lift gently. And then as you exhale, just let your breastbone sink down towards the back of your ribcage. Inhale, almost like your heart could lift up underneath your sternum and then down it sinks all the way to the back of the rib cage. Inhale, heart lifts. Exhale, releasing down, and then one more big lift. And I'm not lifting my rib cage up off of the bed.
Just mobilizing gently and then releasing completely. We're going to do the same small movement side to side. So I'm going to go inhale, let my ribs move over to the right a little bit, and then exhale back to the center. And then to the left as they take that big three dimensional breath in. Exhale back to the center. Inhale to the right, exhale to the center, and again, releasing into the center.
Inhale to the left, and then exhale falling back to the center. All right, if it feels good and comfortable, let's try all four points. So as you inhale, lift your sternum up, fill your heart, lifting up to the breastbone, go to the left with your rib cage, and then sink down towards the center. Inhale over to the right and XL down to the last fans center. Big Circle around to the right and up and left and down. And then one more. This direction right up, left down. Let's switch directions.
I'm going to start going over to the left with my rib gauge in inhaling as I lift the sternum up towards the ceiling. Then moving the ribs over to the right and down. Inhale to the left, then ribs go up over to the right ribs, fall down, center, circling over to the left and up and right and down. And then one more circle left and up. All right and down.
Soften into the bed. Check in through the hips and shoulders. Make sure you're still in a comfortable position. Good. From here, let's take a moment and roll onto one side. So bringing your bottom arm under your head for support.
We're going to fold our knees on top of each other and we want to make sure that our hips are stacked one on top of the other. All right, let's take our top arm up to the ceiling and reach up to the fingertips. All right, now that your shoulders and hips are stacked, we're going to take a long breath in to allow the arm to drop behind us and then as you exhale, gently swing or sway the arm all the way forward. Inhale up and back trying to keep your hips in a stable position and an exhale. Oh, all the way forward. Inhale, you can follow your fingertips with your eyes and then all the way forward, and then one more time in the hail up and back. Remember, only go to the point that you don't feel tugging in your incision. You shouldn't feel any pain in this position that come back to the center.
Place your top hand on top of your top hip, and then just gently push your top hip away. A little from here, we're gonna think about this top leg. My top knee is going to reach forward as my top hip reaches forward, and then I'm going to pull it backwards. Let's use that nice long inhale to move the knee and the hip gently forward and then the exhale to bring it back. Inhale forward and then exhale back on.
One more. Inhale, reach through the knee and through the top hit and then gently bring it back to the center. Now we feel nice and square and level through our hips. Let's keep this position and keep our top foot on top of the bottom foot. We'll do a couple of clamshells in this position. All right, so take a nice long three dimensional breath in and as you exhale, the feet stay together and your top knee lifts a little and then just gently bring that down. Exhale, let it lift. We should be feeling a little bit of work through the top, bottom here, and then inhale, release, exhale and gently lifting. Feel the bum work and then down.
Exhale to lift and then inhale the lower. Let's do one more on this side and live, and it's really normal to feel work on the top side as well as the bottom side. Bring it all the way down. Okay, so from here we're going to lie back onto our back and we're going to transition gently onto the other side. Use your bottom hand as a pillow, and then stack the knees back up. We're going to take our arm up to the ceiling, and as you take that big three, the breasts in, open through the chest and reach your arm back. And as we exhale, we'll just gently rotate forward in hell and open the chest.
Reach back. Remember, only go as far as you feel comfortable. There should be no tugging on your incision. And then forward inhale, open, rotate through your upper back, and then exhale, gently release any tension. Let's do it one more time. Big Breath in, expand three-dimensionally, and then exhale. Find yourself back to a centered position. Okay, so from here, let's take our top hand to the top hit. And again, we're going to reach the top knee and hip forward as we inhale.
And then stacking the hip and knee back up. As we exhale. Inhale and reach forward with knee and hip. Exhale, gently bring it back to the center. Full breath in, expand, exhale. Try to relax as you come back to the center. And then one more big breath, knee and hip.
Rotate gently forward and then exhale back to the center. So now that we're center, our hips are stacked. We're going to move the top pip gently away towards your foot. Our feet stay stacked. We're going to take a breath in to prepare. And as you exhale, the top knee cap lifts your feet.
Stay together and then slowly let it release for a breath in. Exhale and lift. Doing Great. And then bring it back down. Exhale, feel for the bum working on the top side and release.
You might feel work on the bottom side as well and slowly bring it all the way down. Great job from here. Let's roll back onto our back. Now. Find a comfortable place lying on your back, letting your legs rest heavy on your bolster or your pillow. My feet are going to rest on my bed and allow me shoulders to release completely. From here, we're going to do a really simple quad exercise that's going to help lengthen your hamstrings and strengthen the front of your body. All right, so start by just taking big breath in. Expand three dimensionally and as you exhale, just lift your right foot.
Keep your right knee connected to the bolster. You can flex your foot, point your toes, and then release the foot all the way back down. Let's do that five times on the right. So as you exhale, you pick up your foot and keep the knee connected to the bolster. Flex and point, and then release. Exhale, pick up the foot flex feel for the, it's like your kneecap, pulling up the front of the thighs and tightness through the quad.
And then release. Exhale as you lift the foot, you flex points and then release. Let's see the same thing on the second side. Take a breath, prepare and exhale. Picking up that left foot. My knee stays connected to the bolster. Flex point and relax. Exhale, flex. Feel that knee pulling up the front of the thigh, some tightness to the quad point reliefs.
Exhale, pick up the foot flex points release, and then two more. Pick up the foot as you exhale. Flex. Feel that tightening that length through the back of your leg. Point release. Remember to stay neutral and heavy in your hips. Pick up the foot flex point and release.
Take a moment and nice long breath in. Let your body sink into your bed. All right, so from here we're actually gonna move this bolster over your pillow and your in to place it underneath your hips. Make sure it's in a comfortable position and we're going to do a really nice passive hip stretch. So from here I want to make sure that I'm comfortable, relaxed, feel very open to the front of the body. As I take my breath in, I'm going to allow my right knee to fall out to the side and then I'm going to lengthen it out along my bed, keeping the turnout I'm going to bend. And then slowly bring it back in. Let's do the same thing on the right eye. Inhale, the right knee again, drops out to the side and slides out. As I exhale, keep the turnout, I drag the foot back in, and then center.
Let's do three more on the right leg. Drops out to the side and slides out. Find that big breath in. Exhale, keep the turnout as you slide the leg back in and center in hill. Knee drops to the right foot. Exhale, keep the turnout, glide the leg back in and then center and one more out to the side, and then long leg reach. Bend the knee and then bring it back to the center on the left.
Inhale, turn out that left leg and then glide the leg out. Keep the turn out as you exhale. Slide the leg back in and center. The hips are staying neutral. I inhale, turn out and leg glides out. Keeping that turn out, we pull the leg back in and then back to the center and hail. Turn out and glide. Exhale, keep the turnout and center.
Inhale, turn out and glide the leg. All the way to St. And then keeping the turn out, I glided back and find center. All right, so now we're gonna turn out that right leg glided all the way out and we'll keep the leg long in this position. We want to really keep the turnout and take a full breath in. As you exhale, do a little pelvic tuck and then release.
And as you exhale, a little pelvic Tuck, feel the opening of the hip and release and exhale, Tuck, and then just start to rotate gently towards the right. I'm keeping the left leg nice and centered and I'll feel some work on my left glute slowly bringing that back to the center. Let's do it one more time with the rotation. So you tuck your pelvis first, rotate towards the right, keep the left leg centered, feel for work through your left glute. Rotate back to the center, and from here the turn out with that right knee as you glide back in to center. Same thing on the left. Turn out, glide the leg long. All right, take a breath and as you exhale, a little pelvic tuck and release.
Exhale, gently pelvic tuck and release feel for the opening of this left hand. Exhale, pelvic tuck. Start to rotate towards the left. My right leg stays centered, my right glute is active, and I rotate back to the center. Exhale, pelvic Tuck, gently rotating towards the left. My right glute activates, and then back to the center. From here, I keep my left leg turned out, I glide it back all the way up to center, and then I'll gently release the bolster
And then let it go. Let's try that one more time. Take your breath to prepare. As you exhale, press down with your arms and your feet. Feel the entire back side of your body. Gently turn on
Use your top arm to press yourself up to a seated position. Well, I hope you feel open and empowered with some gentle and strong mo movement in your body. Join me for my next class where we'll, we'll talk about how to lift a baby and how to do some strengthening exercises, holding your little one.
Postnatal Pilates: Traumatic Birth Recovery


Comments


You need to be a subscriber to post a comment.
Please Log In or Create an Account to start your free trial.
