Description
About This Video
Transcript
Read Full Transcript
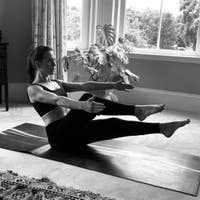
Hi, I'm Tom McCook. I'm here to teach a foam roller class for you today. So you're gonna need a foam roller. It's great to be back here at Pilates Anytime. And the benefit of the foam roller is you can use it to release tension, work your pilates exercises and leave your body more balanced to organized, a little stronger and just a great balanced workout along with taking tension out of your body.
So we're gonna start by sitting on the roller across it with your hands on the floor behind you. And your feet are flat. And you're just gonna take a moment just to massage the back of our pelvis. So with your hands flat, just take a moment and just really slowly curl your tail towards the back of your knees to roll across the back of the pelvis and then come back. And just take it nice and slow.
And as you're doing it, notice can you have it be even on each side of the back of your pelvis. We tend to carry a lot of tension in our hips and lower back. And we're also gonna roll out our mid back. This is a good place just to start, just to come into the body gently, feeling how we're doing. We'll just do that a few more times.
Feels kind of good to massage the back of your pelvis. And two more. No rush as you do these. Now, shift your weight towards your right side and cross your right foot over your left knee and hold the right foot with your left hand. Now you're gonna roll across the back of your right hip, getting into your piriformis muscles, and the muscles in the back of your hip.
And when you find a sore spot or a spot that's a little more interesting, just pause there. Just roll across it side to side a few times. So again, this is gonna give you better access to your pelvic muscles and your hips and help to free up your lower back. So short and sweet and then a few more times, front to back. So think of using this massage opportunity just to let go of the rest of your day and come into your body before we do the full body movements.
And then from there, we're gonna switch sides. Cross the left over the right, left hand on the floor, you're holding the foot. Now have the weight on that left hip as you roll across it front to back or head to tail. And if you find an interesting spot along that path, pause there and just roll across it side to side. Just applying a little bit of pressure helps the muscles to let go.
Then a few more front to back or head to tail. And then just finish with a couple more of just both hands on the floor. Balance just curling the tail under. See, for me, my left hip's a little tighter so my left hip's a little more forward, so I'm just getting that sense of getting it to be a little more even on both sides. Now from there we're gonna come down onto the floor and put the roller across the middle of your upper back.
Another area where we carry tension and stiffness. So with your feet flat, curl your tail slightly towards the back of your knees and lift your hips a few inches off the floor. Now bring your hands behind your head so you can support the weight of your head. Now, just from your mid back to the base of your neck, roll, leave the elbows a little more up so your shoulder blades are more open and you can get into those muscles along the spine in between the shoulder blades. And just let your jaw relax.
Let your head be heavy in your hands. Just again, mid back to the base of the neck, but don't roll onto the neck. And now just shift your weight slightly towards the right side and roll up and down along those muscles close to the spine on the right. Just a small shift. Four, five, six times.
And then shift over to the left. Same movement. Fluid, your breathing's relaxed. Just waking up the tissue. Now, with your hips on the floor, just slowly arch back over the roller, opening your chest and then curl forwards.
You're just gonna mobilize into those joints in the upper back, mid back area. Inhale to open, exhale to curl. Six to eight of those. Again, don't be forceful, just fluid. And one more.
Now, we're gonna transition onto our side. So you want to have a pillow for this particular movement. So I'm just grabbing a blanket. It could be a blanket or a pillow, whatever works for you, just to support your head. Now, when you come onto your side, have the roller parallel to your body and put your top knee on the roller and pull the bottom shoulder out from under you so you can drop your head to the pillow more easily and have your gaze straight ahead so you're not dropping your chin to your chest.
So the roller is to help you stabilize your pelvis and lower back while you mobilize your upper back, shoulders and neck. So you'll take your top hand, you'll put it on your bottom wrists. Now, keeping a little bit of downward pressure into your knee, you're gonna slide your top hand forward, let your head roll with it. Now as you draw that top shoulder back, start to press down into the roller with your knee and as you turn open, only turn open to the degree that you can still press into the roller and then slowly come back. So you'll roll open.
So you're keeping your pelvis stable as you open. And this is helping to open up your mid back, your shoulders, it's great for your posture, especially if you sit a lot during the day. It's a great way to free up tension and make your body more organized and ready and fluid. Now, this next time as we turn open, we're gonna hold it. Now, put your bottom hand on the ceiling and push up and push down with the top knee.
So now you're turning on the muscles under your armpit all the way down to your inner thighs, which is part of your core connection. And then slowly come back and do that three times. You'll open, push up with the bottom arm, pull this shoulder away from your ear, push down into the roller. Slowly come back. And just one more, open, push down, push up, feel the connection.
Now, as you come back, we're gonna take it into a movement that's called the Pin Wheel. So you start to take the top arm up towards overhead. When it gets to the front of your ear, start to turn open, but keep pushing down into the roller and let your eyes follow the moving arm. Really fluid, so you're not pushing the arm behind you, you're turning with the arm to open up your chest, your spine, the muscles along your side body. It's getting all that tissue to glide better.
We'll just do two more. That's it, and one more. And then just carefully help yourself up. We'll take it to side two. And as we come to side two, again, have the roller parallel with your body.
Put your top knee on the roller and pull your bottom arm out in front of you so you can pull the shoulder out from under you, and then let your head come to the pillow. So again, as you're in this position, press the top knee into the roller, draw that top shoulder back and as you turn open, let your head go with it and only turn open to the degree that you can still press into the roller. So the goal isn't to touch the floor with your arm, it's to have an organized movement through your torso with a stable lower back and pelvis. So there's always that balance in every exercise you do of stability with mobility when you get the best results. Then we'll press the bottom arm up as you push down with the top knee, slowly come back.
And again, open, press down with the knee, reach up with that bottom arm and pull that bottom shoulder away from your ear. Slowly come back. That added press turns on a lot more muscle, which relates to a lot of the exercise you're gonna do that connects your arms to your pelvis. Now, the next time as you open, we'll pass time press, and now we'll take it to the Pin Wheel. So take the top arm up towards overhead.
As you turn open, let your eyes follow the moving arm. Keep pushing that top knee into the roller as you move. Let your breathing be nice and fluid. And as you're rolling open, let your head roll, try not to brace in your neck, let your head be heavy on the pillow. Just two more.
Nice and fluid. And one more. Very nice. Now, that prepares us for our next position where you're gonna come onto your back lying on the roller. So put the roller lengthwise on your mat.
Have a seat towards the front edge so when you come down, your head is on the roller. And just take a moment there and bring your feet fairly narrow. Just the width of your sit bones. Your sit bones are the bones at the bottom of your butt. So your feet are slightly narrower than the width of your pelvis.
And what that challenges you to do is just to have a little more stability in your body. Now lift your toes off the ground and feel the ball behind your big toe, the ball behind your little toe and your heel and picture you have a triangle on each foot and you want to keep that triangle on the floor. Then let your toes come down. There you go. Now, just put the heel of your hands on the front of your hips, your fingertips on your pubic bone and picture that triangle, when those three points are parallel with the ground is a neutral pelvis.
That's kind of like your starting place. Now, just practice lifting the pubic bone towards the ceiling. That's more of a tucked pelvis. And now tip the pelvis forward. That's more of an arch to lower back.
So find that midpoint and just bring your arms by your side and take a few diaphragmatic breaths. Big breaths so you let your belly wall move your side ribs. And on the exhale phase, fall into gravity. Let the front of your body fall into the back of your body. Just let the roller give you feedback of how to let the spine lengthen and let go of superficial tension.
One more breath like that. Now put your thumbs around the bottom of your waistline like it's your belly button level and practice breathing a little more where your thumbs are. Breathe a little lateral and wide into your ribcage. And on the exhale phase, blow through an imaginary straw and just start to draw your lower abdomen in so you start to feel your waistline become a little more toned and narrow. Breathe into your width.
Exhale, follow the belly wall in. Connect down into your feet. This is just bringing you into your center line and your deeper core muscles. Do that two more times. Just a great way to let go of the rest of your day and come into feeling yourself.
The best thing we can do is work in opposed to just working out. One more breath like that. Organizing, connecting. Now find your belly button with your first two fingers. Go two inches wider and then two inches lower.
So now we're still continuing with the breathing abdominal. So breathe into that wide place that I mentioned, near the back low ribs, and on the exhale, just draw the tissue away from your fingers for three breaths. Long exhale. Feel how you're bridging the gap between your ribcage and your pelvis. Two more breaths.
Relax your jaw, your neck. One more breath. Now, we're gonna take it into some movements for the shoulders of the chest. So as you inhale with your arms down by your side, shrug your shoulders north and rotate your palms, your thumbs down towards the floor. On the exhale, rotate your thumbs away from your body and slide the shoulders down your back.
So inhale, shoulders up, thumbs rotate in, exhale, shoulders down, thumbs rotate out. So we're mobilizing our shoulders, our shoulder joints, with our breathing, one more. Then bring your elbows up like you're doing a bench press. If you don't know what a bench press is, think of your elbows are right under your hands and you have a broomstick elbow to elbow. So this is for your shoulder joint, the muscles around your shoulder joints, your rotator cuffs that tend to get imbalanced from modern life.
So nice and slow with your elbows not moving in space, spin your hands to the back and then spin your hands to the front. You'll notice going in the forward motion is usually tighter because we're not used to this motion as much. And go slow. Where you're getting that feeling of that movement in the joint and the muscles around the joint where your arms meet your body. And notice when you keep your neck and your jaw relaxed as you're doing that.
These are endurance muscles, so you want to do a little higher number of reps. We're gonna do about 15 of these. Nice and smooth. See, I can already feel that they're getting more fluid and mobile as I do it. Now, find the middle.
Now take one to the back, one to the front. So you're alternating, a little brain tease for you. Still notice that you're keeping that connection elbow to elbow. Few more. This is really good just to develop function around your shoulders and neck.
We tend to skip these little muscles because we can't see them. Now arrive back where you're at that starting place, but this time take your hands to the back so your elbows and hands are the same distance from the floor. And on the exhale, touch your elbows in front of your chest and then inhale to open to the side. So now you're using your mid back and your chest muscles. Inhale to open.
Exhale to close Nice and fluid. Breathe. See if you can stay with that lateral breathing, inhaling as you open, exhale to close. Three more times. Fluid fill your torso, your chest muscles and back are becoming a little more supple, connected.
One more. Now cross your arm, bring your arms across your chest like you're hugging a big tree and have your palms on top of each other. So this is called the Halo Maneuver. So this is to connect you into your middle back a little bit more. So just get the feeling of setting your shoulders down your back and slowly take your halo overhead, keep both sides of your neck long, then reach your arms out to the side into a circle and then back into the halo shape.
Exhale overhead. Reach out into the circle. Now see if you can follow the belly wall in as your arms are going overhead then exhale. Circle and open. Three more.
Fluid motion. This is connecting your shoulders to your mid back, better functioned through your arm connection to your torso. One more. Now we're gonna go right into your lower half. So with your arms down by your side, come back to that breathing core activation and on the exhales, you follow your belly wall in, float one knee in the air like you're marching.
Inhale to lower. See if you can leave the weight low in your body. Connect into your foot points on your standing leg. You're keeping the pelvis in neutral. If you feel like you can take it a notch further, bring the opposite hand to your knee.
Feel that relationship of your standing leg, your lower belly, staying supple and easeful in your upper torso as best you can. Connecting to your standing leg. One more each side. Now bring your elbows on the floor and have your hands directly above your elbows. Retract your shoulders, meaning pull the shoulders slightly back and bring up one leg at a time into tabletop.
Now on the exhale, just touch one leg to the floor. Alternate. Follow the belly wall in as you're lowering. See how much you can relax the front of your hip joint. One more each side.
Place one foot down then the other. Now, this last one is called an arm and leg reach. So it's a goal of you connecting your limbs to each other through the center of your body. So bring up your right knee and your left arm straight up to the ceiling. Now take a breath.
Now, as you start to follow the belly wall in, reach that right leg out to the height of the left knee and then reach the left arm back. Control the return. Exhale. So as you're reaching, you're thinking the spine staying long, that both sides of the neck are long. You're connecting into that core cylinder of your waistline.
The standing foot. Easy and your neck and jaw. Two more times. And one. And we'll switch.
So bring up your left knee, right arm. Set that right shoulder. Now in the exhale, start with the leg, finish with the arm. Inhale back. Feel the lower belly wall drawing in with the exhale each time you start your reach of your leg.
Just two more. And one. Place the feet down and we're gonna go right into an abdominal curl. So bring the hands behind your head, interlace. Let your elbows be a little bit forward of your face so you can see them in your peripheral vision.
And just get that feeling of before you even curl, see if you can bring the back of your waistline where you were touching your ribs a little closer to the roller. Now, take a breath. Now, as you exhale, start to roll your head off the roller like a wheel. Imprint the back of your waistline to lift your upper torso. Inhale back down.
Resist the temptation of pulling on your head with your arms. Imagine it's your torso muscles lifting your head and upper torso. And again, or your waistline muscles. Nice and fluid. Imagine the back of the neck lengthening opposed to shortening as you curl.
Just two more. And one. Now, from there, take the arms straight up to the ceiling, right above your shoulders. On the inhale, reach your arms overhead into a high V, thumbs towards the floor. Exhale, circle your arms out to the side, curl off the mat and that ab curl and reach towards your knees.
Inhale down into the reach. Exhale, circle, nod, curl. Inhale down nice and fluid. Three more times. As you're curling, think of the back of the weight sliding up your back away from your pelvis.
Keep your arms toned as you reach towards your knees. One more. And then carefully help yourself down off the roller. Now we're gonna put the roller across the bottom of your pelvis. Still on your back, under your hips.
Now, just lift your hips a few inches off the floor so you can put the roller on the back of your pelvis behind your hips. And you can make sure it's even and then just touch your pelvis for a moment. Now, just curl your tail a little bit towards the back of your knees so your lower back feels longer so you're not going into a back arch and just melt your ribs in. Then bring your knees up in the air right above your hip joints. There you go. Now, as you're there,
all I want you to do is put your hands against the front of your knees and just practice pressing your knees into your hands very lightly, just to turn on your hip flexor muscles, the muscles that pull your knees towards your chest. Do that three times. One more. Now put your right hand on the roller, still press your left knee into your hand but reach the right foot towards the floor. Inhale back up and switch.
So imagine one knee is resisting towards into your hand as the other foot is reaching towards the floor. This is just like walking. The legs are doing opposite things. We're walking and that resistance helps you prevent the lower back from marching and feel the muscles in the back of the hip of the lowering leg. One more each side.
Now place one foot on the floor. Hold the back of the thigh on the other side and slide that leg out til the leg is almost straight and flex your foot. Now, if you feel your pelvis is tipping forward, bend the leg or slide the leg less straight. Now, start to press the heel into the ground and just take a few breaths as you're activating the back of your hip. Just pull the knee you're holding in just a little bit more.
Follow your belly wall in. This is to stretch your hip flexors in the front of the down hip. Relax your neck. These muscles get chronically tight for a lot of us from too much sitting, that's modern life. So we need to just keep doing things that creates more balance through our body.
Just two more breaths there. Now, as you hold the back of the thigh you're holding, press the thigh into your hand and as you're doing that, as you're pushing it away, lift the down leg up about six inches. Now, as you lower it, pull the knee you're holding more into your chest. Push it away and lift. Lower as you draw in.
A little contract release to get those muscles to function a little bit better on each side of the hips. One more time, press and lift. Lower and hold for two more breaths. And then take a moment to switch your legs. Slide the second leg out about two thirds of the way.
Hold the back of the thigh on the second side. Now press the foot down into the floor to activate the back of your hip on the stretch side. Feel like you're sinking the lower back a little more towards the mat. Take a few breaths. Breath into your width again, relax your neck, your jaw.
Just stay with that feeling of how you're organizing yourself, what's happening for you on a feeling level. Now, as you inhale, push the knee away from you. And as you do so, reach into that down leg and lift it up about six inches to a foot. And as you lower, let the knee you're holding come in a little closer so you feel that opposition. Inhale, push the knee away and lift.
Exhale, lower and draw in. Two more times. Push away and lift. Lower and reach. One more.
There we are. Now bend both legs, bring them back up to table top. Hold the sides of the roller and take both legs straight up to the ceiling. If you can't fully straighten your legs, no worries, go to where you can without straining. Even if you're a little bit bent, that's completely fine.
This is inner and outer hips, so inhale to open out towards the sides of the roller. Exhale, touch the ceiling to close. Open, close with your breathing and feel that sense as you're closing. Your feet are reaching up, your belly wall is sinking. Start to add a little more tone to your legs.
Three more times. Inhale to open. Exhale to close. And two more. And one.
Now, we're gonna go right into a Scissors, which is front to back. So just practice on the exhale. As you follow your belly wall in, flex one foot and reach it down. Inhale point to lift. Flex the second side and reach down and lift and feel like you're using the back of your hip.
You're pressing down using your butt and hamstring on the lowering leg. You're not just lowering into gravity. And your goal is to do this without letting the lower back change. And again. So developing flexibility with strength.
Now add a little pulse to it with your exhale. Inhale to the top. Two more each side. One more. Now, we're gonna go right into what's called Double Leg Circles.
You'll open the width of the roller and then down and together. And in that down and together, follow the belly wall in and start to use your glutes and your inseams so the lower spine stays the same. So inhale to open, exhale down and together. Nice and fluid with your breathing. Use the exhale on the lowering phase.
Just two more in that direction. And one. And now reverse, exhale down the center. Open up and together. And one more.
Now, we're gonna go directly into knee sways, but it's really a lower back rotation, so bring your legs into tabletop and have your knees right over your hips. Now, imagine the rotation is initiated from your pelvis and your waistline. So as you breathe in, rotate your pelvis and knees to your right. On the exhale, squeeze your inseams, use your belly wall to come back to the middle. Inhale to the left.
Exhale back to center. So as you're rotating, keep the shoulder blades on the floor so you're not making it too big. And watch the tendency to let the lower back arch. You don't want to arch your ribs out the front. Feel how it's just a rotation using your waistline and inseams, keeping your shoulders stabilized on the floor.
It's also a nice little massage for the back of your hips. Two more each side. See how much you can keep your shoulders stable and relax your neck. One more each side. Very nice.
That finishes the sequence in this position. Place the feet on the floor. Now roll the roller out and puts your feet on the roller. Now, make sure the roller seems relatively even and have your feet on the roller where it's not jammed up super close to you but it's not too far away, and this is doing footwork on the roller, which is similar to footwork on the reformer, if you were ever on a reformer in pilates, but it's a way to teach you how to use the back of your legs, your center line and your abdomen and not dominate with just the front of your thighs, which can happen with more traditional exercises. Great way to connect to your midline.
Now, with your feet on the roller, one of the things you want to do is not grip with your feet. Let your feet relax. Now, put your fingers, again, where we did earlier. Find your belly button. Two inches wider, two inches below your first two fingers.
Now practice again on the exhale following the belly wall in. Feel that cylinder of support. Sense your posture. Now, as you exhale, follow it in, maintain a little downward pressure into the roller and slide your legs long. Your heels will rock over the roller.
Inhale to return. And again. We're gonna do that six times. Go for evenness with both legs and same time, same speed. Just two more.
And one. Now, as you return, we're gonna keep that same movement but we're gonna add the arms to the back. So arms straight up to the ceiling. Your goal is to not let the lower back arch or shrug your shoulders north towards your ears. So keep the shoulders low.
On the exhale, start to fall the middle in, fall the belly wall in and slowly, legs reach away, arms reach to the back. Control the return. Go for evenness on both sides. I like to flex my feet as I'm straightening because it keeps the back of my legs more active. Two more.
And one. The roller is rolling away. (laughing) Now from there, we're gonna go into single leg. So for single leg, bring up one leg into a tabletop and bring your opposite hand to your inner knee. This is just like the diagonal press we did when you were lying on the roller lengthwise.
So on the exhale as you follow the belly wall in, give a little diagonal press and slide the down leg long. Inhale to return. We'll do six. That's getting you more into the center line of your legs, your alignment, connection to your pelvis. Just two more.
And one. And take a moment to switch your legs. Bring up your second leg, table top. Opposite hand to the inner knee. On the exhale, feel that diagonal press and slide the leg long.
Inhale to return. Just two more. And one. Now, we're gonna use the roller to do more of a traditional exercise, The Hundred. But what the roller will do is allow you to not overwork in your hip flexors and use the back of your legs a little bit more.
So go into turn out with your feet. So heels together, toes slightly apart and take your arms straight up to the ceiling. Set your shoulders low. And on the X, as you curl up with the torso into your ab curl, slide the legs long and you want to arrive with your arms parallel to the ground. Inhale back to the start.
We'll do three and then we'll hold it as we do the Hundreds. This last one we're gonna hold. Keep the legs toned and pressing down and together. Now inhale for five beats through the nose. Exhale for five through the mouth.
Arms are strong. Center line's long and active. If you can take it a notch further, point and lift one leg. Switch legs, two more sets on that side. Lower, roll it back in and rest for a breath or two.
Now take the roller and we're gonna take it into a bridge. So you're gonna put the roller between your knees and your inner feet. And it's just gonna give you that awareness of using your center line a little bit more. And this will help us stretch our lower back by keeping good leg alignment with your feet flat, pelvis in neutral. Take a breath and just as you exhale, curl the tail towards the roller and peel the hips off the floor like you're peeling a piece of tape off the mat.
Now in the bridge, touch the bottom of your butt where your sit bones are and take that part of your pelvis more towards the back of your knees. Now touch your front low ribs. Let them melt more into your body. So now you have this nice line from your knees to your shoulders. Slide the shoulders low.
And as you breathe in, reach the arms overhead into a high V, thumbs towards the floor. Now sink your chest first and use your abdomen as you lengthen your back back down, release the tail and draw the arms back to your side. Three more times. Exhale into the curl. Arrive in that strong straight line, inhale into the reach, exhale traction down.
Nice and smooth. Two more. Breathe through it. Sink your chest first, feel it through your spine, feel your side body lengthening. Float your arms down. One more.
And reach and traction down. Arms to your side. Now take the roller away, roll to your side and help yourself up to a kneeling position. Actually to a seated position. We're gonna go into the roll downs.
I was getting ahead of myself. So you're gonna put the roller in between your ankles. So now you're using the roller to stay in your midline. It's really helpful to get those muscles active because they tend to be weaker, the outer tends to be tighter and overworked. So with your feet flat, flex your feet and find the place where you've just got to bend your knees as little as you need to to get up on your sit bones.
So your head is right over your pelvis. If you're back and you feel like you can't get up, bend your knees a little bit more just so you can make it more... You're in a really organized starting position. So the roll down is exactly the same as the bridge you just did. You're just sitting up instead of lying down.
So just take a nice feeling of feeling your sit bones by rocking on them side to side. Oh, there's my sit bones. As you get up, center the weight on them and hold the sides of your thighs. Grow tall on the inhale. Exhale, squeeze the roller and curl back until your arms feel like they're almost straight.
Take a short breath, squeeze it again, curl back up, inhale to grow tall. And again, exhale the curl. Inhale, hold. Now, as you squeeze and curl up, keep your shoulders low. So the work is really from your mid thigh to the bottom of your breast bone.
Short breath, squeeze, curl back up. Now reach the arms to the front. On the exhale, curl back. If you can a little further, possibly touch your lower back to the ground. Short breath, curl back up.
Inhale up tall. And again. Short breath at the back end. Exhale, curl back up. Grow tall.
Now, we're gonna add here, inhale the arms up overhead, lower the arms and curl back. Short breath at the back end, squeeze, curl. As you come past that neutral place, inhale, lengthen up, reach the arms up, lower the arms and curl back. Short breath while you're back there. Curl forward.
Inhale up tall. One more time. Lower and curl. Short breath, curl, reach and lower the arms. Now, we're gonna do a rotational movement, but just take your arms out in front of you for a moment.
Imagine you have a big headlight coming out of your chest and when you turn, you're not gonna cross the headlight with your arms. So I don't want to do this. That's me turning my arms a lot, not doing a whole lot with my waistline or my spine. So keep the headlight so the rotation is coming from your lower ribs and your shoulders stay open and down. So you'll start here.
We'll curl back about half as far as the last movement. So as you exhale, curl back halfway. Now, keep the tone and the connection to the rollers, you stay in your inner thighs. From your rib cage, inhale, turn in one direction. Exhale center.
Inhale second, exhale center. Three more each way. Feel the control of your inseams, your waistline, your breathing is fluid. One more. Hold in the center, exhale curl forward.
Inhale up tall. All right, very nice. So from there we're gonna transfer to all fours. As you come onto all fours, we're gonna use the roller for stability and mobility in the upper body and core strength. So put your elbows on the roller right under your shoulders and create a straight line from your head to your tail.
So you don't want to be in a round back. Reach back through your sit bones and energy out the crown of your head. Now, just practice really slowly as you drop your upper body between your upper arms, feel your shoulder blades come closer in the back. Now reach into your elbows from your shoulder blades to do two things, both widen and lower your shoulder blades further away from your ears. The tendency when we widen them is to let them go up.
And if they widen, go up, our arms are no longer connected to our core muscles. So we want to widen them and lower them. So it might feel a little smaller. One more. Now from there, we're gonna put the roller under our knees.
Add a little stability challenge. Now, you can keep your toes on the floor and just do one shoulder blade slide here. Let the shoulders slide in towards the spine, hands are right under your shoulders and then float back up as you widen and lower. Now hold and on the exhale, feel the belly wall draw in, reach one arm forward. Inhale to lower.
Exhale side two, stay very strong on your standing arm. So take it slow. Now just do one leg. Exhale, reach one leg to the back. See if you can get it all the way up to hip height.
Inhale to bring it back in. Exhale side two. Energy out the crown of your head. One more of just the leg. Second side.
And now if you feel like can take it a notch further, add the opposite arm. Slowly return. Fluid, connected. One more each side after the one we're on. Last side.
And lower. Now, we're gonna take it into what's called the Knee Stretch. Typically this is done on the reformer, but you can also do it on the roller. So what it's gonna be, it's gonna be a rounding of your lower back as you pull the knees forward. So float your feet off the floor.
See if you can avoid your arms moving front to back. So on the exhale, start to curl the tail forward, lift the waistline up and drag your knees towards your hands. Inhale back to that starting position. So think waistline lifts as the knees pull forward. Just three more.
Two and one. Very nice. Now, as you come back off, come back to your forearms on the roller. And we're gonna take it into a forearm plank. So as you interlace your fingers, do one more (indistinct), let the shoulders slide in again.
Now widen and lower them. Step one leg back into a plank, then bring your heels together as you step your second leg back. Zip up your in seams and take three to five breaths. Follow the belly wall in, smooth breathing. Two more breaths.
Float your knees down, slide the roller out in front of you and we're gonna come on to your belly. And as you come onto your belly, this is for your upper back and shoulders just to create that balance and also to strengthen the back of the hips. Now, if the roller feels uncomfortable for your shoulders in this position, you can also do it with your hands on the floor, if this is too much range for you. But take your hands into a high V, wider than your shoulders and have your head four to six inches off the floor. Now, reach back through your legs and feel like you're narrowing the bottom of your pelvis where your sit bones are.
Not tucking your tail down so much. Opening the front of the hips and just feeling that connection to the back of your pelvis and inseams. Nice and slow, from the outer borders of your shoulders, roll the roller forward. Now, roll the roller towards you using your shoulder blade muscles in the middle of your back. And think of doing it in a way where you don't have to push down with your arms.
It's just a glide. Now, set the shoulders low, keep them low. Keep your legs toned. Now start to slide your heart towards the roller to lift your head. And then lengthen back down through the spine.
Take your time. We're gonna do that three more times before we add to it. Shoulders low, slide the heart forward. Keep the neck long. Lead with your spine.
Smooth and fluid, set the shoulders. Feel the work in the middle of your upper back. Your legs are toned. One more. Now the next time, come up halfway and hold it.
Now, bend your elbows out to the side using your muscles under your arms and your mid back then reach your arms long. Do that for six. In both the reach and the bend, keep both sides of your neck long. It's working on your postural muscles of your upper back and shoulders. Two more.
And one. Lengthen down. Take the roller out of the way for a moment. We're just gonna finish with a swimming exercise in this position. So have your head against a few inches off the floor.
Draw the chest forward slightly like you did with the roller. And on the exhale, lift the right leg and the left arm. Inhale to lower. Do four each side. Length with strength.
Energy out the crown of your head. One more each side. One more each side. Now this is the last one. Now as you finish, slide the arms, the hands under your shoulders.
Press back to a child's pose just for a moment. Take your knees as wide as you need to just to stretch. Soften for a few breaths. Relax your shoulders, your neck, your hips, even your belly. Now, just finish your next big inhale and then slowly just roll back up.
And we're gonna take that into a cat stretch with the roller, which is a nice counter move for those extension exercises you were just doing. So come to tall kneeling. And in tall kneeling, let your hips be a few inches behind your knees so you can carry the weight of your hips more and you don't overload your arms. Now, take your hands a little wider than your shoulders. Set your shoulders low and imagine you're gonna curl your spine down and then we're gonna arch the back nice and slowly.
So on the exhale, curl down, control through your hips and abdomen and your legs. Now, as you inhale, send your tail to the back and open the chest to the front to look forward. Now, roll back up with very little pressure on the roller. Use your core strength and legs. Roll back down.
Send the tail to the back, feel the bottom of your pelvis widen. Curl back up, feel the bottom of the pelvis narrow. Just one more. Round back up. Now, take the roller on a 45 to your right, curl down on that 45.
Reach out. Round back up. Just two times on that side. Nice and fluid. Again, very minimal weight on your arms so you can keep the work low in your body.
Take it to side two. Curl down nice and slow. Still using your leg strength, your core. Sit bones are wide now. And as you curl up, feel the sit bones narrow using your waistline, your inner thighs.
One more. And curl up from the base. Very nice. Now, from there we're gonna do a side hover, meaning a side plank with the roller. Now, as you come onto one of your forearms, one of your elbows, take the top leg in front the bottom leg behind, and have your legs long.
Bottom elbow's right under your shoulder. Now push the floor away to lift out your shoulder and touch your lower ribs with your top hand to pull your ribs away from the floor so you're not collapsed into your waistline. Put your top fingertips on the floor for the first part of the exercise, reach out your legs, push them to the ground and lift. Bring your head back, reach the arm up and hold. And then nice and slow, lower.
You can bring your fingertips back down if you need to. Lift back up and hold. Slowly lower, just one more time. Lift and hold, two breaths. Slowly lower.
Short and sweet, we'll switch to side two. Roll over to the other end. Top leg is in front, bottom leg is behind. Bottom elbow right under your shoulder. Now again, touch your lower ribs and pull them away from the floor.
We tend to collapse into the bottom waist. Top fingertips on the floor. Now push the ground away, reach out your legs and lift. Bring your head back. Reach up, slowly lower.
And again, lift and hold. Slowly lower. One more time. Lift and hold. Two breaths.
Slowly lower. Now we have the reverse plank. So for reverse plank, stretch your legs out over the roller. Have your hands a little bit behind you. Now, the first thing you want to do in a reverse plank is pull your shoulders back.
As you pull your shoulders back, point your feet. Imagine you're doing a bridge. Curl your tail towards your feet and lift. Open your hips then look up. Slowly lower.
Just three times. Shoulders back, tail forward, reach into your legs. Slowly lower. The last time we're gonna hold for two breaths. Shoulders back, tail forward, point and lift.
Slowly lower. And then we're gonna finish with the greatest stretch in the world. That's what it's called, I kind of like it. Let's start with your left foot stepping over the roller in a lunge position. The roller directly under your shoulders.
Set your shoulders down. Now, just practice keeping that front knee right over your ankle, straightening your back leg. Create a line from your back leg to your head. Reach into it. Now, as you exhale, start to lift your waistline up.
Tuck your chin in. Start to lengthen your front leg and rock back onto the heel. It's okay if the front leg doesn't straighten. Inhale and bend the front knee and open your chest to the front, three times. Exhale back.
Inhale forward. Exhale back. Inhale forward. Last time. Exhale back.
Inhale forward. Now, we're gonna take it into rotations. So from here, on the front knee side, the left side, take the left arm out to the side. Keep your right hand on the roller. Now inhale.
Turn open like an airplane wing. Exhale back down three times. Inhale to open, exhale down. Keep reaching into your back leg. This last time, hold for two breaths.
Slowly lower and we'll switch sides. Step over with your right. Front knee right over your ankle, open your chest to the front. On the exhale, straighten the back leg. Create that line from your back leg to your head.
Take a breath. Exhale as you tuck your chin. Lift your waistline up, hips up, rock back onto that front heel. Inhale back into the lunge. Take your time.
Exhale back. Inhale forward. Exhale back. Inhale forward. Now, hold the forward.
Reach the right arm out to the side. Now inhale, spiral open. Exhale to lower. Two more. And lower.
This last time, we're gonna hold for two breaths. Slowly lower, float your knees down. That concludes our session on the roller. I hope you enjoyed. Let me know how it goes for you and I hope to see you again on Pilates Anytime.
Mindful Movement: Functional Practices


Comments


You need to be a subscriber to post a comment.
Please Log In or Create an Account to start your free trial.
