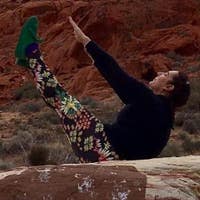
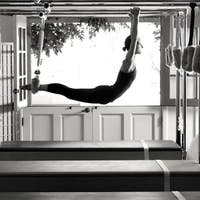
Class #5340
Back to Basics Reformer
Description
About This Video
Transcript
Read Full Transcript
Hi, everybody. Guess what time it is?
That's the point. We hope that you'll join us and learn along with us. I have asked Meri briefly before class, but I'm gonna restate it. I recently got a new client, and I'm very enthralled by it. I'm loving it.
It's been a while since I've had a brand new person to Pilates. So today, we're gonna re-look at the basics. And I'm going to grill Meri for cues and different ways of saying things to someone who's coming in for the first time. I find I'm overtalking. Go figure.
So, is that cool? Yes. Can we begin? Will you start us? Yes. Awesome.
Okay, so we're gonna go just straight down onto our reformer. We have set up for footwork on three red springs. We're gonna lay down. Let's do it. Keep your headrest down please.
Okay. Why? Because we're gonna do some pelvic curls to start. Ah, okay. Okay, so we're gonna start with just a little bit of spinal articulation.
So what I want us to do before we move is to feel the heels of the feet on the frame of the reformer, and the toes just reaching up over the top of the footbar. And then taking a minute. I always like to take a minute to settle in, to prepare, and we'll move. Inhale, prepare. As you exhale, feel your pelvis tip towards your face.
So it will flatten through your lower spine. And then we're gonna roll the spine up. That was nice. Creating a line from the knees to the shoulders, a straight line, pause as you inhale. As you exhale, let the chest drop through the arms.
And then begin the process of articulating down through the rest of the spine. Looking for the individual bones of the spine to come down one by one, tailbone drops all the way down and we go again. Pressing down through the feet to lift up through the hips. I always like to think about, let's go down, the equality of weight between my two legs. It's difficult for me to achieve that.
So I always remind people to check in with that. Let's do three more. Lifting up. The arms can be active. I really like the way you said how to start.
I find that to say tuck or even roll, sometimes people don't know what that means. And I think you said step into your feet or something and roll your low back. If you can remember, will you say that part again next time we go up? Yeah. Yeah.
So what I imagine, If I remember correctly, what I said was let your pelvis move towards your face. Yes. So your low back goes flat, and then lift your pelvis up. Very clear for me. Something like that.
Thank you. So this'll be our last one. Rolling down. And then what we'll do here is reach with the hands and just hold onto the metal, What are those called? Poles? Hooks?
Pegs. Pegs. Hold onto the place where the straps are resting. And then here, before we move, I want us to feel that we're pulling those pegs apart. Gently. Little bit.
We're gonna tip the pelvis to the left, reaching the right elbow wide and down. And then I want us to pull back to center, and then we'll go the other way. So what I usually do is, without giving a lot of details initially, Yeah? Just get someone moving. Just move them. Yep. Just move.
Yeah. That's what I feel like, but I find I keep talking. And then we go. So I personally don't like to just lay there while the teacher tells me all the things that she wants me to do, 'cause I can't ever remember. So I just wanna move and then have cues laid over the top. So that's what we're doing, we're just moving side to side.
And now what you could think about as you're doing that is as the knees are going one way, the abdominals pull back in opposition. And then you're already connected. So you can deepen into that connection to come back through center. And we go over the other way. We'll do this one and then one more to each side.
And then deepen. The knees stay side by side so they don't slide up and down on one another, and deepen to center. All right. What we're gonna do next is bring the head and chest up and hold onto the knees with the hands. So a little bit of a modified abdominal series if you will.
Okay, sure. We're gonna let go with the arms, take the legs down in a hip hinge. So we reach down, and then the hands come back to the knees and you use your arms to pull. Just reinforcing, not necessarily like trying to come up a lot higher, Okay. but just using your arms to help reinforce the curl, as I said.
And we go again. Reach. It's so nice to not extend the legs fully, I'm gonna say. Yeah, it's, Can be more difficult really. Exactly. You don't lose it.
And reach. So what's important here for the basic student is that as the legs are going down, they only go to the point that we can stabilize and keep the lower back on the carriage. We'll just do two more. So reach using the arms, just in case the abdominals are getting tired or just all the time anyway. Reach.
And then back. So now we're gonna do that with one leg at a time. Both hands on the right knee, left leg down. And change. So single leg, hip hinge.
I forget to do this. And change. Yeah, you forget. No wonder my client was suffering. And change.
What I like to think about with the arms here is as the hands are on the knee, the elbows pulled down and wide. So it gives us a little bit of a back support. Connecting the arms to the back feels like. One more. We're gonna add rotation, but we're gonna hold on.
So rotate towards me so you'll see, hold like this, both hands to the outside of the thigh, and change. So what I like to say to people here is that we're not using the arms to make it easier, but using the arms to help find the integrity of the position. So use your arms to make it harder, not easier. Yeah. Yeah. Definitely.
Two more. That was amazing. That means four. Oh, gosh. There you go again with that counting of yours.
Last one. Both knees in. Lift up that littlest bit higher, let go, and come down. That'll do it. Yeah. Let's come up, and put the bar up.
So I would like everyone to remember that Kristi thinks she needs to be taught how to teach. Don't we all sometimes? Tell me I'm not alone. But Kristi is my teacher. So I'm just returning the favor.
Here we go. That infinity loop. I love it. I love it. Can I put my headrest? Yes.
Please? Yes. Yes, I will too. Thank you for that. That's cool.
Okay. So we're gonna start with the heels of the feet on the footbar. Orienting the pelvis into a down, like a neutral alignment. Push your feet into the footbar without moving the carriage yet, and then push out. Oh, I see, now that's perfect.
That's perfect. Push into it, but don't move. Yeah, so they can find the backs of the legs. So as we begin to think about moving the carriage, first, we wanna feel the feet pushing into the bar, and feel the feet pushing into the bar as you come in. There just a way to help people discover the work in the back of the legs and not just the front of the legs.
The feet are flexed here. The spine is in neutral. One more time. Out, and back. So we're gonna move onto the toes, just working through our feet positions, foot positions, press out, and bend.
Do you have anything for, a cue for I'm thinking of again, we want it straight, right? What do you say to get people to go fully extended, especially if they're weight trainers? Their knees? Yeah, sorry, their knees. What I say is, as you straighten your knees, lift up with the front of the thighs like you're trying to lift your kneecaps towards your body.
Okay. It's more of a hyperextension correction cue, but I think it works for both. Yep. And then always dragging the reformer and working on the down. Thank you.
We'll do two more. And last one. Come all the way in, bring the heels of the feet together, the knees open about as wide as the shoulders. So here we have an externally rotated position. So what I want us to feel is a little bit of work from the hip.
So squeeze from the hip as you stretch out and straighten, and resist back in. Squeeze from the hip as you reach out. And that same cue, always feel the feet on the bar before moving the carriage to find work through the back of the leg. Working for me. Me too.
Done this a million times and it's just so nice to have another idea sometimes. We are going to do one more. Come all the way back in. We'll go straight from here, back to parallel alignment with the feet. Push the carriage out, and take the feet all the way down underneath the bar.
So maximum range of motion in the feet, and then roll up onto the toes and go down. Focusing here as you're moving your feet up and down. So again, we've got moving, and now we'll add some cues on feeling the, feeling a connection to all 10 toes. And trying to center your weight over both feet evenly. One more.
Bend your right knee, lower your left knee, lift both feet up to match. And change. Meeting in the middle, and change. Meeting in the middle, and change. Now with the foot that's on the bar of the bent knee, that foot can push into the bar so we get a little stretch in the toes.
Say that again? The bent knee foot, that foot pushes into the bar to stretch the toes in that bent position. Ah, right. Why waste anything? Right.
Got it. One more on each side, direction. And then we'll come up, and we'll come in. So we're gonna go straight into single leg work unless you wanna change your spring. Okay. Good.
You may want to, for your student, change the spring, you'll see. So we're gonna lift the right leg up into a tabletop position. Left foot finds its position on the bar, and then pushes the carriage. The leg that's in the air stays still. So that leg typically will drift in and out.
Mm-hmm. We wanna make sure it stays nice and still, and bend, and two. It's a heavy spring for me, and bend, and one. But I can do it, can you? I can.
And it's kind of nice. I usually go a tiny bit lighter if I've done all of the footwork we sometimes do. I'm ready. But, Push. It's also something relatively easy to manage for a newer client.
So I, Yeah. Yeah. I may not hold back. Another nice idea here is instead of having the leg floating, just put it in a TheraBand. Uh-huh. Last one.
Like that? Yeah, yeah. And just hold it. Yeah. Okay. 'Cause then you can get a stretch at the same time.
We're gonna move to the toes on the first leg, lifting that leg back up, and we go out and in. So the single legs are nice because we can focus on that bilateral movement working from side to side. Most people I think are stronger on one side or the other. It's important to work them individually. That's it.
Change. And press out, and in. What tips do you have for keeping count? You're very good at it. I usually just do five. Okay.
I can count to five pretty well. Okay. Good. Last two. I'm just gonna be quiet now. I'm not so good at that.
And one more. And bend in. Okay. Okay. So that's our footwork series.
Let's turn, come up, and we're gonna change this spring. We're gonna do some arm supine for abdominal work and arm work. Knocking out two with one. Yep. Great.
We're talking about the block system, if you don't understand that conversation, so we're, You're going to one and a half? I'm using a red and a blue., uh-huh. Great. You? Yes, same. Okay. Of course, yeah.
I follow my teacher. Okay. So we're gonna take the straps in our hands, keeping the feet on the footbar for now. The first thing that we wanna do with the arms is set them so that they're just over the shoulders. Now feel the upper arm bone where it attaches to the body, heavy on the carriage.
Nice. Lifts the legs. Thank you for that. And press straight down with your arms. And straight back up.
So bare bones of the movement. There it is. Down. And up. Things to think about.
Can you feel that you're pushing your abdominal muscles down away from your clothing as you're moving your arms towards your pelvis? I'm not counting now. We'll do two more. Can you feel that as you lift your arms, you're holding that arm bone heavy on the carriage? Nice.
Holding the arm bone heavy on the carriage. One more time and pause. Turn the palms of your hands face in, and open your arms out to a T shape, and come straight back down. Here I like to talk a lot about breathing 'cause this is the action that the ribs do when we do lateral breathing. So can you feel your ribs expanding out with your arms?
Can you feel that you're using your arms to squeeze the air out of your body open? That's great. And squeeze the air out of your body and open. And squeeze the air out of your body. And one more.
And squeeze the air out of your body, hold here, turn the palm's face down. Bend your arms. Bend them. Bend them, I'm skipping circles, and straighten. Just nice and simple.
My legs are shaking. For your formation. Are your arms, I do this two ways. Are your arms on the the mat at the moment? My arms right now are lifted off the mat.
Just off the mat. Yep. But I'm holding them close to my body and keeping them still. Perfect. Other words, not lifting my elbows up and down.
We'll do three. And bend. And two. And bend. And one, keep the arms straight.
Lift your arms up so they're back over the shoulders where we started. So you're having to control that action. Place one foot down, place the other foot down. Push with your legs, and step one foot into the strap. Now with the one foot in the strap, if you just apply pressure to the strap, that will keep the carriage still as you step your other foot into the other strap.
Nice. So the same way I like to think about pushing on the bar for footwork, I think about the straps. So can you feel that you're standing in your straps with your feet from the back of your legs? It's great. And stretch.
Nice that it's recognizable now. You know, you said it, footwork, so it's great. Yeah, yeah, yeah, yeah. It's really easy to get there now. So it's just a different place of connection.
But it's an already learned skill. Yeah, exactly. Can you feel the squeeze of the heels lifting or coming up all the way through the inner thighs to the center of your body? Yes. Good.
One more. Press out and hold. Lift your legs towards up without lifting your pelvis up. So that's gonna be determined by your ability to hold your pelvis down. Push down, open, circle around, and touch.
Feel your feet on the straps. Push from the backs of your legs. Open, come around, and touch. We're looking here for equality of movement from side to side or a symmetrical circle. And press, and out, around and up.
And press, and out, around and up. I'm laughing 'cause I'm shaking so much. And out, around and up. Basic is not easy, there's no doubt. I know, I never said it was easy.
Open. I'm so hyper-focused I can't even speak. Come down and together. That was a great cue. Why did I said that? Bring the legs up?
Open, stand on your straps. We push from the backs of your legs. And up, and out, around and down. So we're stabilizing the body but mobilizing the hips. And last two.
And out, around and down. We should make a pamphlet out of it. This is really great. Oh yeah? Your cues are so good.
Yeah, it's just like I'm dropping right back in. Even though I think I know how to do it, it's just really nice. It's nice. Let's push down one more time. Hold there.
Now, imagine that there's a straight line in front of you, like a horizon. You're gonna trace that horizon with your feet, and come back. So it doesn't feel like a straight line if the legs are truly going straight out. It feels almost like a little happy face shape. And back together.
And that's what I imagine anyway. So they start opening, but then it feels as though they lift up a little bit at the end. And back. But you're not trying to. No, no.
I'm just trying to keep them going straight across. So what typically happens or what can sometimes happen is as people open their legs, they drop. Yeah. Okay. Okay. I can only do one more, then I'm having an earthquake. You're already shaking before.
Seriously. One more. This is it. Come back in, bend your knees, step out with one foot, put it on the bar. Hold the carriage still, step the other foot out, and bend the knees to bring the carriage back in.
We are gonna do some more pelvic curling with the feet on the bar, but it's way too light for me. So I'm gonna sit up. And change the spring. I'm gonna use two reds. Okay.
Taking off that blue. Yep. Okay. So just two reds. So Kristi, we are gonna lie back down.
Go on. What if my hamstrings cramp? I know where you're taking me. You'll live. I'll live? All right.
You'll live, then I won't be the only one shake shaming. Okay, take your headrest down. Place your feet on the bar. We gotta move. So my body stays still, roll up.
Keep the carriage on the stopper. Stay there. Push out. Not all the way. Come back in.
I'm gonna live, I'm gonna live. All the way in, and push out. So I like to do this on the heels for the beginners rather than on the toes 'cause it's easier. You're welcome. And out.
It takes you straight to the point. That's for sure. And bend, we'll do two more. Ooh, come all the way in, Meredith. Out, and in.
And out. Can you feel the backs of your legs? No. Roll down. I'm refraining from falling at the moment. Roll down, roll down.
Good. Okay, let's do it again. One more time. Keep the carriage on the stopper, push down with, oh, think of sliding your heels down on the bar a little bit energetically, and then roll the pelvis up. Help me with keeping myself straight up front.
Up top. Like (legs tapping). Come back down. Like finding a straight line? Yeah.
I'm sorry. If you would, please. As you roll up, tip your pelvis toward your face. Keep the ribcage dropping a little bit towards the carriage. So as you're at the top, you are in a straight line from your knees to your shoulders.
Thank you. And press out. And come back in. And keeping the legs parallel out. And back in.
And three. And back in. And two. Keeping those hips high, and back in. And one.
And back in. And roll down. (Kristi exhales) All the way. Okay, we're gonna come up. Okay.
Roll to your side and help yourself up. Do you wanna tell me how you might cue the just basic stretch? Sure. Or do you want me to do it? Well I want you to do it, but, Yeah, you do it.
All right. You're kind of on a roll. Okay. So stand up. Put your hands on the footbar.
Step your inside leg up onto the carriage, and tuck the toes under like you're gonna do a pushup. Okay. You know what I mean? Yeah. So don't tuck them. So could stand on them.
Yeah, yeah, yeah. Exactly. So step the other foot out towards the outside of the frame. Bend that outside leg and press the carriage back. So what we're doing here is just low, Did you change the spring? I'm sorry, I missed it. I'm sorry. I did.
Okay. I'm on one spring. Thank you. That's okay, well, set up is still good. Okay, so we're gonna go down until you feel a stretch in the front of your leg.
Okay. So press through the back of that leg that's on the carriage to maximize that stretch, and think of pushing away from the footbar with your arms and lifting your spine. And we're just pausing here. Cool. I'm breathing.
And then we're gonna lift the foot, the one that's on the floor. Press the carriage out until that leg is straight. (Kristi groans) Hammies. Yeah. Good.
Rebend the front leg, the outside leg, and come back into the place where you're feeling a stretch to the front of your leg, and pause. Keep the arms active. Keep the spine active. And then lift that foot. Push into the heel as you stretch yourself back. Bend your knee.
Come all the way in and up. Step off, and go around to the other side. Oh, thank you. You're welcome. Same, same, yeah?
Same, same. You wanna try now? Do you ever talk about the pelvis? Yeah, sure, I'll do it. What do you mean about the pelvis?
Well, I'll tell you about it. I do teach. Okay. Right. Not too many words. Not too many words.
Thank you. Do what she said with your setup. And then before you push back, maybe think about biasing the pelvic tuck, or how you said earlier, bring your pubic bone or your pelvis toward your face, I think you said. Then push the carriage back and allow the forward knee to bend. How's that?
So you find that stretch. I like it. Thank you. (Kristi exhales) Ah, I could hang out there all day. But back to what you were saying, we're gonna just lift those toes on the foot that's on the ground to start to extend the leg.
The carriage will move accordingly. Looking for a flat back here, as opposed to where we just were, and maybe investigating where the hamstring stretch might be felt. Sometimes it's a rotation of the hip. Sometimes it's a tilt of the tailbone toward the sky. Sometimes it's a bit more of a knee bend.
Keeping that back flat, let's do it again. Lower the toes to the ground. Almost reluctantly bring the carriage back in. So you're looking for that pelvis towards face again. Mm-hmm.
Kind of light in the arms, but they're there. I try to teach my boyfriend this, and I always say look proud. And so I'll be walking through the house and be like, "Look proud." So I have to change that cue so this helped. Let's do it again. Pick up the toes.
I'm impressed that your boyfriend will do Pilates. Well, 1 didn't say that, he just sees me. Well, he did it once, you're right. That's when that happened. You're right.
And now. My boyfriend has only done 20 minutes of Pilates in 18 years of marriage. Yeah. That was enough. Too bossy.
Too bossy. Too bossy. Yep. I know how to breathe, I've made it this far. Breathing on own. Yeah, I gave that up.
But I do think this looks proud. Yeah, it does. I'm not giving that cue up, maybe him. No, just kidding. Okay, come all the way in, we're done.
Take me back. We are gonna go onto our knees. So now both feet on the carriage with the same foot shape, with toes tucked under heels, pressing up against the shoulder blocks. Still using that one red spring. So we'll start just sitting down on our feet.
Now using the same cue of bringing the pelvis towards the face and letting the face look down towards the pelvis. Lift the pelvis just off the feet. Now try and maintain this shape of your spine and move your legs back as far as you can without changing the spine, and then bring the carriage back in. And then push the carriage out, and bring the carriage back in. So this is actually an abdominal exercise, believe it or not.
Not too hard for the legs. So can you feel that you're resisting the carriage coming back with the center of your body? As you bring your knees towards in, push into the bar with your hands to create opposition. And out. So the knees are moving towards the hands, but the hands are pushing away.
And out. Let's make it a little faster, and in. And in. Only speeding it up if we can keep the integrity of the shape. Two.
And one, all the way in. Sit back down. Great. That was nice. Okay, good. Come up.
We are going to take the footbar down. Okay. And what we'll do here is just a mat exercise, but we'll do it laying on the reformer. Okay. I'm thinking sides.
I think I'm just gonna add another spring so my carriage isn't gonna wiggle around underneath me. Good idea. I might do too so I look better. So come all the way down. Thread your arm through so your head can rest on the headrest on your arm.
Let's take the hand just on where? On the shoulder block, on the carriage, what do you like? I think carriage from me. Okay, me too. So what I want us to do is create a straight line from the head down towards the feet, pull the abdominals in and float the legs up.
And back down. And float the legs up. So we wanna bring awareness to the center of the body here. We're using the legs as a weight. It's interest, Against gravity.
because of that footbar, we're already a little bit, Uh-huh. Makes it very small. We're just gonna do four more. Don't touch the footbar on the down. Oh. One.
And thinking about the head just resting on the arm. I said four and then I didn't count. That's three. Okay. Two.
And one. Come all the way down. We're gonna come up now onto the arm. So we're gonna bend the elbow and put the elbow on the headrest. Wrap around with the hand on the shoulder block.
I'm gonna bend my bottom knee here. You can Thank you. keep your bottom leg straight if you'd rather. Nope, thanks. So let's do hand behind the head, lift the leg, flex the foot.
Kick that leg forward, pulling the upper arm against the carriage. So that's just a way to find the shoulder stabilization. So I'm pulling my arm towards my body as my leg goes back. The supporting arm, yeah? Yep. Okay.
I'm pressing my head into my hand. We'll do three more. That makes eight, just so you know. In case I can't count on the other side. Two.
And one. Bend your knee. Let's sit up. Take the leg that was just working on top and put it over the other knee. I never do hip work without stretching cause I, So smart.
How'd you get to be so smart? Because I'm tight. Oh. Necessity. Tight. Tight.
Okay, so leaning in, keeping the spine active. Turns out, I'll just stay upright and be fine. Okay, let's do the other side. So coming all the way down. Creating a straight line with the body, resting the head on the arm, and then lifting the legs off the footbar.
Now keep them off the footbar as they go down a little, and back up. Down a little, holding the straight line. Bringing awareness right into the center of the body to lift the weight of the legs. We have four more to go. Please help me keep track.
It's way harder for me on this side. For your information. Fun fact, Last. Are you alive? I'm back here going, why?
I'm not even moving but I'm feeling it. Yeah, it's harder on this side for me too. I'm just concentrating. Okay, so we're done. Yeah. Okay, good.
Come up. Bending the bottom knee, resting the forearm on the shoulder, Resting the forearm on the headrest, the arm is against the shoulder block. Other hand goes behind the head. Lift that top leg up, flex the foot. Keep the underneath side of the body nice and straight, and go forward.
You have eight. And back? Remember? Yeah. Forward pulling the arm against the shoulder block, particularly as the leg goes back.
Three. I can count if I say it out loud. And four. Holding the body still except for the leg. Five.
And six. And keep that leg nice and level. Uh-oh. That's it. Okay. Bend your knee. Sit up.
Leave it to me. And just sit. Crossing the ankle over the knee. Sitting evenly on both sitting bones is a good way to think about keeping the pelvis squared. And then if you want to lean forward, try leaning forward with a flat back.
Oh my goodness, Kristi. Thank you, Meri. You're welcome, Kristy. And then what we're gonna finish with is just some simple back extension. So what we need to do is put the footbar back up.
For this one, I think either a red or a blue. I like red. Mm-hmm. Okay. Okay. And then we're just gonna come onto our knees.
So if someone is uncomfortable this tight on their knees, I guess, is the best way to say, just put them up on a box. You can do the same thing lying face down on the box. I'll add, if you don't have a box, you could, I've rolled towels, like a little hand towel under here just 'cause it takes some of the pressure. Sometimes it's just the full. Yeah, the full flexion. Closure, I guess.
Yeah. Yeah. So sometimes you could just place a towel or something right behind knees. Or choose a different exercise. Or do something else. Yeah.
Okay, so hands on the footbar. Okay. What we're gonna do here is we're gonna press out with our arms, and think of lengthening the spine down over the size. So getting as flat as you can in your back. That's pretty difficult for me, but I'm doing my best.
Bend your elbows wide and point them slightly down so they're just a little bit below the wrist. And then feel, not your hands pushing, but your shoulder blades pulling down, and your arms responding to that downward action of the shoulder blades. Let's do that two more times. That was a great cue. For me. Thank you.
Don't push with your hands. Let your arms respond to the work that you're creating in your back. One more. Fantastic. Bend.
What's the one, I know you do sometimes about spreading the bar. Do you do that? I do. I say that all the time, so I'll say it now. So we'll go out.
One of my favorite cues to use is when you're bending your arms, feel that you're trying to stretch the bar between your hands. Yeah. It's just a really great way to feel your upper back muscles. Yep. So now we're gonna change.
We're gonna go out. We're gonna look forward, lift the chest. So we're reverse articulating the spine, coming up into a little, like just a gentle back bend, push back out. Eyes go down last, and bend. Pull the bar apart.
And shoulder blades go down, arms reach out, eyes lead the way as we come up through the chest, through the mid back, all the way up into that back extension. So it's not so much about bringing the carriage in, is it? No, no, no. It could be whatever it is. Yep.
Sorry, that was unclear. It just is the movement can be, last one, push out, wherever the person feels like they have movement in their spine. So you could come like here. Yeah. Small.
Yeah. A little bigger. Not going so high to get into the low back. Yeah, yeah, yeah, exactly. Or because both of us can bend our spine.
Yeah. In that direction. We can come all the way up. And let's just do one more. Okay. Go out.
Thank you. And bend. Pull the bar apart. Don't push with your hands, pull your shoulder blades down. And come all the way, all the way, all the way, all the way in.
So my friend, Kristi, those are my best ideas. I thank you so much. You know, it's all in there. It's just so nice to hear you say it. Thank you for being my girlfriend.
Thank you for being my teacher. Spending time with me. I couldn't teach this way unless I had you for a teacher. Oh, please. Thanks for being with us everybody.
Thank you. Till Next time.
Girl Time with Kristi and Meri: Reformer Classes


Comments


You need to be a subscriber to post a comment.
Please Log In or Create an Account to start your free trial.
