Description
About This Video
Transcript
Read Full Transcript
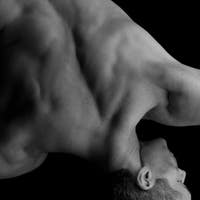
I'm Tom McCook and I'm happy to be back at Pilates Anytime. In this Movement Foundations class, you'll practice the fundamental movements to better biomechanics and a balanced body. You'll need something for your head to support and sideline, either a pillow or a folded blanket. Okay everybody, so we're gonna start in a sideline position where your legs bent like you're sitting in a chair. So as you come down, grab a pillow or a blanket so you can have that for your head and sideline.
Bend your legs so your hips are stacked and your knees are up at hip height. And pull the bottom shoulder out from under you so it's easier to drop your head to the pillow. Now make sure you're not going into nappy position where you're curled up. You want to be where your head's in line with your spine, your hips are stacked, your knees are stacked, and your feet are stacked. So this is for your thoracic spine and your shoulder girdle.
But you also want to stabilize your lower half from your belly button down. Now you'll put your top hand on your top wrist. Now the beginning movement is you're just gonna slide your hand forward. Let your head roll with it. Now draw the shoulder back as your head comes back to the pillow, bend the elbow, turn, look and reach to the back.
And then slowly come back. We're gonna do this several times. So this was to open up your chest muscles, also get your spine to move, but get the feeling that when you're turning open that you're not taking that top knee with you. And a nice reminder is the floor behind you is there, but the goal isn't to touch the floor. It just happens to be there.
Now we're gonna add a little activation as we do it. As you turn open, push both of your knees down towards the floor so you'll feel how you're activating more muscle in your inner thighs and your waistline to stabilize your lower back. Now the next time we're gonna add something more to add even more activation. So this time as you turn open, pushing your knees down, put that bottom hand on the ceiling and pull the shoulder down away from your ear. And as you push up with your bottom arm, push down with your knees and you'll feel the muscles from under your armpit down to your inner thigh muscles turning on.
And then slowly come back. So we'll do that a few more times. You'll glide open, push up with the bottom arm, push down with both your knees, relax your neck. Slowly come back. Two more of those.
Feel you're waking up the muscles that wrap around your torso that tie down into your inseams of your legs. And one more. Great thing to do if you're spending a lot of time sitting, that just restores function, helps improve your posture. Actually one more, the last time. And now slowly return.
Now the second one's called the pinwheel. So you're gonna take the arm up towards the overhead, and when it gets to the front of your ear, start to push the knees down and then turn open. Let your eyes follow the moving arm and then add your breath. Inhale as the arm goes up, exhale through the spiral. Again, you're not trying to touch the floor behind you.
You want to have nice smooth shoulder mechanics creating space in your ribs and for your lungs. Nice and smooth, we're gonna do four more. Feel how you're getting all that tissue around your shoulders and your chest more mobile. But you're stable from the waistline down. And we'll do two more.
And one more. And let's turn around for side two. So I'll face away from you. Again, bend the knees so your knees are up at hip height. Pull the bottom shoulder out from under you and start with that top hand resting on the bottom wrists.
Now slide it forward. As you slide the shoulder back, let the head come to the pillow, bend, turn, look and reach. Slowly come back. And get that feeling when you're turning open that you're not allowing that top knee to go with you. So you'll actually isolate the stretch more through the chest and get the thoracic spine, the part of the spine behind your heart to move better while you stabilize your lower back.
Now add to it as you're turning open, push the knees towards the ground. Nice and fluid. Pull the shoulder blade in towards the spine as you turn. Then let it slide away from the spine as you reach forward. Now we're gonna add the bottom arm pressing up to the ceiling as you push the knees down towards the floor.
And then slowly come back. Feel how that turns on the muscles that tie down from under your armpit on that bottom arm into your waistline and your pelvis and inner thigh muscles. And then one more after this one and we'll go into the next exercise. Retract, turn, and press. Now we're gonna go directly into the pinwheel.
Take the top arm up towards overhead, spiral open. And as you're turning open, push the knees towards the ground. So in every movement when we're moving well, we have a balance of stability with mobility. So that allows you to feel yourself in space and have better biomechanics. Inhale as the arm goes up, exhale through the circle.
Let's do two more before we come onto our back. And one. And then from there, just help yourself onto your back with your legs bent and your feet flat. Okay, now everybody, let's take a moment just to feel our position on our back. So with your pelvis, if you put your hands on the front of your hips and your fingertips towards your pubic bone, just notice if you lift your pubic bone towards the ceiling.
That's called the tucked pelvis, so your lower back is long. Now notice if you tip your pubic bone more forward than the front of your hips, that's an anteriorly tip or arched, slightly arched lower back. Now just find the position where those three points, the pubic bone and the front of the hips feel relatively level with each other with the floor and the weight feels balanced on the back of your pelvis. That's kind of your starting place. And then have your feet in line with your sit bones, the bones right at the bottom of your butt.
And just feel your feet on the floor. And just put one hand on your belly, one hand on your chest. And we're just gonna take a few diaphragmatic breaths where you let the belly wall move first, the ribs, and breathe all the way up into your chest. So nice big breath. Now the exhale, let the front of the body just deflate into the back of the body.
Let your head get heavy and just become aware of more of the back of your body. Most of our sense organs are in the front. So feel the weight on the back of the hips, the back of the spine, the back of the head. And just bring your arms down and take a few more of those diaphragmatic breaths. Big deflation as you exhale.
So you're just using this opportunity in the beginning just to notice where you might be holding tension. So just with your awareness, you can start to let it go and let the energy move and the breath move through your body a little more clearly. One more breath. Now we're gonna do breathing abdominals. We're gonna do two versions of it.
Find your belly button and go about an inch or two below and about two inches wider with your first two fingers of each hand. This is your lower abdominal wall. Now as you breathe in, breathe in through your nose. Now the exhale, like you're blowing through a straw, slowly draw the tissue away from your fingers so you feel the belly wall drawing in and the whole waistline gets a little tighter and more taut. Just try that for a few breaths.
So breathing in, exhale, follow the belly wall in. So you feel how it's a little more firm. No change in your pelvis. And again, nice breath, let the belly relax. Exhale, follow it in.
Two more times. Feel how you're feeling this space between the rib cage and the pelvis gets more activated. One more. You'll also feel the muscles in your lower back get a little activated. Now I'm gonna give you a cue.
It's called one, two, three. And it's help you to activate the whole length of your deep core muscles from your bottom of your pelvis to the bottom of your ribs. And these deeper muscles are more for support and position, not so much for movement. The bigger outer muscles move you while these muscles create length and support for your back, and better form in all your exercises, so you can become a little more efficient. So at your pubic bone level, go straight out to the side and you'll feel a hard bone.
It's the top of your thigh, it's called your greater trochanteric. And at that level is the level of your pelvic floor. Who knew? So when you put your thumb on that bone, as you exhale, imagine those two points narrowing towards the midline. This is activating the bottom of your pelvis.
Just feel that as an image, but feel that as you exhale, like the two points are narrowing. You'll also feel your upper inner thigh muscles. One more breath. That's point number one. Now point number two is the front of your pelvis.
You'll feel a little edge on the front of your hips, little higher than where you were just touching, more in the front. Now this is related to your lower belly wall. So now on the exhale, imagine those two points narrowing towards each other. So now point one and two, the bottom of the pelvis, lower belly come together. Not like you're working hard, you're just feeling it.
Point number three, touch your low ribs. So that's more the top of the deep core cylinder. So on the exhale, think of point one, two, and three, all narrow slightly towards the midline. Just feel that. One more time.
One, two, three, narrow. Now we're gonna add movement of the limbs to this. But think of that breathing activation always comes first. So let's just so we can have that touch feedback of your body. Have your pinky on the front of your hips, your thumbs on your lower ribs.
Now without changing the lower back of the pelvis, as you exhale, start to feel the one, two, three. And as you start to feel it, slide one leg long on the mat. Inhale to return. We're gonna alternate. Sense your alignment.
Challenge yourself to feel the exhale, and the one, two, three just before your leg moves. Inhale back in. So you have stability, core activation with movement. One more each side. Now we'll bring in the upper body.
So put one hand across your body on the front of your ribs. And take that same side arm straight up to the ceiling. Now take a breath. Now start to feel the one, two, three, and wait till you start to feel your ribs starting to drop away from your hand towards the ground, and then reach the arm overhead. So on the exhale, one, two, three.
Inhale to bring the arm back. So I'm not changing my lower back or shrugging my shoulder north. And get the feeling that the goal necessarily isn't to touch the ground. When you have good shoulder mechanics and you don't change the spine, your arm's probably gonna be a little bit off the ground when you reach back. Now let's switch sides.
Put your hand on your other front rib. Reach the arm up, take a breath, feel the one, two, three, reach. Inhale to return. So you're feeling that core activation. You're feeling the rib drop.
Nice and smooth. One more. Now come back to your first side with your hand. Now we'll combine arm and leg. Take a breath, same side, arm and leg.
Exhale, one, two, three, slide the arm and leg away from each other, inhale to return. Four on that side. It's okay if you can't straighten the leg if you're feeling like your lower back's starting to change. Only go to where there's no change in the lower back even if it's only like two thirds out. And gradually your leg will be able to straighten with stability.
One more. Switch sides. Exhale, arm and leg, one, two, three. Balanced weight on the back of the pelvis. Two more.
Now both arms to the ceiling. Now it's gonna be opposite arm and leg. So on the exhale, just by feel, feel the one, two, three, opposite arm and leg. Inhale to return. Three each side.
One more each side. Back to the center. Now from there we're gonna turn onto our belly and do a similar version in a prone position. So when you come onto your belly, rest your forehead on the back of your hands. Now same principle of having your pelvis anchored on the floor with the pubic bone and the front of the hips are on the floor.
Now just practice the one, two, three here. On the exhale, just start with the number one. Feel that that pubic bone level, that there's a narrowing of the outer legs towards the midline. One more breath. Now add the front of your hips.
So point number one, and point number two, feel the belly wall drawing in, narrowing. You'll even feel your upper inner thigh muscles. And one more. Now include point number three, the low ribs. The length of your deep core cylinder.
One more breath. Now we're gonna add movement. On the exhales, you feel the one, two, three, bend one knee halfway so it feels like your foot is directly over your knee, but the pubic bone doesn't come away from the floor. Inhale to straighten, exhale to bend. Two more each side.
So feel how you're using the back of your leg and hip with the core cylinder. One more, keep the shoulders low and smooth so you're not shrugging your shoulders by your ears. Now we're gonna add on the next exhale, bend, still exhaling, bend, still exhaling. Lift the knee an inch or two without taking the pubic bone away from the floor. Lower and straighten.
It's gonna be really small as long as you don't change your pelvis. So on the exhale, bend, still exhaling, lift, lower and straighten. Exhale, bend. Feel the one, two, three. Lift, lower and straighten.
And again. One more each side. Last one. From there, take the arms overhead, little wider than your shoulders, nose just a few inches off the floor. Shoulders set low.
Now we're gonna do an opposite arm and leg lift with the one, two, three. So on the exhale, feel the one, two, three. Lift the opposite arm and leg. Inhale to lower. And again.
Three more each side. One more each side. From there, press back to a child's pose just for a moment. Take your knees as wide as you need to. Stretch for a moment, stretch your back.
And then roll up. And then we're gonna come on back onto our back. So as you come onto your back, this will be a bridge series, but we'll include that awareness that you just developed with your core activation. So first action here is just find neutral again, center your feet. So following your one, two, three in, add curling your tail towards the back of the knees, lengthening your lower back into the ground.
Then inhale to tip your pelvis forward. Do that a few times before we take it into an articulated bridge. Feel that exhale. Let the inhale tip you forward. Now next exhale, peel the hips off the floor like you're peeling a piece of tape off the ground.
Reach the bottom of the pelvis towards the back of the knees. Melt the ribs in. Take a breath, articulate back down through the spine. Two more times. Press evenly into both your feet.
One more. Now we're gonna go into a neutral bridge, meaning that space between your ribcage and your pelvis stays the same. So feel your one, two, three. Levitate the pelvis. Inhale to place the back of the pelvis on the floor.
Two more. And one. Now next time, just come up about halfway. Arms long. Now stand into one foot.
And as you exhale, float the other knee like you're marching. Challenge yourself to keep your pelvis relatively still as you reach into your standing leg, and relax the hip on the lifting side. If you need to, you can even have your hips closer to the ground. One more each side. Now float the pelvis down.
I'm gonna show you one more option. And again, levitate. Now if the marching felt like enough, do another set of marching. Otherwise, as you exhale and you feel that core activation, reach one leg straight out in line with the other knee. Now lift that leg towards your head, back out to straight line and place it down.
We're gonna do four each side. Reach, lift, reach and lower. And again. Nice and smooth, so you have a stable pelvis, mobile hips. This is working on pelvic stability and flexibility in your hamstrings and hips.
One more each side. And last time. Float the hips down. Now have your feet and knees right together. Hands a little wider than the body.
Now as you inhale, let the knees and the pelvis rotate to your right, but keep your left shoulder completely on the floor. Now in the exhale, just imagine you're using that one, two, three connection to pull your body back to the middle. Inhale to side two, keep the shoulder on the ground that you're moving away from. Exhale. So now you're including more muscles than the one, two, three, but you're feeling that deeper support.
Now add letting your head turn opposite your knees. Two more each way. Shoulders on the floor all the way through. Last one. From there, interlace the fingers behind your head.
Have your knees in line with your sit bones again for an ab curl. But we're gonna include that awareness of the one, two, three. And then we'll add a a head float into an ab curl. So first thing, take a moment and just shrug your shoulders towards your ears. Now do the opposite, set them down and away from each other.
So your back is open. Take a breath. Now feel the one, two, three. As you're feeling it, bring the back of the waistline a little closer to the floor to float your head off the ground. Now roll your head forward and slide your chest away from your chin.
Inhale on the down. And again, feel that one, two, three, head float, curl. And it's like you're creating a long arc through the spine. And challenge yourself to not pull on your head at all with your arms. Your arms are just supporting the weight of your head from the muscles under the armpits.
Two more. And one. Now hold the top one. Exhale, turn from your waistline. Inhale, middle, exhale, turn.
Follow the waistline muscles in as you turn each time. One more each way. Come back to the middle, let the arms come down. Now just with control as you feel the one, two, three, float up one knee. Take another breath, and now as you exhale, float up your second leg.
Bring your heels together, knees open, armpit width, like you're in a frog position. Now take your arms straight up to the ceiling. This is called a hundred prep. So first thing, shrug your shoulders again, set them low. Now on the exhale as you feel the one, two, three, imprint the back of the waistline, float your head.
Curl up until your arms are parallel to the ground. Inhale down to that starting place. And again. Arms are toned. You're connecting them to your core.
Now add extending your legs out to a high 45 to the degree that your back doesn't change. Inhale to return, just three more. And two. And one. Come down, take hold of your knees.
Now pull both knees towards your chest. Open them away from each other, just do some double knee stirs, mobilizing your hips. And then reverse. Two more. And one.
Now we're gonna come back onto our side for a side leg series. So grab your pillow or your blanket again. Now as you come onto your side, bend your bottom leg like you're sitting in a chair. Top leg is straight. And just get a sense that your hip is in line with your shoulder and your ear.
So you're not forward, you're straight ahead. You feel like your ankle is directly off your hip with a flexed foot. Now as you touch the top of your pelvis or right at the pubic bone level, that's the top of your thigh. So that's the hinge. So lift the leg a few inches off the floor and reach through it with a parallel leg and a flexed foot.
Exhale to lift the leg straight up without changing the shape of your lower back. Feel that, you're using your lateral hip. You're keeping the lower back the same. Two more. Great to strengthen your hips and just feel that connection.
This relates to walking, standing on one leg. Better balance. Now point the foot. You can put the hand on the floor and feel like the leg is being pulled away from you. And stir a small circle.
Keeping the pelvis and lower back still or relatively still, might be a little movement. And now reverse. One more. Now flex the foot. You're already getting a little fatigue at this point.
Inhale, kick to the front. Now point and press to the back. Now as you press to the back, resist the down knee towards your chest like you're striding up a hill. Inhale, kick to the front, point and press to the back. Inhale front, exhale back.
Just two more. And one. Last one on this side. Straighten your legs, bring 'em together, and a little bit in front of you. Now lift the top leg up about six inches and hold it there.
Now as you exhale and you feel the one, two, three, draw the bottom leg up to meet the top leg. Inhale to lower. Now we're working on your inseam strength, but the connection of your legs to your pelvis. Head back in line with the spine. And three more.
And one. Put the top knee on the floor for a moment. Just tap out your hip. And now let's turn around for side two. So as you come on to side two, place the pillow for your head.
Bend the bottom leg like you're sitting in a chair. Bring your head back so it's in line with your spine. And then reach that top leg right off your hip and get that feeling of right at the pubic bone level, you can feel where the top of your leg is. And reach the leg away in parallel and flex the foot. Now as you lift the leg up, imagine this, the lower back is staying the same.
The hinge is right where your hand is. That's the level of your hip joint. So now you're using your lateral hip muscles, but you're also feeling your core support and your postural line. And we'll do three more. Feel it being pulled away.
And one. Now next time, lift and point the foot like it's being pulled away now. Now stir the leg. I feel like you're just stirring it in the hip joint, but you're getting that sense of keeping the lower back relatively the same all the way through. And then reverse.
Stability with mobility. Now flex the foot. Put the top hand on the floor. Kick forward with the breath. Exhale, point and reach to the back as you resist the down knee towards your chest.
And all the way through, you're challenging yourself to keep the hip stacked, the shape of the lower spine the same. Two more. And one. Straighten out both your legs, bring 'em a little bit in front of you. This is for the inner thigh, top hand still on the floor.
Now lift the top leg up about six inches. Now as you exhale, find your inner thigh muscles and lift that bottom leg to meet it. Inhale to lower. Connected movement. Three more.
And one. And lower. Now put your top knee on the floor. Tap out your hip for a moment. And then help yourself onto a seated position.
And just cross your legs. Now if you needed to sit up on something to sit up where you could be up in neutral, you're welcome to sit on your pillow or a blanket. Otherwise just cross your legs. This is just the rotational movement. So we're just sitting up nice and tall.
Cross your arms like genie arms, retract your shoulders. Now grow nice and tall as you breathe in. Now in the exhale as you feel the one, two, three, from the waistline, turn. Think of you're not turning from your arms, you're gonna turn from your ribcage and spine. Just grow tall on the inhale.
Feel the exhale. Inhale, grow tall to come back to the middle. Imagine both of your hips are anchored to the floor as you turn. One more each way. You could also do this sitting in a chair.
Now next time you turn, hold it. Bring the hand that you've turned towards the floor, your other hand to your knee. Now without pulling from your arms, turn a little more from your waistline and hold for a breath. Come back to the middle. Exhale to turn.
Hand goes behind to the floor, but again, I'm not making it an arm exercise, still turning from the waistline, you just have a little more support. Slowly come back, now come on to all fours. And now in all fours, we're gonna go through some movements of the upper body and shoulder girdle and the spine. So with your hands directly under your shoulders, just take a moment to have that straight line head to tail. And just notice in this position, the head's heavier 'cause it's already about 12 pounds when we're upright.
In this position, it's like the weight on the end of a stick. So if your head's down here, that's kind of normal. So you want to reset that by drawing your nose and your chin straight up. So you've already created alignment. Then with your shoulders, set 'em back and down.
Now just do the one, two, three, breathing here. Breathe in, let the belly wall relax slightly. Now exhale, feel your from the bottom to your low ribs, all narrowing towards the midline. One more breath. Include that activation in the rest of the exercise we do in this position.
As you breathe in, let the body slowly drop between your shoulder blades. Your shoulder blades come closer in the back. Now feel the one, two, three as you float up and widen and lower the shoulder blades. Feel that fluid glide of your shoulder girdle around your torso without changing the shape of your spine if possible. One more.
Now tuck your toes under. Now if this doesn't feel possible for you, you can just imagine you're doing it. Otherwise, we're gonna float the knees off the floor. So as you exhale, feel the one, two, three, float your knees, hold for a full breath cycle. Inhale down.
And again, feel the one, two, three. Float your knees, hold. One more time. Float it back down. Now we're gonna go directly into an arm and leg reach.
So on the next exhale, slide one leg low along the floor. As you start to lift it, reach the opposite arm forward. Inhale to return. And again. Feel the pieces you've put together with the one, two, three, smooth motion, conscious breathing.
One more each side. Let's finish this position with a cat stretch. So on the exhale as you feel the one, two, three, curl the tail forward, lift the waistline up and look back towards your knees. Inhale, tail to the back. Open your chest to the front.
And again, exhale. One more time. Then as you come back, take yourself into a same position actually, we're gonna do a hip hinge. So this will be to strengthen your hips from going from kneeling to tall kneeling where you're really using your hips, core, and back in an organized way. So just practice hinging forward and back a few times.
Now shift back until you feel like you can use your hips, your abdomen, your inner thighs to float your hands off the floor. So just try that a few times where I'm not rounding my back to do it. I'm using my hips with a straight spine. Now next time, shift back. Use those muscles to bring you up to tall kneeling and then hinge back down.
And with control, bring your hands back to the floor. So this is just transitioning, great work for your hips. Like you're doing a kneeling squat, you're getting more mobile and strong in your hips. And now this next time we're gonna add the spine. Hinge up, now reach the arms up overhead.
Now slide your heart forward and up to look up. Come back to neutral. As you float the arms down, float down from your hips, hinging. Just one more time. Shift back with control, come up, reach.
Slide the heart forward and up. Hinge back down with control. Now take one arm out to the side, turn and hinge back. Now come up in rotation, float the arms overhead center, extend, neutral, float it back down. One more to the second side, reach.
As you hinge back, turn open, come up in rotation, center, extend, neutral, float it back down. Now take one foot forward in front of you into a lunge for a hip flexor stretch. Now in this position, you can tuck your toes to the back foot, but if that's uncomfortable for your foot, you can keep it untucked. With your back leg, push the ground to the back to turn on your butt, hand on your front knee, just lift your heart up. Now just let your pelvis move a little forward, but keep your butt turned on just a little bit of a stretch so you're not just sinking into your pelvis too much.
Take a breath there. Now let your front foot walk further out in front of you and bring your fingertips to the floor. If you needed to, you could use a chair for your hands. We're gonna take it into a hamstringing stretch. Now in this position, just walk your back knee back a little bit.
Now all we're gonna do, nice and slow as you exhale, pull the pelvis back to let the front leg lengthen and then bend back to the start. We can do that five times. Two more. Next time you come into the stretch, hold it. Now imagine you're squeezing your legs together so you can put more weight into your legs.
So these muscles that are lengthening are actually carrying more of your body weight. One more breath. Doesn't matter if your leg is straight, it can be slightly bent. Now as you come up, we'll switch your legs. Sticky mat.
And now when we're here, you have your back toes tucked or untucked. Nice and tall, front knee right over your ankle, and on your front knee. Now turn on your back glute by pushing the ground to the back and just lunge a little deeper without the back changing. Hold for a breath or two. Actually, let's hold for three breaths.
Now let that front foot walk further out in front of you, fingertips to the floor, slide your back knee a little further back. As you exhale, pull the pelvis back as you rock back onto your front heel. Inhale to lunge. Just see if you can keep the top of your chest open. Just three more.
On this next last one, we'll hold. Practice unweighting your legs by squeezing the legs towards each other for three breaths. From there to finish, come to a seated position. If you need it again to sit on a blanket, you're welcome to. We're just gonna do a circle stretch for your waistline.
So sit up nice and tall and bring one arm up overhead. As you side bend, keep that outer hip weighted. Now reach out over your opposite knee, circle from your waistline. Bring up the second arm, side bend. Rotate, reach that over your knee and circle.
One more each side. Spiral. And last time, spiral. And then just take a moment, sit up nice and tall. Give yourself credit for taking this time, and thank you so much for joining me today.
Empowered Aging: Moving Well


Comments


You need to be a subscriber to post a comment.
Please Log In or Create an Account to start your free trial.
