Description
About This Video
Transcript
Read Full Transcript
Welcome back. Let's build on beginning with reformer flow. In this class, I'm going to offer some progressions and more ideas and a little bit of growth in your Pilates practice. Or for your Pilates practice. Remember to listen to your body, take care of yourself, and enjoy the ride.
Let's get started. So we are on one blue spring on this reformer And we're going to do the standing roll down close to the reformer. So please nestle up next to your reformer. I don't need you to be touching all the parts, but I want you to be pretty close so that you can really work on flexion of your spine here during your roll down. Start with your arms by your side, stand on your two feet, and feel where you are in space, grow tall through your spine, feel chest open, feel abdominals engaged, 360 degrees of recruitment of the core, we are endeavoring to find when we use Pilates or when we do Pilates. Practice Pilates.
Take a breath. Curl your head forward, curl your upper body forward, allow your arms to float just beyond the foot bar and continue to roll down here, trying to maximize flexion of your low spine, of your whole spine. Now here, I like to use the foot bar to press just a little bit. I'll put my arms on the foot bar and press and pull my legs forward to try to get just a little bit of a low back stretch. So I'm not going all the way down yet, and then roll back up. Let's try that again. Inhale.
Nice and tall. Start by moving with your head, your upper back. And I've got that point where I'm starting to round my low back a little bit, and my legs wanna go back in space or my hips. So here, I'm gonna use my arms on the foot bar, and I'm gonna press simultaneously pull my or press my pelvis forward so I can maximize abdominal recruitment and also a nice little stretch in my back body and then roll up. And so this time, let's go all the way down, please inhale. XL curl your head forward, your upper back.
Roll through your low back, and then put your hands directly on the white part of the reform or the carriage. Here, press down through your hands, shoulders away from ears, pull up through your belly, stretch your back body, roll yourself up to standing. Inhale. Nice and tall. Exhale, curl head forward, round through your upper back, feel that you're reaching for the connection of your hands to the white part with minimal shift back of your hips, although something's gonna have to happen and roll up And this time, we're moving on. So be prepared to stay down there, inhale.
Exhale rolling forward. Once you find the reformer with your hands ground through your hands, hollow through the belly, shoulders away from the ears, feel the intention here. You're using your body. So begin with your arms. Push your arms forward and then extend your spine into a flat back.
And then you're gonna round your back, keeping your arms energized, and then bring your arms in. Think of that. Think about that. So arms first, body second, trying to flatten the back. The carriage continues to move. Round your low back, let your arms come in.
Breathing and moving. Arms first straighten your back looking forward. Round your low back, let your arms come in. One more time. I like to inhale as my arms go forward and I reach, but breath is really up to you. And then a nice luxurious exhale as I round and roll.
All the way in, see if you can really connect to those abdominals as you roll yourself up to standing. Beautiful. And let's get on our reformer. So Three red springs is a nice place to be if you're still developing strength on the reformer. If you feel pretty strong in your body, three reds in a blue is a nice place to be, or even two reds in a blue is a nice place to be.
So it just really depends on your body. I've chosen three reds and a blue for my footwork today. So we're gonna climb into the reformer nice and mindfully. And although we wanna get moving here, take a few moments to really feel where you are. Assess that your neck is equal distance from the two shoulder rest and that you have the same amount of space on either side of your hips.
Start with your feet, just resting on the foot bar. Before we go out and in, we are gonna go up and down with the spine for the pelvic curl. But just take a moment, feel your breath, feel your body, head is heavy, ribs are heavy, pelvis is heavy, pelvic curl, inhale. Use the exhale to curl your pelvis up, finding the height of the curl trying to get the hips nice and high. Take a breath. And curl yourself down through the backs of the ribs, the low back, and the pelvis go again.
Curling up. So you'll often hear me say you're breathing and moving. Exactly when you breathe does not matter nearly as much as it does that you breathe. I like to exhale as I curl up, feel the backs of the legs, feel the inner thighs, feel the arms, inhale at the top, and exhale to curl yourself down one vertebrae at a time. And we'll do a couple more pelvic curls, abs first back so the legs are active. Nice, high curl. Arms are involved. Don't be shy.
Sometimes people will take the arms out of the equation. And that's okay. That's a solution or that's a way of doing the the certain movements, but using the arms is also useful at times. So here, can you use your arms to press up a little higher, use your legs? Support with your abs, feel all your parts, and roll down. So let's do some spine twisting. You may hold the pegs by your ears if you'd like or the frame if you prefer, whatever makes sense to you.
Let's begin with the heels on the on the bar, the back of the heel on the bar knees together, and we rotate the spine to one side, and we pull back. So an option one other way, and we pull back. Option one would be to keep the feet on the bar the entire time. If you're ready to work a little bit harder here, you can take your two legs up. You might point your feet because it looks nice and then twist to one side with an inhale. Use an exhale to pull back. What are you thinking about while you're doing your spine twist? You should be thinking about keeping your rib cage connected to your spine so you wanna avoid flaring your front ribs up But you are rotating the spine.
You wanna keep the shoulder blades down as you twist, and make sure you're fueling this movement with your abdominals. Come back through to center and pause for a moment rest your feet on the bar. Float your hands to the ceiling. Make sure you have space to move. So we're gonna be lifting the chest, and you don't want your shoulders to get stuck on the shoulder rest.
Inhale here. Exhale. Lift your head and chest. Look at your legs. Flexing the spine. Arms are down.
Lower down. Let's do that a few more times. Exail to lift, nice, high curl, low back is grounded, no tension in the neck. Lower down. Exail to lift and hold here. Flow your two feet up.
You can point your feet because it looks nice. We're gonna hold on to one knee with two hands. We're gonna let the other leg drape till it touches the foot bar. The knee shape stays the same, and we change. So this is a modified single leg stretch, changing the legs, staying lifted. Again, don't be shy. Use your hands to help you lift.
Just a bit more. Help you ground your low spine, find your breath and start to develop a little bit of heat in those abdominals. Two legs in, lower your head down, draw your legs to your chest, stretch your low back a little. Same thing with just a little bit of rotation now. So legs come to tabletop, hands go to the ceiling.
Take a breath. Lift your head and chest. That's nice to do on an exhale. Good. Go ahead and drape one leg over the bar. Just touching the bar.
So opposite hand inside knee, find rotation. Push, change sides. Push into the inside of the knee as you rotate, rotate with your gaze too. Go nice and slow for these first two. And then we could decide to go a little faster if you'd like. Here we go. Exhale change. Change.
So make sure you change your gaze as you change and rotate. That will help you eyes and head, help the body follow along one more time, and hug two knees into your chest and take a pause. Alrighty. Flip yourself into position so that you're ready to do your footwork. Your two heels are on the bar. Look up and make sure you have space so that you're even and you have equal space on two sides.
Feel your parts grounded and let's go. Exhale to press out, perhaps. And gently come on in. Usually takes me one or two to figure out exactly where my feet need to be, settle into what my body needs to be doing. So give yourself the opportunity to just kinda get organized, and then hopefully fall into a really nice rhythm here.
So breathing and moving, I like to exhale when I press out and inhale as I come in. Think about your rib cage staying grounded. Think about your pelvis staying grounded. That's probably the hardest part when we're new on the reformer, I think. So the pelvis stays nice and grounded as you go in and as you go out.
And then also be mindful of both legs working equally. Feel this idea of squeezing a little bit the inner thighs at the top, and we'll do just one more here. Squeezing a little bit. And come on in. Let's go to the toes now. So the toe position I like to work on is an active foot position.
So when we press out to straight, that's when you can really feel the height, the maximum height of the heel. So this is where we wanna be lifted. But keeping the integrity of the ankles. And then as you travel in, you keep the feet like that. Now when you keep the feet like that, if you don't have somebody watching your feet, it actually feels like you have to slightly drop your heels in order to not lift and lower.
Because if you keep your ankles locked, what will happen is your heels will lift very high up and you'll pivot around your toe joint. I did a couple like that. Instead, I would like the feet to remain still so that as you bend and straighten, you're actually moving at the ankle joint. Think about that in practice. So as I often say, practice makes better. It's not about perfect.
One more time here, and then come on in. Slide your heels together so you're in a small v position Feel the ball of the big toe on both feet grounded, rib cage grounded as well. Out we go, breathing and moving. Thinking about squeezing those upper inner legs together at the top. Do straighten the knee all the way at the top.
But also make sure that you're using the backs of your legs, the hip extensors and the glutes. Well, I should say the glutes and hamstrings, hip extensors, to perpetuate or to propel the movement in the beginning. So you wanna really feel the initiation from the back of the leg, and then the control from the back of the leg as you come in. Let's do one more here. And then come into a v position wide. So heels are on the bar.
Feel a nice connection through the heel. Feel grounded through your rib cage. All the parts are in order. Out we go. So if I haven't said it enough during this class, one thing you also wanna continue to work on as you practice is making sure that both of your legs are participating equally.
Oftentimes, we have one that works a little differently than the other, and you may find that you notice imbalances over the years. Or perhaps you never notice them. But it's useful to think about maybe working one leg a little bit more for a repetition or two, and then maybe working the other leg a little more and see if you can feel the difference. If there is one, and then see if you can iron out the feeling. One more, please. And then let's come on in here.
Put the toes now on the bar in this same wide position. So that same idea of keeping the ankle the foot where it is so the ankle gets mobility is what one of the things we wanna try to work on. So when your legs are straight, you feel your foot position, and then it remains so as you come in and out. Feel the backs of the legs. Feel your breath, please.
So just a nice gentle flow here. Again, check-in with your other body parts. Neck and shoulders relaxed. I don't think I've said yet in this class. Really try to make sure you're gazing more up and around.
Rather than down toward your feet. If you're looking down toward your feet while you're on the reformer, it's like looking down while you're walking around. One more time here, all the way to straight, please. Come all the way in. Bring your feet close together, touch them. Feel centered.
Look if you need to. Separate your feet and legs a little bit, so we are going to do our calf raises now. So using your legs, press out to straight feet go down and feet go up. So remember to think about your eye gaze a little bit and look around, perhaps more straight up toward the ceiling, check-in and be sure that both legs are participating equally. Ideally, you want to have knees straight.
But when you press up, it feels like you have to do inner thighs a little bit, squeeze your legs together a little bit. And when you go down, you might have to soften your knees just a smidge if you're a hyper extender. Prancing. So one leg bends and the other goes straight into the stretch. So we're pressing up and changing and changing and changing. So just find a nice breath as you prance here.
And, you know, sometimes I'd like to go really slow on these. Other times, I like to just move move kind of quickly and then make changes as needed. So we wanna feel that both feet are working equally. And you should get a little tired in your feet while you do this. You also wanna keep your body stable and some nice breath. And let's hold the stretch on one side.
So when I'm stretching, I like to move my foot so it feels like I can just relax. Breathe in. And breathe out. So I have moved my foot so I can just allow my heel to stretch. I don't feel like I have to grab with my toes. Explore a little bit.
What can your pelvis do? What can your legs do? All I mean is just little movements to feel more stretch perhaps. Right? Change sides, please. So make it real secure for your foot.
Where does it feel right to you? Really drive the heel under the bar, breathe in and breathe out. And then within this shape, I like to just make little tiny mini movements and see what I feel and how it changes what the stretch feels like to me. So explore. You do you.
Let's press up with both feet, reorganize, and gently come on in. For single legs, we're going to want to change the springs. So we'll roll to one side and come on up to a sitting position and take off one spring, whatever that means to you. Okay. So I went from three reds and a blue to three reds. So you'll wanna take off a half spring or a whole spring or whatever it may be. So we're back on the reformer.
Both heels are on the bar. Look at them. Be sure they are. Even, and then lie back down. Keep your right leg on the bar, point the other foot at tabletop, and out we go. Let's do 10 here. Make sure you're straightening your knee all the way. Counting to 10 here.
And gently change sides. So you can work at a faster pace or a slower pace. You could do fewer than 10 if you needed to. Feel the back of the leg initiating. Feel the knee, straightening fully, without hyper extending, breathing, and moving, try to feel your pelvis stable, your ribcage grounded, your breath nice and consistent, ease of movement.
If you need to go a little slower, go a little slower. If you wanna go a little faster, you'll go a little faster, and we've got one more here. Gentlely come down. So we'll put the toes on the bar. I like to put both feet on even though I'm gonna do single legs. And then go ahead and lift the other leg up. So I'm on my right leg now, and we press out and we hold one.
Feeling again, the back of the leg. So when I do single legs, I like to try to keep the numbers exact. Sometimes it's hard to count and teach. So, hopefully, I have done a good job with you. But you can always pick up the pace a little bit or do slightly more or fewer repetitions if needed. As we progress, it's nice to be able to work a little faster, but also with control.
Last one here, let's do the other side. So again, the other leg is just lifted slightly pointed foot, straight strong knee, breathing and moving. Do feel that the quadricep helps really support the knee at the top. So you are using your quad, but you wanna put focus on the hip extensors back of the leg. Mhmm. Breathing.
And moving. And we'll do one more after this one, please. Beautiful. So your legs should feel nice and warm. Give your body a little hug roll yourself up to sitting, and let's change this spring again. We need to adjust for our abdominal work and our hip work.
So for that, one red in a blue is ideal. Now in previous classes, I've explained that If you know that that one red and a blue is too much spring for you, just lighten your spring, you'll have to get up and change before hip work. But if a red and a blue, you can manage for your arms and your abs, brilliant. So we're back on the reformer. We're even we've took a moment we've taken a moment to be sure of that.
Reach back and grab your straps. Make sure you have a little bit of space between your shoulder rest and your shoulders. Use your feet to help find this position where your elbows are straight. Your rib cage is grounded. Your abs are fully engaged.
So I'm I'm meeting the tension of the spring. My abs are fully engaged. I'm gonna point my toes, and I'm gonna tap my toes right there on the, foot bar. So my legs are kind of hovering, but there's a connection. Now I wanna make this an exercise. So we're gonna keep the intention with the arms and the abs, float the legs up, and then reach the feet and tap wherever you tap float the two legs up and reach the feet and tap and float the two legs up and reach the feet down and tap.
Flow the two legs up, stay. Two arms go down. Keep the rib cage engaged as you lift up with the arms. So that cue wasn't great, but the rib cage stays grounded, the abdominal stay engaged. So rib cage grounded, arms come up.
So feel your breath. I like to exhale to go down and inhale up. One more time here. Exhale down. Inhale up.
Tap one foot. The other foot on the foot bar. Stay where you are. Now we're going to progress on that, but if that doesn't feel right for you progressing from there, feel free to return to just doing the arms again. Okay? We're gonna lift the head and chest. So send energy to the from the arms to the straps. Gently put the tip toes on the bar, engage your abs, float your legs up.
Lift your head and chest. Look in the direction of your legs. Uh-oh, are you high enough up? Reach for the footbar with your toes. Gear, put some weight in the foot bar, lift your head and chest even more. Feel it so you don't have the spring right now. Now take the spring with your abs and your arms, float the legs up and lower down.
Try again. Feel free to use that. Lift your head and chest. If you're high enough, great. If you need a little assist, use your feet. Reach into it more.
Use your abs. Use your arms. Flow your feet up. And lower down. Let's try it again. Lift nice, high curl.
Feel free to use your feet or not. You decide. Should help you feel like you've got a little more height there. And one more time, please. Lifting nice and high, big abdominal curl, use the feet or don't, breathe in, and lower down.
Let's put feet and straps, please. So two feet are gonna go in straps. Hopefully, you feel confident with that at this point in your practice. Press your legs out to straight. So for frogs, we want flexed ankles or I'd like flexed ankles. It's not the only way to do it, but flex the feet, bend the knees in, and press out.
So what are we doing here? Hipwork is all about keeping your spine stable. So pelvis is grounded, rib cage is grounded, chest is open. You might exhale as the legs go out and inhale as the legs come in. So in my practice, I like to stop at about 90 degrees hips flexion, maybe a little further. What I don't want is a flopping in.
That's what you wanna avoid when you do this. Flopping in. What IQ people is meet the spring with your legs. And actively press out. So I'm coming into my endpoint.
I'm meeting the spring with my legs and actively pressing out. One more, please. Circals. So point your feet. We're gonna bring the feet up to whatever the high position for you is. Pelvis must be grounded.
Rib cage is heavy. Down through center, circle around to the top. And again, down through center, circle around. People often ask me, how big should the circles be? The circle should be as big as you can control and, enjoy the movement, if you will.
So if you feel pain, make them smaller. If you feel your belly flopping all over the place, make them smaller. Try to feel that both legs are working equally. And just enjoy that range there of that circle. Reverse the direction, please.
So opening and coming around at the bottom and then up through center. Breathing and moving. Remember to play with your eye gaze. Try to avoid looking at your feet the whole time. See if you can look up.
Maybe even to the right or to the left. Also check-in and make sure both legs are working equally please. So with this next one, will you work on your openings? We're gonna open the legs wide, feel a stretch. You're gonna glide your legs back in, inhale big, nice opening stretch, and glide back in.
Today, let's add a little bit of variety on this. So with the next one, open wide and stay. So I'd like you to soften the knees a smidge, turn out a little bit more and pull in a few inches. Open a little bit. Pull in a few more inches open a little bit, pull in a little more.
So progressively just kinda working all the edges that are the adductors all the way together. Let's open again just like that. So nice wide stretch. We're gonna pull in a bit. Open a little bit.
Pull in a bit more. Open a smidge. So you're pulling more together, then you're letting your legs open each time. So slowly, but surely, you end up with your legs together. One more time.
I'll tell you my inner thighs appreciate this. So just little explorations of movement, feel those adductors, Find some breath. Good. One more time, legs are gonna go all the way together. Go ahead and bend your two knees. Let your feet rest together and take a breath or two or three or four here. We're gonna work on The idea of doing the short spine or rolling over.
So I'll call this a short spine prep or a circular frog. So go with me on this. Okay? We'll press the legs to straight again and find your frog shape. So the key for rolling up and over safely and confidently is being sure that you stay connected to your core. So make that frog shape about 90 degrees hip and about 90 degrees knee. It doesn't have to be perfect, but put your hands on your thighs.
Push into your thighs your hands and simultaneously pull with your legs to your hands. So you're creating some tensegrity here. Keeping this shape of your legs, curl your pelvis, engaging your abs, and you're sort of lifting the pelvis up a little bit. And lower down. Try that one more time. Curling the pelvis and lowering down.
So same idea without your hands there. So you're keeping everything still with your legs no longer with your hands. Curl up that happens from your abs, but the stability comes from the legs. One more time, we're gonna curl the pelvis up and then lower down. So now press the legs to straight.
Same idea, different shape with the legs. So we come into about 90 degrees at the hip with the legs. Yes. Keep the legs, the intention of the legs, and curl your spine just a little bit feel that your abdominals are working. There there's tension there, lower down. And a little baby curl, and lower down. Feel free to touch your abdominals if you need to. One more time, a little baby curl, and lower down, send your legs down. Now, we're putting that together. Fold your legs into 90 degrees.
Continue folding your legs, but feel that you're using your abs to create that little bit of curl. Bend your legs here. These come toward your underarms. Use your abdominals with your back muscles to support as you come back through to frog. Press out to straight, point your feet.
Full to 90 degrees, continue folding, but allow just a little bit of lift of your pelvis, feel your abs. Bend your legs toward your underarms. Use your core not your legs to pull through. And press back to straight. Just one more like that, please.
Folding to about 90 degrees, going just a little deeper, feel that the abdominals are supporting you, bend your two legs, and then feel yourself down and press out to straight. Let's gently bend the legs there. Take a beat. Take one foot out of the foot straps. Find your foot bar. Take the other foot out.
Put your two straps away and then make your way up to a seat. Okay. Alright. Let's move on to some full body work now. So one spring is ideal for that. If you need a little bit more support, you might use a green spring. Otherwise, you might use a red spring.
We're gonna step up on the reformer. So remember, you wanna make sure you've got your hands on the footbar before you step on, and then you nestle yourself into position with support from your arms. We're going to do up stretch first. So up stretch one heals her up against the shoulder rest and lift it. Feel that your body is engaged here.
So my shoulders are pulling away from my ears. My abdominals are active. My ribs are tucked in. Slide the carriage back. Pull the carriage in.
Using your phenomenal abdominals. Also feeling that there is work in the arms. There is work with breath. Think about upper inner thighs squeezing together as you pull the carriage in. And let's just do one more after this one, please.
Now we're gonna work from this position to a plank position. Often called Upstretch two. So here we come down to plank position, open your chest, look forward a little bit beyond your arms, feel the support from your abs, and then pull yourself back up to your pyramid position or your up stretch one. Come down to a plank, feel it, feel lifting up out of your hands, up through your upper back, shoulders away from your ears, both legs are active, abs are active. And then pivot back up to your pyramid position. So try to keep your arms still if you can.
So you'll pivot your shoulders through, or you pivot your chest through. So there's movement at shoulders. And hips. Two more like that. Forward, bind breath. I like to use an exhale to lift up.
And one more, please. And here we are up flat feet here. So weight the heels, lift the toes, feel that your shoulders are plugged away from your ears. Lots of abdominal work here. Carriage goes back. Carriage comes in, breathing and moving. Often, I'll use a quick exhale to pull in, feeling the abdominals, feeling both legs working, last two here, and last one here.
Good. Transfer your hands. If you're able to, maybe walk your feet forward just a little, and then bend your knees a little. And then transfer your hands to the reformer. Let your head relax. And you're in a nice forward fold, maybe bend the knees for a moment, and then straighten.
And one more time, bend the knees for a moment, and straighten look up, find the foot bar. Gently step off of your reformer. And we'll move into our arms sitting. The spring that I have is perfect for that. I'm on a red. You might wanna lighten it if you were on the green. I would say somewhere between a blue, a red, and a green.
So we're going to sit with our bottom at the very back edge here. Yeah. Reach forward and hold on to your straps. Lady, I've been enjoying pushing my legs into the shoulder rest to wake up my outer glutes a little bit. You're welcome to try that, or you can use your inner thighs and squeeze your legs together. You choose.
So I'm pushing my legs into the shoulder rest to help me actually sit up straighter here and straighten my knees. Pull your straight arms behind you, chest expansion. So what are we doing? Supporting our core body with our abdominals and our back, moving our arms with some arms, lats, all those things. So as I go back, hold for a little bit longer, press open through your heart, down through your shoulders, check-in with your ribs, energetically lifting up through the crown of the head while using those arms. Let's do a couple more here. Chest open, strong straight arms, check-in with your body.
And one more here. Good. So sometimes we don't go too far forward in this. I really like just playing with more range, so I'm allowing my arms just to kind of float forward and back. You explore what works for you. Put the wrist, the straps on your elbows.
Palms facing your face. Same thing here. I'm gonna push out into the shoulder rest because I like the way that feels these days. Hollow the belly inward a little bit, open the arms to the side. I don't really like saying hollow the belly in so much these days, but, I want you to make sure your ribs are tucked in and that your abdominals are engaged. So take your arms to this open position where you've got elbows bent at 90 degrees.
Think notice where your thumbs are. They're aiming back. Stay here for a little bit longer while you spread your shoulder blades east west. And then just a little bit more external rotation, that means thumbs go back and look up with your eyes. Look forward.
Come again to the first position. So here we open. So a little more thumbs back, slight look up, and then come on back to where you started. Let's do that a couple more times. Breathing and moving, please.
And one more time. Beautiful. So let's do our biceps here. Again, oftentimes when we do the biceps, we lean back So let's just get started with the bicep curls. Try not to lean back. Feel yourself sitting tall the whole way through.
Feel that your arms are staying lifted the whole way through. But you wanna also avoid your shoulders reaching forward too much. So you wanna keep them plugged on your back body. Let's do a couple more here. Actively, I am pushing out against the shoulder rest, which helps me sit up straighter these days. Feel free to play with whether the outer hip or the inner thigh helps you sit straighter or neither.
One more time, please. And we rest that. So now we're going to turn around and do the rest of the series facing the other way. So you'll sit all the way up against the shoulder rest with your bottom really wedged up against those shoulder rest nicely. Draw your belly active. Take your straps and reach out in front of you. So stay here. Fill your shoulders on your back body.
Again, sitting nice and tall. Draw those ribs back a little bit, shoulders broaden as your arms open and pull forward. We call this the tree or hug a tree. Open the arms. I like to soften my elbows here a little. And as I reach forward, I lead with my pinky finger. Inhale opening wide and reaching.
So as you do this, the key to really getting all of the things to be working is that stretching East West. So as you open, don't let the springs take you back You're in control of the springs really reaching to the side there, continuing at a pace that suits you, breathing and moving. Couple more here. Just one more exercise. I think this is really a lot more challenging than people think. We're gonna do one more now to sit up straight. Right? That's a big, big challenge here. So bend both legs Manapple flags, both, arms.
Put your thumbs near your temples, please. So you can kind of decide where you are and then open them up a little bit. Yeah. Thumbs near your temples. Open them up. Now right here, in this shape, I want you to feel your external rotators working. So what are we gonna do? We're gonna let the spring take your hands slightly back. So it's like your elbows are slightly forward. Then press your arms to straight on the diagonal.
Think about that with me. Okay? Ben the elbows. Let the spring take your hands slightly back, your elbows slightly forward, and then you push straight forward with your arms. On the diagonal. As I come in, I'm spreading, and I'm finding those rotators, and I press forward enough. So that's just a way to kinda feel more muscles in the shoulder working. If you just start pressing your arms out and in, you probably won't get the littler muscles to contribute.
You'll be using the bigger muscles. And just trying to feel all the things in the shoulders or that the shoulder, the muscles of the rotator cuff are actually participating here. To help keep stability in the unit. Just one more time here. Pressing out gently come in and down from there. So put your straps away on your pegs back there.
And let's move on to just a little bit of leg work. So still just one spring. I have one red spring, and I think that's probably the best choice for most of us. We're gonna lie on our sides, and we're gonna use our strap for a leg. So like we did in the other class here, you will find the center of the reformer.
You're gonna rest your head on your arm, and you might hold the peg over here back behind you. Should you need to do something different, feel free to. You could use a pillow, you could put the head rest but this is what I like to do for ease of movement. I'm gonna take the strap that's forward. I'm gonna use both feet. You can use one foot on the foot bar and one foot on the, wood piece if you'd like to press out.
Okay? You could also have both feet on the foot bar if you prefer. So I like to have both feet grounded so that I can lift and put my strap on there. Okay? And then my strap is on my top foot. I need to feel that my body is aligned. I'm gonna push down with my top foot and bring my other leg up. Okay.
So my leg, the is bent the leg that's on the reformer is 90 degrees at the hip and the knee, and I'm using my abdominals to lift my bottom rib up. Okay. And then let's just bend the leg that has the strap and take the knee just ever so slightly underneath the rope and push down through the heel to straight. Yeah. So I'm bending the knee just underneath the rope and I'm pushing down, trying to feel my glutes working a little bit. Specifically we're targeting a little bit of the glute med, which is the muscle kinda on the outside here. So pressing down now, a big part of the challenge here is stability through your body. So you're having to hold everything together while you move the leg with the strap, which is a challenge.
So play with it here. We'll do one more here, keeping the leg long and straight. And now we'll play with a long leg movement. So see how far forward you can go with control. Good. And then as you go back, you're gonna find that your your range is gonna be dictated by the rope.
The rope is gonna hit the front of your body, feel that, squeeze the glute back there a little bit, and then go forward. So that's the range I'm looking for. I find if I put my hand on my pelvis, it's the easiest place to keep it so that the rope doesn't, scratch over my shoulder or my arm or anything. So the leg goes forward in space. And as I pull back, I wanna find my body with the robe, squeeze the glutes, and then check-in, make sure that your bottom abdominal wall stays active.
Good. I'll just do two more here. Should feel like nice little glute work. There's lots of fun things you can do here. It's really about stability first, though. So if you don't feel, a lot of work, it's a good there's a good chance that you're not stabilizing well enough through your core here. So we need to work on that.
Bend that leg for me. Okay? Reach down, see if you can find, whew, where is it? Where is the support, Sarah? Find support from your other leg. Take the strap out and bring yourself in. So again, you can either find the foot bar or you can find the wood chunk, whatever makes sense. And should you need to get in a different way, please do you? Let's go ahead and move to the other side. I'm just gonna swivel over for time.
Clime on in here. Hold on to one peg. So I like to have my feet on the foot bar suppose one could just put their foot in oh, no. It's too hard to put in right here. That there was a reason for that.
So if you push out first, it's a little easier. You have more strap, and then it's easier to put the foot in the strap. So there's a lot of side lying work that, I think people like to teach these days. So this is just a nice little introduction to this kind of work. So I've got my bottom leg is bent at ninety ninety, and my top leg is bent about the same. The rope is on top of the knee.
And then you're just gonna work first on just straightening the leg and finding comfort here, finding stability here. See if you can begin to feel that the work is coming from the outer hip, from that glute med area, that hip harness, feel free to keep your hand there if that suits you. Make sure that you're thinking about what's happening on your underside. That's important. One more here.
Keep your leg long and straight, and then allow the leg to float forward in space. And then as it floats back, you're gonna find that spot where the rope just touches your body and then forward again. And find that space where the rope touches your body and use it as feedback to help keep all your pieces in order here. I kinda use it as a guide actually to get a little bit of a stretch. Feels nice.
And as you press back each time, see if you can feel that you're initiating with the glutes, but that you're also adding a little bit of power from the glute at the end there. And then one more here, please. And then bend the knee and see if you can reach down and find the wood piece or perhaps you'll find the foot bar, whatever works for you, however you got in. It can take a little bit of practice getting in and out of that. So let's make our way upright. And then we are going to move in to the mermaid.
So for the mermaid, one spring is ideal. If you know you have issues with your shoulder, you'll wanna go lighter. Those of you that feel like your shoulders are strong and and well, then you can use a red spring, which is what I'm on right now. You could use a blue, you could use a green depending on you. So I'm just gonna walk around to the other side so I can sit down comfortably and then make my way into the mermaid shape. So the the front leg is kind of, bent out in front of you.
And then the other leg is the, ideally, the shin is kind of, in alignment with the shoulder rest, but sometimes people have a hard time in their hips and knees here. So one thing I like to do is bring my foot up underneath me and let my bottom sit a little bit on my heel. Now I have plenty of knee flexion, so that feels okay to me. If it doesn't feel good, find a way that it's comfortable for you to sit. So find a place where it works. When we begin, We wanna feel like we're sitting on our pelvis with the arms stretched in in alignment with your shoulders, so not too far behind you.
Press your elbow to straight and check-in and make sure the spring feels okay and try to feel that you are in fact sitting on your pelvis. Rather than jutting yourself forward. Yeah. So let the other arm be by your side, and let's just play with the movements, then another day will go even deeper into the mermaid. So a nice big side stretch out to the side. Notice I let my hip lift.
My shoulder is anchored. Rotate around, touch the bar looking at the spring, hollow the belly in, or tuck the ribs in a little bit. Look back at me, chest is open. And as we come in, we keep the elbows straight. Breathe, please. Reach away. Feel that.
Rotate around. Touch the foot bar. Look at the spring. Talk the ribs in. Open look and come down. Let's do one more please.
In health reaching. Use your breath, feel that you can kinda thread all this together, enjoy, find the breath that suits you, and we'll come all the way in here. Beautiful. So let's just climb off of the reformer, walk around and set up the same way on the other side. So you'll have a seat on your reformer.
You'll set up your front leg first and then tuck your back leg behind you. So if you are able to, you can wedge the shin up against the shoulder rest. If you need to modify, you modify. You wanna make sure you're comfortable. Hand is outside of shoulder, not behind, feel your support, your stability from your shoulder girdle.
We'll reach away. Notice that the pelvis moves. We rotate around, look at the springs, shoulders are relaxed, breathing, open, and we come in. And again, reaching away. Rotate around, look at the spring, find your breath, tuck your ribs in.
And as you unwind, make sure that you're sitting on your hips, your spine is long, your shoulders are relaxed away from your ears one more time. Breathing, enjoying that movement, looking at the spring, gently unwind, and we'll come out of that. Beautiful. So our final exercise pulling straps. Before we do anything, it's nice to put the foot bar down so it's out of the way.
You can lift your legs higher than the foot bar and not put it down. I like to do this with one blue spring to begin. So it's light, and that gives you the opportunity to really feel that it's a back exercise before it's an arm exercise. So the box goes on long box here, right up against the shoulder rest. And then you can climb onto the reformer with your chest just around the edge of the box.
You wanna think Maybe just below chest line here a little bit, you wanna think center of thoracic spine is where we're bending from. So too far is too far and not far enough is not far enough. So find the sweet spot for you. Squeeze your legs together. Hold the ropes above the buckles, and let's just begin with that. Sometimes we wrap around for a deeper, a longer range of motion, but I'd like to begin with just holding the ropes above the buckles.
Engage your legs, engage your abs, feel your eye gaze looking in the direct of the floor. First, plug your shoulders and then begin bringing your arms underneath you and find back extension, taking the arms all the way up if you're able to. And lower yourself down. So don't think of the movement beginning with the hands. Sholders plug, arms move, but now here, it's upper back, thoracic extension, and the arms are gonna continue.
So let's thread that all together. So one two three here, yeah, shoulders, and lift, and lower down. And breathing. Just open, hold it. And lower down. And this time, we'll lift and we'll stay.
Feel the upper back. Feel the arms. Check out where your neck is, where your shoulders. Are you using your abs? Are you using your legs? And lower yourself down. Put your straps back on the pegs and then adjust your body so that you feel you can totally relax here with your head.
With your legs. I like to really use the weight here, of my head to help just kinda stretch a little bit my upper back and the back of my neck. And letting my arms be heavy here. It feels really nice, gives me a little bit of traction in my low back, which I think oftentimes we can use. So carefully bring yourself up from there.
We'll remove the box. And we'll just finish with a beautiful stretch. Our hip and hamstring oh, it's stuck on there today. Our hip and hamstring stretch. So put the box out of the way.
One spring is ideal for your hip and hamstring stretch. I recommend one red spring, and you're going to need your bar back up to the middle position. So let's stand near the foot of the reformer. Oops. I forgot to remove the blue. Put the foot, the other foot up against the shoulder rest as you bend into your lunge.
And here, see if you can put some effort on keeping those ribs tucked in as you find that stretch. And then really try to bring that pelvis forward just a little bit and breathe in and breathe out. So we can make this an exercise in strength and stability if we just hold this shape, knowing that you don't need your arms. Right? You can use your legs to stabilize, your core to stabilize. But you can also then make variations on this and sink a little deeper into the stretch. Allow your body to fold forward.
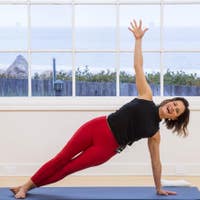
I've put my forearms on the foot bar, and I'm allowing my body to fold forward so I can sink just a little deeper into a different type of hip flexor stretch. That feels really nice here, and it feels more relaxed and passive. Much like some poses we do in yoga where you're more relaxed toward the floor, or more lifted toward, the the sky, if you will. So I've come back to that lifted position just to feel the difference between the two. And why don't you stretch your front leg to straight and feel a little bit of a stretch there through the back of the leg? So here, remember you wanna feel that your back is flat.
So you can maximize the stretch through your hamstring, breathing. And let's come out of that and do the other side, please. Always good to do a nice stretch. So we've got one foot up against the shoulder rest, the other foot near the foot of the reformer. My strong leg as you bend in, breathing in and breathing out.
So again, my legs are working to hold this. My hands are here just to help me out. Ribs are tucked in, supporting with the abdominals, but also enjoying that stretch, that lift, breathing in, and breathing out. And then you can shift if you'd like to. So you might take your forearms onto the foot bar, and then fold your body forward and begin to sink just a little deeper into that stretch.
Just notice feel for things that need to loosen or sometimes when we're trying so hard to hold on to something, it's harder to stretch certain areas. When you find a little more support from the equipment, for your body, you might be able to get a little deeper into the pose, the position, whatever it may be. Put your hands back on the foot bar and find the active position again, and then press your front leg to straight and flex your foot. That doesn't feel good. Don't do it.
This isn't my favorite hamstring stretch in the world. I like stretching my hamstrings in different ways, but I actually still feel quite a quite a lot of hip flexor stretch here. Still a good position. Bend forward, and let's come to standing. And let's together just finish with one roll down kinda surveying how we feel after that luxurious workout with your feet underneath your hips be for a moment.
Feel. Maybe close your eyes. As you roll forward, perhaps open your eyes or keep them soft. So rolling through your head, remember that idea of really maximizing that flexion of your spine, minimizing how much the legs go back behind you. You can bend your knees a little bit or not. It's up to you. Let your head relax.
Let your shoulders relax. Notice where they go. And then plug your shoulders. Keep your head relaxed and roll up. Seems like one is never enough.
Let's do one more. Curle down. Let your shoulders relax, your head relax. Plug your shoulders. Keep your head relaxed and roll up.
And when you find yourself in a standing position, keep your eyes closed for three breaths. Feel yourself growing tall through the crown of the head, open through your heart. Try to find equal weight on both feet. And a hint of a smile across your cheeks when you're ready, open your eyes. And I thank you so very much for playing.
Beginner Reformer: +50-Minute Classes


Comments


You need to be a subscriber to post a comment.
Please Log In or Create an Account to start your free trial.
