Description
About This Video
Transcript
Read Full Transcript
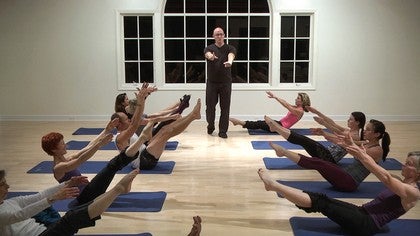
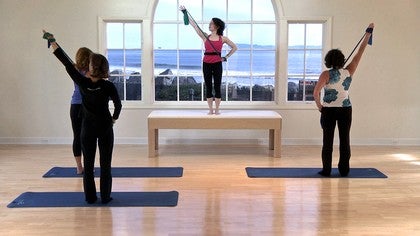
All right. So what I'd like you to do is we're gonna do a little check in our body, a little awareness plan. I like to do it in standing. So with our eyes closed, provided you don't have a balance disorder, if you do have a balance disorder, you can keep the eyes open, but it's a little better exercise with the eyes closed. And I want you to imagine that you are your skeleton and that that skeleton is suspended from the ceiling with an elastic band.
A heavy elastic band from the crown. And the sensation I want you to have is actually that the feet are reaching for the floor rather than your head reaching for the ceiling. See if you can distinguish the difference between that. Just bones and connective tissue, suspended from the ceiling. And feel as if you're reaching for the floor.
If you actually incline a little bit forward, you'll actually feel that suspension feeling. Okay. And let's bring our attention to our toes. And notice that when the body weight is forward, the toes engage into the floor. And the metatarsal heads, the ball of the foot, they spread apart.
And as you gently sway back as the bones, the toes disengage. And the arch actually increases in the foot. So again, as you sway forward, the arch decreases and the toes splay. And as you roll back onto your heel, the arch will lift off and the toes disengage. Now that second toe and the second metatarsal are the levers of the fore foot.
So when you are moving forward, they become stiff and a little rigid. As if it wants to propel you or launch you up onto your toes. And when you go back, it softens and relaxes. And continue to move through the foot in the mid-foot. The mid-foot bones connect to the heel.
The calcaneus and also to the talus. Now the talus is the bone there the foot comes up into your ankle. And the talus, if you were to look at it, has the shape of a saddle of a horse. It's a little bit wider in front. And you can even think of the two leg bones, the tibia and the fibula coming down.
And that little bone that comes down the side are like the legs of the horseman. And you'll notice that when you lean forward, the legs spread apart because the saddle's a little wider and it gets stiff. And as you lean back, those bones slide back and become more relaxed. And again, you can just sort of play and understand our body. How it works just even at the foot and ankle.
That as we lean forward the foot becomes stiff, the second toe becomes a lever. And the heels want to lift off because that ankle bone becomes a little more rigid and ready to propel you forward. If you lean further forward, your heel's gonna come off the ground, yep. The tibia is the primary weight bearing bone. That's the big leg bone that comes up.
And it's gonna meet the femur coming down to form your knee. And that particular joint has what we call two condyles or bicondylar. They're like two wheels of a truck. And the tibia is like a bowl that receives those two wheels of the truck. So if you gently bend your knees, almost like you're bouncing on the elastic band, you can feel the wheels spiraling on the tibia.
And just sort of appreciate that sort of spin forward and back happening at your knee. And the femur stacks up superiorly up towards your head and laterally out towards the outside of your pelvis. If you place your fingers on what's called the greater trochanter or the modeling hips. These aren't your real hips, these are modeling hips. And then bring your fingers across the front of your pelvis until you cross the crease, or the inguinal canal.
And that's actually where your hip joints are. They're very close. Very central. So you notice if you just shift your weight right to left of the skeleton, you don't have to shift a lot of weight. And move a whole lot to be able to get on top of the hip on each side.
You don't have to move very much. It's pretty easy. Okay? And then from there, that femur, that ball comes up into the pelvis. And the pelvis connects in the front with the pubic bone.
And in the back with the triangle of the sacrum. And the sacrum is tilted forward about 40 degrees. So just so again, feeling the skeleton suspended gently forward and notice that sacrum being tilted forward is very natural. And it puts the pelvis right on top of the femoral head. So there's really little work happening there.
And the sacrum because it's tilted forward means that L5, L4 and L3 are gonna stack up superiorly and anteriorly towards your belly button. So place your finger on your belly button and that lines up with the body of L3. So L3 and your belly button is the narrowest place in your body. All right. So when you feel the belly button draw in towards L3, it makes you a little bit taller, a little bit longer.
And when you relax that space between the belly button L3, you become a little bit shorter and a little bit wider. L2, L1, T12, T11, T10, T9, T8, T7 stack up superiorly and posteriorly. They're widening the carriage to hold your heart and your lungs. So that's where our chest gets wide. All right?
So if you put your finger on the base of your sternum or your breast bone, that xiphoid process, that's about T7. That's the widest part of our body. So take in a deep breath and feel the ribs expand forward and the spine expand back. Feel the expansion. When you exhale, feel the belly button and L3 coming together and gently lean forward into that foot.
And you start to find a really efficient place where the muscles almost don't have to work anymore if you can get the belly button and L3 aligned, and you can get the sternum and T7 aligned and gently lean forward into those ankles to where your toes gently engage, you'll find that nice alignment starting there. Now T6, T5, T4, three, two, one, and the bottom of the cervical spine stack up and move anteriorly, narrowing the space again to make your neck. Okay? And then it's gonna come up to your head. And the last thing I want you to do is just place your index fingers underneath your ears and just behind your jawbone.
Now what that is, is that's the transverse process of C1. The very top vertebrae, and your head rests on top of it. And it is the fulcrum for the teeter totter of your head. So if you let your head sort of tilt forward and back, that's the center axis. And now imagine a plumb line coming down from there, goes through the throat, through the cervical spine, and now it's gonna go into space, right into your heart.
So it's not gonna touch any bones, you have the thoracic vertebrae behind, the sternum in front. It continues to drop down. It's gonna go right through L2 and L3, the vertebral body. Just in front of the sacrum, just behind the pubic bone. The anterior 1/3 of the knee, and it's gonna land right in front of the ankle.
So what you'll feel is that little gentle anterior tilt. About 60/40. 60% on the ball of the foot. 40$ on the heel. And again, just imagining the pelvis on top of the femoral head.
You can imagine the sacrum gently tilted forward, the belly button L3 drawing together. And the expansion between the sternum and T7. And the length of the neck right up into the elastic band where the head is connected to the elastic band. Now from here, what I want you to do is just do a self check and observe if there's anywhere in your body that you feel that you're working or that you have a restriction or an assymetry. And just make a little mental note of it.
And then open your eyes and go down onto your mats. On your back. Knees bent. Feet towards the center of the room. And now let's be very conscious and alert, preferably the eyes open.
Active conscious awareness. Feet are about hip width apart. And I want you to imagine the pelvis is like a big bowl of soup. So it's round on the bottom. And the perimeter of the bowl is gonna be your belly button, your pubic bone and the two crests of the pelvis.
So this big bowl and it's open to the ceiling. And let's start with the bowl half full of soup. And tilt the bowl towards your feet until the bowl comes to the pubic bone. And then tilt it back towards your shoulders until the soup comes to the belly button. And just keep doing that.
And every time, use a little less energy, a little less work. And yet, increase the connectivity of each of the connective tissues. So we can start by thinking of the bones. We can think of the pelvis talking to the sacrum, to the lumbar spine, to the thoracic to the neck, to the head. So you should feel the head moving when the pelvis moves.
You could also think of the digestive system. So as the pelvis moves, we have all of our digestive system, our gut, our stomach, our esophagus, all the way up into our mouth. You could think of the circulatory system. As the pelvis moves, the arteries and the veins, the lymphatic system, the heart being moved as you articulate the spine. So as the pelvis tilts anterior and posterior, the spine follows.
Everything follows. Let the pelvis rest and now tilt the bowl to the right and to the left. All right. So the knees stay up towards the ceiling and the pelvis is tilting to the right and to the left. It's rotation of the low back is what I want you to feel.
That's it. And let's do that two more times. Again, notice that the transference of force might not travel up so high when you're going right to left. But if you can even feel deep and imagine that connectivity to the eyes, and to the nervous system as you wind it side it side. Now combine the two movements by doing a diagonal.
So we're gonna tilt the pelvis to the right foot. Anterior and right rotation. And then we're gonna go posterior tilt with a left rotation. And it might feel a little odd at first but actually this is walking. This is the movement of walking.
So just imagine you're just walking with this movement. And allow that diagonal side to side and then we're gonna go to the left foot and right shoulder. So just switch the diagonal. Very nice. And by doing that, what we're doing now is actually putting a true movement through our spine the way our spine is meant to absorb the ground force.
And we're just sorta trying to find pathways to distribute that ground force up and through our spine. And just noticing where we move from, where we don't move from. Let's finish up with a little circumduction as if I was stirring the soup with a big spoon in a clockwise direction. Just allow the pelvis to move. And as you allow the pelvis to move, think of relaxing even more the muscles around the head of the femur.
Or in the hip. So you have to really be relaxed in the hip to allow the pelvis to move around the head of the femur. Otherwise the knees are gonna feel like they have to sway all over the place. So the knees are quiet, the hips are relaxed. And the pelvis, that bowl of soup is moving as independently as possible.
Now we stir back the other direction, counterclockwise. Four or five times. Nice and easy. Getting as smooth as movement as you can. Make sure you still appreciate the anterior tilt.
All right. Sometimes we keep, we don't appreciate that anterior tilt. You gotta appreciate the anterior tilt. And relax. Hands to the side.
Very conscious of where you are. Just down to your side, down to your side. But palms down. We're gonna take a breath preparing to go in to the bridging. Lifting the pelvis off of the floor and rolling up through our spine one vertebrae at a time until the weight's between the shoulder blades.
You're gonna do it on your own time. Take in a breath and peel up and taking another breath, exhale softening the sternum, softening the ribs. Rolling down through your spine one vertebrae at a time. And the key here is to think of yourself almost like a jellyfish. Right on the beach.
And your head is the last tentacle stuck on the sand. And that gentle waves comes in and peels you off. Think of being cellular, not skeletal right now. Take in a breath up on top and allow that energy and that body, those cells to come down one at a time. Or you could think of a strip of Velcro peeling it up and laying it back down.
The last thing I want you to think of in the bridge is reaching through those knees or feeling the pull or tug of the ocean drawing your bottom away from your shoulders. Creating that space. Now in the next bridge everybody's gonna roll up. And we're actually gonna transition our pelvis side to side. So it's like a typewriter or if you are post-typewriter era, you could think of a skateboard underneath your bottom.
And you're gonna slide your pelvis to the right and slide the pelvis to the left. Slide to the right, slide to the left. And then drop down a centimeter or an inch through your chest. And repeat it. Slide to the right, slide to the left.
And I want you to feel really sliding rather than rotating. Sometimes we miss or hiking the hip. It's a true translation. Very nice. Let's do that one or two more times dropping down and keep going.
See if you can four or five repetitions of that lateral translation. That's right. Good. And bring it all the way down. Okay.
Take in a breath. Relax those legs for two seconds. Exhale. And roll back up. And this time we're gonna add a diagonal to it.
So what we're gonna do is drop the right hip down an inch, slide to the right. Drop the left hip down two inches, slide to the left. Drop the right hip down two inches, slide to the right. You might get two to four repetitions of that until your bottom comes down to the ground. So just like a step diagonal, side to side.
Side to side. Boom. Okay. Now the last one we're gonna do is a figure eight. So when you come up on this last one, we're combining everything, right?
And we're thinking of taking that pelvis and if you had a shovel. A little tiny garden shovel on each hip. And sand was underneath you, you're gonna drop the right hip, scoop up a scoop of sand bring it up high. Drop the left hip down, scoop up a scoop of sand. And just keep repeating that as you drop yourself down one vertebrae at a time.
You can use an image that's a little less pleasant. But if you had a writing utensil coming out of your backside. And a piece of paper there, that figure eight would continue to descend by half an inch each time you did the figure eight and painted on a piece of paper. Okay. Let's try it one more time.
Bridging up. And what we're doing here is we're waking up those local muscles by doing segmental movements. So any activity we do after this, the body really is prepared for it. And finish off this last repetition of figure eights. Going through and just gradually dropping ourself down one vertebrae at a time.
Exploring the full mobility of each segment of our spine. Now take your hands together and put the back of the hands so that the index finger is resting on your sternum. Imagine that I'm grabbing your elbows. Yep. So I'm grabbing the elbows and I'm gonna draw them away as you do a partial roll up.
So you're just going to send your elbows towards the center of the room. And it's gonna act like a little bit of a hammock that holds your head up. And then come back down. Yeah, let's just repeat that four more times. And exhale and bring it up.
And inhale back down. Very nice. And again, use the arms. Think of that trapeze, that fascia in the back. As you send those elbows away.
Helping you to come up. And again, exhale. Feel that lift. Yeah. There it is.
And you can also think of the ribs. As you come up, the ribs are gonna go back into the mat. And up underneath your heart. So use that image as you come up. One more time.
Exhale and feel that lift. And take the hands behind your head. We're going into the chest lift coming down. Take in a breath to prepare. Exhale.
Roll it up. Inhale. Arc the arms through space behind your thighs. Exhale. Lift up a little bit higher.
Maintain that height. Inhale, bring the hands back behind your head. And exhale and roll down. And inhale to prepare. Exhale, rolling up.
Inhale, arc the arms. Exhale, roll up a little bit higher. Hold that area. Inhale, arms back behind the head. And exhale rolling down.
Two more times. And exhale rolling up. Inhale, arc. Exhale, lift. Inhale, arc.
Exhale, roll down. Last one, here we go. And exhale roll up. Inhale, arc. Exhale, lift.
Inhale, arc. Stay there. Hands behind the head. Lift that right leg up. Lift the left leg up.
Going to criss-cross. Opening to the right. Opening to the left. You know criss-cross, right? The opposite leg straights out, yep.
And open. We just need to do four really good ones to each side. You got it. Stay up with it. Stay up.
It's opening to the side, not reaching across. That's it. Last one. One on each side. And relax.
Very good. Let your body come down. Okay. Bring your right knee up to 90, 90. Left knee up to 90, 90.
Hands behind. Just gonna do a modified roll up. So take in a deep breath. And here we're gonna try to do this without using any muscles. So it's a balancing act.
If you can imagine your feet are heavy. And you send your feet down towards the mat and your head and spine peel up. Your arms are like the springs. You're gonna come up into a seated position. Use your arms.
Just gently roll up. Take in a breath. Exhale. Gently roll back. Now the idea here is that we could play red light, green light.
Any of you remember playing red light, green light? So if I call out green light, you move. If I say red light, you have to stop wherever you are. If your body continues to move, you're out of the game. (laughing)
They're soft elbows. And you are gonna use your fingers a little bit. But don't pull in, because that will make the balance unequal. Yep. So here go.
Green light, we're rolling. Red light. Green light. Red light. Green light.
Keep going. Keep going, rolling back down. Red light. Green light. Red light.
Green light. Good. Now let your legs slide out on the floor again. Arms up over your head. Going in to the full roll up.
This time we're gonna do something a little different though. We're gonna sing. You all know the words to this song. It goes something like this. ? One, two ? ? Three, four ? ? Five, six ? ? Seven, eight ? ? Eight, seven ? ? Six, five ? ? Four, three ? ? Two, one ? You know the words, right?
So take a breath. And let those hands float over your chest. Exhaling singing. ? One, two ? ? Three, four ? ? Five, six ? ? Seven, eight ? Inhale. ? Eight, seven ? ? Six, five ? ? Four, three ? ? Two, one ? We lost our key there right?
Now listen to this. When you get to four, five, and six, it can't sound like you're having a bowel movement. (laughing) All right? That's when you gotta blow the air out. So it has to sound like this.
? One, two ? ? Three, four ? ? Five, six ? ? Seven, eight ? So four, five and six are really important. I want to hear operatic voices on four, five, and six. (laughing) Inhale, here we go. Arms float up over the chest. Exhaling.
? One, two ? ? Three, four ? ? Five, six ? ? Seven, eight ? Wasn't that easier? ? Eight, seven ? ? Six, five ? ? Four, three ? ? Two, one ? Very nice. Roll over onto your right side. Side kick position. I like to be up on the forearm.
I tend not to do the elbow. I tend to do a full forearm. Weight bearing. Your left hand can be in front of you for balance. Or you can challenge yourself by bringing it behind your head.
Either one is fine. What I do want you to do, is I want you to get that body up on top of that shoulder so that you have perfect congruency on that shoulder. And I want you to imagine it's your body from the ankles all the way up to head are like a tube that is gently arced. Okay? So ribs are in check.
Everything's working. And now just lift that left leg up as high as you can without losing that posture. And bring it back down. And lift it back up. And bring it back down.
And lift it back up. Bring it back down. Lift it back up. Bring it halfway down. Circles going forward with one. (fingers snapping) Two. (fingers snapping) Three. (fingers snapping) Four. (fingers snapping) Five. (fingers snapping) Six. (fingers snapping) Seven (fingers snapping) and reverse.
And one. (fingers snapping) Two. (fingers snapping) Three. (fingers snapping) Four. (fingers snapping) Five. (fingers snapping) Six. (fingers snapping) Seven. (fingers snapping) And hold there. Going into side kick. Feel that length, the leg comes forward. We all gotta do it together because you gotta make me look good. So everybody forward.
All right. So this is a video exercise if I've ever seen one. And exhale, reach back with a point. (fingers snapping) Listen to my thumb. And forward. (fingers snapping) And back. (fingers snapping) And in. (fingers snapping) And back. (fingers snapping) We're gonna add a double pump this time.
In. (fingers snapping) And back. (fingers snapping) And in. (fingers snapping) And back. (fingers snapping) And in. (fingers snapping) And back. (fingers snapping) And in. (fingers snapping) And back. (fingers snapping) One more time. And in. (fingers snapping) And back. And hold it back. Take your left hand, reach it forward. Remember that connection between the belly button and L3?
And the sternum and the thoracic spine? Take in a deep breath there. And as you exhale make the sound of a bee. Zzz.
Connecting the belly button with the spine. Connecting the sternum. Go until there is no more air. Keep lengthening. Keep reaching.
When you run out of air roll over on to your tummies. Place the hands underneath your forehead. Palms down. Create space between your ears and your shoulders. Feel your sacrum moving away from your head.
Feel that length. And gently press your hands and forearms into the mat. And slide your gaze and your nose along the floor and gently bring up your head, your neck, and your sternum. Arms stay down. And bring it back down.
And again. Gently slide the head forward and bring it up. Pushing the arms into the ground. Feel the length between the ears and the shoulders. Yep.
And back down. Now what I'm looking for is I want to see the movement in your upper backs, not in your low backs. So see if you can see that sternum really moving forward. That means the ribs are gonna be moving forward. And down actually.
So you're gonna feel that connection of that lowest rib moving down towards the pelvis. One more time, just the head, shoulders, and thoracic. Come up. And down. Very good.
Now this time, keep the same organization. Let's just float the legs up. Without losing the control of our low back. So we're just going to float the legs up off the ground. Leave the head alone.
Just the legs. And legs down. Just the legs float up. And the legs come down. Still keeping that connection we did with that Zzz sound of L3 and the belly button.
One more time, legs come up. And legs down. Now this time we're going to lift arms and head up. Leave the legs alone. But the arm's gonna come up with the back of the hands attached to the head.
Bring it on up. And down. And up. Just four times. And down.
Two more. And up. And down. And up. This time lift your legs up as well.
Reach your arms out in front of you. Going right into swimming. Legs come apart. (fingers snapping) And one, two, three, four, five, six, seven, eight, and nine, 10, 11, 12, 13, 14, 15, 16, 17, 18, 19, relax. Sit back on your heels. Take a deep breath into the low back.
And when we come back down, we're gonna go on to the left side when you're ready. Go ahead and stretch there a little bit if you want. This is where I check for tattoos. (laughing) On your left side, up on that left elbow. Really getting that nice long tube effect in between those two panes of glass.
Feel that reach, good. Let that right leg now float up. And down. Keep the length of the neck in place. And up.
And down. And up. And down. And up. Two more times.
And down. And up. And down. Last one. Feel that pulse.
Energy up. Halfway down. Circles going forward. And one. (fingers snapping) Two. (fingers snapping) Three, feel the fluidity. Feel that hip.
Almost bring the hip back into the socket rather than reaching it away. Feel it congruent, feel it moving, smooth, lubricating that hip. And reverse. And one. (fingers snapping) Two. Three. (fingers snapping) Four. (fingers snapping) Five. (fingers snapping) Six. (fingers snapping) Seven.
Side kick. And forward, (fingers snapping) and back with me. (fingers snapping) And forward. (fingers snapping) And back. (fingers snapping) And forward. (fingers snapping) And back. (fingers snapping) Double pump and uh, uh. (fingers snapping) And uh, uh. (fingers snapping) And uh, uh. (fingers snapping) And uh, uh. (fingers snapping) One more time. (fingers snapping) And back. Hold it back. Take that right hand. Reach opposite.
Take a deep breath. Feel that connection. Exhaling as a bee. Zzz.
Keep reaching. Keep exhaling. Feel that connection. Keep going, keep going. 'Til there's no more air and the body's long in rotation.
And roll onto your tummy. Very nice. Let's go with our hands behind our back and go into a little double leg stretch here. And let's start with our heads looking to the right. So we look good for the camera.
Yeah, there we go. All right. So we're gonna bring the leg up. I like to do a double pump. Some people do a triple pump.
We're gonna do a double pump just with the heels. You can dorse reflect the ankles doing the pump and then point with the reach, okay? So let's do it together. Here we go. Legs down.
And pump. (fingers snapping) Pump. (fingers snapping) And reach. Reach those arms down and away. Come up into extension. Head comes down to the left. And again, pump. (fingers snapping) Pump. (fingers snapping) And reach.
And pump. (fingers snapping) Pump. (fingers snapping) And reach. Very good. And pump. (fingers snapping) Slide those hands up that back. (fingers snapping) And reach. And pump. (fingers snapping) Pump. (fingers snapping) And reach. Two more times.
And pump. (fingers snapping) Pump. (fingers snapping) And reach. Last one. And pump. (fingers snapping) Pump. (fingers snapping) And reach. Now stay there. Release the hands.
Palms up towards the ceiling. Dart position. Lengthen the back of the neck a little bit more. Slow pumps of the arms coming up. And down.
And up. And down. And up. A little less extension, and a little more length in the spine. That's right.
Feel the length. And up and down. Two more times. Up. And stay in this position just for a couple more seconds.
Doing a fast pulse like a hundred speed. And in, (fingers snapping) two, three, four, five, Out (fingers snapping) two, three, four, five. In, (fingers snapping) two, three, four, five. Out (fingers snapping), two, three, four, five. In. (fingers snapping) Out.
Last one. In. (fingers snapping) Out. (fingers snapping) Bring your hands to the floor. Sit back on your heels and take in another deep breath into your low back. Very nice. We're going to move into the quadruped position on your hands and knees.
And we're gonna do more of a relaxed move right now to loosen things up again. So if you remember how we did the bowl of soup, we're gonna do the same exercise. But now we're going to imagine we're on the moon where there's not so much gravity. And the soup's not gonna spill out of our bowl. But we're going to an anterior and posterior tilt of the pelvis, the soup bowl.
And allow it to articulate all the way through your head. So you should be feeling it. If you just give me your eyes for a second. I'll show you where we're going. So we're here, we're going to feel the movement all the way through the spine.
And we're gonna do diagonals. And then we're gonna do full circles. Now, you can imagine if I had a lot of hair how beautiful this would look. (laughing) But that's what I want to see. I want to see some movement.
That's even with a three level fusion in my neck. You can do it. Here we go. So gently articulating the spine forward and back. And feel that connection.
It's not something you force. Allow the vertebrae to communicate with each other. They're talking to each other. That lumbar is sending a message to the thoracic. The thoracic to the neck.
The neck to the head. And back down again. Feel that full movement. Allowing the movement. And going to the diagonal now.
We're gonna tilt the pelvis back towards the right foot. So post to your right. Come up in here. There. And head goes there.
Now you're gonna come down anteriorly. Your hair makes it easy, there we go. And there. Find the diagonal. What's that?
And then switch sides. And allow it to come back the other way. Let the head lift up. Where's the head? More.
There it is. And back down. Just on top. There it is. Good.
And go right into circumduction. Four or five times in each direction, including the movement of the head. And the spine. Pelvis and head moving opposite. Let it move.
I get paid a lot of money by women to teach their husbands how to do this Andy. (laughing) Reverse the direction. Absolutely. I need to see this go into extension too. So when your head comes up, bottom's up.
Yep. Yeah, then come through. There it is. All right. Did we go both directions?
All right. Now find what you would consider to be that optimal space. Tailbone and crown of the head reaching opposite of each other. Ribs coming as close to the central axis as possible. Shift your weight over to the left hand and the left leg.
Reach the right arm and right leg out. And open up on top, going into a pre-star. Can you do it? Take it on up. Open it up.
Where your eyes go, your body goes. Make sure those eyes are moving. Eyes gonna go. There it is.
And then when you come back down. Shift that weight to the left. And allow the body to move around the ball and socket. That's the key. So you control it.
You aren't doing it from a static position. It's very dynamic. Switch over to the other side. That's it. Where your eyes go, your head goes.
It all moves together. And now when you're coming down, shift that weight back to the right over the hip and the shoulder to be able to bring it down. Exactly. Exactly. Very nice everybody.
Again, to the left. Each time with a little more confidence. Feel a little more connectivity. In line. And shift it to the left and come down slowly.
Control it. Last one to the right. Lift the left hand, left leg. Reach 'em long and open 'em around. Feel yourself articulating around the hip.
Very good. And back down. Now, from where you are in quadruped, right where you are, you're gonna sit your right hip down onto the mat. So you're gonna sit to the side. Yep.
Okay. So from there, we're gonna go into a sort of advanced mermaid. So you're gonna have your legs here. Um-hmm. You guys are the same.
You're doing the same side. So that's good, just like that. And we're gonna just walk our hands out a little bit. And what we're gonna do is we're gonna take that left hand of ours and we're gonna sweep it out and up and over. We're gonna come underneath and pike up.
Reach long. And come back down. Okay. Let's do that. So we're gonna sweep that arm, come up and over that right.
Thread the needle with a little bit of a snake and twist kind of movement. Reach the arm back out into plank, reaching long. And then come down from side lift. Arm comes back in front. Again.
And up. Thread and pike. Plank and reach. And come down. Last one on this side.
And sweep. And thread and pike. And reach and plank. And come back down. Very good.
Now gently sit back on your sit bones and take your legs to the other side. Yep, that's it. And with your right hand gesturing now, did we do that right?
Actually this looks good. You're all facing the same direction. Right hand gesturing. Here we go. Reaching it up.
And thread and pike. And plank and reach. Reach that hand over there Andy. Reach that hand, yep. And then come back down.
And gesture with the arm. And thread and pike. And plank and reach. Out into that snake position. And then come back down.
Yes. Two more times. And gesture. And thread and pike. And plank and reach.
And come back down. Last one, here we go. And sweep. And pike and thread. And plank and reach.
And come back down. Very good. Very good. Let's go right into our mermaid. Our real mermaid.
From that position, you're all sitting in good places. So that right leg's gonna tuck back. Left leg comes in front. Yeah, there we go. Let that left leg come out a little bit.
There you go. Now left hand is on the mat. We're gonna talk about where we want our movement to come from. Right hand behind the head. So we get that whole problem of choreography out of the way.
And bring that hand down a little bit closer, yep. Let the elbow bend a little bit towards you. And then create that as the kick stand like on a bicycle. And now we're gonna take that right elbow and reach it up towards the ceiling, opening the rib cage to the right. Push with that left hand.
So I want that hand even in a little bit closer. Yes. And I want this feeling here. Yep. So feel that opposition between that right elbow and that right hip.
Ribs connected into that center axis. Feel that length. Now we're inhaling into the right lung. And exhaling from underneath and lifting the left rib underneath that arc to the left. So we're not moving the spine, we're just opening it up.
And feel that lift. Feel that lift. Opening that space. One more breath. Keep it going.
Give me more here Andy. I want this. There it is. Open that rib. And up and over to the right.
Leave the legs where they are. Put your right hand down. Left hand behind the head. Now reaching that left hand up towards the ceiling. Feel that inhalation opening the ribs.
Now this is the type of mobility that we want to see going to the right. This is the true lateral flexion of mermaid. Right, if you just let your arm go out too far and you collapse, you really haven't done any lateral flexion. You've just done a translation. We're not really interested in that.
Let's speed it up now. So inhale, exhale. Coming over to your left. Inhale in that right lung. Exhale up and over to the right.
Inhale on the left lung. This time add the gesture arm, up and over. Long arm. Exhale up and over. Right arm long.
Left arm long. Up and over. Beautiful gestures. Now this time, stay here. Let that right hand come down to the floor.
Push the hands away from you, rounding the back. Inhale in between the shoulder blades. Expand that area pushing. As you exhale, feel the belly lifting up. So feel that length.
The head reaching away from the tailbone. Spine is coming up underneath and filling that space between the shoulder blades. That's it. Now, leave the hands where they are. And start to bring the crown of the head and the sternum between the arms pressing the arms into the ground.
Feel the sternum come up almost like you're doing a down stretch on the Reformer. With your chest. And then exhale, push back. And inhale, lift. And exhale, back.
And inhale, lift. Last time. And exhale back. Bring that right hand to your head. Open up, facing the front.
Sit up nice and tall. Roll back onto your hips a little bit, your sit bones and switch your legs to the left. Still facing me. Just switch those legs to the left, very good. Right hand on the floor.
Left hand behind the head. Up and over to the right with a sustained posture with multiple breaths. See if you can increase that range. Reaching that elbow up towards the ceiling. Expanding, expanding the ribs here on the side.
Feel them open up. This is exactly what I want right here. That is beautiful. Use that right arm as a fulcrum. You push with that right arm, it's gonna open the ribs up on the left.
Switch over to the left. Right hand behind the head. Same thing. Sustained posture. Multiple breaths.
Expanding that rib cage. Very nice, very nice. Good Andy, that's what I'm looking for right there. Expanding that rib cage. Remember the ribs on the right are going to the right.
And inclining down towards the hip. The ribs on the left are going to the right, and lifting up underneath your heart. So feel that lift and that support. That elbow reaching up. Let's speed it up, here we go.
Up and over to the right. (fingers snapping) Inhale on that left lung. Exhale up and over to the left. Inhale on the right lung. Exhale up and over to the right. Inhale on that left lung.
Exhale up and over to the left. Last time. Up and over to the right. Bring that hand down around. Both hands on the ground.
Pushing away with the hands. Creating that opposition of force. Increasing the space between the shoulder blades with your inhalation. Yes, good. Hollowing that spine.
Opening up that part of the spine. Take another two breaths there. And then we're gonna add the extension. On this next one, inhalation pressing, almost pulling the hands back towards your body. Head and sternum coming up into extension.
Push with the hands, exhaling pushing back and rounding the spine. And inhale, pull. Exhale, reach. Always keeping the space around the ears. Feel the suppleness of the spine.
Opening that spine. And inhale, last one. Exhale, push. Left hand behind the head. Open up to the side.
Bring it back up. Everybody's sitting back towards the back of their mats. Feet towards the center of the room. Spine stretch. Stagger yourself so you have some arm space.
Some forward, some back. Feet are about shoulder width apart. Fingertips to the side on the ground. It's a little different variation here that we'll do. We're gonna mobilize our nervous system.
Sometimes that restricts us. The fascia in the front of our shoulders. So we're gonna connect our fingers to the floor and walk them out as far as you can walk them out. And sending the crown of the head up as much as you can. So you're gonna feel that little neural tension.
Feel that yucky feeling going down your arm. Reach the back of the neck. Keep walking those fingers out. Open and widen the collarbones. This is what we talk about when we say widen the collarbone.
This is what you should be feeling a little bit. Now let the arms float up. Now hug that imaginary tree. And when you come up and over those legs, like you're rolling over that ball supported. Let the back of the hands rest on the floor out to the side of the legs as you go into flexion.
So come all the way forward. Let the back of the hands rest there. Now without collapsing, let the hands just rest. And stay there for a second. Take in a deep breath.
And feel the blood in your face. Feel your lips become heavy. All right? If you were to talk, you would sound like one of Fat Albert's friends. (laughing) Abba habba a Bigga Maca please, bubba.
Feel that weight. Feel the relaxation in the face. Because then I know you're doing the right thing. Now when you exhale to come up this time, think of that pubic bone lifting right up in the front of your body. And the vertebrae stacking themselves on top of each other in neutral.
So we're gonna stack lumbar curve, stack thoracic curve, stack cervical curve. All the way up. Walk those fingers back out again. Here we go. Walking out to the side, get that little tension.
And a little quicker. Float the arms up. Hug the tree. Up and over the legs. Back of the hands onto the floor.
Take in a deep breath. As you exhale, articulate the spine one vertebra at a time. Segment by segment. All the way. Stacking, stacking, stacking.
Hands are still down on the floor. Walk the fingers out. Float the arms up, hug the tree. And articulate over that imaginary space. Back the hands come down.
Last time. Take in a deep breath. Exhale. Stack it back up. Bring your hands across your shoulders.
Going right into the spine twist. Same idea, sit nice and tall. And we're just gonna take in a deep breath as we rotate to our right. Rotate from this upper spine. Feel the ribs sliding on the other ribs.
Keep thinking of the ribs underneath the shoulder sliding to the right. Take in a deep breath here. Stay here with your eyes looking to the right to the left. To the right, to the left. Just the eyeballs.
Just the eyeballs. Right, (fingers snapping) left. (fingers snapping) Right, (fingers snapping) left. (fingers snapping) Right, (fingers snapping) left. (fingers snapping) A little faster. (fingers snapping) (fingers snapping) To the point that you feel like you're gonna throw up is what I want. When you get to that point, relax and rotate a little bit more to the right. Very nice. Come back to the center.
Take it to the left. Very good. Go where you can go. Again, think of ribs sliding on ribs. Like dishes sliding on top of dishes.
Rotating. More on the thoracic than the lumbar. Eyes going to the left. (fingers snapping) To the right, to the left. (fingers snapping) To the right, to the left. (fingers snapping) (fingers snapping) Left, right, left, right, left, right, nice and quick. Moving those eyeballs not feeling very good. Ew, gonna throw up.
And move a little bit more to the left. Nice, nice. Now let's put that to work. Open those arms up. Come back to center.
Let's do our regular spine twist. And rotate to the right from the body. Not the arms. From the body. And back to the center.
And to the left. And back to the center. And to the right. And back to the center. And to the left.
Back to the center. Beautiful. Open up your legs a little bit wider. Go right into saw. We're gonna combine the two.
Saw is nothing more than a combination of spine twists and spine stretch. All right. so we rotate to the right. Let the left hand now cross your body. Come up and over.
Same thing. Feel the relaxation and the length of the neck. As you exhale, pubic bone lifts up. Spine stacks up. Untwist.
Go to the left. Reach up and over. Execute with the right arm over the left foot. Take in a deep breath. Pubic bone lifts up.
Stacking the vertebrae, one vertebrae at a time. Open back up. One more time to each side. Rotate. Spine flexion.
Supported deep breath. Lifting up from that deep area. And untwist. Last one to the left. And reach.
Very nice. I love it. Take a deep breath. Keep the length of the spine and the neck. Come back up.
Very good. Hands behind you, legs together. Hands back like this. Going into leg pull. You can do it with bent knees if you have some problems with your knees.
That's fine, I don't mind. Or you can go with the long leg. Typically, hands are facing this direction. But if it bothers your wrist, you want to move it a different direction, I'm fine with that as well. So here we go.
Everybody bottom comes up. Your body is in what we call the hundred position here. So the head is gently tilted forward. Open across the shoulders. Right leg comes up. (fingers snapping) And down.
Left leg comes up. (fingers snapping) And down. Right leg comes up. And down. Right leg comes up. (fingers snapping) Oh, sorry, my bad. (laughing) You were right.
I was watching Andy. That's what messed me up, I'm sure. (laughing) Blame the guy in the class and come down. Very good. That was my bad.
Let's scoot to the front of the mat and just have a little bit of fun rolling and letting things go. Yeah. So, first of all grab the back of your thighs. Just a little bit. And find the balance on your sit bones.
And just sort of pull away and sort of feel that space. Because one of the things we want to work on, any of the advanced exercise. You know how we did our assisted roll up. There's a place where you're gonna find that balance. That's really where all the advanced exercises come from.
So right from there, feel that space. And let's just do a roll back and roll up in that space there. Just very gentle rolling back and roll up onto your sit bones again. And again. Now this time when you come up, let's go ahead and wrap the legs tight into our chest.
But still keep that space. That roundness. Think of the energy like a sphere of energy around you. Inhale, roll back. Exhale, roll up.
Inhale, roll back. Exhale, roll up. Let's do that two more times. Nice and easy. As little energy as possible of muscle and think of energy around you like the ball.
Last one, come up. Let's go right into the seal. So weave your arms into your legs. Feet are together. Let's at least do three claps when we're on the back.
And three claps when we come up. Everybody inhale back. Clap, clap, clap. And up, clap, clap, clap. Find that balance.
Same organization. Clap, clap, clap. And up, clap, clap, clap. One more time. And back.
Bump, bump, bump. And up, find the balance. Bump, bump, bump. Hands come over the top of the shins. Take that right leg and reach that right leg up gracefully.
Bring it back down. Take that left leg. Reach it up. Not so gracefully, kidding. (laughing) Bring it back down.
Right leg up. Leave it up. Left leg up, up. Open leg rocker. Here we go.
Inhale, rolling back with that same little bit of flexion. And come up and find that balance. And inhale back. And come up. One more time.
Inhale back. And come up. Find that balance. Remove your hands from your legs. Go into the teaser.
Hollow the belly just a little bit. And let's drop the legs down three times. Just the legs. Down with the legs. Up with the legs.
Down with the legs. Control the range. Only as far as you can control. On that third one, leave the legs up. And the body's gonna hollow and roll down three times.
And up. Just three times. Nice Andy. And down. And up.
And down. Last one. And up. Now. Both drop down, both come up.
As best you can. Three times. This is the end, do it. Here we go. And down.
And up. And down. Last one. And up. And bring your knees into your chest.
Soften everything. Keep that balance. Bring it in and come forward onto your feet. Right, just coming forward, yep. Just like that.
Now, just hold on right there. Cross your legs. And we're gonna come up Pilates style into standing. All the way up. Walk back on your mat.
Take in a deep breath. As you exhale, incline the head and roll yourself down. All the way down 'til the hands get to the mat. Walk the hands out into push up position. Give me one perfect pushup.
And walk your hands back towards your feet. Send your tailbone down. Knees forward. Articulate that spine like an elastic band. Just stacking itself up.
No effort. One more time. Take in a deep breath. Exhale, inclining down towards the floor. Walk the hands out.
Beautiful. Plank position. Long. Come down with a push up. Walk the hands back.
Soften the knees. Articulate the spine up. And gently step onto the wood. Onto the wood. Eyes are closed.
Elastic band suspending the body from the crown. Feel the bones dropping into their place. Lots of space. Absolutely no need for muscles at this stage of the game. We're done with the class.
We're just gonna reflect and see if our body has changed at all from the 20 or so exercises we did. Going down to the toes. What's goin on there? Where's your body weight? Is the weight forward a little bit?
Can you feel the toes engaged? The arch? The heel? The ankle? The talus?
The tibia? The knees? The femur's coming up. The angle of the head of the femur coming in. That hip joint very central.
The angle of the sacrum might be a little bit less right now. The spine might be a little bit longer. The belly button is directly aligned with L3. The sternum directly aligned with T7. The shoulders are wide.
The ribs are lubricated. Take in a deep breath. Expanding the sternum and the ribs. And the thoracic vertebrae away from each other. Like a balloon and exhale.
Draw everything close to the center. This time send your breath into the diaphragm. Inhaling and pressing the abdominal wall out. Like a Chi Gong exercise. Exhale, draw the belly into L3.
One more time into the chest. Expanding the chest forward. Lateral, to the side. Exhale, draw everything into the center axis. Last time to the belly.
Inhale, expanding the belly. Exhale, narrow the belly. Very good. Now just imagine that you're suspended there in the bones and the wind from behind comes up. Whoosh.
Blowing the body forward and the bones sway. And the elastic band pulls you back up into that nice axial elongated position. Feel the flow in your body. One more time. The wind comes from behind.
Whoosh. The body sways forward and back. And it finds that natural alignment again. This time the wind comes the front. Whoosh.
You rock back on your heels. And you sway back and the body again is pulled by that heavy elastic band back into its uprightness. And the wind comes from the right side, whoosh. And the body sways to the left. And almost like a snake, finds its way back up to that center axis.
And the wind comes from the left. Last time. Blowing you to the side. And the body sways and gets pulled back up into its space. Imagine little clouds underneath your shoulders, just floating on top of that rib cage.
Lots of space around the ears. The neck is relaxed. The jaw is relaxed. Relax your tongue. The roof of the mouth sinks.
The eyes are heavy in the head. Open your eyes. Observe the space around you. Compare it to what you felt when we started. Notice if there's any differences.
What do you feel different in your own body? Anything?
A lot more axial length. Looks really good. Like the muscles in the neck are not tense. What else do you notice?
Length, good. Lightness. Ease, lightness.
You say your pelvis feels less rotated?
Good, good. This is the type of thing that we want you to feel after every class. It's a matter of heightening that consciousness and awareness. Just noticing the difference from before and after class will let you know that just doing a set of exercises successfully that are balanced are going to give you a better sense of awareness of your body and space. And that is the heightened awareness that we're looking for.
And if you do that four or five times a week, you're gonna be a person with heightened awareness. It is sort of our type of meditation. Not necessarily take the place of meditation, but it is a movement meditation. Ron Fletcher said if you could about anything else while you're doing short spine, you're not doing Pilates. And the idea is when we come come here to take a class, we're focused.
And if I'm doing a good job leading you, or you're doing a good job leading your students, there should not be any room to think about what's for dinner tonight. Or, I have laundry that needs to be turned over in the house. Or I gotta pay bills. Or I gotta fix my car. I gotta do this at work.
There's no room for it when you're doing a class correctly. So you want to create the environment where you really have to zone in. You can only think about one thing at a time. Any questions about the class? Any things that you noticed that you might be interested in or comment on?
The direction you kept saying ribs down, it was in back extension too. I'm getting a little bit confused on that. Ah, the hip curing, yeah. Basic rule of rib. Where the disc or the nucleus goes, the rib goes.
So when I go into extension, my nucleus is going forward. My ribs go forward. But because they're hooked to the vertebrae below, they're actually gonna tilt down. Mumble. Aha.
And that has to happen for you to have movement in the thoracic spine. Otherwise, all the ribs move together like a brick. And your movement goes into low back. So when you're on the side like you said-- It's the same thing. So right.
So when I'm sending it forward, I'm arcing them down and this side is lifting up. So that's going to give me more mobility in my rib cage. Opening the rib cage rather than just laterally translating like most people that do. Yes, so like the accordion, right? Opening that accordion.
So if I open up the accordion, those ribs on the accordion that are opening have to go down away from the part above for it to open up. These ribs? Uh-huh. So they come up? What's that?
Think of down-- Think of this. Like a fan. This. So the lower ribs are going this way and down relative to the rib above it. I'm thinking these ribs going down.
But it is going down relative to the rib above it. Okay. Right? It's all relative to the segment above and the segment below. But great question.
Any other questions or comments? Yes. When are you coming back? (laughing) Well, I'm sure it'll be soon. When are you coming back?
(clapping) I'm sure it'll be soon. I hope you liked the class. And again, a couple things I want you to notice that I did. I didn't cue muscles at all. So muscles were not part of my class.
And yet I took you to some pretty you know, middle level exercises. So we got through some middle exercises. We also never stopped. So we transition, transition, transition. And I tried really hard not to let you ever have to do too much movement to go into the next exercise.
I didn't have a pre-plotted exercise coming into the class. So the class really was taught for you. So I was looking at your bodies and seeing how you behaved in the very beginning. And how your body was moving even in the standing. And I could see what areas I wanted to work on.
And so I designed the class specifically for you. And for you. But looking at how your body responded. And then that continued to tell me where I'm going next. And it's like having enough repertoire under your belt to know where am I going to go next with this group?
Like I wanted to get more space around your ears. I wanted to get more mobility in the upper thoracic. I wanted to get that low back to open up a little bit without saying tuck your bottom under. All right. So a lot of you felt that height and that length changing by me working that relationship of L3 to the belly button.
Or expanding the chest at the sternum and T7. And as soon as you felt that come into alignment, you immediately got more powerful. You got taller. Things were easier. Even when we were doing the roll up movement.
You notice we use the singing and some of the other preparatory work. Because often what we do is we hold our breath in four, five, and six. We create increased intraabdominal pressure because we think there's more work. And what that does, is it creates a block. So we don't move between T7 and L4.
They move like a brick. And that's the hardest part. So people get stuck there. But if you sing, I learned this from Kathy Grant, if you sing, you'll move through that area. And don't be afraid to make your clients sing.
Mindful Movement: Full-Body Exploration
Mention
 |
Brent Anderson (Teacher) |
 |
Renay B |
|
|
Zofia R |
 |
Gaspar |
 |
Gia Calhoun |
 |
Ivan Z |
|
|
Joanna T |
 |
Gregory G |
 |
Katia B |
 |
Liliana D |
 |
Hazel C |
|
|
Polina K |
|
|
DANIELLE M |
|
|
Rose M |
 |
Brian B |
 |
Paola D |
|
|
Emilia H |
|
|
Ash |
 |
Judy P |
|
|
Avishag H |
 |
Anastasia B |
|
|
Angela B |
 |
Louise T |
 |
Notme |
|
|
Jennifer T |
|
|
Kimberly S |
 |
Lisa A |
 |
Melissa P |
 |
Stephanie R |
|
|
Olena Y |
 |
CADM |
 |
Kristi Cooper |
|
|
Karen D |
 |
Josie Williams |
 |
Jo D |
 |
Silke L |
|
|
Kathy I |
|
|
Pamela A |
 |
Christine D |
|
|
Kim L |
|
|
Carolyn N |
 |
Becca Hewes |
 |
Annie M |
 |
Sorin. B |
|
|
Sarah H |
 |
Jeanne L |
 |
Christine F |
 |
Kimberley P |
 |
Joni N |
 |
mbrown |
|
|
Laurie K |
 |
Pamela L |
 |
Kathy P |
 |
Heikki L |
 |
Amy C |
|
|
RT |
|
|
Jeri Ann Alexander |
|
|
Annalisa T |
|
|
Rachel M. |
 |
Anne M |
|
|
Anita H |
|
|
Ilana F |
 |
Elizabeth D |
 |
Heidi VDB |
 |
Farrah B |
 |
Jennifer S |
|
|
Marie-Josée Packwood |
|
|
Mary M |
 |
Kate T |
|
|
Laurie H |
|
|
Lisa B |
|
|
Kelly F |
|
|
Yoly N |
 |
Anne W |
|
|
Kerry |
 |
Valerie B |
 |
Arlene S |
Comments


You need to be a subscriber to post a comment.
Please Log In or Create an Account to start your free trial.
