Description
About This Video
Transcript
Read Full Transcript
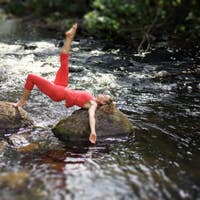
Welcome to Palladio's anytime. I'm Elizabeth Larkam. Delighted to be here with my colleagues with me is gay barns, Danielle Holder and Ronda pre-snap. We're delighted to bring you a my new program, close kinetic chain contemporary mat exercises at the wall, a really long title for a fresh new look at contemporary placemat mat work. It will be useful for you to have a wall from place on which you can plant the souls of your feet and sometimes the palms of your hands. We'll get started first working on the area of the hip joints, the pelvic floor, and the lower spine.
So come to lie on your back and plant the souls of your feet on the wall. Here you are with your shins parallel to the ceiling and your thigh bones, your femurs perpendicular to the ground so you have a 90 degree angle at your knees and at your hip joints. Arms are comfortable by your sides. You can have your palms down or pounds up as you wish. Inhale, why to the lower lobes of the back of your lungs. As you exhale, let the back of your shoulder blades the back of your ribs, the back of your pelvis. Settle down on the mat.
Inhale y to the lower lobes, filling up the back and the sides of your ribs. It's a neutral bridge. As you exhale, stand your ground and lift the front of your pelvis up towards the ceiling as if the eyes at your hip joints could see the ceiling above you and then moving your pelvis over the head of your femurs. Land the back of your pelvis, landing on your Sacred Min. Neutral. Inhale upon arrival. As you exhale, plant your feet. Buckle up from pubic bone up underneath your chest bone and stand up high between your shoulder blades, keeping the back of your neck long and then land at the back of your pelvis. It's a neutral pelvis neutral spine. Upon arrival, this next time in the neutral bridge will stay up. As you exhale, send your knees towards the walls, the back of your neck, long, broad between your shoulders while you're here.
Lift only one heel off the wall and put it down and the other heel off the wall. Alternate lifting your heels. You could have your hands at the front of your pelvis to feel that the bones of your pelvis are level and steady. One more each side. Steering the front of your ankle high over your second or third toes. Land your pelvis. Here we go.
Now bring your feet up just slightly higher, just a little bit higher. That will make it easier for the next one of Dorsey fluxion. As you inhale, plant your feet, stand your ground on the wall. Lift your feet up. Now lifting one a heel and the opposite for foot or toes. Alternate lifting, one heel and the opposite toes and if you would prefer to have your feet higher up the wall even on the window sill, feel free until you get just the right amount of range. Standing high under stilettos and low into earth shoes.
Referencing the 70s and the current decade of footwear. Now land both feet and land your pelvis. Inhale to prepare. Rotation comes next. As you exhale, lift your pelvis while you are up. Rotate. Turn your pelvis to the right.
The light from your naval shines to the right and then the light from your naval shines to the left. It's as if your pelvis could take a walk, steering your sitting bones towards your heels, turning your pelvis to one side. So when you turn to the left, the right Asi es goes to the ceiling. The left goes towards the floor. When you turn to the left, the right the left Asi s goes towards the right and the back one towards the floor. Land your pelvis. Come on down. Now we'll connect the rotation with the footwork. Inhale to prepare. As you exhale, plant your shoulders and lift your pelvis straight up. Turning to the right, lift your left heel and your right forefoot and rotating to the left.
Alternate here. Meanwhile, as you rotate, both sides of the waist are intended to stay intending to stay equally long and the light from your knee cap shines directly at the ceiling somewhere in the world. It's ski season, but not here. Not now. We're aiming both knees straight ahead. Come to the center and land your pelvis. The next variation next to last one is a lateral translation of your pelvis. As you inhale, lift your hips up. As you exhale, shift to your right, steady there.
Lift your left foot off the wall and put it on the wall. Shift more to the right. Stand your ground on your left foot and lift your right foot off the wall and put it on the wall. Now translate laterally to the left like a typewriter carriage. Shift your right foot. Lift your right foot up and put it down.
Shift more to the left and lift your left foot up. Now, if all is going reasonably well, interlace your fingers. Plant the palms of your hands towards each other. Take a breath. Why don't you inhale to shift to the right as you exhale, plant your right heel, your right foot, and lift your left foot. Now shift more to the right, intensify the pressure of the heels of your hands towards each other. As you shift to the Left, press your left hand to the right.
Lift your right foot off and put it on. As you shift to the Left, press your left hand towards the right, putting your foot onto the wall. Come back to the center, palms towards the ceiling, broad between your shoulders. Land the back of your pelvis. Now it's a single leg bridge. Rotating your femur. Place your hands down on your pelvis or on the ground.
This time you'll rotate your pelvis around the head of your femur. Uh, leave your right foot on the wall and lift your left foot towards the ceiling, keeping your left knee bent. As you inhale, lift in a neutral pelvis, neutral spine. Now turn your pelvis to the left and externally rotating your left leg. As you inhale, turn your pelvis to the right as if your foot could go screwing into the ceiling like a light bulb. Unscrew your foot from the ceiling. As you rotate towards your left and as you rotate towards the right, the right thighbone femur internally rotates. Meanwhile, aim your left sitting bone towards your inner right ankle, long on the left side of your waist. Come back to the center.
Land your pelvis and change to the new side. As you inhale, one foot is suspended from the ceiling in parallel. As you exhale, plant your foot into the wall. Lift straight up. Now turning towards your right. The light from your naval shines to the right. And as you inhale, bring the right side of your pelvis towards the ceiling internally.
Rotating your right leg. Exhale to come down towards the right. Inhale, come up towards the ceiling and towards the left side. One more exhale to turn to the right. Inhaling aiming, you're right, sitting bone towards your inner left ankle. Come to center, land your pelvis and come on down from there. Roll to either side. Come up from here. Having addressed the motion of your pelvis and your lumbar spine and rotation and lateral translation.
Now it's addressing the rotation of your thoracic spine. So for this we're going to have the left foot against the wall. Plant the sole of your left foot against the wall and your hands are in line with your shoulders. So this is a neutral pelvis, neutral spine and your left heel is that the level of your sitting bone guarding against hyperextended elbows. Aim the inner aspects of your elbow slightly towards each other. Now we're going to turn towards the wall.
Bend your left elbow and put your left fingers on your shoulder and turn to the wall. Turn your pelvis, ribs, shoulders, neck, head and eyes, turning your ribs more than your head and then come back down. Plant both hands. Planting your left hand firmly as you inhale, turning your left lung towards the right. You'll appreciate that the position of your legs inhibits the ability of your pelvis and lumbar spine to turn all the more work for your thoracic spine. Come down from here. We'll do this once again.
Each sides stand your ground on the heel of your right hand. Inhaling, turning your pelvis, ribs, shoulders, neck, head and eyes. Yes, indeed. This motion is asymmetrical focusing on thoracic rotation. More to the right, drawing your lowest front ribs up to support your spine. Now staying on this side, both elbows who will be straight.
Sweep your left hand along the floor, left fingers up the wall and turning luxuriating in a huge wingspan, but guarding against spine extension. It's more of a neutral spine around your central access. Come down, land your left hand. Now buckle up because this is not as fun as the other side. Slide your right hand along and turning your ribs. Your shoulders. Don't crank your neck too much.
Your hand won't go so far here because this focuses on thoracic rotation more than Lumbopelvic. Okay, inhaling, appreciating the difference here. Your pelvis can turn around the head of your femurs. Exhale to come down. And now since your left foot is against the wall and your left knee is straight, your pelvis can turn only your thoracic spine, your shoulder girdle, your head, neck and eyes. Surely the new side will feel different.
Spin around and let's see how plant the sole of your new foot against the wall with your heel in line with your sitting bone. A re situate your palms fingers spread wide to provide a firm base and drawing long from your tailbone out through the back of your long neck to the top of your head. Turning towards the wall, bending your elbow of the hand that's towards the wall and put your fingers on your shoulder. Press down into the little finger side of the heel of your hand on the floor to rotate towards the ceiling. Exhale to come down as you inhale, turn towards the new side thinking like, Oh, if only, well, if only will come with thoracic rotation with time. Once again, each side, as you inhale, buckle up your abdominal seatbelt. Inhibiting the tendency to go towards spine extension.
The light from the top of your head shines directly towards the wall in front of you. Inhale to rotate your pelvis can turn a little bit around the head of the femurs, but not so much. Exhale to come down. Now sweep your right hand along the ground, taking the longest possible distance between your two hands. Spiraling from your tailbone out through the top of your head. Now when you slide your left hand along the wall, have the feeling that your eyes could be the advanced team.
Your eyes could lead your lungs in the direction of your hand and come down one more each side. Inhaling, turning your gaze, your eyes look to the ceiling, and that encourages your spine to rotate. Also exhale to come down. Let's see how successful that is on the new side. Inhaling, gliding your gaze to the left corner of your eye sockets. You Gay says, come here, come here. We're going over this way. Come down from here now and now it's, it's the favorite. The Pilati SMAD exercise the single leg stretch with the soles of your feet pressing firmly into the wall. So here you are.
Measure two foot distances, two foot lengths up the wall, and then plant the soles of your feet in contact with the wall. So yes, your knees will be an extension. And here you are in a neutral pelvis, neutral spine. Place the pads of your middle fingers at the corners of your pubic bone so that you can feel that the corners of your pubic bone are weighted anchored down into the mat. Helping to create a neutral pelvis neutral spine. Stand the sole of your left.
Put footprint firmly through the wall and bend your right knee into your torso. Left hand just below your knee, right hand just above your ankle, drawing your thigh along the outside of your right ribs, and then press the soul of this foot into the wall. Stand your ground with your whole footprint there, and then draw your left thigh into you. Right hand below your knee, left-hand above your ankle, steering your left sitting bone towards your right heel and plant that foot. Now nodding your nose downward. Look behind the cheekbones of your face and roll your head, neck and shoulders up so your gaze is at the level of your toes.
Here you are pressing your left foot into the wall. Bring your right leg in. Inhale here. Exhale, switch. Each time that she pressed the sole of your foot into the wall that can awaken your deep line, your abdominals so that you can bring both shoulder blades a little bit higher off the ground. Now single leg scissors. Inhale here. Exhale. Stand your foot into the wall. Stand your foot so that you can take work away from your hip flexors and intensify the deep abdominals aiming your gaze towards your toes.
Rotation comes next towards the right. Supports your neck and head turning towards your right and plant your foot into the wall. Stand your ground, drawing your right ribs towards your left inner thigh, your left ribs towards your right inner thigh. And for the more drawn your left long towards your right inner thigh, your right lung towards your left inner thigh. Seeing the mat to one side of you and the other straight leg scissors with rotation. Rotate and rotate. Bring both shoulder blades a little higher off the floor.
You can do that because you can plant the sole of your foot firmly activating more. Work with your deep abdominals. Bring both legs into your torso, roll to your side and come up from here. Now we're going to be on all fours with the sole of your left foot into the wall. Look into your rear view mirror. Just kidding. We don't have one here, but look back so you can get your left heel in line with your left sitting bone. Yes, so somewhere there's a ballet rehearsal, but it's not here because we're not in Arabesque. All right, so your leg is purpose parallel to the ground. That's right. Now the palms of your hands are spread. Why?
To give you a firm base of support, decreasing the amount of elbow hyperextension by aiming the inner aspects of your elbows towards each other. Now planting your left hand and your right knee so you create a diagonal basis support. You will turn towards your right, bringing your right fingers towards your shoulder and turning your ribs, shoulders, head, neck and eyes. Hmm, vaguely familiar. Been there recently. Plan your right palm. Now shift everything to the right. Your whole central axis stands your ground on the lateral line of the right side, keeping your pelvis level and steady. Turn towards the left, drawing your lowest front ribs in.
Plant your left hand down. We'll do that again, each side without a shift because it's not necessary here you create a diagonal basis support drawing your left ribs towards your right inner thigh and the pelvis doesn't rotate here it's thoracic rotation and a modicum of cervical rotation. Stand your ground on your new hand. Now it's a lateral translation of your entire central axis. [inaudible] and keeping your pelvis steady by aiming the left s towards your inner right knee, drawing the lowest front ribs into your spine and come down from there. Change to the new side, standing on your new knee. Look back just to assure yourself that your heel is really in the same lane as your sitting bone and your abroad between your shoulder blades.
Now there's a new diagonal to stand on hand and knee. Ribs to opposite pelvis. Turning towards your left. Inhale to rotate. As you press the little finger side of your hand, draw your ribs in and up to your spine. Exhale to come down. Inhale to shift to the new side. Plant the sole of your foot into the wall and rotate.
Exhale to come down. We do one more of these without a shift. Stand your ground on this dog. You know, turning, rotate, still drawing pubic bone up underneath your chest bone and come down. Now shift to the left. Way over to the left side. The light from your chest bone goes towards your hand and then the light from your chest bone turns. Continue to draw your shoulder blade down your rib wall.
Come down from here and it's time for the is hundred with the soles of your feet on the wall. Here you are coming to line your back. Measure two footprints up the wall. Plant the soles of your feet there firmly and arms can be by your sides. Now inhaling broad across your collar bones. As you exhale, bring the pads of your middle fingers to the corners of your pubic bone. Aim that area down into the mat to create a neutral pelvis neutral spine.
Now nodding your nose downward. Roll your head, neck and shoulders up. And you could either keep your pelvis and we'll keep the pelvis in neutral at this moment so you keep a neutral pelvis and um, thoracic and cervical fluxion arms by your sides. Inhale, palms up, gaze at your toenails. Exhale, palms down, gaze towards your abdominals, pulling them in. Palms up wide across your phone of your collarbones. Steer your eyes towards your knees, towards your mid thighs, towards your abdominals. One more of these. Appreciating the feeling of neutral pelvis. Neutral spine.
When you have the soles of your feet firmly anchored, come to the center and roll down your spine. Now it's the Palazzos hundred with a posterior pelvic tilt and spine flection. The usual way. Inhale to prepare. As you exhale, look down behind the cheekbones of your face. The eyes are the advanced team of your spine. Roll your head, neck, and shoulders up. Now here you are with a post.
Steer your pelvic tilt and spine. The usual cue of Navel towards the spine. Inhale, palms up wide across your collar bones. Exhale, bring your lowest ribs closer to your pelvis. Inhaling broad across your collar bones, the front of your chest. Exhaling. Gaze towards the center of your abdominals. Pull them in one more of these wide across your chest, looking at your toenails. Exhaling, roll up, and then roll down your spine. Returning to a neutral pelvis, neutral spine, putting your head down. Roll to either side.
Come up from here and plant the sole of your foot against the wall. Yes, we're here again with a new variation this time. Instead of keeping the supporting elbows straight this time it will be bending your supporting elbow. Nestling your shoulder blade down to your rib wall. So with the sole of your left foot firmly planted and your shoulder girdle so well organized in a moment, you will starting now. Turn to your left. Exhale to rotate.
It's as if your ear could listen to the floor and you could see the ceiling above your shoulder. As you press the heel of your hand into the ground. Come on up and stand on two hands. Now shift in this case, shift to the right. Shift to the right and turn to the right.
Your left hand comes underneath your right ribs and holds on there. Do a one-arm. Push up and stand on. Two hands. Come to your central access and without a shift, rotate around this central axis. Rotate as if your palm could hug against your ribs. Stand the sole of your foot, the palm of your hand, and come ride on up from here. A one arm push up.
Plant this new hand in line with your shoulder. Shift towards the new side, loading the lateral pelvic stabilizers, Aha and facilitating a lot more strength of your shoulder girdle organization and your single arm. Push up. Now land both hands and change to the new side. Look back in the rear view mirror. Just making sure that your heel is in line with your sitting bones in all planes. Now this time with the right foot on the wall, we're going to turn to the right. The reason being is that this will be the more successful side because you have the oppositional support. As you exhale, turn to the right.
The life from your chest phone turns to the right. Your left lung turns to the right and do a one-arm. Push up from low in the side of your ribs. Plant your new hand. Now shift to the left and turn to the left. Push your right foot into the wall. Shift to the left and turn to the left.
Push your right foot into the wall. Press up into a arm. Push up the new side of weights without a shift. Exhaling turning around your central axis. Even long spiraled around the heart. Ringing out there and a one-arm push up from low in the side of your ribs where your hand is on your ribs. Here we are on the new side.
This is a little rhyme shift to the left and turn to the left. Push your right foot into the wall. The sole of your right big toe stands its ground. Turning there to hear the floor and push up and come down from here. Now we have the Palazzos mat exercises.
Single leg circle with the sole of one foot against the wall. Come to lie on your back and you plant the sole of your left foot firmly into the wall. Unfurl your right leg so the keeping your right knee bent, your toes could be suspended from the ceiling as if by fishing line or clean dental floss. Now press the palms of your hands against each other with the little finger side of the heel of your hands, providing a bit more pressure to focus the lateral line of your arm connection with your ribs. That was a mouthful. Okay, aiming. You're right, sitting bone towards your left heel. As you inhale, your right foot goes to the left, keeping your pelvis level for now, and you can feel that your left hand pushes to the right. As you exhale, circle down. Start now. Don't wait.
Push your right hand to the left and that can help keep you steady. So as your right leg goes left, there's the oppositional pressure of your left hand to the right. Exhale. Start now to drive your right hand to the left. We're going to do once more in this direction. Then reverse. Inhaling right sitting bone to the left heel.
Exhaling now reverse the direction. When your right foot goes to the left, your right hand presses. When your right leg goes to the right, your right hand moves to the left. Yeah, don't say that again. Okay, so we have an oppositional pressure and an oppositional pressure. In order. You might ask yourself, why are we doing this? In order to make a connection through the front functional lines and the Anterior Oblique sling system, connecting the shoulder girdle with the pelvis force stability.
Now let's do the new side and work in a few more cues. Plant the sole of your new foot and keep your knee bent so that it'll be a little bit kinder for your hip joint. Now when your left foot goes to the right, so we'll cross the midline first. You're right, palm presses left. Inhale to crossover. Meanwhile, keep the back of the pelvis steady. Exhale to circle down. Plant the sole of your right big toe on the wall to keep you steady also.
So there are many points of stability. Exhale to circle around and we have one more in this direction. One point of stability is the sole of your foot pressing firmly into the wall. Reverse the direction. Another point is stability or ground forces.
Another ground force will be the back of your pelvis pressing down yet another one would be the back of your shoulder blades pressing down. And one more in this direction. Another one, the heels of your hands so you can create all of these ground forces for stability. Easy. Now come up from here. Come all the way up to hands and knees, and in this case you're going to have your palms against the wall, palms wide, fingers spread, steering your sitting bones wide across the room, ears between your upper arms. So do guard against a forward head. Gravity would take us there, but don't give in. Instead open the eye at the base of your skull, the eye at the back of your neck so you can see the ceiling above you.
Inhale to prepare. We'll start with the left leg. As you exhale, drive the sole of your left toes back. Your left heel back. Hover up your entire abdominal wall. Lift long and hover. The higher your legs go, the more let it goes. The more your abdominals lift. Now Bend your left knee plus press the sole of your left foot towards the ceiling. Press into the wall with your left hand. Reach around with your right hand and take a hold of your ankle.
Shin your foot. Lift your thought. Lift your abdominals. Lift your chest bone and lift your gaze. Lift your thigh, lift your abdominals, lift your chest bone, lift your gaze easy. Let go of that slingshot leg. Plant the sole of your palm of your hand and come down from here. I didn't mention earlier and I should, that your hands are just slightly wider than your shoulders. Creating a diagonal base of support there from your, uh, lower trapezius.
Inhale Bra to the lower lobes of the back of your lungs. As you exhale, Tuck your toes under, drive back, lengthening the front of your thigh and take off from the floor. Reach back, bending your right knee, the sole of your right foot stands into the ceiling. Steady yourself on your right hand. Reach around. Take a hold of something that belongs to you. Inhale thigh up, lower abdominals, lower front ribs. Lift your chest bone. Lift your inhale to come a little bit higher as you exhale.
Careful letting go of that. Stand your ground on the wall and come down. We'll do one more each side. Inhale to prepare. Recreating a neutral pelvis neutral spine. As you exhale, shoulder blade start their descent. Abdominal start their essence and somewhere in the middle your leg takes off. From that support from your pelvis and your shoulder girdle, bending your knee. Your footprint stands on the ceiling.
Your handprint stands on the wall. You have many points of support here. The ground forces to encourage abdominal support for the beginnings of spine extension, lifting your gaze, lifting your chest bone, lifting your chest bone more than your chin. Easy. Now let go of that stand your new ground. Inhale to prepare. As you exhale, glide your shoulders down and wide.
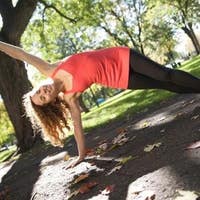
The sole of your right footprint opens behind you. Your abdominals. Hover as you reach long across the room, bending your right knee, the sole of your footprint towards the ceiling, and there's your foot right where you put it earlier. Lift your thigh, lift your abdominals, lift your chest phone, and do lift your gaze up and up. Balancing all of your forces and come down from here. No, we'll take the, I'm kneeling sidekick at the wall, so you'll be on hands and knees again with your sole of your left foot on the wall. This time your left foot will be at greater trocanter level.
However, instead of having your front of your body towards the ground, come up from here and put the side of your body towards the ground so it will be high kneeling side leg kick your hand and your supporting me and your foot on the wall are all in the same plane. Those of you joining us at home, you may feel more comfortable with a small box or a platform like a big phone book on which you can place your hand. Now, if this were a photo shoot, Hahahaha, you would lift your left hand to the ceiling [inaudible] but since it's not necessarily a photo shoot, it's Palladio's is anytime we're here to put your hand underneath your ribs to remind you to lift up your ribs and lift up your waist because this is real time. Pilati is anytime, not just something that sits in a magazine. Alrighty. Nestle, your shoulder down your rib wall. As you inhale, bring your left leg forward, looking down at your hand. As you exhale, reach your toes to the wall and take your leg back behind you. Lift up your ribs, lift up your way. See the ceiling above you.
As you inhale, brush your foot along the wall. Reached for the wall. Look down at your hand. Stand up on your shoulder blade there. Exhaling as you exhale, turn your ribs, shoulders, head, neck, and eyes, and use the arm in front of you to remind your lowest ribs to buckle up. One More Nessel your shoulder blade down.
As you turn your gaze to see your hand standing firmly and broadly on the ground, brush the wall. Reach for the wall and keep reaching for the wall behind you. You can't touch it, but the effort improves matters considerably. Come down now in turn to the new side, so you'll plant the sole of your foot on the wall and keeping your femur perpendicular to the ground. Relocate. So now your palm, your hand, and your knee and your foot on the wall are in align with each other. So just because everybody likes to do it, we'll just do it now and get it over with.
Reach up to the ceiling with your right hand because there is actually a pleasure in this kind of balance of 10 Segretti and forces. There's also some benefit to reminding your lowest ribs and waist to pick up. So hug underneath your right ribs and right waist. And now as you inhale, look down at your supporting hand. Bring the sole of your foot forward. As you exhale, reach your toes towards the wall as if you could brush the wall behind you.
Turn to see the ceiling above you. As you inhale, bring the sole of your foot forward. Stand your footprint on the wall in front of you. Start now. Don't wait. Zip Up from pubic bone up underneath your chest bone. Lift up your ribs, lift up your gaze. See the ceiling above you and reach for the wall behind you. One more could. Lord, do you think she could go any slower? She can, but she ought not to inhale to come forward. As you exhale, get on up there on the Gluteus medius extravaganza.
Come down from this. Now it's time to stand at the wall. So you'll plant the palms of your hands wide apart on your window sill and your spine will be parallel. Let's see, Daniel, sorry. This way your spine will be parallel to the ground. So here you are. Hands wide, spine in neutral, parallel to the ground. I'm editing out the forward head instead.
Broad between your shoulder blades with the back of your neck long. Now it's the sole of your left foot that's sliding back. Climb up high on your right Femur head as you reach back, bending your left knee, press your left hand into the wall and reach around something that belongs to you. You put it there. After all, inhale to lift your thigh. Exhaling, zip up your abdominals, lift your chest bone, lift your gaze, and if all is going reasonably well, plant the sole of your big toe and hover up on your inner thigh. Lower your heel.
Let go of that slingshot leg reached back behind you and come down to the ground. Stand on all four points of focus. All four points of attention, restoring your shoulder girdle. Exhaling, organizing your shoulder girdle. Buckle up your abdominal seatbelt. Reach back, emanating through all five raise from the center. Bending your right knee, the sole of your right foot drives to the ceiling. Reach around, creating a diagonal basis. Support from your left hand, left foot to your right hand. Lift your thigh, lift to abdominals.
Lift your chest bone. Lift your gaze. Plant the sole of your left big toe. Get on up there, climbing up high on your inner thigh. Balancing your forces. Come on down from here. Inhale to reach back across the room. Exhale to come down. One more each side.
Broad with your sitting bones. Exhaling. Press into the ball of the sole of your right foot. Reach back as your left knee bends. Your abdominals. Hover up as you reach back to take a hold of your left ankle, Shin Foot. Lift your thigh. Lift your abdominals.
Lower middle and upper ribs. Climb on up the wall with your gaze. Lifting the light from your chest phone more than your chin. Come down from that. Now reach across the room. Plant the palm of your hand. Plant the sole of your foot.
Inhale to prepare a shoe. Exhale, reach back, bend your knee, take a hold of it, your ankle, your Shin, your foot. Balance, your forces in spine extension and in balancing. Creating a diagonal support from the sole of your left foot to the palm of your right hand. Hover on the way down. Now reach across the room and to come on in. Now it's time for prone spine extension, Sombrero, thoracic. Oh, here you are with the souls of your toes and your metatarsal is pressing into the wall. Now some Bruno [inaudible] was named by my students in Madrid and then a seconded by my students in Barcelona. In this case, the pads of your fingers and thumbs are pressed against each other in this Moodra, which facilitates full lung breathing. That was a side note.
And now when you're on your font, the thumbs will be about two inches or so from the top of your head. In order to, um, improve the opportunity for the lower thoracic area to activate. So here you are. Inhale your hands lift only. As you exhale, your elbows a y to the side. Now press your toes into the wall.
Look up underneath your eyebrows and hover up and up and up. Press your left toes into the wall. Look towards your right ear and side Bin to the riots. Press your right toes into the wall. Look towards your left ear and side bend to the left again.
Press your left toes into the wall. Look towards your right ear extension was side bending pressure, right toes into the wall. Extension was side bending. Come to the center and land down from here. Now, okay, much more where that came from and you will find so many more of these exercises and the um, [inaudible] mat at the wall for computer posture to improve computer posture. But now we're on to standing for the current program. Come on up from here. And this time we're going to take standing side leg kick so you'll have one hand down low on the wall and the other hand up high on the wall.
In order to get there, tilt your pelvis over the head of your femur and balance your forces so that your supporting leg can be perpendicular to the ground and your other leg is parallel to the ground. That's correct. As you inhale, look down and bring your foot forward. Just like the high kneeling sidelight kick, except you happen to be standing. As you exhale, reach your toes back behind. You turn to see the ceiling above you. As you inhale, bring your sole of your foot forward, looking down towards your supporting hand on the wall. As you exhale, reach across the room, lifting up your ribs, turning your chest bone to see the ceiling above you.
One more of these inhale to come forward. Stand up high on the inner thigh of your supporting left leg. Exhaling, reaching back. Lift up your ribs, lift up your waist, lift your back foot a little higher. Push yourself off the wall and come to the new side. Here you are to measure your distance.
You come one arm length and a little bit more. All right, so that when you tilt your pelvis over the head of your Femur, your lower hand can be on the wall. Your upper hand can be on the wall and both elbows can be straight radiating from the center of yourself out through all four points. Inhale to bring the sole of your foot forward. Let's see. Looking down at your foot on the ground. As you exhale, reach back, turn your lower lung. That's your right lung to see the ceiling. As you inhale, turn your head, neck and eyes to see your foot that's on the floor.
As you exhale, reach your toes across the room, turning your right lung up towards the ceiling, pressing all four limbs away from center and the fifth limb is the top of your head. One more here. Exhale to reach back and back and back and back and back. Push off the wall and come up from here. Oh, we're going to take, the last exercise will be the roll up and the roll over. So for this one, you'll be on your back and you'll measure your distance from the wall by bringing the palms of your hands on the wall and your legs out stretched from there. Now the roll up in the rollover has many different variations.
We'll do a few of them and you'll choose the one that you prefer. Have your hands at your pelvis, the pads of your fingers on the corners of your pubic bone. Inhale to prepare. As you exhale, bend both knees, drawing your feet along the ground and bring your thighs to your torso. Hold onto the backs of your thighs, nodding your nose downward. See behind the cheekbones of your face.
Press the soles of your feet away from you, sliding your chest bone towards your pubic bone. Put weight into your feet and roll up. Send the heels forward. Bring the cheekbones of your face in the direction of the sitting bones of your pelvis. Put one hand at the back of your sacrum, the other hand at the back of your neck. As you inhale, lengthen long from your tailbone out through the top with your hand and a she exhale. Interlace your fingers, press your palms against each other and take the longest possible curl, bending your knees to be kind to your spine so the back of your ribs can come in contact with the ground. Bending your knees into your torso. Press your palms down and aim your sitting bones up to the ceiling so that the of your feet come to stand on the wall behind you and then push off the wall and roll down.
Gradually keeping your knees bent to be kind to your spine. Now you could either do that again or scoot a little bit away from the wall. Reach your legs out long. Crossing your left ankle in front. Inhaling palms together, finger center laced, keeping the back of your low ribs in contact with the ground shrug up high to your neck with your lifted shoulders. As you exhale, Dee shrug nodding your nose downward. Roll your head, neck and shoulders up. Any time is a fine time to bend your knees to be kind to your spine or to hold onto the back of your thighs. That's fine too. As she roll forward, aiming your palms away from your pelvis, the cheekbones of your face towards the sitting bones of your pelvis.
Reach from sitting bones long through the top of your head. Come all the way up to vertical and a shoe. Exhale. Nod your notes downward. Bring your hands in front of you. Take the longest possible curl on the way down. Bending your knees whenever it's the right time so your spine can have a smooth descent. Bending your knees now. UNCROSS your ankles.
Press your palms down. Aim your sitting bones up to the ceiling. Stand your ground with the parts source of your feet. If all is going reasonably
Then with knees bending, anchor your pelvis in neutral. Slide both legs out. Interlace your fingers. Take your palms towards the wall. Inhaling now as you exhale, slide your shoulders down, palms towards each other, pressing into each other. Shoulders descend. Your eyes lead the way, rolling up, doing whichever version it suits you.
Using your arms to help bending both knees roll on up. Gradually press the light from the top of your head and the light from your palms forward beyond your feet. Look back at your abdominals and pull them in. As you inhale, elongate long from the sacrum right along the front of your spine, out through the top of your head. Shoulders start their descent and your gaze moves along the floorboards. Illuminating your path with the eyes from the back of your spine.
The eyes from the back of your head, bending both knees, uncrossing your ankles, sitting bones up towards the ceiling and the is going reasonably well. Stand your ground, bending both elbows or you can reach both hands up towards the ceiling, pressing your feet into the wall and then reaching up towards the ceiling in slow motion. Push off the wall, gradually reaching up and pulling back and down with your sitting bones. Ironing your spine right on out on the floor, bending both knees, crossing your ankles and slide your feet on the ground. Stay resting now. Okay, so it's rest time here. You are basking. You can stay there and I'll sit up and talk to you.
Here you are basking in the good feeling of having done a refreshing new take on Peloton mat exercises at the wall. Thank you so much for joining us. I'll look forward to being with you next time on Pele's anytime. Bye now.
Comments


I try very hard to have the kind of connection I did today in my daily mat work but this technique brought me to a new level :)
Thank You so much for this very relaxing and deep work ~ I truly enjoyed being guided in such a kind and gentle voice.

You need to be a subscriber to post a comment.
Please Log In or Create an Account to start your free trial.
