Description
About This Video
Transcript
Read Full Transcript
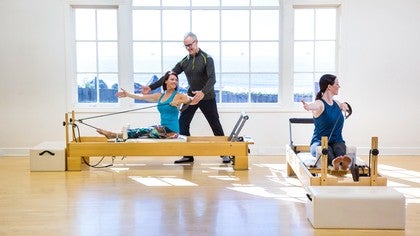
Hi, I'm Tom McCook is a great pleasure to be back here at plottings. Anytime I'm here with Aaron and Aaron and we are teaching. I'm teaching today a reformer class with a focus on the relationship between the hips to the feet along. We will do some interesting stuff with the collarbone in relationship just to being efficient. When you move, it'll be a full body flow. In my recommendation, everybody is focused on fluid movements, being joyful and enjoying the process. So you're going to need a couple of Franklin balls or four inch squishy balls like we have on the floor here and we're going to put them up close to the reformer. The foot bar is down.
Standing Footwork
You want all the springs onto the carriage doesn't move, so they're gonna carefully step onto the balls of the feet. The balls right under there. Sit bones. Then put their hands on the edge of the moving cart with their shoulders right over their wrists. And the first moment, just take a moment to round the whole spine, looking back towards your legs, wrap, wrap the shoulders low and wide and relax the back of your neck. Now just slowly focused on your ankles. Press the feet forward to lift the heels and then lower the heels.The front of the feet will lift and just focus on the hinges, your ankle joint and just go back and forth. Nice and fluid like that so that we're just starting by simple mobility of the ankle and just get a sense that you don't want to grab with the toes. You want to go for a nice smooth glide in the ankle joint, primary joint in our body for force absorption. When we step, we want to get nice fluid moving in that joint. Now we're going to add to it so they're gonna press forward on their feet, roll to the outer edge of the feet, back to the heels, and then roll to the inner edge if y'all, and now we're just getting more of a circular movement, which is affecting more of the joints and get a feeling that when you're doing it, you're not trying to over distort the ankle, but you're trying to roll it around the rim of the ball to get a nice fluid motion through the ankle joint. And see if you get a sense when you're doing that, it's even keep the back round and also notice that the whole leg turns with the motion of the ankle like a long pole. See the pole when the ankle rolls out, the whole leg turns out when it turns in, the whole leg turns in.
So that's mobilizing also your hip joint, bringing Simpson ovial fluid to that. Now when you come to the middle, now reverse. Go inside to the back and then outside and forward still feeling the role of the whole, the whole leg bone. Press into your hands to lift out of the shoulders so you're not caved into the wrist that the back of the neck be soft. Even while you're there, start to increase your breathing. See if you can breathe a little deeper, a little lower. Start to warm up your body. Just with your breath. Do One more. Now as you come to the middle, as you slowly lower the heels, bend the knees, reach back through your tail to come into a flat back and instead of looking forward, draw your chin in and ups you lengthen through.
The back of the neck as you open the top of the chest. Now as you lengthen the legs, press into the front of the feet and around the spine. And again as you lower ankle flection, knee flection, hip flection, wide sit bones, open, chest, long neck and again round in press. So now we're working through the whole body from the feet up and again, heels, knees, wide. Sit. Bones, long spine, open chest, long neck, two more times.
And as you round the collarbones go forward and the shoulder blades wrap in lower. Just two, one more. Nice and fluid. Now as you come to the center, I want you to with bent knees in a in a flat back, slowly shift your hips to the right and lower the right heel. As you lengthen the leg, feel how you're loading that lateral hip and you're getting a little more load into the lateral part of the leg. And then back to center as you bend, both shifted the left and bend the drop the left heel as you straighten the leg and load out into that lateral hip and just do two more each side at your own pace. Find the middle shift in lower, still feeling that you've got contact with the ball of the foot of the stretch side.
Prep for Foot & Hip Connection
You're going to put your foot bar in middle bar, so it'll be like so, and this is a preparation to get your hips and foot connection. So we'll go with a red. Any yellow, you can always go heavier once you get a feel for this exercise. But let's start with just a red and a yellow and you'll come onto your forearms facing the box in a kneeling position. There you go. Now put your right heel on the Bach on the bar and just come into a flat back.There you go. Perfecto. Now the right heel on the bar, just just hold it there for a moment and just get a sense of the line from your head to your tail. Like you're in a neutral position. Press into your elbows to open the back a little bit so the chest can be open, but the back is connected. Now press that right leg long and hold it out there for a moment. Now while you're out there, what you want is you want the heel to invert, meaning the inner heel comes up. So you're going to let it roll that way. There you go.
And now feel how that drives the whole leg rotating out and helps to turn on the gluten. And then Ben and Kim, and as you come in, let the heel drop towards the bar. That's e-version of the heel. Now press out again, feel it invert and feel how that drives the whole leg to the hip and take it nice and slow like that. And that's what we want to happen. That's an action that we want to be involved. That's the drive that happens that creates super nation, starts from the rear foot and let's do four more on that side like that. Feel like the inner heel comes up, the inseam, the whole leg lengthens when you feel the hip extend, so you can start to see that the foot is directly related to your glute firing correctly in your hip extensors, extending the leg in an organized way and do one more.
And there's a very subtle rotation of the pelvis towards the leg, that straightening, it's not staying square when we walk, the back leg rotates back slightly and then come in and we'll take side too. We're going to do two sets. The first set will be on the heel. The second set will be on the ball of the foot. Now we'll take now we'll take side too and just feel your alignment and again, press out nice and slow and just hold the first one. Feel how you're lifting the inner ankle bone up the inseam so you can get into that lateral heel and then feel the whole line of the leg and then can come in.
If all that happens as the leg is straightening and then it's fully inverted, take it nice and slow. They get the sit bone comes in on that side and there's a slight rotation of the pelvis towards the ceiling on that extending left leg nice and smooth and do two more. This is relevant to your ability to be able to extend your knee fully and not have the foot stuck in pronation and hip extension to one more and as we come in, we'll go back to the first side, but we're going to go on to the ball, the foot on the, on the right foot, but different than maybe you're used to. When you go onto the ball of your foot, you want to not just be on your toes. You want to see if you can get that fifth ray, which is the bone below the little, the little toe on the bar, and when you press out, let the heel drop and just press out and hold it there for a moment where you're not in high heel that your your, he'll go towards the bar and hold it there for a moment. Now think of the same action with your heel. The inner heel comes up, but the forefoot is turning down into your big toe so that he will be a little lower.
Now feel that and that little lip, little more ankle, but keep the big toe feel like that's what you're going for is you don't want to lose contact with the front two foot points as the inner heel comes up, the inseam and then bend and just take it slow. This might be new for you to feel this. Just feel that action of the foot. Four foot turns into the big toe, so the four foot is doing what's called e-version. Has the heel is inverting
Your leg will feel a little stronger when it's extended. That's better. Nice. One more. That's it. And we'll take side too. I bet that'll make your sacrum feel better too. That'll it takes that to take a nice and slow and there's the first one.
Just press out and hold it. Make sure that he has not super high. Now just feel how the inner heel is coming a little more up. The NCM of the leg and the forefoot is turning down into the big toe and then Ben and come in and just get a feel for that.
Jumping Prep
So we have a jump board set up and we'd like you to put on a red and a blue spring. We'll play with this weight. Then we're going to go down to a lot lighter weight and you're welcome to have the head rest up for this for your body positions. So we'll come down onto their back and you can, yeah, if you feel like you'd like to head rest up, it's better for your body alignment. You're more than welcome to put it up and then take your feet pretty high up on the board, but not over the top edge and have your feet in line with your sit bones and go ahead and just straighten your legs. Now it's straight legs. Let's become aware of your three key weight bearing points of your foot, the ball behind your big toe, the ball behind your little toe and the center of your heel. Imagine like a triangle on each foot and those are your key three points to stay on the cart when your feet are flat and just take a couple of small leg bands without losing those threeAnd we're on the bar and the fro Fritz swipes out and as you straight in, the forefoot swipes in and the inner heel lifts and the arch follows that. See if you can feel that inner heel goes down, four foot swipes out as you straight the four foot swipes in the inner heel lifts. You guys get a little feel for that. Now take your hands like this, like right in front of you and imagine the bottom of your sit bone. The bottom of your heel of your hands is your sit bone. So that's your pelvis and it's kind of angled like this, like a like a bowl.
And when you bend your legs, the bottom of the bowl opens and widens and then the bottom of the ball bowl narrows. So you can sense at the bottom of the pelvis is opening and stretching. As the foot is stretching, then it's narrowing as the foot is dumbing and lifting. Can you sense those two at the same time? That's what you're going for. So that's east centric loading of the hips and feet absorbing elastic energy, then releasing an industry and in your legs. Now the next one, as you do it, keep narrowing the sit bones and lift the heels and then lower and bend.
And when you, when you lift, hold the lift for a moment. And just imagine at that moment that your tailbone is come a little bit forward. So the space between your pubic bone and your tail has gotten smaller and the sit bones have come in maximally. So when you jump, that's the moment when your spine is the longest. Then as you bend, feel the widening feet and Elvis. That's it. And I just let your arms come long and just stay with that image. Tail goes more towards the floor as you band tail comes more towards the pubic bone. As you straightened, that's an hour we're going to go through, roll through. So press and straighten Relevate up onto the balls of the feet.
With the heels lifted, bend the knees, lower the heels and lengthen and just go for nice fluid action. Hips, knees, ankle. When the heels lift, keep those front two foot points. There you go. Nice and smooth. Two more.
Ankle, knee and hip. Nice and smooth. That's it Kate. A little heavier on that hip. There you go. That's the one that wants to go its own way. There you go. That's it. You see again, that sense of that fluid action through the hips, knees and ankles at the same time. That's a now do one more.
Double Leg Jumps Parallel
Now come all the way and help yourself up and take off the blue springs. So you just have on one red so it's a little lighter and we're going to add a little more abdominal party to the game. So you're going to come down and lengthen out your legs. Now go into turnout. Now the action of your feet is the same and turnout or parallel, but bring your hands behind your head and do an abdominal curl with your upper body.
Double Leg Jumps in External Rotation
And imagine that you do the curl that you show the blades widen and lower in the back of your waistline, goes into the mat and up your back. That's it. Now as you inhale, just do that small leg bend. Feel the front of the foot swipes out. Now Swipe in and throw the card away. That's it. Nice and light like that. Land like a cat. That's it. There you go.XCL through image. When you straighten and jump your spine is that especially your lumbar spine is at its longest. That's it. Now jump from in out. Jump from first position to wide and then from wide to narrow. That's it. Nice and smooth. Let's do four more and three. Feel that nice fluid action, foot to hip and two and one and down and rest. Just for a moment.
And we're going to finish with some single leg. So with single leg, we'll start straight. This time you'll do with your arms down and great and straighten out and bring your right leg up into a tabletop. And now that go back to parallel with your standing leg. With the leg is straight. See if you can feel that the heel, you've got the heel point and your turned down into your big toe, but the little toe is still down. Now as you bend, bend to feel the foot flattening and just throw the card away. Do that for five on that side.
Single Leg Jumps
Feel that nice extension foot to hip, smooth and fluid. There you go. And one more and then it's your legs. Take your time and just again, extend through. Feel the foot swipes in as you throw it away. As you land the foot widens is a swiping out of the forefoot. There's a swiping in. There you go. Two more. Now from that straight position, jump and land in alternate feet.Jump from one to the other. That's it. Nice and smooth. Two more in parallel. One more in parallel. Then transfer right into turn out and continue. There you go. Feel the whole foot absorbing. Throw it away. Still breathing. Nice and smooth. Two more each side.
One more each side. Beautiful work you guys. That was good. Now from there we're going to come up and we're going to do some arm circles and hundreds. So let's, you can go anywhere from one red spring to all the way up to two reds. So I recommend like a red and a blue and we'll keep the jump board on for this particular exercise and then we'll take it off after we're done with that. So when you're ready, you can take the straps into your hands.
Arm Circles
Now with your feet on the jump board, just take a moment before you lift your feet to lengthen your lower back from your table into your belly button into the mat so you have a more of a length in the lower back. Now pull the straps down so you start to feel like you've got load into your arms and float one day at a time. Now keep the back of the waist on the mat and take your shoulders slightly back and on the exit. Just pull the arm straight down, then open into a circle, but stand into the strap all the way through the circle and start to breathe low and wide into the rib cage. Let the head be heavy. Arms are long and toned all the way through. The top of the chest is open. One more in that direction.As you get to the top, reverse open down in together. There you go. Nice and smooth. Two more you guys. Fluid motion. You're aware of your contact to the mat. Now as you arrive back at the top, bring your heels together, but open your knees about six inches and on the exhale, roll up with your upper body into the hundreds. As you press your legs. Long inhale, bend to come back down and feel as you roll up, you're peeling up with a torso. You're zipping up the center line.
Hundred
The sit bones narrow as the legs lengthen. One more on the next one. We're going to hold for the hundreds. If you need your legs to be higher, that's fine. Inhale for five beats. Exhale for five beats. Feel like you're drawing the weight of your head towards your center.Your shoulders are widening and lowering, breathing wide and low CV can keep that connection to your center line of your legs that keeps your lower back. Beautiful. Three more sets of breaths you guys. Two more set. Strong inner border of your arms and one more set. Hold on the next inhale. Exhale, bend the knees and control the return down. Very nice. And we're going to put the straps on the polls.
We're going to roll to your side to come up and we're going to put the long box on for pulling straps and tricep press and we'll take the jump boards off. Now we're set up for long box pulling straps, but before you lie down, I just want you guys to put your left hand on your right collarbone. So imagine when we do pulling straps that the first, cause you're lying on your belly, which makes it already challenging to get your shoulder girdle back. So the first bone to move after you pulled your arms back is your collarbone. Draw it straight back and let that lead the arm instead of the arm leading the collarbone. And what you'll notice when you do that, it's a lot easier to open your chest and then hold it.
Pulling Straps
They notice you can extend the top of your chest forward and keep the back of your neck slightly long and you'll feel that it just gives you more space and room to get better articulation in the upper thoracic and activate your middle back easier. So we'll play with that. So you're going to come onto your belly. We have on one blue. And then reach your hands through the straps and hold the bottom of the rope right above the buckle and have your aunt's outside the the the rails of the reformer. Notice, take a moment and just come into a straight line. Anchor the front of your hips and the pubic bone towards the box.Lift the legs slightly and just draw your nose and your chin straight up so you feel the neck lengthen. That's a no on the exhale. Drag the arms back to your sides. Now the arms back to your sides. Focus on drawing your clavicles back. Now slide the upper chest forward and then lengthen all the way down and we'll take it nice and slow like that. So exhale, draw straight back. Draw the clavicles back as you extend and open the top of the chest with a long neck and then slowly lower. Take it nice and slow like that.
Feel the arms are long and heavy. The clavicle draws back. Nice long neck, smooth motion failure. You're really targeting the muscles in the upper back with length through the spine and getting nice strength and activation of the upper back, but not shortening the back of the neck too much. We want to get more length into the back of the neck, which tends to be short in modern lifestyle.
The second exercise is tricep press, but you'll get into it the same way. And once you're back there, you're going to keep your upper arms relatively still. So come up to straight line again. Now the exhale, drag your arms straight back to your side. Now without extending, just draw the clavicles back. Bring the elbows in tight to the body. Imagine your elbows are parallel to the floor. Inhale to bend, exhale the straighten, but keep that feeling that you're staying in control of using your upper back, keeping the top of the chest open, the back of the neck, long as you press back, imagine you launch out of the top of your head energetically nice and smooth. Three more.
Tricep Press
See if you can also find on the XL phase as you press back your upper inner thighs, lower abdominal wall, three more nice and fluid. Two more beautiful work. That's it. And one more,
Now we're going to transition off of the long box and what you can do when you come up, this is a quick transition. If you feel any tension in your back, just come on up to standing and then puts your forearms on the box for a moment in standing. And as you press into the box, just round your lower back for a moment just so you can release it. Any lower back tension that you might've built up or you're experiencing just for like a breath or two cause we're going to transition into what's called stomach massage. Now. Now from there we'll take the long boxes off, we'll put them to the back of the reformer or wherever you're doing it at home. And we're going to go to low bar, which is the low setting. And with low bar, we're going to have on two reds in a blue for stomach massage,
Round Back
So you'll put your feet in, turn out on the bar, and as you hold the front of the frame, pull the elbows away from each other and widen across your collarbones and not just think of your sit bones start to narrow to round the lower back a little bit. That's it. Now as you exhale, draw the lower belly straight back to lengthen the legs. Now hold the legs long for a moment. Zip Up your inner thighs. Keep that feeling as you lower and lift your heels as you bend in. Come in, hollow in like you're pulling the knees to the armpits and again, lengthen out lower and lift and floated in. That's it. I would even bring a little more of your foot up on the bar. So you've got that fifth ray. On the bar. That's it. There you go.
Fill. Nice. Broadening across the collarbones. Feel a connection right there. Pull that down into my hand. There you go. Beautiful. Feel there's a connection from the underarm across your waistline to your inner thigh, especially as you zip up the legs. That's your anterior oblique sling. Feel that two more.
Flat Back
Pull out again. Now keep the inner thighs zipped as you lower and lift the heels and then grow tall to come in. And again, XL out lower and lift floated in with a long fluid, strong spine. That's it. There we go. Three more times. Feel that nice clear articulation at the ankle and the foot as you lower and lift.
Twist
Take a breath and on the x, as you tuck your Chin and slowly pull your hips back to lengthen your legs. Take a couple of breasts here and just see if you can relax your neck. One more big breath as you slowly bend your knees just a little bit, open the top of your chest and pull yourself back in. And just do that one more time. Slowly as we nod the chin, pull back through your abdominal wall, the length in the legs. One more breath while you're there.
Monkey
And then very slowly help yourself in and up. And then help yourself out of that set up. We're going to go back down to one blue spring and we're going to turn around facing the straps for rowing back. So for rowing back, are you gonna Watch your head rest down. Let your legs go through the uprights and take hold of the straps in your hands. So with the straps in your hands, the starting position will be, your hands will be in front of your chest like this with your palms facing each other. So just imagine it growing nice and tall. Push your legs down.
Rowing Back
As you inhale, just draw the hands to the center of your chest on the XL from your pelvis. As you start to narrow the sit bones, curl back about a quarter of the way in hell. Open the arms out to the side, little in front of you and turn the palms to the back. Start depressed back then. Forward fold using your abdominal wall. Reach the arms straight, back shoulder with shoulder height if possible. Now lift them slightly up and then to the front like a butterfly stroke.Slowly roll that through the spine as you get to the end. And again, inhale, draw the hands into the chest from the pelvis curl. Use your pelvis, inner thighs, abs. Inhale, open. Exhale, start to press forward. Fold you. Use your abdominal wall. That's it. Now start to lift the arms up to show this. Come back as the arms go forward, and then roll up through the spine. We're going to do two more nice and smooth. Inhale and exhale to curl. Inhale to open. Start to press back. Feel the collarbones going back. Not as much because you're inflection now as you open them forward, feel how you're getting that nice fluid articulation in your arm to show the blade joint and then roll up through the spine. One more time.
Inhale and exhale the curl. Inhale, open. Exhale, press back. Forward fold. Lift up and forward with control. Circle. Very nice. Now we're going to go into flat backs, so in the flat back version, Madden, the first movement is you want to have your arms up level with your shoulders. Now just draw your collar bone straight back so you feel that little bit of attraction wakes up your middle back and keeps your chest open without dropping your elbow at all. Bend the elbows halfway. Now keep that retraction.
Press your legs down into a flat back hinge. Now start to lift the spine and lift the arms up and forward. Forward fold. Release the arms long to the outside of the cart. Now press the arm straight back. Hold it back there. Now Ben at the elbow and bring the back of your hand to the back of your pelvis.
Press the arm straight back. Pull the collarbones back. Open the arms and circle forward.
That's it. Press the arms long to the back. Feel how you're connecting to the underside of your shoulders. Bend at the elbows. Pull back from your mid back is the collarbones. Draw back open. Circle to your feet. Roll up through the spine. We're going to do two more in health. The band flat back hands.
Press down with the legs. Reach up and forward. Grow Taller. Forward fold long, heavy arms. Press back, bend at the elbows. Start to pull the collarbones and shoulder blades back to reach back. Open circle one more time. Inhale to bend. Exhale to hinge.
Lift up and forward. Forward fold long, heavy arms. Press back, bend at the elbows. As you breathe in. Pull the blades and collarbones back to reach back. Open circle and roll that through the spine. Beautiful. Now we're going to do something new called the saw on the reformer. What?
So put this, puts your right strap on the pole and with your left hand and reached through the strap and hold the bottom of the rope with the opposite hand. So you're going up, you're going to re, it's not the same side. Hand do it with the, there you go. So let me give you the choreography. I'll stand out here. So there'll be like this. You're holding the strap, you'll be in the saw. Now from there, start to stack your spine. Now pull that, left that right shoulder blade back. Reach the left arm forward. I really pulled that. Left the right collarbone back.
Saw
Less collarbone for like you're in a bow and arrow. Now as you start to come to the center, lift the left arm up. Now spiral into the saw and again, start to stack the spine. Pull in with that. Let right show the blade. Let the elbow being tied to the body. That's it. Now as this arm comes up, you'll come to center and now spiral into the saw.Feel the waistline, pull back the arms, pull away from each other. And again, as you pull, as you pull that right elbow, keep it in tight to the body. Turn around the torso, the that a little lower. There you go. And then as it comes up, you'll start to lift the left arm up, turn and spiral into it. There you go. Feel the arms pulling away from each other to deepen the stretch. Just one more time. Pull in, turn, add a little bit of a smile right there. It's feeling kind of good and go up.
Turn, reach. Exactly. Beautiful work you guys. It'll take side too. That's all about the love and will reach through. Now think of what you're doing is you're youtube. You can think of the ends of your collarbones are opposing each other while you do that. So they're swiveling around the torsos. So as you reach forward with your left now take your right collarbone back, look towards the back arm and let the back palm face in towards the midline of the body. So you'll go that way. There you go. Now start to come up through the spine. Start to retract left shoulder blade, pull it in and reach the right arm forward. As the arm goes up, come to center and then move into the saw.
Fill that fluid action around the torso. All your torso muscles are involved, retract, reach. You're spiraling around your heart given a little bit of love. There we go. Nice and smooth and we'll do two more. Try in and turn. That's it. As you're coming to center, you're controlling it. The way to that upper arm is resting on the clock, on the shoulder blade. Reach into it one more time.
Stack and pulled back with the left. Feel that moment. Go Up, turn and reach. Beautiful work. From there, we're going to transition into thigh stretch. So for thigh stretch I recommend a red and a blue and we're going to come to a kneeling position facing the straps with the knees against the shoulder blocks. And in this position I want you to reach through the straps again and hold the beginning of the rope so your arms will be above the body and you can have a little support from them.
Thigh Stretch
So now we're going to go into a thigh stretch and I'll just show you the setup for it. So when you're in the kneeling position, your arms are forward. So you're just gonna use the spring tension for support. So the first action is open the front of your hips and take your tailbone more forward. Now imagine you're in the hundreds. So flex your thoracic spine. Now imagine there's no change on the exhale as you engage your glutes, hamstrings the inner thighs, lean from your knee joint.
Now the first action here is you're going to retract your clavicles Fenix stand, your thoracic spine. And if you want, you can lean a little further, but lean from your hips and your knees, not from your neck. And then you'll come back to neutral spine and come right back up. So first, feel that thoracic flection lean slightly. Now retract the clavicles. Then slide the heart up the front of the spine to move into extension.
Come into flection. First, lean from the knee joint, retract the clavicles, the heart up the front of the spine to extend. Feel your middle upper back. Beautiful. Back to neutral and float it back up. One more time. Retract, or actually don't retract. Lean Knauer track. That was a test. Slide the heart up the front of the spine. Beautiful. Back to neutral. Float it back up and rest.
Now we're going to take it into chest expansion, which will feel really nice after that. So I'd recommend you take off the blue, make a little lighter, and just hold onto this. Hold on to the front of the rope again so you'll get a little more range. So you'll reach through and hold right above the buckle. Now just notice when you're standing in tall kneeling, now you probably have a little more ability to feel like that's comfortable. After opening up your thighs and just practice thinking.
Chest Expansion
The first bone that moves is your clavicle. Notice the minute you start to move your club called the cart starts to move. Now keep drawing your clavicle back in with the arms come in last and then slowly return. Just do that five times. First bone to move is the clavicle and that draws the shoulder blades close to the spine, but the neck is nice and long and you're open through the top of the chest. That's it.Arms stay fairly tight to the body following what the clavicles are doing. Now the next one is you draw back, keep them back to where you can hold it, and then with an easeful neck, turn your head to one side, back to center, second side, back to center and release. And we'll do that three more times. Lead with the clavicles. Dan Float the head to one side center, second side center and release. And two more times fill that initial movement of the show.
The collarbones leading the show, the blades in arm, James and then the head center turn center and release and just one more. Drag it back. Turn Center, turn center and release. Beautiful work. Put the straps on the Poles, turn around and put on a, you'll have on two outside red springs. We're going to do short spine. If that's too heavy and you want a red and a blue, that's fine.
Short Spine Massage
That's what we're working with today. You can see how that works for you guys and then when you come onto your back, we have it in low bar right now. We can put it up to the Middle Bar, which is the second, the next nice shot and then come on to the back and put the straps on your feet. I recommend you have your head rest down. If it's currently up, I'm going to give you a lead in to doing short spine. If you're having any challenges with flexing your lower back, I'm going to show you how you can do a modified short spine and if that feels more appropriate for you, you can stay with that. Otherwise we'll go from there. The full short spine, so for the modified, just press the legs out to 45 degree angle and parallel and just do a couple of hamstring arc.
So just let the legs come straight up to 90 or a little less and then pull back down and do that a few times just to get a sense that you can open up that back chain that was just contracted through those other exercises. How's that feeling on your lower back?
The back of the pelvis is widening. As you lower the sit bones are narrowing, just like the legwork and jumping you did earlier. One more that direction and then as you get to the top, reverse open down and together nice and fluid. You still aware of your posture from the previous exercise and one more. Now as you come up to 90 or a little less, go into turn out and bend your legs. About an eighth of the way, really small leg bend. That's a, now imagine when you do this version of short spine, you're not going to let your feet go back at all. And what I recommend to start is to hold onto the steel bars. That's it. Now, just set the shoulders low and imagine as you start to narrow the sit bones, let the tail reach towards your feet and curl about six inches off the cart from the bottom of the spine and then inhale to lower.
How's that doing that to feel okay? Yeah, make it if that's, you want to just stay with that today. You can just stay with that. Okay. Yeah, and just feel like as you curl sync there and even press these together so you feel the support.
If you're planning to go to full short spine, you're going to press the legs out to a 45 or stay with that version. Then bring the arms long by your side. Now as you inhale, let the legs come to 90 on the exhale at the tail, chase the feet into short spine. Inhale deeply a on the Xcel. Soften the breastbone. Use your abdominal wall to roll the spine down. As you get towards the bottom, draw the heels towards the butt to get the tail down to open the sit bones.
Then press long and just do three to four more like that. Nice and smooth, and when you get to you feel like you've done enough, you can even just do frogs a few times after just to kind of smooth that out.
And if you get to the bottom, you are good. Now as you bend your legs, slip your hands into the straps to take the straps off. Your hands are off your legs and put them on the Poles. And we're going to take it into a modification of corkscrew who knew so much you to hold the steel bars again and bring your legs up into tabletop. And instead of tabletop, let them be about two thirds straight. That's a now as you glue your legs together, imagine you have one leg.
Corkscrew
Now let the elbows be a little bit off the mat and slide your shoulder blades down your back. And imagine they're gonna stay on the cart. And on the inhale you're going to let your pelvis and knees go to the left. But keep your right shoulder blade on the mat. XL circled down towards the bar and all the way around to center. And we'll alternate directions.
And think of the the size of it as determined by your ability to keep your shoulder blades on the mat and keep the control through the midline.
And then bend the knees, draw them into your chest, rock up to a seated position when you're ready, and then up to standing. And we're going to take that into the long stretch. So for the long stretch, we'll put up the headrest and I recommend a red and a blue and just start by standing right up on the machine with your hands on the foot bar. Now the ball of your feet will go into the crease of the headrest. And I want you to, when you pressed into the bar, lower yourself into a plank. Now it's just get a sense that you can pull the shoulder blades down as you reach the outer border of the collarbones towards your arms.
Long Stretch
Lengthen through the back of the neck and activate your upper arms towards one another. As you inhale, push away from the bottom of your shoulder blades. Exhale the pullin. Inhale out, exhale and now feel like you're pressing the bottom of your hips towards the bar the whole time. That's it. Feel how that connects you to your core muscles and your inner thighs a little bit more. Just two more and one more. Nice and smooth. Now we're going to take it into a version of Arabesque. Let me show you really quick and if you don't mind stepping off just for a sec, I'll just do my demo in my non warmed up version.
Arabesque
So you'll be like this, you'll have your heel halfway up. You reached the leg out as you push out, lower to plank and then reach to think of the arms. Don't really move in space, the hinges, the hips and I'll talk you through that. Here we go. So put the heel halfway up. Now pull your hips back a little bit. That's it.Now as you reach into that back leg, set the shoulders low and lengthen through the back of the neck. Neck. Connect to the bottom of your shoulder blades. And imagine that you're going to hinge from your hips as you push out, lower to a plank and zip your legs together. Now split the legs to come in. Imagine your arms don't really move in space at all. It's all hips lower, half lower, a little bit more and then zip it back up. Feel the split to come in. Feel the platformers your hands to your mid back.
And again, two more. Feel the sit bones narrow as you lower to help you keep your lower back long and feel your core support. Last one and then all the way in and then gently switched sides. That's it. Reach back and I really feel that platform and the Scapula, the connection of your mid back as you reach the lower the pelvis and narrow the sit bones, widen the sit bones, the come in, keeping the top of the chest open and again feel. There you go. And as you split, feel that hip can come up a little bit. There you go. Two more.
Eve's Lunge
Now as you do that puts your right hand against the front of your right hip for a moment. Our left hip, sorry, a little dyslexic in this position. Now press the hip into your hand and turn on your glute on that side. Then bring both hands to the bar and see if you can keep the back glued on as you pushed the cart out. It's not going to be big.
And again, do that four times pelvis turns back to the left. That's it. Beautiful. And you'll feel that a whole lot more when you do that. And there you go. Two more.
Nice work. Nice work. Just take your time with your set up. Have your front foot up by the foot bar as you bend the front knee. Feel your three weight bearing points. Feel how the foot is moving into pronation.
So the heel is coming closer to the floor towards the inside front and let the pelvis turns slightly back to the right and press that right hip into your hand to feel the action of the back of the hip. And as you go down fill, you're going to keep that. You're gonna let the pelvis continue with that feeling and then commence. Do you feel how now you can even reach into that back foot and connect the foot to the hip on the next one as you're going out, you'll take your left, right arm up and side bend into it and then slowly come back in. There we go. Feel that rotation of the pelvis back to the right as you side bend to the left. Just two more times.
Mermaid
Think of doing less with the neck than the rest of the spine. Then come back up or not more than the rest of the spine.
Now feel them widen and lower and go forward as you flex down. And again, they retract as you come up into extension and then as you widen lower, fill the spine. Flex.
Lengthen all the way up and do a counter stretch the other way for a couple of breaths
Do that two more times and again on the next one. As you go into it, go into the side bend, then spiral and reach under the weightbearing arm and do a twist and breathe into the twist and really feel how you're still letting the shoulders wrap. Let the neck lengthen. One more breath and then all the way back up. And in next version you'll take your free hand to the bar, open up your weightbearing arm a little wider. And again, this shit with the shoulder girl driving back through the collarbones to come up into extension. Pull the waistline away as you widen and lower the shoulder blades and the collarbones would go slightly forward. And again, lifting up,
Roll Down
So you can stay on those three points to a small leg bend and then just do one roll down. Peel into yourself nice and fluid. Allow your pelvis to roll over the top of your legs. Go to whatever's comfortable for you. Take a short breath at the bottom. Now with a heavy head, just draw the tailbone and sit bones down and roll up with a fluid, easeful neck. Let the head be the last thing up. And as you get to the top, just close your eyes for a moment. Center, the weight at the breathing drop, lower in the body. Knowledge Yourself, your good work today, you guys and thank you everybody. Hope you enjoy it.Hope to see you again on Flonase anytime. Thank you.
The Teacher's Corner: Embrace How You Teach
Mention
 |
Tom McCook (Teacher) |
 |
PAULINE B |
 |
Rebecca C |
 |
Elizabeth D |
|
|
Judy G |
 |
Martha Valentine |
|
|
Dawn U |
 |
Ana Margarida Cordeiro Ferrao |
 |
Lori M |
 |
Christine S |
 |
Michele G |
 |
Diana H |
|
|
Denee D |
|
|
Frith C |
 |
Carine B |
|
|
Jennifer H |
|
|
Sabrina B |
 |
Debbie A |
|
|
Christine T |
 |
Barbara L |
|
|
Annamari A |
 |
Jennifer S |
 |
Lesley Powell |
 |
Barbara H |
|
|
Melissa G |
|
|
Melissa M |
|
|
Michael Mary S |
 |
Michelle Unzueta |
 |
Clare R |
 |
Helene H |
|
|
Viviana A |
 |
Vanisha T |
 |
Patti S |
|
|
Nicola F |
 |
Patricia M |
 |
Donna V |
|
|
Shari H |
 |
Robyn Baxter |
 |
Traci R |
 |
Aysegul E |
 |
Anat S |
 |
Connie M |
 |
Z A |
|
|
Tisha B |
 |
Lynn P |
|
|
Debbie K |
|
|
Amy S |
|
|
Laurie K |
|
|
Rachel P |
Comments


You need to be a subscriber to post a comment.
Please Log In or Create an Account to start your free trial.
