Description
About This Video
Transcript
Read Full Transcript
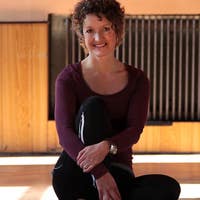
Hi, I'm Rebecca Rotstein. Today I'm going to show you some bone strengthening techniques using the Palladia for buff bones programming. We all begin to lose bone mass probably much earlier in life than you realize in our early to mid thirties so the secret for us is how do we maintain the bone mass that we have after that age, as well as maximize that which we can. Now, the way that we strengthen bone has to do with loading it and increasing the mechanical forces that are placed on it. So more specifically, it means stressing your bones. And in the easiest, most simplistic terms, we're talking about working our bones. So if you think about your bones being very lazy, and if you don't inform them that they have a job or a role, they're going to sit back and take a nap. So in other words, if they snooze, you lose.
So it's really important that we work our bones and we remind them that they have a role and a purpose in our lives, and then they will support us and protect us in turn. So the way that we strengthen the bones, and this is what we do in the Polonius rebuffed bones programming, is through weight bearing resistance and impact work. So these are the three techniques that we're going to be using throughout the workout. It's also important to remember about the alignment of our joints because that plays a role in the optimization of these bone loading forces through our spines and through our entire skeletons. We also have to take into account balance because not only do we lose some of our balanced skills as we get older, but balance is directly related to the strength of your bones because you're using a lot of muscles to maintain your balance in the proper form.
The other thing I want you to keep in mind is that if you have osteoporosis or low bone mass, there are certain movements that you will want to avoid. And I'm referring to the spinal flection or the forward bending of your spine. And the reason is that it can be too much of a compression force on the front part of your Vertebra. So the most dangerous portion though of this would be a loaded flection. So when you're rolling up onto your back and having your body weight on that curved spine. So for instance, if all your body weight is on your shoulders and say rolling like a ball jack knife rollover and the list can go on.
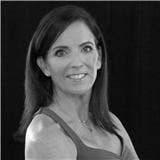
So in these types of exercises I would advise you to modify them so that for instance, in Teaser, instead of rolling all the way up, you may want to just hold a still position and move your legs. Now today we're very fortunate to have Ruth outwork joining us and Ruth is going to demonstrate with me so that I can show you some exercises from the plots for buff bones, workout in the specific sequencing that we utilize and that we leverage to make the most of your bones and to best improve your balance. And also just for optimal joint health and mechanics. So Ruth is going to begin here facing everybody with her feet parallel so her feet are positioned directly underneath her hips. And I'd like to warm up the body, beginning with the feet so that we wake up the appropriate acceptors, which give us all this feedback into the rest of our bodies and especially into our spines. And give us a sense of orientation of where we are in space.
So Ruth, please lift your toes and you can do it on both feet. Good and lower them. Now I'd like everybody to notice what happens. I didn't even ask her if I can do this, but I'm assuming I can just start this clothing her and rubbing her. So as you lift her toes, you may notice that her arches rise a little bit.
So she starts to connect into that deep frontline of Fascia so that the arches connect onto the inside of the calves, through the inner thighs, up to the pelvic floor, and then going up through the diaphragm and up through the crown of the head and lower those toes now and maintain that sense of lift. So it's almost a sense of levity and do that once more. Lifting up through the toes, feeling the connection through the whole body and lowering the toes. And I should give you a little disclaimer that Ruth is doing this for the first time. So she's not planted. She has no idea really what I'm about to do with her.
Now the next thing I want you to do is learn how to hinge at your hips. So if I'm asking her to avoid the spinal curved motions, then I have to teach her what I do want instead. So Ruth, let's ask you to turn and face away from me. I'd like you to bend your knees and send your butt behind you. And now rather than that low, I'm going to bring your chest up a little bit higher. So do that again. Continue continuing the motion. You can hinge forward a little bit, but pause right there.
So you may notice how she started to go pretty far forward. And if she goes too far forward, that's going to change the activation to her gluteus maximus. At this point. Notice that her knees are not going beyond her toes and she's feeling some work occurring through her buttocks, through her thighs, hips, quads, uh, inner thighs, and also through the back extensors which are working to prevent her from falling down. So they're working east centric and rise up to the starting position. And once again hinge. And if you want, you can even look straight forward. [inaudible] and rise.
There we go. So that is our hip hands, which really is the primary motion throughout our plots for buff bones workout. Now Ruth is going to get down onto the ground. So where are you going to use the mat over here. And I'm gonna have you stand up at the front here and face me. Stand on the sand. Stand on it. Exactly. Now stand a little bit further back.
[inaudible] about right there. You can hold onto me if you'd like or she's gonna, she's gonna bury it on her own. Take a deep lunge back. So take a deep step back and place your hands on your front thigh and lower your back knee down and lower down onto all fours. And this is going to get you down onto the ground. So you're gonna walk yourself a little bit closer toward me so that you can then just lower yourself down onto the ground, sliding down onto your back.
So that is one way you could do it. Or You could roll onto your back from where you are. So remember I told you that I did not tell her at all beforehand what I was going to have her do. Let's have you come a little bit closer to me. [inaudible] now bend your knees, Ruth, and I'm gonna start you off with what is my favorite exercise called the limb reach. And the reason I love this so much is that it's incredible integrative as well as, as a stretch for the lateral line of Fascia.
So let's do it. Facing the camera. You're going to slide your left foot out in front of you. So slide the heel out. [inaudible] and lift the same side arm up overhead. Now push into your heel. So push your heel away. So your Dorsi flexing through the foot and reaching your hand away in opposition.
So what happens is she gets a wonderful stretch through the side and relax. Now take another deep breath in and lengthen away from this midline point. And one of our concepts in the plots for buffoons workout is called pushing. So there's always this energetic opposition of pushing and relax and once more length, and then push. Now take a deep breath in here and notice the difference of the inhale versus the exhale and relax. Let's try the other side.
So slide that foot in, sled the other one out, and reach out through the heel. And notice how when you connect through your heel, you get a direct connection into the back body and relax as opposed to if you pointed the foot, it changes the sensation and it changes the feedback. So flex the foot, lengthen up and relax and once more, reach and lengthen and relax. So that's our limb reach. Now slide the foot and lower your hand down by your side. Let's just do a couple pelvic tilts. So breathe into prepare.
Exhale now roll into your pelvic tilt. [inaudible] just to there and roll the opposite direction. So she went into a posterior tilt. Now she goes anterior. And I was just doing this with my family when I saw them the other day. And I gave a cue that was very simplistic, that seemed to work, which was literally let your pelvis roll toward your face. Now let your pelvis roll toward your feet and it worked.
So toward the face, this will be my new cue and toward the feet. So what we're doing is we're now mobilizing a little bit through the lumbar spine and we're also mobilizing a little bit through the hip joints and roll towards the feet and relax. I'm going to bring you into some abdominals now and to do this, I'm going to give you a little head rest. So elevating the head, it's not appropriate for everybody, but for the majority of people it's useful so that they don't feel the strain through their neck. And then the phrenic nerve has a little bit more space, so to speak. It's, it's perhaps not, um, stressed in any way or strained through tight tissue so that we can really get better access into our diaphragm. And to bring one leg at a time, up into table top. Take a deep breath in here, and exhale.
Now I call this the zip up. So as you exhale this time, feel that connection through your heels. Just a gentle, zipping up, not moving your pelvis at all. Just feeling that connection through the low belly. Now place your hands on the front of your thighs. Take a deep breath. In this time you're going to do a pelvic tilt. So you're going to roll your pelvis toward your face without moving your thighs and inhale, release back into neutral. So let it go.
Or She's activating and now she's going to release its okay. And now exhale and little pelvic tilt. So you'll notice that the belly slides down and underneath the ribs towards your face. Inhale, release. And two more exhale. So she's doing a beautiful job of her hands blocking her thighs so that her thighs don't move toward her face. And sure it's having an effect on one there.
Do you want me to heat my neck as quiet as possible and still do this? Or is it okay to let everything? So Ruth had an interesting question. Rest your feet for one moment. Ruth said that she was feeling it in her neck. There's two reasons that I would think of that. One is that I'm not sure for Ruth's positioning, but it's totally appropriate for her to have the pillow under her head.
So before I go into the second possibility of why that's happening, let's take a look. And I'm really glad that you asked this because I think one of the things that we often find is we're doing a demonstration and all works perfectly, and that's not real life. So it's a great opportunity to speak up and it's a great opportunity to show when things don't work perfectly as we want them to. So lift your feet up. Inhale, exhale, little pelvic tilt. Does that help it at all? Um, it's better, but there's still pressure.
There's still pressure. Okay. One of the things, well, one of the things that I'm finding the second, so pause, rest your feet on me for a moment. Now what I'm doing is I'm offloading some of the weight. So in other words, this is a long, it's not such a long lever, but the lever is spanning now from her knees to her feet, right? So that's a bit of extra load. So if I take the load off, let's see what happens. Take a [inaudible]. She's so excited. Take a breath in. Exhale. Now perform the motion. Does that, do you still feel the strain in your neck? You guys felt way, way, way, way less than I'm looking from this position.
I can't see our viewers position. And I actually do want to give you this a little bit because it looks to me like you were flattening out the spine a bit. Now the other thing though is let's go into this again. What I saw was a little bit too much oblique contraction. Now there is going to be some obliques going on in order to create the change in the the trunk. But I feel like you're actually over engaging.
So many of us are culprits of the overactive abs and just over recruitment in general myself as well. So I want to see what happens if I have you bring your feet up overhead. I'm sorry, not overhead into tabletop. I'm going to hold them here. Yes. Now take a deep breath in. Now XL, use less effort. There we go.
So now I'm going to systematically give her even a little less effort or a little less assistance. I'm sorry. Inhale, release and exhale again. So one of the things that I envision is literally the Zipper, so that I'm not thinking about the sides, I'm just feeling that midline connection. How's that? There we go. So I think that she was just recruiting too much. Yeah, and you can do that. But again, it shouldn't be felt strenuously through the neck. Now you might feel a little bit of work through the neck because in I believe at least neurologically as well as certainly factually you're getting that connection all the way up through the neck, but it shouldn't feel strenuous.
All right, great. So now we've done some of our ab work. The next exercise that I'd like to bring you through with our sequence is to have you roll over onto your stomach. And I'm going to remove your towel and place your head down on the mat and place your, I didn't specify yet. Place your hands by your sides right by your chest and let your elbows float up into the air to us a little behind you. That's it. One of the tricks that we focus on in the plots for buff bones workout is where you're getting your back strength from.
Most of us are cheaters and we love to over utilize that lumber area. Well believe it or not or it's easy to believe. I guess you could say that our weakness tends to be in the upper area. So in that thoracic spine, which is very logical when you think about it, what happens systematically as we get older or as we're throughout the day sitting at a desk, where do the spinal changes really happen? You start to make or you start to at least notice it considerably in the upper spine. I want to work through that area between the shoulder blades.
So I want you to just float your hands off the Mat and return them to the mat. And once again, so I'm giving her a little scapular retraction and down and once more now stay there. Float your head one inch off the mat and I want, I don't want you to flatten your spine too much. There we go. And lower down the average person such as myself, has more of a forward head posture. Ruth has more of a tendency for her back to a flat and she said she's avoiding her nose. Cause this is if my head was neutral. So you don't have to put too much pressure on it. But as you rise, I'm going to have you come into a tiny bit of cervical extension.
The average person, not necessarily the average person. We're working on the deep neck flexors for this exercise and lower down. Now I want you to reduce that range even more. Lift your hands now lift your head. There you go. And lower down the whole time she's been grounded to her pubic bone so that she doesn't dip into her lumbar spine. Now this time, lift your hands, lift your head, push your hands down, and we're going to do a baby swan.
So you're going to start to rise up showing off your collarbone and see how high you could come up comfortably. Elbow stay hugged by her side so that she doesn't cheat with her pecs. We get some nice work here through the triceps and lower yourself down. Don't lower your head though. Keep your head hovering above the mat lower, even further, lower further that much so that I'm really isolating the work into her upper back. Lift your hands. Push your hands down and rise up again. And two thirds to lower back down and pause.
And last time, notice she's pushing down through her hands in order to rise up toward the sky. [inaudible] reaching out through the crown of her head, reaching out through her feet, and she can come as high as she wants. If it's comfortable, she could straighten her elbows. And now let your gaze rise up. Inhale and exhale slowly lowering back down. Very, very nice.
Now let's have you rest your arms behind you. Um, let's have you rest them on your sacrum behind you. So look to your right. I'd like you to do a double leg kick set, so we're going to do double leg kick, kicking your heels to your butt, let's say twice one to straightened down. Now straighten your elbows to help you rise up and look down to the second side and we're going to speed it up. Kick kick length into lower and rise and look to the first side.
I'm going to make a variation. Kick, kick, cramp, cramp, and lengthen down through the toes. Now Open your arms out to the sides [inaudible] and I'm going to help you as you bring your arms up overhead and lower down [inaudible] and kick me kick kick. There you go and rise up. I'm going to give you a little bit of assistance because sometimes the shoulders are a little bit tight and you're going to bring your hands behind you to return to the first side. Now let's roll and face the camera here for everybody. We're going to go onto our sides. We're going to start warming up the hips.
We're going to start off with the side leg lift with your yep, exactly. What your feet in line with your head. I'm glad you knew what I wanted. I think that was actually ESP. So that was excellent. Press down through your bottom foot in order for your tap to just levitate up. [inaudible]. Now what you may not see is that her hand, her ear, her shoulder, her greater trope, cantor.
So right here I had her hip as well as her heel are all in one line. So it doesn't look like this. There's no breaking of the line. It makes it much harder for her to balance and it narrows her base of support, lower that foot down. So I like to envision pushing the feet away from each other so that this bottom hip, this bottom glute gets really active. So lift that top foot, push down through the bottom foot. Now lift your top arm up to the ceiling. [inaudible] and I'd like you to make big circular motions with
Breathe into this area right there. Yes. So then you're going to get that proper balance. Intention. Relationship now reversed the circles. Does your thigh hip feel it yet? You can lower your head a little bit. You can even rest your head on your arm if you want. Yeah, rest your head down on your arm. It's a little harder that way.
So I never saw anybody cheat like that. Thank you very much. Now I know what to watch out for. So it's a lot harder when you do it the way that actually it's designed, which is keeping your head down because you don't have that additional assistance. It is your, well, it's in line. You're right. It's not completely in line, but it's also the sensation that you're getting to recruit more with your neck as you do that. So I'm not allowing you to do that. Now the next thing, keep your foot up. Bring your hand up towards the ceiling.
Now bring it pointed up toward the ceiling. There you go. Now lower it down straight in front of you. [inaudible] lifted up. And Lord don't I push you away and up and last time, lower your hand down to the ground, place your hands, sorry, on the mat there and lift your bottom foot to meet the top one. Now bend both knees in toward your chest. So I'm giving you a challenging version of an exercise and push out and bend the knees in. So with this workout we actually have various modifications, various adaptations.
There we go so that we can make it appropriate to different levels. And last time, push out. Now stay beat your heels. Ten nine, eight, seven, six, five, four, three, two, one and rest. Pause. Bend your knees in for me. Lift your top foot up and straighten the knee. [inaudible] reach the foot forward. Good and turnout, lower the foot down toward the ground lifted up. So almost as if you were going to do a classical version of hot potato, it's not the same, but now you're going to tap it down and you're going to tap it up and forward.
Heel. Yup. And down. So we are bringing in a little bit of a PNF pattern, which is something else that we integrate into the workout. Turn inward and point the toes. There you go. That's it. And last time going forward and relax. So bend your knees and sit up to face away from me.
Face straight forward. [inaudible] please your hands behind you. We're going to do our version of teaser. So I'd like you to open your chest and lean back. Um, exhale and return to neutral. Very good question. And inhale, lean back and exhale to return.
And once more she leans back and now she returns. She's going to lift her feet and hold onto the backs of her thighs, which is gonna be sure that she doesn't fall backward, which I am here to prevent. Straighten one knee up and separate your feet. Separate your thighs, I should say. So you're not holding your hands together. Your hands are holding onto each separate thigh. Reach one heel up to the ceiling. Yup. And now swap. The other heel goes up.
That's it. And if you'd like, you can turn out a little bit if it feels better. Otherwise you're fine here. And pause. Now, lower your feet down. I want you to lift one arm up and extend back. So it's, it's more of lifting the arm back and extend through the chest and return and the other one and let's do it less than you're leaning backward. Yup. You're leaning backwards and I'm going to take you out of your dancer body for a second. She automatically was like, ah, let's just, instead I want you to just lift one arm and down.
So a little bit more functional, up and down. And there we go. And down and up and down. And last one. Good. So we get a little bit of thoracic mobility as well. Sorry, you have to finish a even yourself out to the left. I tend to be a little bit of a stickler on, on repetitions. Very good.
Now we're going to go to the second side. So for the second side of our sideline series, you're going to have your head, nope, your head over here. Sorry. It's a real problem when the instructor can't even remember. So we'll, we'll run through this rather quickly. Now that you know what you're doing, press down through the bottom foot, flexing your feet in order for the top to float upward and lower it back down and she rises up and she lowers it back down. This is a really wonderful one for setting the pelvis for getting the gliding mechanics through the hip for getting the Gluteus medius to activate, for getting the correlating abdominals to cert. Start supporting you and some of the spinal stabilizers to kick in and lower down. Now lift your foot and stay there.
Lift your top arm up to the ceiling and let's go into small circles.
She's ensuring that her pelvis stays stacked so that this top hip doesn't roll backward, which is the tendency that most people have. And then what happens? Well. Then they start recruiting more of that hip flexor, that TFL, and that's not my goal. And relax. Lower your foot down for a moment. Lift your foot back up, lift your hand to the ceiling, lower it down in front of you and return back up. Yes. More rapidly. So we play with speed a bit and down and down. Good and down and relax. Lower your arm.
Rest for a moment. Now lift your top foot, lift your bottom to meet it and bend the knees in and push away. Yes. And Ben in a push to lengthen. Good. And then, and push and Ben so you can see she's really working to stabilize here and to figure out where her body is in space. So it's really working her appropriate stepson. And last time relax. Very nice. Let's bring you on to all fours. So now we're going to get some weightbearing through the wrists. Oh, I forgot that. Yes. Sorry. This is why I have an instructor. Devil.
We know we have to do our little hot potato variation. Thank you. So lift that top foot and reach it forward in front of you. Now something that you may want to do and that would assist is if you move that you're not going to, but I'm going to give everybody an option to move that bottom foot forward in will widen your base of support and make this considerably easier. Yep. And back and last time and back and relax. Are we done with that now or did I forget anything else? I think we're good. So then we both forgot. So now we can go on to all fours.
So we're going to do the quadruplets. One of the biggest issues, especially for post-menopausal women, is the fractures that can occur through the wrists. So something that we don't often think about because many people are often thinking about hip fractures, et cetera. And usually those are happening much more in the elderly, but in a much younger age, the risk fractures. So at the distal end of the radius is a really big concern.
So we have to make sure that from, from very, very early ages, we're doing weightbearing exercises and we get a lot of that in yoga and we get some in Pele's. But I want to make sure that we always are incorporating it. So we have a whole section with this in our Polonius for buff bones workout. You'll be back on your hands and knees with your hands directly underneath your shoulders and her knees directly underneath her hips, spreading through her thumbs. She is going to tuck her toes under. She's in a neutral position. She's doing a beautiful job in terms of keeping her head in alignment as opposed to what I often see, which is I call this the dangling head syndrome and you're going to lift through your head. Good. And now lift your knees an inch off the mat and hover there.
Hold it. One, two, three, four, five, lower down and again, exhale, rise up. So there's this nice integration through her shoulder stabilizers, through her trunk and again and through the neck flexors. One, two, three, four, five, lower down. Now we're going to make it more interesting. Lift up again. Remove one foot
So you're going to kneel and now you're going to sit back
You might want to scoot yourself forward [inaudible] and walk yourself into a plank. Nice. Now lift one foot up. Let's do our leg poles. So shift your weight back forward. Replace the foot. So lift one foot, flex both point, both end down. So flex both and she shifts point both and switch. Lift one flex both shift and relax.
Now you can stand up and I'm gonna have you stand off the mat so you have a little bit more of a stable surface. And I'd like you to face exactly where you are. We're going to start integrating everything that we've done into the standing component. So with your feet here in parallel, I want you to imagine a magnet that is placed between your two ankles so that it's preventing them from swerving away from one another, which is what we often see with people. And we want the ankle to remain above that for a second toe area. So you're going to slowly Relevate or rise up [inaudible] so you can see she's working really hard and the work is occurring, especially through the outer part of her calves, her peroneal muscles and lowering back down and push down to grow taller, rising up again.
[inaudible] and I'm going to make a little adjustment. There we go. So I got her to breathe into her kidneys a little bit and lowering back down. Now we're going to add in some other interesting balance challenges. Who's going to rise up and she's going to look to her. Right? Beautiful. Look to your left and look to the camera and lower back down once more.
Rise up this time. Close your eyes. Wow. This is very challenging. That's great. And lower back down. Nice. Next, I want to bring in a little bit of some impact. So we're lucky to be here in Santa Barbara where at least the Pinot noir is one of our good grapes, Cabernet as well. So I want you to do some grape stomping. So pretend that you are crushing grapes, which has one foot and I want you to go in every direction that you possibly could so that we're working the bones in ways that they were unexpected or they were accustomed to previously. I think that's about good.
Maybe the tannins are a little strong still and try the other foot. So we're getting some nice impact. Now this is assuming that there's no bone spurs or fractures that have occurred or somebody downstairs or somebody downstairs and relax. So that's getting some of our impact. Now let's bring in some of our resistance with additional weight in a weight bearing capacity. I'm going to give you two, three pound weights here and I'd like you to bring your arm. Actually before you do anything, I want you to align your spine, feel that zip up, that connection that we did at the beginning of the workout.
Now lift your arms straight up in front of you, palms facing the ceiling. So instead of with a classical position today, I'm going to have you just parallel and I want you to just do a set of five bicep curls [inaudible] and notice how as you keep the elbows still in stationary, it requires a lot more work through that front line so that you don't count our lever with the weight and lean backward too. And one more. Nice. Now lower your hands down. I'd like you to lift one arm up overhead. Nope, I don't care. And then swap.
Now I want you to breathe into your back body as you do this so that you don't lean back. There's a real tendency to do that. Feel your back with air. And once more and relax. Now we're going to learn some squats. So I'd like you to take a wide stance, slightly turned out, not dancer, like I can't get the dancer out of you, Ken. I old habits die hard. Exactly. Bring your hands straight in front of you and I want you to to sit back, but you're gonna look straight ahead so you're not going to do the classic dancer approach to it. You're going to look straight ahead as you squat back and rise.
So you'll notice that she's maintaining the position you can keep going of her knees directly over her toes. So many people tell me I can't squat and I look at them doing it and I say, well, I couldn't do that either because that would kill my knees. So you make sure that those knees have good alignment. You want to make sure that the knees also don't go beyond the toes. So pause for a second. I want you to sit back further.
The more she sits back into her heels, the more her glutes have to fire it. Feel that rise up and again. Now pause there. Can you feel that or what do you feel? Personally for me, I feel more you feel a little quads. It could be how well it could be. You're going very low.
So Ruth has pretty long Achilles. I don't see that very often with people. In other words, what I mean is she's able to squat pretty low without her heels lifting. So if you yep. If you stay about right there and not go quite so low and bring your chest more upright. Yeah. Well actually that was perfect. I'm glad that little mistake happened because in keeping her chest more upright, it's going to get her glutes more. She's not going quite so low.
Pause, go a little bit lower, a little bit lower, a little bit lower. There you go. Now breathe into your back body and come back up. Turn this way so that we can have another view of it. It's so interesting because this is what I was talking about before, the specificity of the joints and the positioning of the joints in the most subtle way makes the biggest difference and makes all the difference in the recruitment of the musculature. So once again, sit back [inaudible] so show them what you did initially. She was a little bit art. She was going into that thoracolumbar.
Just know where the previously the previously [inaudible] yeah, she was going to about right there. So she's gonna show you when she wasn't feeling it. Yup. And now rise and now she's going to show you what she did to correct that. So she started going back, she started breathing into this area and then she got her weight a little bit further back as well. Do you feel that and rise. So that little subtle difference made all the difference in the recruitment and in the sensory feedback as well. Nice.
Now you can turn to face everybody again and I'm going to add in one other thing. I'm going to have you step to the side and I want you to step behind you as if you're doing a curtsy position and lower yourself down and now you're going to pulse it for 10 and nine. You can have your elbows down if you'd like seven, six, five. So you could get a good ITB on stretch three to one other sides step and one n two n three and four so you can feel it on whichever is the one that seems to be tighter. Three, two, one and noticing how the knees continue to stay in relationship to the foot and we can lower our weights down. Thank you. And let's have you just stand in a natural position, relatively parallel. If it's comfortable, lift your arms out to the sides.
[inaudible] and once again, I want you to experience that sensation of breathing into the back body because we saw how that little change creates a difference in the stacking of your two diaphragms of your respiratory diaphragm, directly over your pelvic diaphragm or in other words, it changes your alignment if you want to think about it in the simplest, sick, most simplistic of terms. Now lift your hands up overhead. Careful not to lean backward, but I want you to breathe into that back body once more. There we go. And lowering the hands down by your sides. Thank you. So we've just done some exercises that are critical for bone strengthening and part of the plots for backbones workout.
And I hope you can see a couple of things that we've done. We've brought in some of these bone strengthening principals as well as balanced. And you've seen how we've gotten some stretch in there eland even though it hasn't been a static held stretch, but the stretch has occurred through the tissue in the strengthening of other areas. And then finally about how the specificity of the movement really makes all the difference. And that will also make a difference in the bone loading itself. So thank you again. I'm Rebecca Rotstein and I hope you enjoyed this tutorial.
Bone Health: Osteoporosis Safe Workouts


Comments


You need to be a subscriber to post a comment.
Please Log In or Create an Account to start your free trial.
