Description
About This Video
Transcript
Read Full Transcript
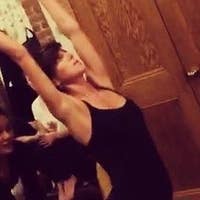
Hi, I'm Cathy Corey and I'm here today with Sarah. And Sarah had asked me to teach her the Russian squats. The Russian score is a very advanced exercises performed on the reformer. And as I was taught how to do the exercises, there are many different components that we need to know before we actually move onto the reformer. So I like to start with work on the Cadillac that is going to help us look at your alignment and um, the placement of the feet, the placement of the body in order to properly do it on the reformer with a moving carriage.
And so we're going to create stability and we're also going to create, um, the alignment from the center of the body into the extremities so that the exercise is not going to be so, um, scary and or even that advanced. When we get to the reformer, we can take it piece by piece so that we know the essence of the exercise and we know how to make the exercise work for everybody. So thank you so much. We're going to set up the um, the tower on the Cadillac to begin with. So we're going to have one red spring coming from the bottom and we're going to do on a tendon stretch. It's kind of the reverse of the, the monkey that we do. And how I like to set this up is that I want to make sure that the hips are under the bar. So go ahead and bend again and we're going to look so that when the legs are straight, we're going to have a straight line.
Go ahead and straighten your legs so that the weight of the spring is going to come do rectally from the center of the foot through the knee and into the hips. This is going to help to prevent any tucking or curling of the pelvis. So we actually are now creating a neutral pelvis, allowing the spring to help us keep that alignment. Now we want to watch the feet because one of the things that we need to do in the Russian squat is to have really strong foot alignment. So the first thing we're going to do is bend the knees and we're tracking the from the center of the foot through the knee and into the pelvis, keeping that pelvis straight down and we're going to oppress up and just flex and 0.3 times.
So we're going to go in and really get that long stretch so that we're going to stretch through the Achilles and stretch the tendons as well. So we're looking at the tracking of the ankles and the tracking of the heels in this position. At this point, go ahead and bend down. We may need to put a small ball at the knee or the ankle to make sure we have the tracking all the way into the hips. Now we're going to go into, we're going to press up and point and then we'll flex the foot and roll to come down. Point the feet, roll through the foot. Good. And again, once we're, what we're doing here is really watching that ankle position, making sure that we're strengthening both sides of the calf evenly and all the way up rural through the foot and come down. Now we're going to keep that flex and we're gonna push through the heel to have the movement come all the way up.
I'm gonna Point High and bend the knees in over the chest. Again, tracking that movement and to the flex to come up and point the foot and Ben to come down. Very nice. And one more time. We're going to flex and point and rural and calm down. Very nice. And just get a little stretch here. Little spinner stretch. Good. So we're lengthening and stretching from the hamstrings, pressing the tailbone and reaching that tailbone down to the mat and now hold the bar and release it all the way off and slide back and come off. Very nice. How did that feel? Great. Good. Thank you.
We're going to take the spring off and we intake the um, the safety strap off as well. Now we're not going to use the spring on the bar, but we're going to get, have Sarah stand on center facing the bar and her distance is going to be so that her arms are straight and she has a little bit of pool into the the straps. We're going to make sure that we're not hunching forward or leaning forward the least little bit. We're have that nice lengthened position. The feet are going to be hip distance apart. Good. And keeping the ankles down, keeping that long stretch that we just created. We're going to use the bar and we're going to go into a knee band, so we're going to expand straight down. Beautiful.
And then come straight up using the bar to help us in this alignment and we want to watch that we are keeping shoulders and hips in alignment as we come down. So the tailbone really reaches down toward the floor and we press into the feet, especially into the heels as we come back up and using the breath. Inhale and exhale. Take an inhale at the bottom and exhale and come all the way up. So I can see that Sarah's does this beautifully. She's not leaning or pulling, but she's actually using the bar to help train the muscles.
We're going to do two more of these and when I see that the foot alignment, the knee alignment, the hip and shoulder alignment is still in this perfect, um, positioning, then I know she is ready to then go onto the next step, come back up, lift your leg up and bend the knee. Now from this position we're going to slide down as far as you can, keeping your alignment and push into the foot to come back up and we can see how much more we need to really work on that and come back. I've only one more of these and comes through right down, down. You are beautiful and her range of motion is limited by how and to change sides by the alignment. So we're not going out, but we're going straight down, beautiful and up using a full breath down and a full breath up, shoulders over hips. And we're also now looking at one side to the other to see are our stronger or more dominant side and really coming to train those muscles to get ready for the Russian squat. Now we're going to do the same thing. Take the leg up, but this time we're going to extend the leg out.
And once again we're going to sit straight down. Beautiful and come back up. So we now the fact that we have the bar up high and come down other side, um, allows us to really have the feeling of what's going to happen on the reformer before we get there. Beautiful. One more each side and extend. This is a beautiful positioning and a great way to get the muscles ready for rushing squat on the reformer last time and come up so I can see you are really ready. Let's move on to the reformer.
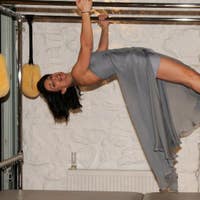
Continuing in our preparation for the Russian squad, we are now going to go onto the reformer. So Sarah is going to put on all the springs. And I know this is not a usual way to do this, but I like people to feel the stability of the carriage with the movement before they actually have to move the carriage back and forth. So we're going to have you, I'm Sarah. Please get on standing on good and holding the straps.
Now the position is we want you to have a little bit of resistance, so wherever she's going to hold them, the straps will be taught, but she's not going to be leaning forward for, for that movement so that the shoulders are above the hips and the alignment stays shoulder to hip and all the way down to the foot. Now remember, we have to have the strong foot positionings to begin with and that the heels really need to be planted strongly so we're not tipping the body forward and the heels come up the least little bit. So the first thing we want to do in this position now is once again do the squat. So we're going to bend and straighten and come back up. Now we can see that with the strap coming from below, this makes the movement more difficult to do even though we have all the springs on the stability of the and we have the resistance here in the straps. Very nice, beautiful and use the straps and come back up. Use your breath one more time and coming down, bending you did it and use this trap and come back up.
So with all of that, once again, this is the first step. We're looking now at the strength of the center of the body as we do the bend and straightening with this with the straps. Now the next challenge of this exercise is that the carriage is going to move. And how I like to train this is that we're going to go into our kneeling chest expansion. So we're going to go down to probably just one red.
I usually do this on one red or one red, one blue, and we're going to kneel at the shoulder, wrist. Once again, we're going to hold the straps just so there's a little bit of tension and we're going to, once again keep the alignment shoulders to hips down to the knees. We'd come back and front, so we're looking here. If there's any pulling of the strap, the chest will lean forward and this is not going to allow us to have the stability. We want to look at the position of the feet, so once again we're really opening the foot, pressing down into the foot centers so that as we are working the whole body, the kinetic chain foot, knee, hip, shoulder, up to the top of the head is really good. Now on the next one I'm going to have Sarah come back and she's going to hold the straps there and this point she's going to turn the head and turn the head, turn the head center and then release. And why we want to do this is to make sure that she can stop the movement and have movement across the shoulder girdle so that it's not tension in the upper body as she's doing the movement.
One more time coming back and now we see that she has the strength and the ability to take this to the next level, which is to do the same exercise in standing position. Here we go, standing up. Once again, the stabilization comes from the center of the body so that we have the hips and the shoulders aligned and we can't pull the straps. It has to come with the breath in a smooth and even movement so that we're coming front and back with the entire body activated so that as we are working, it's not a pull or a release, but a smooth and even movement all the way through. Now because her alignment is so good, we're going to add something. We're going to come back and release it front.
I now bend and straighten the legs. Good. And once again. So now we don't have the uh, spring tension that we did before. So when, Eh, when she is bending, she really has to feel all the muscles in the body working. Try not to come down so far so we're not coming out good. One more of these arms and the bend.
And straighten. Now the actual rushing squad is to put that together as we come back. Let's see how we go and come back and bend as you go back and stray and then release the spring up and Jen arms come down and come back and lift up and bend and lift. Now when we, now that she has all those components, the idea Yaz, as we train the muscles, we're going to go deeper into that movement as we come down and bend
We're going to start with the straight back, but I know it's very difficult to do with one leg. So how we're going to get there is we're going to place one foot on top of the shoulder rest and I'd like it to be just on the ball of the foot. The heel is relaxed, show that we're pressing into the metatarsal arch. But don't think about coming up too high on there. And now we're going to try and keep the hips level in this position.
And once again, now just come back. We're gonna do three of these. Yeah, leg will stay straight just to feel the balance through the movement and to exhaling back and inhaling front, very nice. And the hips stay level pressing here. Good. And now we're going to press back, lift the foot, extend the leg, bend the leg, faced the foot back and released straps. Great. One more time. And if in the leg and bend and come back, last one and out. Hips, breath and extend. Beautiful.
Takes a lot of strength and release other leg. Find your balance. And with with issue we'll see, um, with yourself that one side is going to be much easier than the other. So once again, pay attention to putting all of that energy into leveling the hips and utilizing the muscles actively through the entire body to get into this Russian split. What? Russian squad and all right, here we go. And take it out and bend and touch and release. So all, all those muscles are working evenly. Activating upper body has to be strong and lifted and lower body has to be stable and working.
One more time and up and out and in and down and release. All right, now what comes down, let's give it a try. So the leg is going to come out, you know your stability and we're going to bet as we go back and straight and Ben. Beautiful Sarah and Stragan. One more time and then you got it. You got it. Everything is working and straightened and change the leg.
Good. Other side I'll put down and then and, and eventually her goal is to go down much further than that and straighten the carriage is moving. So you have to have a good stability through their entire body and straighten and last one bend and straighten and take them. Nice little rest or release the straps in round over. Before we continue with one more movement.
So now we're going to have you round down. Now roll the spine up. We'll do that two more times because the next one does have us round over and come up. All right, so now we're going to be holding the straps and once again we want resistance on the strap so her where she is standing is going to make a difference in the resistance. The further back she stands, the more resistance she will have. So you want to take a little step back for these? Good. Very nice. Now from here we're going to uh, let's do, uh, of three of these so that as we're coming over, we're going to pull and we're just going to round and the arms are going to go back.
Knees are going to bend and come back up and lengthen it nice and long. Good. And again around in the back as we come down. Beautiful. And come back up and one more time around it. And Stuart from bringing it a tailbone round and over and roll up all the way if you can, we take one leg out and without moving first just round to your leg. There you go.
And come back up. Yup. And change sides. So would just looking here at the stability through the hips and just round beautiful. And come back up. Let's add it, if we can the bend, as we round that leg and hips are level and use your breath and beautiful and come back up. Let's do two more of those views. Shuffle around it over and come back up one more time. Rounding. Good. Good, good, good, good. And up other leg and find your, find your center.
Take your time and round and come back up. And we all have one side that is going to be more stable than the other. And we are going to be working on this to make the body work symmetrically. We have one more. Let it go. There it is.
The Teacher's Corner: Breaking Down to Build Up


Comments


Thank you Kathy for such expalation on great deatails ...
I love listening to your tetoriels!!!
Keep them coming please


You need to be a subscriber to post a comment.
Please Log In or Create an Account to start your free trial.
