Description
About This Video
Transcript
Read Full Transcript
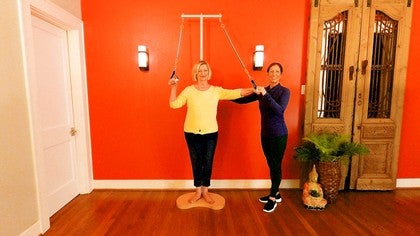
Hi, we are continuing on with our session, correcting kyphosis and forward head posture, with our client, Peggy. We're using the Pedi Pole now and a theraband to do some exercises that will incorporate thoracic extension strengthening and posture. So what I'd like you to do, Peggy, if you could stand against the Pedi Pole here. You're gonna stand and face your back to the pole. And turn your feet out to a little bit of a V.
And you place your tailbone, your mid back, and your head to the pole. So, as of right now, she's about one inch away from the pole, and you see when she tries to get her head back to the pole, she's looking slightly upward. And, so, we're gonna be working on that. And what I want you to do is bring your feet back a little bit and heels together. Perfect, that looks great, excellent.
That's wonderful how the Pedi Pole inspires good posture. Okay, so this is going to serve as a little bit of a head harness. And I'm gonna demonstrate what I'll do with it first. So, I'm gonna take the band and put it behind my head, and then, pull around, and then press into the band as a goal, and as feedback to try to bring the head into alignment. So, you can understand what I just did.
And so, now, we're gonna put it under your hairline, and then keep it open as much as possible. I want you to hold onto it, 'cause it's easier if the patient actually holds on it to it themselves. Choke up a little bit more, that's it. And then you pull forward, and what I want you to do is try to put your head back on the pole. And then tuck your chin a little bit, draw your shoulders down, great.
Let your head come away from the pole and then pull it back again. So you're really working your deep neck flexors, and your neck extensors to try to lengthen. So, it's not really a nod yes, you're actually pulling straight back away from my hand. Yes that's it, I call it the chicken and the swan. We wanna turn you into a swan.
Okay, bring your head all the way back to the pole. That's right, and just release a little bit. Don't let the band bring you forward. Stopping there. Keep your head on the pole.
Now tuck your chin a little bit. There you go. So you got that resistance. And then pull straight back. So keep your eyes level, right on my hand here, and then pull straight back, yes.
And usually as a teacher, I'm standing right in front of her demonstrating what I want her to do. Yes, that's it. So, she's one of those people that likes to hold her head sideways. I think she's been a secretary for the school board for many, many years. 35 years, I think it is.
37. Let go with the band. And then, she's been talking on the phone for years, and years, and years, answering the phone there, so I think that shows up in her neck posture. Okay, so now we're gonna put the band aside. And we'll place the arms or hands into the handles.
Now I've taken off the neoprene off of these handles since COVID, and because the material is very porous, so you'll see, I'm just using the PVC pipes here. And now I want you to bring your head back to the pole. That's it. Straighten your arms forward and pull your arms straight down with your wrist straight. Okay, so notice how her shoulders are coming up by her ears and then reach the arm forward.
Great, and keep the wrist flexed. And now, plug the shoulders into the sockets. So I'm gonna kneel down a little bit so that people can see. And then, draw the shoulders down towards your hips. That's good, keep your arms really straight.
If she doesn't keep her arms straight it becomes an arm exercise, with the arms straight she'll really activate the obliques in the abdominal wall much more, pulling straight down and keeping the head touching the pole, looking more this direction here turn your head to the right, there you go, that looks better and pull down. And now, go into a little bit of abduction here. We call this scaption pattern. Take it up, nice, that looks better, good job. So we're really working her postural muscles because we're keeping our arms straight, drawing the shoulder blades down and back, keeping the neck lengthened, and the head against the pole.
Now bring the arms in more of a circle, and then press down to the sides, and then come up and forward, take it out and around. Excellent, that looks great. Okay, now I want you to press the arms down to your side seams, and then, keep your elbows at your sides and bend, your elbows for a little tricep press. So keeping your shoulders down and bend your arms forward like that and back. Okay, so like this, bend and straighten, that's it, and bend and straighten, keeping your elbows at your sides.
So, don't let 'em come forward if you can help it. Shoulders down and back. Yeah, so I'm making her work in her best posture of the shoulder and the spine the whole time. Great, now turn your palms outward like a penguin wing and flap your penguin wings, there you go, and then pull down same thing, and then keeping your elbows in and your hands out. So I always call this the pen;guin.
I love this one for really working the rotator cuff. Okay, so now hold your arm here, then pull down. That's it, right that but don't let the shoulder come forward as you do it. So straighten your arm right there and then back up again. Yes, that's it.
So you're really holding that humeral head back in the socket. Yeah, that's hard for her, so we're just doing one at a time so, I can really see what's going on. Otherwise she's letting the shoulder roll forward as she does the exercise. Okay, let's do this side, let that arm rest. Let's see how this left one does.
And I'm gonna help you with it if you need to. Yeah, that looks good, better on this side. But sometimes the learning happens on the one side and the second side does better 'cause it understands what to do. That looks great, yes, I love it. Okay, now let's take a look at what the feet are doing.
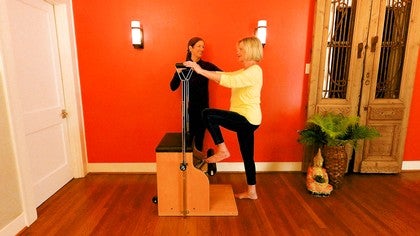
We worked with her peripheral neuropathy and you can see the discoloration of her feet when she's still and not moving her legs. So, what I want you to do is take your arms out and then bend your knees and let's do a little plie, and bend down a little further and just stay there. Hold that, and I want you to pull the knees apart just a little bit, that's it, and that helps to lift the arch. That's great, and then come back up. Use the arms pulling into the Springs to help you a little bit, and pull the knees apart into my hands.
So, pulling those knees out into my hands as you go, that looks great. Now stay here. Pull the arms down just a little bit. Not that much, so just a little bit, arms straight, arms straight, elbows straight, that's it, and pull the shoulders down, there you go. Now, come back up.
Now she's got everything going, it's a lot to do. Okay, again, yes, much better. Better shoulder organization, better spine alignment, and foot and knee alignment, that looks really good, great job. Okay, now, release the straps. And then what I'd like you to do is just take your arms up and forward, just like you're raising them up.
So, you don't have Springs that are gonna go around with you. Look how beautiful that looks already, and then coming back down. Now I'm gonna take that band again, put it in your hands, and then if she weren't doing so well with that, I would have her do arms straight out, pull the band slightly apart. Not bouncing it but just keeping the wrist straight, flat like that, make a straight line to your knuckles, just like that, like you're trying to show off your rings. Perfect, and then, that's great.
Now, bring the arms overhead, keep the head against the pole, and then pull the arms a little bit. Yes, that's it. Keep your thumbs reaching up. See how her wrists are bending. So that's gonna be important for strengthening and also activating the Teres major.
Yes, that's good, and pulling apart. Excellent, okay. And this is inspired by the Fletcher Towel Work. So bend your elbows, coming down and then I'll take the band. Okay, now step to the side off of the Pedi Pole and now we're gonna take this to the wall.
So, I'm gonna slide the Pedi Pole over just a little bit, so you have space. And now come to the wall here, and put your hands on the wall. Okay, not too wide, yeah, there you go, just like that. And, maybe we move this over just a little bit more so you all can see, and then I'd like you to slide your hands up the wall. Great, okay, and then come back down.
You see how she's bringing the arms and her shoulders up walk a little bit closer to the wall and this is gonna make her stand up tall. So shoulders down as the arms go up. There you go, great, that's it. And now shrug your shoulders toward your ears and then draw them down. So you feel the difference between the two, shrug and down now, hold that, and I want you to take this hand off the wall and stretch it up overhead without lifting up the shoulder.
So remember, plug that shoulder into the socket and then take it away from the wall again. There you go, that's it. Draw the shoulder down as your arm goes up. So, I think of it like a Seesaw, that's it, and take it down, all right. Place the hand against the wall again, and then take the arm straight up, shoulder shrugs up, shoulder pulls down.
Now you're gonna hold it there. Keep your elbow straight, press into the wall a little bit. That's it and then lift the arm away from the wall. Just like that, without lifting it up, that's it. Okay, so here's what'll help.
We're gonna take the strap in the hands, put it in your hands here. I want you to pull the strap apart just a little bit. So, give it a little bit of tension. Now, pull it away from the wall and keep the tension. Yes, there you go, so no upper trap there and then you've activated this Teres major and then it keeps the shoulder in place as she lifts away from the wall.
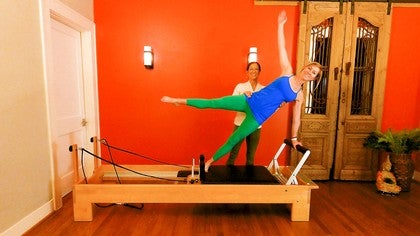
Another exercise I really love to teach you is extend the left leg back, kicking it back behind you and then lift the leg up with a straight leg. So, you're kicking the leg straight back behind you. Okay, can you do that without leaning forward? Keep the knee straight and kick it back. That's it, now lift the arm and the leg at the same time.
So this is a great one if someone can't lie prone to do the swimming exercise, or keep it pulling outward as you pull, there you go, draw that shoulder down, that's it. When you start combining different motions sometimes the coordination gets challenged. Okay, I'm gonna have you hold your hands like that, kick this leg back again. And my cue for her is to keep that knee straight and lift and extend the hip. And then try not to let your face get closer to the wall.
There you go, excellent, that looks much better. Okay, let's try the other side. Lift this leg, keep the knee straight behind you and you can just point the foot behind you and then extend the leg, one, and two, three, four. And then lifting this arm, and this leg at the same time. See if you can do that.
I will do That's it, pulling this way left arm, right leg. Yes, that's it, drawing the shoulder down. Yes, you've got it. Straight leg, straight arm, shoulder down. Excellent posture.
Great work. All right, come down, bend the elbows and then stand with your back to the wall. So at home, what you can do is either stand against a door frame, or you have like the feeling of that Pedi Pole behind you, or you can stand against the wall, and put your head to the wall, make sure your head touches the wall. Feel how much easier that feels now, and now raise your arms up overhead. Yep, that's great.
And with your shoulders down, that looks perfect. Okay, now come on down. And now, what we're gonna do is remeasure your thoracic kyphosis to see if it's better. Okay, so let me get my supplies. And, what I'm gonna do is have you turn to this side and kind of on the diagonal here so we can see what we're doing.
And then I'm gonna find that C7 point the top of your spine, C7T1, make a little mark, there we go. And then, I'm gonna do another one, down below on the lumbar spine. And again, we look for the prominent bones at the back of your pelvis, and then go right across, that's S2, come to the top of the iliac crest, that's where L4 is. And then we go one notch down from that. And that's where L5 is, right there.
Then we have to really make sure we know where L5 is for this particular segment. Okay, so usually we do it against the skin but I'm gonna just do it quickly here with the flexible ruler, molding it to her back and we're gonna see if it changed. Okay, make sure you got the ruler going the right direction, and then molding it to the back, and certainly making sure we know where the L5 segment is. Okay, right there. So, I make a mark on the ruler, as soon as I take it off of her skin and then standing up tall, placing your hands against the wall, turning to the wall, towards the wall.
And then I want you to... 'Cause I'm gonna push on you a little bit to make sure this mold is correct. And then, alright, then we're gonna see how that worked out. Okay, you can relax there. And then I'll go and make the measurement, and let you know what the score is.
Okay, now we're going to discuss her improvement in her thoracic kyphosis. So, at the beginning of the session we measured her thoracic kyphosis where we found the curvature of her spine was a large thoracic curve and a small lumbar curve here. And her kyphotic index was a 14.44, 13 is the threshold for thoracic kyphosis that needs intervention, we call it clinical kyphosis And after our session we remeasured and we see here, you can see that the curve is smaller and she has more of a lordosis. Her transitional segment has changed. So, it doesn't only change the thoracic kyphosis, it also changes the whole balance of the spine.
So this is much more like a healthy spine should look. And she had a 5.2 centimeters away from the center point here in her apex of thoracic kyphosis. And now she has a 3.3 centimeter and that's just an excellent progression which gives us an 11.4 kyphotic index which is now under the threshold for clinical kyphosis. So as you can see, the mold of the spine, looks a lot different than it did before. So, I'm really pleased with this progress, and this is after one Pilate session that she improved in this.
The key is to see whether or not she can maintain that improvement. So, if she continues to do the exercises on a regular basis, doing say two to three times a week, home exercises two times a week, zoom exercise classes couple times a week, and then an intervention once a week with a teacher on the equipment, I think she'll really make even more gains than this and can really reverse that pattern of thoracic kyphosis which tends to progress over time. So, this is actually a 20% reduction in her thoracic kyphosis, which I'm really excited to see. So, I'm hoping that you get the same results with your clients and I hope you enjoy the tutorial. Thank you so much for joining us.
Bone Health: Osteoporosis and Exercise
Comments
You need to be a subscriber to post a comment.
Please Log In or Create an Account to start your free trial.


