Read Full Transcript
Hi, I'm going to sell pert and I'm going to take you through a very basic, pretty easy mat class, um, influenced by the other modalities that I've studied. The Trager approach, the Alexander Technique. I've done many years of continuum as well. And so it's going to be a very gentle, relaxed kind of math class. Um, if you use props in your normal, uh, traditional mat work, like a theraband for leg circles or towels or any other supports you need, go ahead and get them before you begin this class with me.
So here we go. You're gonna start lying down and just take a deep breath in. I'm breathing out cause what's a day without breathing? [inaudible] you might want your feet up to support your lower back. No your knees up, feet on the floor.
[inaudible] and then we're going to go into the hundreds percussive breath pattern, just the breath alone and his son [inaudible] like a big old physiol bowl, deflating [inaudible] allowing your diaphragm to completely release San ribs and sternum to completely descend and then go back into the a hundred spread pattern, which is essentially pumping iron for the muscle of your diaphragm muscle. That is your diaphragm and his son. I'm used to this. I have a long excursion. If you hyperventilate, stop, do shorter breaths, no problem. Let your legs go down all the way and roll your head side to side. Check out how your neck feels, what your range of motion is, how far your head goes and come back to center. Bring up your right knee, clasp your hands and circle in your socket like stirring a teaspoon in a teacup.
Or another way to think about this is lubricating, greasing up your hip socket and the softer you are the grease here you'll be. How's that? And then go to your feet both feet. Very important that you have a sense of the southern end of your body at your straight leg, as well as your lifted leg circles both ways. And then bird feet and Barbie, feet and bird feet and Barbie, feet and bird feet and Barbie feet.
[inaudible] RB as in the doll. She's in this permanent high heels and pull it back and then spread your toes. Wiggle. Do anything with your feet that brings blood and attention all the way down to your, it's your frontier. It's the leading interview. Your feet, your toes. Okay. Relax your feet.
Put a hand on your opposite pelvis to keep it stable and find where your femur turns out while it's still dropping back in, down into your socket, right? So just find that placement of your femur to your side. This is going to be the place that you do like circles from good and bring it back. Switch hands, right arm extends left hand on your knee. Carry your knee across. Shoulder blade comes up. Hell, this comes up and your foot. I personally don't like having my foot on my knee.
That puts more pressure on my back. I like my foot out, but that's up to you. Whatever works best for you. Then just a few breaths here. When in doubt, breathe [inaudible]. You can also put a pillow under your knee if you need to. If your leg doesn't go as far over this mine does. And then full arm circles as if you had a piece of chalk and you were drawing a circle on the floor around you.
I first learned these in 1969 as a freshman dance major at Bard College from my mentor, Eileen past law and lo these many years later, I'm still not done with arm circles. [inaudible] let your arm be heavy and sequence through your shoulder blade, your ribs all the way over. You can do this as long as you like, but for now we'll reverse it. You know you're done with them when you're not getting any further stretch out of it, so that can vary day to day. It's initiated from your fingers, but it travels into your arm socket, into your Scapula, into your ribs, into your pelvis and becomes a total body event. Good back out.
See if your shoulder blade can drop a little closer to the floor, perhaps support your knee from underneath. Bring it up towards your chest to open it back out. Go to your open side if you like. You can hold your foot and do the stretch this way. If that's too much, you can just support your knee and open it this way and then drop your foot down or leg down.
Take a moment to notice how your right side feels compared to your left. There might be a difference and just know that your right side now is your real side and however your left side feels is you on tension where this is your real body without so much. And draw your left knee up and circle in your socket. Again. Feeling warm olive oil or coconut oil. And as you stir the Femur head in the socket that coconut oil is liquefying, it's actually what's happening. You actually are releasing it, stimulating the secretion of synovial fluid with gentle movement.
Good and stabilize your right side. Let your knee open. Find that placement where the Femur is dropping back down into your socket. But yet you're still rotated automatically. My right leg rotates out when this leg rotates so you can police it or you can let it happen. For now it doesn't matter.
Good. And then come back to center and ankle circles. Four and reverse, two, three four and bird feet and Barbie, feet and bird feet and Barbie, feet and bird feet, Barbie, feet and bird feet and Barbie feet and any other movement that again gets you connected to the edges of you and reminds your body that you do indeed have feet at the end of your legs and not just dead fish hanging off. Good. Carry your knee across with your right hand. Left arm extends out to the side. Accommodate it so that anything comes off the floor that needs to, again, a pillow or a support under this knee can be helpful. Few breaths just to arrive and listen to your body.
We'll get bossy a little later, but this part is to really come to meet your body, where it is at the moment, and then arm circles, letting your head flow with you and your whole ribcage move and your rib cage rolls back so that your shoulder blade is on the floor, so it's so whole body movement by the end of it. Yeah, and reverse. There might be days when you want to do 10 of these, especially if you've been working all day at a computer and there might be days where you get the job done in three or four circles. Again, that's just part of listening to what your body is requesting. Good arms stays to your open side. Come back, deepen into the stretch just a little bit. If there's more available now, oh, that feels great.
Support your need to come back up into center and drop your leg down. The next thing we'll do is I learned it as a heel rock. It's actually from Bar Tenea fundamentals, the lob on work and I learned it from Susan Klein in New York in the 70s when I was teaching. At a summer camp once a young 12 year old said, it's like rowing a boat with your feet. I always thought that was a pretty clever description. You want to keep your quads out of it, right, so very quiet quads.
It's really, I imagined that I'm on the conveyor belt and my whole back is moving through my heels. So heel rocking will pump your center line, your pump, your spinal fluid, and of course let your head be part of it and they'll reorient your body to the vertical till your vertical line. Okay, we're going to go into the hundreds next. Any modification that you're used to doing is just fine. Start with your knees up, arms up to the ceiling, inhale for nothing. Exhale, come up to the position. That was the 90s that'll do for today. Arms up overhead. Your roll-ups. Inhale, exhale.
Okay. Inhale. Okay, exhale. [inaudible]. [inaudible] one more.
Right here is where Mike Glitches. If you notice, and I have to work to keep my neck loose and to keep going. I have met one symmetrical body in 34 years of teaching. She had no problem with. Roll Up. All of us have challenges. Roll over as next. Bring your knees up, scoot down on your mat, bring your knees up and inhale over.
Separate flex and rotate down. This starts from your feet. Your feet lead into your hamstrings, into your sitz bones, into your tailbone. Open, flex and roll down. One more. This direction. Point, feet sits bones, tail, spine, open and reverse heals. It's really hard to talk and do this at the same time, but it does make sure that I'm excelling because we talk on an exhale. Okay, like circles. Bend one knee to the other knee.
Extend your leg up. Before we go to leg circles, find that spot. Support your leg with your hand. Find the placement where your femur drops down into your socket. If your leg is too far over, it's going to pull off the other pelvis, right? So it's actually going to be a diagonal place for your leg.
Further up towards your head than to the floor. Come back down. Now we'll do it for real. Extend arms out and go across down. Find that spot and then a cross down. Oh three and four.
I'm just doing four of everything today. You can do more if you want, and cross down and up and cross down and up. You could also put a hand on your tro canter and find the rotation. Ah, there we go. That's it. Good. And Bend and down. Other leg up and here. Go across, down, out, and cross down, out, up. Then this is my injured old injury legs.
So I do use my hands on my true cantor, which is helpful and open down, across and up. Open down, across and open. Now, across, up and down, across. End Up. Bend your knee. Play. Sit Down, find your reach through your arms. Come up for rolling like a ball. Find your position. Wherever that is for you. Sniff, blow. Good. You might be a little fish tally, so just notice if you are, that usually means something's happening in your spine.
Single leg stretch. Let's do a long two leg movements for each breath. [inaudible] double leg, a stretch. I have super long arms and super short legs. Celio Holton, my colleague, uh, in Santa Fe taught me how to do it. Holding my heels in. This works really well for me.
Traditionally you would hold on top [inaudible] and rest that your head goes side to side. You could also stick in here, the killer ab series, the scissors and Chris Cross and all of that for today. We'll leave those off. Yeah. And you're going to come up from there into spine stretch. We're going to do Michelle Larson's, um, modification first.
So hold your toes and slide out and bring it back in and slide out and bring it back in and slide out and let go of your toes and building blocks back up and go to the same place. So what that does holding onto your feet is it just tells your spine where to go. And then you just go there again. [inaudible] good open lake. Roker from exactly the same angle. You just pick up your legs and stay here. [inaudible] and find the amount of, that was a bad one. [inaudible] that was better. First one is sows rehearsal.
[inaudible] good. Bring your legs together. Look mom, no hands. You can sneak in teaser for a moment. Corkscrew is next line down, legs up. We're going to do a modified version, which is essentially just double leg circles, letting your pelvis go with you.
If you feel like doing the full one, that's just fine. Roll back up. Saul, I've re defined the word fall in this exercise. I think the way I originally learned it was your pinky toes thawed between your, no, your pinky finger. Sod between your pinky toe and your other toe. But I change it to say pinky toe. Pinky finger says hello to your pinky toe and then it says, see, I saw the pinky toe.
So here we go. Twist and reach more characters, twist and reach and up and center and twist and rich. So this is essentially spine stretch with a twist. Spine goes to the same place that it went in your spine. Stretch. Good swans. He Rollover Swan prep elbows.
So find where you need to be to get this connection. I had a client in Santa Fe once who coined the term Bandelier muscles like the State Park, Bandelier national monument. Because the lower trap, the Latinx [inaudible] and the serratus together create this band of support. So we just used to call them the bandoliers. So find your bandoliers, drop your Sh, press your elbow into the ground, roll a marble with your nose, not a basketball, just a marble.
The head on the top vertebrae is a very small movement and then the rest goes into your spine and you get this fantastic stretch up your front. And all you need to do to come down is bend your elbows and rolling marble with your nose. I keep my feet apart because of my sacral issues, but if you want your feet together, that's fine too. Two more. Okay, one more. [inaudible] so again, first connect your shoulders. Point your feet.
Oh, come two feet up and down. Lengthen up. I'm actually thinking of bringing up my thighs. If I think my feet, my knees will bend. So I reached through my feet. I point so that my body knows where again its edges are. It's from tier in space.
And then I reach out and lift my thighs and Clint white foot, reach out. Good. And then you add, hang on. So when you come back into your swan, your hamstrings are very much part. Your legs are very much part of drawing your tail and sits bolt. We'll draw on your sits bones down because a swan, this has to go down for this to come up. Otherwise you'll end up killing your lower back. So again, my head comes up and immediately this goes down so that I could wag my tail off. I wanted to. And then you can, do you want rocking [inaudible] again? This was modified.
One more good. And come down windshield wipers. Okay. Curl your toes under and just relax your pelvis and glutes. Okay. All right. Single leg kick.
Walk yourself back up your mat. Make sure that you've, um, you're not dropping into your belly, but you still have this connection through your hamstrings from your sits bones so that your pelvis is actually tipped up. One, two, out and down, two out and down. [inaudible] I can never remember, is it point first or flex first? My body always wants to point first. You can do whatever you want. Okay. One and two.
Make sure you're not sagging, but you're pushing the floor away and you're looking straight ahead. It really makes a difference if your class or one fist over another eye. You could try both, but they're not the same. Last set. Good double leg kick.
The tricky thing with double leg kick is we all want to do this right release in the front of the hip sockets. So you really have to press oh most. What I do is I press my pubic symphysis down into the mat. Okay. But for you think of it however you need to. One, two, three and [inaudible]. One, two, three n and one, two, three and [inaudible] and one, two, three in good.
Sit back in child's pose. And uh, sometimes it's nice to have your knees apart so your sacrum can really open and release. And why waste the position when you're here? Let's do a little breaststroke worms up and open in, in, in. It just buys you time to stay here a little longer so your back gets to stretch out a little more. It's a sneaky way. Good.
And you can reverse the breaststroke. A nice release for the shoulders. And then, um, an exercise I made up. Chicken wings. If your hands are turned in, your elbows are out to the side. It's a position where your scapula really hang freely.
And so you can do with your shoulders, sort of what I get to do in the Traeger approach. You can move them any which way. They're just very loose here to begin with. And I know it's going to look really bizarre when you look at it on, on the video, but you'd be surprised how much your shoulders will look exactly the same when you do it. It looks bigger than it feels. Don't let your head hang really gets to all that upper thoracic, Mr Gosse that goes on. All that tension up there.
[inaudible] just play, do whatever feels right to you. All right. So from there, we're going to do a very, a modified neck pole and we're going to do it as an undulation for your spine. So not how we usually think of Nick Paul, but I'm playing with this slightly. Uh, it's my latest, um, experiment. So we're gonna Start Upright and you go back to flat curl forward. And from here undulate [inaudible] back up to f to center.
So back curl and wave your spine back up, back flap curl forward. And we one more time back. That's Nick Paul. When you're in your upper decades [inaudible] let's do um, a s a bridge. Next, I'm going to steal this from another body of work. It's not the polities bridge, but it's the bridge that's interesting me these days.
So legs are very wide mat with a part and you're going to start from your sternum and arch your way up and curl down. Okay, inhale and lift up and curl down. I find this with my legs wide and allowing it to have an arch as I go up. Much less stressful on my SEI joints, which have always been opinionated about this exercise. Again, this, you could think of this as a spine undulation, moving through the curves of your spine. Alright, sidekick.
So I like this placement for the arm or this one. You can do this one, but I find that this creates a lot of shoulder tension for most people. But any of it works. So your legs are slightly forward. And before we, um, you know what we're gonna do first actually is go to a complete straight line, like a total straight line. You might have to check yourself, come up and look, flex your feet, lift your top leg to your tro height and length and out and release back in and lengthen out and release back in. And when you lengthen out, it's gonna bring your ribs off the floor, which is where you're gonna want them for sidekick.
So keeping that, bring your feet forward and then take your top leg pointed and find your back stretch. Take your leg as far back as you can. This hand is going to counterbalance you front and this leg is also going to counterbalance. So you're practically in a scissor. So that's as far back as you want to go in your back kick front kick and point to that place front kick and point to the back in front and point to the back and front. So your standing leg is very active and front and back. One more. Front and back.
Hello. There you are on your other side and front and [inaudible]. Again, take a moment here. Find that backspace, feel the length of your, so as the real opening without distorting too much and front and and front. Think about where your head is. Is it in line with your spine? It's hard to tell by yourself, but at least if you have a thought it that counts. Yeah. Good. Okay.
Okay. Let's sit up for spine twist. It's really helpful to get along. Stick and put it be and hold it so that when you twist, your arms are in line with your shoulder blades. I don't have a stick and I forgot to tell you to get a stick. So we're going to do it without a stick, but you can imagine it. So you're twisting your spine, not your arms.
Yeah, in the last set and then twist. Good. Let's go to seal. Find your seal. Two claps. Roll two claps. Roll two claps. Then we used to do this with noise. Make like a seal. I'm now by the ocean. So there really are seals here.
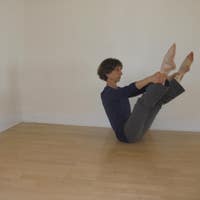
Oh, oh, oh ah, ah, that sounds more like a c goal. Hmm. Oh, oh, oh, oh, okay. It's a six seal. Open teaser. Just a moment, ted. All look more. No hands to do. Doo Doo, Doo, Doo, Doo, Doo, Doo Doo. And here you are. Let's come up. Four push up.
So here's the thing about push up. Everybody wants to push from their arms. This is really about your hamstrings and your legs for me. Let me show you what I mean. So you walked down, you walk out, you do whatever pushup you can accommodate. You come back from your heels, dropping down both heels.
Right? Let me do that again. So it's my heels into my sits bones. It's going to be this as if somebody had their hand hooked around. You know, if this is my tail, the hook of my tail, somebody gets their finger in there and just pulls me back from my whole spine so that I'm not pushing back. See if I can show that to you.
There's a little push off my hands, but mostly it's my legs, right? My tail is really active here, right? I could do, this is my tail walk, right? That's tail. That's tail. That makes sense. Last one, stay here and stretch just because it feels good. You're allowed to feel good in this work and roll up. Find your tail dropping behind. You.
Find your rib cage on top of your pelvis. Remember that your ribs hang in front. They're lower in front, had stacked on top and just whoa and come up to Relevate your final test. I have to come off the mat for this so my tail is dropping behind me, not under me, but behind me. My Rib cage has over and hanging. I don't have to do any knitting of my ribs or any other action.
I just have to leave them alone and let them go into the shape that they naturally have and I put my head somewhere up here and then all I do is lift my heels to come up. I don't even have to ship forward that much. That's your test. If you can come right up to center, you know you're pretty centered. So is also from right under here. Thank you.