Description
About This Video
Transcript
Read Full Transcript
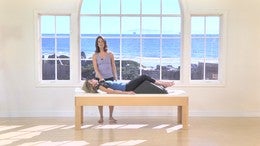
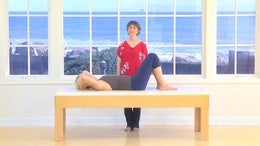
So we're going to do a Mac class specifically for people who have difficulty breathing. Um, and we're gonna work on movements and imagery and breathing to open up this tissue and the structure of the body to enable people who have restricted breathing more opportunity to breathe better. Okay. So first we're going to start in a seated position. So I want you to sit on the edge of your chair so you're not sitting back. Chairs tend to slope, so you're going to be on the edge of your sit bones, feet planted on the ground and just arms resting. So at any point throughout the movement class, if you're feeling stressed in your breath, I want you to stop and sit in this kind of what I call a seated rest position at any point. So we don't want to force or try to struggle with anything here.
All right? So a couple of imageries about breathing. It helps to have an image in your mind and we're going to different kinds of breathing. And one is to imagine that your trunk is like a cylinder, hence a cylinder, okay? And the cylinders divided into two chambers. We have an upper chamber where the lungs and the heart set, which is on top of the diaphragm. So this press here with the filters, the diaphragm, and at rest the diaphragms higher.
The amount of space in the upper chamber is less than the abdominal area here. And so when you take a breath in and you breathe in slowly, if, so, if you can imagine your body as the cylinder. And right about here is where the presses the filter. So as you're breathing in, what's happening is this is depressing down. So the space is changing in the cylinders. The top cylinder is creating more space.
And then of course on the bottom cylinder is creating less space. So the abdominal is actually your Oregon's might displace a little bit and we'll talk a little bit about that and feel we're gonna feel more about that breathing. But right now I just want you to take a few breaths very slowly. And what I'd like you to do is to breathe in through your nose only, not your mouth. If you can do it. If you have to breathe through your mouth, go ahead and open your mouth and breathe, but see if you can breathe through and imagine the cylinder. So let's do it together. So take a little out-breath. You can do it through your mouth just to, okay.
Now close your mouth and breathe in through your nose. Slowly. Imagine the chambers changing. And then when you have to exhale through your nose and then feel the diaphragm or the filter moving up. So inhaling again, this is coming down the diaphragm's, moving down, inhaling. And then as you exhale, it's coming back up one more time. This is kind of imprint, that imagery is debris, then good. And then exhale, it's coming back up. Very good. All right, so we're going to use that cylinder because call it a cylinder imagery when we're gonna be in certain positions in the mat.
So you'll have to come back to that image. All right, so now we're going to practice nose breathing and hissing sound. All right. So on the exhale we're going to make a hiss sound and your tongue has to be kind of on the front, the back of the front of your teeth a little bit. As you start to hit, you'll, you'll feel your tongue moving in that direction. It's not easy at first.
So just this practice is no time to do your own breath timing, no stress in your breath. So on your own, just breathe in through your nose and start testing.
So none of you are really doing that, but be conscious that when you're his saying that your body's not sinking.
That's the effort. In the exhale, we want the internal muscles that fashion the diaphragm to move on the exhale. So one more time. So keep the chest floating as you're exhaling with the hiss. I actually feel like it's easier to exhale, keeping that lift and light okay with the chest. Okay, so we're going to do it again. We're going to breathe in and out through our nose. I'm gonna give you another image, and that is a thermometer.
So you know how the mercury goes up and the mercury goes down in a thermometer. So imagine the thermometer in the front of your spine here. All right? So it's the whole length. So as you're inhaling, the mercury is actually going up. All right? So as you're inhaling, you're bringing that mercury all the way up, and then as you're exhaling, the mercury is going down. Okay? No hissing unless you want to, but just breathe in and out of your nose and see if we can get the mercury going. All right? So here we go. And exhaling and feel the mercury going down, doing your own breath time. Everybody has a different amount of time for inhale and exhale.
So don't wait for my cues. Just breathing in when you're ready to breathe in and exhale when you're ready to exhale. And don't get to a point where you're struggling at the end of either the inhale or the exhale. So again, inhaling and Mercury's going up. Can you get it to go up? Good. And exhaling, allowing the mercury to just go back down one more time on your own time breathing and exhale. Good. Alright, got one more. So kind of a little bit of a different one in the war.
In a certain exercise or motion and movement. We're gonna work on this one and it's like shrink wrap. I don't know if you've ever seen anything be, have been shrink wrapped. So imagine like your whole cylinder, right? You've got the whole cylinder, but we're going to shrink wrap it and we're going to shrink rabbit to a point where it's just like a broomstick or a pole in the center. So we're taking this three dimensional wide torso of ours and we're going to shrink wrap it to fit into a little broomstick. Okay?
And that's going to be on the exhale. So here we go. So you're going to inhale through your nose all through the nose and right the XL. Instruct the shrink wrap. Again, don't effort. Breathe in when you have to relax and breathe in. And now shrink wrap. So the sides, the front, the bottom, the top, everything's pulling in to find the central axis of your body. Nice. Good. And again, on your own timing and shrink wrap, find the pole in the center axis. Do you feel yourself getting taller?
You should feel a little more elongation. So we're going to refer to that feeling again where we're doing some movements. And I suggest that if you have a severe, uh, or challenging breathing pattern, right, I suggest that you just sit and practice these four different images. Uh, just breathing. And you can do this. Any, you stuck in traffic, you can be doing this and you can drive and do this at the same time, right? So we had the image of breathing with the coffee press, the breathing of the cylinder moving. It was one second one was the no practicing nose breathing with his Singh, right? Don't force you want to not get your heart rate up right?
The thermometer, the mercury going up and down and shrink wrapping. I liked shrink wrapping because it engages the body totally and gets elongation, which is going to be important for some of the movements we're going to do. Okay, so now this area, the whole thoracic is an important area for breathing. And when you have a breathing issue, this is where we start getting the tissue starts getting tight because the struggling of the breathing and the diaphragm that's a postural muscle in addition to a respiratory muscle is not doing the work it needs to do. So this kind of posture that starts to happen is because the dysfunction of the diaphragm. But we can open up this tissue up in here, you know, through movement, uh, and breathing.
So that's going to be what we're going to focus on. So at first, just let your arms hang down. All right. And what I want you to do is we're going to shrug our shoulders. Always. You can bring your shoulders towards your eyes. Just bring them in, bring towards your eyes. Okay. Strung that way. Okay. And just let them drop. So I'll call that a shoulder shrug. So you're going to bring the shoulders up, inhale and hold them here in hiss. So, and then when you have no more air left, just let them drop.
And again, bring them up towards your eyes. Inhale and stay here in Hiss
A little different. It's Kinda interesting. Okay. Next step is we're going to try to bring our arms up over a headset. No. Right? So the arms come up, whatever is comfortable. If you're very tight in here, I don't want any strain. Maybe your arms are more here or maybe they're here, but we want to bring the arms up as best you can without too much tension. And next we're going to inhale here and we're going to hit here and here.
Inhale and Hess. So when you run out of air drop, don't wait for me. If you have a breathing restriction, your inhale and exhale is going to be shorter. So when you're done, just drop your arms. So we don't have to be doing choreography together. One more time. Inhale up [inaudible]
So I would suggest doing that four, five, six times. If you feel really tense up here. Starting to open up the tissue here. Okay, so now this one's a little subtler. So we have shoulder tips, right? So the bottom of the scapulas like right here. And what we're going to try to do in this next one. So just pointing to you can see is what we're going to try to do is we're going to try to move that tip and I don't know if you can see, but the move the tip out to the side and kind of under, and then I'm going to, so moving the tip.
Can you, is it moving? Can you see it? I can feel it. I don't know if you can see it. Yeah. Okay. It's gonna the sterile, the tips gonna move in this direction. It's going to widen. So wherever it is, I don't know where it's sitting on your back, you know? But the tip is going, what we don't want is the shoulder to move so much. And here's the hard part is the pack. The tech was all here. Okay? So when we try to move the shoulder tip, you're going to feel this contract and we don't want that to happen. So place your hand on your pectoralis muscle. Right. Okay.
And we're just going to, you're just monitoring with your hand. So now imagine first you have to, with movement like this, that subtle, you have to do some, you have to imagine it's happening and then eventually the brain makes the connection. So see if you can imagine that shoulder tip moving sliding wide away from your spine, towards your arm pit and around the side. All right. And see if, can you feel your pack firing? I don't want the pack to fire. No, I'm just doing one. One at a time.
Well both would be too hard. Yeah, just do one at a time. So I'm doing the right my right one and I can feel a little picture Alice happening. So what I want you to do is soften the chest under your hands so it kind of sink as if I don't want you to round, but just soften and sink this tissue towards your ribs. So just as if it's moving in and softening and then keep that soft and try to move your tip to the side arm. It'll have a bit of movement.
We try not to because actually the muscles on the shoulder blade or not, she asked if the arms, I have to move my arm a little tiny bit. Little bit. It wants to move a little bit. Yeah. But as long as you can, you know, see the fact that that is sliding wide. It's very subtle but I feel it's like a whole opening in my armpit. I feel like there's try the other side. Put your hand on your pack and then see if you can get that shoulder tip to widen. My left one is not as good as my right one.
I don't know if that's your experience. Yeah. So it takes and then it's try to soften the chest here and see if we can move that wide. So they idea is that we're imagining the scapular moving away from the spine, from the Scapula, not using the pex or the lads cause those muscles are attached to your arm. They're not attached to your shoulder blade. So we want to try to get been the shoulder blades on the rib cage, which is the rib cage is the part of the constriction for the breathing.
So that's just kind of one of those little subtle practices that you can work. It's nice working with a practitioner. If you are a person taking this class and you get to go see someone because they can work with you with their hands on the body. And it's very nice because they can actually move your scapula a little bit, you know, that way you know, for, for you. So when, if you can't feel it moving, yeah, you're, the practitioner can actually help with that movement. Right? So, you know, you can take the breathing class, but then getting some hands on work. If you really have restricted breathing, it really helps with the tissue. Okay.
So, um, we're now gonna do some more. So we're going to practice, um, that movement and the breathing and the hissing on some mat exercises. But before also, the other part about breathing is the pelvis area. So your hip joints are attached to your pelvic floor and the pelvic, the part of our container, okay, we have this area would be like where here. So the thoracic outlets like this part of our container and the bottom part of our containers, the pelt, the bottom of the pelvis, the bottom of the bowl of the pelvis where our legs come out of through here. So this part works also with the diaphragm.
They move together even though there's this glass and it won't move, but there's compression of the diaphragm coming down. This pelvis has to be strong. So doing exercises for your hips are very important to help with the breathing. So we're going to do a few squats. Okay. So come stand up and it also gets it going a little bit and you can use your chair. All right. So, um, just to hold onto, you can hold onto your chair like a ballet bar if you'd like, or you can stand in front of it.
You want to feel safe with your squat and you want your hips, your feet just a little wider than your hips. If it's really restricted for you, you can even take a little wider stance with a little turnout if you'd like. Okay. Whatever feels comfortable. But I'm, what I'm looking for is that you can actually squat all the way down if possible. So, but for a lot of people, that's not possible. Um, but be gentle and kind to your knees. All right? You can just do a squat where you go part of the way down. It'd be nice. Keep going. It'd be nice if your hips can go below your knees. At least they don't have to touch your heels. But if they can, uh, just get down below your knees. Yeah. So keep going and just breathe easy.
So breathing in and out. Go ahead and squat. You want to do about 10 by working the hip joint, especially a little turned out here and strengthening through the legs, right? We're helping with the pelvic floor, we're stretching it where it needs to be stretched and we're contracting the deep hip muscles that helps strengthen the pelvic floor. So squats are one of the best things you can do for pelvic floor strength. Better than key goals. Actually, you don't have to think about it.
It works automatic. It shouldn't work. Automatic. Okay. Do a couple more. Can you feel the heat? Yeah. So it's nice and if you're breathing hard, you stop and rest so you don't have to push your breath. Okay. So now you're going to do a squat and we're going to get down onto the floor. So we're gonna have to move the chair. But let me, uh, let me just, um, if you're a person who can't get down onto the floor, a good way to do, to get onto the floors to hold onto the chair, right?
You can kneel down on one knee if you have trouble getting onto the floor. I would say that if you have trouble getting onto the floor, it's a good practice to get on the floor and to get up. Cause to someday you might be on and find yourself on the floor and you have to get up. So what you can do is just kneel down either here and then place one like here and side, sit right and then get yourself set up. So for those of you who have trouble, uh, just coming up, that'd be fine.
Okay. But the others, you guys can just squat and get onto the floor. There you go. Sit down. Perfect. Different variations. Okay. Very nice. Okay. All right. So you're gonna lie down on your back. Now, for people who have structural changes in their posture because of their breathing problems, we're going to need some props to help support the body in this lying down position. So they have towels to support the head. You might need two towels, you might need something under your arms or your shoulders. Um, we're going to show a way of doing some very good propping for people who have, um, really compromised breathing positions. And that will be in another segment if you'd like to watch that. Okay, so now we're lying down on our back.
So our props for our heads and we're gonna place the hands on the front of your thigh bones here on the thighs itself. Close to where it meets the pelvis. And what I want you to, his fingertips facing in. And the palms are actually on the femur on the thighbone. Yeah. But close to the groin. So your thumbs in the groin. Yeah. And on the fiber. That's it.
So what we want to do now with your hands is you're going to push the femurs away, right? So you're pushing this way, that's it. And just let your ribs do what they're going to want to do. But we're gonna push and lengthen, right? Yeah. That's it. Your ribs might come up a little bit that everybody's body's going to be a little bit different, but you want to push with your hands creating that length. Now keep that length. Okay.
And you're going to breathe into your back and exhale and just let your ribs and your back relax as much as it can. It's, there's only a certain point, right? So keep that length happening. That's actually kind of lengthening this. So as here. So inhale there and exhale and then let go of your thighs and just place your hands down. Good. So we're gonna do a little hip stretch, which is also very important for the legs. So depending on your flexibility, there's two choices. One is just across the right foot. Over the left is a very popular terraform stretch to place your right foot over your left. And then that could be a stretch for some of you.
You can bring the left knee up towards your chest. Hold the back of your left thigh. Don't hold your knee, hold your thigh, that's it. And then you just rest in that position. Feel the weight of the femur dropping into the pelvis, right. Don't worry about pushing your leg out the more you kind of fold. Now don't curl your back. No, that's curling your back.
We want your pelvis down. There you go. We want to hip stretch, not a lower back stretch. Very good. And if that's a good stretch for you, that's great. You can switch. You can switch sides. I'm going to show you another one after they do the other side, which is another option. It's a little bit a more, it's a bigger stretch than this one and a little different muscles. Yeah. So you want to keep it as sacred anchored. That's the bottom of your spine, anchored into the mat so you're not flexing your back. You're actually in the hip joint itself. So you could do that one again or you can go to the happy baby.
So you're gonna open the legs, flex your feet, hold the inside of your, that's it. Great. Very flexible gals here. Good, right. And again, see if you can get your weight onto the and not into the lower back. It's a good opening of the hips and just breathe here. So breathe in slowly through your nose. Let's try a little hissing here.
So it's like your pelvis has a steering wheel and you're going to be steering right and left. So reach the right sit bone, reach the left sit bone, right? And it's just in the pelvis. So we don't want to see too much rib shifting. So just back and forth. It's a small movement. It's a little side bending of the lower spine. That's another area that gets tight. Good. Just back and forth. Perfect. Let's do that a few times.
So it's a nice way to release the lower back. Okay? Then come back to neutral. And y'all know where the sacrum is, that triangle bone at the bottom here. And what we're gonna do is we're going to start in a curl, but we're only going to go to where the top of the sacrum is here. And I want you to make a circle around the sacrum. Only the sacrum. So see if you can do a little sacred circle. So it's a very small movement.
That's it. But a full circle around the sacrum. Do three circles in one direction and three circles in the other direction. And just again, monitoring your breathing. Don't hold your breath, keep it nice and easy. Great. Three in each direction, and then come back. And we're just going to just take a normal breath in through your nose and out through your nose again, and then bring your arms up. Inhale and bring them up.
So they're going to be straight facing fingertips towards the ceiling. And you're going to inhale now slowly start to bring your arms towards the floor. You don't have to touch the floor. It's gonna be very hard. We want to keep the spine nice and relaxed on the mat. Exhale, bring the arms back. Good. And we'll do that. Move in again. Inhale, reach over. I want you to breathe into the sides of your ribs. Now hold that position and hiss here. And then inhale again. Open the ribs. Think of fish, gills opening here.
So inhale, you're separating the ribs and hiss.
So curl the pelvis and then start to roll up, but only go to the bottom of your rib cage. So just reach out. You're going to come up not to a full bridge, but a little bit higher. Christy. Yep, there you go. Good. So you're on your scapulas, so you should be resting on your scapulas. Yeah. And now hang your back. Relax your back. So you're holding on with your legs, but your spine is like in a hammock. It's just hanging. There you go. That's it. It's a hanging bridge. And just breathe in here. Inhale, lift the chest a little bit as you inhale. And then as you exhale, start to lower your pelvis down. But don't lower your chest.
Just bring the pelvis down. Keep the chest where it is. Keep the weight on the Scapula. Try to keep the chest where it is so we're not curling down and trying to flex the spine so much in the upper back. All right, so again, pelvic tilt. We are going to curl the pelvis and reach, but rest on your shoulder blades. Keep your sternum lifted up so you're not sinking into the chest as best you can. Go ahead and inhale here. Open up the ribs, keep the chest floating as you exhale and roll it down.
Keep the chest up. Don't let the chest drop as you're rolling through the lower pelvis. Good. Let's do it one more time and exhale, curl. Good. You guys doing great job. Come on up. Rest on rest on the shoulder blades. Not very high where you have to work as in your hips. Yeah.
And then relax the spine. Lift the chest. Inhale here. Keep the floating of the chest and rule it down. Roll, roll, rural. Very good. Okay, so now we're gonna to bring your legs together and just twist your knees a little bit from side to side. It doesn't have to be a very big twist. Just nice and easy. And then take a twist and make it roll yourself onto your side.
You're gonna twist to your side. That's it. And then we're going to lie on our stomachs. Okay. Very good. Yep. Line your stomachs. Yeah, you can roll up the towel if you'd like it to put on your, uh, foreheads. You don't have to smash your nose into the right cause you got to breathe through your nose. So we don't want to smash walls. So we're going to roll up the towel and we're going to be placing it. Yeah, on the forehead. I think you can all see that, right?
So it's like this on the forehead here. Okay. And just bring the arms by your sides and just relax your, now for some people this is uncomfortable because the chest has been compressed by the floor. And if you're a chest breather, this is hard to lie here. So do this in little doses, but try to lie on your stomach. So here's an image for you. I want you to imagine your body is two plates of glass, okay?
You have a front plate and a back plate. All right? So and I wanted to to imagine that you have lungs in the bottom of your pelvic ball, right? So I showed you where the bowl is, but now your lungs are sitting down in your pelvic bowl. All right? So you're going to inhale through your nose and you're going to breathe. Inhale down the back plate as you inflate those lungs in the base of your pelvis. And then as you exhale, you're going to melt into the floor. Do some shrink wrapping and find your central axis.
That makes sense. So inhale down your back plate as you're breathing into those lungs in the pelvis. And exhale, start to melt and do your shrink wrap. Okay, so repeat that again. So inhale, now notice if your chest is pressing. So just keep doing this, but notice is your chest. When you inhale, pressing into the mat, that's a good sign that you're more breathing into your chest. So see if you can find that your breath is actually coming into your back, into the back lungs and into those lungs in the pelvis. So let me see if it's you inhale, you're going down the black back plate and trying to expand through the back and fill those alumns in the pelvis. Very good. Okay, one more time. You're going to inhale. Try to widen the lower ribs, widen as you inhale, and then exhale, sink and melts. Okay. Place your hands underneath your shoulders and push yourself up. Just to come up to like a quadrat pit position. Okay? Just rest for a second.
I want you to rest on that. Okay. So that was one image of working with this idea of you have two plates, one front and one back. The breath going down the back and filling the lungs in your pelvis. Okay, so we're gonna do a different one for the upper thoracic. I just want to show off your stomach for a moment. Okay? So come back down. You can certainly do both images the whole time if you're comfortable on your stomach. But most people aren't for a long time.
So she'd have our time breathing. Alright, so now relying down. Good. Now what you're going to do as you inhale, I want you to feel that you're a wining those lower ribs. So when we were doing that already, so you're gonna Inhale, expand the lower rib area, and then as you exhale, feel your shoulder blades melting into your rib cage. They're actually moving down towards your rib cage and then moving downward towards your feet. But think of it as a melting thing, not a, so inhale, expanding the lower ribs lower and into the lower back. And then exhale.
Scapulas are actually melting into your ribcage and down towards your feet. Nice. So put your attention there two more times. Breathing into the back. Nice. And then scapulas. Exhaling, melting, melting in and down. Nice. Really Nice. One more time. I know it's hard to see, but imagine that inhaling into the lower back and the ribs and then exhale coming from the scapula. Melting into your ribs. There you go. Very nice. Okay. And now what? I think he was, reach your arms overhead and let's take your towel and unfolded now.
And we're going to,
This might be it cause you're so much pressure on your ribs. Keep breathing into the ribs and then you can go back down. So you actually don't need to do the towel. Part of this is all that you're going to do, but we're going to do is we're going to look up and then start to pull that towel towards you. So you're sliding it towards you and you're going to get up onto your elbows.
You have a mat issue there, Huh? Okay, that's good. And then just sit here and we're going to inhale here. Think of the ribs now, widening in the back and exhale scapulas now let's see if you can melt them into your back. Good. One more time. Breathing into your lower back and exhale. Melt the shoulder blades. Great. And then just slide the towel away. And um, you actually had pretty good positions. You could move your body forward a little bit if you wanted to drag the towel so your elbows don't hit the mat. Okay, so let's try that again. So I'm going to look up and pull.
It's towards you. Whatever's comfortable rest on your elbow is, I call this Spinx right? And we're going to inhale into the lower ribs. Fill up those lower lungs in the pelvis and exhale right through the nose or his thing. Good. Inhale and scapulas are melting. Melt into your back, down. Good. And then slide the towel away. Very good. Let's do it one more time. It'll be three times, probably enough. And inhale, looking up. Slide in rests on the elbow is good. And breathing into that lower back. Nice. Exhale.
Melting the scapulas into the back. Good. And again, breathing in and exhale the scapulas into your back. Let them melt. Good. And then slide away. Nice. Okay, now come up to the hands and knees again. Quadrat pet position. Okay. And find a nice long spine right from head to toe.
And let's just do a couple of breasts here in the hissing breast. So you're going to be in the long spine position and we're going to inhale through the nose, feel those lower lungs in the pelvis, exhale his sings good and breathing in through the nose, expanding the lower ribs, and then his sing breath, his same breath. And just see what naturally is happening to your body. Where's the breath being held? Good and breathing in and his same breath.
Great. Okay. And we're going to do a little pelvic curl here again like we did on our backs, but not changing the rib cage at all. So take an inhalation and as we hit through a hissing breath, just curl your tail under spin. Don't change your [inaudible] chest at all. So be very small. It's like a sacrum curl. And then inhale, bring the tail up towards the ceiling. Good. And again, his Singh breath exhaling. Very nice. So the thoracics gonna stay extended and pelvis tail goes up.
Very nice. And again, these guys are making it look so easy. For those of you have breathing issues, it is very hard to not move that rib cage. You guys are doing a wonderful job. Let's do it one more time. Breathing in through the nose, his seeing breath. Good. And then come back to the long spine. If you're tired on your hands and knees, you can come up and sit on your heels or we're just going to continue.
We're going to do a little tailwag here. So we're going to inhale and wag the tail to the right and then exhale through the nose. Come back to the center and Inhale, tail wag to the left and exhale, come back to center. Good. And again, the rib cage is going to stay nice and quiet and lifted and come back to the center. Breathing in through the nose. Inhale. Good. Exhale, come back two more times. Inhale, wag to the right. Very nice and center and lag to the left and center now, but it keep the arms straight and that spine long. And we're going to inhale in, the sternum is going drop towards the floor, breathe in, send the breath forward here and then exhale, bring the sternum up. Okay, so inhale, sternum forward and up a little bit and exhale. Yeah, and away. So try to think of it just in the sternum, not the lower part.
And again, just earn them that fit. See, that's it. And exhale. Sternum is still moving from here, right? It's up in here. So this is moving. There you go. It's very small movement that's and breathing in, right? So the breath goes forward through the sternum and then exhale through the sternum. Try not to push with the arms.
It's not like doing a pushup to really the sternum. Right? So don't move too much here and exhale. Now you're muscling it through here. I want it more up in here. The breath in through here. Yeah. Inhale. This moves. See, and this is another one where if you have a practitioner giving you a little hands on, it actually really helps to get that because that position, yeah, you can come sit back on your heels. Yeah, that's hard movement. So the upper thoracic has a very different movement than the lower part.
So the where the diaphragm is, this area moves different a little differently than this area. And this is a very hard area, especially when you have a breathing problem. To move. So just trying to stimulate it inhalation here and an exhalation of hollowing in the movement through here. And it's just easy to like muscle through that. But it's just something to practice. You actually, you don't have to quadruple, it helps because of the gravity, but you know, just, just even sitting and trying to move.
And this is another area where the practitioner can really help you with that. Okay. I call those sternum drops. Okay. All right, so we're gonna do a little twist here. So sorry you don't, one more quadro pad. So come on back. It's very simple one. All right, and you're going to take the right hand and I just want you to bring it through behind your left hand, but the palm down. All right? So you're going to bend the elbow that you're supporting your weight on and you're going to reach across. All right now the pelvis stays where it is. We're not going down. So watch me. I'm not going, I'm not going to get my shoulder down. I'm not going down.
This Mike central access is staying. Okay. So I, my chest is still open and I'm keeping that set and the hands not going to get very far in a place. Your hand on the floor, you're going to use that hand and you're going to inhale, lengthen, stay there. And then hes and pull yourself a little bits to look over your left shoulder. The hand doesn't move anymore. You're just using it to drag yourself. Can you feel that? Yeah. Inhale, keep the length. One more time. Inhale. Nice.
Now exhale, drag with your hand and pull your shoulder under your nice, there you go. Very nice. Great. And then come back to center other side. So just past your hand doesn't have to be far. Make sure you've got these central axis long. We'll get an inhale and then as you exhale, pull yourself. Good.
And one more time. Breathe in and exhale and pull.
So, um, if you have a chair, it's nice if you need to to get up off the floor. Okay. But if someone of the best ways to sit up is to do like a side sitting where you cross one leg over. So just come onto the side and you have your hand and get yourself onto all fours again. All right, so we were on o four f all fours and Tuck your toes under for stability. And if you can, this is where having a chair nearby is helpful.
Bring one leg forward, right? And you're going to use your back leg. Push with your back leg to stand up. Use your back leg. Say it's easy. Yeah. So I'm gonna try that one more time and then we can have a chair just so I can demonstrate. For some people it's actually kind of safe on a chair. So we are sitting on the floor. All right, so you're sitting, you want to go to your side, come onto it. Your hands and knees. Okay.
So if you have a chair nearby, this is where you can use a chair, but tuck your toes under, step forward. All right, now push with the back leg to step forward. It makes it easier to just do that. Okay. So it's important to have if you need a chair nearby. All right. So, okay. All right, so we can do a few more squats again. Huh? This time, no chair if you can. So let's just go down and come up. Sometimes a little turned out as helpful and down. Just counter with your arms.
If you can go below your knees, it's great. And come up. And again, if you need to, you could still use a chair. Okay, so just coming back down, I like to change my feet up. You can sometimes go parallel. It's a little different action. A little harder in the hip to be really paralleled through open a little bit. There's a little more room in there.
Go ahead.
He feel that it increases your circulation, those leg muscles and your breath starts to get a little more challenged. So. Okay. And then come back. Okay. Let's get our chairs back so we can sit again.
So let's bring the arms this way. All right. And just stretch, open. Inhale and exhale and relax. And again, inhale and exhale. And it helps to look up a little bit with your eyes just a little bit because we're also working the extensors of that upper back.
Now I'm s I'm speaking to, I'm exhaling through my mouth, so I want to make sure I wasn't sure. I think I heard a couple of exhales through the mouth is kind of a [inaudible] habit to breathe out of the mouth, so I don't know if that's what I heard, but anyway, so yeah, do a couple more. See. Inhale through your nose. Exhale through your nose. Yeah, it's different. There's more resistance with the breath. Okay, good. Now if it's possible, bring your arms up overhead and just bring your palms up and let's clasp the fingers here. All right, so if your arms have to be here, they can be here, but let's try to bring them up. There should be no tension in the neck.
All right, so we're gonna breathe in through the nose again and out through the nose. Just relax your arms. If you can feel heavy in the shoulder blades, remember the shoulder blades have melted into your back. So inhale again and let the shoulder blade smell okay. And release the arms down. Good. We'll do that one more time. So bring him up. Bring that up here. Good. Now breathe into those ribs and now exhale. Make a little circle very song like you're shining your halo over your head as little tiny circles to keep breathing in and out of your nose.
And let's go the other way. A little tiny circles and then release. Okay, now we're going to reach the right arm up. Inhale again, open the ribs, reach the left arm down and exhale and reach up and exhale through your nose. And that never feels good to you. If you want a nice to just release the arm down without tension or reach the arm can try both. The release is kind of Nice. So lift, reach down. Now stay here and exhale. Okay through the nose. Now inhale, go up and side bend. Now just reach down and reach long.
We're looking for a long reach and then come back and down and up and reach and back. Good. Two more times. Set up and reach down. Go ahead and live breathing into that side and reach and uh, okay. Now we're going to find that shrink wrap central access, right? So inhale can shrink wrap.
Keep that and I want you to do is lean forward. See if you can keep that length in. Lean forward and inhale and come back up to center. Inhale, exhale. Lean forward and you lean forward from the hips and have the back nice and long and come back. Inhale and exhale. Lean forward and come back one more time. Keeping the back long. Lean forward.
And come back to center and do one more each side and reach to us. Excellent. And Center number to inhale, find the shrink wrap and elongates. Shrink wrap and center. Good. So now I want you to sit sideways on your chair. Let's face that way. And I want you to sit on the edge of the chair and even to bring the right leg back. I just did this one. Yeah. Yup. So sit on the edge of the front edge of the chair. The s the, yeah, exactly.
Hold the chair. You're going to face this way, Aaron. Sorry. That's all right. Face that way. So your left sit bones on the edge of the chair. Your rights upon that. Bring the right leg back. There you go. This way. Good. Nice. And we want to do is stretch and open the front of the hip. Great. That's okay. That's good. Okay.
And now bring your arm up. The one that's on the outside of your chair, not the other one. There you go. I can't say right or left. You're different, right? And now sideband yourself. Open Up. Reach your knee to the floor. That's it. Now inhale into the ribs here. Inhale into that, and exhale. Bring your arm back. Good. And again, so you're gonna inhale into the rib cage here. Open that up. Drop this down. So we're getting full opening here. Good. And exhale. And one more time. I'm going to breathe and opening up that side. Very good. And exhale. Good. That was three times.
Let's do three times on the other side. So you have one sip bone on the chair. Your knees reaching towards the floor. Great. You're gonna reach your arms up overhead. Excellent. And inhale into that side. We're opening up all these ribs dropping here. Exhale, come back again. It's all through your mouth.
You're not through your mouth, but through your nose. I mean, yeah. So all in and out. If he can, that's it. Really Open that side up. Nice. That's it. And exhale. We have three of them. Last one.
So we can move your chair back. I guess we're done. Yeah. Alright, good. So you can face each other, but make sure you're not going to hit each other. Yeah, staggering is good. All right, so we're going to take the right arm and you're going to lift it up. Palm is up, then you go to turn the palm over, bring the thumb down and look behind you with the associates. So, so palm up in the front and do a range that's comfortable, comfortable for you. Don't strain in the shell, but I want you to turn that thumb down as you go back.
So we're going to inhale here and exhale as you go right through the nose. Thumbed down. One more time. Inhale up, turn the hand over. Rotate his spiral the arm all the way. And let's do the other side and I'm up. Turn the thumb over and down. Good. And inhale, palm up. Turn. Good. Full rotation of the shoulder. Inhale.
Great. Good. And then we're going to inhale, bring both arms up, breathe into your sides again and exhale and bring them down. Just hold this position and inhale and coming up. You can look up a little bit and
So we're stabilizing the lunge and trying to lift the trunk up. Inhale and exhale and in and
One more. Good. All right. Inhale up and exhale. Good. Remember those ribs are really opening up and you're lifting the chest up. That's it. And um, and one more time. Lift that chest up and down. Okay. Now can you kneel there? Can you go down onto the floor? Very good.
All right. And then bring the other foot back. Good challenge. Sit down. Excellent. Now we're going to do the constructive rest position a, it's a position developed by loose y guard who's done a lot of body study to old book. Uh, but it's a wonderful position. And so what it is is that your feet are in line with your sit bones. Not Too bad, not too far out.
You want to be able to rest on your bones and the knees just kind of fall towards the mid line. All right? Now for some people it's very difficult to not be holding your legs in that position. So I suggest that you take a belt and you can use any kind of belt. You can use your robe belts or a yoga belt or whatever and tie your legs together like this. And then you can just relax there so you're not holding your legs at all, right? So I suggest you do that. Otherwise you can just have your legs fall. She says, ideally you should be able to sit in this position and be relaxed and not be contracting to hold it, you know, reach your arms up, right.
And Cross your arms over your chest. You're trying to just what's ever comfortable and you want the weight of your arms resting yeah. On your chest so you shouldn't have to hold, shouldn't have to hold here. And what you might notice, it starts to, uh, your arms start to fall. Yeah. Okay. So just Aaron's doing pretty good. She's pretty rested. And can you not hold and just relax? Don't hold your hands, don't hold your shoulders. It's just be very heavy. Right. Don't hold Christie. Try to let them. Yeah. Good. Okay, good. So this is the, basically the position and you could practice all of the breathing that we've done. But before we do that, I want you to do a little test for me. I want you to now bring your arms over your head, this way back this way, over your head. Onto the floor. Yeah. All right. So for all of you, this is pretty easy to do, you know? Right.
But for many people with breathing difficulties, their arms are not able to. So you have to be in a position where you have no strength. So for some of you, the arms might be like here. Okay, so lower your arm. Yeah. Right? So Amy's got a little tightness there. Okay. So from here what I want you to do is inhale through your nose. I want you to do hissing breath. So inhale and hiss.
Good a couple of times. So breathe in. Arms are relaxed. And his Singh. Yeah, just totally relaxed arms, right? And one more time. Breathing in and hissing. Just relax. Good. Okay. Now bring the arms back crossed over your chest. And is it easier to relax and hold there?
And one more time and exhale easy. Now just relax. Normal breath, just normal whatever is for you. Just don't do anything special. Just relax. So imagine you're wearing a suit. All right. And so what's going to happen is as you're breathing, as you exhale, you're actually melting inside the suit. It was kind of like the wicked witch of the West. I'm melting so that your close is all that's left on the mat.
Your body disappears. So this is a wonderful position to be in, especially if you're a structure is very tight and you do some of the propping of the head and the shoulders and the legs are up to the spine, can relax and practice the four imagery breathings we did at the beginning. Even if you just did that as your practice, that would be very helpful to your body. Thanks.
Mindful Movement: Breathing-Focused Classes


Comments


You need to be a subscriber to post a comment.
Please Log In or Create an Account to start your free trial.
