Description
About This Video
Transcript
Read Full Transcript
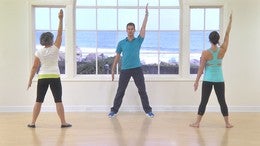
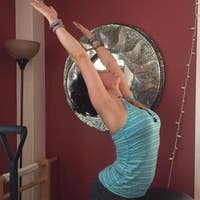
Hi, my name is Benjamin Degenhardt. I'm here with Kristin and Laurel today. And I'm sharing a little series of videos that introduce the reformer as your practice tool for your Pilates workouts. The way this is going to work is that we start with very basic skills that really explain how the reforming forms the way you move. It's supposed to reform the way you move.
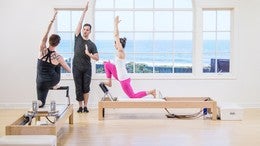
A lot of the exercises you're about to see and practice are sometimes considered advanced. But we'll just do the very first portion of it. And start to build a full bodied workout, so that then, by the next time you come back for our second installment, we'll start building skill on top of that. We're working with Gratz reformers today. I'll start to address a little bit what the different features are and how you can adjust the foot bars and the straps, if you work with a different apparatus at home.
As props, we have a box and a pole that we're going to use today. And we'll be starting on our backs. So you guys can go ahead and lie down. One of the first things to think about when you mount your reformer is the distance of the foot bar. A lot of reformers are adjustable in terms of the distance between the end of the carriage, as well as the foot bar.
What you really want to make sure of here is that the spine can rest in a lengthened position, there's no, what I call cringing in the lower back or the hips as the toes are set up on the bar, right? So if the foot bar was too close to her, she wouldn't be able to really lengthen out her lower back. The reason for footwork is really to wake up our neuromuscular system to start making a connection between the head and the nerve endings in the feet. So from here we'll just start on the toes, the heels touch together for a nice, strong center line connection. All 10 toes reach into the bar.
The spine is lengthened out and from here we extend out 10 times. We push the bar away from us, and then we keep pushing as we come in. Nine more times, pressing out, and coming in. Eight to go, they push and pull back in. What happens physiologically is that the reformer is trying to compress us for the most part, right?
We're in between two places held in place, and then the spring tension coming in and out is trying to make us shorter. It gives our body a signal to lengthen out against it. We'll take three, and in, pressing out for two. And in one more time. Pushing all the way to the top, coming back down.
Then we change the position of our feet to knees and heels and toes together. Coming to the arches, letting the feet curl around the foot bar. Same exact movement here. We press out ten, and back in. Pressing out, nine.
And back in. If the springs get too heavy for your own body, you'll start to notice that the shoulders might fight up against the spring tension. That might be a moment where you want to decide to lessen the spring tension initially, until you feel that your shoulders are not fighting against them. Maintaining length for four, and down. Pushing three, and in.
Still waking up the feet, getting into your practice. One more time, out, and in. For the final set we come to the heels. Even weight on both the toes pulled back, nice and strong. And then we'll do a quicker set of 10 here.
Pushing out 10, and back in. Pushing out nine, and back in. It's important to understand about the reformer is that the springs will pull you in no matter what. So, you wanna maintain a sense of control that feels like you're still pushing against the bar, even as the spring pulls you home. And you try to close that very last inch as well.
One more time, push and pull. We come back to that first position we started in on the toes with the heels touching the toes apart. We take one full extension from here and then you pause on the outstretch. The next and last portion of our footwork is the tendon stretch. First, before we lower the heels down, I want you to try and stretch your springs out just a little bit more without lifting your heels.
And without lifting your shoulders though. Can you make your spine longer to stretch the spring? Beautiful. Once you feel that, keep the length, lower the heels down as far as you can keep the heels together to feel a stretch through the backs of the legs. And going back up, up, up and lowering down.
It's extra yummy when someone gets to pull on your heels. Lift up, and lower down. But the point is that you try to not let your heels come too far apart even if that limits your range of motion. Lifting up, and lowering down. We call this the military stance, often called the Pilates stance.
It really serves to build a strong connection through the inner thighs all the way up into the center axis of your body. Let's do three more. Up and down. I often think about that moment when you're on the plane and the plane takes off and you're being pushed into your airline seats. As you push into the bar let your ribs deepen into the mat the same way you are when you are being pushed into your seat.
Bend your knees, come all the way home. This will conclude our footwork. Next up, we will go into the hundred. Where we use the straps, the foot bar comes down for this. If you know how, you can take one foot under the bar, the other foot against the kickstand.
This will not work with every reformer but on these that works quite nicely. You can do it yourself. Then you stretch your legs out long over the foot bar. You reach your arms straight up with the handles in your hands. Good.
If you're not working with this particular reformer, make sure that the handles come right above or even slightly past the shoulder blocks so that the shoulder starts taking load in a nice supported position here. And make sure that the risers, if your reformer that has them, are lowered all the way down, so that the direction of pull really informs a good movement pattern here. We first start to take load into our shoulders by pulling tension into the straps. You'll start to feel your shoulders engage, your ribcage deepens down. There might be a sensation of bracing through the ribs.
And then from here we stretch the legs out of our body the same way we just did in footworks. Stretch the feet out of your body until the feet lift off the foot bar. Pull the straps down, lift your head up and look towards your feet. Just gonna hold this position for one deep breath. Pushing the handles away from you also means you get to push yourself away from your handles.
Lower the legs down, lift your arms up, and release your head back down. We'll try that a couple more times. You stretch the legs out of your body like footworks. So that's your carry over from the first exercise. You pull tension into your straps, you lift yourself back up.
If this puts strain on your back, you always have the option to bring your legs up higher until your lower back gets to settle down or if that's your last resort, bend your knees slightly in to release the lower back. If possible we stretch the legs all the way out, like you're actually still pushing against that foot bar. Lower the legs down, lift your arms up and release your head. Looks like a very static position but there's a lot of internal movement happening, would you agree? Pull yourself into that position one more time.
Lift yourself up. So with one small un-weightening of your body, your whole body gets to be turned on and fired up, warming yourself up. Bring your legs up just a smidge higher for me, good. Push the handles away from you. Take one more breathe at the top, and release it all the way down.
We'll now transition that into a hundred. A real warm up. Deep breath in, pull your straps down, lift your head, neck, and shoulders up. Reach the legs up and out of your body. Start pumping your arms up and down.
Now breathing in for five, (inhales) and breathing out for five. Here's where we address the breath. Very often we think that there's always a linked breath. It's true for this exercise. You have five pumps to inhale. (inhales) And five to exhale.
That just gives you a nice little rhythm to keep your breath calm and controlled. Inhaling. (inhales) And exhaling. On your inhale try to lift yourself up little bit higher, on your exhale try to push the handles further away from you. We're halfway through. Breathing in. (inhales) And breathing out.
Remind yourself of your footwork you've just done and your legs keep stretching actively out of your hips. Exhale all the air. Give me your last one, your last breath. Make it your strongest pumps. Maybe the arms lift up a little higher, yes! And exhale all the air out, (claps) and release.
Legs down, head down, arms go up. Feeling warmed up? Yes? Alright. A little furniture change for the next exercise.
We're gonna drop down to two springs. So far we've been on three or four springs. We'll take it down to two. So come on let's sit on up. Can take the handles into one hand.
Pull yourself off to the side. Take two springs off, and then lie down on your back again. Take your head piece flat down for this one. Most head pieces have a little kickstand underneath. You're gonna remove that so it's all flat because we now go into a preparation for the overhead exercise.
We're not gonna do it all the way, we're just continuing where we just left off going into a bigger range. The arms go straight up to the ceiling the same way they just did in the hundred. You pull your arms down by your sides and lift your legs straight up to 90 degrees and you hold the position. Think of a gymnast and the rings. You press down into your handles to stretch your legs straight up to the ceiling.
Keeping them hugged together tightly, lower the legs back down, and lift your arms back up. We'll do that simultaneously two more times. Arms down, legs go up. Try to create a nice right angle at the hip. Slightly bent behind the knees if your hamstrings feel super tight.
Stretch your legs away from you to lower them down. Arms lift back up. One more time. Super simple, arms go down. Legs go up, hold the arms back to open the chest.
Give me one more deep breath. And then lift the arms up, lower the legs down. And next up is our coordination exercise. You bend your knees into your chest, your elbows come down by your side. You lift your forehead to your knees.
Nose as close to your knees as you possibly can. So second time the head is up. Make sure there's space in the back of your neck here. So your chin comes in but you're not closing up the passage way for your breath. On your inhale press your arms into the mat and extend your legs out as low as you can.
By now you know where that point is for you because you've been there so many times. On the exhale, bend your knees back into your chest and bend your elbows at the end. We'll do that again. So this is a coordination exercise to mix your body up a little bit. On the exhale first the knees come in as close to you as you possibly can, and when you're done exhaling, then you bend your elbows.
We'll take three more. Inhale, out. (inhales) Hold the position, hold the breath. Then exhale, knees come in. Keep pushing into your handles though. Bend your elbows at the end.
Give me two more. Inhale, out. (inhales) You can start to play with how low you can take the legs. Maybe at this point for your last one, you can take them just a smidge lower. Try it. Inhale press it out, hold the handles far away from you as you exhale, and bend your knees back in.
Elbows return in and you rest your head down. And this concludes our warm-up on the back. We're gonna get rid of our handles. And set up our next exercise, the preparation for the swan. Where we start to go into a backbend.
You come up to standing. You take that box and set it up the long way. So the short end goes against your shoulder blocks on this reformer. And we stay on two springs for a good amount of support. So we'll be using pads for this exercise just to give you some extra padding for your thighs.
Your thighs will go right against the edge of the box. Your toes will stand on the inside of the frame and I essentially want you to think of this exercise like footwork, but down on your stomach. So we're gonna take the pads right around the edge here. They'll just feel a little bit nicer on your legs. You'll step inside the frame with all 10 toes being there.
Sometimes there's a jump board attachment right at that spot in the reformer. So make sure you have enough space there. The foot bar is an alternative take to place your feet against, but it's a moveable part of the reformer so it's not always the best place to learn this exercise. So just a couple of inches below your hip crease is where the boxes edge will go. And then you just drape your torso over it.
Your knees are slightly bent. Your feet, arch, and toes are safely supported inside the frame and then from there, just think footwork on your toes like you started today. Just straighten your legs out, pushing the frame away with your legs. Once your legs are straight, reach your arms opposite to your toes until your torso starts hovering up. All the muscles in the back of your body should fire here.
Into a nice little beginning of a back bend. Then slowly lower the torso back down, crease behind the knees to bring the springs back to a close. Or a little bit in, that is. You stretch your legs out to start. Once your legs are straight, start to lift your torso up by reaching your arms away from your feet.
Find that opposition between your toes and your heart. Stretching forward and up. You can move your chin away from your chest and gaze just past your fingertips and then reverse the action. Come back down, crease behind the knees to come back in. We'll take a couple of more of those.
This is really just to warm up your back for what's next. A pulling strap exercise, you push inside the frame, stretch your arms forward and up and again the whole back of your body is lengthening and lifting. Release back down, soften behind the knees. Make sure that your lower back stays nice and long through most of the exercise. We'll take one more.
Straighten the legs out first, reach your arms forward and away from you, lift yourself all the way up. Nice and long through the lower back abdominal while lifting. Beautiful, that was great. Slowly come all the way back down, soften behind your knees. Now the dismount is a little tricky.
You take your hands to the top of the box, you lift yourself up, hips to ceiling, you stand on the frame, bring the carriage all the way in and then once you're safe, you take your pad you get rid of it. I'll actually collect them for the moment. You take off one spring so we drop down to one and then you set yourself up on your stomach yet again for pulling straps, our next exercise. You want to make sure that your chest is supported but also that a part of your thighs are supported on the box. You want to make sure that your legs are not hanging off the end.
Then you grab your leather straps right on the outside of the frame with your hands reaching forward from here. Remember how earlier on you were on your back? And for that initial lift into the hundred you had the arms right above your shoulders. We're essentially doing the same thing here. We're pulling the straps but now we're on our stomachs.
Press your hips down to start, start to pull your arms straight down and straight back behind you. Super simple, we try to keep the body straight here initially so we're really just pulling the hands back, and against that pull the chest forward and up. Slowly return the straps down and forward. Keeping resistance on the spring as long as possible. We'll take four more of those.
Pull the arms down and back. So now we're isolating a little bit more strength into the upper torso. You pull back, but more than that just try to stretch your chest forward. Slowly return. The next three come a little bit quicker.
Legs together strongly like in footwork. You pull down and back. Remind yourself of the previous exercise. How your feet were standing on the frame, use your legs that strongly. Two more.
And pull. So imagine you're standing on my hand here. Yes, nice! And return, take one more. Pull down, pull back. And then keep the resistance on the spring as you slowly return.
Let the spring pull you and release. Excellent. We have one more variation. You have the T pull. You slide your hands back to the start of the leather and you bring your arms out to the side.
Maximum wing span, can you stretch your knuckles further away from each other? From there you pull. Five times, same thing here. You pull back, stay. Try to keep the carriage in one place as you return the arms, find space in your shoulders first.
The spring will eventually move again. We'll do that four more times. Pull on back, think that from your heels right to the crown of your head, you stay in one super long line. Open the arms nice and wide to return back to beginning. Last three.
Pull on back. If you start getting more comfortable with this, you can start to add a little bit of a chest lift here. Stretching your heart forward and up. Opposite to your feet reaching back. We're on our last two, pull on back.
Nice and long through the lower back. Try to find your back bend in your upper torso instead. Slowly return. One more, last one, promise. Pull on back, make this your strongest one.
Again, the feet reach back like they're still standing inside the frame, return the arms with control and then release everything down. Easy head, easy legs. You can let the straps go and then step off to the side. We're gonna flip the body around again. Still working through some of the more basic movement directions of the spine.
We just moved backwards, now we bend forward again. Have a seat on the very front edge of your box. The spring tension doesn't really matter for this one because we're not moving the carriage. We sit as close to the front edge as possible. You can place your feet right on the foot bar.
The arms stretch out in front of you. Not necessarily for decoration but as a counter weight to your spine. From there we take a seated roll back. The hips curl under, you make a round spine. You start to roll yourself about halfway back.
It's about where the tops of your pants would be. Try to get back towards the box without collapsing into your spine. It's a good moment to remind yourself as your trying to create space in your body. Then you lift yourself back up. And yes I'm completely holding you in that tough spot by design.
You roll yourself back, get to your point of most resistance but where you can still have some control. Easy through the shoulders, nice. Keep that length through your spine and then lift yourself back up. You'll know when you get to that point when your feet start to get a little bit lighter on the bar. So go right back to that spot.
A little tremble is good. See if you can keep the back of the neck long as well, so it's chin down slightly but in an effort to lengthen the back of the neck. Lift yourself back up, and now see if you can take it a little further down. Roll yourself to your shoulder blade tips. To that same spot where you performed your hundred just a little bit ago.
See if you can get yourself that far down. Keep the legs close together and lift yourself back up. Let's just do one more like that. Toughest point is when you go from going down to coming back up, right? So press the legs together when you get to that space.
Keep the hips steady, bend your spine up and forward to come all the way back up and let your arms relax. This will eventually become our teaser and our backstroke. For now, just go ahead and step off to the side. You can get rid of your boxes, place them behind your reformer. We have another change coming up.
We'll add a spring. So we're back on two springs. We also lift our head pieces back up. We need a little wedge to stick our feet into for the long stretch series. Here are the pads again just to provide some anti-slip.
You put that right on top of the head piece. The foot bar is lifted up into the upright position. Here's a transition that's really helpful to get into the long stretch without having to adjust much once you're up on the carriage. We're gonna take our near hand, nearest to the reformer onto the foot bar. Then you take your far foot, step it right into the crease of the headrest, between the shoulder blocks into the crevice and then you take your far hand and your near foot and your in position.
Your heels are together, your toes apart. That same military stance again that we started our footwork in. We're now bearing weight into our shoulders. So the hands press down for the space behind your heart to lift. You stretch the crown of your head forward and your heels back.
We're just gonna stay with that position for a couple of deep breathes. The point here is that now for the first time our spine is not supported by the box underneath us or the carriage behind us. So the spine has to organize itself all on it's own. Poor little thing, right? And our goal is to keep that all long, it's the long stretch.
Head forward, heels back, now push the bar away from you with your arms. Maintaining that long line. And then slowly come all the way back in, nice. So if you set it up correctly, you're not gonna move out very far and that's not the point either. You press out as far as you can keep the length.
And then it's really about coming all the way back in and I mean all the way. Yes, good. Let's take three more pressing out, out, out. Pull your chest through your arms to initiate the return until you hear the stopper underneath you. Last two, and back in.
Nice you guys, one more time. Press it out. So again, if you don't see a lot of movement happening here, you might see if you go up really close that these guys are shaking, it's a lot of work just holding that length in your body and that's the point. You bend your knees, you lower the knees down into the carriage, you step your feet against the blocks for sort of a kneeling continuation of the exercise. We call it the down stretch.
Now there's often talk of a two-way stretch in Pilates. We stretch the body in two directions. Here there's at least four. Your heels press back against your blocks, your hips push forward. Your hands press down and your chest lifts up.
Once you have those four things on stretch, you press out the same way you just did. Take an inhale to press out. Let's make the breath more specific on this one. On the exhale pull your chest through your arms and lift yourself up, good. You press out as far as you can keep your lower back long.
And exhale, lift yourself back up. You'll notice if you press out too far, there's a bit of a compression happening in the lower back. You don't go that far. You want to challenge the abdominals enough to keep the length and then you come all the way back in. Good, you guys, one more time, press it all the way out.
Exhale, come all the way back in and then we change the shape of the spine yet again to what we call the elephant. Go ahead and stand up on the carriage with your feet flat down in front of the shoulder blocks. You release your head down. You press your hands down into the foot bar, you press your heels down into the carriage, all in an effort to lift your bottom most rib up towards the ceiling, so start with that. Puff your back up towards the ceiling.
I feel like you can almost take your weight forward just a little bit. Also give you nice stretch through the backs of your legs. That's great right there. From here we add a tiny movement. Push the legs back, open the springs and pull the carriage right back under you.
We'll do it again. Push back, and pull back in. The heels get heavier as you press out, so the second you see your toes starting to grip, you've pushed out too far. Again, we're working with very small movements. Especially here as we're getting to meet our reformer and the springs.
Pressing out, and come back in. Can you lift your back into my hand more? Yes you can. Three more, pressing out, and come back in. For two.
And last one, pushing back, come all the way in. And that's your elephant. Very good you guys, step off to the side. Let's have you actually stand inside your reformers on the side here, and go ahead and grab those metal poles set out by your boxes. We're gonna take a preparation for the long back stretch, that does not really involve your reformer at all.
And if at home you don't have a pole, you can use a broomstick or a mop or something that doesn't weigh a lot and doesn't break if you pull on it. You're gonna take that bar behind you with an underhand grip meaning your palms face forward and you open your chest. You stand with your heels together, toes apart if that serves you in that nice military stance. Make sure you're not all the way against your reformer because you might start leaning back a little bit. From here feel as though you're pulling the bar together between your hands like you're trying to make it a little shorter to open your chest a little bit wider.
And then from there just stretch your arms back behind you. We're not necessarily going up with our arms but really down and back to open the front of our chest. Do you feel that there? Good, and then you slowly bring the bar back in towards you. And again, the bar goes down towards the floor then back behind you as far as possible to open the chest nice and wide and you come back in.
As you do all of that, try to maintain length between your heels and the roof of your head. You pull down and back to open the chest and you slowly come all the way back in. There's an exercise on the reformer we'll tackle next time that has this stretch in it. One more time. You pull your arms back so much you can go no further.
Start to bring your chin in towards your chest, to lengthen the back of your neck and roll your head into yourself. Keep your arms back behind you and start to lift the bar up towards the ceiling as you roll yourself down. Trying to get your head down towards your knees, lifting the bar up above your shoulders. Take a moment there, make space in your spine again so you're not slouching your way down, good. And then push the ground away with your heels to roll back up.
Looks great you guys. Lift yourself all the way to the top. Bring the bar against the backs of your legs and press it forward into you to feel the chest open even more, we'll take one more of those. Pull the arms down and back. Chin over chest rolling down.
The exercise we're preparing for is called the long back stretch. Which really means we're going after the long muscles in your back that wrap from the shoulders all the way down into your lower back. Once you max out your forward bent, take a deep breath in, press your heels down into the ground to roll yourself all the way back up. Head is last. Press the bar against your thighs again to open your chest.
It almost feels like the beginning of a bicep curl. Pretend that you're trying to break that bar. Like you're trying to bend it around your legs. For one more breath. (inhales) (exhales) And then let it go. It doesn't look like much but you will certainly feel it.
You can get rid of those poles, put it right behind your reformer again so it's out of your way. And the next step we go into the stomach massage series. Which is really a way to prepare the body for deep squatting. You bend through the knee a lot, you bend through the hips a lot, and so you get lots of space through your lower back. Massage your internal organs and all that stuff.
We're gonna move those sticky pads down towards the very front edge of the carriage. We'll stay on two springs for today. I want you to sit down on those pads facing your foot bars and set your feet in the same position where you did your footwork in the very beginning. So heels touch, toes apart, all ten toes on. Especially your big toe, pinky toe is trying it's best to get there as well.
Your hands wrap around the front of the carriage. There's a bit of a pull happening through your arms here, so use your hands as though you are trying to lift the carriage up with your arms. Make your back as round as possible without losing any space for your vertebra here. And then super simple you just straighten your legs out maintaining the shape. You push through all 10 toes and you come right back in.
Bending the knees, pressing out, and coming all the way back in. The magic happens at that last in, so you try to come forward more. Pressing out, and coming back in, good. If you practice on the mat as well, you'll recognize the shape as rolling like a ball as you double leg stretch, as you single leg stretch, every time you bring your knee to your chest. You press out, and you come back in.
Once you got the hang of that go a little quicker. Pushing out, and coming in. And pushing out, and coming in. Think that each time your legs are fully extended you put some extra length into your spine as well at the end of that extension. One more, stretch come all the way home and stay.
Now lift your spine up, take your hands behind you around the shoulder blocks. If possible you try to get your hands on top with your fingers pointing back and with your elbows somewhat soft. So you're really not just pushing yourself away from them. You keep the lift out of your back and you use your arms as a kickstand. Do the same here, straighten your legs, and you come back in.
And you stretch out, and you come back in. You get that same compression again on the way in. It looks and feels like a squat. You push all 10 toes and you bend the knees to come back in. A little quicker if you got it.
Push five, and in. Push four, and in. Each time the legs fully extend again, think of your spine as getting a little longer as well. Take your last one, stretch. Come all the way home and the last one, the funnest one.
You reach your arms up and forward, so now you have no points of contact with the carriage other than your seat and your feet against the bar. Can you create that same lift again? Let's take the first one slow. You stretch your legs out. The second your legs are straight.
Use the push to lift your spine up a little bit higher. Higher, higher keep the lift. Bend your knees and slide back in. Again, you stretch your legs out. Once they're stretched lift the spine up and then bend your knees and come back in.
A little quicker, four more times. Press it out, and come back in. And three, press out, and come back in. That's two, stretch. I'll give you a little bit of a lift.
And one more time. Stretch, come all the way home. Here's a lovely little stretch after that. You take your hands right next to your feet onto the foot bar. We call it the monkey on the Cadillac.
Similar here, you straighten out your legs, keeping your hands wrapped around the bar. If and only if your legs get straight here, then you can lower the heels down as well. Maybe pull a little with your hands to give yourself an extra stretch. Is that yummy or what? Release the head.
Good, lift your heels back up, soften your knees, and then come all the way back home. Lovely done you guys. Now because we've been in that forward bend again for quite awhile. We flip that around and go into the backbend series which is now called the short box series. And we're gonna prepare it with those boxes, so get those.
The pads go away. The foot bar goes down, we can do that later, once the box is on. To set up your boxes on most reformers, you will bring the headpiece down and hopefully there's some feature that allows your box to be placed in a secure place where it doesn't start moving back. So on these we have these tiny little screws here that'll hold the box in place. Set it up right there.
Doesn't really matter what springs you attach. We're gonna use two to keep the carriage in place and we keep them on the outwards settings, so that your feet fit in between. Alright, have a seat on top. Facing inwards, you grab those straps that are right at the end of your reformer frame. You stick your feet underneath and you flex your feet.
Now the setup is really super important. Almost more important than what's to come. You wanna make sure that your feet can press out into the strap and you can pull your toes backwards. Really strongly. It's like your standing inside the strap.
Which means your heels are not really touching anything, they're free in space. So your hips can articulate freely on top. First, we'll go into what we call a round back. You take your arms around the waist. It's almost feels a little bit like you're taking your ribcage and you're lifting it up.
You make your spine round like you've done in your stomach massage just before. And then start to roll yourself back like you did in your seated rollback a little bit ago. So now we're putting all those things together. Go to your point of resistance again where the tops of your pants touch the box. Where things start to get a little dicey and shaky.
And then lift yourself back up. Know that this time you have the strap to support you. So use your legs strongly and actively. You roll yourself back again, making lots of space through your back. Get to the shaky place, and exhale.
Come all the way back up, good. One more time. Pull the toes back strongly, roll yourself back, and then see if you can come down a millimeter further. We're gonna add a little bit of traction here. I want you to separate your arms and take your elbows against the back of the box.
Push your elbows forward to traction out your lower back. And if you have it in you, release your head back, only if that feels right to you because that's what we progress towards. Keep pushing through your elbows, bring your chin over your chest first, max that out. Then bring your arms around the waist, and come all the way back up, good. Let's do that one more time.
This time focus on not holding your breath over it, alright? Roll yourself back again. Pull hard on the strap, it's there to support you. Press your elbows against the back of the box. Make a length in your lower back.
Then release your head back. So you create an opening through the chest, it's your back bend again but his time turned around. You'll bring your chin over your chest again. Then arms around the waist, so good. Then you come all the way up.
You sit up tall, you take your hands behind your head. Press your head back into your hands to give yourself a little bit of a lift. And yes, if your hips were sliding, this is where you readjust. Start to lift your spine up super tall. Get a little taller, start to lean your body back now with a flat spine.
You go again to that shaky point, right? Hold the strap strong with your feet, pull the toes back, lift yourself back up. We'll try that a few more times. Going back to our airline analogy. This is your airline seat going back, right?
And you lift yourself back up. Now for every inch that you go back, try to get a little bit taller too. You lift to go back, you lift to go back, you lift to go back. Keep the legs active as well and lift back up. So again, you'll see you don't need to move a lot to get a lot out of it.
One more time, go up to go back. And lift yourself back up. Now here's a direction we haven't moved into yet which is side to side. I want you to take your arms up to the ceiling. Hook your thumbs together.
Feel like you're pulling them apart and then lift up and forward out of your waist just a couple of inches. And once you're there, this is what I want you to stretch. Just the bottom of the side seam of your shirt. You lean over to your right to feel a stretch down there. And for right now I don't really care what it looks like as long as you feel the stretch down there.
You come back to center and again you go slightly forward and over to your left. Stretch down the right side. Keep the hips steady by pressing your legs into the strap, come back to center. We'll just do it one more time each side. The goal is to get a little longer on the left.
Like there's a measuring tape, can you give yourself another inch, maybe two, maybe three? Oh there we go! And come all the way back one more time. Forward and left. Stretch, stretch, stretch pull the toes back, yes. And come back through center, arms come down.
(sighs) How are we doing? Good, we take the tree next. Which is really a one legged version of the round back. So I want you to think of it as that. Sit back a little bit further, take one foot out, your right leg.
Make sure that your left leg is centered. And then hold on behind your thigh. Because we're gonna hold the leg out let's warm it up a little bit, you kick it out just about five times. And you try to maintain a nice lift through your spine right from start to finish. Shoulders down, neck is long.
Three. Four. And then hold the next one. You take your leg to wherever it's straight. If that's parallel to the floor that's just as fine.
If that's all the way straight up then congratulations that's wonderful too. Your hands go to where your ankle is and then your head is being pulled to where your knee is right now. Bend your elbows out to the side. Find that same spine that you used in your half rollback earlier in your stomach massage. No further, no slouching.
Hold that position, hold the strap with your left foot as well, and just take that whole shape back a couple of inches till you feel traction. Still feeling safe from the strap. Think of your rollback now, your round back rather. Right, we just did it a couple of exercises ago. Your hands walk down the leg, you bring the tops of your pants against the end of the box.
If you get down far enough, give yourself that traction again. Hands to the back of the box, press against it release your head back. Here's a full inversion of the body with one leg up. You bring the chin over the chest again to climb all the way up to the top. Nice.
Lift it up, and again, walking down the leg. But then really the emphasis is that backbend at the end of that, that's really what we're going for. You open the chest. Joe Pilates called it the back bends as well. You bring your chin over your chest and you walk yourself all the way back up.
Nice, make sure that your hips stay level from start to finish. Let's take one more. Roll yourself all the way back, hands against the back of the box to lengthen out the lower back and then open through the upper back. Open the chest, chin over chest, lengthen the back of your neck, come all the way up to the top. So good you guys.
Lift yourself all the way up to seat and see if you can stay with a straight leg and then straighten your spine as well. Take one more breath here at the top. (exhales) And then change to the other side. Right foot goes under the strap, left leg comes in. The first portion is almost a little bit like that stomach massage we just did. So we work on that same fold of the hip.
The knee coming close to the chest with a nice lifted spine just like the second version that we worked on. Let's do one more kick. Stretch the leg out. Keep the foot where it is, walk your hands towards it. Keep your knee where it is, bend your spine towards it.
Head to knee, elbows wide. Take your body back just enough to get tension on the strap and then start your roll downs. Again, three times. Rolling all the way back. Releasing your head at the end, elbows against the back of the box.
Opening the chest and then come all the way back up. Chin over chest, walk your hands up the back of your leg and lift. If you start to get really familiar with this you can start to feel what this is like if you're not using your hands all that much against the leg. You're just sliding down your leg. Give yourself traction still though to protect the back.
And then put your chin over your chest to slide all the way back up. Yes, good. Easy through here. One more time, roll yourself all the way back. Heavy head, open the chest.
Make sure that your right foot is still actively pulling back. Lift yourself all the way back up. I know, that seems so far away from you, right? It's easy to forget. You press the leg into your hands to lift yourself back up.
Ah, nice lifted spine, maybe that leg comes up a millimeter higher, yes! Of course it can. And then release it down 'cause you stretched it so much. You can step off to the side and get rid of your boxes. So that's done with. Next time we'll add on to that.
The next exercise is a repetition of what we've already done several times. We pulled the straps down on our back then we pulled the straps from our stomach. Now we're gonna do the same thing from a kneeling position. It's called chest expansion. I want you to stay on two springs.
Kneel on your carriage facing your shoulder blocks. And reach for your straps. You might have to pick them up before you set yourself up there. Perfect. The setup here for me is where you feet are right around the edge of the carriage, your toes point down towards the springs and you pull them right against the edge so you have something to hold onto.
I like to hold onto the handles here not the leather strap. So that you can work on your grip here as well with your palms facing back. It's called chest expansion so even though we're pulling the straps again, the goal is really to open the chest more than getting your arms far back, alright? First stand really tall on your knees. Press your knees down, lift your chest forward and up.
Then expand your chest as you inhale start to pull your arms back once you feel your chest is open. Hold that for a second. And then slowly return the arms forward as you let the air come out. Do that again. Inhale to open the chest, at the pull at the end.
It's like pulling straps but you'll find that you have to organize your hips quite strongly here. Slowly return the arms forward as you exhale. We'll do that three more times. Inhale and pull. As your hips wanna sit back, see if you can use your toes right against the edge of the carriage.
So push your hips forward just a little bit more. Oh, someone's shaky. And slowly come all the way back in. Again, very little movement, lot's of stuff happening on the inside. Did we have two more?
It's always two more, right? Pull the arms back, lift your chest forward and up. Make space for your breath and come all the way back in. It's truly the biggest gift you can give yourself. More real estate for your breath.
One more time. Pull, pull, pull hold the breath here. That said, and then exhale, come all the way back home. This set us up for a thigh stretch. We're opening the front of our bodies still.
Now we're making it more intensely for the fronts of the hips and our quadriceps which tends to get so tight. We're adding a third spring here. So hold onto your straps with one hand, sit back, add one spring and then lift yourself all the way up. Walk your knees against the blocks this time. If you happen to have long open hair, we would probably want to put a pad on the springs to protect you, but these guys are all safe here.
You walk your hands out on the straps as far as you can reach. We have three springs now which is a solid amount of resistance and control which we want. The springs are there to keep you safe on this one. Think of your tailbone lengthening down in the back of you and think of the chin coming in towards the chest just to lengthen out the back of your neck. Not aggressively closing the front of your throat, just lengthening the back of it.
Now from here ears to knees. You stay in one long piece and you hinge your body back. And you see how far you can take that. The stretch you want is really in the fronts of your hips. But almost think tail under you a little bit more than you want to.
Yes, good. Hold it there for a second and lift yourself back up. Alright, we'll do that once more. You go slow so that you really stay with what your knees can process. If you have tricky knees you might find that you only go a millimeter back, you get a massive stretch and that's just as good.
Range is never the goal, that comes over time. You lift yourself all the way back up. Let's take one more. Deep breath in. Think that your chest expansions still remains.
Everything we've been doing so far has gotten you here and has warmed you up for this place. So there's that length through your back like in your long stretch. There's that openness in your chest like in your chest expansion. Lift yourself all the way back up and then take the straps with you as you step off to the side. We're gonna turn that around into a reverse chest expansion.
I want you to change your springs down to one this time. We'll do another simple variation of this which is facing the other way. So you kneel up on the carriage again facing the foot bar this time. Feet go against the block so you have something to press your heels against. See if you can bend your toes under so that they get a little stretch as well.
And then your palms face forward again. You open your chest and you press your arms down and forward. We're not lifting the straps up quite yet. Your idea is to really just get your hands down to the front edges of your reformer. You hold it there.
See if you can lean your whole body into it a little bit and then against the straps pulling towards you open your chest a little. Yes, and slowly come all the way back in. Again, deep breath in. Pull the arms down and forward. Once the arms push out, think about the rest of your body and how to organize your hips and space.
Slowly take the arms down and back behind you. Three more times. Down and forward, stand taller on your knees, open the chest wide, long through the sides of your neck. You come all the way in, and last one, take it down and forward, forward, forward, forward press. Get a little taller, keep the length.
Return the arms. Alright, that length we get to keep in what's next. The tiger stretches. Sit back over your heels, get rid of your handles. You can just release them over the pegs there or down to the floor is good too.
We need two springs for the next exercise. Lift the foot bar up into the highest position. Take your hands to the foot bar right in front of your shoulders and again setup is key especially in this very first lesson. So make sure that your hands press against the bar and the space behind your heart is puffing out in our position. Your head is released and long.
You want to create that same amount of stretch you feel in your upper back through your middle back by pulling the abdominals in and then curling the hips under to feel that same stretch in your lower back. Key to this exercise is to maintain all of this and have your arms push into the bar, start to finish. Now start to press your feet back against the shoulder blocks. Move the carriage back until you feel that you're losing the round in your back, pause. And then pull the knees back forward underneath you.
And again, you press back and you come all the way back in. So you can really see how the springs as they start to open, how they load up the rest of the body as well and how much they have to work to keep the spine round. Push, and pull. Good, like an angry tiger. Push, and pull.
Now go a little quicker. Pushing out, pulling in. Pushing out, pulling in. Three more. Out and in, for two.
Push and pull. Strong grip around the bar. Hold and then change the shape of your spine into what I call the happy tiger. Your hips stay back, your chest sticks forward and then same idea. Your arms are already pushing.
From your arms to your hips, your installed in the reformer. All that's moving is your legs. Press your feet back, we'll take five slow. And then pull the knees forward from here, sitting the hips back further. Four, and come back in.
As the springs open make sure the space between hips and ribs stays long. It does not get to compress you. And push, and pull. Five a little quicker. Push out five, and come in.
Four, and in. For three, keep pushing the arms into the bar. Last one, out and in. Round your spine the opposite way again, angry tiger. Your tiger gets so angry this time that the knees float up a little bit.
Curl the hips under, lift the knees, just hold that position for a little bit. And slowly come back down. You might want to play around with this a little bit. There's two ways you can lift yourself up here. One is to press your arms down so hard your knees start to lift.
The other is to curl the hips under so much you draw the abdominals in to the point where your knees start to get a little lighter on the mat. That's the one we want. You might have to take your weight forward into your arms a little bit. That was great, nice! And slowly lower the knees down. Take one more and then we add the same motion again.
Stretching the knees all the way out. Pushing the legs back eight times. And eight. Seven. And in, six.
And in, five. And in, keep the back round that's the most important part. Three. And two. Take your last one, pull the knees all the way under you.
Lower the knees down. Who wants to cool down a little bit right about now? Yes, let's add two springs here. It's the same setting that you used in your footwork. So if you used three there, you use three now.
You go ahead and lie down on your back. You can lift that headpiece back up so that your head is supported. Lie down on your back 'cause that's the only thing the body's able to do right now. Your arms along by your sides. You straighten your legs all the way out.
Then we mobilize the ankles. A running motion through the feet. One heel lowers under the bar, the other knee bends and you switch, and you switch, and you switch. You do it fast 'cause it's a run not a stroll. And you just massage your feet here.
Finding that length in your spine. Letting your heart beat inside your chest a little bit, 'cause that might still be going on. Good work you guys. Everything is very simple we've done so far. It doesn't even look like there's a lot of movement happening but internally we really set the body up for finding more space and support for our joints, our spine, our organs, our breath most importantly.
In the next lesson things will become a little bit more complicated. We've come to the end now. Bend your knees, come all the way home. Set your feet right against the corners of your bar. Your legs are slightly turned out.
Let your knees be a little wider than your shoulders. Then imagine there's a second headpiece right underneath your seat. You curl your hips under just enough that another headpiece would fit underneath. So it's not a shoulder bridge, it's just a very even C curve from head to tail. Then from there you do your footwork again.
You press out through your legs, and come back in. And pressing out, and coming back in. Again, if you think about the springs and how they work on the body here and how they try to compress you. Your goal is really to unload the hips by pushing back through the legs and keeping the curl of your hips. If you turn this upside down you would have your knees stretches all over again.
So a lot of the shapes that we do, especially in the beginning stages of the work, are always the same. We flip them around and upside down, and left to right so that the body gets to recognize them. Memorize them and hopefully once you leave the reformer, it still knows how to move well. Two more. Push, and pull.
Last one. Stretch, and come all the way in. Slowly roll your hips down onto the mat. Give your knees a little hug into your chest. Excellent.
We'll do one more exercise here. Come on up to standing. We'll set you up for the front split exercise. But before we put them on top of the reformer, we'll actually do them outside of the reformer. So just come on up to standing.
So for the front split outside of the reformer, one thing that's important to know is that this foot bar obviously is gonna move that way if you push against it. Once you put your hands on it, make sure that you always pull against it. We're gonna stand about leg length away from it. So you can raise one leg up and just measure that way. And then take your right foot on top, bend your knee to lean into it so it's sort of like a lunge.
And then take your hands to the outside of your foot against the bar. Remember your hands pull as your foot is pushing. Take a moment here to use the pull of your arm, sort of like pulling straps earlier to lift your chest forward and up to find that length. And then from your head to your back heel, it should almost feel and look like your long stretch earlier. So it's all starting to come back here.
And then from here we're gonna add like your tree, a stretch to the front of the leg. You press your right leg to straight, letting your torso be draped over that thigh until it comes away from the body. And then you bend your knee forward again to lean your body into the shape. If you need to make adjustments with your foot that's on the ground, if you want to turn it out slightly, that's alright. You straighten the front leg out.
The key is really to stretch the right hip back so that your hips stay level start to finish. Bend the knee in and we'll take one more stretch. Pull with your arms start to finish. Straighten your leg out. Pull with both arms, feel your left leg also pressing down into the ground.
And then bend your knee in. And then find your way over to the other side. Push yourself away from the bar and then take your left leg on top. We'll do the same thing here. This is a bit of a safer way to explore the front split rather than having moving springs underneath you.
So bend your front leg, lunge your way in. Take your hands right to the outside of your foot and then straighten your leg out three times. You'll often find that one side is more limber than the other so take note of that. Maybe this is the one, maybe it was the other one. Stretch it out, and bend it back in.
And just one more time. Three will do to get that full body stretch. Make sure the right leg is stretching down into the ground as much as the left leg is stretching into the foot bar. Bend your knee come forward, step all the way back in and then step away from your bar. And that'll conclude our first lesson on the reformer.
Again, simple movements. We'll add on to this next time around. Thank you guys so much. (clapping)
Comments


You need to be a subscriber to post a comment.
Please Log In or Create an Account to start your free trial.
