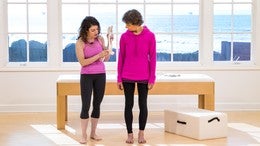
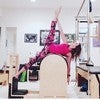
Description
This is an advanced class that is safe for those with osteoporosis, however there are a few exercises which are contraindicated. For these exercises, Rebekah offers safe modifications that can be done instead.
About This Video
Transcript
Read Full Transcript
Hello, I'm Rebecca Rotstein and I'm happy to be back here at Peloton anytime for my sixth year and I've never done an art class before so I thought it would be a fun experience to try. This is actually part of the circuit workout that I did last month at the PMA conference and had some really good feedback and people asking for more of this. So this is the opportunity to try it if you haven't done it or to practice it if you did it. We're also going to be integrating some spirals in here and I should mention as well that even though I'm often known for osteoporosis and my work for art with osteoporosis, this is not designed as an osteoporosis workout. However it is, aside from some articulation that we do through the spine at one point, rolling backward, it actually is osteoporosis safe.
So you really could be doing it if you have some issues with bone loss, but it's also not a beginner workout at the same time. So it is designed for people that have some experience and awareness in their bodies. So let's get started. We're going to begin with some release work. So you're going to take your arc and this assemble. It's so set aside the headrest part and turn it upside down.
We're going to do a little bit of work with the foot as we just did this foot tutorial as well. I now slow it down.
And last time pause. Ideally Ruth, I'm going to have you move your feet inward, just a little bit closer to closer to your hips so that when, so for everybody who is practicing, this is at home when you're, when you're lifted up with your hips, when you're rocking back. Yup. The knees not are more directly above the feet. So Amy, you could even move your feet in a little bit. [inaudible] now everybody rock back and lift your arms overhead so we get a nice stretch of the entire front line or chain of fashion in front of the body and lower back down. And again, so ideally you probably would want, it's like a sticky mat so that you don't slide too much. And let's just do a big port, our arms around rocking back and circling the arms all the way.
And if you want, you could even do one more and hang there for a second. So see if you could extend and reach to your fingertips so much with your arms behind you. So you're going to be in shoulder flection arms all the way behind you. And you may get, if you have some hypermobility in the shoulders, you might get a nice little bit of support for the arms and the sockets because of the positioning a in relationship of the arms to the arc. So see if you could create a full backbend experiencing the anterior glide as well through the hips and slowly lowering yourselves all the way back down.
Now return back up. This time your hands are gonna reach to the ceiling. And this is why I wanted your feet to be in real. Your ankles to be underneath your knees. You're going to push yourself back a little bit. [inaudible] and we're going to lift one foot [inaudible].
So the beauty of doing it in this position as opposed to on the roller where we often are, is it on the roller? It's a lateral stabilization. How do you not fall off to one side? Now the stabilization here is how not to move forward or back to where I'm working more in the sagittal plane in this instance, and keeps switching legs. Sorry if I didn't tell you to do that. Relax your arms a little bit more in the sockets. Amy. Yeah. And Ruth, I want to see more hip extension. So push yourself back.
Ah, so you're going to feel much more engagement in both posterior or back of the hip that way. And that's part of the key is how do not allow yourself to fall too far forward in the rocking toward your feet. The back of the thighs and the hip area has to stay active the whole time.
So let's end our warm up with a little bit of triceps. So you're going to help yourselves sit up and you're going to place your hands in probably the see the second rung back. So one, two, and feet will be slightly in front of your ankles and you're going to push down into your hands and then return, uh, in case anybody can't hear. There's this, ah, sigh going on from our audience here and push. Exhale, two more. Feel the connection through the back of the shoulders and the triceps. Last exhale this time. Let's exhale on the push.
Inhale, release, but don't collapse. Inhale, release, exhale, push. Beautiful. Exhale, release, last time. And stay. Could you slide one foot forward and return back in? Finding your connection in the low of abdomen area. Two more. So you two are doing a really excellent job in avoiding the rib thrust so that you're still inhaling into the back ribs lux.
All right, let's reassemble our arcs. So to be honest, most of this workout could be done on, um, uh, a half barrel or even an arc, perhaps step barrel. Um, but at the same time, that initial part couldn't. The reason I like the arc is because the difference in angles on either side and that the arch itself is not quite as intense. So for the average person, it's a lot. It's a lot easier. All right, let's begin seated. Yeah. Why don't you see sit facing one another in the well and Amy, let's have you scoot back just a tiny a, you scoot your arc back a little bit. Yep. All right. Let's start moving our bodies a little bit more.
Grab the backs of your thighs. Take a breath in, exhale, and just tuck your tail under and pause there. Returning back up. So don't even don't even allow yourself to articulate that much. Think of it more of a lift up and over. So for instance, rather than collapsing and we weren't totally collapsing, but thinking of a lift and, and there was a rolling backward, a movement from the pelvis. Yes. And back up and again. And it forces you to find that connection through your inner thighs and up.
And again, two more. Good. And back up. And last time, feeling the pressure down into your feet and coming back up. Now stand up. Watch this. We're going to see it before and after. You're going to take one foot and step onto the lip. So we talked in our tutorial about the cuboid bone, that little pocket that is just in front of the ankle bone and at the very bottom of the foot. Yep.
And you're just going to get a little pressure rocking forward and back on that. So we're helping elevate that cuboid bone and let's, and it feels really good. You know, you've got, if it feels good, it's not in the center of the foot, it's just a little bit further back and switch feet other foot. So it's just in front of the heel. It's that little, I call it a pocket. I don't know why I like to call it a pocket, but it's, it's this little, uh, little arc and back. So your toes should be facing forward while you're doing this.
And then one more. Okay. Now go back into your seated position and see the difference.
Breathe in. Exhale, feel the connection into your feet and start rolling back until your elbow Streeton pause and then let your oboes pull you back in and sit tall at the end and rolling back. And I have a mic blocking me and rolling forward and up and again back so that those elbows straighten. Yes, and pause right here. So the art blocks you from going any further as well. And then you return for word and rise. Now place your hands behind your head. Continue the movement, but let the elbows Clem closer to one another as you roll down, rolling down, and then go all the way back.
And role two, three reached through the elbow and Chin and return back to three and four once more. Rolling and reach elbow and Chin and drop the Chin to return in and rise and lengthen last time. And I've lost my snap and roots with that Chin last time and drop through the Chin in order to return back up. So we start to bring in a little bit of a neurological movement pattern for the upper trunk, which will help us avoid that Chin jutting forward and strengthen the neck. All right, continue this without the arms hands in front of you and start going around the world. So we're going to go around the world, pretend you're holding a big ball rolling around and move the ball to the other side and continue and drop your kin to return and up.
And I know that kind of made you lose the ball, but that's okay. [inaudible] circling around with the arms all the way. So we get that whole upper trunk connection and again and circling around and reaching it up and once more lovely. And we still have that full connection to the body because the feet are working and now we're going to add in a little bit of a sling system. So we go to the first side again.
Now remember the side that we start with is the leg that's going to end up rising. So I went to my right first and the right foot rises and I go back over and around and then I go to the left and the left rises. Now pause here. I'm not trying to have you thrust your ribs forward. I want you to allow your sacrum to rest against the arch. It's getting the support from that and again, circling around so we get this beautiful connection from the external to internal oblique leaks to inner thigh Dr.
Set and once more around, around and around. Feel the neck cradle like we did before, and relax. Lower the feet down. All right, let's sit up on top of our art because at this point you want to sit just in front of the apex. So again that your sacred can rest on that apex and we're going to lean back. We're going to zip up here. We're going to push out through one heel. We're going to switch, push out through the other. Heal, single leg stretch and push, push, zip, push, and 10 none. You can lean back a little bit more if you'd like. Eight, seven, good. Six, five, four, three, two, one. Relax.
Bend both knees in and we're going to rotate to one side. Rotate to the other side. Rotate to the first side. Rotate to the second. Let's make it a little bit dancy. Yeah, don't fall off a little bit of a circle. Eight or figure eight is that what it's called? Circle Eight. I'll make up my own phrases. Keep going. Good.
And two and one. And relax your feet downward. Woo. Sit Tall. Now Curl your toes over the lip here and pull yourself up and relax. And once again, pull yourself up and feel a little bit of extension going on through the upper back and relax. So speaking of extension, let's do some, we're going to turn around.
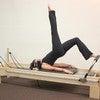
So you're going to face away from the center with the ASI s points. So these are the pelvic points being at the apex or the top of the, the arc. So you're going to be prone on your arc. Yes. Dive forward. Ruthie. I'm teasing you. Go down. So everybody, all two of you, everybody place your hands. Place your hands directly in front of your shoulders. Yes.
So push into your hands ever so slightly that allows enough, that will allow you to let your head float just a little bit and relax back down. And again, push. Lift your head a little bit more. Ruth [inaudible]. Now stay there without using more of your hands. Use your upper trunk to start to rise and pause everybody again. All two of you talk your toes. I'm used to having a bigger group class.
Tuck your toes, straighten your knees. Yes. Notice how that connects you into the whole back chain of the body, into your hips and lower yourselves back down through your trunks. But keep your feet where they're [inaudible] feel the connection through your toes. Connecting to your hips into the back as you start to rise. Rise again up. So let's see if you can rise more from here.
Don't straighten the elbows all the way. [inaudible] and lower yourselves back down ladies. So the idea is to make your back, do the work in your hands. Just give you a little bit of feedback and support. And again, that's it. That's it. That's it. Much, much, much better. Pause right there.
Inhale everybody x lowering back down. Place your right hand behind your head. Place your left hand behind your back. [inaudible] you're gonna turn your head to the direction your your elbow is. So you're going to start to rise and turn your head to that direction of the elbow. Don't rise too much and lower yourselves back down. Yes.
And once again, rise and lower back down. And last time rise. There we go. And stay. Now the opposite foot. Your left foot is going to rise. This is another relationship to gate and to walking and lower yourself back down and lower the foot. And again, that's the sequence. We lift the arm and the leg and we rotate through the upper trunk and lower back down and lift.
But it's more of a lengthening and lowering and lengthen. Lengthen. Lengthen. Lengthen, yes. And lower. And let's try the other side. So switch arms and first without the leg. So turn your head to the direction of the elbow. [inaudible] and lower back down and again, so reach out to me more. There you go. And lower back down. And this time add the foot [inaudible] so see if you could experience that.
Reach out through your elbow that will allow you to relax through the shoulder. And again, opposite arm and leg. [inaudible] ah, that's it Amy. So it's almost like you're creating space and distance between your ear lobe and your shoulder. Two more. Yes. That's nice. Ruth has a terrific cue that we're going to use, which is to grab your shirt around the back of your pants, a right at that area where your hand was. If you can grab your shirt here. There Ya go. And pull it away from your head while you lengthen. Yeah.
So Ruth is going like this, which is really nice giving you and queuing that sense of length. I don't know if that was on purpose or not, but it looked good. Or maybe she was just adjusting her pants the whole time. All right, so that's, that is our little gate preparation, which is going to help us in a little bit. Let's now turn to face me over in this area. You're gonna sit in your, well, we're going to do some sideline work keeping your bottom knee bent.
You're going to straighten the top leg [inaudible] and you're going to side bend over all the way over. It's going to be beautiful, glorious stretch, and you're going to grab your top wrist with your other hand, gave yourself a stretch while you reach out through that foot. Now extend through the air, I should say, flex the foot so you reach to the heel, take a breath in. Exhale. Feel even more length occurring through here. And once again, inhale and exhale. Ah, nice place both hands behind your head.
Reach out through that foot. See if he could push one another with your foot. You're going to push one another so much that you're know that you're not gonna move your foot, that you're going to reach out so much through your heel, that it's gonna rise and down. So your hips are going to be stacked. I lower down to more. Lovely. So you're noticing this is the connection of the abdomen when you're doing sideline work.
This is not just about the hips and rest here. Now continue pressing out through your heels. Reach your hands behind your head as they are and see if you could float your ribs up off your art just a tiny bit and lower back down and lift up. I want you to push me. Push, push, push, push, push. Yes. That's, that's the amount of tension I want to feel. Yep. Just a little bit. It's almost though more than a Seidman.
It's more of like a levitating up off your arch. Yes. On the bottom side and hunt again. Up, up, up, up, up. Push me away. Push me away. Push me away. Yes. I want to feel that equal pressure. Good at. Don't come up all the way though. Don't come up too high. Yeah, and lower yourselves back down. Nice. Now take that top hand. Place it on the front of the arch.
Lift that top foot from back leg kicks and kicked forward twice. Kick, kick point, pause. Exhale, forward kick, kick and point. Reach back and pause. Exhale, forward kick, kick point and pause. Xcel forward kick, kick point, reach and pause and stay there for a second. We're going to flex the feet. Let's do five small circles and five, four, three, two, one. Turn it a little bit more, Amy. Yeah, and reverse it. And Five, four 30 to one. So it's challenging because the hip has a Macan or the glute has a mechanical disadvantage at this point because it's already at a shorten stage to begin with and lower the foot all the way down. Here's where we're going to get into some more interesting stuff. Bring your feet forward, that top foot forward, flex it and let the toes lift to the ceiling. Yes.
So we're going to do some spiraling in the sockets for some PNF. You're going to rotate and roll that foot back as you pointed behind you internally, rotating it up into the air and flexing the foot, lowering it down. So it's a direct trajectory. As you go back, spiral, spiral, spiral up, up, up, up, up, up, up, up, and lowering, back, down, down, down, down, down, and up, up, up, up, up and down, down, down, down, down, and up, up, up, up, up, and then down, down, down, down. Woo. Shake it out. Give yourself a little release on that side. Yeah, turn over for the other side. So it's some Nice, nice hip work that's both mobilizing as, as strengthening. So side bend over, grab your wrist and pull yourself all the way.
[inaudible] uh, yes. Exactly. So use your bottom hand to pull you over. Yeah, so that you can get the maximum length. Nice. Take a breath in. Exhale. See if you could extract just a little bit more. Stretch from that, that juicing moment and hands behind your head. All right. Ready to reach out through the heels and pushing up and lowering back down and up and lowering back down and help that rib a little bit.
How's that feel up and lowering back down and two more and lowering back down. We want to feel this whole connection with the gluten, the upper hamstring area, as well as some of the rotators that are helping out in the process. Not to mention on the lateral side of the hip and pause now push down through the foot. So there's a very specific reason for this sequencing that has no contracted and activated your glute mead so that when you go into your side, sit, you don't contract through your back and hover and back down and again, hover yes and that down. Don't worry about coming too high, worry about the leg. That's going to be your support base and down.
Anyone's more up and stay in the lower back down. Nice. So place that top hand on the top of the arc. Let's go into our front, back leg kicks and kick forward twice. Kick kick point to reach back. Exhale, forward, kick, kick. In her point to reach back. Exhale, forward kick, kick in. Hilary XL. Forward kick, kick in, heel reach. Let's do one more for good luck and exhale, reach. We go into our circles. Small circles, just five, five and four and three and two and one and reverse five.
Nice. Four three. Thank you Amy too on. Remember that the ribs need to have breath in the back space and lower the foot down. We end with our hip spiral PNF so you're going to place your foot forward and so when your feet are forward, the toes are facing the ceiling, so you're externally rotated in the hip here and then you're going to rotate through the foot to go back, back, back, back, back, back, back, internal rotation, extension and Ab duction ending again back in the rotation where the heel touches. Beautiful and spiral on the way back, back, back. But be careful. It's not an arch up and down.
It's a diagonal going up with a spiral on the way. Yeah, and down. Let's do one more. That's it. Yes, yes, yes, yes, yes. Internally rotate though into more internal. Yup, Yup, Yup. It's a matter of reaching up. Beautiful and lowering back down to end. Nice. All right, let's go into some quadro pad work.
So you're going to end up facing away from one another with your hands directly on top of your arc. We're going to start off with some foot to action. We're going to be here at our plank because we're gonna assume that we're all strong enough just to hold a plank, but it's a piece of cake here and we're going to move through our ankles. We're going to circle around through the ankles. [inaudible] careful not to let yourself dip through the mid section of your trunk and reverse your circles. [inaudible] two more and one. Now, Bend your knees here, so let your knees just rest on the lip and straighten.
Here's a perfect example. While you stay right here, this is a perfect example of that net cradling that we did at the very beginning to strengthen the neck so that the head doesn't dangle and straighten the knees again and Amy, move your feet back. Yes, so that you can shift your weight forward a little bit more. Yes, there you go. And then straighten the knees. Yeah. And Bend and straighten. Lift through your heart just a little bit more Ruth. Nope. Behind Ya. Up into the air.
Point to move forward. Look down a tiny bit and last time flex to move back. Point to move forward and switch. Now we get a little bit more creative. We take our right foot. Well actually if you want, you can do the same side. We're going to pull one knee in. So yeah, let's, I'll do it. Pull that knee and cross it over and then place it out to the side.
Bend the knee so that you can get a little bit of a hip stretch here so you can rest that knee. On the arch [inaudible] you even could bend it in further so that you get even more stretched around that Piriformis area. Now straighten the knee all the way out to the side. Place the hand that is closest to me or the hand that is the same side as the extended foot. You're going to reach it on top and then you're going to go into what would be a yoga fallen star. Breathe in.
Exhale. Make sure that your back foot is facing forward. Yes, there we go. Now bend that knee and allow the hip to drop. I know I should. We should probably do this so that you can see me and come back up.
So basically if the idea is that you're right here, you're going to bend that front knee, get a little stretch so it's almost like side bend here. And then come back up and bend the front knee and come back up once more. Bend the front knee, come back up and go into a full bend. And now you're going to return to your starting position. [inaudible] but it's a lot of arm work here.
So make sure that your arms are, your shoulders are directly over your wrist to begin. So come back into your position here. Take the other foot, the one that you didn't do yet, pull it in toward your chest. [inaudible] cross it over. [inaudible] and as you have it crossed over there, you're gonna allow that knee to bend so that you feel the stretch on the hip. Yes. And you can bend your elbows as well. By the way, that might make a difference. [inaudible] so if you bet, I think that might've been the secret, I'd probably didn't tell you to bend your elbows.
Bending your elbows will allow you to hit the stretch in the back part of the hip here. Exactly. Take a breath in, exhale and straighten the elbows and straighten that leg so you're almost having no weight on that foot so that you could straighten the knee out. Ready. Place the foot, the same side foot as hand, or it seems I'd hand his foot in the center of the arch and lift up. Now bend the front knee and look over your hand.
So again, that back foot is pointing, is facing forward, and bend the knee and rise all the way up. So you get the full side bend and maybe even look toward the ceiling.
So the idea is that when you bend your elbows, you lower yourself down, kind of like a yoga Chaat, Uranga or a police push pushup. Stay here. Now bend the knees, lower the knees down to push yourselves up. So it makes a little bit easier and straighten. Do that two more times. Lower yourselves down. [inaudible] good. Bend your knees when needed and push through your elbows to rise and once more, start lowering yourself down.
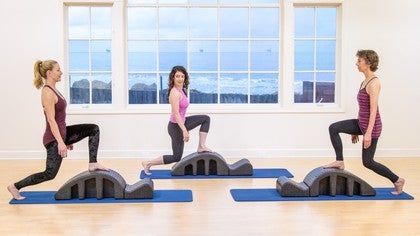
And as soon as you feel like you would sacrifice your form is when you bend your knees. Beautiful. Good. And push yourself all the way back up. All right. Shake out your wrist. Ready for the standing part? Sure. Okay. Face a face. One another. Yeah. Oh, I didn't, I didn't actually say that. Clearly faced one another behind the arcs.
It's like where should we face one another? Have your foot that's closest to me on the top of the arc. You want to make sure you have enough space behind you that you can lunge forward. So you might want to scoot your arcs a little bit further forward just to give yourselves a little bit more in terms of options. Hands on the waist or it doesn't have to be lifting lower the back hill.
All right, here's the secret. Keep going. The toes have to face forward if the toes are not facing forward. The direction of movement and the weight shift goes in a completely different direction, as does the center of gravity [inaudible] and down. It also doesn't achieve my goal of integrating the foot. Here's another little secret, a little tiny button lift.
So the inner part, that little inner crease of the, but if you can feel that it's going to help you out with your stability and down and two more and once more. Nice. So now we're in this position with the heels lifted back, heel lifted. Bend that back knee and straighten and bend the back knee and straightened. So your relationship to one another will not change. In other words, you're not shifting forward and back. You're just going straight up and down and pause.
Take a bigger step back. It's going to make it much more advantageous so that you have a deeper split lunge and down and up and down and up and down and up and down and up. Ready, take your whichever is the hand that's back there. Reach forward, forward, forward. Lift your arms both and now spiral. So you're going to twist to the direction of the front foot. Make sure that the twist happens in that upper back, which is what we were warming ourselves up for in the beginning. Return.
And once again, this is where it's imperative that you're breathing into your back ribs. Beautiful. Feel that connection down to the second toe and come back up. Now bend both knees and balance. Whoo. Lovely. All right, other side. Ready?
So we have the second foot on the top of the arch is also this, this gives you a nice support and sensation of the urges of your feet as well. So we begin with is lifting and lowering. Remember what I said about the inner part of the butt cheek. It really makes a difference for me. It's partly, I think it's partly related to um, quadrates for Morris as it comes and suctions in as a lateral rotator of the hip. But it's really a hip stabilizer. When I don't have that connection, I feel a rather than stable and like my head, my thought isn't really in the socket.
There you go. So we're going to keep repatterning that get that cal Caney spiral inward as you arise and last time and Ben both knees, no [inaudible] and we're just going to do it two times up and down before we widen the stance. So the back heel is going to be lifted. Yup.
And pause at that last one. Notice how when you're doing a split stance that the wider the distances between your front and your back legs, that actually the easier it is and also the less strain it is on the front knee and quad and lowering down. And this is again where I concentrate on the levelness of the pelvis, the little half moon. But
Are you ready for your rotation? So you're going gonna rotate to the direction of the front foot. Rotate nice and up and down. No energy is your fingers. Yes and you get a really good stretch as well. Let's do one more even though I don't know if we did that on the other side.
So it also is great for the challenging of the balance and then return back up and ready. Bend your knees and stand up and balance and do a beautiful porter bra. And kids do not try that at home and stuff off. So before we end, let's try a little bit of a stretch. So you're going to sit, let's sit facing each other, facing the lip and cross one. Cool. Over the other thigh.
The benefit of being in the seated position here is that you could actually grab your front knee. It might be easier to be honest, if you're seated away from each other at the so that you don't have quite as long as the distance in front of you, but it allows you to pull yourself forward so that you get the stretch appropriately in the hip as opposed to it coming into the back. There you go.
And here's another little foot secret trick that I like. I like to place my forearm around this area of the lateral foot to the inner heel. It's a really nice, uh, sensory experience and hints forward full of little tricks and hints forward. So again, when I pull myself forward from my, from my hands against my shins, I can get even more into the deep fascia around the hip and the low back even. All right, now I'm going to give you a treat. This is one of my very, very favorite exercises. It's a stretch. We're going to end our workout here the following way.
Create a little bit more space in the front of the low end of your art and you're going to end up facing, well, you know what, why don't you flip it around so that you can face each other. Those who are doing this at home don't need to flip, but you will want to make this further back so that you have plenty of space. Okay, Amy's already ready just to lie down and rest, but that's not what we're doing. So you're going to dance off. So you're going to stand up. This is, this is my secret stretch for my quad. And maybe we'll break it down another time, but you're going to come down into all fours and you're going to place one foot at the top and Tuck it top of the arc.
And then you're going to just step forward on the other and you're going to send your hips slightly forward. So there's a little bit of a forward with the hips as you can track through the glutes and push it down through that back foot. And it really, and it really concentrates the stretch into the belly of the quad, which if you have ever had specific knee injuries or trauma like myself, you might be familiar with the fact that this type of stretch does nothing. I, this is the only way I can stretch my quad and not let the string go into my knee is to have the knee supported so that the knee can't go into any kind of torque. It's down. Yep, exactly. So the more yes, the more you push into that foot, the more you'll feel it. And to be honest, if you really, really wanted to make it a more intense stretch, you could lean back or you could dissemble your arch so that your foot's even higher. Basically the angle of the knee flection would be greater. So let's try it on the other side. So you get your knee as close to the base as possible. He stepped the other foot forward and yes, and pushed it.
It's almost like I'm pushing down through my foot and through my knee, and that sends my hip forward and it also gives me more stretch in the anterior capsule of the hip. And then as a, I can't do it yet. I'm not warm enough. But as Amy was showing, yeah, you could even lean back a little bit more and intensify that stretch further and stand up. Whew. And shake it out. And thank you for joining us. I'm Rebecca, and it's so nice to be back. Thank you.
Intermediate Mat Workouts: 40-Minute Classes
Mention
 |
Rebekah Rotstein (Teacher) |
|
|
Joanna G |
 |
Lisa Press |
 |
Laura K |
 |
Patti S |
 |
Vanisha T |
|
|
Lani G |
 |
Margaret B |
 |
Carla Oliva |
 |
Giglia M |
 |
Sarah D. Carrasco |
 |
Darren T |
 |
Elaine S. |
|
|
Julia M |
|
|
Sari R |
 |
Leah D |
|
|
Yael A |
 |
Patricia M |
|
|
Melissa T |
 |
Amanda E |
 |
Anne-Marie S |
|
|
Colleen L |
 |
Jocelyn N |
|
|
Perla Z |
 |
Paola Maruca |
Comments
 . I loved and enjoyed every single minute of this 'smart' class. As always, your cues are impeccable. Everything makes sense and you wish class never ends. Awesome...any chance for a class on the Wunda chair anytime soon?????? )))))


Yes thank you as always for your sweet compliments. I was just at Pilates Anytime in December so we will see what is possible for the next visit! BACI!


You need to be a subscriber to post a comment.
Please Log In or Create an Account to start your free trial.
