Description
About This Video
Transcript
Read Full Transcript
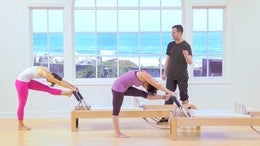
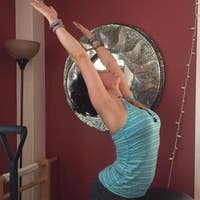
Hi everybody. My name is Benjamin hearts. I'm here with my student Benny. We'll take you through the fifth class in the reformer progression. I hope that at this point you're comfortable with the previous ones and just know that if anything in this class, which will move at a much quicker pace, there's anything that your body's not quite comfortable with. You will find the progressions in the building block leading up to it in the previous classes will flow through this one fairly quickly. Beginning with our footwork rugrats we reformer three to four springs.
You can go ahead and move along from the toes. We go pressing out, coming back at this point that your body is more familiar with these movements. See if he can tune more into your own awareness of what that movement teachers, your body, how the springs inform the body will take about 10 repetitions in each variation of the feed here beginning on the toes to build good connection into the farthest point of our body coming to the arches. Next, the feet curl around. You goes from here pressing out, coming in. So clearly the spring tension impacts our feed and gives us a sense of resistance and strength building through the lower body, but increasingly more and more as we go. We also want to tune in to the way that our spine length is out. On top of that, the final set will be on the heels.
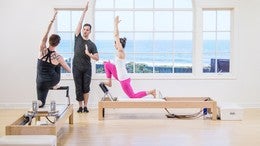
Pull your toes back towards your shins and then take your quickest set here. 10 and nine and in again, the full body is engaged with every single movement we may. So even the arms have a job here. That is to keep the chest open, to let the breath travel through the body to keep the neck long and the crown of the head reaching an opposition of the heels come all the way in, returned to the toes. That first position for tendon stretch presses right out, keeps his head reaching one way as the heels lower down and we lift back up from here. So this is where the full body is starting to pick up that spring tension so that in the next exercise we can now use our own strength and our own connection to our center. To lift the weight of our body up, right? His legs are exactly in the position where he's going to hold them in the hundred next to really feel how your hips connect down into the toes and how the spine lengthens out on top of that last one.
Lived all the way up and then bend your knees in a manhole, lower the foot bar down, and then he moved themselves away from the shoulder blocks. We're going to pick up the handles, lift the arms up, moving right into the hundred foot. Work the legs out of your body. Pick them up for SCO straps. Now lift your head. Neck and shoulders begin to pump. Inhaling and exhaling. This is where we become increasingly more aware of the breadth that is really what's new about this exercise to hold the shape we're in and then working with our breath. Each inhale expands the lungs.
Each exhale moves the springs out a little bit further. Finding more space in the spine. Exhale, we try to even out that space in our spine as we've worked on in previous classes so the Chin doesn't collapse unto the chest. We've looked for space in the upper back. Let's just take about two more here. Inhaling, try to move the carriage back a little bit more. Last set, ten eight seven six, five, four, three, two, one. Transitioning into overhead, the body comes down.
We'll take two springs off here, so we end up with two springs. Head will be flat for this exercise because we will go overhead. Super important. Lower you have piece down. Then we begin the same way as in the a hundred flowing ride through the arms. Come down the legs, lift up the hips, roll over the leg, stretch up through the ceiling and there's an opposition happening here.
As the body rolls down, his legs still keep reaching up, trying to sit down on the springs, lower the legs, lift the arms up just two more times. Arms down, hips up, Jackknife the legs up towards the ceiling. Then melt the spine towards the carriage. Keeping the tension in your arms. Just one more time. So we continue where the a hundred has left us off, but we introduce inversion to the value, right? A chance for the body to figure itself out and organize itself when it's inverted and upside down. Coordination, we're going to keep the head down. This time around makes the exercise a little more challenging, but also more soothing for the neck because you don't have to pick up the head.
Elbows, hug the midline, press your arms onto the mat, extend the legs out long and low. Is that a hundred position? Again, open, closed the legs. Knees go in as deeply as possible. Elbows bend at the end. You press out. Push my hands apart. Really create resistance with your legs. Draw me back together. Knees go in, elbow. Spin at the end. We'll take one more strong breath. Fill it up, open the legs, close the legs. Exhale the knees come in. They come in more. Yes, and then you can sit yourself up. We're going to add to our rowing series.
Last time we started working on that, just remember it's really about opening your shoulders, but the movement always comes from the spine. For this part of rowing, he's going to face the police. The legs are between the shoulder blocks and you hold your arms out straight in front of you. From here, lifting the spine up nice and tall. You can always come forward a little bit more so you have more space behind you. What begins the movement is the spine curling back. He curls his tailbone under switches the legs forward.
The second he gets tension on the straps, he pulls them towards his chest. Let's just do that as a first step, especially on [inaudible] forward. Lift your spine back up and repeat that. So it's very literal. The like a rowing machine that he pulls the spine back, draws his hands towards his chest and then lift back up. Good on the next one and make sure that the strap stay on the outside of the block so you pull in hands, come towards your shoulders. No, stay here and bring the arms up to the side around your head.
Forward like the spine, stretch on the mat, and then pick the arms up and circle them around over your feet to pull yourself in for a stretch. You get two more of those spine begins. The movement curling back. Arms reach wide to the side, opening the chest head rounds down and the arms come up and around. One more time. So it's very different from moving the arms around. It's really the spine that generates the movement here. The arms end up behind him because he moved to spine.
Forward the arms lift up and come over the toes so that he can pull himself in on his feet for a deeper stretch. Very nice, and then he lifts himself back up. We're going to go into the second variation, the palm space up still. We begin with straight arms. The spine rounds back lifts through the chest. He bicep curls in at the same time from here of any stretch the arms up and forward. Lift the spine child til you lose tension on the springs, round over the legs and finish the same way as before. The arms lift up and around. To take two more.
Lift yourself up, take the body back, hinge back farther, and then lift yourself up in forward. Looking up to where the fund wall meets the ceiling. Round over the legs. Take the arms down to the floor, up to the ceiling and around over your feet. Last set, so just like those arm circles we worked on last time, we were really looking to mobilize and free up the shoulders with a strong, strong back. Arms lift up. They'd come around. You pull yourself in for a stretch because now we're going to face the other direction.
We'll repeat what we did last time around our rowing facing the foot bar beginning from the chest. We're still in one spring here. The legs are together. The spine is lifted, the elbows hug back. The chest is open, especially up on a high diagonal. Letting the whole body follow a little bit. The arms go down and straight up, up towards the ceiling. The arms circle out to the side and down. Take a twice more stretch. Lower lift up, arms circle around, continue to live the ribs off the hips.
Last one from the back to the front down, two up, arms come around and then we take the hands down by the hips. Flex the feet, roll your head down towards the knees, press on our Paval. Your back. Lift yourself all the way up. Nice and then circle the arms out to the side and down. Two more times, strongly flexing through the feed the entire time. It's like you're standing on the heels. One more time. Roll down. Press our, keep the spring still. As you lift yourself up, circle the arms up and back behind you. Change the grip in your handles. Flex or sorry, point your feet.
Take your hands right next to your head and then lift straight up from there. Pause for a second. Let's be really specific about this one. How can you take your rib cage and lift it up in a way from the hips by pressing your legs together and then keep that sense of lift as you bend the elbows down. You got it. Take two. More like that. Stretching up. Try to keep the arms almost back a little bit.
Here's what they go straight up and down in space. Let's just do one more later on. We'll add a sequence where we move the arms up overhead one at a time, which will be twice as hard. At least take the arms up one final time, then circle in out to the side and down to release. All that. Next step is our swan dive. We want our shoulders to be nice and warm for that, which I think they now are, so we move right into that and grab your box. We're going to use the pad. Remember this is done on two springs.
I will change them for you. We're gonna use springs that are in the center of the gear bar here, so they don't need to have space to fall into. All right, your toes are inside the frame. Remember the boxes edge goes a little bit further down than your hip creases. You're not right at the crease because that gets really uncomfortable very fast. Your arms hang down by the sides going right away into the full motion.
The feed, press back, the arms lift of the chest. That's up. Now bend the knees, continue to lift up into a backbend, reverse the shade, but keep the lift through the abs and then release all the way back down. Two more times. The movement starts in your feet very much like footwork. We continue it into a form back bend the arms open, he reverses the steps through, come all the way back down at this really be one flowing motion lifted up the back. Ben Never ends and you reverse it solely coming all the way down nicely. Darn. He steps off to the side and we transition into our pole straps.
All right, so a lot of times in the traditional world we find that we go from a full bodied effort turning on the whole back of the body into more isolated efforts. So now that his back is warmed up, we go into our pulling straps here, focusing more on Chester Lyman. Three times. Of course we have to do them well, right? Begin by pressing the hips down. Go ahead and bring your arms down, back and up. Lift your hands up as high as your shoulders at the end, but keep the low back long and then slowly return. Nice. Even here, even though the legs are free in space, I want you to think of that previous exercise. Go again. Pull down and back.
It's like your feet are still standing inside something pushing through the toes to lift the chest. Nice and return. One more time on your own pole. On back. He burst the chest open. Very nice. Keeping that low back long. We transitioned into t poll. Think of it as the same exercise for us. A different challenge for your shoulders. Touch the sidewalls. Go on back. Try to keep the carriage in place as you return the arms. Excellent.
Take two more active legs. Pull, lift the chest, find your breath. Open the arms wide. Take your last one. Think that as long as you keep your arms here, try to keep your neck just as long. Excellent arms open, wide releases. That is. Take a moment here. Let your legs be heavy. Step off to the side. Yeah, when you're ready with that, no rest for you. Then take a rest here. Just take your hands down to the ground.
It's nice to let the lower back go into the opposite shape just for a moment and then we continue on. Add a spring, we'll go into a backstroke next. We skipped it out of our last class. Last class we did focus a lot on circling the arms around, right? So that comes back in this exercise as well. We're going to bring it all together now.
Legs and arms move at the same time and all of the swimming exercises. First we can transition into our shape. Make a ring with the arms. Curl yourself up nice and high so you want to be super compact. Here heals to the seed. Knees to the shoulders, nose towards the knees in one motion. Arms and legs go up. They open, they circle forward. You curl yourself up, the legs almost come down. Now resist falling back into the box as you come in. Next again up open.
Circle forward, lifting up, getting ready for teaser, which is next. One more time up open. Circle forward. Hold it right there. Keep reaching through the legs without clinching the toes. Slowly come all the way back in. Take the handles into hand. Set yourself up and take a spring off. So we're trying to keep the flow going.
We have the reverse option as well. I want to leave that out. We have many options for the teaser when to keep it super simple. At this point, arms out to the side. I want to see a super pristine lift into your balance right behind the sitz bones and then see if you can challenge yourself to find a new place. Arms parallel to the legs, hips curling under so the leg come closer to you. Arms lifting so high the body has to come down and then release everything back down. Do exactly like that. Twice more. Chin over chess. Pick up the straps.
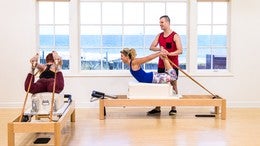
It's very much like your t pole where your arms begin and that whole position of the body is very much like your breaststroke as well. While that looks nice, come all the way back down the leaves your body here, right? So every time you arrive here, think of your breaststroke for a second. Your legs actually reaching your arms actively reaching while more time or rolling up, lifting up, lift out of your back first. Then lift the arms, then lift the legs, find your breath, and then slowly come all the way down. Release your head all the way back and take a moment there, fully inhale and exhale Wowza ready for breaststroke now, which is where you rise in that same position. I'm going to give him an assist which allows him to go even higher.
We stay on one spring. Organize the straps in front of your body the way we have before the hands go to the front corners of your box. You step over. Good. Especially when you have somebody assisting you here. You want to make sure that your knees are not right at the edge of the box, right? Your hands are underneath your shoulders. Again, your whole back body's already fired up because your hip bones are pressing down because your legs are reaching back. Double cake through the legs. One, two, especially the feedback and ums forward. Now I'm going to match you live by pressing down into your feet.
Use that and lift your sternum forward and up and then come back down. Kicking once, kicking twice, stretching back. So I'm really just serving as an extra piece of reformer here. I'm not trying to do anything to him. He's doing the lift all by himself. One to stretch. Lift yourself up, open the chest.
Why come all the way back in? Take your hands to the front of the box. While that's over already, you step off to the side. Very nice work. You come all the way in. Now we're going to flip the shape of the spine around again into a seeker, into our horseback. You organize the straps behind your body. Now you can swing one leg over to straddle the box.
When right away into that full arm circle here, writers, and we're remembering that full bodied movement. The legs reach forward and down. Start by flexing the feet and turn your legs at least parallel. If not even a little bit turned in. It's very easy to turn the legs out here and then lose the connection to the inner thighs. From here, elbows pull back.
You stretch your arms out in front of you, round your spine back and see if you can keep your legs reaching slightly towards me here as well. Let's stay with that for just a second. Find more space along the a c curve of your back and then flex your feet, lift your legs up, bend your elbows and come all the way back in. Let's just do that portion one more time, but your body can really settle into that. The arms stretch out in front of the toes, point forward and down, and we're looking for the back bottom rib to be the farthest point in the back and then slowly recover from there. Adding the arm circle from here, stretching out in front, lifting up. Think of unrounded your spine rather than arching at nights and going again.
Rounding into your c curve and round the spine. Pickup the legs. Open the arms up and even back behind you at the end. Try One more rounding and pressing out. Curl the tail under. You. Got Enough licks the fetal. Lift yourself up. Open the arms on why to the side and then step off to the side.
Very nice word. You can get rid of your box and your straps go right into a long stretch series. Next. All right, tee work. You lift your head pieces up, you put your sticky pad on top. We're also lifting the foot bar up and we're adding a spring. At this point we want two springs on our reformer.
Then we set ourselves up and our bike hands on the bar, feet go back, remembering that we will do pushups in the end. Right already. Think of loading up your hands, pressing down into their hands to lift that space between your shoulder blades, the crown of the head, reaching forward, the heels, reaching back in opposition. Stay this long and go out three times. Pressing. Ouch. Coming all the way in. Go again, pressing our polar chest through the arms to initiate the return. Very good and one more time progressing out. Come all the way in.
Lower the knees so that you feet against the blocks. Four way stretch, heels back, hips forward. Hands Down, shifts of, and go press on out. Lift back up. Think of that opposition through your heels, reaching back, especially as you come in. One more lifting up. We'll take that balance back. Then again, swinging the arms up and then looking for your fingertips. With your eyes. Then you take your arms back a little and then you look for your fingers again and then you'll take your arms back a little and you look for your fingers again or you play that game until you can go any further.
You come forward and you go into your outstretch. Nice work. He lifts his hip creases up towards the ceiling. Hips are the highest points, so it feels like you're folding yourself in half. You can even keep a straight of back. Here he goes, I lifted, we go into the up stretch, pressing stay, transitioned into your down stretch from your lift, your eyes forward and up. Think again of the ends of your spine moving at the same time. Press out and then curl everything back towards one another. Nice.
Do that again. Pressing out, lifted, chest forward and up. This is where the reformer almost gets a little too short for impressing out. Curl all the way back in. One more time on your own. So we fully undulate the spine in this movement here, always supported by the springs and by two strong arms and legs. Elephant is next and last in the sequence. Feet flat.
And if you back up into my hand, come forward just a little bit with your shoulders and then go ahead, press up, come back in, pressing out, come back in. I want you to think of your knee stretches already at this point, right? They're far in your future, but it's the same exact movement just with straight legs, right? So your arms the same way you would in your knee stretches later on. Try to dig your heels down so much the toes can lift one more time and then come in. Right leg lifts up.
We're going back into a one legged variation will be a little bit more specific about the setup here. It's very easy to open up out to the side. We want to turn it in so that the hips are side by side and then actively reaching back. Lifting the back, bottom up, and then go from here. Press out to the left, come in, press out in, come back in. Continue to push down through both your hands from this part of your back into my hand. Come all the way home and then change to the other side, right? Four down left leg lifts.
Easiest to transition with straight legs here so you don't have to find that act, um, activation to your leg. Make the left side of your waist just as long as the right good and then go press com. Press Com. If you're unwrinkled your lower back out and in two and one and to be drawn, you can step off to the side immediately turning around facing the other direction to do our long back stretch. Adding that down and out motion we added in last class starts with a little bit of chest expansion, right? We can now remind the body of exercises that are still to come because you already know them. Tilt the chest forward, push out through the tail and the heels. Lift yourself up.
Come all the way in two more times this way right will start to notice whether the front of your leg starts to kick in too much. If your toes start to push into the shoulder locks so you can pull them back instead, start to finish. I straight out for two down. Lift back up. One more time. Open chest, lift yourself all the way back up and then step off to the side. All right, into our stomach. Massage, keeping the body moving quickly. Now going and bending the spine again into a little bit of a deeper reflection.
He sits at the front edge of his carriage. His feet are on the foot bar. Take your hands around the front edge here. Pull yourself into a shape that feels nice and lifted through the lower back. Why? Through the upper back. Release the head all the way down and then press out from here. Lower lift, the heels come all the way home.
We're going to springs for this one is often taught on more springs. Then too. I like having less compression of the springs and instead of deeper flection of the hips that comes from your own body moving rather than the springs pulling you there. But you can play around with that too. You take one more here. Lower lift. Come instead. Take your right leg under the bar. We worked on that one leg stretch here. Do it with your left leg. Now press lower lift.
Come all the way home you to keep that leg right in front of the body as you come in for one more lower lift, come in, switch for the other side. Good. Reinvestigate the curve of your spine. See if you can find a little bit more lift. It's very easy to start sinking in a little bit as we go. That was a great adjustment. One more stretch. Lower lift.
Come all the way in. Take both heat back on. Take both arms up in front of you. Let's go right away into that one here. Find that lift in your back. That same adjustment you just made. Beautiful. Then straighten out your legs. The second they're straight. Lift the spine of even taller. Keep reaching up and forward through the arms. Soften uniques. Press out.
Lift yourself up. Now almost let the springs do the job of closing them. Pull you hope. Next stretch out and lift. Lift, lift, come all the way in. Adding the twist rate and goes back. More importantly, the left arm reaches forward right to that spot between the feet. You come back and left side back, even weight on both your feet and you keep the heels together in one spot. I'm getting picky now. All right, I'm back. Left. I'm forward.
Lift the spine up. You should get picky too at this point in your practice, right? You can start to think about all those things you've been working on all along. One more second. All right, I'm back. Think of your foot. Work on your toes. The spine. Come back in last one. Promise stretch, come all the way and we'll take our monkey stretchy as well cause he deserves it. Now. After all that hard for her can lower the heels. Also preparing the body forwards. Next or tendon stretch.
Lift the heels back up. Then your niece come all the way and then we'll set up for that. Stay on two springs. Turn the path length wise. At this point we can transition into the exercise already differently. We now understand how the movement works.
You can set yourself up with your hands right here, your feet on the pattern, your hips already lifted. That's it. And then straighten your legs up that you had dropped towards the knees. Readjust your feet. If you feel like you're not in a good spot, you want to feel secure, but you want your heels to be able to drop and then puff. That'll be your back ribs in to my hand. Yes, to close the carriage. Nice. We go into that first step from last time you press out through the heels, pushing yourself into an arch at the end.
So really bring the arms back and your chest forward and up the keep yourself away from the foot by reading verse the shape. Come all the way back in. Nice. Let a little quicker. Two more times. Pressing it open through the chest. Reverse the movement. Chin over the chest. Come in one more time and then we take three more. Adding one more step, a little dip of the arms. Once you out in your arch, bend the elbows, straighten them out. Curry yourself all the way back in. Nice.
Two more times. Pressing out. Lift through the eyes. Bend the elbow, stretch up, come all the way back in. One more time. He's definitely maxing out the space on this before around this one. Come all the way back in and hold. Bring your hips over the heel. See if you can close the garage all the way. You got this, you got this, you got this, and then sit on down. Ah, nice work. Not An easy one to bring carriage all the way on that one.
We now get rid of the pad. We translate that movement into short spine. It's like your reward for all of that. We'll add a little something about shorts mind though it doesn't make the move and more difficult. If anything, it makes it a little weird, especially in the setup. Uh, but you will find that it creates a nice little torque on your knee and ankles that might help you fill your differently. And the exercise. Threading the leather strap right through the center of the handle. Set yourself up the same way you always do, and then we'll make a little change to how the feet relate to the exercise.
This is a great position to work from. The exercise changes someone because of it. We take the like straight up to the ceiling, right? Almost not moving the carriage. Then we lift up and over from here. The feed will come a little bit out of that prayer shape, but the second the knees bend back in. We try to find it again, drawing heels and c together, and then keeping the shape as we roll the body down in one unit.
And then again going straight up, lifting up and over. So we limit the movement on the carriage and driving it more from the spine so that we actually get into that sensation of a massage up and over again. Knees Bend in, rolling down, and then take your leg straight up. Even if that makes the carriage move a little bit right there. Yes. And then lift up and over. Bend your knees in, roll yourself down.
We'll just take one more into losing the straps overhead and then moving on into our next exercise. Roll yourself all the way down. Step off to the side.
We want to make sure our body cannot slide any one way. We want some extra padding forehead as well. So we're just gonna use a towel. Sometimes you'll have access to a little a leather pillow. For this, uh, we on two springs, the foot bar is in the high position, and again, just a quick reminder, we're not going to put a lot more weight on your head than this, right? Just patting yourself on the head. He's going to take his eyes to the foot bar. Hands next to the shoulder blocks. Go ahead and set yourself up.
So your arms do a lot of work here. Now we're going to add movement to what we set up last time. He's going to push through his toes, rounding his hips forward and down as far as possible, and then lifting back up. Sending a sits bows towards the ceiling. We'll repeat, go again, pressing out all of this tractions to the back of his neck, but never to the point where the spring tension runs into his neck. If you've done the neck, pull on the Mather should feel very similar to that just in a much more elaborate and sophisticated set up the last one. Press yourself out, lift the hips up, bring yourself all the way back in and then go ahead and step off to the side.
Slowly roll yourself all the way up and that is our headstand after our headstone and we continue with our chest expansion or thigh stretch setting up for that. You take the foot bar down, actually get rid of this as well. Go ahead and take your straps. We're still in two springs for this next one. Familiar movement from here on out until we add our site arms in. Set yourself up with your feet strongly flex. Remember we're starting to become more and more aware of what's happening behind us with our feet and to try and set them up nice and parallel.
Go right into pulley. Arms back press. You had spoiled open the Chester and you had one way. The other straight forward come back in. The chest opens first. Your arms almost end up behind you because of that, because you're expanding your chest that much. One more time each way. Open. Look right, left straight and back in one more time.
Really use your feet as a strong, secure hook so that you can go a little farther with each one. We add a spring, we go into our thigh stretch next. How do you feel about adding a back then to our thigh stretch here? Let's do it right so it starts the same way as before. From the ribs down, we want to be nice and connected, active through the center. He hangs off of the straps. Take yourself back from here and then you actively pull yourself into your Backman by lengthening your chest away from your hips, opening your collarbones wide and then reversing the shape, bringing in all the chest first, letting the scraps pull you up.
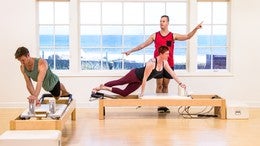
Let's do that again. Take your body back, curl your tail down and forward. Open your chest actively without defaulting into your lower back. Chin over, chest coming back in. Lift yourself up. Now do one motion. Take your body back, open through the chest, release the head, Chin over, chest return, lift yourself back up. Very nice work, so that's how you add your backbend into this exercise as well. We're now getting rid of one of our straps. Let's get rid of the left one first. We're going to face this direction here. We dropped down to one springs who add some one arm work here, side arms.
There's many different names for this one and there's many different setup positions as well. One that I like to start with typically is with the feet flexed so the toes are on the carriage, the knees a little wider than the feet so that we have a nice wide base of support. The handle is in your right hand. First you left hand can be on your hip to make sure that your hip alignment is all right. What we're looking for in this exercise, complete verticality throughout the body. It's not about your arms as much as you would think. Pull your arm out on the high diagonal stay vertical as you slowly return all the way back in, unfolding through the wrist and elbow. Then shoulder again, opening wide through the right side of the chest and slowly falling back in.
We'll do one more here, taking it out to the side, slowly returned. Change your grip, take a left and into the handle right into the hip and arch your ribs and your lower back. And then take your left arm straight up to the ceiling and back down. You can play around with how close you keep your hand to your face in the initial portion of that movement. But again, more important than how close you can keep your hand to you as how much you can keep your spine in one long upright position. Take one more stretch on up.
Take it all the way down and we'll play around with more variations. Next, take the handle into your other hand again or move the knees together, far away from the shoulder blocks. This time the feed right behind the knees. This exercise is much less about the right arm, even though it has to work quite significantly, but it's much more about your left hand pressing down your hips, pushing forward and keeping that nice, strong and active throughout. Unfold the arm. Tried to stretch it out on a high diagonal and to come back in. Lift the elbow up and return with control. Try that two more times. Pull your arm out on a high diagonal. Keep the bend in your spine.
Push your hips a little to the ride for me and try one more. Last one, take it up on a high diagonal lift. The elbow even higher to come all the way back in is more variations in the side. I'm serious, but we keep it at that for today. Who knows? Maybe we'll have more of these in the future. Let's turn the valley around and face out. Do not get distracted by the view if you can. That's the hard part.
So the feet are together. You can see that on this side very nicely. The knees are open a little wider than the hips were. Wide Base of support, but still with that close chain of the feet being together. And we'll start again with the left hand and the handle out on high diagonal and coming back in, keeping the verticality of the back strong throughout. So the crown of the head reaches up, the tail lengthens down. This prepares us for what's next. This is your last one here.
Take the right hand into the handle. We go straight up the side of the head and then down. It's very tempting to lift the rights out of the rib cage up away from the ways you try to keep yourself contained, but lifted all throughout after three. We'll go into our final expression here. The right knee moves against the left hips push forward.
There's fully extension happening here. The chest is open, the head turns down towards your bottom hand was which is pushing into the shoulder block. And then three times unfold your arm on a high diagonal. Lift the elbow up and come back pressing out. So think of this almost like a very extreme version of what we're working on in our arm circles, which are next. And which will feel like a walk in the park. After doing this, slowly come all the way back in. Nice work. Let that go. But go ahead and turn face this way with both handles in your hands.
Then we go into our arm circles, so again, we're now super warm for them, so we'll go right into them. No steps leading into them. Four circles each way. Nice and high, nice and open. Linking your breath into it right away. Take an inhale as you lift. Exhale as you come down for two more. All the while, still thinking of that verticality in the back that we just found working with one arm at a time. Now we're going to reverse. Take the arms out to the side up. Lean your body almost into the springs a little bit for three more.
The same lessons apply here that apply to your one arm work. Your hips are a big part of this. Press them forward. Extend actually through them. Last one. Um, come down. They go back, we get rid of our straps here. Go right into our knees. Stretches coming towards the end. Now almost there. Remember we've already done a version of knee stretches, right?
Just with straight legs and called it elephant. Think of it the same way here. I'm straight hips back towards the heels, a super round spine. Off you go. Push and pull, push and pull, push and pull. I've been looking forward. His point is that the shoulders don't really move anywhere closer to the hands or farther away from the hands. They kind of just stay in the same relationship. Let's do one more app and then change the shape of your spine, pushing back and forth, keeping the sides of the waist long and this one is really what's important so we don't default into the arch of our low back, pushing back and [inaudible].
Same rules. Apply. Shoulders and hands stay in the same distance from one another. One more time. Hold Round your spine all the way in, nose to navel, navel to nose. Try to pick up your knees from here and then you can go right into it. Push out it, push out, pull in again. Shoulders.
Stay at same distance to the foot bar. Start to finish. Try to keep the knees closer to the carriage, almost there. Pop up that space behind your shoulder blades for two and for one oh and you're done. Now there's some steam coming off of him. Now go ahead and add a spring here. Going back to the same setting has split work, running feet parallel. You stand on all 10 toe amounts. Go right into it, straighten out the legs and then think about nothing much other than your breath and your feet peddling out.
Tell us a little bit like our knee stretches here and that the spine is completely curled while the legs extend out of the hips. Just one more time and come all the way and roll yourself down. Step off to the side. I'm gonna finish it up with one split series. Here. We will take our Russian splits. So for this variation that we're going to take today, we will need um, the sticky pad. I'm gonna put it right on top of the headrest.
Change the two springs.
Find the opposition between this leg really fully extending out of the hip. And then three times straighten the front leg using your arms, bend back and do that twice warm. Think of this as you warm up for your splits or check in with how well that front leg extends after three upright your spine and we'll do it there three times. Pressing out, coming back in. Good. Use Your hands if you choose to hold onto your ribs, me really use that to square the hips off. Typically you want to bring your right hip a little bit further forward.
Draw your left sits bone back up to three. Looks good. Straighten your front leg, take your hands onto the shoulder block and then walk your foot up a little bit higher on to your headrest. Straighten both legs now and try to rest your chores as close to your front leg as you possibly can. You can even turn your right ear on this side towards your knee. Looking over your left arm here, but all the while, ky pulling your left hip up from here, pushing both legs away from each other as far as we can.
Keep that back leg strong and then lifting the left hip crease up again through. Bring the carriage all the way to a close. Let's do that two more times. Pressing out both legs, split away from each other. Left hip lifts, he comes back in one more time. Pressing out nice. Keep pushing through the arms as well.
And then lift yourself all the way back up and then find your way to the other side. Good. Yeah. Stepping onto the carriage and then right foot, halfway forward, left foot jumps back. Perfect. Find your lunch position to start. And again, this side might be completely different than the others. Just be mindful of that. Pressing out three times, trying to make your back a little bit longer here you pull the chest forward and now nice after three up right the spine, hands for hip control, left hip forward, right hip, back on this side, back leg straight. The front leg straightens three and two and the one transitioning into the final portion here, both legs straight. Now again, the front leg comes up a little bit higher.
It gives you a little bit more flection in your ankle as well as just generally more space split into the head. Can turn to the right here, square the hips. That's it. And then press on out. Both legs are super active here. You can use your arms at the end a little bit to push the carriage out farther. If you have space on your reformer, that is you go again, pressing at length in through the right side here and then come all the way back in. One more time. Pressing key, reaching through both legs. Come all the way back in and then slowly make your way up to the side. Nice work. We've cleared our Russian squad last time around.
We will do it on the reform of this time if and only if that clearing test we did last time went well, which you did. Step off to the side for just a second though. We'll make some changes here. The foot part comes down. You don't want it in your way. We'll get rid of this too, and I'll set up your handles and straps right behind your shoulder blocks. Now, the way that we set our body up for this position, for this exercise is holding on to the shoulder blocks and then setting the fee down on the opposite end of the carriage, right? Remember last time we were standing outside the reformer, making sure that our feet could be flat as we squat all the way down, so we'll take that same position here and this might be it, right?
This might be the point where you decide I'm not going to stand up from here, right? If you can, we'll go into the next step where we pick up one handle at a time. It's now the strap that becomes Todd as he lifts his arms up one at a time. It will hold them in place. If this doesn't give you enough, you can always hold on to the leather strap as well, so maybe try that because now the straps really become part of your support system. They should hold you in place. His heels are going to press down. How are you doing here? All right, I'm going to take my foot off the carriage.
Go ahead and stand yourself all the way up at the very top. The carriage will move a little bit. See if you can upgrade your spine completely. Keep pressing the heels down and then from here simultaneously bend your knees, squat your hips down, lift the arms up simultaneously the same way we lifted the foot bar up in their clearing test last time, and then stand back up. Lifting to the top, extend your hips fully at the top and then come back down. Requires a lot of concentration to go through this well, right.
Come to a fully extended hip at the top. Now think of your knees going straight forward as you sit yourself down. We'll take one more after this one. Nice. Press down through the heels. Lift yourself all the way to the top. Feel like your chest is as open as in chest expansion, and then we'll come all the way down.
You can allow your chest to come forward a little bit. One Hand at a time to take them to the shoulder blocks. Bring the carriage to a close. Forget about the straps. You can step off to the side and that is your Russian squad. We will finish with our balance control pushups.
We did push ups on the floor last time around. Remember that that's always an option. If you don't feel comfortable taking it on top of the reformer. We'll make a little adjustment to the spring bar here and take the springs off of the gearbox in a little bit and then add a stopper that really just serves as in having the body be a little less compressed in the position that we're taking ourselves into. So the football can lift up from here. The set up is very much like long stretch. We are on our feet and our hands, but the feet will be on the foot bar this time, hands on the shoulder blocks.
So go ahead and set yourself up. And then we worked through, through uh, through two different movements here. The first one, beginning with the chest, pulling through the arms and then moving the arms forward and back, making sure that the arms never passed the shoulders on the way in because otherwise we would face plan right down. Keep the hands under your shoulders on this last one, and then add a little pushup coming down and pressing back up. Looking for length between head and heels. Lifting back up. One more time for NRG the back. Last one. Press up, lift the hips up to bring carriage to a close. You can round your back as you step off to the side here. Ah, and that is our pushup on the reformer. Great job, Annie, and great job. You at home. I hope you got a lot out of the sequence again.
If anything along the way didn't sit right in your bodies, go back, revisit the exercises and how we built up to them. Um, and I'll see you next time. Thank you.
Comments


You need to be a subscriber to post a comment.
Please Log In or Create an Account to start your free trial.
