Description
About This Video
Transcript
Read Full Transcript
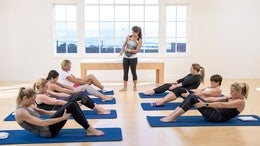
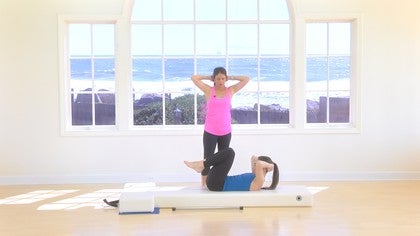
Okay. So I get a lot of questions, especially from my beginner series of what do I do when I have really tight hamstrings. And it's hard to get into all the exercises. So I'm just going to go over basically, uh, not quite the first of the beginner series. I'm going to give you a few more exercises so that this can kind of tie you over for the first two or three of the mat class progression series of the beginner of what do you do if you have tight hamstrings. So we're going to lie down and you're going to have your knees bent and the feet flat. And if you have tight hamstrings, well let's start with stretching them. So you're gonna pull your belly in and bring in your right knee and hug it and exhale and just try not to be holding anything tense or tight.
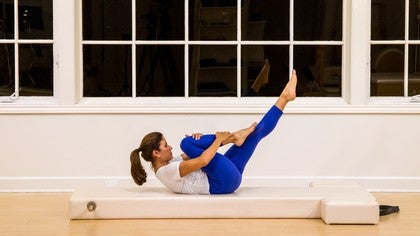
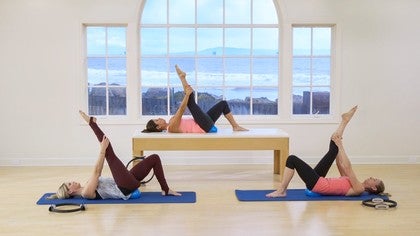
And then you're gonna put it down and then exhale and bring in your left knee and then put that down. And now we're gonna go into our stretch. So we're going to exhale and bring in our right knee and then you're going to straighten the leg. Okay, so I can put my, I am here, I am putting my hands behind my cap. But if you need to, you probably gonna have to put your hands behind your thigh, which is great. Try to have your shoulders on the mat. Your legs going to be a little lower than what I just had. Make sure this knee is bent so it allows us leg and give yourself a good stretch pulling that leg towards you and you're gonna want to also focus.
Very importantly, I want you to roll this knee in and that foot in and feel how this whole hip comes up and the line between your hip and shoulder get short. We want to keep your box perfectly even in square. So we're going to turn out that hip and knee so that the knee almost points to your right shoulder. And now that line is straight across. While you're stretching, it's going to give you a different stretch and you're going to point your toes as much as you can and flex your foot. So you really want to try to get a straight line from the Shin to the toe and then pull back every toe like you're a waiter and you're holding a tray of champagne glasses and you don't want to drop any and you're gonna point away.
So you don't want to pull back just your big toe and your foot's tilted like this. You want every toe back am point and one more flex. Your whole spine should be flat also. And then do three big circles. Can you make a real nice letter? Oh with that leg, but that foot and after three we're going to reverse. So we're just stretching out the back of the leg.
And then after three we're going to hug it in and put the foot down and we're going to inhale. Exhale, bring in the left knee, straightening it up to the ceiling with your hands behind your thigh. Make sure you don't hold behind your knee, the knees, a weakest joint in the body, so you don't want to pull on it again. You're going to roll that knee and foot into to feel what does it feel like to have that hip lift and make this line short. You're going to turn it out so you're aware for the rest of your workout how it is to keep the hips straight and then stretch by pulling the leg as close to you as you can without lifting up that hip. Okay? And you're gonna point the toes and you're going to flex.
Now I'm not flexible, but I'm not stiff either, so I could hold up behind my calf and bring my leg up here while doing these stretches. If I was a ballerina, I get out of my leg line down. So you want to make sure your leg is where you are. Getting a really good stretch, very challenged. After three of these in the waiter, you're going to do three circles one way. Really waking up all the tendons and ankle and reverse it for three.
I'm gonna pull my lower belly in, I'm gonna roll up using my powerhouse. And then I'm going to let my knees go over my hips so that my legs make a right angle or a table. And you're going to do your hundred from here and exhale. So if you have tight hamstrings, this is where you want to keep your hundreds so you really feel your belly. But say you're a little stronger than that with your stomach. Then you can use the back of the legs to straighten the legs forward. Just shy of the ceiling.
Really important not to go directly to the ceiling cause that would tighten your hamstrings three more. So I'm not straight up, I'm a little lower if I have tight hamstrings or you could do a few like that. And then return here, whichever one after a hundred last XL
We're going to roll back our lower back so that we can get our waistband down on the mat. Take a breath and exhale. Use your lower belly to round forward. So I'm going to try to keep my upper body from leading in this exercise. Lower belly rolled down the waistband. Take a breath and exhale forward. If you can do that easily, we're going to advance to rolling down to the bottom of our shoulder blades or the back of your restaurant. So squeezing through here, pulling in your lower belly, rolling down, and then coming forward.
Keep your waistband on the mat as long as you can. One more inhale. Exhale, pulling back, getting the lower back to round and stretch. Take a breath right here and exhale forward. Now I want you to go ahead and straighten the legs and stretch forward cause why we have tight hamstrings. So this is a big stretch. Now to roll back, I want you to roll back your upper body as you slowly bring the knees up and roll all the way down to your head. But keep in mind that the last thing that goes down, so start with your lower back, one bone at a time.
Articulating middle back, shoulders, head. Inhale, head up. It's the first thing. Now waistband is the last thing. Once your shoulders are over, your hip bones, stretch your legs and stretch forward. Try not to stick your bottom out behind you on this stretch cause we're also stretching the lower back and you're not stretching it. If you do that two more. So squeeze now. If it was really hard for you to just go to your waistband, stop there and just stay there. I'm just showing you where you can take this exercise, but you should go where you can keep control cause that is what plys is all about. So you're going to roll back lower back, middle up, or rolling down the hat in with the air.
Exhaling. Once the shoulders are over, the hips, you stretch forward keeping your scoop. One more. Draw your belly in, rolling down, rolling out the head. Inhale, lift the head powerhouse. Curls you up, keeping your waistband down and back. Straighten the legs for that stretch and bend the knees. And you're going to transition to single leg circles. So you're going to pull in and rollback. And this time you get to stay here and we're going to hug the right knee into your chest and straighten that leg up.
Putting your hands appropriately behind your thigh, behind your calf, but not behind your knee. The legs a little turned out. Now tempo and turnout are super important here. So we got the turnout. You're going to press your arms down by your side and you're going to cross the body circle around one and two and three and four and five rivers one and two and three and four and five, and we're going to hug that knee before I go to the other leg. Some things, maybe you can't do it with your legs straight because of your tight hamstring, so you can keep the leg a little bent or you can also keep the range of motion smaller, so either one is fine. However, the more you kind of reach to the ceiling, then you're getting a little bit more of what Palladio's is all about. So you're going to hug that knee and put that foot down and we're going to scoop in. If you don't do the circles quickly, then your quad just tightens up and does the exercise for you and that is not what this exercise is about. Straighten and stretch, turning it out and we're going to place your hands down. Now you can do it like this or a little Ben. I'm going to do it bent this time.
And we're going to circle one. None of your box, your frame moves, just that thigh circling in your hip joint, reverse for five, one, two, three, four and five. Now you might not feel all the right muscles, but that's okay. You don't need to feel everything perfectly. The more your body gets used to the movement, the more you'll feel. Just keep sending those messages.
So now we're gonna roll up for are preparing for rolling like a ball. So I'm gonna straighten my legs to help me sit up. Okay. So my head's going to come up as I straighten my legs and I'm going to just stay here for now. Um, sometimes we lift our bottom forward, but in this exercise we're just going to stay here and you're going to bring the knees here and just really scoop in and balance with the right leg up and put it down. So what I'm looking for is that your, whereas the foot comes up, you don't pop out your ribs and your lower back, but your belly is super scooped. And now we're going to do the left and down, and now we're going to get a little exciting and it's going to be the right and we're going to add the left. So no more depending on those strong legs and down. That's part of the reason why our hamstrings are tight.
And we're going to bring up the left and add the right this time holding in your belly. And, and now we'll add a little rocking. So you want to pretend like you're rocking chair and here's your rocker. So we're going to balance with the right leg up and then the left, and we're going to massage our back. So we're just going to rock back and up and rock. End Up. And let's do three more. Inhaling, exhaling in with the air. Exhale one more and rest your feet.
And we're going to get ready for our series of five. So you may be, you're just at the first two and that's great. Or maybe you know how to do all five. Again, I'm just going to show you them all so that you can progress and kind of get to know what to do with a tight hamstrings. So we're going to lie down your lower back, your middle back, until you're all the way flat. And we're gonna hug the right knee. Now, whenever you do the series of five, your legs are going to have to be up to the ceiling. And so I can't stress enough, I'm going to put both legs up to really give you the visual.
If both legs are straight up and you're tight hamstrings, they're gonna really be gripping. And you're going to have this big hole underneath your back. And there's no way you're gonna be able to pull your powerhouse in. So whenever you straighten your legs up to the ceiling, you're going to not want to go straight up. They're gonna. If they were both out, you're going to want to have them a little lower.
Okay? A little lower allows you to get flat higher, makes you tighten up. So when you go out and you're not going to go out and then down, you want to um, go just straight to that position. Okay. Um, so we will try to show you how to, I'll show you how to do that. The first one though is single leg stretch and your leg again does not go straight up. So I'm gonna use my belly to bring up my right hand is going to go on my ankle. My left hand is going to go on my knee and I'm going to not go straight up with this leg. I'm going to go a little forward and switch and switch and switch.
I really don't care unless you have a hip or knee injury. What your hands are doing, they can grab your leg. However, I just care that the leg is extending forward and not straight up. And you're using your powerhouse of course. And one more set. And then since we're going to be, we're beginners, we're going to lie down now we'll do the double version, the double leg stretch. Your legs are gonna straighten out and then bend in.
They're not going to go straight up. They're going straight, straighten forward and out and then bend it and your arms are reach back at the same time and then circle back to get your ankles. Okay? Using your belly. Let's lift up your pet and shoulders and legs go forward while your arms reach back. Now notice my angle. I'm not back here with my legs there. They need to use the same angle and then pull in, okay. And the same thing. My legs aren't down here in my arms up. Okay? It's the same angle. And then pull in. Let's do five more and for and reach and squeeze in the back of the thighs and seat two more belly scooping in, one more and will rest. Since we're beginners here. Okay, so now I'm going to have you put your feet down and I'm going to hug the right knee into your chest and I want you to straighten it and stretch it.
And I want you to put your hands down and reach your leg down while keeping your belly in and see if you can use your belly to scoop that leg up and do it two more times. Because I want you to feel how free this leg should feel instead of gripping. Bend the knee, rest the foot down. We're gonna do the same thing on this leg. Hug It in, stretch it, and we're gonna reach it down the middle of our body. And we're going to try to use our powerhouse.
One more. Good. And now let's keep this leg up. Maybe it's like this and that's okay. And we're going to use your belly to lift up your head and shoulders and hold behind the Fi. Reach your leg, the other leg up as well. Okay, so both legs are up and let's switch our hands to behind the right cat. I think you can do that. And we're gonna lower the left leg and pull it up and switched to the left calf.
Lower the right and pull it up using your stomach and switch. Now this is called single straight leg. And what's super important is that you don't change it to single leg stretch, which looks like this. So the leg that's app cannot be bent. Okay? It has to be as straight as you can get it. And they stay that way as they switch. Again, not like this, but like this.
And we use our belly and our belly and our belly to switch those legs. Yeah. Last set. And now bend the knees and rest your head. Uh, now we will do the double version, double straight leg. So sometimes it might be easier if you put your hands underneath your tailbone. So I'm gonna rest my feet down and I'm going to make a little diamond with my hands and I'm going to allow myself to put them underneath my bottom and have my uh, fingers right underneath my tailbone, said kind of rocks my pelvis into a tilt position and draw my knees into my chest. Use my belly to lift up my head and I'm going to extend my legs, not quite straight and I'm going to lower the thighs, pull them back in, lower the thighs, pull them back in lower. Pull back in three, pull back in to one more, and then hug the knees in.
So that's an modification you could use if you had really tight hamstrings. Now we're going to do the last one of the series of five, which is Chris Cross. So hands go behind your head, one over the other, and you're going to use your belly to lift up as high as he can. Well here you're gonna use your belly to bring in the right knee and reach your left leg forward. And then try to get your right left shoulder opposite shoulder to the knee, and then switch opposite shoulder to the knee and switch.
So the should not be a problem with tight hamstrings. It's just a problem with or tummy. And switch. One more time and last one, and hugging those knees. All right, now we're going to sit up and do spine stretch forward. So we're gonna use our legs to help us sit up in spine. Stretch forward.
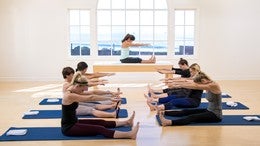
You're going to open your legs a little wider than your shoulders and your head flex back those toes. All right. So obviously I can sit up nice and tall with straight legs. That's not always the case. So I'm going to lift my bottom forward a little bit to allow my legs to band because otherwise I might be here sitting up and we don't want to be there. You want to get more flexible and stronger.
So we're going to soften the knees and now hold the arms up, take a big breath, tall spine and exhale. Now since we have tight hamstrings, I might just have you drop your hands here and then roll up cause I'm more interested that you and you don't have to flex your feet back either. You can keep your feet like this and if you're on a high mat and you have really tight hamstrings, I'm gonna slide back to show you. You can even have your feet hanging off and that's fine too. And you're just gonna stretch forward.
Notice I'm not doing this forward cause again, I want to stretch my lower back. So I'm gonna bring my head to my chest and then roll one bone at a time. Crawling my fingers forward. If I had the edge of the mat, I'd pull on it to stretch and then rule tall. I'm going to go back to those blocks in case you don't have a high mat or you have a yoga mat and you're just three inches wider than your shoulders. And I'm just going to take a big breath and exhale.
Inhale, rolling up to more. Inhaling up. Cause when you did the series of five last one an exhale, then you might have started to use your back. So it's a great stretch. We're rolling. Okay. Now we're going to bring our legs together and you're going to bend your knees towards you and we're going to put our hands underneath are nice.
If you were doing open like rocker, your hands would be on top of your ankles and that is very hard when you have tight hamstrings. So your hands are going to be underneath your knees scooping in and you're going to push slightly your left foot into the mat as your right leg extends probably to here and yeah, and pushing lightly with your right foot as your left leg extents. And yeah, do it again. Scooping in, right and down and scooping in. Left and down. Let's try both. So we're going to really use our belly. Kind of push your thighs into your hands. Maybe even your here.
That's fine. As long as you're not here, Kay. Really support with your belly and bring it down again, scooping in and down. This time we're going to challenge even more. We're going to scoop in really pulling geo lower back. Bring those knees and legs together. Open up and down.
One more. Scoop it and bring those legs together. Open and deal. Great job. Let's put your feet down and roll down your back. We're going to do corkscrew. We're going to revisit that diamond. So we're gonna put our hands here and extend the legs.
Oh, we're going to give them a little back, right? And maybe even a little lower. And we're gonna keep the range of motion kind of small as we go right down a little bit and center. We're left around to the right and center. So you're drawing a circle on the ceiling and then reversing it.
And the whole time you're just trying to keep your belly pool going into the mat. Just trying to get with that. Again, just getting used to the motion. That's enough of those. And we're going to roll up to sit up for saw. We've got two more exercises here, so you're gonna put the feet. Same thing if you have a high mat, slide back and let your legs hang. If you don't have a high mat, put your feet just a little wider than your shoulders. Don't have your legs straight.
Just soften and just enjoy this stretch. You're just going to twist to the right and exhale forward. Inhaling up when you have tight hamstrings, you're going to use your belly and exhale. But think more about stretching your hamstrings, pulling in. Then about every other little detail does. The rest will come.
Pulling in, twist to your left and exhale. Exhale, exhale. Inhaling up and twist. One more set. Exhale, reaching your pinky for your baby toe. Last one, pulling in, twist and Xcel. Pinky to the baby toe and then pulling into sit up tall. Alright, our last exercise is seal. So you're going to have your feet together here and you're going to lift your bottom forward a little bit and you're going to put your palms up to the ceiling and then slide them underneath your ankles.
And we're going to balance like we did for open like rocker and we're going to hold it here. So this is going to be an easier rolling exercise than rolling like a ball was because we're not, eventually you're going to be tight as a ball for rolling like a ball, right? So here I want you to get used to almost touching your feet to the mat behind you and then holding him up just here. So you're going to hold, maybe you can clap three times, one, two, the re that was without moving any other part of your body. And we're going to use your powerhouse to roll back and to roll up. And you're going to hold it here and you're going to one, two, three, not the leg so much as the powerhouse. The legs just follow you.
They follow where you're going and then you come up, clap two, three. What you're working on here is making sure your belly is holding you, not your lower back and chest. If you're doing this and sticking your tailbone out behind you, you're just strengthening your back and we getting your power as house. You're extending your stomach. So hold that belly in, clap two, three, rolling back and exhale forward holding the belly to balance two, three, four more in with dear exhale, holding the belly to balance. So a lot of exercises are hard to really get deep into your belly. Keep it behind the line of your hips if you can, to more in with the air.
Exhaling. One, two, three, and last one, massage your back. Hold one, two, three, rest your feet down. And I hope those little modifications and tips really helped you to still do your mat class, your progression series of the beginners with tight hamstrings. Still getting something out of it. Thank you.
Pilates with Monica Wilson: Beginner Mat Workouts
Comments
I would love a .... Level 2 to Level 2 1/2 .... Mat class ... at a deliberate pace.... that follows the Classical Pilates exercises from start to finish.
I need a "deliberate pace" because I'm getting older. I have no problem doing the exercises, I just can't do them as quickly as I used to.
I would love to have a nice 40 minute classical routine that could be my basic every day "go to" class.
Perhaps you have already done one. If so, please let me know which class it is. Thank you !!!
You need to be a subscriber to post a comment.
Please Log In or Create an Account to start your free trial.
