Description
About This Video
Transcript
Read Full Transcript
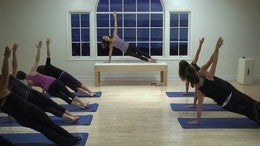
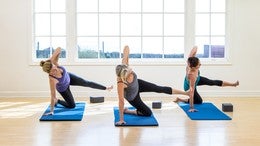
All right this reformer class is for focusing on movement through the ribcage and the spiraling of the arms. In the traditional Pilates work. But we're going to start not traditional with some spinal movement, calling cats with the box. So you're going to stand on the end of your reformer, we have a light blue spring on so you don't want it to be too heavy, but you want enough resistance from the box. So you just stand parallel with your weight equal underneath your pelvis.
Okay so we're going to place our hands on the top of the femurs, a little bit lower Merideth, right on the legs, so you want to push the femurs back so your sit bones are widening and as you lean forward your hands are going to reach for the box. Now you can soften your knees a little bit if you'd like and you're going to take a breath in. As you exhale just reach the box away and at the same time press your femurs back. So you want the femurs to go back as you're lengthening through the back, and let you shoulders come up, really push the box away. So, we're trying to elongate this whole area here.
Keep pushing the box away, I want to do a little curl of the pelvis, now you're doing it like a cat, and just respond through the head as it drops down, rolling up. And then just bring your spine to a neutral position, keep your hands on the box. So, again, take a breath in, exhale, start leaning back with the femurs, press the box forward, get a nice length. Really reach, both arms, feel the length of the waist. And then, you're going to curl the spine again, and then let your head relax down, chin towards your throat, and come up, We're gonna change the hands, so they're gonna turn out now.
So, turn your hands out on the box. And we're gonna repeat again. Take a breath in, exhale. Femurs go back. And as you reach long, you're getting that rotation.
Keep pressing the thighs back, opening the sit bones up. Good. And keep reaching the box away as you're curling up. Very nice, you guys. Rolling up.
And take another breath in as you lengthen your spine. You're going to go again, femurs back. Sit bones wide. Keep reaching through the arms, that's it. Press the box slightly further away, and keep pushing away as you curl through the spine.
Excellent, breathing out. We have one more hand change. Take the palms inward, this way, fingertips facing inward, and again, femurs go back first so there's widening in the sit bones. Reaching back, very good. Easing in the shoulders.
It should feel good. Take a breath in through the ribs. Reach away, exhaling, curling back, good. Allow your upper back now to broaden. We're gonna be focusing on the ribs coming back into the scapula, so try to feel that in this position and go again.
Femurs going back, reaching out, good, find a nice length. Inhale, exhale, start your curl, and feel the back ribs come up into the scapula. Broadening the back as much as possible. Very good, all right. Now, we're gonna change the hands back.
We're gonna do a little lunging with this. So, turn your finger tips back so they're facing up. And we're gonna go back out again, so reach out, femurs back, and we're gonna stay here now. You're gonna find that length, and I'm gonna have you bend you right knee and press with your left arm. So, you're bending the right knee, and pressing through the left arm.
You're gonna feel a little rotation, you can look even a tiny bit under your hip. That's it, nice and easy, then reach with both arms and then curling back up, so you want to find your center as you're coming back up. Good, take another breath in, we're gonna do the other side, and again, push away, femurs back, find the length. Now, we're gonna bend the left knee, and you're gonna press with the right arm. Feel those ribs translate a little bit.
Take a little look under your hand under the left armpit, good. Then reach for both, and then curling back up. Good, we're gonna do that too more times, right and left. Go ahead and reach forward again, good, lengthen long, and now you're going to bend the right knee. Try to keep the pelvis fairly level.
It's going to drop a little bit, and then reach for the left arm. So the ribs are actually translating a little bit to the left, and there's a slight rotation. Reach with both arms, good, and roll back up. Good, and last time, we're going to go forward again. Lengthen long, feel the femurs come back, feel those femurs really come back, that's it, good.
And then bend the left knee and reach for that right arm, good. (train whistle) And a little more translation if you can, easy does it, good, and then reach through, not so much in the tail, that's it, it's more in the ribs, excellent. And then curling back up. Very good, excellent. I'm gonna do one more with a little more twist, so here you go again.
Femurs go back, stretch long. Slide your left hand over to the right hand. Slide it over there and reach with both arms again. So, it's a little bit of a side bend now. A little bit because you're reaching.
There you go, really nice opening there, and let's do a cat here, so curling back up. So, you're on that side bending now, good, through the ribcage. And then bring your hands back to the center, we'll go to the other side, and reach the femurs back, extend the spine long. Move your right hand to your left hand. Find that nice opening of the right side of your ribcage, that's it, and then curl it back up.
A little side bending, open these ribs here. Good, nice. Now we're gonna go back, both hands again, and push out again, lengthen the spine. We go left hand to the right hand again. And find that side bending, reach.
There'll be a little translation of your ribs to the left. Excellent, now take your left hand and hold the frame of the reformer, and then start to turn and look under your right armpit. Nice and easy, good. Don't pull too much. Try to feel the rotation, good, and then feel the rotation back to the box.
Keep lengthening, we're gonna slide your hands to the corners, both corners, that's it, and then bring your right hand to your left hand, lengthen again and find that side bending, open the side of the ribs, good, now use the right hand to hold onto the frame of the reformer, and then try to rotate, nice and easy, don't pull hard. Keep reaching box away, nice, to get that length, good. Now bring both hands back to the box in the center, and reach away and curl all the way through the spine. Beautiful. Great, now we're gonna do a little more ribcage motion.
We're gonna kneel down on the floor, sideways, so it's like a side-mermaid. You're gonna place your hand on the box. They both have a left hand on the box. Your right arm is just going to hang for now. And what I'd like you to do is start the movement through your ribcage, so push your ribcage to the left, so towards your left arm, so you're actually side bending away from it as you go, it's a little bit of a side wave.
And then ripple through, and now side bend. Push the box away and open up the opposite side, good, and now come back to center. You're pushing the box away. The ribs are moving to the left. Great, and then you move the ribs to the right as you resist the box coming in.
It should have a seaweed kind of feel to it. Reaching out, very nice. Let your head respond. It's going to want to side bend away. Let the box push into you, get that side bending opening in the ribs.
One more time, and reach, ribs, head, let your head go, very good. And now the ribs are going to resist by going this way with the box. Resist the box, let your head go the opposite way. Now we are going to do it two more times using your arms. Push the box away, seaweed.
Lift your right arm up, and then side bend as you come back into the motion here, good. And then bring your arm down, and then again side bend, pushing the ribs away, push the box with your ribs, that's what we're trying to do, and then bring the right arm up, and you're going to open the right side, opening the ribs, and come back to center. Let's do the other side. So, now you understand the seaweed motion, correct? Right hands on the box.
And our ribs are going to shift to the right. We're gonna shift the ribs to the right, and then they're going to resist the box as you shift your ribs to the left. So, it's a little bit of side-shifting of the ribs. Very good. Let your head respond, good.
And resist as you come back, good. This is good for the neck, too. Go reach into the box, just let your head fall. Good, just a little easy motion in the neck, and then resist and come up inside the arms, so press the ribs away, good, and then you bring the left arm up overhead as you're opening up the side of your ribs here. Good, and then bring the arm down.
And again, ribs shifting, very nice, good, and arm overhead and shift back, excellent, and come back to center. We got the ribs all nice and juicy, so what we're gonna do is a rowing back now. This is a variation of the row back. What I'm going to have you do is cross your straps. We're still on a blue spring.
You could do it with a red spring if you'd like, but the point of this rowing back is to get in touch with the ribcage and how it can lean back and rest into the scapula, alright? You're going to start with the rowing back. You start pulling the arms so that your knuckles come together, and it's in front of your breast bone, and your elbows are wide. Here's where you get to feel the width of your back. Now you're going to inhale, exhale.
You start to roll your spine back. Think of the ribcage settling back into the scapula, very nice. And then pause there, and then unfold your arms. The straps are going to pull your fold as you straighten your elbows, and then let the reformer pull you up, still feel the fact that your ribs are resting in your scapula. Now, turn the palms down, and you're going to pull back and lean forward a little bit, opening the chest and pulling back like chest expansion, very good, and bring the arms back.
And that's our motion. And bending the elbows, pulling the straps towards your chest. Elbows wide, really reach for the elbows. Inhale, exhale, and then curl back through the pelvis. Feel the ribcage really rest into the scapula.
You want to have that feeling of that weight. Good, extend the elbows forward. Let the reformer pull you forward. Let it, and keep your ribs hanging back. Turn your palms over, lean over, nice and long spine, pull back and chest expansion, good.
And then come forward. Now you know the moment, just a little bit quicker now, okay? Pulling, exhale back, curl. Extend the arms forward, rolling back up, let the reformer do the work. Turn your palms over and pulling back.
And reach the arms forward, and again. Knuckles pull in, elbows are wide. Rolling back, feel the ribcage. Extend the arms forward, let the reformer pull you up. Palms down, we'll do it one more time.
Very nice, arms forward, and again. Bending the elbows wide, pulling back. Go a little deeper this time, good. And extend the arms, palms down, and pull. And lean forward, excellent, and bring the arms forward.
We're just going to use our cross straps. Let's put the left one down onto the peg there, good. And you're going to hold the... No, actually it's the right one on the peg, sorry, Erin. That's it, yeah, you're going to use the right arm, so it's a cross grip.
And the arm is going to do is it's going to be palms up to begin with, so you're still doing the rowing back, but you're just going to pull, and we're gonna pull the thumb down and look over the right shoulder, okay? Start to curl back, and you're going to start to rotate the thumb down, and then pull back and look back over your right shoulder, good. And then let the arm extend first. Let the reformer pull you, and you untwist the thorax, your ribcage, and come back. And you can do a little cross twist here, good, and pull again.
Pull. Feel the arms spiraling, thumb down even more, thumb down. That's it, very good! And then extend the arms forward, let the reformer take you, and let it lean a little more forward, good. Two more times. And curl, good.
Feel that thorax resting into the ribcage here, good, and extend the arm, good, one more time. And rolling back, that's it. Feel the spiral of the arm, excellent, and roll it forward. Follow the rope, let the reformer take you. Let's switch straps.
Good. So, the palm is upright to begin with, and you start to roll back through your spine and spiral the arm inward, the thumb goes down, and now you want to feel the ribcage resting onto that scapula, and extend the arm forward. Let the reformer take you. And find that rotation, very nice, good. And again, exhale, curl back, good, and rest back.
Really turn, good, don't overstretch your elbow back. That's nice, good, and come forward. Nice, oblique action here. Yes? And again, two more times.
You move through it a little bit more now, you got the motion, very nice, beautiful. And coming forward and up. And last one, and curling. God, beautiful! Bring it back, alright. So, now we're going to switch to some footwork, okay?
So we'll take probably three springs are what you'd prefer for a footwork, so it could be two reds and a blue or three reds, really depends on your preference for footwork. And your bar height. Okay, perfect. Alright. So, we're going to start a little bit more towards the heel.
And I do want your legs together, alright? So the legs are together, and the feet are gently... We have a nice angle of the foot, maybe perhaps looking at the bar here. So, the little-toe side of your foot is lifted, not too much tension in the toes. So, I want you to feel that you have weight as I push into the bar, can you feel that?
Yeah, so that's how you know your heels are in a good place. When you put some weight into it, your feet will not slip off the bar. Okay, so this is going to be a little different queuing. We're going to do three foot positions. I'm going to have you do a transition between each one.
I'll talk you through it. But as you lie here, I want you to take a moment and I want you to feel the weight of your thorax dropping into the carriage. I want you to pay attention to the back ribs, and feeling them really rest into the scapula. Can you imagine the scapula is like a saddle, and your ribcage is actually resting in it. So, I'm going to ask you to kind of monitor that as you move, okay?
So, first just slowly push out through the legs, and now notice your ribcage. Did it change it's weight? Take a little moment and sink, sink, sink into your scapula. Yeah, it's almost like you feel like you're leaning back a little bit. Can you feel that?
And then slowly come back in. We're just going to do a couple feels here. I notice when I do this, I tend to lift my ribcage just the slightest bit off my scapula. So, push out again, check, yes. See how that changed your core?
Isn't that interesting? Yeah, that was much better. And come back in. So, I want you pay attention to that one more time. Ribcage rests back into your scapula, and you push out.
How about if you think about it that way? And come back, and one more time. Rest the ribcage into the scapula, and pressing out. Very good. Now we're going to do five fairly quick now, ready?
And go. And out, and in. And easy, and in, and out. In, one more after this one. And out and stay, check and come back in.
She was already at the bumper when I said stay. So, rest your ribcage into the scapula. Notice how maybe it got a little bit lifted there? So just notice that. Now, you're going to reach our hands behind and hold the shoulder rest this way.
And I want your elbows to reach up a little bit. Right, so the idea is really reach up, that's it. You feel the width of your back? Your shoulder blades are wide? And feel the ribs resting, can you feel that?
So, let's do a few more repetitions here, so you can feel it. Not too fast at first. Go out, feel the ribcage, and come in, very nice, good. And out, does that help? Keeping the width of your back helps keep the ribcage settled in there.
Very good. Five quick ones for me. And one, and two, and three, very good. Four, try to keep your feet together. Five, and come all the way in.
Now, don't change your ribcage, feel the weight. Lift both legs up at the same time. Exhale, ah, very good. Turn your feet out, little V. And place the balls of your feet as you come down onto the bar.
Very nice, good, I'll just make sure you're in the middle. Excellent, a little wider here is fine. Feel the weight of your legs into your pelvis. Those femurs are really sitting in there. Right, width of your back, ready?
So, five, no we go slow first three times. And push out. Easy, check your ribcage. And the elbows? Yeah? And come in, and again.
This is just your kind of noticing what are your ribs doing in relationship to your arms and your scapula as you're pushing out. Very good. And then come into the home position and rest. And here we go, five times. One, and two.
Good. Three, good. Four, a little quicker. And five. It's hard to do it quick and keep the ribs there right?
And rest for a second. Let's do another five, ready? And go. One. And two.
Good, and three. Notice the width of your back. Four. And five. And come into the bumper.
Now, you're going to exhale. Lift both legs again at the same time. Ah, very nice, and then bring the heels out to the wide position on the heels. Very good, good. Alright, sink those femurs down.
It's so easy to pull them out of the socket there. Very good. Now push slowly, just check out your ribs and shoulders here. Feel the width, good. We'll do three, this is just your awareness set here, awareness of your ribcage.
Okay, and one more. She's one ahead of you. (laughs) That's okay. And come in, ready? Five, and one, and two, and three, and four, and five, and, you're doing so much better in the ribcage. And rest for a second.
Do you feel the difference? You're being more consistent, that's great. One more time. Five times, and quick. One.
And two. And three. And four. And five. Good.
You know, we move slowly to bring our awareness to where we want to be in the body, and then the challenge is, "Can I move quickly and keep that same position?" We don't do that enough. I don't feel like we do. Now you lift both legs up together, and you're going to place them parallel back onto the bar. We're going to do a bridging in a parallel position. We're going to separate your feet a little bit, and I am going to give you a block because we're going to use it.
This prop is going to be about using the inner thighs so that you're going to be pressing one, sometimes one femur more than the other as we queue. I always say to the prop is it's an egg, you want to hold it, but you don't want to break it. Okay? So it's not, that's it. Very good.
So, we're going to take a few bridges. First, we're just going to the pelvis. I do want you to be aware of what your ribcage is doing as you're doing this. So, inhale, exhale, and just curl your pelvis up, just the pelvis part, good. And then roll it back down.
And again. And exhale. Pelvis just only pelvis. So you're just going to like the back of your waistband. Good, and down.
Next set, you're going to go to the lower ribcage, so inhale, exhaling, curl from the pelvis. Now, go a little bit higher, but your lower ribs are just off, right? And your upper ribs are still on. And then roll it back down. Good.
And inhale, exhale, and curl, excellent, lower ribcage, nice, and roll it back down. Now, we're going to take it to the shoulder blades, but guess what? I want your ribs to stay resting in the scapula, so go ahead. We're going higher. But not so high that you lose the contact of your ribs into the scapula, so it's not going to feel like you're doing a super high bridge, which you're not.
And come up a little higher, Erin, use that block to track your knees a little more parallel, good. And then soften the chest, feel your ribs really drop into the shoulder blades, lower down, very beautiful. Good, excellent. And we're going to do that one more time. And exhale, good.
Curl, just so you can feel where the ribs resting into the shoulder blade. Good, excellent. And then roll it back down. Great. Now, I did leave the springs to the same footwork springs because I wanted it a little bit heavier for the bridge, so the carriage doesn't move very much, so you're doing great.
We're going to add a little bit of an isolation of the legs, which is going to create a rotation, so start to curl your pelvis, and come up to those shoulder blades again. You get to stay there. Now, you're going to take your right inner thigh and you're going to press into the block more firmly as you reach the left knee long. That's it. What's that going to create?
It should create a little left rotation, a right rotation, sorry, of the pelvis. Can you feel that? And now engage the left leg and reach the right one. There you go! So this is rotation at your hip joint here, you feel that? And then come back and drive it through the adduction of the leg, so if you're squeezing this one you're reaching this one.
And that creates that rotation this way, you feel that? And now you got to squeeze this one and you're going to reach that one. Make it smaller. You're moving too much in this area, and I want it in your hip joint. Do you feel that?
And then come back. One more time each side. Engage, you're reaching through this one, and engage more, come on, yeah! (Meredith and Erin laughing) You feel it more in here, right? Now bring your pelvis back. Now last time.
Reach for this one. Do it in your legs and your hips, you got it, good! And then reach for the center and you get to roll it back down again. If you're mobile in the thorax, (laughs) as I said in the tutorial, like Erin is, you're going to be doing all that rotation up here instead of finding it through the hip joint in the pelvis. That was really good. Now we're going to take this away.
And we're going to get up and do a shoulder mobilization to get some mobility before we do semi-circles. We're going to take the spring off (metal creaking) and we're actually going to push the carriage out, and you're going to come inside the frame. And you're going to kneel down onto the ground there, alright? And we're just going to clasp our hands and place our elbows on the carriage and the forearms on the carriage, so it's almost like you're praying. Okay, (laughs) good.
And then all I want you to do is you're going to slide the carriage out and allow your lower arms to come up, and you're going to lower and you're going to come on to the upper arm just a little bit. It gives you that nice rotation. And think about those clavicles rotating upward. That's it, right through here. Beautiful.
Now, drag the carriage back, put your forearm back down onto the carriage all the way to the wrist. Now, Ms. Mobile here, we're going to see. So lengthen out your spine and go again. Reach forward. Now, where I want the rotation is that first region (laughs), I don't want it in the lower regions of the thorax.
It's in the clavicle, first rib, second rib. That's it as you're reaching. So you have to kind of hold back. Other people have to push to stretch, right? Pull it back in.
You have to control it just a little bit more. Than bring the arms down. I, on the other hand, push it a little bit, because I need more mobility in that area. But Erin here has to control it. I want these ribs to come up, right?
First rib in the front, second rib in the back going down. Lengthening, really good. And you can see Meredith is a little bit tighter there, so she needs to work it a little bit differently than Erin does. She needs to kind of work that flexibility. Very nice, good.
And then pull it back in. Okay, good warm up. Now, we're going to do the semi-circle. So, come out of the carriage. (laughs) Okay? Depending on how much weight you want in your arms, I would recommend a red spring.
Some people do red and blue, but I find that there's a lot of compression into the shoulders, so you might want to choose a red spring. Alright? We're going to lie down on your back. Your knees are going to hook over the bar. It is never graceful to get into semi-circle. (all laugh) Place your hands on the shoulder rests this way, and then you're going to wiggle yourself (laughs) which is good rib translation, right?
(Meredith and Erin laugh) And then kind of sit your butt down in the well. Oh, well you have to put your feet up there. So, let's get your feet up. And for this version, this is a non-traditional semi-circle. I want you a little more on the heel like we were on the footwork, so it's actually cuboid bone, so not heel.
It's like the front of the heel. I'm going to give you your egg. (laughs) Okay? Right? Good. So, we got the block here.
Come down into the well. What's nice about the semi-circle, and you have to be very careful, is where's the edge of the reformer hitting you in the spine, you see? So, you have to really lengthen your arms away, so scoot a little bit more 'cause I'd like for it to be a little bit higher, there you go. Perfect. So, it's a lot of work in the arms to keep that resistance, very good. Now, we're going to curl the pelvis, and you're going to reach that block over your toes, so I want to see dorsi-flection in your ankle, and I want to see your knees reaching and resting on the shoulder blades, good.
And then, what we're gonna do is, again, engage the block. Let's take your right knee, press into the block. I'm going to create that rotation again by reaching the knee. And then I want to add is that you're going to press through the left arm a little bit more to create a little more side bending, it's just easy, and then come back and reach for both legs. It's very minimal movement.
Now, she's going to adduct the other leg. Right leg. Good. And she's pushing through the arm to create that side bending. And then come back.
Good. And then roll it back down for a second. So just playing with it. Adduction of one knee as you're pressing through the opposite arm. So let's try that again.
So, we're going to come up, and be really clear on that queuing. If she's using her right leg, she's going to press into the right leg, just here, reach the left knee. Little bit more rotation, not so much translation. Good, now try to reach through the left arm. There you go, you feel that opening up through here?
Just very small, and then come back. And then squeeze with the opposite leg, good, and then translate and reach through that arm. Right, so it's this leg? That arm, good. Opposite side there, you feel that?
That's very good, and then come back, and roll it back down. Can we do it one more time each side? You guys doing okay? Alright and again. Rolling up now.
If you're pressing with the right leg inward, and reaching the left a little bit, that creates a little bit of a slight rotation in the hip joint. That's all I'm looking for. And then if the right leg is pressing in, you're going to be pressing through the right arm. Are you pressing through the right arm or the left arm, let's see. Yeah, press through the left arm, that's it, that's easy.
That's what I said, the opposite. And then come up. And then you're going to press through this leg, and then the opposite arm, just a little push into the carriage, that's it. That was better. Excellent, does that make sense?
Okay, so it's the opposite arm reaching for the block that you're pushing in, okay? Roll it back down. Very good, alright. I'm going to take the block away. Come to the small V now.
I'll take your block away. And we'll do more of a traditional semi-circle. Come all the way in. The carriage is wherever is comfortable in your hips and knees, there we go. Start in the pelvis, you're going to curl.
And you're going to reach you knees, you come towards me, that's it. Come onto the shoulders, beautiful. And you kind of lift through here, very good. And then reach out, now you stretch away. Move the carriage out.
Good, now start from the ribcage at the sternum, sternum! Lower ribs! Good! Lowest ribs! (all laughing) Good! Pelvis! Very nice! And then you bring it all the way in, and curl from the pelvis again. Now really stand on your feet. Come towards me. Reach those knees. Very nice.
And again, reaching out, push out. We don't have to go too slow. You know this movement, good. And roll it down, beautiful. Nice, Erin, let your heels release a little bit and come in, come all the way in.
We got to reverse two times. Now you're sitting down, and push out. And now lift the pelvis up, and bend the knees over. Let your heels relax, that's it! That's the dorsi-flection, that means bending at the ankle. Good, and then rolling down.
Nice, Meredith, good. And last time, push out. Good, lift from the pelvis, good. Up, that's it with the heels. Nice, Erin.
Roll it down. Beautiful work! Alright, now scoot back a little bit. So, you're going to come out of this. Now you're sweaty and stuck to the reformer. (all giggling) and bring the carriage in, if you want, you can get your legs over the bar or not.
Great, alright, relax. (all giggling) Good, alright, come on up, very good. Now we're going to switch to a row front, so we're going to want one blue spring or a red spring. And we're going to play with the row front with, again, the spiral of the arms and the thorax flexing and extending. The bar can be down for sure.
We're going to sit facing the foot bar, legs are straight. If sitting with your legs straight is not comfortable for you, or you can't be up on your pelvis, you can do this by sitting up on a bolster or a block just to bring your pelvis up a little higher, or on a short box, alright? We're going to start with palms down in this position here. With the arms, let's just practice the arms for a second. So what you're going to do is you're going to come out and you're gonna slide with your thumbs down, and then what happens is you turn your palms this way.
And you're going to bring them up, and I want to see your armpits. I want to see them facing, not to the side, can you see that? So, Erin, for you, you really have to wrap that armpit around this way, right. Then you spiral your thumbs down, okay? And then from the down you go up with the thumbs and you circle and open the chest around, good.
The spine now, you're going to flex back into your thorax, and then slide the hands long along the reformer. Good, extending your spine long as you come up, and let me see your armpits. That's it, nice long body. So, lean a little forward as your thumbs go down. We're internally rotating the shoulder, and now thumbs go out as we circle out and around.
Good, and turn your palms over, and down, thumbs are down, good. Rolling through, good, and coming up. Let's see your armpits. Good. And coming down, thumbs down.
Good, and up and circle around. Okay, Erin, I'm going to have you move forward a little bit because you're kind of getting blocked by the shoulder rest. Let's see if we can keep your pelvis... And don't lean 'til it's time to lean. There is a lean, but when it's the right time to lean.
Okay, here we go, so this is flection. So, you curl down through your spine as you're going forward. This is the only time that we're doing flection. Reach forward and extend through the spine, that's it. Bring yourself a little more upright here so the pelvis is upright more.
And then watch your arms. And then come down, thumbs down, good. Lean forward. This is a lean forward. And then come up, thumbs out, and circle around.
Try to feel the different positions of the spine. Two more times. And curling down, flexing through the spine. Now you extend, show me your armpits. Don't let the ropes get too far behind you, Erin.
It's going to get too dangerous. And then come down, thumbs down, good. And then thumbs up, circle around, beautiful Meredith, thank you. And then circle around. One more time.
Curling down, head down, curl through the thorax. Stretch forward, armpits. Extend the spine up, good. And bring the hands down, thumbs down. Lean forward, good.
Rotate out, circle around, good, and rest. You have to be careful. Your back muscles... (Erin mumbling) Your back muscles have to work because the ropes, when you're coming up, they're pulling you in this direction. It can be, if you're really mobile, it's going to pull you in this way.
So, you have to work not just your back, but your front is really holding you here, and don't allow your arms to get too far behind you. It gets a little precarious on your shoulders. We're going to do a short box series now. A very interesting little variation. We're going to want to load the springs up so the carriage doesn't move, and then we're going to use our box in the short position, okay?
And of course our strap for the foot, right? We're going to do a little bit of a different arm action here. We're going to hold the wrist in this way here. If you hold your wrist, you good? Okay.
You pull your hands apart like this. You're pulling your hands apart, so your elbows are reaching out. You're pulling with your hands, see how I'm doing that. You feel what happens in your back? It gets nice and wide.
You feel that? We're going to try to keep that action. We're going to play with pulling one arm and the other arm to get rotation. Pulling your arms, feel the width of your back, and start to curl back. Rolling back, again we want that ribcage to rest in the shoulder blades.
Inhaling, exhaling, rolling back up, keeping the width, good. Bring it upright, yeah. We go through flection and curling back. Feel the width of your back, very nice, and exhale, beautiful! And then just right yourself up into neutral. One more time, and curling back.
Good. And rolling back up, okay, next set. You're going to roll it back, so roll back. What we're going to do is pull the left arm so that you rotate to the right. And then pull the left, the right arm, to bring yourself back, does that make sense?
So pull the right arm to rotate to the left, and then you're going to pull that left arm to bring it back, and then come back up to center. So try that a couple of times. And curl back with the elbows. You're pulling apart. Now, pull that left arm across you, and then pull that right arm coming back.
Pull the right arm to come across you, very nice. Great! And pull and come back, and come rolling up to center. We have one more to do. And curling back. This time, you're going to pull your right arm across, yup.
Right arm across. Pull that left arm back to center. Pull the left arm across the center. And bring back, both arm are pulling, and roll it back. Feels different, doesn't it, the core?
Okay, here's the hard one: around the circle. So here we go. Pull wide, roll it back. We're going to pull the left arm first, so pull the left arm, now stay here and go over the top. Pull your right arm over the top.
Turn the torso around and then the left one, yeah! And then bring it right back up to center. Excellent, you guys! And the other direction, and curl it back. Good, pull that right arm across. Go over the head if you can. Over and rotate to the the other side, excellent! And pull yourself back, eek! And up, let's go again! That was only one set, let's go! (all laugh) and curl back, and pull your left arm to the right, and overhead, you can just move through it, breathe in, exhale, roll around, pull that left arm back to center, with width in both arms, and again, one more time.
To the left, so you're going to pull that right arm across, and you're going to go up and over, great. Pull to the center, and come back up. It's harder than it looks, isn't it? (Meredith and Erin laughing) But it really directs, it's the connection of your arms and your thorax with the serratus and the obliques. You can really feel it with that engagement verses just holding a stick which we usually do, right?
So I like that one, good. We're going do up-stretch but with a rolling through the thorax. In the old days, oh, in the old days, that was the way we did up-stretch. Actually some of us used to call it "jack knife". But that's not it's name anymore.
The up-stretch is either a medium or a high bar depending on how tall you are. (metal clanging) You want to do one fairly strong spring. You can do one green or one blue, I mean red, not a blue. Or red and blue, depends. It's one of those where your body weight, you know when you're moving the carriage, you have to distribute. I would start with maybe a green spring.
If that's too much weight, then I would drop to a red. You're going to stand up onto the reformer. We're going to put our feet up against the shoulder rests. Your heels are on the midway point there. You're on the balls of your feet.
Now, what I'd like you to do for this is actually have your armpits, if it's possible, a little bit more forward. So we're no fully flexed in the shoulders. Especially for you, Erin. No I want you to come forward this way, yeah. It might feel more like a quadripod thing.
So, you see your armpits? I want them to face the floor. Can you see that? That's what I mean by facing right. Her armpits are facing the floor.
Does that make sense? Yeah. You're going to push out with the legs. Let's practice the up-stretch a little bit first. Come back in. So, let's just do just legs.
So, just legs. We're gonna keep the spine, that's it. And then pull the legs in, exhale, pull in. Good, try to keep some more length through here. Push the legs back, very good.
That's the beginning of that, right? Very good in your shoulders, Erin, you gotta keep working that, it's hard work for you, I know. Now we're going to take it down into a plank, so you're going to push out, and then drop your body into a plank. Keep pushing the carriage back with your legs, good. And now you're going to drop your head, and you're going to curl, and you're going to lift that thorax up, roll through your spine, and then send those femurs back, remember how we did the cat in the beginning.
Excellent, and push back with the legs. Go into the plank, good, and now drop your head first, curl through the thorax, bring it all through, and then send the femurs back. Not your shoulders, it's the femurs, ah! Good, and go back again. Good, into the plank. Great, now start to curl, roll, bring that thorax up.
Now keep your shoulders here, and push your femurs back, and bring your feet forward. That's it! So, the feet pull forward, and you femurs go back. Two more times. And plank, good, it just keeps moving, curl, curl, curl, beautiful. And watch how she does this.
The femurs go back, yeah, and the carriage comes in. One more time. And reach, nice motion in your thorax. Good, and curl, and reach it back, good. We're going to start, you guys want a break for your arms, or are you okay?
I'm okay. Okay, you can always take a break on your arms whenever you need to, okay. So the next set is you're going to start with your legs going back, okay? Good. All the way back into that plank.
Now, hold it there. Here's the hard part. Can you move your right hand to your left hand? Mm, great. Can you take your right hand and twist underneath your left hand and do a little twist?
Excellent, bring it back. To center is fine. Yeah, bring it back to center. I was just prepping you there. Bring the carriage in.
Bring the carriage in normally, just up-stretch. There you go, okay? You got the motion? So, we push the carriage back, we're going to do the other side, I'm just doing it in steps so you feel safe. So, do your left hand to your right hand.
So, if you feel safe there, that's great. If you don't, then, go back. Now, you're going to reach under your arm and do a little rotation in your thorax. Very good, now bring it back to the center on both sides, good. Then, bring the carriage in.
You guys doing okay? So, now instead of just reaching the arm into space, I want you to try to grab hold of the frame of the bar. (laughing) Pushing back, here we go. And now, just take your right hand and reach under and try to grab that. There you go, try to keep your pelvis here if you can.
There you go. Then, bring the arm back, and then come center, and we want to try to keep the pelvis here and go back again. Good, Erin, that's it. Back, now just try to reach to the bar across from you. Yeah, it's a lot of strength here.
That's great, Meredith, good. And then bring it back. Excellent, and come in, alright, that's a real challenge. Really tough! (Erin and Meredith laugh) Did you notice a difference between the right side and the left side? Yeah, so your right arm was a little more difficult, but that's alright, come on.
We're going to shift to an elephant, so you can stay up. But I want your feet more here now, so a little bit more further back, I think. Yeah, right there is good, Alright, good. You're going to lift your toes up, as much as you can, and you're going to curl the ribcage, so we're going to do this right, and now your femurs are still pushing back that way, that's it, and you're going to move the carriage back with your femurs, that's beautiful. And exhale and pull them in.
Breathe out, good! And again, pushing back, and pulling in, good. Now, lift a little more, 'cause you can really... Bring this up more, good. Now, don't move with your arms. It's your leg.
That's your arms! (Erin laughs) Yeah, go ahead, legs! There you go, feel the difference? You got to push with your femurs! That's it, these bones go back, they go back. That's it, try not to move through the arms, that's it. A couple more times. Very nice.
Good. Alright, one more. Nice. Good, and rest. Sit down on you reformer, and we're going to add another spring so if you're on the green, they're on the green, I would add a red.
Okay? If you have a red, I would add another red and a blue, maybe. So, we're going to do stomach massage. Alright? We're going to lower the bar depending on your hip flexibility, but if you put the bar on the low end, and sitting on a sticky mat is actually a very good idea.
Now, in this version of it, what I want is the spine to actually be long. So, reach your arms behind you to grab, if you can, the shoulder rests. It's also very tricky. Especially if you have super long arms like Erin does. Can you come a little more forward perhaps on the, yeah, so that your arms are, yeah, okay.
Now, can you feel when your arms are back how congested your upper back can feel? The shoulder blades are kind of really engaged, and kind of feel like (strained noise) back there. And if you go wide, all of a sudden your shoulders kind of round, right, it's not optimal either position. It's a very hard position to be in. I want you to do is release your right arm off the shoulder rest, and reach it out to the side.
Do an external rotation like that, and feel that scapula rotating upward, and reach out of your fingers, so you're kind of pulling that. Keep that feeling of the scapula. Just internally rotate your arm. So, don't let your shoulder blade kind of move with it. Can you just do your humerus?
And then bring the arm behind you and see if you can put it on the shoulder rest. Does that feel a little different? You're almost there. Does that feel different though, where your shoulder is? So reach the other arm out to the side.
You're doing two things. You're externally rotating and you're reaching it out, like pull a little bit, like someone's pulling you, and you're going to feel your back get wide. Now, don't change your back, but just turn your humeral head over. You feel it? The whole arm turns over.
And you're going to keep that and you're going to bring that back. I find that helps me set my ribcage and my scapula in a good position for my arms. (Meredith and Erin mumbling) You feel the difference? Yeah, good! Now, you're going to keep that, and we're going to push out. In your stomach massage way, and you're going to drop your heels under, and lift the heels up, and bend the knees and come in, good.
And again, pushing out. Nice, Erin. It looks so much better in your shoulders, yes! Your back looks so much better. I just like that little way of treatment of trying to get the scapula set on the ribcage, good. And reach out, down, good, lift, beautiful.
Okay, we're going to do five quicker now, keeping your back where it is, and go. And one. And lift, good. And press, and lift, good, And press, and lift, very good you guys, and press, and lift, and one more time, I don't know if that was five, (all giggling) and come up, and good. Reach your arms out to the side, find that width, see if you can hold that position, and bring the arms down, and rest, thank you very much, very good.
Thank you!
Mention
 |
Madeline Black (Teacher) |
 |
Sofie van der Sommen |
 |
Stacy W |
 |
Lacey |
 |
Barbara L |
 |
Kayleigh M |
 |
Beverly L |
 |
Cindy K |
 |
Michelle H |
|
|
Joy B |
 |
Rachel |
 |
Diane C |
 |
Heikki L |
 |
Amba Loudon |
|
|
Jennifer C |
 |
Bahara |
 |
Valya Karcher |
Comments


You need to be a subscriber to post a comment.
Please Log In or Create an Account to start your free trial.
