Description
About This Video
Transcript
Read Full Transcript
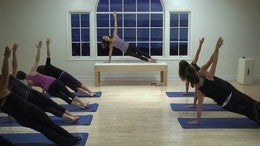
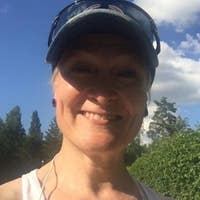
Hi, I'm Madeline Black, and we're going to do a mat sequence that's gonna focus on the ribcage and the rotation, and integrate it into some traditional Pilates mat exercises. But first, we're gonna start by feeling how the ribcage moves. You're gonna lie on your back, and we're gonna stretch the arms out to the side. The palms are up. Now, just take a moment and take a breath and allow your ribcage to just sink.
You're not pushing hard, but you're allowing your ribcage to sink and be weighted, almost feels like you're leaning back into a chair. All right, and arms up, and what I'm gonna have you do is rotate your left arm so your little finger side comes up, and you're gonna turn your head to the left. You're looking at the hand with the palm up. Your right hand, you're gonna go palm down. You can feel right now how the shoulders are rotating.
There's a slight rotation of your upper chest. Let's just turn and switch to the other side. You're gonna rotate the right arm so the little finger's up, and we're rotating the opposite arm so that the shoulder's coming forward, and you're looking at the palm up. Let's do it as a fluid movement now. Rotate, and look, and just breathing out easily, and breathe in as you shift, and rotate.
You really wanna feel that both shoulders are getting a spiral, one forward and one back. You can feel your clavicle's moving, and the neck, nice and easy, and we'll finish looking at the left hand. Now, turn the left hand over, and the right hand up. Now you're looking at the hand with the palm down. We're gonna alternate here, rotating.
Now you're looking towards the palm down, and rotation, and you wanna minimize any lower ribcage motion. It's really about the upper part, the first region of the thorax. Okay, then bring both palms up. Now, we're gonna bring the arms down into what I call a W shape, so whatever's comfortable with you, you wanna make sure your back's not bowing off the mat. You're not pushing it down, but again, you want the weight of your thorax, your ribcage, to sink into the mat.
Whatever your shoulders do, just let them do what they do. We're gonna do a little reaching, not straightening the arms, but you're gonna shift your ribs to the right, and slide your right hand away a little bit. You're opening up very minimally the right side of your ribcage, and you can breathe into that side. Now go left, breathe in to the left side, and feel that ribcage opening a lift, very small movement. Right side, breathe in to the right side of your ribs, and reach the arm a little bit.
Other side, left side, reach. It's a mid-ribcage kind of translation. Now, reach your arms up to a high V, whatever's comfortable, but I do want your arms resting on the floor. It doesn't have to be super high V, just whatever's comfortable in your shoulders. Now, we're gonna reach to the upper diagonal.
You're gonna reach with the right arm. Breathe into your right armpit, it's like you're opening up your armpit, and then bring it back. Reach into the left, open up that armpit, open those ribs, and then come back. It's like a upper sternum clavicle rotation here as you're moving, breathing in, just reaching with the left, and then come back to center. Now we're gonna bring the arms down to a low V position.
This one will have a little more movement. We're gonna reach through the right arm, and you're gonna translate your ribs to the left. You're sliding the right arm, you can let your head go, too, and then come back. This has the most movement, and reach through. Your ribs should open up onto the right side as you reach your left arm, and reach the right arm, open up the ribs on the left side and then come back.
One more time, reach with the arms translating your ribs to the right, and then come back. Now we're gonna slide our legs long, nice and straight. We're gonna bring the arms over head. Again, comfortable in the shoulders, so wherever they land without tension. Have your thumbs down onto the floor now, so you're on the thumb side of your hand on the mat.
Then, I want you to flex both feet, and you're gonna reach through your right heel like someone's pulling your leg, and you're gonna reach through that right arm. You've got kind of a traction going on to opening up that right side, and then come back. Reach through the left leg, slide the left hand along the floor, away from you, so you're opening up that left side, and breathe into the right side of your ribs as you reach through your right foot, and pull your right hand. And exhale, and breathe into the left side, opening up those side ribs, opening and lengthening the lower spine on that side. Now, we're gonna reach through the right leg again, but this time, try to reach through the left arm.
It's a oppositional reach. It's limited movement compared to the one we just did. Reach through the left leg, reach through the right arm, try to open the right side of those ribs and reach through that, and come back. One more time, reach through the right leg, and open up that left side, can kind of breathe into the ribs here, and come back. Last time, reach through that left side, pulling that left foot, and opening up the right ribs.
Good, and then come back, now let's reach through both. Circle the arms around to the side. You can bend your elbows, and we're gonna bend the right knee. Just place your arms down by your side, and point your left foot now. We're gonna stand into that right foot, and we're gonna reach your knee over your right toe.
You're reaching away from yourself, and you're gonna allow your pelvis to rotate to the left. You kind of roll a little bit onto your left side, and you could look gently over your right shoulder. Then, bring your pelvis back. Start the motion from your leg, reach that knee over the toe. You're gonna directing your knee straight forward, don't let it fall into the midline, reach it forward.
Just rotate through your pelvis, and look over your right shoulder, and then come back. One more time, reach through that knee. Let the pelvis rotate, go over to your left side, look over your right side, and come back. Now we're gonna switch sides. Standing on the left foot, start with the knee.
The knee goes towards your toes, and that's what sends your pelvis to the right, and easily look over your left shoulder, and then bring the pelvis back. Again, reach the knee, and rotate the pelvis, looking over your left shoulder, and then come back. One more time, we're gonna reach, rotate, good. Then, come back, okay, I'm gonna bend both knees again, and this time we're gonna do is a little bit awkward for people with tight shoulders, like myself. You're gonna do what I call a inverted W.
You want your hands this way. Allow your shoulders to come up. Don't try, what we wanna focus on is can the ribcage rest back into the shoulder blades. Have the palms down, elbows out. Even if it feels super awkward, okay?
If there's pain, don't do it, but you'll see that different people have different flexibilities in this range here. What I want you to do is lean back with your sternum. You're just kind of feeling the spine dropping down into the mat. Then what you're gonna do is slide very, imagine you're sliding your hands towards your feet and allow your thorax to drop into the shoulder blades. Then, take a little pelvic curl.
We're gonna curl the pelvis slightly up, just slightly, just to your waistband in your pants there, and then roll it back down and relax your arms a little bit. Here's the action, you slide the arms down, rest your ribcage into the mat, curl the pelvis, and just come up a little bit here. Come back down, great. Now we'll take it a little bit higher. Slide the arms down, good, rolling up just to the middle of the ribcage, and then roll it back down, nice and easy.
Reach the arms, rest the ribcage, curl, open up the back between the shoulder blades here. Roll it back down. We'll do two more, this time we're gonna go a little bit higher, and reach the arms long, soften your chest, curl the pelvis up, and now we're gonna come up just so you feel you're resting on your shoulder blades. You could even bounce a little bit, feel that you're resting there, and then roll it back down. Take a breath in, and again, reach the arms long, curl the pelvis, good, up to the shoulder blades, good, and roll it back down.
Now we're gonna turn the palms out on a low V, and, again, let your ribcage rest there on there. Then, we're gonna do a full bridge again. Curl through the pelvis, now think of your knees reach over your toes. You wanna feel your ankles flexing. It's called dorsiflexion, and you keep reaching.
Try to lift your pelvis up, but now look at yourself. Are you resting on your shoulder blades? Test that out for yourself, and then roll it back down. We don't want to push too much through the spine that we lose that contact with our shoulder blades. It's gotta be more hip, so feel your knees, reach over your toes, bend at the ankle bones there.
Roll through, lift the pelvis up, rest on your shoulder blades, and try. Push down with your heels a little bit to lift your pelvis slightly higher, and then roll it back down, roll, roll, roll, nice and easy. Rest into the shoulder blades. Let's do it two more times. Inhale, exhale, reach those knees.
If you pull with your knees, you're gonna feel how that pulls the pelvis into that rotation that we're looking for. Rest onto the shoulder blades, push a little bit through your heels, just to elevate slightly more with the pelvis. Roll it back down, nice and easy. All right, last one, we're gonna go up and we're gonna stay up. We're gonna roll it up, reach up, come up to that nice bridge.
Now, you're gonna take the right knee, and you're gonna reach it longer than your left knee, just a tiny bit so it gives you more stretch, but can you feel how it turns your pelvis ever so slightly to the left? Now, reach your left knee, keep reaching your left knee, feel how the pelvis rotates slightly. It's very slight to the right. There's a lot of hip joint motion here, and reach that right knee. Now, are you resting on your shoulder blades, or have you lifted?
Keep reaching through that leg. It's like you're trying to stand towards the ball of your foot. Left side, reach, reach along, excellent. Then, come back, and we'll do two more. Reach that right one, rest your shoulder blades, and come back.
This is a good butt toner. Reach, excellent, good. Now, through both hips here, reach again. See, can you get a little higher? Do you feel the difference, you can come up a little higher now, good, and then roll it back down, all the way down, excellent.
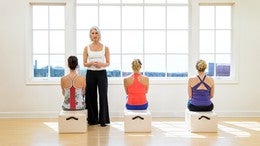
Now we're gonna do a little rotation, and we're gonna roll to our left side. I do wanna use possibly the blocks. Let's grab the block. What we're gonna do is we're gonna lie on our side, and we're going to hook our right foot behind the left knee, and you can rest your knee on this block, you see, like that. I see. Yeah, so the underneath
leg is just relaxed, a little bent. You're hooking the right foot behind the knee, and we're resting the knee on the block. That's to stabilize our lower part of our body a little bit. I'm gonna place both hands behind our head. You can hold the back of your head.
What I want to do is a thoracic rotation. I want you to bring your elbows together. Can you bring that right elbow towards the floor? Good, and then bring it back. Did you pelvis move with it?
I don't want the block to move, you see? Try not to do that, now bring your elbow back. Rest into the mat now if you can. This is hard the first time. You'll see our restrict, you'll see the difference between the three of us, and rotate back.
Then, come forward, and rotate to the floor. Breathe out, touch the floor if you can. Rotate back, and you're gonna notice each time you do it, you're gonna get a little bit further. And forward, now if you're got the flexibility, don't push, but as you do this more often, you're gonna go a little further that if you cannot lose contact with your block, that your elbow actually can go to the floor. (laughing) Yeah? Yeah, if you're the mobile
thorax person, yes, you can. You'll notice the difference between your two sides. But I'm noticing, can you notice how each time you're going a little further? Yeah, so let's go a little bit quicker for a couple more, and rotate back. Try to keep your weight on that knee.
I know I lose my block a little bit, and feel that. Good, and one more, and rotating back. Good, and come center. Now what I want you to do is take a hold of the block with your right hand. You're gonna roll on your stomach.
Roll to your stomach, bring it around to the other side. I like to transition to the prone position. We're gonna hook the left foot behind the knee, rest the knee on the block, hold our hands behind the head, and wait 'til you see the difference between your two sides. Go to the floor, and coming back. Look at the difference. Oh my gosh.
Yeah, and forward, touching the floor, and back. (exhales) And forward, just breathe naturally. You wanna exhale kind of towards the end range, here, like exhale here, (exhales) and in, curl. Back, exhale. (exhales) Nice, two more, and forward, and back. (exhales) Last one, forward, and back. Nice, okay, now we're gonna stay on our side. We can just move the block away.
We're gonna come up onto our elbow, just move it back. You want your elbow to be right under your shoulder, and actually you can even exaggerate it a little bit, and it can be further in from your shoulder, and your palm down, and then line up your legs so that you're as flat in the front as you can. Meredith, bring your knees back a little more if you can. We wanna be as flat as we can if that's possible. The first thing I want you to do is you're just gonna slump.
Take your left hand, and go ahead and hold your ribs underneath. Yeah, just slump there. That's the translation, now don't use your hand, but lift your ribs up, and let your head tilt a little bit. Yeah, so you kind of have to right your eyes to the horizon, good, and then slump. And you feel that, slump, and then lift the ribs up.
Can you feel how the obliques engage there, you feel that, and then the muscles under the shoulder girdle, one more time, slump. It's a terrible word, but, and lift up, but it feels good, doesn't it? Okay, now from here, you're gonna lift your bridge up. Lift your pelvis up but keep the ribs lifting up. Very nice, and then sit your hip back down, and let your ribs drop towards the floor.
Lift the ribs up away from the floor, and lift the pelvis up, good, and come back down. Let the ribs sink to the floor, and lift the ribs up. Last time, lifting up, good, and come back down. We're gonna change our angles so that we don't kick each other. If you're with a group, you wanna do that.
We're going to bring the right elbow back, and the legs forward a little bit. I'm gonna come to the front of the mat. We're on a little bit of an angle with the mat, which makes it more challenging to line yourself up. This time we're gonna stretch the top leg out on a diagonal. Again, put your hands on your ribs, underneath, your left hand, and find that position now where you're neither dropping towards the mat, or over-bending towards the ceiling.
See if you can find that position of your ribcage where you're lifted in an alignment, long line on this side. Then we're gonna lift the leg up just to the height of your hip here, and we're just gonna do parallel circles. Forward and back, forward and back. There's no change in your ribs, no change in the pelvis, and we're just circling nice and easy, little small circles, trying to stay in that parallel position. Keep going around, good.
We're only gonna do backward circles in this direction, right? Meredith, I'm actually doing the other direction. Yeah, that's it, I like to work more of the outward and open, because people need to open the front of the hip a little bit more. We certainly don't need to close the hips down, right? Opening out, okay, and now point your foot, and turn the leg out, all right.
It's a little bit harder to keep the pelvis in. Now, circle forward and back so it's an external rotation. You're coming forward with the foot, and going back behind you, trying to keep the ribs lifted, the neck nice and free, and we can go a little quicker around, little circle, around, going the other way, Meredith. (laughs) Around, and around, it's all right. You can do both directions, just that I prefer to have more of the external rotation working here.
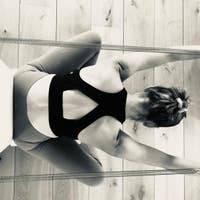
All right, and then bend the knee, and come back in. Now we're gonna come up onto the knees. We're going to place our hand down in that corner, and we're gonna find a plank position here. Again, those ribs are still lifted. Hand behind your head, stretch that leg out to the side, and we're gonna be doing that side kick.
We're gonna kick forward, two kicks, and sweep the leg back. Check your ribs out now here. Forward, they soften a little, and then as you reach back, they lift a little bit. They do respond to the movement here. Reach, and breathing out, kick, kick, and reach, and kick, kick, and reach, two more times, kick, kick, and reach, kick, kick, and then reach and hold it.
Breathe into the ribs, and bend the knees and come on down. Beautiful, let's do the other side. Come forward, now for the first set, is we're gonna be on our elbow, and long line of the hips. We're not on the diagonal this time. We wanna be the same as the other side.
It's a little easier to line yourself up on the mat. All right, so, we're gonna drop the ribs down. Put your right hand on the left side of your ribs, and then lift the ribs up, and drop them down, and lift. This is actually a nice way to lengthen between the pelvis and the bottom of the ribs. When you let the ribs drop down, can you feel that?
It's lengthening those lateral muscles there. Reach, good, all right, and lift up. Now make sure your elbow's in a good place to lift. Now, we're gonna lift the ribs up, and now lift into the bridge. Just the pelvis comes up, breathing, and coming back down.
Now we're letting the ribs drop towards the mat. That's the slump that I talked about. Then, lift the ribs up, and lift the pelvis up. Then, coming down, and then drop the ribs down. Good, ribs lifting up, and pelvis comes up, and sit.
We'll do two more, and reach down with the ribs, and lift them up, good, and pelvis lifts, last time. Drop, feels good, doesn't it? Lift, and up, great. Now we're gonna change our angle. Let's bring our left arm to the back edge of our mat.
I'm gonna come forward a little bit. All right, and then the feet are more forward on the mat here, very good. Now, hold your ribs still, so we're gonna still keep that idea, and if you've lost it, kind of let your ribs drop and then lift them back up into place. Now we're gonna extend the right leg long, flex your foot, and parallel, and we do circles that go to the front, side and back. It's an external kind of rotation, and you can do a little lift at the top to get more of the lateral, posterior lateral part that's the side in the back of your hip.
In the meantime, we're trying to keep the ribs in that position of lifted up, and not sinking quite so much. Good, good, keep going. We did quite a few on the other side 'cause I was Miss Chatty, so we wanna just keep rotating. It feels really good there, good, and then finish and point your toe. Turn the leg outward so you're heel is gonna come forward a little bit, check the ribs, circle forward and around.
You're drawing a little circle with your toes. Good, and around, and we can speed it up a little bit. Around, around, and let your spine respond a little bit. As the foot comes forward, there's a little bit of a drop, but then there's a lift as you go back. It's very small, so we're not rigidly holding the ribcage.
It actually is breathing and moving with the circles. It is a good distraction. Okay, and then come back down. Now, we're going to come up into the side kneel and kick. You're gonna put your weight on your arm.
Hands behind your head, put that foot out, and here we go, forward, kick, kick, and reach back. Again, the ribs are gonna respond a little bit. As you reach back, there's a lift of the chest, and a little softening as you come forward. That's it, and reach back, and exhale, (exhales) and reach back, (exhales) reach back. Let's do a couple more, exhale, (exhales) reach back.
Last one, (exhales) and reach and hold it for a moment. Breathe into the rib, and bend, and rest. Very good, now we're gonna lie on our backs. We're gonna come to the edge of the mat this way. You want your feet so that you're able to slide them forward and slide them back off the mat.
Then, we're gonna take the block and put it between our feet, and I'm gonna lie back. It's in between your feet so that you can actually slide the block away and pull the block in. But here's the sequence. We're gonna start by taking the hold of our head in the back of the head, and now what I'd like you to do is lift your elbows slightly off the mat so that you can feel that upper part of your ribcage, again, sinking into the mat. Now just put your elbows down onto the mat.
If you're tight in your shoulders, you'll feel that your chest lifted a little bit. That's where, if you can bring your elbows up, until the point where you feel your chest relax, then you know your arms are in a good position. We're gonna find that angle there. Chest is relaxed. Now all I want you to think about is your hands are, and your arms are a hammock that your head is resting in.
You're gonna start to sink your ribs down, not by pushing, but just sink your sternum into the scapula, and then let that float your head up. It's like your head is hanging, you should feel like you should be able to move your head around, 'cause it's just resting in a hammock that's swinging. Can you feel that, you can swing it a little bit. Yeah, good, and then come back down. What's moving your head up?
Well, it's kind of the upper part of your ribcage, and the lower part of your neck. So, if you breathe out, soften the chest, sink the spine into the mat, that's what's gonna bring your head up, you see? You feel the ease in your neck and all of that. You still feel your abs working, right? And then come back, I mean it's not a terrible feeling, but it's a nice one, I mean, it's not hard.
Go ahead and float the head, I call that the hammock. Now we're gonna stay here, and you're gonna take your right hand now and do a low V position. Check your neck and make sure that your sternum's resting and your head's still floating, all right? Then, what we're gonna do is we're gonna reach, you're gonna roll all the way over to that right side as far as you can. Go way over there, good, until you're on that right side of your back, and then come back, but still floating your head.
If you have to put it down in between, that's fine, but there really shouldn't be any tension in your neck with this kind of floating hammock idea. Here we go again, reach, breathe out, roll over onto that right side, and then come back. You might notice that you're using your inner ankle line. Can you feel that, as you roll over, feel your inner ankles on the block. Yeah, it's different than having the block between your legs.
Feel the ankles and hold the block, and roll over as far as you can. You have to kinda slide your arm a little bit, otherwise your scapula's gonna get a little stuck. I just felt that on myself. Can you feel that, if you slide, the shoulder blade kind of gets out of the way. One more time, and slide, and come back, all right, let's switch hands.
Check your hammock, reach your arm, and here we go, reach the arm, slide, and go way over, and come back. You'll notice a difference between your right and left side. Exhale, and that's okay, and reach. Come back, and reach, and come back, and reach, and come back, one more time, and reach, and come back, okay, then put your hands behind your head. Just rest back for a second.
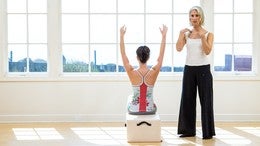
Now, we're gonna take our hands and we're gonna do a clasping of the wrists here. What I'd like you to do is engage your block with your inner ankles. Your knees shouldn't clock your knees, just your inner ankles, feel your heel, can you feel your heel on the block, doing that? See what that does to your legs. Try to keep that contact and grabbing the wrists.
First, pull your wrists apart so you feel your chest sink. Feel that connection of your ribs. Good, now we're gonna pull that left arm. Just roll to the side at first before the head comes. I just want you to feel that rotation.
Then, pull the other arm back. Now, you can switch hands if you'd like, and pull so you feel that rotation. Good, kind of what we started with, with that little, then pull the other arm, and then switch hands. Now, here's the hard part now. I want you to try the hammock head here without holding it.
We're gonna exhale and drop your sternum and float the head up. It's like the hammock is still there, and now you're gonna pull across, come into flexion, put your elbow on the floor, you got it way over there, no. Squeeze your right ankle into the block. There you go, isn't that nice? Then, come back, but stay in the flexion.
Hammock head, and switch hands, pull, and get that elbow down onto the floor. Pull yourself over. Now, use your inner, I just felt that myself, inner left ankle, press into the block. Then, come back, switch hands, and again, elbow down, inner right ankle on the block. Then, come back down and switch, inner left ankle on the block.
Good, and come back one more time. Switch, now, we're gonna go over the head with the arms and roll around to the other side. Keep pulling your right arm, come to your elbow again. Good, and now we're gonna go back overhead again. Get your right elbow on the floor.
Good, one more time, roll it around. Get your elbow on the floor, use that inner left ankle. Yes, yeah, no, I needed the same queue. (laughs) Then rotate, let's get that right one. Good, and then come center, and then roll down.
Relax your arms, very good. Now, we're gonna attempt to slide the block out and in. What I'm gonna ask you to do, and I'm gonna watch you on this one, is you're going to rotate to the side and slide. You can use your elbow a little bit here, then slide the legs out as you go round, good. Then, just come down through the center, engage the block.
You're gonna come all the way around, and then as you roll back, bend the knees. That's it, Amy, good, and go to the left side, good. Now, as you slide the legs out, you're curling and reaching, beautiful, and then roll through the middle. It is hard to do that right, good, and rotate, and start to slide the legs out, nice, come center, roll it back, good. Last time, and rotate over, beautiful, slide the legs out, reach, beautiful.
How's that? Excellent. Much better, good, you wanna do one more each side? (laughs) Yeah, it gets, you get a little bit looser through the lower back especially. Slide the legs out, that's it, good.
Down, last time, that's it, and go twist, and roll. Use your legs, use your legs, you gotta get your weight in your legs, beautiful, excellent. Roll the legs down. Okay, so we can get rid of the block now. Put it aside, but we're gonna stay close to the edge of the mat like we're doing.
Now, we're gonna bring our legs up. We're gonna have our hands behind our head again. We're gonna hammock the head, feel the sternum sinking. Now reach your right arm palm up to the high V. Your right arm is up here in the high V, palm up.
We're gonna look to the hand, you're gonna reach now, and we're gonna twist and reach. It's a little bit more of extension versus flexion as the other side. Then, come back, and switch sides. Go to the high V, and then turn, and just reach in that direction. You feel a little higher up in the body, right?
Then, come back and switch. Feel the inner legs again, reach. It helps to reach through the left elbow towards the ceiling, as well, you feel that? Come back, now reach through the right elbow towards the ceiling and hit that high V, rotate, use that inner left leg, yes. It's a real key right there, okay, then come back down. Woo!
You okay, yeah, so you notice when your legs start to veer out, veer away from the center. Here's the next one, the combination of low V high V center. Legs are up and we're gonna add a single leg stretch. It's gonna look like this, you go, we're gonna start here, low V, extend your leg out, the left leg goes out. Low V, go to high V, and bring your head back, and bring your legs in, hammock head, right leg out, low V, do the twist, high V, palm up, come back, bring it in.
Low V, palm down, breathe out, twist, good. High V, reach through that left elbow. Nice, come back in, and low V. What does this look like in slow motion? It's our criss-cross, yeah, and bring both heads down.
Here we go, criss-cross, just easy, to the right, and to the left, yes, right. It makes this less stressful in terms of the rotation. Good, and breathing out, keep thinking of those principles and that rotation. Let's do double time, and one, and two, and three, and four, and five, six, seven, eight, one more, finish, rest. (exhales) Feels good.
We're gonna roll onto our stomachs. We're going to lie down on our mats for a moment. We're going to stack our hands, and place our foreheads on our hands. Now, we just did a lot of that flexion, so what I'd like you to do is separate your legs wide, and actually go pigeon-toed so your heels are out. You should feel your sit bones spreading.
Just take a breath in and then exhale, and let the front of your pelvis just sink into the mat. Just think of the bones, and then think of your breast bone now going into the mat. We're kinda doing the reverse of the ribs. We wanna feel the ribs now weighted, can you feel that, into the mat. Gravity is helping us extend the spine naturally.
Yeah, can you feel that, try to wiggle a little bit for that breast bone. Now, line up your heels so that they're in line with your sit bones. We're neither turned out or turned in, turn out, or turn in, but right in the middle. I want you to feel the front of your groin imprinting or releasing into the mat, all right? Now, you're gonna take a breath, and as you exhale, the first thing I want you to think of is your breast bone sinking into the mat, which is then allowing your head to float up.
Your hands come with you, and come back. Not just doing a lift, do you see the difference? Use your breath, exhale, sink your sternum into the mat first, (exhale) and let that float your head up, just barely off. Come back down, and again, exhale, sink the sternum down, (exhales) and let that float your head up. Now, stay there, and you're gonna look towards the right elbow, and come back, keep hovering here.
Look towards your left elbow, and come back, and, again, look to the right elbow, and come back, and left, and come back, and then lower down. Do you notice we're not very high, we're just kind of hovering up. Now we're gonna change, now you can keep your hands here if that was enough of a challenge, or you can place your hands behind your head. We're gonna do a similar thing, but this time we're gonna do a little bit more of a twist. Inhale, exhale, let your sternum drop, let that float yourself up, it's not very high.
Then, turn and look towards your right elbow, bring your left elbow towards the floor. We're gonna look underneath your right armpit. That's it, and then come back, and rotate to the left. You can put your right elbow on the floor, and lift and turn, and look under your left armpit. That's it, and then come back, and one more time, turning, look under your armpit, and come back.
Turning one more time, looking under the armpit, and come back and rest. Let's push ourselves up, and just sit on your heels if that's comfortable. If that's not comfortable, you can always take your block and kind of sit on a block if your knees are a little tight. Just rest for a second, it's a lot of extension. Let's do a couple of cats just to warm up the flexion from all that extension, and then we're gonna go into a little plank series.
Let's take the block away, we don't actually need that anymore. Just on your hands and knees, and what I'd like you to do is when you curl, go ahead and curl your tail, but push with your arms, so we're really bringing that ribcage up towards the ceiling and trying to open up all those little joints of the spine. You kind of sit back a little bit, and then reach out. We're gonna bring the breast bone forward. Feel the collarbones rotate up, but also sit back a little bit.
You can push with your hands so you're doing a little bit of hip flexion, and widen those sit bones, and then come forward a little bit, and exhaling while curl back. Try to lift this vertebrae up towards the ceiling, pushing back, good, and then come center again. Now we're just bringing the breast bone forward, and the tailbone behind you so you are bending in the hips a little bit, and you're looking up slightly. Then come back, great. Let's tuck your toes under if you're still on your mat.
We'll come into a plank position. In the plank what I would like you to do is reach your right heel behind you, and then come back, and then reach your left heel behind you, good. Right heel, so can you feel the side bending that's happening? You'll feel the obliques working, and reach back. Good, now let your ribs go a little bit.
Push, as you reach with your right hand, push with your left a little bit. Get the ribs, and come back, and reach the left, push with your right hand a little bit. Can you feel that little side motion? Again, reach back, and push, and come back, and back, and push, and come back. Now, bend and just rest.
You'll feel that oblique work there. Now, we're gonna do our front support, but we're gonna add a little bit of oblique for here. Come back up to the plank position. We're gonna lift the right leg up here. Now, we're gonna shift the ribs to the left, and then come back, shift the ribs to the right, and come back.
Very small movement, shift the ribs to the left, and back, and right, and come back, and place your foot down, and if you have to, come out and rest. That's a interesting feeling, isn't it, the oblique there through the arms. All right, other side, and come up into the plank, and lift your left foot up. Now, we're gonna shift to the left, and come back, shift to the right, and come back, shift to the left, and back, shift to the right, and back. Then, come down and rest.
Let's just stretch the shoulders. Just grab back and just kind of pull. For a finishing release, it's a movement I'd like to do with the ribs. It's a figure eight of the rib cage, so if you can imagine your sternum doing a eight, the eight can be going this way, side to side, but it's also a little front and back. It's more like this, this kind of motion, if you can see that.
It's a little bit of an eight, but we're gonna do it, you can do it against the wall. You can just be in a forward bend with your hands on the wall doing it, or I'll show you with partners, which is really fun. I'll have Meredith and Amy do it. Facing each other, you're gonna place your hands on each other, and then come back as if you're going onto a wall. You can go lower, right, so move your feet back some more so you're right under there, good, great.
They're each other's wall, and then just a minute, they have to go in different directions. Meredith will go to the right, oh, you go to the right, too. You'll go to the right, which will be the opposite, right. The figure eight's going around and down, and around. The sternum, nice, straight arms.
This is the stable part, the wall doesn't move. Go ahead, figure eight, let it go towards the floor. That's it, Meredith, that's it. Keep going, that's it, that's it, Amy. More sternum, less lower thoracic, more sternum.
I know, it's not easy, right here, under armpits. There, that's it, think of your armpits, do an eight. Make it free, make it free, easy, towards the floor more. I want more extension, more towards the floor. That's it, more towards the floor, go the other way.
Good, yes, good. (laughs) Great, yeah, okay, and roll out of it, just nice and easy. (laughing) All right, and rest, thanks. Thank you. (applause)
Comments


Am now really looking forward to the London intensive in September!

You need to be a subscriber to post a comment.
Please Log In or Create an Account to start your free trial.
