Description
About This Video
Transcript
Read Full Transcript
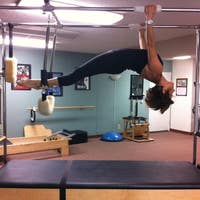
Hi there and welcome back. My name is Leah Stewart and I am here today doing a prenatal pregnancy class on the reformer. This class is geared toward more of the intermediate, low intermediate level client. You can certainly adjust it for your client's need, whether they're a little bit more advanced or a little bit more at a beginner level. And at this point I am 36 weeks pregnant, so I'm getting very close to my due dates. So I've had to kind of alter some of the movements according to what is my, what are my needs at this point in my pregnancy. So certainly if I were doing a reformer session at the beginning of my pregnancy, it would be quite different than it is now, well into my third trimester.
So two things that you're going to need for this class. A, you're going to need your long box for your reformer. And the second thing you're going to need, which I'll bring out in just a moment, is the jump board. And we're gonna use that for our footwork series. And I'll go ahead and explain that now so that we can keep the flow of the class going generally about after 20 weeks or so. You could, you know, give or take a few.
We want to avoid with pregnant women lying supine, which means lying completely flat on their back. Why we do that is because the baby is big enough by that point where it kind of compresses the inferior Vena Cava, which comes down from the heart, the artery there that can actually block some of the oxygen flow into the, at the, to the baby. So we want to avoid lying supine for any sort of extended period of time. If you lie supine for a couple minutes, no problem. But we're talking about supine longer than maybe 10 15, 20 minutes, something in that range, which we really don't do a lot, um, in Pele's per se.
But it's something you want to be careful of. So I'm going to utilize the jump board today as you'll see later in the class for a foot work, which is basically just going to keep my chest a little bit elevated so that I'm not lying supine while I do my foot work. Okay, so we're going to go ahead and get started. We're going to do our warm up today. On the long box decision is one of many options that you have for a reformer class. So this is what I'm going to show you guys today. So we're going to sit straddling the box. You're going to keep all of springs loaded and we're going to just get nice and comfortable according to what your clients need.
If they need to be a little further back, a little bit forward, whichever feels more comfortable. Arms I guess is going to be down by the sides are going to start with just a few deep breath. Inhaling through the nose,
So by lifting those arms above the head, you can kind of release some of that pressure for a moment and then exhale, it feels really good and it gets a nice little stretch to the rib cage as well in Haleigh. And exhale again in Haleigh and exhale last one. And inhale, elevating the rib cage up off the waistline and exhale. Now moving into some spinal movements, we're going to go into some pelvic curls or some pelvic tilts and some spinal are some pelvic circles as well. So again, another thing at this aspect of pregnancy is the lower back is getting tighter and tighter, a little bit more stressed as the belly is growing out. So this is just a really nice way to kind of relieve some of that pressure. So we're going to take a nice big breath in. You're going to utilize the abdominal sucker, that lower back, feel the tightening of the pelvic floor, curving nice and deep, and then inhale, you're going to rule over the top of the pelvis and next sale and in hillside.
I want you to focus on moving from the lower back and not over rounding the upper back and inhale center and exhale. Just feel like you're stretching out that lower spine as much as possible. And inhale back up to the top. And Becca, about five to 10 of these will do and Baca and feel as if you hook the pubic bone underneath and draw it forward like a wave. And then come back and we'll do our last one here and we'll go back. Now we're going to make some pelvic circles, which is a little bit harder to do here. It's easier to do on a ball.
But what I want you to do is I want you to Tuck your pelvis, take your hips out to the left, circle your hips to the back, circle your hips to the right, and then pull your abdominal wall in to go back to the top. So you're just feeling like you're taking your sits bones and the underside of your pelvis and you're making a big circle on top of the box. So you're going to circle around. You can stick your bottom out a little bit here, all the way. So what we're getting is we're getting a sense of tightening the pelvic floor and we're here.
We're getting this sense of opening and stretching out the pelvic floor. All the while we're Loosing up any sort of pressure or tension or tightness in that lower back about five or six in each direction. And as you can see, you're just getting a nice full circle and exhale and back to center. Now you're going to go the other way and exhale, and they just started to get a little bit more comfortable with this movement. You might start to find that you incorporate your rib cage a little bit more, which is absolutely fine. There's really no rules involved here other than that, just to engage the abdominals, engaged that pelvic floor, get that nice movement through your blower back and through your pelvis excels. You'd go through the posterior tilt, rolling onto one hip. Are He in the back?
Slightly ruling onto the other, last one, and back to center. And then I want you to kind of neutralize yourself here. And next we're gonna go into an exercise we call through the pipe. It doesn't really make a lot of sense for this. The name of the exercise here. So we're gonna go fingers in her behind the head. You're going to get up nice and tall, trying to get your shoulders as much as you can, right over your hips.
We're going to take a big breath in. You're going to fold over your center body with an exhale. You're going to drop your elbows down to your knees. With an inhale. You're going to extend your back up on the diagonal so you can get a nice diagonal line. And then Xcel come back up to vertical. Taking your breath in XL, curve your lower back.
The rest of your back will follow. Inhale, extend from the bottom of the spine all the way up to the crown of the head and XL. Back to vertical breath in. Allow your head to drop. Allow your elbows to drop. Inhale to the extension and exhale at two more. Five Times.
Nice strong back. Inhale, depas exa pull the belly button and let the rest of this mind follow in row all the way up. Inhale, exhale forward. Inhale, pause, and XL. You're gonna wrap and Roy yourself up. Twice. More breath in. Exhale, keeping the shoulders nice and calm. Feeling the energy out through the crown of the head.
Breathe in for the pause and XL down and that inhale. Exhale forward. Breathe in all the way around and app into our lateral flection here. So getting a little bit of a side stretch, keeping the pelvis nicest, steady fingers. They interlaced behind the head. We'd go side stretch over to the right with the breath in and they use the left side of the obliques to pull you up. This is also feels really nice for that rib case.
You get that nice stretch to the rib cage, which tends to get a little bit tight during that second to third part of a trust. Trimesters during pregnancy gets a little bit tight there, so it feels good to just stretch it out. But I want you to be mindful of all your Palladio's rules, so trying to keep that stability through your pelvis as you mobilize that torso into pure lateral flection. So remember there's going to be a little bit more of a tendency to go into the arch of the back with pregnancy. So you just want to try to control it as much as you can and backup the center and over to the right, bending from the waist and pulling yourself up from the waist and over. Inhale and with your Xcel come up and we're going to add the rotation.
We're going to twist to the right, trying to keep the left hip back and back to the middle. And exhale, twist to the left, getting nice and tall. As you twist, feel like you're going to get taller, you're going to leave some of that pressure down. You're going to lift up through your body and come back to center. XL. Rotate using the obliques to initiate that rotation back to center and exhale, rotate, twisting and back to center and exhale and back to center. Exhale and center. Give me two more. One more set at sail and center and XL back to the middle. And I used to say back to the middle here, center. Good.
And just take your arms down and just kind of shake out those shoulders. So that's going to be our warmup that we're going to use on our long box here. From here, we're going to take our long box off. So next we're going to move on to our footwork series. I'm choosing to use the jump board today. So we're gonna take the, um, the top part of the jump port here.
We're just going to place it up against the shoulder rest. There are many different ways to do the foot work on the reformer for your pregnant clients or for yourself if you're pregnant. We have the sea cushion. Uh, we have the sh, the long box short box that we could use many different ways. The most important thing is that we want to avoid, again, that line supine for an extended period of time. So I'm electing to use the jump board. It feels most comfortable on my body.
I like it. I like the way that it feels. It's gonna elevate my and my head up above the rest of my body, which is important. So we're going to go ahead and lie down. Our springs are loaded up appropriately too. They're Nice weight and I'm going to keep my bottom down onto the cushion or down onto the pad of the reformer and I'm going to place my head here. Now I'm at a pretty good height.
Some clients prefer to be elevated with their head with a cushion. You can do that if you choose. We're going to start with parallel heels and today I'm just going to do eight repetitions of each position. Taking a breath in and pressing out, slowly drawing it in slowly drawing. And so we're trying to utilize the hamstring work as we pressed that carriage out, keeping the body nice and calm, feeling the weight of the pelvis sink down into the carrot and just practicing that deep breathing, abdominal breathing. And number eight here and we move on to the parallel tow position.
Taking the breath in and we press out keeping the heels and nicest steady. Imagine that we're pressing from the hips, the top of the hips as opposed to too much emphasis on knee extension. Let the first thought be about the hip extension first and then you can get into those hamstrings a little bit better. All the while we're focused on that nice chunk. Stability.
Let's go two more. I'm trying to time the legs so they extend at the same moment and we'll go to the small v from here, heels come together, knees a little bit wider than the shoulders promoting that external rotation at the hip. We press and slowly draw it in. So again, with the springs, the beauty of it is that you have the controlling in which provides that little extra element of work here. And a nice cue for pregnancy is as you press out, you want to feel that pelvic floor closing and tightening and as you open your legs, you want to feel that opening of the pelvic floor. So you have that lifting up, that squeezing and that lifting up and that opening and kind of that sense of release. Exhale,
Great. Now we're going to go to the Open v position on the heels, so again, we're going to keep this idea, this image of opening up pelvis as we draw the carers back in, controlling that knee flection. Inhale, opening that pelvis, nice and wide Xcelerate things squeezes up and it opens.
We take the breath into prepare and we press sal. Be Mindful that your pelvis is just sinking down into the carriage. You're still keeping the abdominal wall as flat as possible.
Drawing your awareness deep into that pelvis.
We're going to do 10 of these
We're going to move on to single leg, but I'm willing to choose today to do our single leg lines size. So we want to alternate that kind of supine position with some lying side, um, positioning. So we're going to move down to one and a half springs. Uh, so it's kind of a, a lighter to medium resistance for your lines, side legwork. So this is our single leg. So go ahead and lie on one side and I just feel comfortable lying my head down on the head rest and my other arm kind of bent. If you need to put a cushion there, you're more than welcome to. You're going to take your top leg up onto the bar and you're going to push out to where you feel your heel really secure into that foot bar and you're going to bend your knee only as far as you can maintain that heel being down.
So you wanna make sure your hips are stacked and your shoulders are stacked nicely. You want to keep that thigh parallel to the floor. With the breath in, we press out
So we're just getting that distinct hinge at the hip and that distinct bend at the knee
I even think about the same thing here as you draw that Karajan, that opening of that pelvis. We're toning the thighs here, opening of the thigh, opening of the pelvis, keeping the foot nice and flex two more, and the last one all the way in. Then bring that guy in. And you're going to go ahead and sit up and we're gonna move on to our abdominal series. So now we're gonna move onto our abdominal series. We're going to do the short box series. There's a couple of different ways that you can do the short box series.
And we're going to do, it's the, I'm today I'm going to show you not the full series, but most of the theories from the bathy method that, uh, how we learn it in the basket method here. So we're going to place our foot bar down. I'm going to place all of our springs on and our box will be there appropriately. And we're going to sit right at the edge and we're going to grab the foot strap and place your feet under there. So we start with the round back. So again, this is nice, safe abdominal work for your pregnancy, for your pregnant clients, um, but also gives that chance to kind of mobilize the spine here. So we're going to start with the round back position.
So elbows are going to be slightly crossed. Hands in the crease of the elbows. We're gonna sit up nice and tall breath and to prepare. Exhale drawing into the c curve. Shoulders stay over the hips. We start to hinge back as far as you feel comfortable and controlled. We take the breath in and with the XL we come back up and inhale.
Restack the spine excelling dicker of that spine. Let the arms float up. Continue with the XLT, hinge back, breath and prepare XL. Keep the curve, come back, shoulders over hips and articulate to the flat back curving that lower back. Let the arms float and hinge ing, getting more of that posterior tilt of the pelvis. Breath in. Exhale back and up. Two more breath out and starting to Hinze. Squeeze in the thighs together, breadth into holds, and exhale all the way back up.
Last one, letting the rest of your spine follow. Breathe in and exhale all the way back. Moving into the flat back position. The flat back is about controlling with the abdominals, giving that nice sense of Koch and traction with your backing, your abdominals, using the hip flexors to move here. So we're going to take the breath in hindering back. Exhale, hinges forward. Inhale, keeping the shoulders directly in line with the hips, even the ears and the neck directly in line with the shoulders, with the waist, with the hips as we hinge.
So we're this nice flat controlled spine. As we move and breath in, hinges at the hip and breath out. Feel like you're lifting up and out of your pelvis. And again, inhale and the exhale. One more breath in and exhale. Next we want to the twist. We rotate similar to as we did in the warmup.
We hinge back on the diagonal. We come back up onto the rotation and back to the middle. Inhale, rotate. Xcel. You're going to hinge. Inhale, pause, exhale, come all the way back up and center. We're doing a four breath pattern here. Breathe in. Exhale, take it on the hinge. Inhale, pause, exhale, come back up and back to the middle. Keep the rotation.
Float the rib cage up. Xcel back, breath in.
We rotate and hinge with the XLU twist through that flat position all the way to the other side. You come back up and to the middle. Inhale, XL hinge. Continue with the exhale as you go. All the way around. Inhale. Exhale, back to center. Breathing in XL, the hinge. Continue with the XL. Inhale, exhale as you find the center. One more time. So we're feeling that nice mobility yet strengthen that spine as we move through our positions and back to center and bring your arms down to relax.
So that's what we're going to do for our short box series. Today. We're going to go ahead and take our box and move it off. Next we're going to be moving onto our stretches into our full body integration. One exercises. We're going to do the standing lunch. We're going to have a one spring on our reformer here and I'm going to go ahead and start on the other side. You're going to place your outside leg.
In this case, it's going to be your left leg. Your left ankle is going to be in line with the metal notch. The right foot is going to come up onto the reformer foot up against the shoulder rest, getting your hands secure down onto the foot bar. You're simply gonna bend your front knee, allowing the carrier should push back naturally. I don't want you to think about going into the splits necessarily.
I want you to just think about bending that knee and going straight down. From here. You're going to slightly pull the pubic bone forward and underneath you. What that's going to do is it's going to draw the pelvis into a posterior direction. It will not go posterior but into a posterior direction, which is going to allow for more opening and pool on that hip flexor. And as we know because of the postural changes in pregnancy, if flexors send, sending it a little bit tight so it feels like a very nice stretch to get that nice opening and we're just going to breathe.
You want a more intense stretch, you bend that knee a little bit deeper trying to keep your hips as squares you can. Next we simply extend the front knee, flex the front foot, the hips, just glide back on as one flat straight line and we'd go into our hamstring stretch. Your torso will naturally hinge forward and you maintain that really nice, beautiful straight spine. And this time you can think about actually sticking your bottom away from you or out drawing your hips to a square position. So you get a really nice pool line of pool on that hamstring.
And by flexing the foot, we get a nice stretch through that calve promoting that breath.
Now's your time for your pregnant ladies to really think about that nice full breath. The stretches are challenging for you or a little bit uncomfortable for you. Now's your time to use your breath, to draw your focus, to help you relax into the stretch.
The right ankle is in line with that little metal notches there on the reformer. Your left leg comes back. Nice, gently placed. You get yourself all established trying to get your shoulders and your hips relatively square. Hands down on the foot bar. You simply bend your knee, your front knee as you go straight down. Once you're down, establish a little bit more of that draw of the pelvis to the posterior direction and you find your breath
Try to stick your bottom out just a little bit more, squaring off your hips as best as you can, keeping your head in line with the rest of your spine and you breathe
This is where you need to start practicing that technique of getting yourself completely in tune with your body, being completely aware of the sensations that you're feeling, that's going to guide you during your labor.
And we can start to link PyLadies to these different aspects of our life that when it really becomes more than just a set of exercises.
Hands are in line with the shoulders, and you're going to go ahead and sit with a flat back. To begin, you're going to draw your pelvis into a post to your till and let the rest of the spine follow. We're gonna try to keep this nice tilt to the pelvis. We take the legs out with the breath in an Xcel, draw the kerogen legs out without losing that tilt to the pelvis and utilize the abdominals to draw it back in. Inhale. So this is a very closed and contained position and we want that. We want that drawing into the abdomen, that tightening of the pelvic floor, that strength of the shoulders. Inhale. Now I'm kind of taking some of the dynamic out of it and making it a little bit more even.
We usually do this a little bit faster.
The back sensors sing nice and active, but opening the back part of the pelvis as you draw those legs in
We start with the flat back, but then we're going to curve the back here. This is like a cat stretch position. Shoulders are nice and strong. You have the [inaudible] store, PSI active. The serratus anterior is nice and active to keep the scapula fixed where we want them. We take the breath into prepare. The head drops down is if we're looking toward our pelvis and we thread the belly button in
We do not move the shoulders, nor do we release the pelvis. Completely. Exhale,
Any sort of tightness in the back should feel so much better at this point cause we're really utilizing the abdominals, getting that nice curve through the spine.
You're gonna come up to your nice and vertical right on top of your knees. Now we're going to work on getting that really beautiful stable trunk here. Keep the arms in front of you. You're going to slightly go into posterior tilt. You're going to begin to hinge at your knees, hinges, hinges, hinges. Take the breath in, then exhale, hinge back up. Your keep that little bit of bias toward the posterior tilt and you really sit.
Exhale,
Feeling the power through your torso.
We're going to continue on with an arm sitting series on our long box. We're going to begin with one spring and we're going to sit facing away from the foot bar toward the straps. We're going to grab our shops here. You can go ahead and wiggle yourself back just a little bit more to kind of get a little bit more pull on the straps and on the spring we're going to begin with bicep curls breadth and to prepare with the XL
One more palms are going to face in. We're going to pull it back into a slight row. We're going to draw the scapular together as we pull the elbows back and inhale
XL Down and back.
Inhale as you get that final elbow extension. Exhale. Inhale, hold. Exhale all the way up to the top. Give me two more breathing.
Arms are going to be up at 90 degree angle at the elbow and a nice 90 degree angle up the shoulder here as well. We would take our breath into prepare with the XL. We're going to take the arm straight out and inhale back to the middle, keeping yourself vertical as you do the work, trying to promote the back of the shoulders, allowing a natural glide of the scapula. They're going to naturally glide together, but I don't want you to necessarily think about pinching your scapula together. I want you to think about moving your shoulders into what we call horizontal abduction and then allow the Scapula to move appropriately.
So working again, that posterior aspect of the deltoid muscles and also across the upper back and as we know during pregnancy, as the breasts grow larger, they pull the body forward, the upper back muscles tend to get a little bit weak and even pooled. So we want to help to restrengthen them and open up that chest. One more time. We take the straps away from the elbows, we play some back into the hands for external rotation. You pull the elbows back, 90 degree angle at the elbow.
You rotate your shoulders, bring the arms up, rotate them back and extend. Exhale, same Xcel as you rotate. Inhale as you rotate it back and extend XL, keeping the trunk vertical twisting at the upper arm. Inhale and extend. Exhale, twisting at the shoulder, twisting in the upper arm, promoting that nice pure external rotation of the shoulder. Attempt to keep the arm on the same. Level the wrist nice and neutral and extend one more to finish.
Exhale, inhale all the way. Placed this chops back onto their loops there and we're going to turn ourselves around. You can still choose to keep yourself on half a spring or you can choose to go onto a full spring, whichever you like. Depending on your control, your level of fatigue and such. We're going to move on to the chest or excuse me, not the chest, the hug a tree.
Keep ourselves nice and vertical might be a little more advantageous to hinge forward slightly if you have a heavier spring so you can hinge a little bit forward if you have your spring, if not, try to keep yourself as vertical as possible and you're going to bring the arms together.
As the arms move we pull the belly button in and curve that spine and we articulate back up to center
Exhale over. Inhale back to vertical. Now I'm doing this on a half a spring. If you had a quarter spring, you could also use that which might be a little bit more user friendly because we're doing single arm work and over
Hand is out to the side hand right over the shoulder here as you go into your side bend and pull it back to the middle. Today I'm doing five repetitions of each. You could go up to 10 if you feel like you need to
Draw it back to center, keeping nice pelvic stability as you rotate from the rib cage, keeping yourself vertical as you rotate.
I've put us on one spring. The hand is going to reach out and is flexed other hand behind your head. We're going to go into a lateral flection here until you're healed, the hand touches the bar. You're going to continue to stretch out that side, keeping the pelvis nice and square. Take the breath in at the bottom. The next cell.
Pick yourself all the way back up to the middle in health side. Bend XL. As you push the carriage away. Inhale, pause, deepening into that stretch XL Baca
Stay nice and square and open in how paws and deck sail back up. Two more. Inhale in how? Pause and exhale back. End One more time. Inhale. Now here you're going to bring your legs about halfway in, you're going to take your hand down. Rotate yourself so that your hand is on the pedal and you're getting this nice pike physician, this rounded position, so you get this really beautiful stretch through that back, keeping your shoulders nice and square with the ham that was already down on the ped on the foot bar.
I'm pushing that arm forward with the other arm that came down. I'm pulling back so I'm getting a little bit of opposition there. Trying to keep my abdominal wall pulled in Nice and tight. I'm going to release it. Put the hand back behind the head and slowly up to center, so five sides stretches into that nice twisted position to really get that nice opening of the back and we're going to go to the other side.
Just getting yourself nice and square. Knees are just underneath the hips if not a little bit wider hand behind the head. Other hand flex is going to be right in line with your rest shoulder. Inhale over to the side. Exhale, big side bend. Inhale, pause and exhale all the way up in how control with the obliques control what that trans versus pulling in flat XL over in hill, pause and XL over, or excuse me, lifting up to the top. Now as you go into that deep side bend, I want you to avoid a shift of your pelvis to the one side or the other, wants you to try to keep it nice and steady. Inhale, pause, Xcel that last two. Inhale, breathe in all the way up.
One more time. Inhale
Now we're going to complete this with a nice back extension. We're going to move back to our half of spring and we're going to come forward. Now for us, pregnant women, we have to open the legs kind of wide. So I want your knees to be wider than the shoulder risk is. We're going to place our bellies right down in between our legs.
You're going to reach forward and you're going to grab the out part of the reformer here. Head is going to be down. You can adjust yourself to whatever feels more comfortable. You're going to take the breasts into prepare. With your exhale, you're going to draw the shoulders down. You're going to lift the head, neck and chest up into a nice, lovely back extension. Then inhale, you're going to take it down. I'm going to have you come up on an exhale cause I want you to get that nice shoulder activation
That kind of happened over a longer period of time, so absolutely you can choose to do half of it. You can choose to take some exercises out. It needs to be appropriate to your body or you can pick and choose some of those exercises that you like to do. Your own reformer, a session on yourself so we can take a nice deep breath in through the nose
Your eyes were closed. Go ahead and open them. Give yourself a nice big hand for doing your reform my session here. Thank you so much.
Comments


Jamie - That top is from Lululemon.
Honestly, I have not tried to set up in any other position than shoulders and hips stacked and in line with one another. I lean toward that position simply because it provides the best alignment for the torso and pelvis.
Yes, both sides of the waist should be engaged and supported during the exercise.
Hope this helps a bit!
Take care Jamie!
Leah
You need to be a subscriber to post a comment.
Please Log In or Create an Account to start your free trial.
