Description
About This Video
Transcript
Read Full Transcript
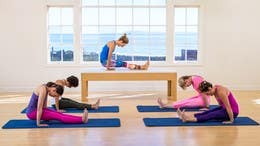
Hi, I'm Leslie Logan and we're here to play with the mat and a little bit of the magic circle, and it's all about connecting your body to your equipment, which today is your mats. So, we'll be using the magic circle a little bit for that. I've got a great class with me, so come to the front of your mat, cross one ankle over the other ankle, one arm over the other arm, and then with control, stand in your foot and lower yourself down. Think rolling like a ball, think, you know, all that curl and then lie all the way back. Stretch your arms long by your side for a moment, and your legs all the way out and just feel what's touchin' the mat right now.
Depending on what your day is like, if you just woke up, or if you just got off of work, somethings might be touching that shouldn't (laughs) and some things might not be touchin' that should. So, press your arms down into the mat, and then feel like they could go wide, that you could get really wide in your upper back and feel your ribs fall into that space. It's really hard to pull those ribs that wanna pop out in if we don't make room for that, so just press your arms down and try to stretch the mat apart, and let your ribs fall in, and then feel your legs wrap tight in together. Feel the back side of your legs really connect. So, the more your second seat, your thuddocks, can connect right now, the easier the hundred's gonna be.
So, then with all of that, just reach your arms up overhead. Take a nice inhale, exhale, float up to your hundred. So, arms down by your side, legs up, and then pump your arms vigorously, and if you pump, if you came up and you found yourself in teaser, you know just roll your ribs down and keep going. That's just something to take note of where your body is today. Two more cycles of breathing and don't stop.
Hundred
You're going to finish this next exhale, sweep your hands behind your head, bend your news into your chest for footwork, and press out and in for five and just see can you already connect your shoulders down into your back, or are your shoulders ready to be up in your ears? Take this next one, reach your legs out, hold it, stomach in, ribs back, curl another inch higher. Arms long by your side. Finish your hundred. Five more cycles of breathing, and while your arms are pumping, your body is trying to not pump, right?
Pilates Stance
Your body is trying to be super still and connected, and that way your arms can just float through and you can find the width of your back cause you will need it for the rest of our workout. Finish your exhale here and then without makin' a bid deal, lower the legs, lift the arms, lower the head and chest, and roll up just for this first one, just come all the way up to sitting. Grab your magic circle. You're gonna place it around the outside edges of your feet. So, when you don't have a strap on your mat, it can be really difficult to keep the legs down if you find that your legs are always lifting, and it's really frustrating, it's just because we don't have enough bootie in this.
Hundred
So, you're gonna put the circle around your feet, flex, and see how your circle is parallel to the floor, it has to stay that way. Lie all the way onto your back. Take your arms up overhead. Press out on your flexed feet, and then inhale roll up, round forward, and you'll pulse forward three times. Head down, pulse one, your stomach goes back, two and three, and then you roll down pushing your feet wide and not just your toes, but the heels too, and feel how you can find your outer hips and then roll up again.
Roll Up
Two more with the circle. So, when we use a prop, it's really just to help us find the outer hips, and then find the width of your back from your hundred as you go. One more time, roll up. Push your feet out as those heels go out. Your stomach will pull back, and you'll still have this awesome connected seat to keep your legs grounded as you roll down.I lied. You're gonna do one more with the circle cause you're gonna roll up. You're gonna take the circle off your feet. Set it to the side. You'll squeeze your legs tight together, and then roll all the way down, and let's do three roll ups, as we go so you have that seat going, right?
Well, you'll roll forward and you'll pulse one, two, three, and then are you using your seat to keep your legs down here? You don't have a strap, so it's all you've got, and again roll up and pulse one, two, three and it's still the beginning of our class. So, feel if you're rolling to one side or the other, and then roll up again. Squeeze the heels and round one, two, three and then roll it back. Stay all the way down, and without thinking too much about it, arms come by your side.
Legs go up and we'll go into our roll over. So, take your legs over with pointed feet. Feel the stretch of the back. It's our first one. Open your legs up.
Roll Over
Point those toes, and when you roll down, the more your head and arms and wide back stay on the mat, the easier this is gonna be. Close the legs and roll over, and so when you roll over, if you have control of your body, you won't roll onto your neck, you'll actually stop at that strong upper back. Last time this direction, if you can touch the feet to the floor you do. If you can't, that's where your at, and that's okay, and you circle together, you close the legs here. You'll open them and you'll go the other direction.Reach your arms long and away, and if you feel like when your legs roll down your head wants to lift up, just tell your head to push down your shoulders to get wider it. The more you anchor into your upper back, the easier this gets and the more stretch you get cause the more opposition you get. You'll do one more of these. You'll let your hands press down. You'll let your arms press wide, and then you'll let your stomach roll your body down.
You'll leave your right leg up and your left leg will float to the floor and we're gonna go into our single leg circles across our body first and then down, around and up, and so as you do your circles, I want your shoulders to feel wide, not just down, right? It's not like pulling your shoulders back, but wide. After your fifth circle, reverse direction so that your ribs again have that space to fall into, and so that you can actually have this strong anchored hold on cause when we do other exercises later in class we need that. Scissor switch your legs if you can and go across your body. Right when we go into our control balance at the end, and some other shoulder standing type exercises, the more you have this open strong back to stand on, the easier you get.
Single Leg Circles
So, take advantage of the circles cause they really just help set you up. After you're in your fifth circle in this last direction, you'll lower your leg down. You'll squeeze your legs tight together, and you're gonna roll up for rolling like a ball. And so, before we do our rolling like a ball, we're gonna grab our magic circle, we're gonna bend our knees and place the circle around your knees like a little crown or a halo, and then you'll push your knees apart and let your heels come tight together, and then lift just your feet up and grab your ankles. So, you should feel these outer hips wake up, and it should be very apparent that they're on, and then notice where your magic circle is in relation to your chest, right?
Rolling Like A Ball
So, if it's not touching your chest now, it's not gonna touch your chest when you're upside down, and you're gonna rock back and up three times. If your circle becomes a necklace, it's just a sign that you lost your seat, right? And so, it's easy. It didn't go too far. Your just gonna push out on circle on the next one, you're gonna find it there.And now, come up and you can stick with this, so if you're like, oh that was pretty fun, put your elbows on your knees and do three more, and this is just to make sure that you find that your rolling like a ball is part of your stomach, and they're doing an awesome job keeping their elbows connected to their knees. On the up, it's the hardest part. We usually use momentum, but if you use your stomach, you'll keep your elbows there. Good save, and then just to make sure we actually rocked what we needed to, take your circle off to the side. Put your hands on your ankles and three rolling like a balls, just to see can you keep your seat on without being told to by a magic circle?
And can you use your stomach without using your elbows? And last time, you'll stay up here and then we'll just transition to our single leg stretch. Grab your right shin with both hands, straighten your left leg out, look at it, keep your left leg there as you roll back to the tips of your shoulder blades only and stay. Pull your right knee in, pull, pull, switch. Grab your left leg, pull, pull, and then, you know, we're gonna try to stay up the whole time for ab series today, so if you have to take a break, go ahead and do it, but one more time each leg and when you're even, bring your heels together toes apart.
Single Leg Stretch
You should already feel like your rollin' like a ball. Inhale, reach your arms and legs away, and circle your arms around and pull your knees in. Chest is up as your arms go back. Because you've got that wide back, right? You know how to reach your arms out, and find your upper back. You're not reaching your arms out to let your shoulders touch your ears.
Double Leg Stretch
You'll do one more and then you'll circle the arms around. Lift your legs up. Grab your right ankle. Let your left leg go down and pause. Push this leg into your hands to connect your body into your back.
Single Straight Leg Stretch
Pull the leg two times, trying not to use the bend of the elbows, but the stomach. Pull, pull, switch. So, it's really easy just to pull on the leg and let the leg feel like it doesn't have anything to do, but the more you can push your leg into your hands, and let the curl of your back be strong in the upper back and your stomach pushed down. When you're even, sweep your hands behind your head. Good.
Double Leg Lower Lift
Find your shave here, where your shoulders connect to your back. Curl up another inch higher, lower the legs for three, two, one. Lift and one curl higher. Lower the legs three, two, one. Lift and one.Lower the legs half way down, only lift them halfway up, and then lower 'em almost all the way down. Lift 'em halfway up, and then one more time as far as you can go. All the way up, bring your right knee into your chest. Twist over to it as your left leg goes out. Curl up higher as you switch to the other side.
Criss Cross
I know it's really mean. You haven't had a rest. You only have to do two more each side if you can keep your chest up when you twist. So that upper back does not get to touch the mat. I know you're even now, so bring your knees into your chest, and that is done.So, you get to sit all the way up and enjoy a spine stretch forward. So, come up. Grab your magic circle. We're gonna do the mat as a spine stretch forward two ways today. So, I find most people hate spine stretch forward cause it just gets grippy and they can't sit up.
So, take your magic circle around your feet like you did for your roll up. And then, you will just take your arms parallel to the floor for this version of our spine stretch forward, but before you go anywhere, can you push out on your heels and your feet to find your outer hips? And then because you did that, does your stomach allow you to pull in and sit up a little taller? And then, without losing that height just round forward. Head toward your knees, arms reach forward, but because your shoulders are connected to your back, you get this beautiful stretch, and then inhale from your stomach up, lift up, but that circle's pushing out and then round forward again.
Spine Stretch Forward
Reach, and you'll know if you cheated. If you let go of your legs, your circle will fall. Your toes won't be flexed anymore. Lift up just one more time to take advantage of what this feels like in the outer hip, and that it is possible to find your seat here. Lift all the way up and stay here.Remove your circle. Press your legs out as wide as your mat. Take your hands between your legs and we'll do the old fashion spine stretch forward. You lift up and you round forward, and you pulse three, two, one and you roll up, but how can you feel the same outer hips here? Again, round forward because you're gonna go into open leg rocker in a moment, and part of the problem with open leg rocker is we just don't have enough seat action, and one more time round forward, and this is actually really reaching up and over, and then roll up, and then ideally if you have enough space, you'll just lift your legs up and go into your open leg rocker, but if you need to, you can scoot a little forward on your mat.
Open Leg Rocker Variation
Grab your ankles and hold. Right, come all the way up. Whoo! And we're gonna pause at the top here together, and press out into your hands like it's a magic circle. There we go. Rock back and up. So, sometimes you rock into your open leg rocker and you go right for it, but if you can take a moment at the top to find your outer hips, two more times like this, then you will, and then you can continue to open leg rock or hold it here and see if you can find you balance.Try not to pop your ribs forward, but instead find more of a teaser shape in your ribs and close your legs and open your legs, and close your legs and open your legs, and pull the shoulders and your back closed, and then you have options. You flex your feet and you grab your toes, and you'll try your open leg rocker here or you're gonna let your fingers reach past your toes, and then you'll rock back and up three times trying to keep your fingers past your toes. So, just depends on where you are in your open leg rocker journey, right? If you're doing what Ashley and Michael are doing, it's hard. It's actually like doing the rolling like a ball with the elbows on it, so you're doing Chanda and Zola's version, it's not easy either.
You get stuck back there. Hold it, and then everyone rolls down for corkscrew. Find yourself centered on your mat, and corkscrew you can do the variation where you keep your hips down, awesome, or you're gonna roll up to the actual corkscrew at the top, and so that's what I'm gonna teach today. Roll up. So, before you go anywhere, your head is down beyond your neck and your arms are there.
Corkscrew
We're all gonna take our legs to the right, and we're gonna circle down, around to the left and up, and then you'll go the left down around to the right, and I really challenge you to find the width of the back here, right? The more you can stand on your shoulder girdle, and the arms pressing down in wide, the easier the corkscrew's gonna be. We'll do one more time each side, and the more you do that when the legs go forward, you're not gonna feel like your head is gonna pop up, and instead you can find that seat that we've been working on this whole time. So, you actually keep your legs together and keep your stomach engaged. And just roll down through center and don't make it a big deal.Roll all the way up to sitting. Good. Okay, take your legs a little wider than your mat. Take your arms wide to the side, and then before you go anywhere, can you find your spine stretch forward hips? So the more you find that outer hip engagement here, the easier it's gonna keep your hips connected to the mat.
Let's twist to the right together. Let your head look at your stomach and round forward, you pulse forward three times, without your left hip popping off, and then you roll up, you're in your twist. Twist more, twist more, twist more, and then unwind. I'm super pet-peevy about that. I know twist and round, but there's a whole extra inch of twist when you roll up in that low belly lifts, and you get all the way up there and then you unwind, and then we'll go with a little more float.
Saw
Twist, and you'll keep pulling your opposite hip back, so that as you twist, you're not letting your feet shimmy across the mat. What that means is we lost our outer hips, and we've lost our twist. We're just turning, and you can turn around any time you want, but we don't have a lot of opportunities to twist in life, so you're gonna fight for that opposite hip to stay down and back, and then when you're even, we'll go into our swan, and then twist a little bit more. Find your outer hips and rest. Okay, so just go ahead and flip, facing each other, onto your stomach.If you're at home and you're not facing anyone, you'll just, you know flip over. We're gonna do a couple swans, and then we're gonna do a little diving, and you get to choose, right? So, it's choose your own adventure swan day. Lift your, before you go anywhere actually, let me set you up because I love the seat in the swan. It really does make this awesome thing happen, so I tend to spin my inner thighs up a little bit to push my pubic bone down, and that helps me find my low belly cause that's the first thing that wants to go bloop onto the mat.
Swan
We're gonna pull it in, and that means your frontal hip points will probably be lifting up. Try to make sure your toes aren't tucked under, and then lift your hands, head and chest off the mat, and before you go anywhere, did your frontal hip points already dive in? Did you already stick your butt out? Maybe, so reach that tailbone towards your heels. Place your hands down and pull your chest forward.Not back right, it's not this awesome thing that's gonna be an Instagram moment. It's just gonna be forward and long. And you're gonna lift your hands up and you're gonna hold it, and then you're gonna lower all the way down. Your hands head and chest will lift up, and again, did you drop your stomach? Can you pick it up off the mat when you push your hands down and drag your chest across your mat?
Then let's lift your hands up. Nothing falls, it's not a big deal, you're gonna roll down. Now you can stick with that. It's an awesome way to find the muscles in your upper back, or we're gonna dive with our arms wide like wings today. So, take your hands, head and chest up.
Swan Dive
Reach your tailbone long to get out of your lower back and make this extension your upper back and put your hands down and lengthen a little bit further, and maybe a little further than you did before. Shoot your arms out, lift your legs up. Rock forward and back three times. One, get your spine longer, two, and then hold at three, hands down, sit back, child's pose. You can do cat cow, child's pose.
Child's Pose
You can do Joe's cat pose where your head goes to the floor, and you reach back and grab your ankles. Zola's gonna do that. She's gonna lift her hips up a little bit to stretch her back. That's my favorite. And then you're gonna shoot yourself out for your single leg kick.So, come into your single leg kick. Prop yourself on your forearms, and then just let it all go. Like just, like let it all hang out. (laughs) Yeah. So, this is what that feels like, and then we're not gonna do this again.
You're gonna lift your stomach up. You're gonna connect maybe your pubic bone to the mat, but this, these frontal hip points are gonna pull up towards your ribs, and they your head will be an extension of your neck, which is probably looking more forward than you think. A lot of people like to look down, and then you're gonna do your right heel toward your seat two. kicks, and your left heel towards your seat two kicks. And as you kick, I want you to feel your stomach pull up into your spine to actually support the lower back. So, we couldn't balance anything here, right?
Single Leg Kick
Because it's actually this nice extension. Pull your shoulders back one more time each leg, and then lower both legs down. Lower your whole chest down, and take your hands behind your back for your double leg kick. And I like to just layer the hands, as opposed to enterlace them, and you're gonna look to the right. You'll press the creases of your thighs down to lengthen the back, and when you kick your seat, we don't twerk, we're just gonna kick three times.
Double Leg Kick
The hips won't booty bounce off the mat because your super connect in control of your hips. Then, you'll lift your hands up to go back, and your chest will go forward, and then you lower down and you kick three times. Three, and then you'll pull your arms more up then back and your chest more forward, and then you'll kick again. So, using the hands layered to actually find your back muscles to pull chest up is gonna feel a lot better than hanging off hyper extended elbows, and just pulling your shoulder blades together will actually make you stronger. Let's do one more time each side.As you kick again find your swan stomach, and find your open chest from the back muscles that we've been working all day, and then finish this one. Enjoy it. Sit back. Do your final child's pose here. So, we're gonna go into thigh stretch and in the thigh stretch, if you're like I don't stand on my knees, it's not my thing, then you are gonna rock with Zola's gonna rock, which is shoulder bridge, cause we're gonna meet you on the mat in a moment anyway.
Child's Pose
So, go into your shoulder bridge. Otherwise, you're gonna stand on your knees and your arms are gonna be up to the sky, and so before we go anywhere on your knees, it's really easy to be like okay I'm standing there, but this is not working at all. So, what I would love everyone to do is take your heels and just squeeze them together behind you for a moment and make yourself push a little further forward over your knees than you would feel is right. Then, separate your feet, but keep the vas on, keep that second seat on. You'll lower your arms in front of you as you lean back for your thigh stretch, and you should feel like rowing free here, you should find your back here, and then as you lift your arms up it helps pick your spine up off your hips, and then you lean back, and the more you reach your knees down, the more opposition you have, and then one more time, we're gonna lean back and you're gonna go a little inch further and you're gonna try to find more length, and you're push your feet into the floor and lift up.
Thigh Stretch
Open the chest and then plenty of those. Let's all sit up facing each other for our neck pull. So, when I teach neck pull in a class, it's rare cause if you don't have a strap, it's the meanest exercise in the world, but we have magic circles and we have strong butts, so we're gonna do it. It's gonna work. So, put your circle around your feet to push out, to find the seat.Yes, and then you take your hands behind your head, and ideally you're gonna stay, you're gonna start lying on your back. That's what I'm gonna make them do, you know, no one's watching you at home. Choose your own style, but lie on your back, and then before you go anywhere, just double check that your feet are pushing wide also from the heels, and then because your hands are behind your back, your ribs probably decided to take a moment and stick out. So, let's pull them in, bring them back to class, and then you're gonna roll up and dive in head to knees, and you're gonna pulse three times. One, two, three.
Neck Pull
Then you just sit up, and then this is the best part. Just push out on your circle and roll down. Just roll down, no even hinging, just roll 'em and dive back in, and then you don't take a long time at the bottom cause you have to get back up and you sit up and you roll back, and when you get to the spot of where your shoulder blades is about to hit the mat, that's when you push your head into your hands more because that's where the neck pull is. It's on the way down. So, you just push your head into your hands and stretch your neck.Let's do one more cause we have the circles and their doing amazing keeping their legs down. I'm amazed. Roll down. Go all the way down, then that's enough of those. So, ditch your circles and we're going to go into high scissor and bicycle, and so make sure you have enough mat on underneath your head, and then take your legs up to the sky, and then place your hands in your back pockets, and then when you're here, your gonna lift your legs up. So, it's easy to think that up is behind your head, but up the ceiling that's above you, and then you're going to keep your right leg reaching for the ceiling.
High Scissors
It does not counterbalance as your left leg goes forward, and then you lift it up and then you switch, and so we're really trying to lift this leg up to the sky as we go, this back leg is going to go up, yep, and the back one goes up, more up than back, yes, and then you're gonna go into your bicycle. It's really hard to do up and not back, so if you find that your leg wants to counterbalance, you just have to keep thinking, how much can my shoulders and my head help that? And as you bicycle, your hips can go forward a bit over your hands. Reverse your bicycle. You're trying to aim for the mat.
High Bicycle
So, Ashley's got it. She's gonna try to touch her foot to the floor, and she did it, it happened here, you saw it. (laughs) So, when you're even bring both legs up to the sky. You have two options. Well three, you can just roll down.That's fine. Or, you can take one leg and reach for the mat and land in your shoulder bridge, or turn your hands to the side, bend your knees, find your rolling stomach massage on the Cadillac. Reach both feet for the math and land. Boom, quietly in, or loudly in your shoulder bridge, but that was amazing. So, in shoulder bridge ideally your hands are underneath your hips, but if you're like please dear God don't make me do that, your arms just go down by your side, and then everyone's gonna narrow their feet up a little bit cause you never know how they're gonna land.
Shoulder Bridge
So, make sure their only a fists distance apart. Slide your right foot along the mat. Point your foot. Kick it up, and then flex, squeeze it down, and point lift it up, and if you can the heel will touch the mat because you're awesome and your butt is strong and you're stretching your hip, and then when you're gonna hit the mat, you're gonna slide that foot back in, reach the other leg out, pull the stomach back, and point kick it up. Flex, squeeze it down.So, if you're finding that your wrist's hate this, it's because you're not using your butt enough. So, just push your head and your shoulders into the mat and find more seat and your hands are really just there for looks, and then you'll finish this one. Your foot will go down. Your arms will reach down by your side. You'll roll your hips down, and you'll sit all the way up cause you survived all of that, and we're gonna go into our spine twist.
So, legs are together and then just like your single leg kick, what I would love for you to do is just sit like you don't really do Pilates. (laughs) Like what does that feel like? And then, sit tall and squeeze the back of your legs together. Good. And then let your butt go.
And then squeeze the back of your legs together and then let it go. And then notice who when you squeeze the back of your legs together there's like an inch extra. I mean there is for me an inch extra space, and then take your arms wide, and say I will never let my butt let go, and with your heels together, twist to the right. Hold it. Pull your low belly in.
Spine Twist
Keep your feet together. Twist a little deeper, and a little deeper. And then come and unwind, and then twist, and they are doing an awesome job of not moving their feet. I didn't even have to tell them to, and so you at home are all thinking, how awesome did I rock the saw, can I do the same thing here and keep my seat on and my feet together so that I am actually wringing out my waist, right? And then one more time each side.And then when they're even, with their hugging legs together, they're just gonna reach their arms forward and you're gonna roll down onto your back. Make sure that your head is on your mat, so scooch in if it's not, and then take your arms down by your side, and so we are going into jack knife, and if you need to do the roll over again, that's awesome too, right? It's just another variation of it, so hug the legs together. Let's start 'em of to the ceiling for the first one, and then with your wide back, take your legs over, try to touch the mat. Lift 'em up to the sky.
Jackknife
Toes are over your eyes and pause. Reach your toes up to the sky with your tail, and then roll down with control. The legs will lower to a level you can control, and then take your legs back over and up. So, the legs go over, they lift up. Hold, yep you stick the landing, and you reach your toes to the sky as you curl your tail up.So, that there's opposition, you let the legs lower and then you go over up one more time. We just enjoy this moment. Push your arms down. Lift the legs and hold, and then your toes don't go behind you anymore cause decided to do jack knife, and you're gonna roll down, and you're gonna control it all the way down. So, we can lie on our right side for our side kicks.
So, I'm super particular about side kick set up. I'll never stop until people start being particular too. So, your elbow to shoulder to booty is at the back edge of your mat. Like don't let your butt be in front of that, and then both legs come to the front of your mat, and if you have a moon box, then they go on the moon box, and give yourself that moment, and then your bottom leg, it's like your standing on it, like if I was to do side kicks right now, my foot is flexed, so you're gonna push that foot flexed and down into the mat, like you push out on a magic circle, and you push so much and you take your top leg, and you point your top foot, and you reach it longer, that your underwaist, it might not be lifted, but I could certainly blow wind through it, right? Because your obliques are all on and that's gonna help you connect, and then this other hand can be behind your head or it can be on the mat.
So, I like mine behind my head because it keeps me honest and then take your chest and just reach your chest, you know, away from your foot. It's gonna feel like swanish. Then you're gonna take your top leg, kick it forward two kicks. One, two, kick it back, one, two, and so how I learned the kicks is it's kick forward a little bit back and then kick forward, and then kick forward a little bit back, kick forward, back, a little forward and back. Kind of like you would bounce a ball, so it's how much in control of your leg are you?
Forward and Back
If you're swinging your leg, that cue made no sense to you, but if you're in control of your leg, you can actually do it, and I think we've got it down here, so we're gonna take that top leg, we're gonna reach it longer cause we didn't lose our underside. Turn the leg out, point kick it up, flex, squeeze it down, and so people, some of us are blessed with this amazing ability to lift our leg behind our head, and that's cool, but can you keep your right waist up when you do it? Right? So, you can lift your leg as high as you want, but you can't let the hip dip back to make that happen, and it also can't dip into your rib cage. Keep your sides long.
Lift and Lower
You need them. Okay. Then take your top leg back, and this is where everyone likes to dive their chest forward. So, swan your chest out. Point the foot and do little circles back here. Oh, way back here.
Circles
Yes, way back where you can really find your thass, where your thigh meets your booty, and then reverse your circles, and you're trying to do it from your thigh and not from your pelvis cause we're not hula hooping, and then take your top leg over your bottom leg, and this is where, you know you're just gonna do it. They're big circles and you're gonna go up, back and around, touch the heel, forward, back and around, touch the heel. One more time, forward, back and around, touch the heel, and then you reverse, you go back up and around and touch, and your shoulders are probably in your ears about this point so you're gonna find your back as you finish your circle. Top leg over the bottom leg, and we're gonna flip over and do the other side. So, you guys will just take your heads over here.
Circles
Yeah, so they can see your beautiful faces. It's more fun that way. So again, second side is set up as the same as the first side, so take your legs forward, lift your underwaist up, connect to your obliques, and then the top leg goes. Find that magic circle set up with your legs. Kick your top leg forward two kicks, and then back two kicks, and then don't forget, you know, it's kick forward, a little bit back, kick forward.
Forward and Back
Back a little bit back. Kick back. Good. Forward kick, and then we're gonna reach back, back forward, forward and back, back, and we're gonna keep that waist nice and long. Good. Okay. With that top leg over the bottom leg, turn it out.Point kick it up, up and then flex, squeeze it down, and as you go up, did you lose your length in your waist? I get excited too, I think the more I can swing it up, then the easier it's gonna be going down, but it's not true, and we'll take that leg one more time up, and you'll flex squeeze it down, and then you'll open your chest a little bit, and you'll take your leg back, and then maybe further back than you think. Pull your stomach up and circle your leg, and the up and the back are actually the harder parts, so don't skip those. The down and the forward, I don't really care so much about. Right? I don't not care, but it's not as hard for you to remember to do, and then top leg after that reverse if you haven't.
Lift and Lower
And then top leg over the bottom leg. So, before you go into the big circles, hold. Just think about your big toe. Pull your stomach in, push your bottom leg down, and then three big circles from the big toe. One, and two, and three, and then reverse, and if you just think about your big toe moving through space, it becomes less of an effort, and then rest. Good.
Circles
They're gonna bring their feet forward towards each other on the mat for teaser. They'll sit up just for a moment. So, teaser, we're gonna do all of 'em because they can and I believe everyone can someday, but if you're new to teaser, there's a magic teaser. So, we'll do magic teaser together, and then you can choose your teaser journey today. So, hands by your hips.
Circles
Take those find twist hips and squeeze 'em together. Pull your belly in and then you'll round forward because remember teaser isn't a V, you have that nice round shape, and then you'll lift your feet up and you'll tip back, and then you won't crash land, you'll come back down, and you're trying to keep the relationship of you ribs to your thighs the same. So, stomach in, tip and then land, and then tip, and maybe you reach forward and you actually try to touch your toes in tease gravity, right? Like if we fall it's actually okay. It means you were trying to do the teaser, and then you'll come back down. Good. Okay, so you can do magic teaser for the next few moments, or you're gonna lie down.
Teaser Prep
And then, you know take your arms overhead. It should feel more awesome than it did before the hundred because we're super warm and ready. Squeeze the legs tight together. Float up for teaser one. Reach up and pause here, just to lift your arms up.
Teaser 1
Find your thigh, stretch back. Roll your upper back down, leave your legs. Lift your arms forward and reach. Try to keep your legs in one spot. Lift your arms up and roll down, and then reach your arms forward and hold it here.Tease gravity, reach forward so much you can lower and lift your legs. So, we're doing the teaser. It's not usually very pretty. There's not really a good moment for a picture cause if you're doing it right, it's like I'm gonna fall. Hold it, lengthen your arms away from your legs, and you're gonna lower everything down and touch the floor and come back up, and then reach the arms up.
Teaser 2
Find your upper back. Stretch away from your seat, lower down, and then lift back up, and then we're gonna do one more time. Reach the arms up, lower everything down. Yes, you have to come all the way back up. You don't get a break, you just take your hands back behind you, and you can be on your hands or on your forearms.
Teaser 3
Hip circles, here we go. Circle the legs. Three time each direction, where your ribs actually pull back cause you're still in teaser, and your stomach pulls in to support those legs, and then your seat, you know, it's still there holding those legs up. It's much easier if you use your booty. Hold it, reach your arms forward, and then lower all the way down, and ha, just flip over for swimming.
Hip Circles
Arms long in front of you. Legs long behind you. Find the pubic bone in the mat to lift your lower belly up, and then lift everything off the mat, and start to swim opposite arm and leg, and we're gonna use that wide back that we discovered in the beginning of class cause that's where our arms are connect to, and you're gonna use your inner thighs and you're gonna thank God swimming exists because after all that, it's important. Then, you're gonna lower everything down. Sit back, do a child's pose.
Swimming
Whoo! Okay so, we're going into kneeling side kicks. If you again, can't kneel, you'll do some sidekick variation. Zola's gonna rock some sidekicks for you, but before we go into it, we're actually gonna do a prep. So, maybe you're like oh I hate, I can't do kneeling sidekicks, but maybe you could do the prep, right? So, you'll stand on your knees.
Child's Pose
Put your hands behind your head like you're gonna do the shave. And so I find that kneeling side kicks, the hardest part is just controlling our side body and not twisting. So, we're all gonna pull our shoulders down and our ribs in and then dig your shins into the mat to feel lift out of your hips, and then you're just gonna tip over and we're gonna land on our right hand. Hold it. Your right hand should be in line with your shoulder.
Kneeling Side Kick Prep
Your right hip over the knee, right? And then, your left leg is out. Then, we're gonna use our stomach and everything's just gonna come up and land super nice. Then, we're gonna tip over and land on our left side. Oh my goodness, maybe I should be doing that with you guys because it's really hard when you're cold, and we're gonna come up and we're gonna land, and we're gonna tip and reach, and tip and lift, and you'll feel where you need to feel this.What has to warm up, keep going right and left, is these hips, right? They are what support you and they are what help hold it all together. And we're gonna do the left side and then this next time we hit the right, you'll stay there. Now if you're like, Leslie I love what you've created so much, just keep doing it. Otherwise, hold it here.
Forward and Back
Hips over and go ahead, start to kick your top leg forward. Kick, kick and back, back, and kick, kick and back, back. Now the beauty of this is only have to do three, and so that's three, and you're gonna lift your leg up and hold it, and big circles here. So, the bigger they are, it actually feels better, but keep your right hip over your right knee. If it's starting to stick out, reverse it.
Circles
Then, you're just putting your butt to the person behind you. It's not polite. So, bring your hip over your knee. Hold it up there, tip back onto your knees Yep, go to the left side. Tip over, hold, kick forward kick, kick and back, back, and then I know we're tired, and this is the end, but let's keep the shin down and the hip forward, and then you're gonna hold it and do big circles.
Forward and Back
Yeah, big circles. Yep, just like the big ones. Use the big toe, reverse it. Don't think about, oh my god this is killing my butt. Just think about your big toe, and then land on both knees. Good. All right.
Circles
So, now we're all gonna sit onto our right hip, and place your right hand out for side bend. So, the feet can be stacked like Ashley's doing. They can also be top foot in front of the bottom foot. It's totally up to you. You can be on your forearm or on your hand.Ideally, you're on your hand, and then before you go anywhere, tell your right elbow it is not gonna hyper extend. And then tell your right bicep to spin out. Your hand and your feet are in one line so you don't twist, and then you're just gonna take your left arm over and boom land in your side bend, lift your hips up and hold it. Lift your bottom hip up and then with control, bend your knees and lower your hips all the way back down and go again. Lift your hips up and reach, and I have to say I just nailed this two days ago without any twist, so if you're twisting, you know it took me 10 years, so there you go.
Side Bend
And lift up. If it takes you two days, you rock. Pull your ribs in and then come all the way down, and then I lied, you have to do another teaser. Kick your legs over to the other side. Left hand down and then same feet position as before, and here we go.Lift up and reach that left bicep out. So, I tend to find that the shoulder comes in, lower all the way down bend your knees, because we don't actually pull the left shoulder onto our strong back. So, turn your left bisep out, and then bend in and you will find that you actually have something better to stand on, and lift up, and you're not just relying on your like neck, and then come all the way down, bend your knees and face each other for boomerang. So, boomerang is just that magic teaser and open leg rocker and a little bit of rowing all together. So, we are so ready for this.
Cross your right ankle over your left. Take your hands, they're gonna stay by your hips for most of this exercise. You're gonna bend over and think about your stomach pulling up and away like you would for tendon stretch on the reformer or rowing, and then find your magic teaser. Lift your legs up. Rock overhead. Quick change, and then as you roll down, you leave your arms by your side.
Boomerang
You reach your arms back and you pull some back from your back. Three, two, one as you roll forward, and then your hands just come back by your hips, and you just roll back and you open close quickly. So, those are pulses are actually a way to counterbalance the landing, so you should still be rounding forward and lowering your legs, but you won't crash because your arms are connecting to your back, and so that's what we always have to think about. Our arms are not these limbs that are out in front of us, but they're actually something that works from our back. So, you'll keep rolling.Let's a couple more. As you go, you'll actually find your outer hips, and then when you go forward let your legs come down as you reach your arms back, Ashley. Yes, there and it's hard to you know control it, but that's what you're trying to do, and so if you at home are like, I'm not getting this timing, you know it won't happen today, but it will happen eventually, and then you can thank your back for all of that. Whoo! So when you're even, plenty of that. Bend your knees, dive your hands in.
We're gonna do some seal. Yep, so your hands go in, they grab the feet and then my ideal seal is that you inner foot is touching. So, not your soles of your feet, but the inner foot. That is also all balance on flexibility, so don't worry if you can't get there. Close your knees, become your own magic circle.
Open and close your legs three times. Some of you will rock back, and you'll balance, and you'll clip one to three times behind you, and some of you, you know, will do nothing back there, and you'll just come up, but what you are trying to do is lift your hips up to the sky cause we're getting ready for our balance control and you need to be able to stand on your back, your wide back and lift your hips up. So, use your seal to help prepare your body for what's to come cause that's what the mat's all about. Right? Then, you're gonna come up, you're gonna enjoy that seal it happened, and you'll set your feet down.
Seal
So, we're goin' into balance controls. If that's not, you know, something that's available for you, you can do your single straight legs stretch again or you can keep sealing, and you're gonna lie down, and your arms are gonna be by your side, and then you're gonna take your legs overhead. They'll reach for the floor, and then you'll take your arms overhead, and you'll grab an ankle, and the ankle that you grab, just double check that you're not on your neck, that your shoulders are down your back and you're on your wide back. Lift your left leg up to the sky and it's actually going to the sky, not in front of you, so lift it up as much as you can, and then, you know, with your stomach in and your strong back, switch your legs, and you can bring that leg down and then switch or you can switch in the air, it just depends on where you are and then switch, right? And then switch, and just do a few more and trust your wide back, because again the more you actually got into your back the easier this is.
Balance Control
It doesn't become a balance exercise, it becomes just a body exercise, and then when you're even, you'll bring both legs overhead. You'll leave your arms overhead, and you'll roll your legs down and with control, you're gonna come up to standing on both feet. So, roll down. Land on your feet. Reach up to the sky. Superstars you are. Boom.Walk to the back of your mat. Okay, heels together, toes apart. We have warmed up our back and our butts for this moment. Arms to the sky. When you round forward, do not stick your butt out behind you.
Push Up
Imagine you're doing your awesome roll up, right? You roll down. Then you keep your head in and you get four counts to walk out. So, use your hips to rock forward to make you go forward in four counts, hold it. Just one push up here.Lower it down, come up, pause. Head goes in, find your elephant, lift your stomach up, and as walk your hand back, it's because your stomach lifted up so much, and then when you roll all the way up, keep your arms by your ears and land at the top like that, Ashley, thank you so much, and then round forward and you're gonna dive in, and when you roll down you don't stick your hips out or lock your knees. You're gonna walk out, and then you're gonna do two push ups, and then when your head goes in, your waist goes up. Eliminate the down dog, walk your hands back and then soft knees, tuck your butt under. Roll up with your tail dropping down to your heels, and then walk, roll down. Go out.
This is the last, this is all you have to have energy for. I promise. Three push ups or you can hold, you know that's always an option, and then because it's your last chance to roll back, using your body, lift your hips up and then tell yourself, I will not stick my tailbone up to the sky. Walk your hands back, pulling your ribs up and your shoulders down. Soft knees.
Roll all the way up. That was amazing. Lift your arms up. Circle your arms around. We totally did it.
(laughing) (clapping)
Comments


You need to be a subscriber to post a comment.
Please Log In or Create an Account to start your free trial.
