Description
About This Video
Transcript
Read Full Transcript
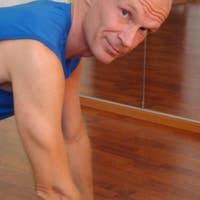
Hi everybody, it's Jo Bezzina here. I am so excited to be here after winning the 2017 Pilates Anytime Next Instructor contest. I'm going to take you through a reformer class and I'm so happy to have Angelica and Mary here to participate and to inspire you in your own sessions. So we're gonna start with a standing roll down coming up and over the foot bar. So ladies, you could place one blue spring on your reformer and we're going to have a moment to really feel the connection down into the ground through your feet, feel the energy through both the front of the foot and through the heels, energizing up through the rest of the spine, allowing the shoulders to soften, feeling the length through the neck, and feeling that connection and support through the lower abdomen as well.
Let's begin to exhale and roll the spine down, allow your arms to come up and over the foot bar and let the heel of your hand rest on the edge of the carriage. As you start to roll the carriage forward, really this movement is coming from, it's gonna stay in flection a little longer, and the movement's gonna come from a sense of elongation through the lower spine, good. Take this moment to inhale and feel the expansion through the ribs, and then as you exhale, keep pushing the carriage away as you curl the pelvis under, feeling that connection through the lower abdominals as the carriage comes closer and closer in, pause, and then we go again. Exhale as you roll forward, maintain that flexed spine, feel the length through the lumbar spine, allow the head to fall a little, good. Allow that expansion through the ribs, really feel how long you can make your body, breathing in, and as you exhale, resist the carriage as you curl, feel the way the pelvis rolls over the tops of the femur bones and bring the carriage in as close as you can, really feeling that tight flexed spine.
One more time here, curling forward. This time, when we hit the end of the movement, you're gonna stay here and bend the elbows close to your body, that's it, nice and close to the body, and then as you press away, feel the way the ribs open up even more and more and more and more, creating space through that part of your spine, bending the elbows two more times, in, and then finding that length as you press away. Good, possibly even getting in some more length through the lower part of the body. One final time here, bend, and reaching into the carriage, moving it further away than you thought you could, noticing the way your shoulder blades slide around your back and now curling the body back up, resisting the carriage, very very nice. Rolling through, feel the hands, effortlessly lift off the end of the carriage, the pelvis rolls over the tops of the thighs, fantastic.
We'll place a red spring onto the reformer and come a take a lie down. So we'll have our head on the headrest, feet can rest on the bar, just really taking a moment to feel your connection to the reformer, that you have evenness in terms of your position around the shoulder blocks. Beautiful, and really feeling the length of your spine as you connect to the carriage. Let's take hold of those straps and what I'd like you to do is to find tension in the straps nice and early. Good, really feel that connection so that now, when you take your feet up off the bar into a tabletop position, you feel ready.
We're gonna allow the arms just to settle nice and deep into the shoulder blocks, really feeling that downward energy into the shoulder socket. We'll take the arms a little wider as though we're gonna do the YMCA and we'll draw the arms down to the hips. Beautiful, inhale as the arms float back up into position, noticing that lift and that space through the rib space as well. We'll continue for five more, breathing out as you draw the arms down, breathing in as the arms come out to that YMCA position. Beautiful work, noticing the way your legs are behaving in this position as well, feeling that connection from each thigh deep into the hip socket.
Beautiful work, final two coming your way, just bring those arms in a little closer there Mary, beautiful. And up, and final one, this time we can leave the arms down nice and close to the hips and close to the reformer, the palms should be facing down but not actually resting, and I want you to have a sense of where the middle of your body is, where mid seam of your T-shirt might be, as we bend the elbows out to the sides, feel the openness, so just out to the sides, yep. Feel that openness through the pecs as you take your arms out this way and then pressing back down again, beautiful. And again, reaching those elbows as wide as you can, and then back down again, like you're pulling apart something like fairy floss, really feeling that openness across the stretch that is facilitated by those arms moving out in this position, and then back down. Be mindful that the hands stay flat to the mat, great, and down one final time now, bending the elbows wide, and then straightening them back down.
This time, take the arms straight up over your shoulders, and again, find that openness in your chest even though your arms are right over. We exhale and draw the arms straight down by the sides, we pause here, bend the elbows, so fingertips point directly to the ceiling, straighten the arms again and then take the arms back up again, every nice, five more of these. So breathing out to draw down, then bend the elbows, then keeping the arms straight, take your arms back up, perfect, really nice. Breathing out to draw down, good, bend, see if you can hover your elbow just off the mat while the elbows are bent, keeping that space, good, and then raising the arms back up again. Two more, breathing out to draw down, and bend, exhaling as you straighten, and floating the arms back up, good.
Final time, drawing down, and bend, and straighten, pause here, take time to open up through the shoulders and then take the arms up again. Good, as you take your arms out to the sides, I'd like you just to pause here, reach out through the pinky fingers further than you think you can, use the previous two exercises to find more and more space through those pec muscles, beautiful, draw the arms down, palms should face into the body, pause here. Feel a little more external rotation through the upper arm than you thought was possible, and then when you bend your elbows, they will go out into a slight diagonal. Really nice, good, and then from there, straighten the elbows again and take them out to the sides. So that's the pattern, we have five more.
Breathing out, drawing down, bend, it's really important to feel like this is coming from the top of the arms so that you're not feeling any discomfort at the elbow joint, and up. Drawing down, and bend, and like you're using an old-fashioned wine opener, as the arms go out, feel the weight of your hips dropping down and arms come down, and bend, good. Each time you bend, noticing that beautiful openness through the shoulders, one more time, draw it down and bend. Perfect, and straighten, and up, good. Pausing here, find that space one more time, three arm circles in your own time, bringing the arms forward and down, and around, really good.
And just using this time to really feel where your bones are in your body, in addition to what your muscles are doing. Good, and around one final time, and then we will reverse. Good. Feeling that breath move through you as well, how are your ribs behaving as you are seated here on the mat? Very nice and then the arms will come up, perfect.
The feet will come down onto the bar and we're going to be on the heels. That's it. See if you can bring the carriage all the way in. Excellent, but keep tension on the straps, good. So we're going to use the arms for feedback, as our goal is to keep the carriage completely still for bridging.
So, we want the feet about hip distance apart, hip width apart, great. And let's start by really finding that connection nice and deep through the lower abdominals, rolling up, not necessarily all the way, but just as far as you can keep the carriage still, feel as though there's something pulling you up to the ceiling through your kneecaps. Take a little inhale here, use this opportunity to breathe into your back and exhale, rolling down, without any movement through that spine at all. Fantastic, good, we've got five more of these. Breathing out as we curl up.
So this is a great time as these lovely ladies continue, to think about our standing roll downs that we started with, and how you're able to find that deep abdominal work, and apply it to this position, really creating that length through the spine. This time of course, we're thinking more of the lower part of the ribcage and lower spine. Curling up, spearing your thighs far across the room as though they're a pair of javelin, and then rolling down, notice the way your chest softens, your heart falls, your lungs and liver weigh you down and give you connection to the mat, and then widening the sitting bones before you go again. Good, that's it, keeping that connection through the lower abdominals, noticing the way the glutes connect and help you stay up here as you inhale, and then exhale, the throat, the heart, the chest, the abdomen, the lower spine, the pelvis, the hamstrings let go, the glutes let go, ready for one more time, rolling up, reaching to the ceiling and then soaring those thighs across the room. Energy through those arms, and then rolling down.
We'll throw another one in for good measure, good. One final time here, maintaining the alignment through the thighs, rolling up, and this time, when we hit the top, keeping that carriage still and being mindful of your stability, left to right, let's float the right leg up to tabletop. Place it down and now the left. Good and we're gonna do three to each side. In your own time, feel the way the left and the right side of the pelvis have to stay really connected.
Good, rolling up, yeah, that's okay. Roll it up, we'll just do one more to each side. And Mary, you can come on down whenever you're ready, so one more to each side, good. And the other, good. And then rolling down.
So quite a challenge on only one red and one blue spring. (giggling) Let's take your feet into the loops now. Okay, so we're gonna take the legs straight up. Nice and straight, beautiful. So this exercise variation is called, putting the lid on the box.
Our goal is to keep the thighs completely still, and we're going to use the hamstrings initially only to flex the knee. So we're really thinking about the lower fibers of the hamstrings, so as you exhale, drawing the knees into a bent leg position, good. Like so, you can go a little further, good. And then from here, we push that box away, so you straighten the legs and now we're thinking about hip extension and then we take the legs back up again. Good.
So just keeping that lovely parallel alignment, we're going to keep the thighs still, draw the legs down so it's just a knee bend, moving that carriage, fantastic, from here. It's all about opening up the hips, pressing away. Beautiful, and then the legs come straight back up. Great, so we have knee flexion, moving the carriage as you do so, hip extension and then release for those hamstrings. Perfect, three more, drawing down.
I really love this exercise because as someone who hyper extends my knees, I find it a really great way of connecting to the backs of the legs for the circles that we're going to be doing a little later. So drawing down, find a connection through your lower abdomen as you push away so you get that connection between hamstring and belly, and then here, enjoy the release through the glutes as well. One more here, pulling down. And then press and then lengthen. Now we can reverse this, so we take the legs while they're still straight and lower them straight down so there's our hip extension phase.
Now from here, it's as though we're pulling the heels in, as opposed to just thinking about bending the knees, and then lengthening up, reaching the heels, and finding that release through the hamstrings. So reaching down, and imagine that your whole sole of your feet is going to touch the far side of the room, draw your heels in, of course, that requires bending the knees, but we're just really gonna think about the heels, creating drag and then reach those heels to the ceiling with as little movement through the carriage as possible. Very nice, six in total, reaching down, and then drawing those heels in and now finding that elasticity in the back of the thigh, reach for me, good. Soften the ribs as you bend the knees, beautiful, and now lengthen, focusing on the back line of the body. Great, two more.
Drawing down, checking in with the rest of the body now that you have the choreography, how's your head positioned, how's your rib cage? Are you tense through your hips or are you able to create this movement just through the legs? That's it, and bend, and lengthen. Now at this point, we can keep the legs long. We're gonna take both legs and push them away from you and then circle them out to the sides, and let's do three leg circles, just really enjoying the movement but focusing on how you can create that movement as close to the hip as possible and coming from a place of muscular connection rather than just pushing out through the knees.
Good, so that's a beautiful third circle. Around and then we get to go the other way, these are like a reward. Enjoy, see how long you can make those legs up, and out and elongate, good. One more time, up, and out, and find that lift through the pelvic floor and connection through the legs and then take the legs up. This is a good time just to make sure that your headrest is down as we're moving into the short spine.
So let's take the legs straight down one more time and really feel that connection. Today the version of short spine that I'd like to do, we're actually going to get the pelvis moving quite early, so I want you to really feel as though your arms are part of this movement, almost as though you're trying to push the carriage in with the arms as the legs are going up and over. So from here, exhale as you curl up and over, really lifting up through those hips, and sending your legs away from you on the diagonal. Bending the knees, pausing here, and let's think about how actively we can create this frog position. So using our last exercise, how active is the far end of your hamstring and the top end of your hamstring to find this really active frog, so the legs can facilitate the movement of your spine as you roll down now, keep that activity through the legs, keep it, keep it, keep it so the legs do not straighten, they stay bent, staying bent, staying bent, beautiful.
And then the pelvis will come down and you can extend the legs out away from you. Perfect, and again, curling up and over, and now we're really gonna think about the way we bend the knees, so it's active knee flexion, active hip flexion, really deepening into the core, now we match the energy from the straps as we roll down, one segment at a time, keeping the knees bent, matching the tension from the straps through the feet, good. That was really nice, beautiful Angelica, and then pressing away. Good, one more time like this. So curling up and over, deep through the core, actively bending through the knees, finding that connection through the straps, working with the equipment like it's your dance partner.
Rolling down, maintaining that same shape through the legs the whole time, keep reaching through the feet, further and further and further until your bottom is down and you can press away. Very nice, so we're gonna do one more and this time we're gonna add some frogs in the air. So let's curl up and over, good. So this is gonna be quite a strong hip extension exercise, bending the knees, now maintaining the same position through your pelvis the whole time, you're gonna reach your feet out onto a diagonal, so the carriage will move and the legs will straighten as much as you possibly can, that's it. And then bend the knees to find that same short spine position again, you got it, Angelica.
And then again, press it up, let's go for six of these. Good, and my challenge to you, is to find the longest line that you possibly can out away from you. And scooping in through the core, this is a lot like a knee stretch position each time the legs come it, push it out, and in. See if you can go a little further out next time Mary. Yes, that's it, and down, and one more time, reaching out into the diagonal more than the ceiling, pausing here, let's see if we can keep the legs straight and start to articulate the spine down without moving the carriage, one vertebrae at a time as though we're doing the long spine stretch, rolling through, feeling each leg drip into the hip socket, fantastic.
Beautiful work. We can then separate the legs into a small circle, reaching for the far side of the room, not just with your toes but also with the whole sole of the foot. Lengthen the legs straight back up again, just to a vertical position, 90 degrees at the hips, one more long spine for good measure, rolling up. Beautiful work, this time let's separate the legs just a little and rolling down, as your legs come and weigh your pelvis down, feel the elongation through the spine. Notice the support through the back line of the body.
Separate the legs, reach for me, bend the knees. Rest. Take your hands into the straps, we're gonna keep the red and the blue spring. Let's stretch the legs long over the foot bar. It's time for the Hundred.
Let's organize the upper body, take an inhale, as you exhale, let's curl all the way up and over, of course, change those legs if you need to, breathing in: Two, three, four, five, and exhale. Two, three, four, five, beautiful work. Noticing the way you connect into the carriage, curling up and over those lower ribs. Feel the way the backs of the legs support you more than the fronts of the legs, energy through the heels, beautiful, steady gaze out in front of you. Can we draw the abdomen deeper and deeper and deeper almost like your organs are just resting into the carriage, not just your body, two more breaths.
And getting that air right out. One more time, breathing into the back of the body, exhale, drawing back down, bend the knees, take your arms up, let your head rest onto the mat. This time we're going into the butterfly. So breathing out as you curl forward, the legs shoot out directly where they were earlier. This time, the arms and the legs move apart and as we exhale, we close them, we curl a little further, just in case, breathing into open.
Exhale close, we're gonna do six of these, only four left. As you continue, go back to when we were doing our hands in straps earlier, how open can you make your chest, and close. How long can you make your body? And working from the lowest possible point, one more time, inhale and exhale, long through the neck, bend the knees. Arms up, feet onto the bar, and rest.
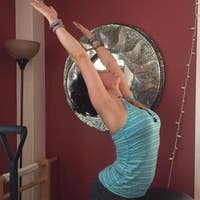
Really well done! So you can take your straps and place them onto the pegs, and we're actually going to do the Cleopatra. So, you can come up to a seated position, and we'll have your shins as close to the shoulder blocks as possible, and we can have your right shin as close to the shoulder block as we can. That's it, beautiful. So I'm going to place this yoga block here, we're gonna use that just to have a little bit more connection to the reformer and our goal in getting a really great Cleopatra is actually to bring your underneath shin as close to the shoulder blocks as you absolutely can even more, to the point where you think that you've made a mistake. So then your left hand can go onto the bar, and you almost feel as though your greater trochanter is actually, you're almost sitting on the other side of it so see if you can bring your hip under even more.
Yeah, that's it, then your right hand can go onto the foam block and I'm going to go ahead and take a blue spring off the reformer because I forgot to cue you. We can go ahead and push the carriage out. Really nice. And it's so tempting with the Cleopatra to really fall through the lower ribs, but we're gonna make most of this come from the two ends of the spine, so your left sitting bone is going to actively reach for your left foot the whole time. As we come in, you're gonna create downward pressure through your right hand, so much so that you lift your spine, and you're not gonna do the rotation straight away, actually through the neck, but come straight up and aiming more for the side bend.
Beautiful, so the more you press the reformer down, and in, the more lift up and over you can create, finding that space through the upper ribs. Now, as we go back out again, we're going to start from the left sitting bone, reaching it as far away from your hand and as close to your left heel as possible. Now, the pelvic floor lifts, the hand presses down, you feel an energy coming up, up, up, through the crown of your head, you can side bend, and here, opening up that left shoulder like we've been practicing all session, good. And then pressing away again. Now, on our next two, we're going to add a little bit of rotation through the head.
So from here, we can press away, just to find that nice sense of space, beautiful. And then from here, commencing the movement from the pelvic floor, lifting up, create down energy through your hand as you bring the carriage in. The bottom side of your ribcage fans open. The head tilts and then you turn your head away, so you can turn the other way Angelica, that's it, so your chin is going as far away from your shoulder as you absolutely can get it. The more you lift, the more side bend you can get and the more openness you can get through the left side of the body.
Turn the head to the front and we'll do one more. So reaching from the left sitting bone, like you're going down a slippery slide and then lifting up through pelvic floor, using the down energy to help you. Letting the head tilt and then turning your head as far away as you can, feel a little external rotation, can you lift more, can you find more space through the front? And then turning the head to the front, ah. Rest, we'll do the other side.
Beautiful, it's one of my favorite exercises. (giggling) So we'll bring the shins as absolutely close to the shoulder blocks as we can. Remember at first, it might feel like you've made a mistake. But the closer you can get, the better. We want to tilt that pelvis right under so you almost feel as though you are sitting on the topside of your greater trochanter, your left hand is going to go onto the box.
Now, with the hand position on the bar, the further back the hand is on the bar, the more opportunity there is to open up that shoulder. It might be a little neural for some people so if you're uncomfortable, just be sure to bring your hand a little further forward. This is just such a great exercise for those of us who are really spending our time forward, so it's just going to open up the shoulders. So we can go ahead and find the start position by pressing the carriage away, and remember we get there from the pelvis so reaching our right sitting bone towards our right heel. Good, then we check that we're not falling into the middle of the ribcage.
That's it, so from here, we start by sense of lifting up through the pelvic floor, elongating through the spine, the more down energy we have through the left hand this time, the more side bend we can get and lift and openness up through our upper ribs, beautiful. Challenge yourself to add a little more side bend through the neck as well, as you really open up the pec, being sure not to lock the elbow. And then, leaning from that right sitting bone, over you go. Fantastic, and you should see a beautiful curved spine coming up now as Mary brings the carriage in, elongating, feeling the scapula slide down, and opening up the front of the shoulder as much as you possibly can, sliding away now, right sitting bone leads the way. Good, it's so tempting to pull ourselves back in using the lats, so when we come in, really use that left hand to create the movement instead, energizing more and more and more, this time we can add the head rotation.
How far can you turn your chin from your right shoulder? Good, almost like your shoulder's moving away from your chin then the head can come back to the center and we can slide away again. Good. One final time, energy down, like you're pushing yourself up onto something, fanning the ribs, open as much as you can. Feeling the drop and then turn that head, let's have some attitude about this final head turn.
It is Cleopatra after all, right? And then rest. Beautiful, we can take the block and move it out of our way as we're going to kneel facing the back of the reformer. That's it, and we're just going to keep our one red spring for this, so facing the risers, I'd like to have about a hand's space between the shoulder block and the knees. Good, okay, taking hold of the straps, we're really going to just keep going with this beautiful sense of openness through the chest.
How better but with some chest expansions? So energy through the arms, now just to make it simple and clear, each time we turn the head, the first time we'll turn to the left, and then after we've done three repetitions turning to the left first, then we'll do the next three repetitions turning to the right. So beginning with an exhalation, inhale to open, turning the head to the left, center, right, center and exhale, allowing the arms to move forward. Continue with that rhythm, ladies. Inhale as you draw back, and as you turn, how far can you turn from the right shoulder?
How far can you turn from the left shoulder? Center it and allow the arms to travel forward. One more time, starting with the left, inhale back. Good, and rotate and center, and rotate, beautiful, and center, and forward, very nice. Three to go, inhaling to come back, this time turning to the right first, checking the traffic. (giggling) And then moving the arms forward, great.
So for our final two repetitions, just check in with your legs. How energized are they down to the ground? As you turn to the right, is there a change through your pelvis? We know there's often a change through the shoulders, and arms come forward, very very nice, and final one, beautiful work, turning right, and left, and center. Good, we're gonna keep going with this theme, the carriage will move forward, from here as we exhale, you're going to start to pull the arms back, but you curl forward creating flexion through your spine, challenging yourself to go deeper into a round back, via the arms and then as you restack the spine, the arms travel forward.
So actually this is quite a whole body movement, taking a breath in, as you exhale, drawing back and feeling that knee stretch position, the more you push back, the more your arms can go forward and then returning to the upright position. This always reminds me of somebody on a paddleboard, so as we grow tall, it's like we're scooping the water back so that our board can surge forward, further and further and further forward. Your hips will move a little bit, that's normal, and then let's restack; feel the way the pelvis comes back up over the knees and you find that length through the spine. Let's do two more, breathing out as you curl, very good. Notice the way the backs of the legs are working here, roll it back up again, and then on this next one, we'll hold the round back so breathing out as you curl, good, and then from here, keeping the upper arm exactly where it is, let's just bend the elbows, the hands will swing forward, and as you push your arms back to that straight position, that's the time to connect into the low belly.
Inhale, and then exhale, reach it back and maybe we'll surge a little further forward each time your arms straighten, press it back, good. And three to go. Feel the way the legs connect, notice the way your shins connect to the carriage as well. Where is your neck? Where is your head?
Final one, good, let's keep the arms straight so that we can roll up safely. Beautiful work, good. So let's take the straps and place them onto the pegs. Now at this point, you might like to lift your headrest just a little, maybe just to halfway. If that's not right for you, feel free to take it down lower or possibly even higher.
So we're gonna do some backwards splits, so let's take our right foot and place it onto the headrest while our left foot comes up and onto the bar. Now I've left the spring on, one red spring, that's it. I would suggest to place the foot first, that's it, and then you can lift the knee, we're actually gonna keep the hands on the shoulder block and we're gonna bend our front knee. That's it and you want to just feel comfortable with where that front foot is positioned, but super energized through this back leg, 'cause this is the important side, the way we connect to the world behind us, as well as to the bar itself. So let's press that front leg out until the carriage moves and the leg is straight, or as straight as we can manage, and then pull it back in.
Good, so we'll do three of these, pressing out, but looking for a long, neutral spine position here with this one, and bend. Good, and one more, pressing it out. Good, and bend. Lovely, now next time we press the leg out straight, we'll keep it straight, and now the focus will be on the spine so we're gonna let the head drop in, and curl, lifting the spine up to the ceiling as round as we can, both legs staying straight, and then we take that split forward again, to going back to the position we were in earlier, aiming to find neutral spine through the body. Beautiful, and again, curling up.
Good, feel the way the pelvis rolls, this back leg stays strong and then reach it forward. Good, one more time. Breathing out, find that scoop through the belly, working as low as you can, very nice, and then stretch it out, good. Now from here let's bend the knee, and we're gonna place the right foot onto the bar to meet the left, good. So a variation on the balance control front, so let's keep the left foot on the bar, good, we're just going to push that carriage forward only with the arms, that's it and then bring it back in.
Let's go for six. Press it forward, and back, good. How can we work from the shoulders to make this happen? Oh, look at that Mary, you look amazing. Forward, and back, last two, keep that length through the lower portion of the spine, and last one.
Fantastic, arms just vertical, left foot comes onto the bar now, it's almost a relief to do the backward splits on the other leg, so from here we're going to take that left leg and straighten it forward, and then bend. Yep, beautiful, that's it. And then press and bend. Lefts and rights are not my strong point. (giggling) One more time.
Good, and then bend, and we'll do this extra-straightened now, so straightening that carriage, that leg out, and then we'll let the head drop, and start to curl the spine up, allowing the carriage to bring you in, fantastic. And then reaching from the left foot, feel the spine articulate back into that neutral position, as you find the split, and again, now leading from the lowest possible point, very nice, energy through this back heel, and leading with that front foot. Good, one more time, curl up, deepening, further and further and further through the lower belly and then reaching out one last time, this time we can bend that left leg, good. Place the left foot onto the bar. And now we're going to keep both arms straight but bend both knees, the carriage will move backwards, the hips stay lifted, and that's it, perfect, and then straighten the legs back out again.
Good, so we have five more of these, bending both knees and straightening both knees, like we're a jackrabbit running through a field, reaching out using the backs of the thighs. Bend, and straighten, two to go. Bend and straighten, final one. Bend and straighten, keep the arms strong. Place any foot you like onto the carriage and bring it all in.
Wait until the carriage is in before you take your foot off the bar. Well done. So we're gonna step off the carriage for a moment, and you're going to kneel again on the carriage, facing the foot bar. Very nice, so now we're going to place another spring on, we're gonna just put the blue spring back on. So this whole session we've just moved from a blue, blue and a red, just to red, and now back to both again.
So it's very simple. Place both hands onto the bar and this again is going to be a little bit of repetition from the jackrabbit we've just done, so we're going to take the feet onto the shoulder blocks, and aim to get your heels as close to the shoulder block as you possibly can, maintain a neutral spine for these knee stretches, and we're gonna take the hips back but not the carriage. So just take the hips back, perfect. So we've got a good amount of hip flexion to start with, feel a sense of connection between the front and the back of the body, so you don't feel as though you're sagging forward, you're working against gravity. Notice the length through the neck and then the challenge is how open can we be through the chest while our arms are in front of us?
Can we draw our arms back almost like there's a vacuum deep inside the shoulder socket, pulling our humerus bones into place? Now, the hard part is of course, maintaining this through a dynamic movement of the leg. So let's press the legs out, good, and then find that fold through the hips again, let's go for 10, just go at your own pace, really allow this to move and find that energy. I really like feeling that movement to a plank to a squat, and a plank, and a squat, and think about each time that you move into a squat, what it feels like, the way we open up between our sitting bones, the way the glutes and hamstrings are able to let go. Let's just do one more of these ladies, and you can hold the plank position.
So let's go out there, beautiful. Now, we're gonna do some pushups here my dears. So without moving the carriage at all, feel that length through the body, let's go wide with the elbows, let's bend the elbows as wide as we can, and then press away. We'll do six, so that's already one down, and each time those elbows bend, it's like that first exercise we did with the hands in the straps. We use the movement of the elbows to open up through the chest.
We're in the home stretch. Good, one more, bend and stretch, beautiful, hold that there, do not move the carriage. Can we find more hip extension now? Allow the pelvis to move forward, find more and more extension through your whole spine and voila, we have the down stretch position. Really challenge yourself to lift up more than you thought was possible, let's inhale and draw the carriage in, feel like you're gonna go up through the ceiling, and now we'll reach with the knees to take the carriage back.
Good and inhale, taking it up, up, up! Notice a little mini spiral through the arms and then take it back. Very nice, let's do two more. Inhale, take it up, feel that lift coming from the bottom of the body and as you come back, feel the connection of your heels as well as your knees. One final time, lifting up, now here we're going to bring both hands to the center, take your right hand up to give us as much length as we possibly can, start to rotate the body and we might not be on fall down too low, and the elbows, sorry my dear, can soften a little, and then we can reach out so it's a little dramatic. From here, we reach back through the knees, it's gonna be a little heavy but I think you can do it, and then let's lift up, good.
Now we want to make sure that we're not side bending, so you feel that lift and length on the side that you're weight-bearing through, press it out, we're just gonna do three of these. And feel that lift almost like a hurricane, a tornado, that's what I'm looking for, pushing back, and then lifting, up, up, up, up, up, and we can circle the arm down onto the foot bar, down, down, down, the other arm comes up, we rotate, we find that lift through our heart, we push back through the knees. Oh, they have it, and lift. And pushing back through the knees and the feet, each time you come back and get a little longer. Good, one more time, press it back, and bring it in, and let the arms circle down, hand onto the bar, this is the good bit, you get to sit back into a child's pose, let your bottom rest onto your feet, you can take your feet out from the shoulder blocks and just let them rest onto the headrest.
Beautiful work! Ah! All right, so now, it was a short-lived rest. Let's come up and stand on top of the carriage. We're so close. So we're gonna have the feet about halfway, okay? And you can actually stand all the way up with your hands not on the foot bar.
Good, so just to be sure, we've got a red and a blue on here so it shouldn't feel too light. Let's feel that connection to the ground, compare it to how it felt when you first started the class. Energy down, rebounds up through the spine and gives us more length. We're gonna curl for head, neck and shoulders forward, and as you do so, and your arms start to come forward a little, let's just pause here and then feel the way this feels a lot like the Hundred, how long can we make our lower back, while we have the beautiful curl through our upper back? Good, remember this feeling so as you come closer and closer and closer, and your hands eventually come to the bar, we still have that beautiful connection in our upper body, it feels like a mile away from the Hundred, so something that we've all learned from such a long time ago.
We're just going to do six movements of the Elephant, so reaching down through the heels, let's press it back, and then exhale to draw it in, one. Pressing back, so really working from the backs of the thighs, and three. Scoop it in, check in with your Hundred position, do you still have it? Do you have the connection around the back of your body? Now, on that sixth one, we're actually gonna hold the carriage out, yes, hold it there, for 10, nine, eight, seven, keep those legs working, four, three, two, one.
Draw the carriage in using those legs, find the connection to your belly as we roll up, aim to not move back too far, all the way to standing, feel the way the backs of the legs helped to open the fronts of the hip, inhale. Exhale, let's roll down again. Find your Hundred position, feel the length through your spine, just as you would if you were on the mat. Eventually, those hands will make their way onto the foot bar. It feels like so far away.
How are you connected through your feet? Is there an inclination to lean back or can you stay on the front half of the foot? Can we now send the weight into the heel, six little movements, pressing out through the backs of the legs and then exhale, scoop it in. Pressing back, and scooping in, and three, scoop in, pushing back from the backs of the thighs, four, good, you can do it, five, and now number six, the good one, six, hold it out there, keep those legs working, nine, eight, seven, six, five, four, this left one, two, that's it, one, now scoop it in, with the intention of keeping those legs working so that your hands can be lighter and we can start to roll up. Oh yes, that's it.
Good, very nice, no more Elephants, standing tall. Find the arms, float them up, just let your body lift up into a little extension as well. Let the arms circle down by your side as you find neutral. Let's do one more like that. Take the arms up, open, stay connected through the feet as your arms open and then bring your arms down by your side.
Take your hands onto the foot bar to help you come down safely; make sure the blood doesn't rush out of your head too quickly. Thank you so much Mary, thank you so much Angelica. It was so, so fun to do a class with you! Come on over. If you have any questions, feel free to list them down in the comments section. These women were wonderful, thank you so much again, and I'll see you soon.
Intermediate Reformer: 40-Minute Classes


Comments


You need to be a subscriber to post a comment.
Please Log In or Create an Account to start your free trial.
